Anti spam policies in Microsoft 365

One of the biggest misunderstanding’s I see around Microsoft/Office 365 is managing anti spam settings. These are done in Exchange Online. Thinks like Office 365 ATP actually perform additional functionality (such as safe list and attachments). Thus, if you want to limit the spam that users receive it is important to ensure you have your anti spam policies correctly configured.

This video will show you how and where to configure both inbound and outbound spam policies as well as some best practice recommendations for both. You’ll find the direct link for the video here:

https://www.youtube.com/watch?v=X9GeUYoRSzc

Blocked files types in OWA

Outlook Web Access maintain a list of allowed and blocked file types. These are contained in a policy for each user. To determine what this policy is with PowerShell, the first thing you’ll need to do is connect to Exchange Online. I have made that easy for you by creating a script to connect using the new Exchange Online V2 PowerShell module. you will find that script here:

https://github.com/directorcia/Office365/blob/master/o365-connect-exov2.ps1

Once you have connected, run the following commands:

$casmailbox=Get-CASMailbox <user email address>
$owapolicyname = $casmailbox.OwaMailboxPolicy
$owapolicyname

This should display something like:

image

which gives us the policy name.

Next run the command:

$policy = Get-OwaMailboxPolicy $owapolicyname

to get the settings/values of that policy.

To view the allowed file list run the commands:

$allowedFileTypes = $policy.AllowedFileTypes

$allowedFileTypes

which should show something like:

image

To view the blocked file list run the commands:

$blockedfiletypes = $policy.BlockedFileTypes
$blockedfiletypes

image

The next question is, can you adjust these lists? Yes you can. You basically do that by adjusting the list of extensions variable (here $blockedfiletypes) via something like:

$blockedFileTypes.Remove(“.XXX”)

and reapplying that to the policy like:

Set-OwaMailboxPolicy $policy -BlockedFileTypes $blockedFileTypes

and if you want to extend the list just use add instead of remove in the above command prior to applying it to the policy.

Microsoft is making additions to the BlockedFileTypes list from April 2020:

What file extensions will be added to the BlockedFileTypes list with this change?
The following extensions are used by the Python scripting language:


“.py”, “.pyc”, “.pyo”, “.pyw”, “.pyz”, “.pyzw”


The following extensions are used by the PowerShell scripting language:


“.ps1”, “.ps1xml”, “.ps2”, “.ps2xml”, “.psc1”, “.psc2”, “.psd1”, “.psdm1”, “.cdxml”, “.pssc”


The following extension is used by Windows ClickOnce


“.appref-ms”


The following extension is used by Microsoft Data Access Components (MDAC)


“.udl”


The following extension is used by the Windows sandbox


“.wsb”


The following extensions are used for digital certificates:


“.cer”, “.crt”, “.der”


The following extensions are used by the Java programming language:


“.jar”, “.jnlp”


The following extensions are used by various applications. While the associated vulnerabilities have been patched (for years, in most cases), they are being blocked for the benefit of organizations that might still have older versions of the application software in use:


“.appcontent-ms”, “.settingcontent-ms”, “.cnt”, “.hpj”, “.website”, “.webpnp”, “.mcf”, “.printerexport”, “.pl”, “.theme”, “.vbp”, “.xbap”, “.xll”, “.xnk”, “.msu”, “.diagcab”, “.grp”

The list in my test tenant right now is:

Blocked File Types:

.settingcontent-ms
.printerexport
.appcontent-ms
.appref-ms
.vsmacros
.website
.msh2xml
.msh1xml
.diagcab
.webpnp
.ps2xml
.ps1xml
.mshxml
.gadget
.theme
.psdm1
.mhtml
.cdxml
.xbap
.vhdx
.pyzw
.pssc
.psd1
.psc2
.psc1
.msh2
.msh1
.jnlp
.aspx
.xnk
.xml
.xll
.wsh
.wsf
.wsc
.wsb
.vsw
.vst
.vss
.vhd
.vbs
.vbp
.vbe
.url
.udl
.tmp
.shs
.shb
.sct
.scr
.scf
.reg
.pyz
.pyw
.pyo
.pyc
.pst
.ps2
.ps1
.prg
.prf
.plg
.pif
.pcd
.ops
.msu
.mst
.msp
.msi
.msh
.msc
.mht
.mdz
.mdw
.mdt
.mde
.mdb
.mda
.mcf
.maw
.mav
.mau
.mat
.mas
.mar
.maq
.mam
.mag
.maf
.mad
.lnk
.ksh
.jse
.jar
.its
.isp
.ins
.inf
.htc
.hta
.hpj
.hlp
.grp
.fxp
.exe
.der
.csh
.crt
.cpl
.com
.cnt
.cmd
.chm
.cer
.bat
.bas
.asx
.asp
.app
.adp
.ade
.ws
.vb
.py
.pl
.js


and Allowed File Types is:

.rpmsg
.xlsx
.xlsm
.xlsb
.tiff
.pptx
.pptm
.ppsx
.ppsm
.docx
.docm
.zip
.xls
.wmv
.wma
.wav
.vsd
.txt
.tif
.rtf
.pub
.ppt
.png
.pdf
.one
.mp3
.jpg
.gif
.doc
.bmp
.avi


Your mileage may vary.

What supports modern authentication in Microsoft 365

I get a lot of questions of what does and doesn’t support pure modern authentication in Microsoft 365. Pure modern authentication DOESN’T include App Passwords!

In short, you are best off with the latest version of the Microsoft software. However, here’s the list:

Office 2016

Modern authentication is already enabled for Office 2016 clients, you do not need to set registry keys for Office 2016.

Office 2013

To enable modern authentication for any devices running Windows (for example on laptops and tablets), that have Microsoft Office 2013 installed, you need to set the following registry keys. The keys have to be set on each device that you want to enable for modern authentication:

Registry key        Type        Value

HKCU\SOFTWARE\Microsoft\Office\15.0\Common\Identity\EnableADAL        REG_DWORD        1

HKCU\SOFTWARE\Microsoft\Office\15.0\Common\Identity\Version        REG_DWORD        1

iOS

In order to use the native iOS mail client, you will need to be running iOS version 11.0 or later to ensure the mail client has been updated to block legacy authentication.

Mac

One of the three most recent versions of macOS. When a new major version of macOS is released, the macOS and the previous two versions.

macOS Mail on macOS < 10.14 does not support Modern Authentication

Android

Android (Google) Mail does not support Modern Authentication

Outlook on mobile

Outlook for Mobile supports modern authentication by default

Office for iPad® and iPhone® (including Outlook for iOS on iPad® and iPhone®) requires iOS 12.0 or later. Office for iPad Pro™ requires iOS 11.0 or later Office is supported on the two most recent versions of iOS.

Office for Android can be installed on tablets and phones running any of the supported versions of Android and have an ARM-based or Intel x86 processor. Starting on July 1, 2019, support will be limited to only the last four major versions of Android.

Office for Android™ can be installed on tablets and phones that meet the following criteria: running Android KitKat 4.4 or later version and have an ARM-based or Intel x86 processor.

Compare how different mobile devices work with Office 365 – https://support.office.com/en-us/article/Compare-how-different-mobile-devices-work-with-Office-365-BDD06229-776A-4824-947C-82425D72597B

Need to Know podcast–Episode 222

I’m joined by Stephen Rose, Senior Product Marketing Manager for Microsoft 365, to speak about everything Microsoft 365. Stephen explains what the products is all about, how it can help businesses and the direction that the technology is taking off the back of many announcements from Ignite. Of course, Brenton is also here and we bring you up to date on all the latest Microsoft Cloud news before some of us head off for a Christmas break. Fear not! The episodes will continue even in the face of absenteeism. All the best to all our loyal listeners for the holidays season. We appreciate your support and look forward to providing you more information in 2020.

This episode was recorded using Microsoft Teams and produced with Camtasia 2019

Take a listen and let us know what you think – feedback@needtoknow.cloud

You can listen directly to this episode at:

https://ciaops.podbean.com/e/episode-222-stephen-rose/

Subscribe via iTunes at:

https://itunes.apple.com/au/podcast/ciaops-need-to-know-podcasts/id406891445?mt=2

The podcast is also available on Stitcher at:

http://www.stitcher.com/podcast/ciaops/need-to-know-podcast?refid=stpr

Don’t forget to give the show a rating as well as send us any feedback or suggestions you may have for the show.

Resources

@stephenlrose

@contactbrenton

@directorcia

Stephens’ presentation from Ignite 2019 around adoption

CIAOPS Patron Community

Ignite the Tour Sydney

CIAOPS Techwerks 10

Microsoft Teams now available on Linux

Microsoft Integrated Threat Protection

Campaign views in Office 365 ATP

Windows VM now support Azure AD authentication

Native support for WebAuthn and FIDO for iOS

Preview of Azure spot machines

What’s new in Microsoft Forms

Beazley Breach insights

Blocking macros with Intune

Licensing guidance

Remove known bad emails from tenant

Microsoft has a technology in Exchange Online known as ZAP. It will basically move known malicious emails, even after they may have initially been delivered to a mailbox. You can read more about the the technology here:

Zero-hour auto purge protection against spam and malware

ZAP however, is a ‘reactive’ security technology requiring knowledge of malicious content prior to taking action. There will therefore be cases when malicious content can get delivered to a mailbox, especially if the attack is relative new in the wild, simply because it has not yet been identified.  Hopefully, users have been trained so they can report any suspicious material that they do find, as I have detailed here:

Improved security is a shared responsibility

You can also enable an alert that notifies when someone reports an email. When that happens, you may want to check through all the other mailboxes to see whether that malicious email occurs elsewhere. If the payload is indeed malicious, you may wish to take the pro-active step of deleting that bad email from all users inboxes.

You can achieve this using two steps:

1. Create a content search to locate the suspect item in your tenant

2. Use PowerShell to delete the discovered items

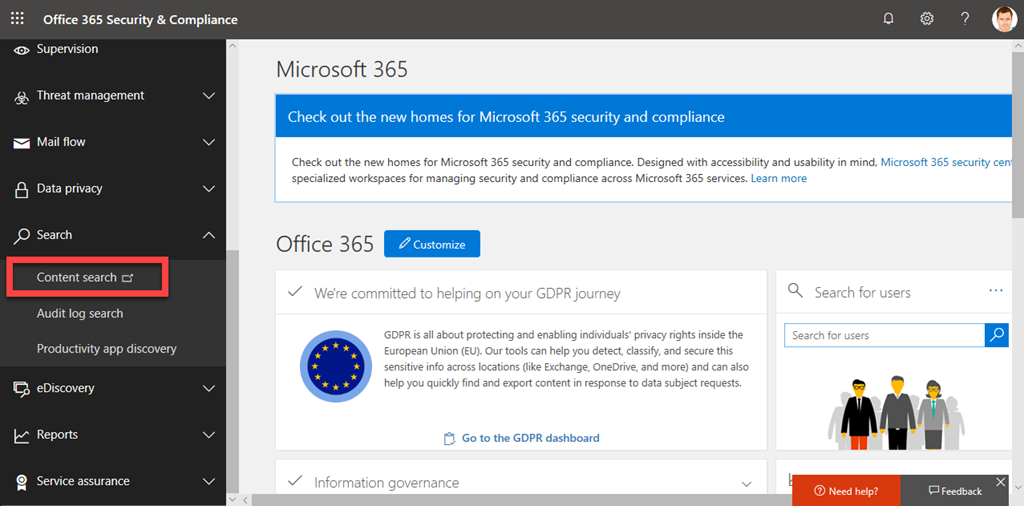
Step one is to login to the Microsoft 365 tenant as an administrator and visit the Security and Compliance Center like so:

image

Select Content Search from under the Search option on the left.

Before you create a new search, you’ll need to find something unique about the item you are searching for.

image

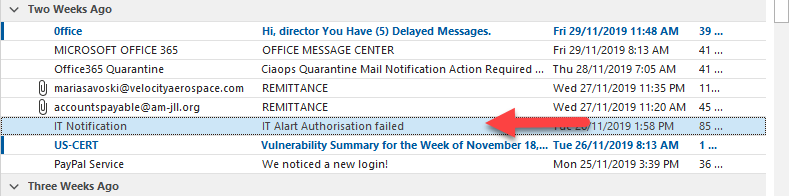
In the case above, with this dodgy email, I’ll do a search based on the senders email but I could as easily do one on the mis-spelled subject ‘Alart’. All you need is something unique.

image

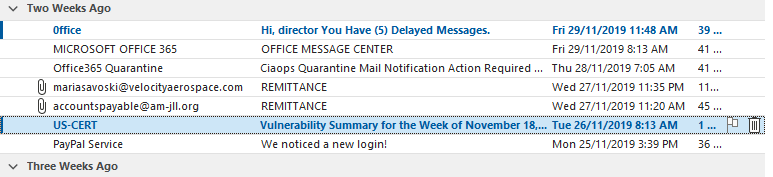
If I look in my inbox I can see this email listed as shown.

image

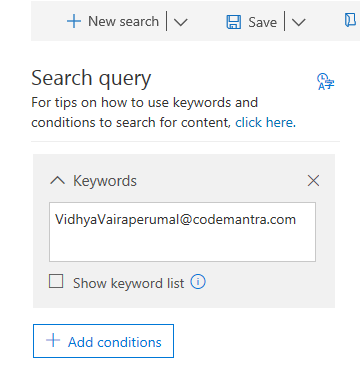
I create a new Content Search and use the unique criteria in the keywords as shown above.

image

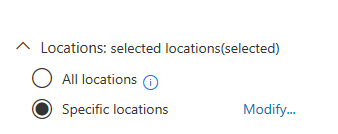
Below this I can limit where the search is conducted. In this case, I will specify messages, as that is what I am looking for. You can get quite granular here if you need to. Just select Modify and specify the location you wish to search. Remember, the more places you search the longer it will take to return results.

image

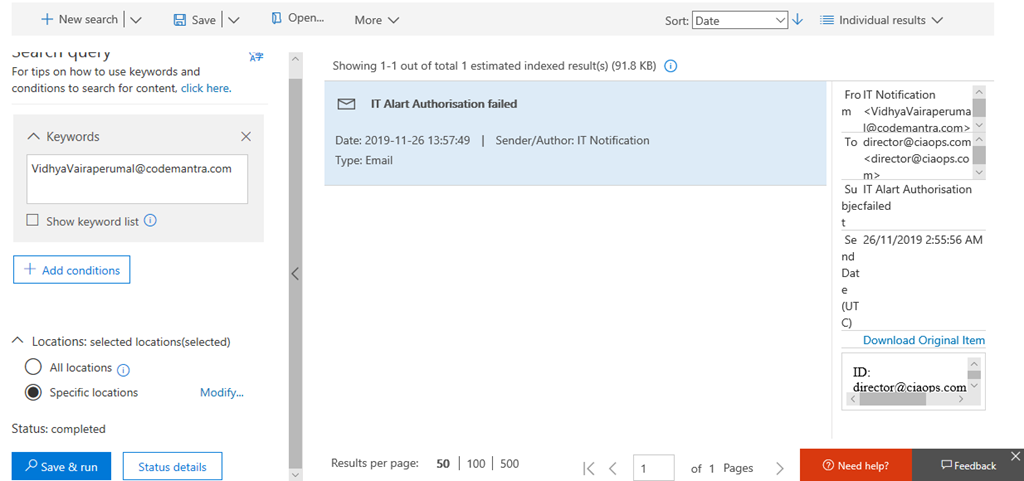
Once you have crafted your search, select Save & run in the lower left. After a short while, you should see the results. In this case, I have only found the one result, which is the item in my inbox. Make sure you check the items that are returned as it is these items that will be deleted! You may need to adjust your search to get exactly the results you wish.

Next, you’ll need to fire up PowerShell and connect to the Microsoft Security and Compliance Center for you tenant. I have a script that you can use here if you have MFA:

https://github.com/directorcia/Office365/blob/master/o365-connect-mfa-sac.ps1

and if you don’t (shame on you):

https://github.com/directorcia/Office365/blob/master/o365-connect-sac.ps1

Once you have successfully connected you need to run the following line of PowerShell:

New-ComplianceSearchAction -SearchName “<Content search query name>” -Purge -PurgeType SoftDelete

for a ‘soft delete’ of the item (i.e. recoverable). Or

New-ComplianceSearchAction -SearchName “<Content search query name>” -Purge -PurgeType HardDelete

for a ‘hard delete’ (i.e. non-recoverable). You’ll also need to change <Content search query name> to match the name you gave the Content Search when you created it.

image

You should now see a prompt, as shown above, asking you to confirm your actions. Generally, you’ll select Yes to All here.

image

This will kick off the process of deleting the content you have found. Note, this process is not immediate. It may take a little while to work through all the locations.

image

When the process is complete, as shown above, that item no longer appears in mailboxes.

That’s how you run your own ZAP!

Need to Know podcast–Episode 218

I talk to industry veteran and Microsoft MVP Tony Redmond about a variety of topics including Exchange Online, Teams, PowerShell as well as his fantastic Office 365 administration eBook offering. He shares lots of great insights on a variety of Microsoft offerings. Brenton and I also talk about news and updates in the Microsoft Cloud and get you ready for what we are potentially expecting from the upcoming Microsoft Ignite conference. Listen along and get ready for the tsunami from Microsoft Ignite.

This episode was recorded using Microsoft Teams and produced with Camtasia 2019

Take a listen and let us know what you think – feedback@needtoknow.cloud

You can listen directly to this episode at:

https://ciaops.podbean.com/e/episode-218-tony-redmond/

Subscribe via iTunes at:

https://itunes.apple.com/au/podcast/ciaops-need-to-know-podcasts/id406891445?mt=2

The podcast is also available on Stitcher at:

http://www.stitcher.com/podcast/ciaops/need-to-know-podcast?refid=stpr

Don’t forget to give the show a rating as well as send us any feedback or suggestions you may have for the show.

Resources

@12knocksinna = Tony Redmond

@contactbrenton

@directorcia

Tony’s blog

Office 365 for IT Pros eBook

Surface laptops are finally repairable

Microsoft’s cloud earnings

CIAOPS MS-101 online training course now available

New Microsoft partner CSP agreement

Microsoft acquires Mover.io

How to check user sign in history

Tamper protection in Microsoft Defender ATP

End user self service for Power Platform

What is Microsoft 365 Business [VIDEO]

Call of Duty – Modern Warfare

Connecting to Exchange Online with Azure Cloud Shell

I’ve written previously about

Azure Cloud Shell

and how handy it is when it comes to connecting to your tenant with PowerShell. What you may not realise is that you can also Azure Cloud Shell to connect to Exchange Online! All you need to do once you have launched Azure Cloud Shell is run the command:

connect-exopssession

image

As you can see from the above where I have connected and then used the command get-mailbox inside Azure Cloud Shell.
image

This now means you could copy my mailbox forwarding checking script:

https://github.com/directorcia/Office365/blob/master/o365-exo-fwd-chk.ps1

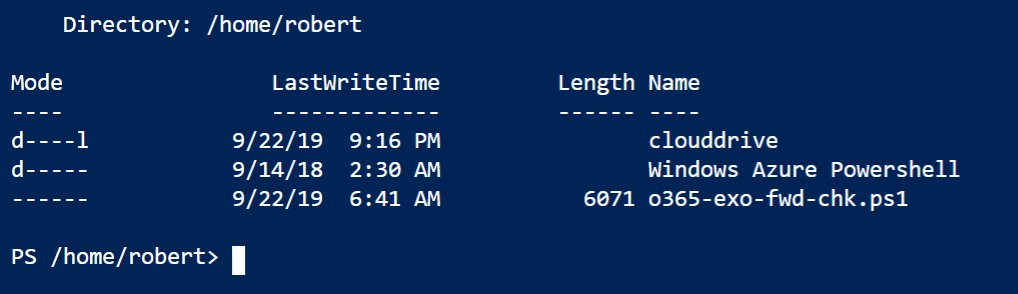
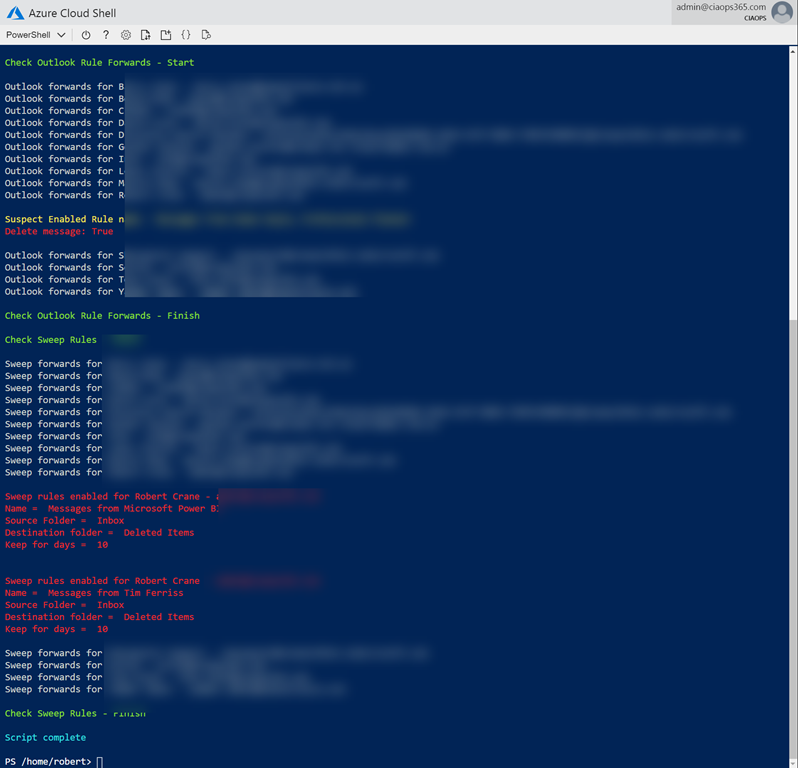
into your Clouddrive that is part of Azure Cloud Shell and run it.

image

And thanks to Clouddrive it will be there next time you use Azure Cloud Shell. Handy eh? If you want to learn about this capability, visit:

Azure Cloud Shell now supports Exchange Online

Check your journaling rules

One of challenges with security is that there are lots of places to check and secure but only one vulnerability required for compromise. Most compromises happen at the user level but there are also other places that you may want to keep an eye. One of the is the journaling rules in Exchange Online.

Now, journaling rules can only generally be configured by an administrator. According to:

https://docs.microsoft.com/en-us/exchange/security-and-compliance/journaling/journaling

“Journaling can help your organization respond to legal, regulatory, and organizational compliance requirements by recording inbound and outbound email communications.”

That means it maybe possible to record email traffic and forward it to another location. That may mean for example, a rogue administrator setting up a journaling rule to send the CEO’s emails to their own private external email box.

Defending against rogue admin is tough and requires some planning. The least that you could do is check any existing journaling rules and ensure that only required ones appear.

image

You can do this by visiting the Exchange Online Admin Center. From here select Compliance Management then journal rules as shown above.

As you can see there are no journal rules in this tenant and it is my experience that most tenants don’t use journaling at all. That doesn’t mean there isn’t legitimate reasons for having journaling rules. All I’m saying is that you should check what you have and ensure it is right.

As always, I find that using PowerShell is a much quicker way to report on this using the command:

get-journalrule

The reason which checking journaling is important, is because as I understand it, journaling won’t show up in the audit logs for the tenant. This means that once it was surreptitiously enabled, it could run unreported in the background, collecting information unknown to everyone? That is a bad thing.

The best solution against rogue administrators in general is Privileged Access Management (PAM) in Office 365:

Configuring Privileged Access Management

which is typically only included in advanced Microsoft 365 licensing like E5. This, unfortunately, puts it beyond the reach of many. So, for the time being, keep an eye on your journaling rules and check to see where they maybe sending your information.