Office 365 Usage report customisation

image

Many people don’t appreciate the flexibility that Office 365 usage reports provide.

image

For example, in the top left, under the breadcrumb navigation you’ll find a Select a report option.

image

Which you can see has a large number of reports to select from. You’ll also notice that there is a Office 365 groups activity report.

image

If you select the ‘hamburger’ menu in the top right of any column,

image

You’ll be presented with additional options as shown above.

image

Selecting Columns will allow you to add additional fields to the report as shown above.

I’d encourage you to go into your Office 365 Admin center and have a look at all the report and options that are available to you. I think you’ll be pleasantly surprised at what you find. And if the reports here aren’t exactly what you are after you can easily export them to a CSV file and potentially then analyse the data in Power BI.

A century on

A century ago we were still in the middle of what was most inappropriately called as the ‘War to end all Wars’. World War One, as it is known, became the point at where humanity and industrial revolution collided. It was the stage where mechanical devices (such as the machine gun) provided the slaughter of thousands of lives.

Into this meat grinder Australian and New Zealand soldiers (ANZACs) had initially gleefully joined up to protect the historical concept of the ‘mother country’. Their tour started in Gallipoli in an ill fated attempt to loosen the German grip in northern Europe. At Gallipoli, the diggers, as they had become known, forged a grim determination to serve but their motivation became more about their ‘mates’ and never letting them down.

The Gallipoli campaign ended but the ANZAC commitment continued in northern France, fighting the Germans directly. Along with the Canadians, they became the elite of the Allied forced who could be trusted to achieve their objectives and punch well above their weight. This came at grave cost, with many units suffering significant causalities throughout the remainder of the war.

By 1917, the full effect of this brutal conflict was being felt on the home front, with more and more families losing loved ones. The war would end but the scale of the losses never would. The memorials went up, the survivors came home and people tried to get on with their lives.

The common method of coping with trauma back in those days was suppression. It is only now that more people are discovering the astounding contribution and sacrifice the ANZACs made during their service in World War One. They fought and died for the belief that they were making the world a better place and they did.

It is for that sacrifice and commitment to country that we pause today and remember them. We remember the others that followed in their footsteps and served in other conflicts since the day. We also remember those who serve us today in the armed forces. We shall remember them but we should also remember the cost of human greed, insensitivity and selfishness is war. Global conflict is a reflection of the individual in the street.

Today we live in a complex world far from the conflicts of 1917 but yet countries, states and people still default to violence and aggression as solutions to conflict. We honour and remember those who gave their lives for what they believed in but we also need to remember the human cost war brings. As we remember let us also commit to being more accommodating of those around us, because from small conflicts potentially grow larger ones. 

If you are interested in the ANZAC battles of northern France during World War One check out my web site:

http://www.anzacsinfrance.com

and the Twitter feed for regular reminders of anniversary dates

http://www.twitter.com/anzacsif

Lest We Forget.

Send recurring tweets using Microsoft Flow

Much of the content that I create on my blog has value beyond just the day it was posted. This is what is known as ‘ever green’ content. I wanted a way that I could ensure that the best of this ‘ever green’ content gets posted to social media on a regular basis. This will allow new followers of mine to discover information they may not have seen since they first started following me.

Thus, for this exercise I want to have a process where I can list tweets I want to recur and have them automatically scheduled to be sent. I am currently using a third party service to achieve some of this but it does lack some features and flexibility so I decided to have a crack at soling this challenge using Microsoft Flow.

Now, I will fully admit up front that I am still bumbling around Microsoft Flow and finding out how things work. There are probably better and more efficient ways to achieve what I’m doing here but this is just my initial step and I plan to continually improve this over time. However, if you have any suggestions or know how I can do things better, by all means please let me know.

To start with, I needed a location to store my tweets. I therefore created a custom list in SharePoint in Office 365.image

The Body field is a text field of 140 characters max (as this is how long a single tweet can be) and contains what will be tweeted. The Post field is that day (date) that I want the tweet to be sent. My plan is to scan this Post field, find today’s date, then use the Body field from the matching record in the actual tweet that gets sent out. What I then wanted to do was add one year to this Post date so the same tweet would then be scheduled to re-occur next year. I’ll get to the challenges I encountered doing this shortly.

I also created a unique sequence number for each tweet so I could easily track which tweet I was dealing with in a field called Sequence. I could have used the SharePoint ID field but I wanted more control, so I created my own.

image

What I also wanted to be able to do was group my tweets by month (I was thinking about doing things like; May is the month of Azure and the like down the track). This field, called Month, is a calculated field as shown above. It basically gets the month value from the Post field.

image

Now the Next Post field was the way I solved re-scheduling the tweet for the following year. I tried all sorts of things in Microsoft Flow to update the existing Post field but none worked, so I decided to simply use a calculated field in SharePoint which you can see above. The Next Post field basically takes the date in the Post field and adds one year using the formula above. I’ll use this Next Post field to update the Post field after the tweet has occurred in the Microsoft Flow.

So now onto building the Microsoft Flow.
image

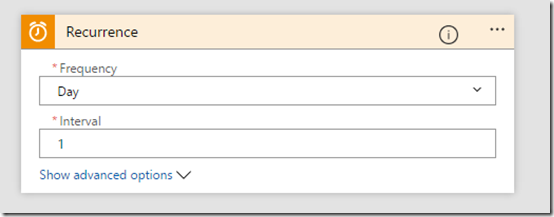
So I started with a Recurrence block. I want a tweet to go out daily so I set that here. You when you are testing, you may want to change this down to something like 1 minute so you can make sure things are working. You can always change it back once you are confident in your code.

The other thing that I would like to do is actually be able to exactly set what time in the day this recurrence happens. I couldn’t see how to do that so when you run the Microsoft Flow for this first time, this will be the starting recurrence point. Thus, run your Flow at the time you want it to automatically tweet during the day.

image

So once Microsoft Flow is activated on the daily schedule it then needs to go to the SharePoint list (here, Tweets 2) where my list of tweets is saved. It needs to get the items in this SharePoint list, so add the SharePoint Get Items block to your code and point it to the appropriate Site Address and List Name as shown above.

image

Now what you need to do is add a Condition block to check the SharePoint list and find a match for today’s date so you know what tweet to send. This proved a little challenging so I needed to go into the advanced mode and check the field Post using the following condition:

@equals(item()?[‘Post’], utcnow(‘yyyy-MM-dd’))

This basically will find the row in my tweets list that matches today’s date. It does that by looking through the Posts field for a match.

I couldn’t find how to do a time check in my local time zone. The only option seemed to be UTC. Again, a bit more research and I’m sure I can work it but for now my condition statement is checking UTC not my local time zone. That can mean I end up posting a different tweet from the day in my list. For now, that isn’t a big issues as I just want a tweet posted daily.

image

So now, thanks to the Conditional statement, we have found the record we want to tweet for the day so in the YES condition we need to add an action block to actually send out a tweet. The contents of the tweet will be the Body field. You use the Post a tweet action block to enable this.

image

I then added a SharePoint Update Item action block to increment the date in the Post field one year. As I said earlier, I played around with different formulas to achieve this in Microsoft Flow but didn’t have any luck. I solved it simply by adding an additional field to the SharePoint list that contains the Post date plus one year (that field I called Next Post).

Here, I update the Post field with the Next Post field so now the tweet has gone, it will automatically be rescheduled for the same date next year. And because Next Post is a calculated field it will automatically up date to a further year out ready for the next time the tweet gets posted.

image

When I now run my Microsoft Flow you can see that a tweet from my original SharePoint list was tweeted. For the eagle eyed, you will notice this is in fact the second listed tweet from SharePoint. That’s because of the UTC timing in the conditional statement I mentioned earlier. Thus, tweet 116 was sent, not 115. No issues but now you can also probably see why I decided to give each tweet its own unique sequence number. Makes it much easier to follow what’s being sent.

image

Once the tweet has been sent I look at my SharePoint list and I see that tweet 116 has had it’s Post field incremented by one year as expected (to 2018).

As I said, this is far from a complete or perfect solution. At this stage it does the job and now gives me a basis for improving and enhancing what’s there. I’ll provide updated articles when I add major improvements to this Microsoft Flow, but for now I’ve very happy with how quickly I could get this working.

Some improvements I’m now thinking of:

– Having a posted tweet simply go to the end of the queue of posts (i.e. last date) rather than adding one year to it.

– Categorising tweets via their content and being able to schedule tweets based on their tags.

– Creating a tweet campaign where tweets for something like my monthly webinars could be sent out on a regular sequence.

– Doing some similar with other social media networks such as Linkedin, Facebook, etc.

– Have blog posts I create be automatically be added to this recurring schedule.

– etc, etc. This potential is enormous.

Hopefully, this will inspire you to take a closer look at Microsoft Flow and see what it can do to automate and streamline your business. I’m going to continue playing with Microsoft Flow but also get into Azure Functions, Azure Logic Apps, Azure Run books and more as I want to automate as much as I can.

Software will eat the world!

Need to Know podcast–Episode 150

Yet another milestone achieved. Episode 150! Wow, but we still have lots more content to bring you so it’s head down towards episode 200! Thanks everyone for listening and keep the feedback and reviewing coming.

This episode is proudly brought to you by Exclaimer, the best option for Exchange signatures on premise or in the cloud.

After our usual updates of the latest cloud news you’ll hear a few sound bytes from local MVPs at the recent MVP Community event in Sydney. Marc and I then speak with Brad Shepard, Senior Product Specialist, from Exclaimer all about their product. You’ll learn what Exclaimer is and how it can be used to reduce the burden of managing email signatures in your business. You’ll also get some deeper insight into how the products works behind the scenes and the technology it uses.

Take a listen and let us know what you think –feedback@needtoknow.cloud

You can listen to this episode directly at:

https://ciaops.podbean.com/e/episode-150-exclaimer/


Resources

@marckean

@directorcia

@greiginsydney

@leontribe

@martycatherall

Exclaimer

Azure news from Marc

External access coming to Microsoft Teams

Editing posts in Yammer now available

Team news rolls up come to SharePoint homepage

This episode proudly brought to you by:

April webinar resources

https://docs.com/d/embed/D25190964-2382-8197-9450-000528713933%7eMd4186d87-61d5-259a-4d26-00a8bd86cfff

April’s webinar is done and dusted. You can download the slides from:

April 2017 Need to Know Webinar

If you are not a CIAOPS patron you want to view or download a full copy of the video from the session you can do so here:

http://www.ciaopsacademy.com/p/april-2017-need-to-know-webinar/

We had a great session around Microsoft Staffhub with some fantastic questions from attendees. Thanks everyone for attending

you can also now get access to all webinars via:

http://ciaops-academy.teachable.com/courses/need-to-know-webinars

for a nominal fee.

See you next month.

Need to Know podcast–Episode 149

Marc and I bring you up to date with the latest Azure and Office 365. Lot’s been happening so tune in for the latest information on what been happening in the Microsoft Cloud.

Take a listen and let us know what you think –feedback@needtoknow.cloud

You can listen to this episode directly at:

https://ciaops.podbean.com/e/episode-149-cloud-news/

or via Soundcloud here:

Subscribe via iTunes at:

https://itunes.apple.com/au/podcast/ciaops-need-to-know-podcasts/id406891445?mt=2

The podcast is also available on Stitcher at:

http://www.stitcher.com/podcast/ciaops/need-to-know-podcast?refid=stpr

Don’t forget to give the show a rating as well as send us any feedback or suggestions you may have for the show.

Resources

@marckean

@directorcia

Azure news from Marc

Azure VM pre checks

Improved Office 365 login experience

SharePoint page Team news now visible

New file viewers in OneDrive for Business available

Removal of restricted file characters in SharePoint

Recover deleted Groups in Office 365

Assigning multiple users to tasks in Planner now available

This show brought to you by:

https://cpem.io/tJ01Hzu2k.js


Azure Active Directory version 2 PowerShell module

For a long time we have been using the msonline module in PowerShell to access Azure AD which provides Office 365 identity and security. This has now been superseded by the new:

Azure AD V2 PowerShell module

Also thanks to advances in PowerShell this module is even easier to install.

image

Just open the PowerShell application on your workstation (it is always recommended that you do this as an administrator). Then just type:

install-module –name azuread

and press enter.

image

You may be prompted about a Nuget provider as shown above. Select Yes to continue.

image

You should now see this being installed as shown above.

image

You may also be prompted about installing from an untrusted repository. Select Yes to all to continue.

image

You should now see the Azure AD module being downloaded.

 image

When complete you’ll be returned to the command prompt.

image

You’ll still need to login to your tenant using the standard get-credential command. However now you use the following:

connect-azuread

command to access Azure AD.

image

Once that is complete you can issue some of the new module command such as:

get-azureaddomain

as shown above to work with your cloud AD.

This new Azure AD module will the option to use going forward to work with your identities PowerShell for Office 365 because the older version 1 msonline will be depreciated at some stage.

Azure CLI 2.0 on Windows Bash shell

I recently wrote how to install Azure CLI 2.0 on Windows 10:

Configuring Azure CLI 2.0 on Windows 10

However, another option now with Windows 10 is to use the Bash Shell. Here’s the process of how to install both Bash and Azure CLI 2.0 on Windows 10

image

You’ll firstly need to install the Bash shell on Windows 10. To do this navigate to Settings in Windows 10. Then select For developers as shown above. Now select Developer mode.

image

You’ll be prompted to turn on developer mode. Select Yes to continue.

image

Windows will firstly search for the appropriate package

image

and then install it.

image

When complete you should receive a message, as shown above, that indicates you may need to restart your PC. You don’t have to reset just yet.

image

Go to Control Panel and select the option to Turn Windows features on or off. From the list that appears, locate and select Windows Subsystem for Linux (Beta) as shown above and then select OK.

image

Once the changes have been made you will need to reboot your PC.

image

Once rebooted select the Windows Start Menu and type bash. Select the bash option from the menu that appears.

image

Hit Y to continue.

image

The bash shell will be downloaded from the Windows Store as shown above.

image

It will then be installed.

image

When that is complete, you’ll need to enter a bash shell admin user name and password. This doesn’t have to be the same as you PC login but make sure you remember the details.

image

The bash shell installation will complete as you can see above.

image

If you now return to Windows Start Menu and enter bash you will see the option has changed to Bash on Ubuntu on Windows.

image

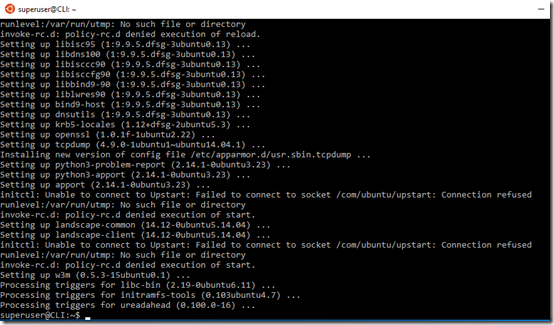
Next step is to ensure the Ubuntu subsystem is up to date. To do this enter the following command at the bash shell:

sudo apt-get update

image

Next, enter the command:

sudo apt-get upgrade

Once that is complete enter the following command:

echo “deb [arch=amd64] https://packages.microsoft.com/repos/azure-cli/ wheezy main” | \ sudo tee /etc/apt/sources.list.d/azure-cli.list

image

Then:

sudo apt-key adv –keyserver packages.microsoft.com –recv-keys 417A0893

image

Then:

sudo apt-get install apt-transport-https

image

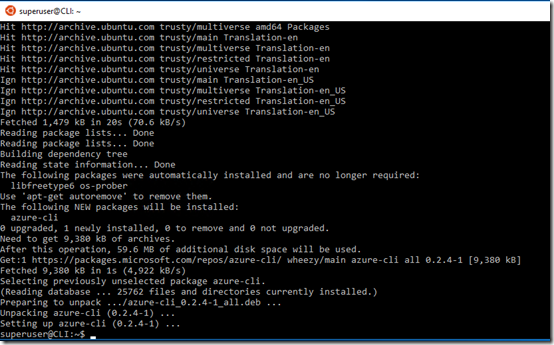
Finally:

sudo apt-get update && sudo apt-get install azure-cli

to actually install Azure CLI 2.0.

image

image

Now if you type:

az

at the command prompt you should see the Azure CLI appear as shown above.

Remember, Azure CLI is designed to be a cross platform tool. That means it works on both Windows 10 and Bash on Windows 10 as well as Mac, Linux, etc. This makes it a great way to manage Azure from any platform.