Privileged Identity Management (PIM) for Entra roles

image

Walk into most SMB tenants and check who holds Global Administrator. You’ll find at least one. Often three. Sometimes more. All permanent. All active. All the time.

That’s standing privilege. And it’s the biggest gift you can hand a token thief.

Most MSPs I talk to know about Privileged Identity Management. They’ve seen it in the Entra admin centre. They just don’t switch it on for clients, because they assume it’s an enterprise thing — too expensive, too complicated, too overkill for a 25-seat business.

Wrong on all three.

What is PIM, really?

PIM is just-in-time admin access. You stop being a Global Administrator all day every day, and start being eligible for it. When you need the role, you put yourself in for a fixed window, with a justification and a record. A few hours later it drops off. You’re back to a normal user.

That’s not least privilege as a slogan. That’s least privilege as a clock.

You can layer MFA on activation, approval workflows where one admin signs off on another’s elevation, and access reviews that quietly remind you each quarter that someone’s eligibility hasn’t been used in 90 days. All portal-driven. No scripts. Microsoft’s overview of PIM is worth a read, but the licensing point is the one that trips everyone up.

PIM needs Entra ID P2 or Entra ID Governance. That’s not in Business Premium. But — and this is the part MSPs miss — you only need to licence the admins, not every seat. Three admin accounts is your premium. Compare that to one incident.

Step-by-step: switching on PIM for Global Administrator

Run through this in the Entra admin centre. Sign in as a Global Administrator and licence the admin accounts you want under PIM first.

Park a break-glass account

Before touching a role, create a dedicated break-glass admin. Permanent active Global Administrator. Long random password in your password manager. Excluded from every Conditional Access policy. Document it somewhere you can find at 2am.

This is the one account PIM doesn’t touch. Skip this step and you’ll lock yourself out the first time MFA goes sideways.

Open ID Governance

ID GovernancePrivileged Identity ManagementMicrosoft Entra rolesRoles.

Configure role settings for Global Administrator

Select Global AdministratorRole settingsEdit. Microsoft documents every option here; the ones that earn their keep look like this:

Activation maximum duration:   4 hours
Require MFA on activation:     Yes
Require justification:         Yes
Require approval to activate:  Yes (2 approvers, not self)
Permanent eligible assignment: Disallowed
Notification on activation:    All Global Admins

Notice what’s missing? PowerShell. None of this needs it.

Move existing GAs from active to eligible

Assignments → find each Global Administrator → use the assign roles flow to make them eligible instead. Same permissions — only when they ask for them.

Schedule an access review

Under Access reviews, set up a quarterly review of all eligible Global Administrators. Configure it to auto-remove on no response. The clients who think this is overkill are the clients who’ll have an ex-staffer with admin rights twelve months from now.

Why this actually changes behaviour

PIM isn’t a tool. It’s a posture. The second a Global Admin has to type a reason and wait for approval, two things happen — they stop using GA for the trivial stuff, and someone else sees every elevation.

“But our admins will hate this.”

They’ll hate it for a week. Then they’ll forget it’s there, because activation is two clicks. And the first time you can prove with an audit log that no privileged account was active during an incident, you’ll wonder how you ran tenants any other way.

A standing Global Admin is a key under the doormat. PIM is the locksmith.

If you’re not setting this up for your clients, you’re leaving the front door open and calling it security.

Named locations + Conditional Access location-based policies

image

Most MSPs I talk to have a Conditional Access policy that blocks “high-risk countries”. They built it once, switched it on, and never looked at it again.

Then they sleep well at night.

That’s the problem.

A country block on its own is theatre. The attacker is on a VPN egress inside a country you allow, or a residential proxy, or a mailbox client that already has a refresh token. Named locations are useful — but only if you understand what they actually do, and where they fall down.

What is a named location, really?

A named location is a label. That’s it.

You’re telling Entra ID, “this IP range is my office”, or “these countries are where my staff actually work”. The location doesn’t enforce anything on its own. It’s a building block you then reference inside a Conditional Access policy.

The policy does the work. You decide whether to block, require MFA, or skip a control. The location is just the where.

And here’s the bit that bites people. Location is evaluated after first-factor authentication. The password’s already gone. Conditional Access then decides what happens next. Treat named locations as a layer, not a perimeter.

Step-by-Step: Setting up a country block that actually earns its keep

Portal path only. Report-only first — non-negotiable.

Open Named locations

Sign in to the Microsoft Entra admin centre as a Conditional Access Administrator. Go to Protection > Conditional Access > Named locations.

Create a Countries location

Click + Countries location. Name it something obvious — “Allowed countries — AU only” beats “Country Block 1”. Pick the country (or countries) where your staff actually sign in. Tick Include unknown areas if you want the location to also catch IPs the geo-database can’t classify. I leave that off for allow-lists and on for block-lists. Save.

Create the policy

Go to Policies > New policy. Name it. Under Users, pick All users — then exclude your break-glass accounts. Always. Under Target resources, pick All resources.

Set the network condition

Under Network, set Configure to Yes. Include Any network or location, then under Exclude select Selected networks and locations and pick your “Allowed countries” entry. That gives you “block everything outside my country”.

Grant

Under Access controls > Grant, choose Block access.

Switch to Report-only and review

Set Enable policy to Report-only. Create. Then watch the sign-in logs for at least 48 hours. The report-only results tell you exactly which users would have been blocked. Anyone surprising in there? Investigate. Then flip the policy on.

Why this actually changes behaviour

Here’s the real win. Once you’ve got clean named locations, every other CA policy gets sharper.

The “skip MFA from a trusted location” pattern — careful with that. Marking your office public IP as trusted feels like a productivity gift to users. It’s also the exact thing an attacker on your guest Wi-Fi or a compromised contractor on your VPN will piggyback. My recommendation? Don’t mark anything as trusted unless you have a strong reason and you’ve documented it. Use sign-in frequency and authentication strength to soften MFA friction instead.

“But our staff hate MFA prompts in the office.” Then fix the prompts. Don’t punch a hole in the wall.

The other classic trap is the corporate VPN. If everyone egresses through one public IP in a country you’ve blocked, you’ve just locked your own staff out. Map your VPN exits before you write the policy. Read the network assignment conditions before you write the policy, not after.

Notice what’s missing from all of this? PowerShell. You don’t need it. The portal does the job, and the audit trail is clearer.

A country block doesn’t stop attackers. It thins the noise so the rest of your stack can do real work. If you’re not showing your clients this — and explaining why “trusted location” is a loaded word — you’re leaving security maturity on the table.

That’s the job. Use named locations for that, and not for the warm feeling a checkbox gave you.

Entra ID backup just turned up in your Business Premium tenant

image

A few weeks ago I logged into a Business Premium tenant to do something completely unrelated and noticed a new node in the Entra portal: Backup and Recovery. No upsell banner, no add-on prompt, no “contact your reseller”. Just there. Sitting under Identity governance like it had always been part of the furniture.

That’s the bit worth pausing on. Microsoft has quietly turned identity backup into table stakes for every BP tenant. Notice what’s missing? An invoice.

For years the conversation around protecting your directory has been someone else’s product pitch. Third-party backup vendors built entire businesses on the fact that Microsoft wouldn’t restore a Conditional Access policy you nuked at 4pm on a Friday. Now Microsoft is restoring it for you.

What is Entra Backup and Recovery, really?

It’s a daily snapshot of the configuration that runs your tenant’s identity. Users, groups, applications, service principals, Conditional Access policies, named locations, the authentication methods policy — the things that, when they go missing, take down sign-in for your whole client base.

Five days of retention. Tamper-resistant. No global admin can switch it off, no compromised account can wipe the safety net before the bad thing happens. That’s not a feature. That’s governance.

Important caveats so you don’t sell something that isn’t there. Hard-deleted objects are gone — the recycle bin still does its 30-day job for users and groups, but Backup is for configuration recovery, not undeleting things. Hybrid identity synced from on-premises AD has limitations. Workforce tenants only — not B2C or External ID. And it’s currently in Public Preview, so treat it like one. The official overview is worth a read before you stand in front of a client.

A daily snapshot you can’t disable is more honest than a backup product you forget to renew.

Step-by-Step: turning it on for a Business Premium tenant
1. Sign into the Entra admin centre

Use a Global Administrator account. Navigate to Identity governanceBackup and Recovery. If the node isn’t there yet, give the tenant a day — rollout is staged.

2. Enable the service

It’s a single switch. Once enabled, the first snapshot is captured within 24 hours. There’s nothing to license — Business Premium already includes Entra ID P1, which is the bar.

3. Assign the right roles

There are two purpose-built ones: Microsoft Entra Backup Reader and Microsoft Entra Backup Administrator. Don’t hand recovery rights to every Global Admin out of habit. Restoring a Conditional Access policy from a five-day-old snapshot is exactly the sort of move you want logged against a named, scoped role.

4. Run a Difference Report before you restore anything

This is the part that earns its keep. Before recovering an object, the portal shows you what will change — what’s in the snapshot, what’s live, and where they disagree. You see the diff before you click. The supported objects and limitations(opens in new window) page tells you exactly what’s in scope.

Why this actually changes behaviour

Here’s the real win. The reason MSPs have been selling backup-for-Entra add-ons is fear — what if? That conversation gets harder when Microsoft has put a tamper-resistant safety net in the box.

My recommendation? Stop selling fear. Start showing governance. Walk your BP clients through their backup status, the role separation, and the recovery flow for applications and service principals. It takes ten minutes and it positions you as the person who knew this was already there, not the person trying to bolt something on top.

That’s not a product conversation. That’s an advisor conversation.

The relief, when you find it, isn’t the relief of buying a safety net. It’s the relief of finding one you didn’t have to install.

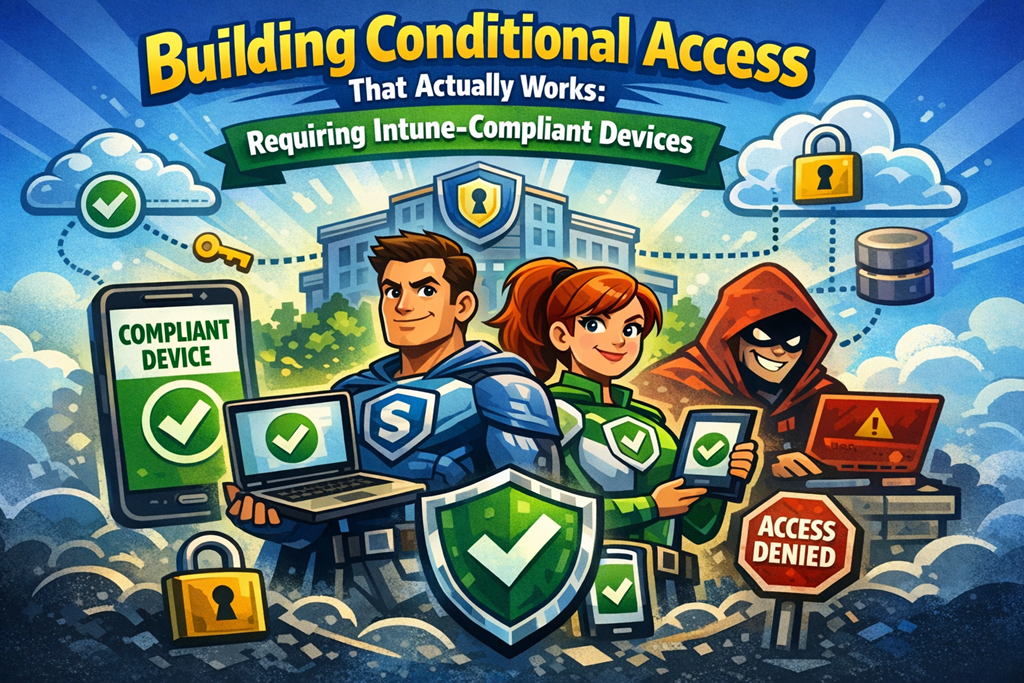
Building Conditional Access That Actually Works: Requiring Intune‑Compliant Devices

image

Requiring Intune‑compliant devices via Conditional Access is one of the most impactful controls available to Microsoft 365 Business Premium tenants. It’s also one of the easiest ways to accidentally break access if you don’t understand how the moving parts fit together.

This article walks through the end‑to‑end mechanics, not just the clicks, so L2/L3 engineers understand why policies behave the way they do.


Architecture: What Happens During Sign‑In

When a user signs into a cloud app (Exchange Online, SharePoint, Teams):

  1. Microsoft Entra ID evaluates applicable Conditional Access policies

  2. If a policy requires a compliant device, Entra queries Intune
  3. Intune returns a binary verdict: Compliant or Not compliant
  4. Access is granted or blocked accordingly

Microsoft explicitly states that Conditional Access relies on Intune compliance state and will not function as intended without an Intune compliance policy in place. [learn.microsoft.com]

This is not a soft dependency — no compliance policy means every device fails the check.


Step 1: Define “Compliant” in Intune (Before Touching Conditional Access)

In the Intune admin centre (intune.microsoft.com):

Devices → Compliance policies → Create

At minimum for Windows endpoints in Business Premium, Microsoft supports compliance checks such as:

  • BitLocker enabled

  • Secure Boot enabled

  • Minimum OS version

  • Antivirus and firewall present

These controls form the inputs to Conditional Access — they do nothing by themselves. [learn.microsoft.com]

Operational tip:
Assign compliance policies to user groups, not devices. Conditional Access evaluates user sign‑ins, not device objects.


Step 2: Create the Conditional Access Policy

In the Microsoft Entra admin centre (entra.microsoft.com):

Protection → Conditional Access → Policies → New policy

Core configuration (baseline):
  • Users
    • Include: Target user group (do not start with All users)

    • Exclude:

      • Emergency access (break‑glass) accounts

      • Service accounts (where applicable)

Microsoft explicitly recommends excluding emergency access accounts to avoid tenant lockout. [learn.microsoft.com]

  • Target resources

    • Start with: Exchange Online or Office 365

    • Expand later to “All cloud apps”
  • Grant

    • ✅ Require device to be marked as compliant
  • Enable

    • ✅ Report‑only (initially)

This exact flow is documented by Microsoft as the supported deployment approach. [learn.microsoft.com]


Step 3: Report‑Only Mode Is Not Optional

Report‑only mode evaluates the policy without enforcing it. This allows you to:

  • Confirm which users would be blocked

  • Identify unmanaged or unenrolled devices

  • Detect users authenticating from unsupported platforms

Microsoft strongly recommends Report‑only mode before enforcement for Conditional Access policies of this type. [learn.microsoft.com]

Validation path:

  • Entra ID → Sign‑in logs

  • Filter: Conditional Access → Report‑only

  • Review failure reasons


Step 4: Common Failure Scenarios (Seen in the Wild)

“User prompted repeatedly for MFA then blocked”
  • Device is Entra ID joined but not enrolled in Intune
  • No compliance policy applies to the user
“macOS or BYOD phones blocked unexpectedly”
  • Platform not covered by a compliance policy

  • Device enrolment incomplete
“Policy works for admins but not staff”
  • Admins often use already‑managed devices

  • Staff devices lag behind in enrolment

Microsoft documents that Conditional Access can only evaluate compliance for MDM‑enrolled devices. [learn.microsoft.com]


Step 5: When Not to Use Compliant‑Only Access

Microsoft explicitly provides alternative templates where compliance is one of several controls, not the only one, such as:

  • Compliant device OR Microsoft Entra hybrid joined OR MFA

This is recommended where full device management is not realistic. [learn.microsoft.com]


Production Roll‑Out Recommendation

For Business Premium tenants, Microsoft’s own Zero Trust guidance aligns to:

  1. Require MFA first

  2. Enrol devices into Intune

  3. Require compliant devices for core workloads

  4. Expand to all cloud apps once stable [learn.microsoft.com]


Official Microsoft References

ASD Conditional Access policies comparison script

Screenshot 2025-11-26 092018

I have taken the ASD Conditional Access policy recommendations here:

https://blueprint.asd.gov.au/configuration/entra-id/protection/conditional-access/policies/

and created a script here:

https://github.com/directorcia/Office365/blob/master/asd-ca-get.ps1

that will compare your existing Conditional Access configuration to what the ASD recommends and tell you what you should consider changing to bring your policies more in alignment with those from the ASD.

Screenshot 2025-11-26 092225

Above, you’ll see one policy evaluation and recommendation outputted to a HTML file for easy reading.

The documentation for the script is here:

https://github.com/directorcia/Office365/wiki/ASD-Conditional-Access-Policy-Evaluation-Script

I look forward to hearing what you experience is using my script.

Updated Global Secure Access Clients

Something I have been waiting on for a while with Entra ID Global Secure Access (GSA) has been the availability of the Internet traffic profile on iOS.

image

When I check the latest version of Defender on my iDevices I found that this has now been enabled, provided better protection and advanced filtering like I have on other devices.

image

When I also updated my Windows devices I found that there is a nice new admin console available as well.

Microsoft Entra ID Global Secure Access helps small businesses protect their data and simplify IT by combining secure sign-in, app access, and network protection in one solution. It uses a modern “Zero Trust” approach, which means every user and device is verified before getting access, reducing the risk of cyberattacks. Instead of juggling multiple tools or complex VPNs, you get a single, easy-to-manage system that works for office, remote, and mobile workers. It improves employee experience with one login for all apps, supports flexible work without slowing things down, and scales as your business grows—all while saving costs by replacing multiple security products with one integrated service.

How SMBs can use AI with security

bp1

Microsoft 365 Business Premium offers a robust suite of security features, many of which are enhanced by Artificial Intelligence (AI) and machine learning. For SMBs, leveraging these AI capabilities can significantly bolster their cybersecurity posture. Here’s how:

1. AI-Powered Threat Detection and Prevention (Microsoft Defender for Business & Office 365):

  • Advanced Malware and Ransomware Protection: Microsoft Defender for Business (included in M365 Business Premium) uses AI and machine learning to analyze endpoint behavior (PCs, Macs, mobile devices) and detect suspicious activity indicative of malware, ransomware, and other advanced threats. It provides real-time threat detection and automated response capabilities to mitigate issues before they escalate [1, 2].

  • Phishing and Zero-Day Attack Protection: Microsoft Defender for Office 365 (Plan 1, also included) employs AI to identify and block sophisticated phishing attempts, including those crafted with Generative AI to appear more convincing. It uses “Safe Links” to scan URLs in emails and documents at the time of click, and “Safe Attachments” to open email attachments in a virtual environment to detect malicious content before it reaches users. This AI helps interpret email language and intent to classify threats at machine speed [1, 3].

  • Behavioral Anomaly Detection: AI models continuously learn normal user and system behavior. Any deviation from this baseline, such as unusual login patterns, large data downloads, or access from unfamiliar locations, can trigger alerts and automated responses, indicating potential account compromise or insider threats [3].

2. Identity and Access Management (Microsoft Entra ID Premium P1):

  • Risk-Based Conditional Access: AI plays a crucial role in Conditional Access policies. It analyzes factors like user location, device compliance, and detected risk levels (e.g., impossible travel, anomalous login times, leaked credentials) to determine if access to resources should be granted, denied, or require additional verification (like MFA). This proactive approach significantly reduces the risk of unauthorized access even if credentials are stolen [1, 4]. Microsoft Entra ID Protection categorizes risk into low, medium, and high confidence levels, using machine learning to inform these assessments [4].

  • Multi-Factor Authentication (MFA) Enforcement: While MFA itself isn’t AI, the AI in Entra ID (formerly Azure Active Directory) can recommend and enforce MFA based on detected risks, making it a critical layer of defense against identity attacks [1, 4].

3. Data Loss Prevention (DLP) and Information Protection (Microsoft Purview):

  • Intelligent Data Classification: AI in Microsoft Purview Information Protection can automatically identify and classify sensitive data (e.g., credit card numbers, health information, personally identifiable information) across Outlook, SharePoint, and Teams. This helps ensure that sensitive data is appropriately protected, encrypted, and prevented from leaving the organization, whether maliciously or accidentally [1, 5]. Sensitive information types and trainable classifiers leverage AI to find sensitive data in user prompts and responses when they use AI apps [5].

  • Automated Policy Enforcement: Based on the AI-driven classification, DLP policies can be automatically enforced, preventing sharing of sensitive information with unauthorized external parties or even internally if policies dictate [5]. DLP also uses machine learning algorithms to detect content that matches your DLP policies [5].

4. Device Management and Compliance (Microsoft Intune):

  • Automated Security Policy Deployment: While Intune primarily manages devices, AI can inform and automate the deployment of security policies, ensuring devices are compliant before accessing company resources. It can also help detect and flag non-compliant devices, preventing them from becoming entry points for attacks [1].

  • Remote Wipe and Data Protection: In case of lost or stolen devices, Intune allows for remote wiping of company data, which, while not directly AI-powered, is a critical security measure supported by the device management framework [1].

  • AI-powered insights for device management: Microsoft Intune leverages real-time data and AI-powered insights (e.g., in Endpoint analytics and with Copilot in Intune) to help proactively manage and secure devices, pinpoint problems, identify vulnerabilities, and deploy remediations [6].

5. AI for Security Operations (Microsoft 365 Copilot & Analytics):

  • Microsoft 365 Copilot (Add-on): While primarily a productivity tool, Copilot, when integrated with Microsoft 365 Business Premium, can contribute to security by:

    • Summarizing Security Alerts: Quickly digest and understand complex security alerts and incident reports [7].

    • Threat Intelligence Analysis: Help analyze security logs and data to identify potential threats and vulnerabilities [7].

    • Generating Security Policies/Documentation: Assist in drafting security policies, guidelines, or incident response plans [7].

    • Adhering to existing security controls: Copilot inherits existing Microsoft 365 security, privacy, identity, and compliance requirements, ensuring users only see what they have permission to access [7].

  • Security Analytics and Reporting: The underlying AI within M365’s security features continuously collects and analyzes vast amounts of security data. This allows for better insights into the organization’s security posture, identifies trends in attacks, and helps predict potential vulnerabilities, enabling SMBs to make informed security decisions [2].

How SMBs can best leverage this AI:

  • Enable and Configure: Don’t just subscribe to M365 Business Premium; actively enable and configure its security features. Many of the AI-powered capabilities need to be turned on and customized to your business’s needs.

  • Prioritize MFA and Conditional Access: These are foundational and highly effective in preventing identity-based attacks [1, 4, 7].

  • Educate Employees: Even with AI, human error is a significant vulnerability. Train employees on phishing awareness, data handling best practices, and the importance of reporting suspicious activity.

  • Regularly Review Security Reports: Pay attention to the security insights and recommendations generated by M365, as these are often powered by AI analysis.

  • Consider Professional Assistance: For complex configurations or if you lack in-house IT expertise, consider working with a Managed Service Provider (MSP) who specializes in Microsoft 365 security. They can help optimize your security posture and ensure you’re getting the most out of the AI-powered features.

  • Stay Updated: Microsoft continuously updates its security features. Keep your M365 environment updated to benefit from the latest AI enhancements.

By proactively utilizing the AI capabilities within Microsoft 365 Business Premium, SMBs can significantly enhance their defenses against evolving cyber threats, protecting their data, devices, and ultimately, their business continuity.


References:

[1] Security Features of Microsoft Business Premium | Smile IT. (n.d.). Retrieved from https://www.smileit.com.au/cybersecurity/security-features-of-microsoft-business-premium/

[2] Microsoft Defender for Business | Microsoft Security. (n.d.). Retrieved from https://www.microsoft.com/en-au/security/business/endpoint-security/microsoft-defender-business

[3] Microsoft Defender for Office 365 | Microsoft Security. (n.d.). Retrieved from https://www.microsoft.com/en-au/security/business/siem-and-xdr/microsoft-defender-office-365

[4] What are risks in Microsoft Entra ID Protection. (n.d.). Retrieved from https://learn.microsoft.com/en-us/entra/id-protection/concept-identity-protection-risks

[5] Use Microsoft Purview to manage data security & compliance for Entra-registered AI apps. (n.d.). Retrieved from https://learn.microsoft.com/en-us/purview/ai-entra-registered

[6] Microsoft Intune data-driven management | Device Query & Copilot – Mechanics Team. (n.d.). Retrieved from https://officegarageitpro.medium.com/microsoft-intune-data-driven-management-device-query-copilot-fc6b958a5e83

[7] Securing Microsoft 365 Copilot in a Small Business Environment – CIAOPS. (n.d.). Retrieved from https://blog.ciaops.com/2025/07/07/securing-microsoft-365-copilot-in-a-small-business-environment/

Using Multiple Authenticator Apps with One Microsoft 365 Account: Guide for MSPs

bp1

For Managed Service Providers (MSPs) with multiple employees managing numerous customer Microsoft 365 tenants, efficiently and securely handling multi-factor authentication (MFA) is crucial. While a single Microsoft 365 user account typically links to one primary authenticator, there are legitimate scenarios and best practices for MSPs to leverage multiple authenticator apps for a single user, enhancing both security and operational flexibility.

Why Multiple Authenticator Apps for an MSP User?

While the general recommendation for individual users is to have a single, primary authenticator app for an account, MSPs often encounter unique needs:

  • Redundancy and Backup: In case a primary device is lost, stolen, or damaged, a secondary authenticator on another device ensures access isn’t lost, preventing costly downtime.
  • Shared Administrative Accounts (with caution): While not ideal, some MSP workflows might necessitate a shared administrative account for specific, highly controlled scenarios (e.g., break-glass accounts). In such cases, multiple technicians might need access to the MFA codes, making multiple authenticators a practical, albeit carefully managed, solution.
  • Employee Transition: When an employee leaves, transferring MFA access to a new team member can be streamlined if a secondary authenticator is already configured on a shared, secure device (e.g., a dedicated company phone for administrative access).
  • Location/Device Flexibility: Technicians working from different locations or using various company-issued devices might benefit from having the authenticator configured on each frequently used device.

Best Practice Approaches for MSPs

The core principle for MSPs managing MFA is to prioritize security while maintaining operational efficiency. Here’s a breakdown of best practices:

1. Leverage Conditional Access Policies (Azure AD Premium P1 or P2)

Conditional Access is the gold standard for managing MFA in Microsoft 365, especially for MSPs. It offers granular control over when and how MFA is enforced, allowing for much more sophisticated policies than basic security defaults.

  • Granular Control: Define policies based on user groups, location (trusted IPs, risky locations), device state (compliant, hybrid Azure AD joined), application being accessed, and sign-in risk.
  • MFA for Administrative Roles: Always enforce MFA for all administrative roles (Global Administrator, User Administrator, Helpdesk Administrator, etc.) across all customer tenants.
  • Location-Based MFA: Require MFA for sign-ins from outside your MSP’s trusted network locations.
  • Risky Sign-ins: Automatically require MFA or block access for sign-ins detected as risky by Microsoft Entra ID Protection.
  • Device Compliance: Require MFA for access from non-compliant devices.
  • Prioritize Microsoft Authenticator: Encourage or enforce the use of the Microsoft Authenticator app for push notifications or number matching. This is generally more secure and user-friendly than SMS or voice calls.
  • Phased Rollout: When implementing or modifying MFA, conduct a phased rollout. Start with your internal IT staff, then move to pilot groups, and finally to all users.
2. Designate Specific Authenticators for Specific Purposes

Avoid a free-for-all with authenticators. Be strategic:

  • Primary Authenticator (User’s Personal Device): The Microsoft Authenticator app on the technician’s primary work smartphone should be their main MFA method. This offers convenience and strong security (push notifications, biometrics).
  • Secondary Authenticator (Company-Provided Device or FIDO2 Key): For backup or shared administrative accounts (used rarely and with extreme caution), a secondary authenticator on a company-issued device (tablet, spare phone) or a hardware security key (FIDO2) is preferable. FIDO2 keys offer the strongest phishing resistance.
  • Avoid SMS/Voice as Primary MFA: While useful for recovery, SMS and voice MFA are susceptible to SIM-swapping and other attacks. Limit their use as primary authentication methods, especially for administrative accounts.
3. Implement Break-Glass Accounts

Maintain a small number of highly secured “break-glass” or emergency access accounts. These accounts are exempt from normal Conditional Access policies and are only used in extreme emergencies (e.g., a global MFA outage, or if all administrators are locked out). These accounts should:

  • Be cloud-only (not synchronized from on-premises AD).
  • Have strong, complex passwords stored securely and offline.
  • Be monitored for any sign-in activity.
  • Have their credentials rotated regularly.
  • Ideally, use hardware FIDO2 keys for MFA.
4. Regular Auditing and Monitoring
  • MFA Registration Reports: Regularly review who has registered for MFA and what methods they’ve configured.
  • Sign-in Logs: Monitor sign-in logs for unusual activity, failed MFA attempts, or sign-ins from untrusted locations. Microsoft 365 Lighthouse (for CSP partners) and Azure AD reports can provide consolidated views across tenants.
  • Access Reviews: Periodically review administrative roles and MFA configurations for all users, especially for those with elevated privileges.
5. Training and Documentation
  • User Education: Train your MSP employees on the importance of MFA, how to use their authenticator apps correctly, and how to report suspicious MFA prompts.
  • Internal Procedures: Document your internal policies for MFA, including how to set up new authenticators, handle lost devices, and manage break-glass accounts.

Step-by-Step Configuration: Adding Multiple Authenticator Apps to a Single User

This process generally involves the user adding additional authentication methods through their security info settings. An administrator initiates MFA enforcement, and the user then registers their chosen methods.

Prerequisites:
  • A Microsoft 365 user account.
  • Global Administrator or Authentication Administrator role (for initial setup/management).
  • Microsoft Authenticator app installed on the primary device.
  • Secondary device (another smartphone/tablet) for the second authenticator app.
  • (Optional) FIDO2 Security Key.
  • Azure AD Premium P1/P2 license for Conditional Access (highly recommended for MSPs).
Step 1: Enable MFA (if not already enabled)

For MSPs, using Conditional Access policies is the recommended way to enable and enforce MFA. Security Defaults are a simpler option but offer less flexibility.

Method A: Using Conditional Access Policies (Recommended for MSPs)
  1. Sign in to the https://entra.microsoft.com/ Microsoft Entra admin center (formerly Azure Active Directory admin center) as a Global Administrator.
  2. Navigate to Protection > Conditional Access.
  3. Click + New policy.
  4. Name the policy: e.g., “MFA for All Users” or “MFA for Admins”.
  5. Under Assignments > Users or workload identities, select the relevant scope (e.g., All users, or specific administrative roles/groups). For MSPs, definitely target administrative roles.
  6. Under Cloud apps or actions, select All cloud apps (or specific sensitive apps).
  7. Under Conditions (optional, but highly recommended for MSPs):

    • Locations: Exclude trusted locations (e.g., your MSP office IP ranges) to reduce MFA prompts when users are on-site, but require MFA when outside.
    • Device state: Consider requiring MFA for non-compliant devices.
    • Sign-in risk: Set to require MFA for medium or high sign-in risk.
  8. Under Grant:

    • Select Grant access.
    • Check Require multi-factor authentication.
  9. Set Enable policy to On.
  10. Click Create.
Method B: Using Security Defaults (Simpler, less flexible – good for quick enforcement)

If you don’t have Azure AD Premium licenses, Security Defaults provide a baseline level of MFA enforcement.

  1. Sign in to the https://entra.microsoft.com/ Microsoft Entra admin center as at least a Security Administrator.
  2. Browse to Identity > Overview > Properties.
  3. Select Manage security defaults.
  4. Set Security defaults to Enabled.
  5. Select Save.

Note: If you previously had “per-user MFA” enabled, you must disable it before using Conditional Access or Security Defaults. You can do this from the Microsoft 365 admin center > Users > Active users > Multi-factor authentication link, and set user status to disabled.

Step 2: User Registers Their First Authenticator App (Primary)

The first time a user signs in after MFA is enabled, they will be prompted to set it up.

  1. The user navigates to https://myaccount.microsoft.com/.
  2. They sign in with their username and password.
  3. They will see a message: “Your organization needs more information to keep your account secure.” Click Next.
  4. On the “Keep your account secure” page, they will be prompted to set up the Microsoft Authenticator app (recommended).

    • Choose Mobile app from the dropdown.
    • Select Receive notifications for verification (for push notifications) or Use verification code (for TOTP codes). Push notifications are preferred for ease of use and security. Click Set up.
    • A QR code will appear on the screen.
  5. On their primary smartphone:

    • Open the Microsoft Authenticator app.
    • Tap the + sign (top right on iOS, top left on Android) and choose Work or school account.
    • Select Scan a QR code and scan the code displayed on the computer screen.
    • The account will be added to the app.
  6. On the computer, click Next. Microsoft will send a test notification to the app.
  7. On the smartphone, approve the notification (or enter the number matching code if enabled).
  8. Once verified, click Next on the computer.
  9. They may be prompted to set up an alternative verification method (e.g., phone number) as a backup. It’s recommended to do this.
  10. Click Done.
Step 3: User Registers a Second Authenticator App (or another method)

Once the primary authenticator is set up, the user can add additional methods via their security info page.

  1. The user navigates to https://myaccount.microsoft.com/ and signs in (they will be prompted for MFA using their primary method).
  2. On the left-hand navigation, click Security info.
  3. Click + Add method.
  4. From the dropdown, choose the desired method:

    • Authenticator app: To add the Microsoft Authenticator app to a second device or another TOTP authenticator (e.g., Google Authenticator, Authy).
    • Phone: To add a secondary phone number for SMS or voice calls (less secure, use with caution for admin accounts).
    • Security key: To add a FIDO2 hardware security key (highly recommended for strong phishing resistance).
  5. For a second Authenticator App:
    1. Select Authenticator app and click Add.
    2. Follow the on-screen prompts. It will present a new QR code.
    3. On the second device, open the chosen authenticator app (e.g., Microsoft Authenticator, Google Authenticator).
    4. Add a new account (Work or school account for Microsoft Authenticator, or generic TOTP for others) and scan the QR code.
    5. Complete the verification steps.
  6. For a Security Key (FIDO2):
    1. Select Security key and click Add.
    2. Follow the instructions. This will involve plugging in the FIDO2 key and touching it when prompted.
    3. Give the key a memorable name.
  7. Once successfully added, the new authentication method will appear in the “Security info” list. The user can also set a default sign-in method from this page.
Important Considerations for MSPs:
  • Dedicated Admin Accounts: For managing customer tenants, use dedicated administrative accounts for each technician rather than a single shared account, where possible. This improves auditability and accountability. When shared accounts are necessary (e.g., for legacy systems or break-glass scenarios), ensure they are tightly controlled and monitored.
  • Microsoft 365 Lighthouse: For CSP partners, Microsoft 365 Lighthouse offers a centralized portal to manage multiple customer tenants, including MFA configuration and monitoring. This can significantly streamline MSP operations.
  • Azure Lighthouse: For Azure services, Azure Lighthouse enables MSPs to manage resources across customer subscriptions from their own tenant, reducing the need for direct access to customer tenants and simplifying MFA management.
  • Privileged Identity Management (PIM): For high-privileged roles, implement PIM to provide just-in-time and just-enough access. This requires administrators to activate their elevated roles, and each activation can require MFA, even if their standard user account doesn’t.
  • Regular Reviews: Conduct quarterly or bi-annual reviews of all administrative access, including MFA configurations, for all customer tenants.

By following these best practices and understanding the configuration steps, MSPs can effectively manage multiple authenticator apps for their users, enhancing security posture across all their managed Microsoft 365 customer environments.