Microsoft Defender and Purview Suites for M365 Business Premium – Detailed Breakdown

Microsoft has introduced two new add-on suites for Microsoft 365 Business Premium – the Defender Suite and the Purview Suite – to bring enterprise-grade security and compliance features to small and mid-sized businesses (SMBs) at an affordable price[1][2]. Below, we’ll break down each suite’s included services, compare them to what Business Premium already offers, and assess their value for an SMB. Real-world examples are provided to illustrate how these features can be used effectively in a small business setting.


Business Premium Baseline: What’s Included Already

Microsoft 365 Business Premium (≈$22 per user/month in the U.S. for annual subscriptions) is an SMB-focused bundle that already includes a solid foundation of productivity, security, and device management features. Key security/compliance features built into Business Premium (base license) are:

  • Azure AD Premium P1 (Microsoft Entra ID P1) – gives advanced identity management like Conditional Access policies and self-service password reset[3]. (Entra ID P2 is not included in base; more on that later.)
  • Microsoft Defender for Business – an endpoint security solution providing next-gen antivirus and endpoint detection and response (EDR) on PCs and mobile devices[4]. This is essentially a version of Defender for Endpoint tailored to SMBs; it includes robust malware protection and automated remediation, but lacks some advanced features like threat hunting that are in Plan 2.
  • Microsoft Defender for Office 365 Plan 1 – provides email and collaboration security such as Safe Attachments and Safe Links for phishing/malware protection in Exchange, OneDrive, SharePoint, and Teams[3]. (Plan 1 is included; Plan 2 features are not.)
  • Core Microsoft Purview Compliance features – Business Premium offers basic compliance tools:
    • Information Protection (AIP Plan 1) for manual sensitivity labeling and encryption of documents/emails[3][3].
    • Office 365 Data Loss Prevention (DLP) for Exchange Online, SharePoint, and OneDrive (but not Teams chats or device endpoints)[3][3]. This lets admins create policies to prevent sensitive info (e.g. credit card numbers) from being emailed or shared in documents.
    • Basic eDiscovery and Audit – content search and ability to place simple legal holds on mailboxes, plus audit log retention for 90 days[3][3]. This covers standard needs to find information across M365 and track user activities, but without advanced analytics.
    • Basic retention policies for data (manual setup of retention tags in Exchange/SharePoint)[3].

In short, Business Premium’s base license provides a “secure productivity foundation” for SMBs[3]. It has strong baseline security (device management and basic threat protection) and some compliance capabilities, sufficient for many smaller organizations’ needs. However, more advanced, enterprise-grade features – like proactive threat hunting, AI-driven identity protection, or comprehensive data governance – are not included in the base plan[3]. To get those, SMBs traditionally had to upgrade to costly Enterprise E5 licenses or layer multiple standalone products. This is where the new add-on suites come in.


Microsoft Defender Suite for Business Premium (Security Add-on)

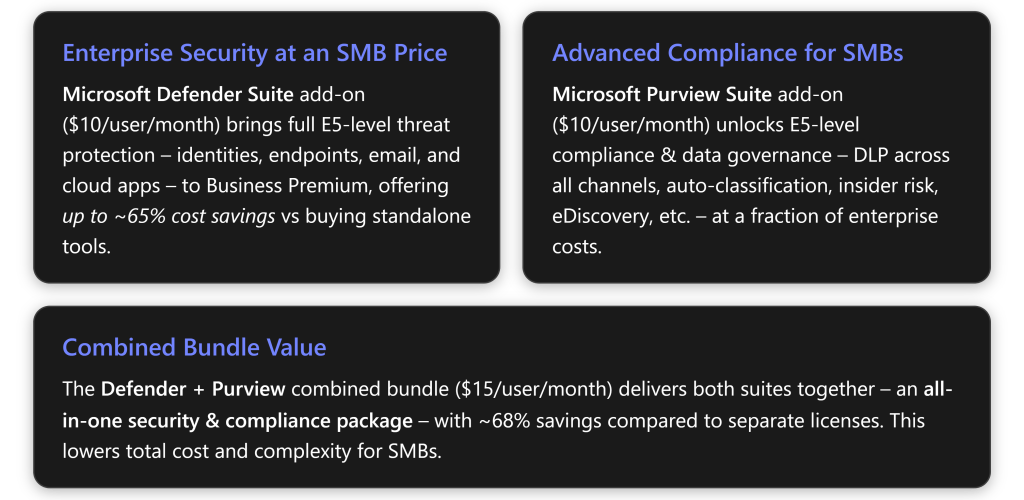
Microsoft Defender Suite for Business Premium is a security-focused add-on that layers full E5-level threat protection onto Business Premium. Priced at $10 per user/month (U.S.), it includes five advanced security tools that were formerly found only in Microsoft 365 E5 (Security) subscriptions[2][1]:

  • Microsoft Entra ID P2 (Azure AD Premium P2): Upgrades your identity management to include risk-based Conditional Access, Identity Protection, and advanced identity governance. This means the system uses Microsoft’s trillions of signals to detect and automatically block or challenge risky sign-ins (e.g. atypical locations or known breached credentials) in real time[5]. It also includes features like Privileged Identity Management (PIM) and access reviews (helping enforce least privilege by time-bound admin access). Base Business Premium has Entra ID P1, which supports Conditional Access but does not do automated risk-based policies or PIM – with P2, an SMB gets the same identity security as an enterprise[5][6]. Example: if a hacker runs a password spray attack (trying common passwords on many accounts), Entra ID P2’s Identity Protection can detect the suspicious behavior and lock out the attempts, preventing a breach without IT needing to intervene[5].
  • Microsoft Defender for Endpoint Plan 2 (MDE P2): Enhances endpoint security beyond the included “Defender for Business” capabilities. With this, SMBs get industry-leading endpoint detection and response with features like threat advanced hunting, custom threat detection rules, detailed threat analytics, and up to 180 days of timeline retention for investigations[4][4]. Base Business Premium already provides next-gen antivirus and automated remediation on endpoints; the add-on unlocks advanced EDR: analysts can proactively hunt for threats using queries (KQL), detect advanced attacks, and even protect IoT devices[4][4]. It also adds capabilities like device-based Conditional Access (tying endpoint risk score to access decisions) and attack surface reduction rules. Example: With MDE P2, a small IT provider can query all devices for traces of a new ransomware indicator and quickly identify which PC is infected – something not possible with just the base antivirus alone.
  • Microsoft Defender for Office 365 Plan 2: Extends email and collaboration protection with Automated investigation & response, Threat Explorer, and Attack Simulation Training[5][1]. Base Business Premium includes Plan 1 (anti-phishing, safe links, safe attachments). Plan 2 adds the ability to run realistic phishing simulation campaigns to train employees in a safe environment[5], and to automatically investigate and remediate phishing attacks (e.g. auto-quarantine all emails malware after the first alert). It also provides rich reporting (who clicked what, etc.) and tools to analyze attacks after they happen. Example: An SMB can conduct a phishing simulation for its staff – say, sending a fake “reset your password” email – using built-in templates. Those who click the dummy link are flagged for training. This proactive training (available only with Plan 2) helps reduce real-world click rates, as one construction firm found it crucial after several employees fell for actual phishing emails (a scenario where Plan 2’s training could build awareness).
  • Microsoft Defender for Identity: A cloud-based tool that monitors on-premises Active Directory signals (if the business has local servers or domain controllers) to detect threats like lateral movement, DC attacks (e.g. Pass-the-Hash, Golden Ticket attacks). It’s essentially an Identity Threat Detection & Response (ITDR) sensor for your directory services[4][4]. Most small businesses with solely cloud identities might not use this, but those with hybrid setups benefit. Base Business Premium has no equivalent for on-prem AD monitoring – this is an added layer of defense against insider attacks or network intrusions targeting identity infrastructure. Example: A manufacturing SMB with a legacy AD server can catch suspicious behavior – Defender for Identity might alert if an attacker inside the network is trying to replicate domain controller credentials, giving early warning of a breach[4][4].
  • Microsoft Defender for Cloud Apps (formerly MCAS): A Cloud Access Security Broker (CASB) solution that gives visibility and control over SaaS app usage[5]. It can discover shadow IT (e.g. employees using unauthorized cloud storage or AI tools), monitor data in 3rd-party cloud apps, and enforce policies (like blocking downloads or applying DLP to those apps)[5][4]. Base Business Premium does not include a CASB, so SMBs often had zero visibility into, say, an employee using personal Dropbox or ChatGPT with company data. With this add-on, SMB IT can see all cloud apps in use and set risk policies. Example: A small consulting firm discovers via Defender for Cloud Apps that several employees are uploading client data to personal Google Drive accounts – a major data risk. They use the tool to block unapproved cloud storage and coach users to use OneDrive instead[5]. It can even apply real-time controls, like blocking risky file downloads from generative AI platforms (e.g. stop users from feeding confidential info into an AI chatbot web app)[4].

How Defender Suite Differs from Business Premium Base: Essentially, Defender Suite fills all the “gaps” in Business Premium’s security:

  • Identities: Base has Entra ID P1 (static policies), add-on gives P2 (adaptive risk-based policies, PIM)[5].
  • Endpoints: Base has Defender for Business (EDR without advanced hunt), add-on gives full Defender for Endpoint P2[4].
  • Email/Collab: Base has Defender for O365 P1, add-on gives P2 with automation & training[5].
  • Cloud Apps: Base has none, add-on includes CASB[5].
  • Threat Analytics: The combined XDR capability of correlating signals across identity, endpoint, email, and SaaS is realized only with the add-on. In other words, Defender Suite turns Business Premium into a unified XDR platform like an enterprise SOC would have[4][1].

Value for SMB: For $10/user, the Defender Suite is highly cost-effective. Buying these components individually would total around $30-$50+ per user (e.g. Entra P2 ~$6, Defender Endpoint P2 ~$5, Defender O365 P2 ~$6, etc.) – Microsoft cites about $47.20 if bought standalone vs $10 in the suite (≈ 68% savings)[1][1]. More importantly, SMBs face the same threats as enterprises (phishing, ransomware, credential attacks), but often lack the tools or full-time specialists. This add-on gives “big company” defenses in an integrated, easy-to-manage way[2][2]. For example, instead of juggling one vendor for email security, another for endpoint, etc., an SMB IT admin gets one unified Microsoft 365 security dashboard with all signals, making threat response faster and simpler[2].

Real-world SMB scenario: Consider a 20-person accounting firm handling sensitive financial data. With Business Premium alone, they get basic protection, but they still worry about things like business email compromise or malware sneaking in. By adding the Defender Suite, they dramatically boost their security: Defender for Office 365 P2 catches an employee’s risky click on a phishing email and automatically isolates the affected mailbox; Defender for Endpoint P2 flags and quarantines a strange PowerShell script on a PC before ransomware can execute; Entra ID P2 forces MFA re-authentication for a user sign-in coming from an unusual location (stopping a possible stolen password login)[4][4]. All these defenses work in concert, minimizing the chances of a breach that could be devastating for a small firm. Given the relatively low cost, the Defender Suite add-on often represents a very good value for SMBs that need stronger cyber defenses, especially those in sectors like finance, healthcare, or any handling sensitive data.


Microsoft Purview Suite for Business Premium (Compliance Add-on)

Microsoft Purview Suite for Business Premium is a compliance and data protection-focused add-on that brings the full range of Microsoft’s E5 compliance & information governance features to an SMB. It costs $10 per user/month and includes a comprehensive set of Microsoft Purview capabilities[1][2]. These go far beyond the base Business Premium’s limited compliance tools, enabling an SMB to protect and govern data just like an enterprise. The suite’s key components are:

  • Microsoft Purview Information Protection (Premium) – Extends sensitivity labeling and data classification with auto-labeling and encryption enforcement. In Business Premium, you can manually tag documents or emails as “Confidential” and apply encryption; with the Purview add-on, you can automatically detect sensitive content (e.g. a document containing a Social Security number or client health data) and have the system label and protect it in real-time[3][3]. It also includes Microsoft Purview Message Encryption (to easily send encrypted emails externally) and Customer Key (bring your own encryption keys for M365 data)[5][5]. Example: A small law firm can configure auto-labeling so that any file containing the keyword “Attorney-Client Privilege” or any credit card number is automatically labeled “Highly Sensitive” and encrypted. Even if an employee mistakenly emails that file externally, only authorized recipients can open it thanks to the attached encryption[3][3].
  • Microsoft Purview Data Loss Prevention (DLP)Expands DLP beyond email/Documents to cover endpoints and Teams. Base Business Premium’s DLP can stop a sensitive email or document in SharePoint from being shared; the add-on enables endpoint DLP (monitoring and blocking sensitive data copied to USB drives, printed, or uploaded from a device) and extends DLP policies to Microsoft Teams chat conversations[3][3]. Example: With Purview DLP, a health clinic can ensure that staff cannot copy patient records to a USB stick or paste them into a Teams message. If someone tries to, the system will block it and log the attempt[3]. This helps prevent accidental leaks or malicious exfiltration of sensitive data (like medical info or credit card numbers), across all channels.
  • Microsoft Purview Insider Risk Management – Provides tools to detect and investigate potential insider threats. It uses behavioral analytics to flag risky activities by users, such as an employee downloading unusually large amounts of data, multiple file deletions, or attempts to forward sensitive info outside[5][3]. It intentionally anonymizes user identities in its dashboard until a certain risk threshold is met (to preserve privacy)[3]. Base Business Premium has no insider risk solution. Example: An SMB in design services notices via Insider Risk Mgmt that one of their designers downloaded 500 files in a day and attempted to upload them to a personal cloud account – a red flag the person may be preparing to leave and take IP with them. The system alerts IT, who can investigate and intervene before a data theft incident occurs[5][3].
  • Microsoft Purview Communication Compliance – Monitors internal communications (Teams, Exchange email, even Yammer) for policy violations like harassment, inappropriate language, or sharing of sensitive info[5][3]. In an SMB without a large HR or compliance team, this tool can automatically flag problematic communications. Base Business Premium doesn’t include this. Example: A 20-person company can set up a policy to detect harassment or discriminatory language in Teams chats. If an employee uses offensive language in a Teams channel, a compliance officer (or owner) is alerted with a snippet of the conversation[3]. This helps SMBs maintain a professional, safe work environment and meet workplace compliance standards without manually reading chats.
  • Microsoft Purview Records Management & Data Lifecycle Management – Offers advanced retention and records management capabilities. While Business Premium allows basic retention policies, the Purview suite lets you classify certain content as official records, apply retention labels with event-based retention (e.g. start a 7-year retention when a project closes or an employee leaves), and require dispositions (reviews before deletion)[3][3]. Example: A small investment advisory firm is legally required to keep client communications for 7 years. With Purview, they create a retention label “Client Record – 7yr” and apply it to all client email folders. All emails are then automatically retained for 7 years (and can’t be deleted sooner), helping them comply with regulations without manual admin work[3].
  • Microsoft Purview eDiscovery (Premium) – Greatly enhances the ability to respond to legal or investigative inquiries. Base Business Premium has Standard eDiscovery (basic search and hold). eDiscovery Premium offers an end-to-end workflow: case management, the ability to search across mailboxes, Teams, SharePoint with advanced filters, place content on hold, perform OCR text recognition, thread Teams chats, use relevance analytics to cull down data, and export results with auditing[3][3]. It essentially lets an SMB handle litigation-related document discovery in-house, similar to what large enterprises do. Example: A 50-person company gets an unexpected lawsuit and needs to gather all communications from certain employees over the past year. With eDiscovery Premium, their IT admin can create a case, search all email and Teams chats by keywords and date range, and quickly export the findings for legal counsel[3]. This could save significant time and outsourcing costs – bringing a capability in-house that normally only big firms have.
  • Microsoft Purview Audit (Premium) – Extends the audit log capabilities by keeping audit logs for up to 1 year (or more) and logging more events (like exactly who viewed or accessed a specific document, mailbox, or item)[3]. Base audit only retains 90 days and might miss certain detailed events. Audit Premium is invaluable for forensic investigations after an incident. Example: After a suspected data leak, an SMB can use Audit (Premium) to trace back an incident – e.g. see if a particular file was accessed or exported by a user, even 8 months ago, since the logs are retained[3]. That level of detail can provide evidence for an investigation or regulatory response that wouldn’t be available with standard logs.
  • Microsoft Purview Compliance Manager – While available in base in a limited form, the full suite gives the full Compliance Manager toolset: templates for various regulations (GDPR, HIPAA, ISO 27001, etc.), an assessment dashboard, and improvement actions tailored for your tenant[3]. This acts like a virtual consultant, showing where you meet or fall short of compliance requirements and suggesting steps to improve. Example: An SMB in healthcare can load the HIPAA template in Compliance Manager and instantly see a checklist of controls they should implement (e.g. enable DLP for certain data, enforce MFA, etc.)[3]. As they implement each recommendation, it checks off and improves their compliance score. This helps a small team manage complex regulations systematically.
  • (New) Microsoft Purview Data Security Posture Management (DSPM) for AI – A new capability mentioned for AI oversight[5]. It helps monitor how AI applications (like Microsoft 365 Copilot or even third-party generative AI) are accessing sensitive data, with real-time alerts for risky behavior and enforcement of policies (like blocking an AI from seeing certain content)[5]. Example: If an employee tries to have an AI bot summarize a file containing customer SSNs, DSPM for AI could flag or block that operation. This is forward-looking for SMBs preparing to adopt AI responsibly.

How Purview Suite Differs from Business Premium Base: In summary, the Purview Suite unlocks all the advanced compliance features that Business Premium lacks:

  • Broader DLP: from just emails/SharePoint to Teams chats and devices[3][3].
  • Smarter labeling: from just manual labels to auto-classification and enforcement (with encryption, etc.)[3][3].
  • Insider Risk & Comm Monitoring: none in base, fully available with suite[3][3].
  • Records Management: basic retention vs advanced records declarations and event-based retention[3].
  • Discovery & Audit: basic vs Premium eDiscovery and long-term audit logs[3][3].
  • Compliance Manager: base access vs full templates and analytics[3].

In effect, the Purview add-on transforms Business Premium into the equivalent of Microsoft 365 E5 Compliance for an SMB[3][3].

Value for SMB: For organizations in regulated industries (financial services, healthcare, legal, government contractors, etc.), the Purview Suite provides immense value. It allows a small business to enforce data protections and privacy controls on par with a Fortune 500 company, without hiring an army of compliance staff or buying multiple solutions. At $10/user, it’s much cheaper than third-party compliance tools (which might be needed for DLP or eDiscovery if one doesn’t have this). It’s also far cheaper than upgrading to Microsoft 365 E5 (which can cost ~$57/user) just to get these features – Business Premium ($22) + Purview ($10) totals around $32, nearly half the cost of E5, with almost the same compliance benefits[1][1]. And if both security and compliance are needed, the combined bundle at $15 makes it ~$37 total, still much lower cost than enterprise plans (while staying within the 300-user SMB licensing limit)[5].

Real-world SMB scenario: Imagine a small medical clinic (50 employees) handling patient records. With Business Premium alone, they can label documents as sensitive and have some basic DLP on email, but an employee could still, say, download a bunch of patient files to a personal device undetected. After adding the Purview Suite, the clinic gains fine-grained control: endpoint DLP blocks a nurse from saving patient data to an unencrypted USB drive; auto-labeling ensures any document containing patient insurance numbers is tagged “PHI – Confidential” and encrypted; Communication Compliance flags if a staff member tries to gossip about a patient’s case in Teams (violating HIPAA privacy); Insider Risk alerts the admin that a departing employee downloaded an unusual volume of records last week[5][3]. Later, when an audit or legal inquiry comes up, they use eDiscovery Premium to quickly pull all relevant emails and Teams chats about a specific patient, instead of combing through mailboxes manually[3]. All of this significantly reduces the risk of data breaches or compliance violations that could cost the clinic fines or reputational damage. For many SMBs, especially those dealing with sensitive customer data, the Purview Suite’s capabilities offer peace of mind and concrete risk reduction that justify the cost.


Feature Comparison: Business Premium vs. Defender & Purview Add-ons

The following table compares which key features are included in Business Premium out-of-the-box versus what is added by the Defender Suite and Purview Suite add-ons:

Feature / CapabilityBusiness Premium (Base)+ Defender Suite Add-on+ Purview Suite Add-on
Identity Protection & GovernanceEntra ID P1 – Conditional Access, basic SSPR; no risk-based policies[5].Entra ID P2 – Adds risk-based Conditional Access, Identity Protection (automated ML-driven risk detection) and Privileged Identity Management[5][6].(No change)
Endpoint Security (EDR)Defender for Business – Included EDR with next-gen AV and auto-remediation; no advanced hunting[4][4].Defender for Endpoint Plan 2 – Full EDR suite with threat advanced hunting, custom detections, 180-day data retention, threat analytics[4][4].(No change)
Email & Office 365 SecurityDefender for Office 365 Plan 1 – Safe Links, Safe Attachments, anti-phish for email/SharePoint/OneDrive/Teams[3].Defender for Office 365 Plan 2 – Adds Attack Simulation Training, automated investigation & response, threat trackers, rich reporting[5].(No change)
Cloud App Security (CASB)None included (no CASB; shadow IT not visible)[5].Defender for Cloud Apps – Full CASB: SaaS app discovery, OAuth app control, session policies (e.g. block risky downloads)[5][4].(No change)
On-Prem Identity Threat DetectionNone (no on-prem AD monitoring).Defender for Identity – AD threat analytics (sensors for DCs to detect lateral movement, credential theft)[4][4].(No change)
Information Protection (Sensitivity Labels & Encryption)Manual labeling & encryption (AIP Plan 1). Users can apply sensitivity labels to emails/docs and encrypt them manually[3][3].(No change)Auto-labeling & advanced protection. Automatically detect sensitive content and apply labels with encryption automatically; includes Message Encryption for emails and Customer Key for BYO encryption keys[5][3].
Data Loss Prevention (DLP)Office 365 DLP for Exchange, SharePoint, OneDrive. Can detect/prevent sharing sensitive info in email and M365 documents[3][3]. No coverage of Teams or Windows endpoints.(No change)Advanced DLP across Exchange, SharePoint, OneDrive, Teams chats, and endpoints (Windows devices). Can block sensitive info in Teams messages or copying to USB, etc.[3][3].
Insider Risk ManagementNot included.(No change)Insider Risk Management – Detects risky user actions (mass downloads, data exfiltration indicators) with dashboards & alerts[5][3]. Privacy controls to pseudonymize user identities during investigation.[3]
Communication ComplianceNot included.(No change)Communication Compliance – Monitors internal communications (Teams, Exchange) for policy violations (e.g. harassment, inappropriate sharing) and flags them for review[5][3].
Records & Data Lifecycle MgmtBasic retention policies for email and files (manual setup, no record declaration)[3].(No change)Advanced Records Management – Classify content as records, apply retention with triggers & disposition reviews; automated lifecycle policies for regulatory compliance[3][3].
eDiscovery & Legal HoldeDiscovery (Standard) – Basic content search and ability to place holds on mailboxes/sites[3][3]. Limited features, suitable for small-scale searches.(No change)eDiscovery (Premium) – Full case management, legal hold across M365, Teams conversation threading, search analytics, export toolset[3][3]. Enables in-house handling of legal inquiries at enterprise scale.
Audit LoggingStandard Audit – 90 days log retention; basic user/activity events[3][3].(No change)Audit (Premium) – 1 year (extendable) retention of detailed audit logs, including events like document read/access, item deletions, etc.[3]. Critical for forensic investigations and compliance audits.
Compliance ManagerBasic access – Compliance Manager with a few assessments; limited automation (mostly manual tracking)[3].(No change)Full Compliance Manager – All regulatory templates (GDPR, HIPAA, ISO, etc.), automated control tracking, improvement action workflow[3]. Provides a centralized compliance dashboard for managing requirements.
AI Data Insights (New)None (base has no specialized AI data governance tools).(No change)DSPM for AI – Monitors AI/cognitive services interactions with your data, alerting on risky prompts or data exposure via AI. Helps ensure sensitive data isn’t misused by AI like Copilot[5].

Table: Key feature comparison between Business Premium base, and with Defender Suite or Purview Suite add-ons enabled. (A checkmark “✔” indicates the feature is included with that plan; blank/‘no’ means it’s not included. Some base features are enhanced by the add-ons as noted.)[3][1]


Are These Add-Ons Good Value for SMBs?

Considering their breadth of features and pricing, the Defender and Purview suites offer strong value for SMBs that need advanced security or compliance:

  • Cost-Effectiveness: At $10 per user each (or $15 for both), these add-ons are dramatically cheaper than upgrading to an Enterprise E5 license. For example, Business Premium + both suites = ~$37/user, whereas Microsoft 365 E5 (which includes similar security/compliance features plus other things) is ~$57/user – a significant jump[1][2]. Microsoft and partners estimate ~65–68% cost savings compared to purchasing equivalent capabilities standalone or moving to E5[1][6]. This puts enterprise-grade tools within reach of smaller budgets.
  • No Paying for Unneeded Extras: Unlike a full E5 upgrade, these focused suites let an SMB pay only for security and/or compliance enhancements, without paying for other E5 features they might not use (like phone system, Power BI Pro, etc.). It’s a targeted uplift: “exactly what SMBs need to stay secure and compliant” without unnecessary extras[2].
  • Integrated Simplicity: All Defender and Purview tools are part of the M365 platform, meaning one unified ecosystem instead of a patchwork of point solutions[2][1]. SMB IT teams benefit from a single pane of glass and correlated insights (e.g. a Defender alert can link directly to related user activities that Purview Audit logged)[2]. This reduces complexity and the learning curve. For a small business with perhaps one IT admin (who wears many hats), having these advanced capabilities built-in to Microsoft 365 is far easier than managing separate third-party security or compliance products.
  • Improved Security Posture: The Defender Suite’s real-time detection and XDR approach can dramatically shorten response times to threats – automatically containing incidents that might otherwise go unnoticed for days[2][2]. Shorter “dwell time” means less damage if a breach occurs. In an SMB, where a single cyberattack (ransomware, business email compromise, etc.) could be devastating, this proactive defense is invaluable. Additionally, many cyber insurers now require enhanced controls (like EDR, MFA, DLP) – these suites can help meet insurance or regulatory requirements that an SMB might face[4].
  • Strengthened Compliance & Client Trust: The Purview Suite helps SMBs meet data protection laws (like HIPAA for health, GDPR for any business dealing with EU data, GLBA for finance, etc.) without hiring a compliance team[2]. It can also be a selling point to clients – an SMB can demonstrate they use the same robust compliance tools as an enterprise to safeguard data. This can build trust and open doors to business that might demand certain security/compliance standards in contracts.
  • Flexibility: SMBs can choose either or both suites depending on their needs. For example, a small CPA firm might adopt Purview for compliance (to protect financial data) even if they feel base security is enough, or vice versa, a tech startup might take Defender Suite for security hardening. There’s also flexibility to license only certain users if desired – e.g. give Purview Suite licenses just to legal/HR personnel for eDiscovery and communication monitoring, or Defender Suite just to IT admins and high-risk users. (Note: Microsoft does recommend a consistent deployment for security tools to be fully effective[4], but the add-ons can technically be applied per user.)

Potential Considerations: Of course, whether it’s “good value” depends on the specific SMB. For a very small business (say 5-10 users) with a tight budget and minimal sensitive data, the base Business Premium might suffice – $10/user extra might not seem worth it if they feel low-risk. However, as soon as an organization has valuable data or regulatory obligations, the cost of these add-ons is modest compared to the potential cost of a data breach, fines, or a serious cyber incident. Also, deploying these advanced tools does require some IT expertise to configure policies (e.g. writing good DLP rules or tuning insider risk thresholds) – SMBs may need a partner’s help or IT consultant to get the most out of it. But many Microsoft partners offer managed services on top of these suites to assist SMBs (as noted by providers like Chorus and others)[1][1].

Overall, Microsoft has intentionally priced and packaged Defender and Purview suites to deliver high value to SMB customers. They effectively “democratize” enterprise security and compliance, letting a 50-person or 200-person company attain nearly the same level of protection as a 5,000-person company[2][3]. For most SMBs that “face the same threats as large enterprises, but without the same resources”, these add-ons are a welcome solution[2]. In practice, they allow SMBs to level up their security and data protection posture significantly without breaking the bank – which, in today’s threat and regulatory landscape, represents a very good value.


Real-World Examples of SMBs Using Defender & Purview Features

To illustrate how features from the Defender and Purview suites can be applied effectively, let’s look at a few concrete scenarios in small or mid-sized organizations:

  • Phishing and Ransomware Defense (Defender Suite): Scenario: A 100-user manufacturing company was frequently targeted by phishing emails, one of which led to a malware infection that halted production for a day. After adding the Defender Suite, they used Attack Simulation Training (Defender for O365 P2) to run quarterly fake phishing campaigns, educating employees on spotting malicious emails[5]. They also benefited from automated investigation – when an employee later clicked a real phishing link, Defender instantly quarantined the suspicious email across all mailboxes and isolated the user’s device. The attack was contained in minutes, with minimal impact. Defender for Endpoint P2’s advanced hunting then allowed their IT service provider to scour all machines for the malware’s indicators to ensure no foothold remained. This multi-layered defense, previously only feasible for enterprises, dramatically reduced successful phishing incidents at the company.
  • Shadow IT Control & Data Oversharing (Defender Suite + Purview): Scenario: A 50-person marketing agency found that employees were signing up for unapproved cloud apps to share large graphics files with clients, bypassing IT policies. This posed both security and client-data privacy concerns. Using Defender for Cloud Apps (CASB) from the Defender Suite, they discovered dozens of third-party apps in use[5]. The IT manager set policies to block high-risk apps and require OAuth approval for others. At the same time, with Purview DLP, they put rules in place so that even if users tried using personal apps, any file containing client personally identifiable information would be blocked from upload[2]. In one case, Defender for Cloud Apps flagged an employee trying to use a free AI writing tool with client data; thanks to integration with Purview, a DLP policy automatically prevented the user from feeding sensitive client info into that tool[2]. The combined suites helped the agency rein in shadow IT and protect client data, all through their Microsoft 365 admin consoles.
  • Insider Threat and Fraud Prevention (Purview Suite): Scenario: A small financial services firm (100 users) dealt with an incident where a departing employee attempted to take client lists and sensitive reports on their way out. Without Purview tools, this wasn’t noticed until after the data was gone. Now, with Insider Risk Management, the firm has policies to alert if someone downloads unusually large amounts of confidential data or tries to mass-delete files[3]. Recently, it flagged a middle manager who downloaded a portfolio of 200 client files in two days. Upon investigation, it turned out to be for legitimate work, and no action was taken – but the company leadership expressed relief knowing the system is actively looking for early warning signs. In another instance, Communication Compliance caught an employee in the finance department discussing “off-book accounts” in Teams with a colleague – triggering an alert to compliance officers. This led to an internal review that uncovered a potentially fraudulent activity, which they stopped early. For a firm subject to financial regulations, these kinds of internal checks were something they never imagined they could implement with a small IT team.
  • Regulatory Compliance & Audit Readiness (Purview Suite): Scenario: A healthcare clinic with 30 staff must follow HIPAA regulations. They used to rely on manual policies and trust. After adopting the Purview Suite, they leveraged Compliance Manager with the HIPAA template, which gave them a clear to-do list and showed they were only ~60% compliant initially. Over a few months, they methodically raised this score by enabling various controls (DLP policies for patient data, encryption on all sensitive emails, strict retention on medical records, etc.)[3]. When an external auditor came, the clinic was able to demonstrate – using Compliance Manager’s reports – exactly what safeguards were in place and how they map to HIPAA rules. They also had Audit (Premium) logs to show detailed histories of who accessed what information when, which impressed the auditors. The clinic’s administrator noted that what used to be a nerve-wracking, costly compliance audit process became far smoother thanks to having enterprise-grade compliance tooling. They avoided potential fines and felt more confident that they weren’t inadvertently failing their legal obligations.
  • Legal eDiscovery for a Small Business (Purview Suite): Scenario: A 25-person consulting company became party to a legal dispute and needed to produce all communications related to a particular project from the last year. Without eDiscovery tools, they would have had to manually search individual mailboxes and Teams chats – a time-consuming task (or hire an expensive external eDiscovery service). However, since they had the Purview add-on, their IT admin used eDiscovery Premium to create a case, search across all user data (emails, Teams, SharePoint files) with date and keyword filters, and then used the built-in relevance sorting to cull irrelevant data[3]. They placed a few mailboxes on hold to preserve data and exported a neatly organized dataset for their lawyer. What could have taken weeks manually was done in days, saving on legal fees and minimizing disruption. This level of capability, once exclusive to big companies’ legal departments, proved extremely valuable to this small firm in handling an unexpected legal challenge.

Conclusion

For small and medium businesses, the Microsoft Defender Suite and Microsoft Purview Suite add-ons represent a significant opportunity to enhance security and compliance without overspending or adding complexity. Business Premium already provides a strong base for SMB productivity and security, and with these add-ons an SMB can effectively elevate itself to E5-level protection in the areas of threat defense and data governance[3].

These suites include a rich array of services (from XDR across identities, devices, email, and cloud apps in Defender[6], to end-to-end information protection and risk management in Purview[6]) that previously were out-of-reach for many smaller organizations. Now, at roughly $10–15 per user, SMBs get access to tools that enterprise CISOs rely on, which can be a game-changer in fending off cyber threats and staying compliant with laws. The real-world examples above underscore how such capabilities can directly reduce incidents (like breaches or leaks) and empower SMBs to handle situations internally that they otherwise couldn’t.

In assessing value, it’s clear that Microsoft has targeted these suites to deliver maximum bang for the buck for SMBs: they consolidate multiple solutions into one package, leverage the existing Microsoft 365 platform (no extra infrastructure needed), and come at a price point that is justified by the risk mitigation they provide[1][2]. For most growing businesses – especially those handling sensitive customer data or operating in regulated sectors – the Defender and Purview suites are indeed worth the investment to secure their environment and protect their data. As one Microsoft partner put it, “You get an immense amount of coverage… at a heavily reduced price point. It’s offering incredible value for SMBs and offers the level of protection they’ve desperately wanted and needed for a long time.”[1][1]

Ultimately, with cyber threats rising and data regulations tightening even for smaller firms, these add-ons enable SMBs to operate with the same confidence and compliance as a larger enterprise, without having to incur an enterprise cost or complexity. In summary: Microsoft Defender Suite and Purview Suite for Business Premium equip SMBs to defend against external threats and guard against internal risks in a holistic way, making enterprise-grade security accessible and practical for businesses of any size[1][2].

References

[1] Defender and Purview add-ons for Business Premium | Chorus

[2] SMB Cybersecurity Gets a Boost with Microsoft 365 Business Premium

[3] Microsoft Purview Suite for Business Premium: Features & SMB Use Cases

[4] Microsoft 365 Announces E5 Security for Business Premium Customers as …

[5] Introducing new security and compliance add-ons for Microsoft 365 …

[6] Elevate SMB Security, Compliance & Copilot Readiness: Microsoft …

Microsoft Purview Message Encryption in SMB: Setup and Effective Use

Microsoft Purview Message Encryption is a cloud-based email encryption and rights management solution that helps protect sensitive emails in Microsoft 365. This report explains what Purview Message Encryption is, how it works, and provides step-by-step guidance to set it up and use it effectively in a small or medium-sized business (SMB) with Microsoft 365 Business Premium. We also cover policy configuration (mail flow rules and sensitivity labels), licensing considerations (assuming the organisation already has Business Premium), and best practices. All pricing is provided in Australian dollars (AUD) for clarity.

What is Microsoft Purview Message Encryption?

Microsoft Purview Message Encryption (formerly known as Office 365 Message Encryption, OME) is an online email protection service built on Azure Rights Management (Azure RMS)[1]. It combines strong encryption with fine-grained access controls (rights management) to secure email communication. With Purview Message Encryption enabled, users can send encrypted emails to recipients inside and outside the organisation. The encryption is enforced such that only recipients who authenticate with the allowed credentials (e.g. their Microsoft 365 or Gmail account, as specified by the policy) can decrypt and read the message; anyone else who intercepts it sees indecipherable content[2].

Purview Message Encryption enhances the default security of email in Microsoft 365. By default, Microsoft 365 already encrypts data in transit between its data centers and uses TLS encryption for emails in transport. However, Purview Message Encryption goes further by encrypting the message content itself and applying persistent protection. This means the protection stays with the email even after it leaves Microsoft’s servers, and it can enforce restrictions like “Do Not Forward”. For example, you can send an email that cannot be forwarded or printed by the recipient, or an email that only specific people (inside or outside your company) are permitted to open[3]. The encryption persists regardless of where the email goes – it remains encrypted at rest in mailboxes and in transit over the internet[3].

How it works: Purview Message Encryption uses Azure RMS (part of Microsoft Purview Information Protection) to encrypt the email and any attachments, and to apply rights policies. When an authorised recipient attempts to open an encrypted email, Outlook (or the viewer portal) checks their identity against the email’s permissions. If permitted, the service silently decrypts the content for viewing; if not, access is denied[3]. Internally, Office apps like Outlook, Outlook on the web, or mobile Outlook provide a seamless reading experience – users see the content normally if they have access rights. External recipients (for example, a client using Gmail) receive an email notification (often branded with your company’s details) stating that they’ve received an encrypted message. They are prompted to authenticate (using a one-time passcode or by signing in with a Google/Microsoft account) on the encrypted message portal, after which they can read and respond securely through that portal[1]. This approach means you can safely send confidential data to any email address.

Comparison to traditional encryption: Unlike S/MIME encryption (which requires exchanging certificates) or manual password-protected attachments, Purview Message Encryption is centrally managed and user-friendly. The sender doesn’t need the recipient’s public key or a shared secret; instead, the encryption and key management are handled by Azure RMS. The recipient just needs to verify their identity. Purview Message Encryption was introduced as an evolution of the legacy OME and Information Rights Management (IRM) features in Exchange. In fact, Office 365 Message Encryption (OME) was retired in July 2023 and automatically replaced by Purview Message Encryption, which provides a more streamlined experience[4]. Key improvements in the new Purview solution include an “Encrypt-Only” option (allowing encryption without restricting recipient actions, for easier collaboration), the ability for users to manually encrypt emails directly in Outlook (not only via admin rules)[4], and a unified experience for both internal and external recipients (no more downloading of HTML attachments; external users use a web portal)[4].

Example use cases: An SMB might use Purview Message Encryption to protect emails that include personally identifiable information (PII) like customer contact details or tax file numbers, financial data like bank account or credit card numbers, or any confidential business information. For instance: an accounting firm can ensure that all emails containing tax file numbers or financial statements are encrypted; a healthcare clinic can automatically encrypt emails with patient data to comply with privacy laws; or staff could manually choose a “Confidential – Recipients Only” label when sending internal strategy documents to prevent those emails from being forwarded outside the company.

Licensing and Requirements

One of the advantages for SMBs with Microsoft 365 Business Premium is that Purview Message Encryption is already included in your subscription[4]. Business Premium includes Azure Information Protection (AIP) Plan 1[5][5], which provides the rights management and labeling capabilities underpinning Purview Message Encryption. This means you do not need to purchase any additional licenses to use the standard email encryption features.

To clarify how Purview Message Encryption is licensed, the table below compares Business Premium with other Microsoft 365 plans in context:

Plan or LicenseEmail Encryption AvailabilityAdditional Requirements?Price (AUD)*
Microsoft 365 Business PremiumIncluded – Purview Message Encryption via AIP Plan 1[4]No extra license needed. Azure RMS is automatically available.$32.90 user/month (ex. GST)[5]
Microsoft 365 Business Standard / BasicNot included by default in these plans.Requires add-on: Purchase Azure Information Protection Plan 1 for each user to enable Purview Message Encryption[4].$18.70 / $9.00 user/month (ex. GST) + AIP P1 add-on (~$2.80 ex. GST per user/month)[5][6]
Office 365 E3 / Microsoft 365 E3Included – Rights Management (AIP P1) is part of E3[1].No extra license needed for standard encryption features.~$32.80 user/month (ex. GST) for Office 365 E3[7].
Office 365 E5 / Microsoft 365 E5Included – AIP Plan 2 is included, which adds Advanced Message Encryption.No extra license needed; advanced features available (e.g. decrypting/revoking email).~$56.40 user/month (ex. GST) for Office 365 E5[7].

*Prices are per-user, per-month in Australian dollars. Business plans are listed at annual commitment rates excluding GST[5]; enterprise plan prices are approximate. GST in Australia is 10%, so e.g. Business Premium is about $36.19 including GST.

As shown above, Microsoft 365 Business Premium already covers the necessary licensing. If an organisation had Business Standard or Business Basic, they would need to add Azure Information Protection Plan 1 licenses (approximately A$3 per user per month) to get the encryption capability[4][6]. Enterprise E3 plans include it by default, and E5 plans include even more capabilities (more on Advanced Message Encryption below). Each user who sends or reads encrypted emails should be licensed appropriately[4].

Technical requirements: The core requirement to use Purview Message Encryption is that the Azure Rights Management service is activated for your tenant[8]. In most cases, for eligible plans like Business Premium, this service is activated automatically by Microsoft, so no manual step is needed[8]. It’s essentially “on” if you have the right license. However, if your organisation previously used on-premises Active Directory Rights Management Services (AD RMS) or had deliberately turned off Azure RMS, you may need to activate it or migrate to Azure RMS first[4][8]. (This is uncommon for SMBs; it typically applies to larger organisations that had older on-prem infrastructure. In an SMB cloud-only environment, you can assume Azure RMS is enabled by default.)

To double-check, an admin can run a simple PowerShell command in Exchange Online:

  • Get-IRMConfiguration – this should show AzureRMSLicensingEnabled : True if Azure RMS (and thus Purview encryption) is enabled for your tenant[8].

If it’s False, you can enable it by running Set-IRMConfiguration -AzureRMSLicensingEnabled $True[8]. You might also run Test-IRMConfiguration -Sender <user> -Recipient <user> (using any two user emails in your org) to verify that encryption and decryption tests pass and that it finds the default RMS templates (like “Contoso – Confidential” or “Do Not Forward”)[8]. A successful test confirms that your tenant is correctly configured for Purview Message Encryption.

Advanced Message Encryption (AME): It’s worth noting that Microsoft offers an Advanced Message Encryption feature set for organisations with higher compliance needs. AME is included with the top-tier E5 licenses (or as an add-on via the Microsoft 365 E5 Compliance suite for others)[9]. It builds upon the standard encryption features by allowing more control over encrypted emails. For example, admins can define multiple custom branding templates for different purposes, set expiration dates on encrypted emails, or revoke access to an already-sent encrypted email via the admin portal[9][9]. These advanced controls are particularly useful if you need to automatically expire sensitive emails after a period or track and revoke messages for compliance. However, Advanced Message Encryption is not included in Business Premium, and for most SMB scenarios, the standard encryption (already provided) is sufficient. We will focus on the out-of-the-box capabilities available with Business Premium.


Step-by-Step Setup Guide for Purview Message Encryption

Setting up Purview Message Encryption in a Business Premium tenant involves a few one-time configuration steps by an administrator. Below is an overview timeline of the key steps, followed by detailed guidance:

Let’s dive into each of these steps in detail:

Step 1: Activate (or Verify) Azure Rights Management Service

Why: Purview Message Encryption relies on Azure Rights Management (the encryption engine of Azure Information Protection) to do the encryption and decryption. If Azure RMS isn’t active, encryption will not work.

What to do: In a Business Premium tenant, Azure RMS is typically already activated[8]. To double-check, you can go to the Microsoft Purview compliance portal, navigate to Information Protection > Overview. If you see a banner or option to “Activate” Azure Information Protection, go ahead and activate it. (If everything is already active, there may be no such prompt.)

For a programmatic verification, use PowerShell: Connect to Exchange Online (with an admin account) and run:

Get-IRMConfiguration | fl AzureRMSLicensingEnabled

If it returns True, then RMS is enabled[8]. If False, enable it by running:

Set-IRMConfiguration -AzureRMSLicensingEnabled $true

Additionally, if your organisation had been using an on-premises AD RMS server in the past and you haven’t yet switched, you must migrate to Azure RMS first[4]. (This likely doesn’t apply to a cloud-based SMB setup.)

Optional – Bring Your Own Key: By default, Microsoft manages the cryptographic keys used for encryption. Some organisations (usually larger or highly regulated ones) prefer to manage their own root key for encryption (a process called BYOK – Bring Your Own Key). This is complex and typically not necessary for an SMB. Microsoft recommends most customers let the service manage keys[8]. If BYOK is desired for compliance reasons, it should be done before broad deployment of encryption. (BYOK setup involves Azure Key Vault and is beyond the scope of this guide, but it’s supported[8].)

Step 2: Verify Configuration with Test Commands

After activation, it’s good practice to verify that encryption is fully functional in your tenant:

  • Run Test-IRMConfiguration -Sender <user@yourorg.com> -Recipient <user@yourorg.com> in Exchange Online PowerShell (substitute any valid sender and recipient in your organisation)[8]. This test attempts to acquire RMS templates, then encrypt and decrypt a sample message internally. You should see output with PASS results for acquiring templates, encryption, decryption, and IRM being enabled[8]. Typically, it will list available templates such as “ – Confidential”, “Do Not Forward”, etc., and conclude with “Overall Result: PASS”.
  • If the test fails with an error like “Failed to acquire RMS templates”, it may indicate Azure RMS wasn’t enabled or there’s a configuration issue. The Microsoft documentation provides additional PowerShell steps to troubleshoot this (for example, connecting to the AIPService module to set the licensing location)[8]. In most cases, with Business Premium, this step will pass on the first try if your licenses are assigned properly.

This verification ensures that your tenant is ready to start encrypting emails.

Step 3: Create Mail Flow Rules to Encrypt Emails (Automatic Encryption)

Mail flow rules (also known as transport rules) allow administrators to automatically apply encryption to emails that meet certain conditions. This is the primary way to enforce encryption consistently without relying solely on users. You can create rules, for example, to:

  • Encrypt all outbound emails sent to recipients outside your organisation (external email).
  • Encrypt messages that contain certain sensitive keywords or data (like “Confidential”, or credit card numbers, etc.).
  • Encrypt emails sent to specific recipients or domains (for instance, always encrypt emails sent to a particular partner organisation or a specific client’s email address).
  • Prevent recipients from forwarding certain emails by using a “Do Not Forward” template.

How to set up a new rule: Use the Exchange Admin Center (EAC) for a GUI approach or PowerShell for scripting. In the new EAC (https://admin.exchange.microsoft.com) go to Mail flow > Rules and click + Add a rule. Give the rule a name (e.g. “Encrypt outgoing financial data”). Then:

  • Conditions: Under “Apply this rule if…”, choose the condition that triggers encryption. Common conditions are:
    • “The recipient is located – Outside the organization” (to target external emails)[10].
    • “The subject or body includes – ” or “The message contains sensitive information – ” (to target specific content).
    • “The recipient domain is – \” (to target specific partner domains).
    • You can combine multiple conditions with Add condition for specificity (e.g. external + contains “Project X”)[10][1].
  • Actions: Under “Do the following…”, select Modify the message security > Apply Office 365 Message Encryption and rights protection[10]. Once you select this, another drop-down appears to choose an RMS template. Here you will see options like Encrypt, Do Not Forward, and any custom templates/labels you have.
    • Choose Encrypt if you just want to encrypt (allowing recipients to forward or reply normally, but the message stays encrypted).
    • Choose Do Not Forward if you want to encrypt and restrict recipients from forwarding or copying the content.
    • (If you had published sensitivity labels that include encryption, their names might also appear here as available templates.)
    • After selecting the template, click Save.
  • You can add additional actions if needed (for example, adding a footer to notify the recipient that the message was encrypted). But typically just applying encryption is enough.
  • Exceptions (optional): You may add exceptions if there are cases you don’t want to encrypt even if conditions match. For example, you might exclude a specific internal sender or a trusted external domain from the rule.
  • Mode: Set the rule to Active (or test in audit mode first if you prefer). Save the rule.

Once enabled, any new email that meets the conditions will be automatically encrypted as it’s sent out. For instance, if you created a rule to encrypt all external mail, whenever a user sends an email to an @gmail.com or any non-company address, Exchange will apply encryption before delivering the message. These rules are enforced on the server side, so they work regardless of whether the user is on Outlook desktop, mobile, or another client.

Important: Mail flow rules cannot encrypt messages incoming from outside senders to you – they only act on messages your users send. If, for example, an external partner sends you an unencrypted email with sensitive info, the Exchange Online transport rule can’t retroactively encrypt that inbound message[10]. It will be delivered as is. (Transport rules in Exchange Online don’t support encryption as an action on incoming mail from outside, by design.) To protect inbound communications, you’d have to rely on the sender encrypting it on their side or use other methods (like asking them to use a secure portal).

You can create multiple mail flow rules for different scenarios as needed. Microsoft’s rules are quite flexible – you can combine conditions (AND/OR logic) and have multiple separate rules to handle various needs[1]. When you have more than one encryption rule, be mindful of their order and if any might overlap; rules can be ordered and if two rules apply encryption, the result is the same (the email is encrypted once). Also, consider adding a rule to strip encryption in certain cases if needed (for example, some organisations add a rule to decrypt emails sent to an internal archiving mailbox or certain internal tools, so that those systems can index or scan the content). Microsoft provides guidance on creating a rule to remove encryption as well[10], but for most SMB scenarios this may not be necessary.

After setting up your encryption mail flow rules, you effectively have automatic encryption policies in place. This is great for compliance: it doesn’t rely on employees remembering to do anything. For example, you could enforce that all emails leaving your company with an attachment get encrypted, or any email mentioning “Payroll” that goes externally is encrypted.

Tip – using Data Loss Prevention (DLP): In Business Premium, you also have Microsoft Purview Data Loss Prevention available. A DLP policy can detect sensitive info (like credit card or TFN numbers) and one of the possible actions is to encrypt the message. This is essentially another way to create content-based encryption rules, with a richer interface for detecting sensitive info types. For instance, a DLP policy could automatically encrypt any email that contains a tax file number or health record. This achieves a similar outcome as mail flow rules. In fact, one recommended approach (for scenarios like HIPAA in healthcare) is to use DLP as a “smart filter” that scans emails and then triggers encryption when a sensitive data pattern is found[11]. The advantage of using Purview DLP policies for this is that you get benefits like detailed incident logging and user notifications. According to a case study, this delivers “zero user effort” (encryption happens even if staff forget), central control (one admin policy covers all mailboxes), and audit-ready logs of every encryption action[11]. In summary, DLP and mail flow rules both can automatically apply encryption – you can choose whichever method fits your admin comfort. (Mail flow rules are simpler to set up for straightforward conditions; DLP is powerful for detecting specific data types.)

Step 4: Set Up Sensitivity Labels for Encryption (Manual User-Driven Encryption)

While mail flow rules handle automatic encryption, you also likely want to empower users to manually encrypt emails when they choose. Business Premium allows you to create sensitivity labels in the Purview Compliance portal, which users can apply to emails or documents. These labels can be configured to include encryption.

For example, you might create a label called “Confidential – All Employees” that, when applied to an email, automatically encrypts it and only allows people within your organisation to open or read it. Or a label “Highly Confidential – No external sharing” that not only encrypts the email but also uses the “Do Not Forward” policy so recipients (even internal ones) cannot forward or copy the content.

How to create a sensitivity label with encryption:

  1. In the Microsoft Purview compliance portal (https://compliance.microsoft.com), go to Information Protection > Labels and click + Create a label.
  2. Give the label a name (e.g. “Confidential – Company Only”) and description for users.
  3. For the label scope, make sure Emails (and files, if desired) is selected, so that this label can apply to email content[3].
  4. In the configuration, you’ll have options for adding encryption. Enable the setting to “Encrypt content” (in older interface this might be a checkbox like “Protect content” or “Control access to content”[3]).
  5. You will be asked to choose how to assign permissions:
    • Assign permissions now: You as the admin specify exactly who can do what with content under this label. For instance, you can state “Only users inside my organisation can view this email; they cannot forward or print it” (which is effectively an internal-only, do-not-forward policy). You could also allow some group full rights and others read-only. This is static; end users applying the label don’t get to change the permissions.
    • Let users assign permissions when they apply the label: This option is useful if you want to give users some flexibility. With this, when a user applies the label in Outlook, they will be prompted to enter who should be able to access the content (they could type in specific email addresses or choose from a directory) and what permissions to give. This is akin to users creating an ad-hoc encryption rule on the fly, within the bounds you allow[3].
    For simplicity in an SMB, the first option (assign now) is commonly used. For example, define that the label encrypts the email and allows “All internal users” to read it (so any external recipients would not be able to decrypt it). Or define a label that allows only certain departments.
  6. If assigning permissions now, configure the specifics:
    • Choose the users or groups who will be granted access when this label is applied (e.g. All members of for all internal).
    • Choose their permissions: e.g. Viewer (read-only), or Editor (read and modify), etc. For email scenarios, typically read-only is used if you want to prevent forwarding, whereas if you just want to allow normal usage, giving view + edit might be fine (edit in context of email means ability to reply/forward I believe).
    • If relevant, you can tick an option “Do not allow forwarding” which automatically restricts forwarding and copying from the email (this is essentially the Do Not Forward template enforced via the label).
    • You can also set content expiration here (e.g., email content expires after 30 days) if using Azure Information Protection P2, but with P1 (Business Premium) this might not be available in sensitivity labels interface. Typically expiration is an advanced feature.
    • You might see an option for offline access or the number of days a user can access the content without re-authenticating – these are fine-tuning options.
  7. Finish the label creation. Then, publish the label by creating a Label Policy (in Information Protection > Label Policies, include the new label and target it to the desired users or whole organisation). This causes the label to appear in end-user apps.

Once published (it may take a little time or a restart of Office apps to show up), users will see the sensitivity label in their Outlook (on the ribbon or under the Sensitivity button). They can apply it to an email just like they would mark it Confidential. Behind the scenes, as soon as they send an email with that label, the Exchange service will encrypt the message according to the rules you configured.

End-user experience (manual): If no sensitivity labels are defined, users in Business Premium will still typically have an “Encrypt” button in Outlook on the web or under Outlook’s Options > Permissions menu, giving them at least the default Encrypt-Only and Do Not Forward choices[1]. However, using custom labels allows you to present more user-friendly or scenario-specific options (with your own descriptions) and to integrate encryption with your classification scheme (e.g. a single label might also add a footer/tag like “Confidential” in addition to encryption).

For example, after the above setup, a user writing an email in Outlook can click the Sensitivity drop-down and choose “Confidential – Company Only”. Immediately, Outlook will show a small lock icon or a note indicating that encryption and forwarding restrictions are applied. When that user sends the email, it will be encrypted and only other people within the company tenant will be able to open it. If they accidentally sent it to an external address, that external recipient would get a message stating the email is protected and they are not authorised to view it (since our hypothetical label didn’t grant external access).

Important considerations with labels:

  • Exchange IRM Configuration: To get the full benefits of using sensitivity labels to encrypt emails, you should ensure IRM is enabled in Exchange (which we did in Step 1)[3]. Otherwise, certain clients might not be able to open encrypted mails and search indexing might not work. We covered this, but it’s worth noting that enabling IRM (AzureRMS in Exchange Online) is what allows even mobile Outlook and web to open these labeled emails seamlessly.
  • Multiple encryption methods: If a user applies a sensitivity label that encrypts an email, you do not need a mail flow rule to also encrypt it (and vice versa). They won’t conflict – the mail flow rule will typically detect the mail is already encrypted and skip, or it will apply encryption to an already encrypted mail which is fine (it remains encrypted). However, generally design your strategy to use either automatic rules for certain scenarios and labels for user-driven ones. They solve different problems (one doesn’t rely on the user at all, the other gives user flexibility).
  • User training: It’s a good idea to show your staff how to use the new sensitivity labels in Outlook. For instance, explain that when they have a particularly sensitive email to send, they should apply the Confidential label before sending. The first time, some may be confused by the experience for external recipients (e.g. “The client said they had to click a link to view my email”). Include that in training so they and the recipient know it’s normal due to encryption.

Step 5: Test the Encryption Setup

Before rolling out broadly, test the configuration:

  • Internal test: Have two users (or use your test account) within the company send encrypted emails to each other. They should be able to open them normally in Outlook (perhaps a small banner might indicate the message is encrypted). This ensures internal access isn’t inadvertently blocked by a policy.
  • External test: Send an email from inside to an outside email (e.g., a personal Gmail or Outlook.com account) that should trigger encryption – for example, an email containing a sensitive keyword if you made that rule, or just any email if you encrypted all external mail. Confirm that:
    • The external recipient gets a mail notification that’s branded (by default it will show your organisation name) saying “You’ve received an encrypted message”[11].
    • The external recipient can follow the link or the instructions to authenticate and read the message in the browser. They might use a one-time passcode or sign in with a Google/Microsoft account. Test both if possible.
    • Check that the content of the message is correct when they do see it (formatting, attachments if any).
    • Reply as the external user through the portal and ensure the internal user can read the reply (the reply will also be encrypted).
  • Policy tuning: If the external email did not arrive encrypted when it should have, double-check the conditions of your mail flow rule or DLP policy (maybe the test didn’t meet the condition exactly)[11]. Also verify the sender has the appropriate license (Business Premium assigned, etc.), since each sender needs a license for encryption to apply[11].

Everything working? Great. Now you can confidently roll this out knowing that protected emails actually reach their destination securely.

Step 6: User Awareness and Best Practices for Effective Use

Finally, effective use of Purview Message Encryption in an SMB isn’t just about configuration – it’s about incorporating it into your organisation’s workflows and culture. Here are some best practices and tips to get the most value:

  • Educate your team: Introduce the feature to your users. Let them know that some emails will now be encrypted and what that means. For example, explain that if they see a lock icon or a banner that says “This message is encrypted” in an email, it’s expected. Likewise, if they send an encrypted email to a client, that client may contact them about the extra step to open it – your user should be able to reassure them it’s for security. Microsoft provides user-friendly guides on how to https://support.microsoft.com/office/cb882d70-47c1-4da6-b7da-4bb6ee4893b4 and how to open one, which you can circulate. In Outlook on the web, the user just clicks Encrypt under the compose options; in desktop Outlook, they can select an Options > Permissions setting or use the Sensitivity button if labels are deployed.
  • Start with clear policies: When deciding what to encrypt, start with the most sensitive or regulated information. Don’t over-encrypt everything, or users might get frustrated with extra steps for trivial email. Common starting points are: encrypt all external emails (if your business frequently sends confidential data externally), or encrypt based on keywords (like “Confidential”, project names) or sensitivity types (like any email with a 9-digit number might be a TFN – treat accordingly). Make sure these rules are well-communicated. For instance, if you choose to automatically encrypt all external mail, users should know every email to a customer will have that behaviour (so they’re not caught off guard by a client’s questions).
  • Use branding for familiarity: You have the option to customise the branding of the encrypted message mail and portal – for example, adding your company logo and a friendly message. This is done via the Set-OMEConfiguration cmdlet (for the standard single template) or in the Purview portal for advanced branding. Consider doing this so that when an external recipient gets an encrypted mail, they see your company’s name or logo on the portal. It helps them trust that it’s legitimate and from you. (Branding is an included feature for one template; multiple templates require AME/E5.)
  • Integrate with DLP for compliance (if needed): As discussed, if you have compliance requirements (like HIPAA for health info, or need to protect credit card data under PCI DSS), leverage DLP policies. DLP can not only encrypt but also notify the sender (policy tip) that “This email was automatically encrypted because it contains XYZ”. This educates users over time on what triggers protection, and it provides an audit trail. In Business Premium, DLP for email is available[2][2] and can be a powerful ally in preventing data leaks.
  • Test periodically: Make encryption testing part of your routine, especially after any Exchange or compliance configuration changes. Ensure new employees have the appropriate license and can use encryption if needed.
  • Monitor and adjust: Check the reports in the Purview Compliance portal. There are audit logs and reports that can show label usage and DLP policy matches. For example, you can see how often your encryption rule triggers, or if any emails were blocked or had encryption removed. This can help fine-tune conditions (to reduce false positives, etc.). In an SMB, volume may be low, but it’s good to keep an eye that it’s working as intended.
  • Know the limits: Be aware of a few limitations: The maximum message size for an encrypted email (including attachments) is 25 MB[4]. This is lower than the regular Exchange Online limit for non-encrypted mail. Very large files might need to be shared via SharePoint/OneDrive instead of email if they can’t be sent due to this limit. Also, if you send to many recipients via BCC, note that in some cases those BCC addresses might be dropped before encryption (an edge case with certain routing scenarios)[4] – generally not an issue unless you do mass BCC mailings.
  • Advanced controls (if ever needed): If one day your SMB grows or has needs to revoke or expire emails, consider advanced message encryption capabilities. For instance, if an employee accidentally sent an encrypted email to the wrong external person, you as an admin could revoke access to that message (if you had Advanced Message Encryption via an E5 Compliance add-on)[9]. This isn’t available in Business Premium by default, but it’s something to be aware of as a potential upgrade if such scenarios are critical.

By following these steps and best practices, even a small organisation can leverage enterprise-grade email encryption with Microsoft 365 Business Premium. You’ll be keeping sensitive communications secure and meeting compliance obligations, all using tools that integrate natively with the email clients your users already use every day.


Conclusion: Microsoft Purview Message Encryption provides SMBs a robust yet user-friendly way to secure email communications. With Business Premium, you have all the needed components (Azure Information Protection P1, Exchange Online, etc.) to deploy it without additional cost. By carefully configuring the service – enabling it, creating sensible mail flow rules, and utilizing sensitivity labels – you can ensure that confidential information in emails is accessible only to authorised recipients, helping protect your business and your customers. Best of all, it achieves this in a manner that is largely seamless to end users and external partners once set up. In summary, Purview Message Encryption, when set up and used effectively, can significantly enhance your organisation’s data protection posture for email with minimal disruption and excellent integration into your existing Microsoft 365 environment.

References

[1] Enabling Microsoft Purview Message Encryption – UC Today

[2] Set up information protection capabilities – Microsoft 365 admin

[3] Apply encryption using sensitivity labels | Microsoft Learn

[4] Message Encryption FAQ | Microsoft Learn

[5] Microsoft 365 Business Plans and Pricing | Microsoft 365

[6] Microsoft Azure Information Protection – Telstra

[7] Office 365 Pricing Australia | Crowd IT

[8] Set up Microsoft Purview Message Encryption | Microsoft Learn

[9] Advanced Message Encryption | Microsoft Learn

[10] Define mail flow rules to encrypt email messages

[11] How to Automatically Encrypt HIPAA‑Sensitive Email with Microsoft …

Need to Know Podcast–Episode 228

No Brenton still but that doesn’t stop me bringing you the Microsoft Cloud news. For Brenton fans you’ll still hear him with the interview of Lorenzo Coppa about Gluh that is in the second part of this episode. Some aggressive moves by Microsoft in the default browser search space so make sure you are aware of what’s happening and listening along.

This episode was recorded using Microsoft Teams and produced with Camtasia 2019

Take a listen and let us know what you think – feedback@needtoknow.cloud

You can listen directly to this episode at:

https://ciaops.podbean.com/e/episode-228-lorenzo-coppa/

Subscribe via iTunes at:

https://itunes.apple.com/au/podcast/ciaops-need-to-know-podcasts/id406891445?mt=2

The podcast is also available on Stitcher at:

http://www.stitcher.com/podcast/ciaops/need-to-know-podcast?refid=stpr

Don’t forget to give the show a rating as well as send us any feedback or suggestions you may have for the show.

Resources

@contactbrenton

@directorcia

Gluh

New Year new browser

Microsoft will be carbon neutral by 2030

Microsoft Search in Bing through Office Pro Plus

Windows 7 support end

MVP for 2019-20

MVP_Logo_Horizontal_Preferred_Cyan300_RGB_300ppi

I’m proud to say that Microsoft has graciously awarded me as a Most Valued Professional (MVP) for 2019 in the Office Servers and Services category. This makes it now eight awards in a row for me, which is very special and honouring. I thank Microsoft for this special award and acknowledge the responsibilities it entails.

However, this award is not possible without members of the community out there who take the time to do things like read my blog, watch my YouTube channel, attend events where I speak and more. Thanks everyone.

I’m committed to continuing to provide more information and insight into the fantastic products and services Microsoft creates. I can’t wait each day to see what new stuff Microsoft has brought us and how it can be implemented for users. With the rapid development rate in the cloud I am always amazed at all the new stuff that becomes available but it is really great to have that challenge of staying current.

Having attended my first MVP Summit this  year I’m looking forward to next year’s one so I can again visit Redmond and learn from Microsoft and fellow MVPs. Being an MVP is being part of a unique community of very dedicated and smart people who truly love to share their knowledge. I aim to live up to the example they set and continue to improve and grow. I congratulate all those who were also awarded for this year and look forward to seeing you at the MVP Summit in 2020.

But again, I thank Microsoft for this honour and will work hard to live up top the expectations it sets again for 2019-20 so I can make it nine years ins 2020!

Need to Know podcast–Episode 200

Well we made it! 200 episodes are now done and dusted. We thanks our special guests for attending this episode live, Mark O’Shea and Marc Kean.  Of we can’t forget the co-host Brenton Johnson, who helped make this episode special. We’d also like to thank everyone who shared best wishes and congratulations. It is fantastic to know that people are out there and enjoying what we put together.

This of course is only the beginning of the march towards our next 200 episodes and we hope you’ll all join us for the journey. We’ve come a long way in around 10 years of podcasting and so too has the Microsoft Cloud. What’s it going to be like in another 10 years? Join us on the journey.

Thanks again to both Mark O’Shea and Marc Kean for being part of our special episode and supporting the podcast over the years.

Take a listen and let us know what you think – feedback@needtoknow.cloud

You can listen directly to this episode at:

https://ciaops.podbean.com/e/episode-200-lets-celebrate/

Subscribe via iTunes at:

https://itunes.apple.com/au/podcast/ciaops-need-to-know-podcasts/id406891445?mt=2

The podcast is also available on Stitcher at:

http://www.stitcher.com/podcast/ciaops/need-to-know-podcast?refid=stpr

Don’t forget to give the show a rating as well as send us any feedback or suggestions you may have for the show.

Resources

@intunedin

@marckean

@contactbrenton

@directorcia

Microsoft Ignite sessions on YouTube

CIAOPS Techwerks whiteboard training–Sydney 31 January

I’ll be hosting an all day focused, hands on, technical whiteboard training session on Microsoft Cloud technologies (Office 365, Microsoft 365, Azure, etc) in Sydney on Thursday January the 31st 2019. The course is limited to 15 people and there are still a few places available if you wish to attend.

The content of these events is driven by the attendees. That means we cover exactly what people want to see and focus on doing hands on, real world scenarios. Attendees can vote on topics they’d like to see covered prior to the day and we continue to target exactly what the small group of attendees wants to see. Thus, this is an excellent way to get really deep into the technology and have all the questions you’ve been dying to know answered. Typically, the event produces a number of best practice take aways for each attendee. So far, the greatest votes are for deeper dives into Intune, security and PowerShell configuration and scripts, however that isn’t finalised until the day.

The CIAOPS Techwerks events are run regularly in major Australian capital cities, so if you can’t make this one or you aren’t in Sydney on that date, stay tuned for more details and announcements soon. If you are interested in signing up please contact me via emails (director@ciaops.com) and I can let you know all the details as well as answer any questions you may have about the event.

I hope to see you there.

Using multiple authenticator apps with a single Microsoft 365 user account

One of the best ways to ensure an account is secure is to enable Multi Factor Authentication (MFA) for it. This means, the user logs in as normal with their username and password but before the login process is complete they must enter another form of verification. That form is typically via an SMS, Phone call or an authenticator application on their mobile device.

The best practice with Microsoft 365 is to use the Microsoft Authenticator app, which is available on both iOS and Android. Here’s an overview video:

The way that you set up MFA for a Microsoft 365 account is to login to the Microsoft 365 portal as an administrator and navigate to the Admin center.

image

Then do a search for MFA as shown above. One of the returned results should be Azure multi-factor authentication settings as shown, which you should select.

You should be aware that here you are configuring Multi-Factor Authentication for Office 365 which is a subset of all the features available in Azure Multi-Factor Authentication. You can see the feature comparison here:

MFA version feature comparison

All versions of Office 365 and Microsoft 365 come with Multi-Factor Authentication for Office 365 the more advanced Microsoft 365 plans, such as E3 and E5 come with Azure Multi-Factor Authentication. The discussion here is focused on Multi-Factor Authentication for Office 365 and this applies to all plans. 

image

After selection of that option, a notification should now appear from the right of the windows. Select the Manage multi-factor authentication link that appears as shown above.

image

This should take you to a list of your users as shown above. This will show the MFA status of each user. The above shows you that Alex Wilber currently has an Enforced setting, while everyone else has Disabled.

image

Select the user you want to enable on the right and then select the Enable link on the right as shown.

image

You should now see the above message. Select enable the multi-factor auth button to continue.

image

After a moment or two, you should receive confirmation that MFA is now enabled for the account as shown above. Select the close button to continue.

SNAGHTML1980450f

As shown above, you will now see that the status of that user is now Enforced. This means that they have yet to complete their MFA enrolment. Once they have, their status will change to Enabled.

image

After the user enters their login and password into the Office 365 tenant the next time they login, they will see the above message telling them they basically need to enrol in MFA.

image

They should now see a screen like that shown above. In this case we are going to use a Mobile app as a means of authentication so we select that option from the top box. In the, How do you want to use the mobile app? box select Use verification code. This will request the user to end a unique code from the authenticator app to verify their identity during login. There is also the option to receive push notifications BUT if you are going to be using multiple authenticators then best practice is not to do this, and I’ll detail why further down when I talk about the scenarios where this multiple authenticator environment can be used. For now, select Use verification code and then the set up button underneath.

image

You’ll now see a QR code like shown above that you can use with your Microsoft Authenticator app. However, using this does come with limitations.

Firstly, this method doesn’t support third party authenticator like Google Authenticator or Lastpass Authenticator.

file

If you try to use those you’ll get an error like you see above and be unable to configure the third party authenticator.

file2 (002)

Secondly, if you try and use the same QR code on another device running a second Microsoft Authenticator app then you’ll see the above error, basically telling you that the QR code has been used before (which it has).

image

The trick to overcoming both of these limitations is to select the link Configure app without notifications to the right of the QR code as shown above.

image

When you do so, you’ll get a new QR, that looks very similar but has different wording a link.

You can now use this QR to set up multiple Microsoft Authenticator apps on different devices as well as third party authenticators. You may also want to take a screen shot of this QR code for future reference if you wish to set up or reconfigure authenticator devices in the future.

Some considerations here. All devices you now use with this QR code will configure the same identical sequence of rolling numbers for authentication. Thus, when you configure multiple devices this way you’ll see that the pin numbers will be identical on all devices and will change more or less at the same time. What you have effectively achieved here is a duplication of the MFA token for that user. Is that a good thing? Best practice is to only have ONE and only ONE authenticator per account but there are scenarios I will illustrate later where having a duplicate is acceptable. However, please remember, the more tokens you have for an account, the less secure it is.

image

Once you have used the QR with all the devices you wish to use, select Next and then Next. You’ll then be prompted to enter a verification code from any of the devices (as they all show the same code now anyway) to verify the account set up. Enter the code and continue.

image

You’ll then need to enter a phone number as a fall back option. Select the Next button when this is complete.

image

You’ll then see a single app password you can use if needed, but best practice is that you shouldn’t be using these so select the Done button.

image

Now when the user logs in to Microsoft 365, they’ll enter their login and password as before but then also be prompted for a code from an authenticator. If you have duplicated the authenticator as shown above, the code on the devices will be the same and thus all you need to access that account is any of the devices just configured.

image

So where might a duplicated authenticator make sense? Perhaps as an administrator of a tenant I move between different locations and devices. Or perhaps I want to have the same code for everyone using authenticators for access. Perhaps different people need to read me the code from an authenticator on their device. There are scenarios where duplicated authenticators may make sense, so it is an option if needed.

Duplicating authenticators is probably ok if there is only one user accessing the account, but what happens when multiple need to access the one account using MFA? They should use a unique authenticator as best practice I would suggest.

To set up multiple unique authenticators (rather than just duplicates), complete the above process but just for a SINGLE authenticator app. Again, it is recommended not to enable push notifications and just use a pin code entry. Once the single MFA has been configured for the account, login to that account using MFA. Select the user icon in the top right of the screen. That should display a menu like shown above. From this menu, select My account.

image

In the window that appears, locate the Security & privacy section and select the Manage security & privacy button.

image

Now select Additional security verification at the bottom as shown above.

image

This will display two additional options as shown. Select Update your phone numbers used for account security.

image

This should display the above options, where you can configure the MFA settings for the account. At the bottom of this screen you will see that there is already one Authenticator app, which is the initial one configured for the account. To add a second independent authenticator tied to this account select the Set up Authenticator app button as shown.

image

This should display the now familiar MFA configuration window as shown above. The default option will be for push notifications. This means that any time the account logs in a push notification will be send to ALL the authenticator apps configured to this account whether they have been set up as duplicates or separate authenticators. As mentioned previously, this option also only allows a single Microsoft Authenticator configuration and no third party options.

image

Thus, best practice is again to select the Configure apps without notifications link on the right to make more authenticator options available.

image

This will again give you a slightly different screen with a QR code to configure the authenticator device. Remember, here you are not duplicating the existing authenticator that was created initially, you are creating a separate independent authenticator app that is tied to the same user account.

image

When you have completed the configuration process for this authenticator you’ll again need to verify it as shown above.

image

When you return to the Additional security verification screen you will now see two authenticator apps at the bottom of the screen as shown above.

image

This might appear confusing, but in my example I configured two different authenticator apps independently on the same device (one Microsoft, one Google). If you configure authenticator apps on two different physical devices it should look more like the above where you can tell the difference between the devices. In my experience, if there is ever confusion or duplicates, the more recent configurations appear at the top of the list if you ever wish to delete one.

image

You may want to ensure that you DON’T select the option to Notify me through app, because doing so will send a push notification to all configured and supported apps for verification. If you have different people, all with their own authenticator app configured, on separate devices, you don’t want them all getting a notification when ANY one of them attempts to login to the account. Not only is it annoying, but any of the other devices can approve the login request, even though they didn’t initiate it. You can use the notification option for authentication if you wish BUT, use it with care and an understand of the risks it brings.

Screenshot_20190115-084113_Authenticator file1 (002)

The above shows you that I have configured authentication on two separate devices (Android on left, iPhone on right). Note how the time is the same on each device, along with the account it protects. You’ll also notice that one device is using the Google Authenticator while the other is using the Microsoft Authenticator, just to show you that you can mix and match authenticators as you please. These are two independent authenticators tied to the one account as I have just shown you how to configure. Thus, if I now try and login to the configurated account, I use the one user name, plus the one password and either of the two numbers on the authenticators I have configured on these devices.

Now, where does this multiple authenticators to a single Microsoft 365 account make sense? The most common scenario is for IT resellers who need to support multiple customer tenants with multiple technicians securely using MFA. A typical scenario would be to configure a single management account in each customer’s tenant that is a global administrator for the tenant. That account would have an initial MFA authenticator enabled during set up. Then, for each technician who needs access, each of their personal devices would also be enabled for MFA on that same single customer admin account using the process I detailed above. Thus, the admin login details would be shared amongst the technicians along with the password BUT each would use their own authenticator app to gain access to the customers management account. Thus, each technician use the same username and password to access the account but a unique MFA pin code that is generated on their own personal device and is unique to them.

In the event that a technician leaves, the IT reseller could merely remove that technician’s authenticator app from the customer’s admin account and probably change the password and re-share that updated password amongst the remaining technicians. In an environment with lots of tenants and technicians, manually doing this would be time consuming. I’d be confident that this process could be scripted using PowerShell but can’t say for sure until I look at that in more detail. Stay tuned. But at least you can have multiple technicians accessing multiple shared accounts with their own unique MFA authenticator app.

So there you have it. Yes, it is possible to have multiple authentication apps providing MFA to a single Microsoft 365 account. Yes, it is possible to achieve this with both Microsoft and third party authenticator apps. Yes, it is possible to have duplicate and independent authenticator configurations for one account. And finally, YES, it makes an account LESS SECURE by having multiple authenticator apps configured against a single account, so use with CARE and THINK before you implement.

Need to Know podcast–Episode 199

I speak with Program Manager Windows Defender ATP, Iaan Wiltshire, from Microsoft all about this security offering and how it fits into the market. We discuss what Defender ATP is and what it includes, so if you are keen to hear how Microsoft is integrating threat management from the desktop through to the cloud, listen along.

Brenton and I, of course, give you all the latest Microsoft Cloud news in this first episode for 2019. There is still lots happening so listen in to stay up to date.

Also, don’t forget our invite to join us during the live recording of episode 200 on the 21st of January 2019. Just sign up at http://bit.ly/n2k200

Take a listen and let us know what you think –feedback@needtoknow.cloud

You can listen directly to this episode at:

https://ciaops.podbean.com/e/episode-199-iaan-wiltshire/

Subscribe via iTunes at:

https://itunes.apple.com/au/podcast/ciaops-need-to-know-podcasts/id406891445?mt=2

The podcast is also available on Stitcher at:

http://www.stitcher.com/podcast/ciaops/need-to-know-podcast?refid=stpr

Don’t forget to give the show a rating as well as send us any feedback or suggestions you may have for the show.

Resources

Iaan.Wiltshire@microsoft.com

@contactbrenton

@directorcia

MSP risks for clients

Questions to ask your MSP

Report into MSP hacking

Discounted cyber security for your client

December updates video

Ignite 2019 – Sydney agenda

Contextualizing Attacker Activity within Session in Exchange Online

MyAnalytics, the fitness tracker for work is now more broadly available

Watch Microsoft Stream on the go

SharePoint Roadmap Pitstop: December 2018

Introducing new advanced security and compliance offerings for Microsoft 365

Evaluating Windows Defender ATP

Windows defender Test Ground

Microsoft Security Blog

Defender ATP Overview