Setting up an iOS Intune device compliance policy

Once you have added an Apple certificate to allow device management for iOS as I have detailed previously here:

Adding an Apple Certificate to Intune

the next step in the process to get your iOS device managed is to create a specific iOS compliance policy in Intune.

A compliance policy is basically a set of rules that the device must follow to be considered compliant. If the device fails these rules then it is considered noncompliant and you are able to take action on that such as excluding it from connecting to your corporate data. Compliance for all devices is checked regularly.
image

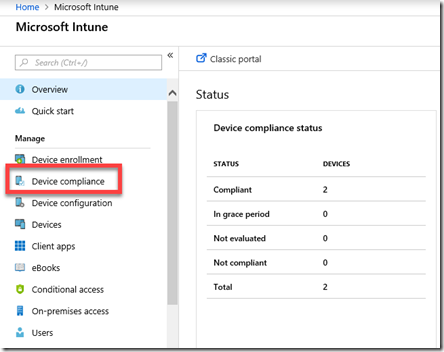
To create this compliance policy you’ll need to login to the Azure portal and navigate to the Intune service. Once there, you’ll find an option in the menu Device Compliance as shown above, that you’ll need to select.
image

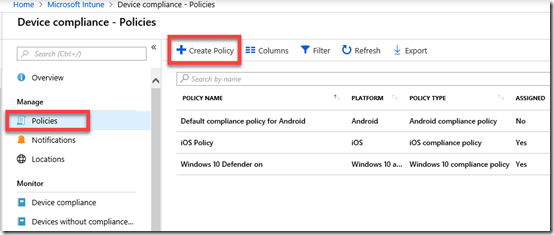
You’ll then need to select Policies on the left and the Create Policy option from the menu on the right that appears as shown above.

You may also see number of other existing policies here for different platforms. Note, that it is possible to have multiple compliance policies for the same platform if desired.
image

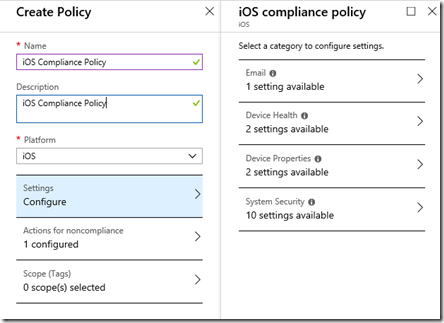
You’ll now need to give the new iOS compliance policy a Name, Description and select the Platform as iOS as shown above.

You’ll then need to select the Settings option below this to configure compliance rules. When you do so another blade will appear on the right with four categories: Email, Device Health, Device Properties and System Security as shown above.
image

You can configure as many options as you like here but I’m going to cover what I consider the basics for iOS compliance.

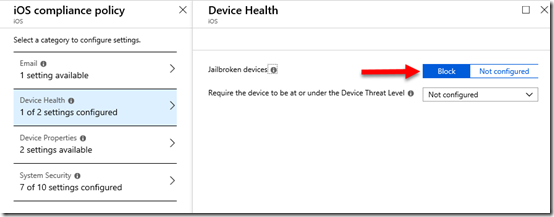
In Device Health, set Jailbroken devices to Block as shown above.
image

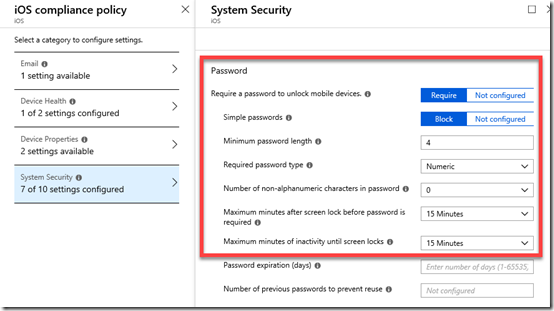
In System Security set the Password options as shown above.

Make sure you select OK at the bottom of each setting to update your preferences.
image

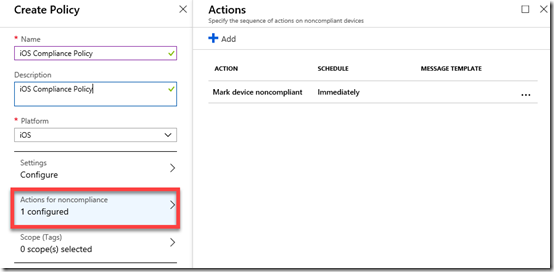
If you go into the Actions for noncompliance you’ll see there is currently a default option to Mark device noncompliant.
image

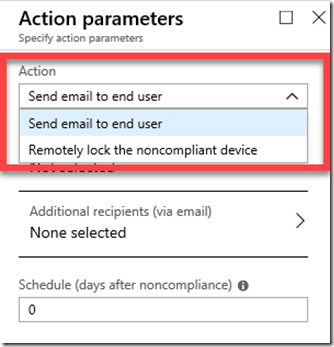
You can add more actions here, to Send email to end user and/or Remotely lock the noncompliant device if you wish.

When you have finished making your change, ensure that you Save the policy.
image

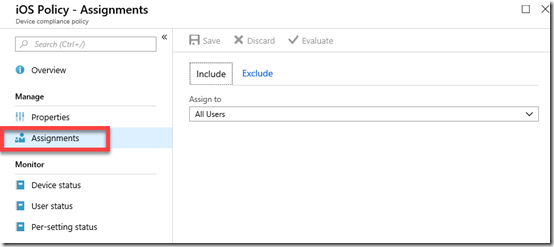
Now that the new iOS compliance policy has been created you’ll need to apply that policy to a group of users. To do this, select the policy you just created from the list of compliance policies. Then select the Assignments option from the menu on the left.

It is probably easiest to apply this new policy to all users but you can certainly select a group of users as well as exclude user if you wish.

Once again, when you have made you selection, ensure you Save any changes to have the policy applied to these users.
image

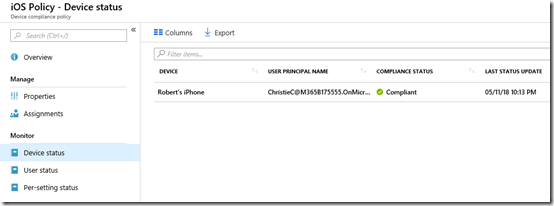
When devices connect to the tenant, they will be evaluated to be compliant or not. When this occurs, you can again examine the options at the bottom of the policy to see the device status as shown above. This will tell you whether connected devices are compliant (here they are).
image

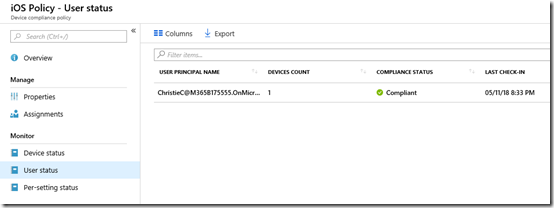
You can also get the status by user, because remember, some users may have multiple devices.
image

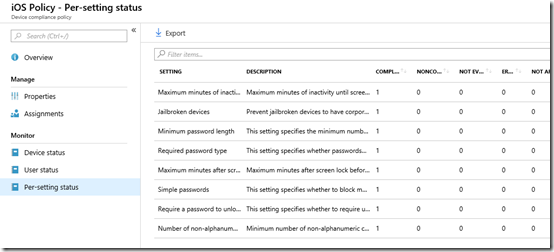
Finally, you can also examine the per-setting status. This is handy if a device has failed compliance and you want to know exactly what setting(s) have caused this failure.
image

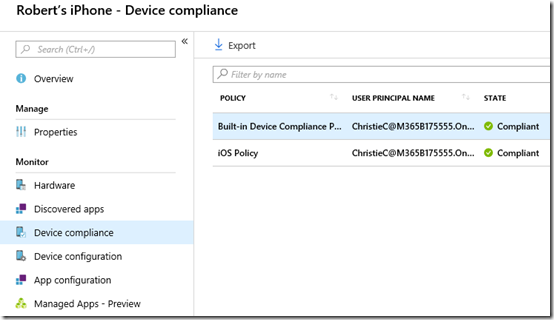
You can also see the compliance by examining the individual device in Intune as shown above.

You’ll see here that there is in fact a default compliance policy as well as any your have created.

Selecting the Built-in Device Compliance Policy will show you its settings like so:

image

Basically, the Built-in Compliance Policy simply checks whether device is active, the user exists in the tenant and another compliance policy has been assigned. Thus, the device won’t be considered compliant by default until we create at least one compliant policy for the platform.
image

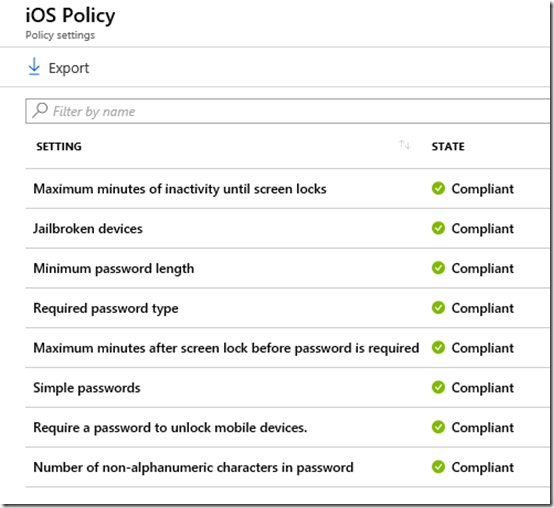
If you instead select any of the custom compliance policies that you created you will see whether each individual setting is considered compliant in that policy as shown above.

So, creating a device compliance policy is important when we wish to use Intune to manage devices. You need to create a compliance policy for each platform with the settings against which devices will be continually checked. This will ensure that devices connecting to your environment maintain the settings you desire.

The next step will be setting up device configuration policies to actually configure how the device operates. That will be covered in an upcoming article.

Adding an Apple Certificate to Intune

When you use Intune to manage your Apple devices you’ll need to add a push certification to allow control of the device. If you don’t do this, then you’ll get error messages about failing to join when you try and enrol the device using the Intune Company Portal App on the device.

image

To add a management certificate you’ll firstly need to login to the Azure portal as an administrator. You’ll then need to navigate to Intune.

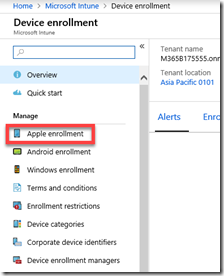
Once there, select Device enrollment from the menu.

image

Next select Apple enrollment from the new menu that appears.

image

When you do this a new window should appear on the right. Select the top option, Apple MDM Push certificate.

image

You will see the enrolment status at the top of the page. If this is a new tenant, the status will show Not set up as shown above.

image

Scroll down the windows to commence the set up process.

Place a check in the I agree box in section 1.

Then select Download your CSR from section 2.

image

Save this certificate file on your local machine. Make a note of this location as you’ll need to upload it soon.

image

Scroll down to section 3 and select the hyperlink Create your MDM push Certificate.

image

This will open a new browser window and ask you to login using an Apple ID. if you don’t have one of these yet, you’ll need to create one. If you are doing this on behalf of a company it is best practice to use an Apple ID that is linked to the business rather than the individual.

image

Once you have logged in, you’ll see any certificates that you have already created.

Select the Create Certificate button in the top right.

image

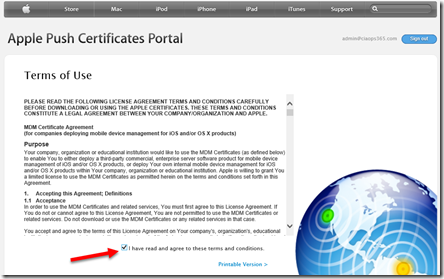
Accept the terms and conditions.

image

Browse to the location where you downloaded the certificate file from Intune previously. Select the file. Then select the Upload button.

image

In a moment you should now see that a new certificate has been created for you. It is important to note that certificate last for 12 months, after which time it will be required to be replaced or renewed.

Select the Download button to copy the new Apple management certificate to your machine.

image

Save this Apple management certificate on your local machine and remember where it is located.

image

Return to the Azure portal and the setup in Intune.

In section 4 enter the Apple ID that you used when you created the certificate.

In section 5 browse to the Apple management certificate you just downloaded.

When complete, select the Upload button at the bottom of the page.

image

In a few moments you see a message from the Azure portal indicating that the certificate has been successfully uploaded.

image

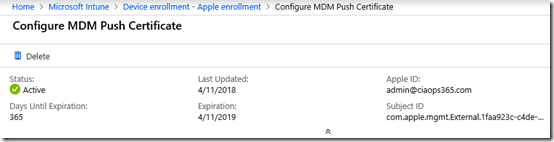
If you now scroll to the top of the page in Azure you should see that the status is now Active as shown above.

You have now successfully uploaded and configured an Apple management certificate into Intune. You can now proceed to enrol your Apple devices into Intune management. Just remember, that this certificate is valid for 12 months, after which time you’ll need to renew it.

Windows Autopilot Deployment heading to Azure portal

image

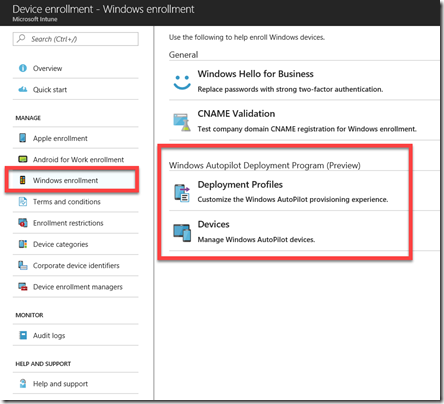
If you go to Intune in the Azure Portal, then select Device enrollment, then Windows enrollment, you see some new options for Windows Autopilot deployment as shown above.

If you need a refresher on where the settings where originally check out my previous article:

Introduction to Windows Autopilot

image

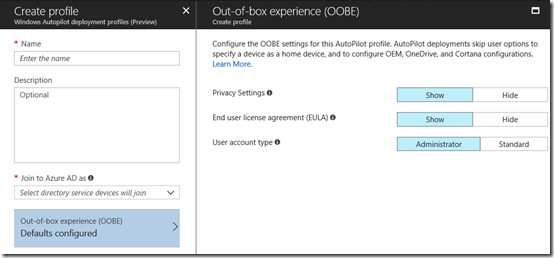
The above is what the deployment profiles option look like when you go there.

Here’s what it looks like in the original Business portal.

image

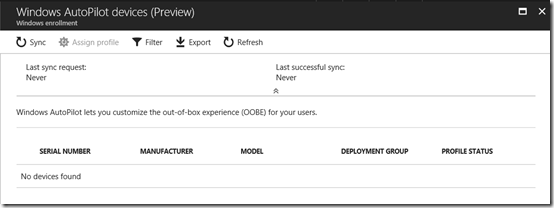
There isn’t a place to upload the machine identification file as yet in Azure as you can see here:

image

However, I would assume that it is coming.

So, keep your eyes posted to the Azure portal for more additions for Windows Autopilot.

Adding Apple MDM push certificate to Intune

When you start using Intune with services like Microsoft 365 Enterprise or stand alone you’ll need to add an Apple MDM push certificate to allow iOS devices to be managed by Intune. If you don’t, you’ll get errors when you try and add these devices.

Here’s how you create and add an Apple certificate to Intune.

clip_image001

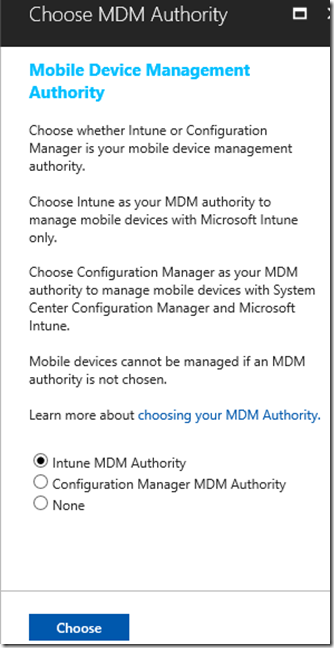
When you initially go into Intune via the Azure portal you’ll need to set the Mobile Device Management Authority as shown above. Simply select the option for Intune MDM Authority and the Choose button to save the choice.

clip_image001[6]

In the list of Intune options, under the Manage heading, select Device enrollment.

clip_image001[8]

From the blade that appears, select Apple enrollment from the menu and the right side will then show a number of boxes.

clip_image001[10]

Select the box in the top left that should have the heading Apple MDM Push Certificate.

clip_image001[12]

Another blade will open. Under Step 1, select the Download your CSR hyperlink.

This will prompt you to save a file called IntuneCSR.csr to your computer.

clip_image001[14]

In Step 2, select the hyperlink Create your own MDM push certificate.

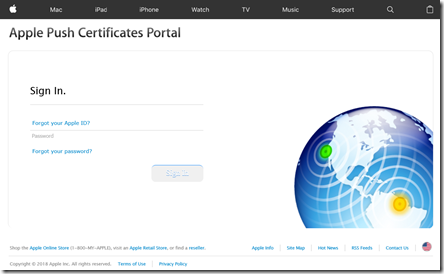
image

This will open a new tab in your browser and take you to the above Apple site. You’ll need to have or create an Apple ID to login here.

clip_image001[16]

You’ll need to accept the Terms of Use.

clip_image001[18]

You’ll need to create a new certificate. To do so, select the option to Browse at the bottom of the window as shown above.

Navigate to the certificate file you downloaded from the Intune portal previously.

Then select Upload.

clip_image001[20]

Next, select to Download the certificate created by the Apple site.

clip_image001[22]

Return to the Intune portal and insert the Apple ID you used to create the certificate in Step 3.

In Step 4, upload the Apple certificate.

When complete, select the Upload button at the bottom of the page.

clip_image001[24]

When you now look at the Intune portal the Apple MDM Push Certificates should now show a green tick, as shown above. This will now allow you to place iOS devices under Intune management.

image

Microsoft 365 Application Management for Windows 10 mappings

I wrote a previous article that showed the mapping from the Microsoft 365 Business Windows 10 Device Configuration settings to those in the Intune console in Azure. You can read that article here:

Microsoft 365 Windows 10 Device Management settings

What I am now going to cover is the Application Management for Windows 10 policy. That is the software and information that resides on Windows 10 devices.

image

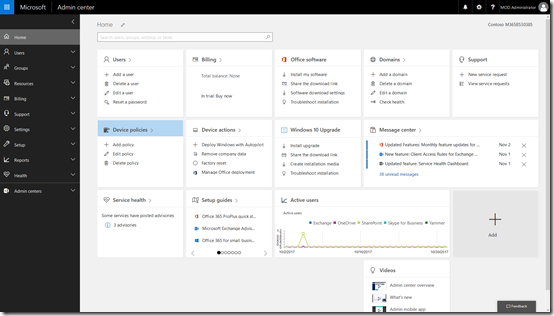
Start by navigating to the Admin center in your Microsoft 365 Business tenant.

image

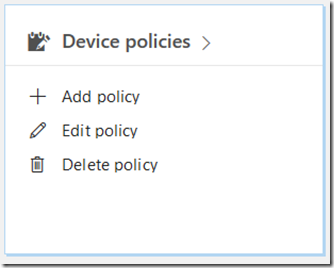
Locate the Device policies tile and select it.

image

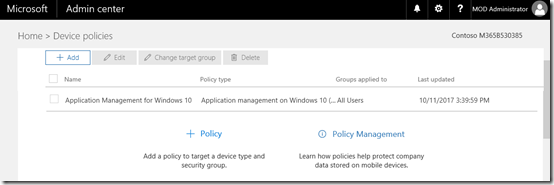
You may see a number of policies here but one should be named Application Management for Windows 10 as shown above. Select this.

clip_image001
clip_image001[5]

If the policy doesn’t exist you can create a new one. When you do you will see the above settings.

If you expand the display for each option you should see a list of all the options and their status as shown above.

The question now is, how do these map to settings in Intune?

To view the settings in Intune you’ll need to login to the Azure portal for that tenant and then navigate to the Intune option.

image

The easiest way to find the Intune settings is to do a search in the top right and then select Intune from the results.

image

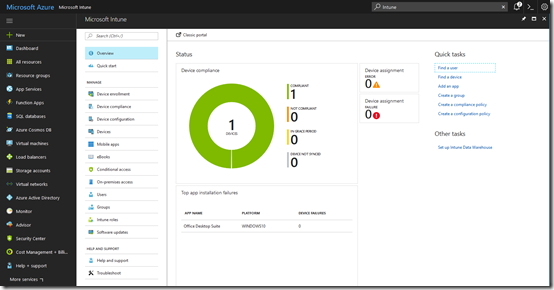
You should see the Intune console displayed as shown above.

image

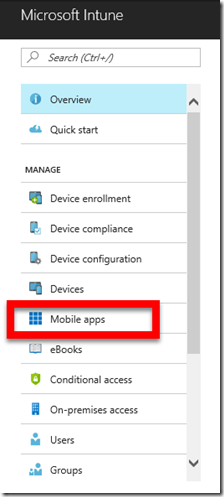
From the menu, under the Manage section, select Mobile apps.

image

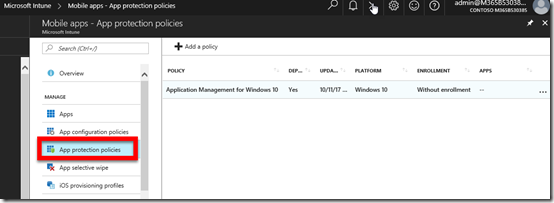
From here select the App protection policies option under the Manage section. This should display a policy on the right that matches the one you have in the Microsoft 365 Business console (here Application Management for Windows 10). Select the policy name to continue.

image

You will notice that when you create a new Application Management for Windows 10 policy that you have the option to set Encrypt work files to be on or off.

image

However, after you set it to on and save the policy you can’t change it to off as shown above. Thus, once Encrypt work files is set to on, it stays and can’t be changed.

image

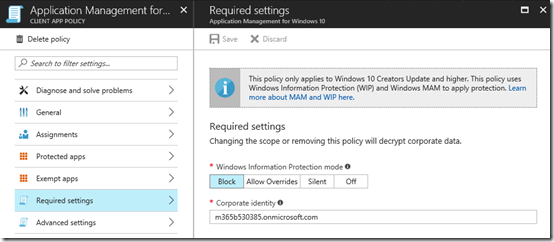
This setting maps to the Windows Information protection mode in the Required settings of the Application Management policy in Intune as shown above.

image

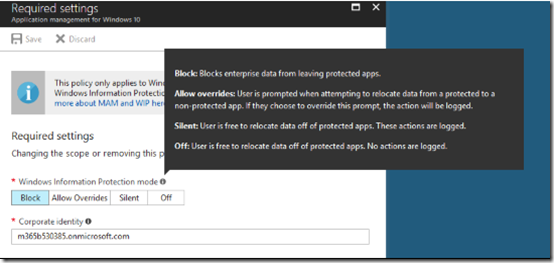
When Encrypt work files is set to on, the option in Intune is set to Block. This basically prevents Office 365 data from being used in non Office 365 applications on Windows 10. Thus, you can’t save an Office 365 file to a consume storage platform like Google Drive.

clip_image001[9]

When Encrypt work files is set to off, the option in Intune is also set to off as shown above. Thus, Office 365 files can be shared with any application.

image

If the option to Prevent users from copying company data to personal files and force them to save work files to OneDrive for Business is set to on, then I can ‘t see how this is enforced by the policy as there doesn’t appear to be any settings for this like there is with iOS and Android policies. I’ll need to investigate this one further.

clip_image001[11]

The next setting is Manage how users access Office files on mobile devices.

image

image

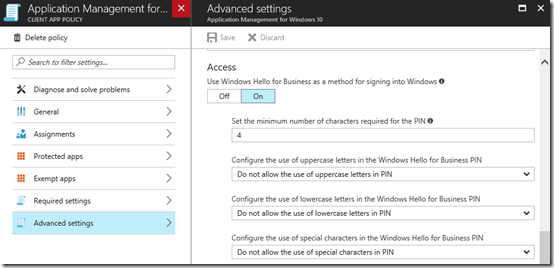
If the Require a PIN or fingerprint to access Office apps is set to on, the use Windows Hello for Business as a method of signing into Windows in the Access section of the Advanced Settings of the policy is also set to on as shown above.

image

image

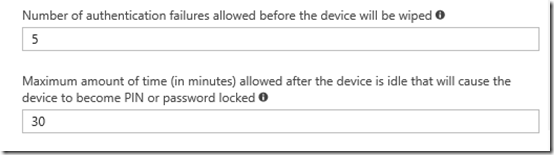
The Microsoft 365 Business policy options Reset PIN when login fails this many times and Require users to sign in again after Office apps have been idle for settings are located at the bottom of this same policy as shown above.

image

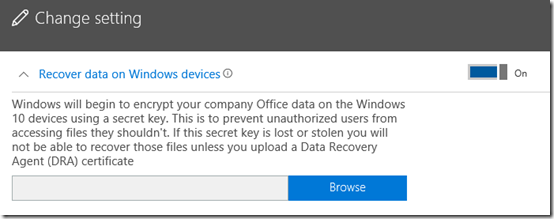
The next option Recover data on Windows devices appears to map to the Data protection area of the Intune policy.

image

I haven’t quite worked this setting out yet. I’m unsure whether you need to upload your certificate BEFORE you apply the policy to machines or you can do it at any time AFTER the policy has been applied. One would think that you need to do it BEFORE and retain the certificate to decrypt files later. However, I need to dig deeper here and do a follow up article.

clip_image001[13]

image

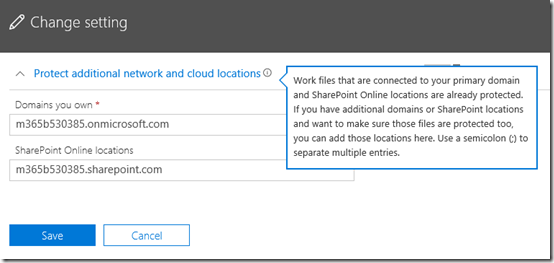
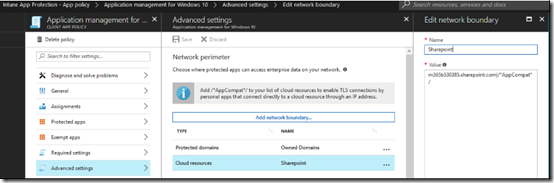
The Protect additional network and cloud locations in Microsoft 365 Business option maps to the following areas in Intune policy.

image

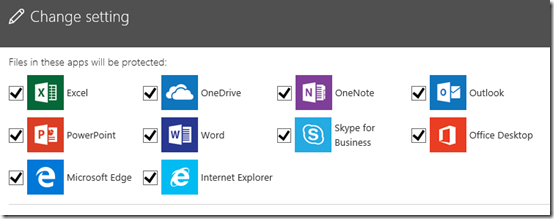
The final option, Files used by these apps are protected

image

map to

image

image

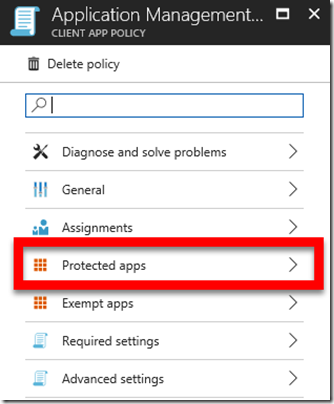
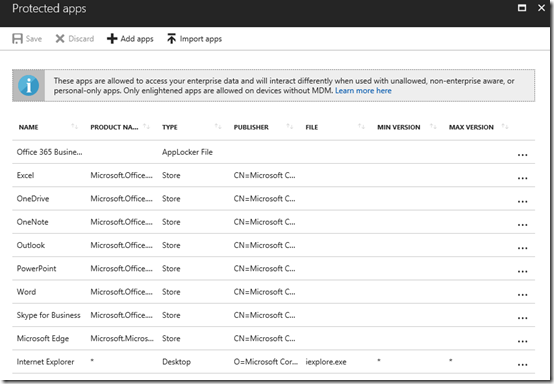
the Protected Apps area of the policy as shown above.

Remember, there is a similar policy for both iOS and Android that I’ll cover soon. There are also a few things here I need to do more research on but you should now have a better idea of how the Microsoft 365 Business settings map to Intune.

Also, as I understand it, you can’t make changes to the policies in Intune, they all need to be done via the Microsoft 365 Business console.

So, when you create a Application management for Windows 10 policy in Microsoft 365 Business, these are the mapping that occur to Intune under the covers.

Microsoft 365 Windows 10 Device configuration mappings

Microsoft 365 Business allows you to configure Windows 10 devices that are connected. This management is typically done by Intune at the back end while Microsoft 365 Business provides a simplified interface over these settings. However, what settings in Microsoft 365 map to Intune?

The best place to start to understand this mapping is the following document from Microsoft:

How do protection features in Microsoft 365 Business map to Intune settings

image

Start by navigating to the Admin center in your Microsoft 365 for Business tenant.

image

Locate the Device policies tile and select it.

image

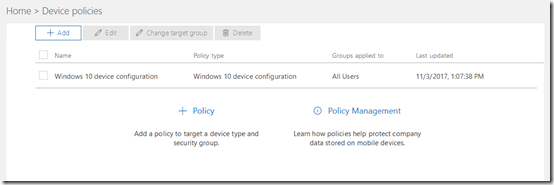
You may see a number of policies here but one should be named Windows 10 device configuration as shown above. Select this.
image

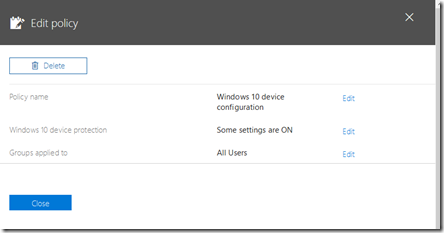
You should be taken to the Edit policy dialog as shown above.

Select the Edit hyperlink at the right of the Windows 10 protection line (the second option from the top).

image

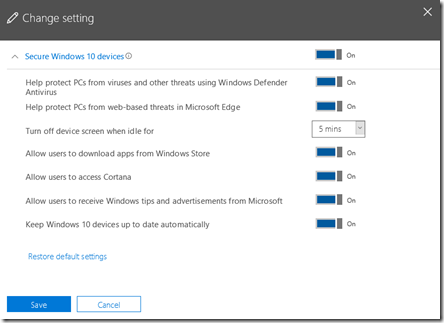
If you expand the display you should see a list of all the options and their status as shown above.

The question now is, how do these map to settings in Intune?

To view the settings in Intune you’ll need to login to the Azure portal for that tenant and then navigate to the Intune option.

image

The easiest way to find the Intune settings is to do a search in the top right and then select Intune from the results.

image

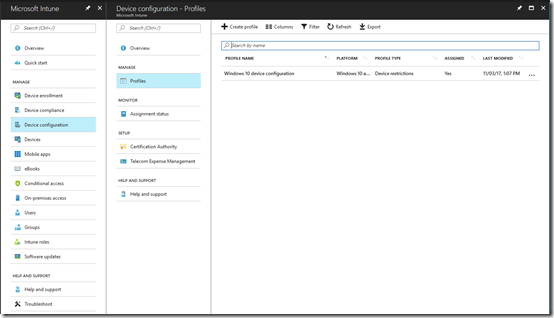
You should see the Intune console displayed as shown above.

image

From the available options, select Device Configuration. From the blade that appears then select Policies. You should then see a policy that matches the one in the Microsoft 365 for Business console (here Windows 10 device configuration).

Select the policy name.

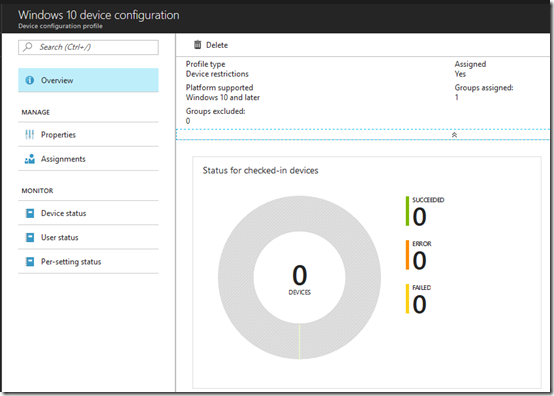
image

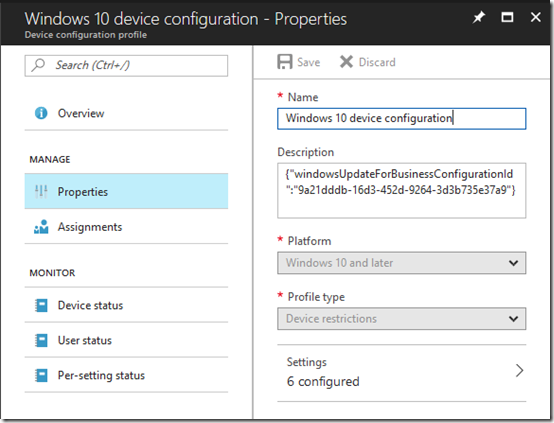
From the new blade that appears select Properties.

image

This should open another blade like shown above. The last option on this blade should be Settings. Select this.

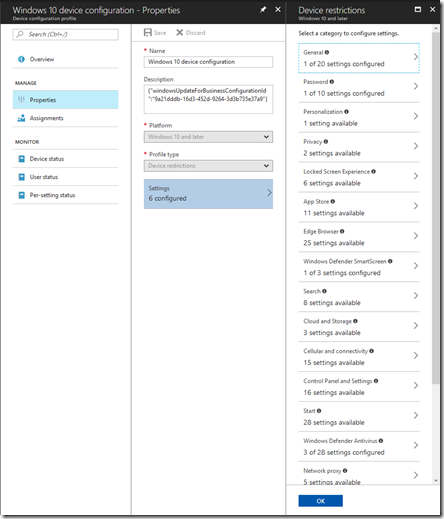
image

This will open a Device restrictions blade with lots of different settings as you can see above. This is where most the mapped settings from Microsoft 365 are.

clip_image001[5]

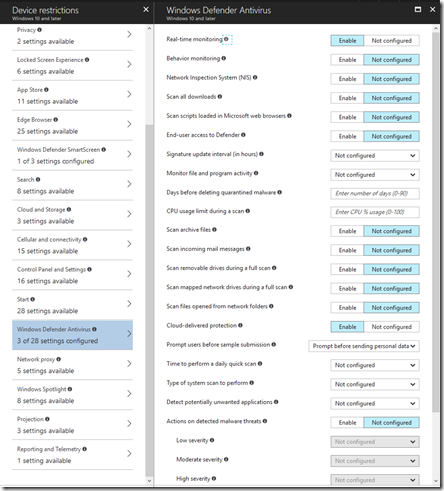
Working from the top, the Help protect PCs from web-based threats using Windows Defender Antivirus maps to Windows Defender Antivirus as shown.

image

However, only 3 of the 28 options are set and they are:

clip_image001[7]

clip_image001[9]

clip_image001[11]

Next in Microsoft 365 Business is Help protect PCs from web-based threats in Microsoft Edge,

clip_image001[13]

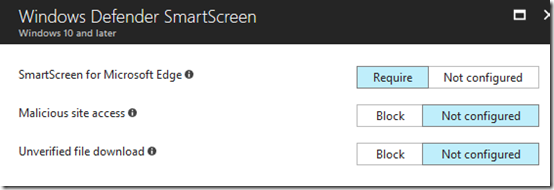
This maps to SmartScreen for Microsoft Edge in Windows Defender Smart Screen.

clip_image001[15]

image

The next option is Turn off device screen when idle for:

clip_image001[17]which maps to Maximum minutes of inactivity until screen locks in Password.

clip_image001[19]

The option Allow users to download apps from Windows store maps to a Custom URI that I haven’t been able to locate in Intune.

image

I’m still researching what that actually maps to. More soon.

Next is Allow users to access Cortana

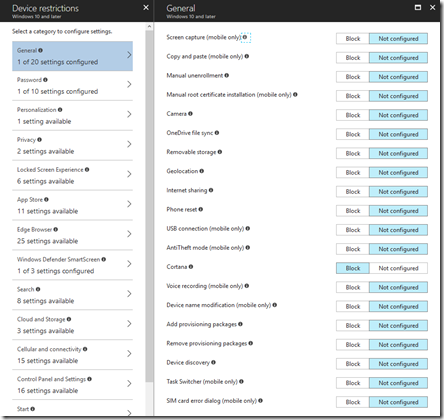
clip_image001[21]maps to Cortana in General in Intune.

image

image

Next, Allow users to receive Windows tips and advertisements from Microsoft.

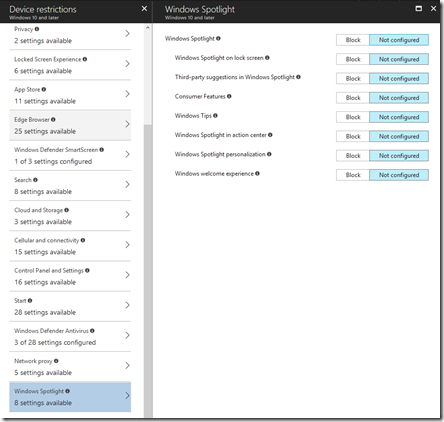
clip_image001[23]which maps to Windows spotlight in Intune.

image

Finally, Keep Windows 10 devices up to date automatically

image

is actually configured from the Software updates option in Intune.

clip_image001[29]

From the main Intune blade select Software updates. From the blade that then appears select Windows 10 Update rings. Then form the new blade select Update policy for Windows 10 devices.

clip_image001[31]

Select the policy and then Properties from the blade that appears.

At the bottom of the Properties page select Settings. This should then show a blade like that shown above.

clip_image001[33]

If the Microsoft 365 Business setting is ON the Service Branch will be set to Semi-Annual Channel (Targeted) like so:

clip_image001[35]

If the Microsoft 365 Business setting is OFF, the Service Branch will be set to Semi-Annual like so:

clip_image001[37]

You can review these update channels here:

Assign devices to servicing channels for Windows 10 updates

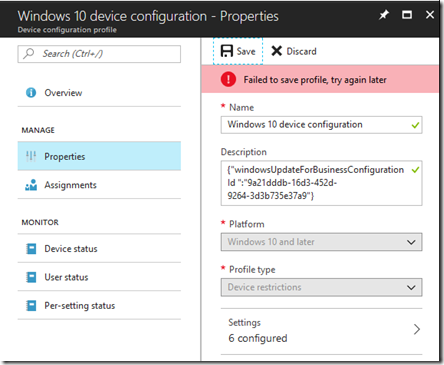
So making any changes in the Microsoft 365 Business console will be reflected in the Intune console. However, if you change these settings in Intune and then try and update them you seem to get an error like so

image

I would have thought that I could change the settings in any console but that doesn’t appear to be the case. I currently can’t find any confirmation of this but I will publish anything I find. So for now the guidance is – only make changes in the Microsoft 365 Business Admin Center.

There are a number of other policies in Microsoft 365 Business that I’ll cover in upcoming posts.