In a previous article I showed how the first step into Azure is typically to use Azure backup for files and folders. I also covered off how you can restore files via that method. That backup method works great for static files and folders on a network but what about applications such as SQL, SharePoint, Exchange, etc where important data also resides? You typically can’t backup the data because it is ‘in use’ by the application. In most cases you need a special ‘agent’ that allows the data inside these applications to be backed up even when the data is in use. Luckily, Azure provides that with a service called Azure backup for applications.
This walk through covers how to use Azure Backup for applications with Azure Resource Manager. if you are looking for how to do this in the older ‘classic’ Azure Service Manager check out my previous article on that topic:
Azure Backup Server for Applications configuration
Azure backup for applications is an extension of Azure backup for files and folders. You’ll back the data up into the same Azure Backup Vault that I detailed how to create in a previous article. What I’ll therefore show you here now is how to set up Azure backup for applications.
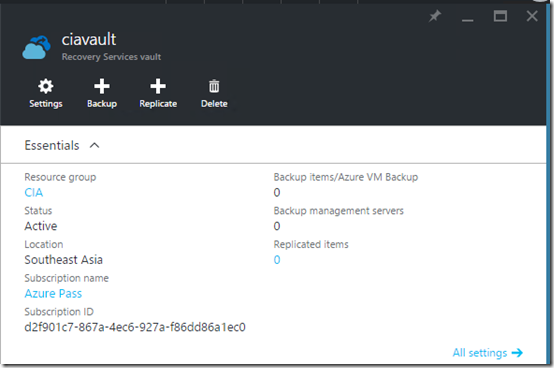
You’ll need to navigate back to the Azure Recovery Vault in the new Azure portal. When you do you should see a screen similar to that shown above. Select the Backup button at the top of the page.
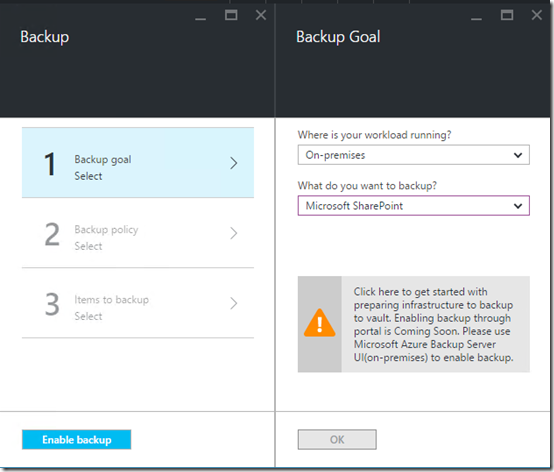
You’ll now be prompted to work through the steps required to configure the Azure backup. For the option Where is your workload running? Select On-premises from the selections available. For the option What do you want to backup select either Microsoft SharePoint, Microsoft SQL or Microsoft Exchange (i.e. an application).
When you do you’ll see a warning message appear below prompting you to click on it to get started. Do so.
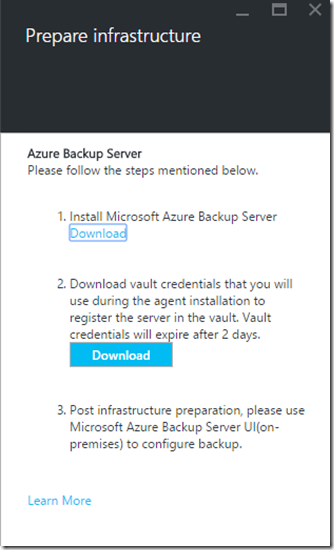
You’ll be taken to the Prepare Infrastructure blade as shown above. You’ll now need to download the dedicated Azure Backup software. This is different from what was used with Azure Backup for files. It is in fact a version of Microsoft Data Protection Manager (DPM). To download the DPM software select the Download link. This will open a browser windows to:
https://www.microsoft.com/en-us/download/details.aspx?id=49170
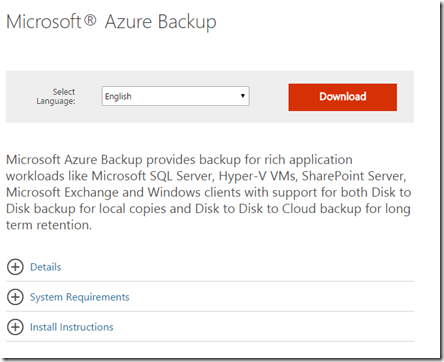
You are now taken to the download page for the Azure Backup for applications software as shown above. Select the Download button to continue.
You’ll need to select all the components and download them to the machine on which you plan to install the software. You’ll note that this software is much larger (at 3GB) than that for Azure Backup for files and folder, that is because this Microsoft Data Protection Manager.
Once the software has downloaded, kick off the setup and select Next to continue.
Select the location where the files can be extracted. Typically, just accept the default and press Next to continue.
Select Extract to expand the compressed files from the download.
You should now see the files being extracted as shown above.
Ensure the Execute setup.exe is select and press the Finish button.
The above splash screen should now appear. Select the Microsoft Azure Backup option under the Install column in the top left.
You may see some additional software components being installed as shown above.
Select Next at the Welcome screen to continue.
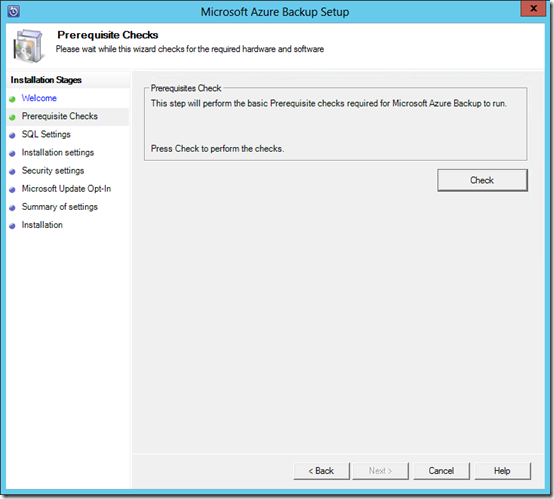
Select the Check button in the top right to verify the current computer meets the requirements for the Azure Backup software.
Hopefully everything is in order and the check are passed as shown above.
Select Next to continue.
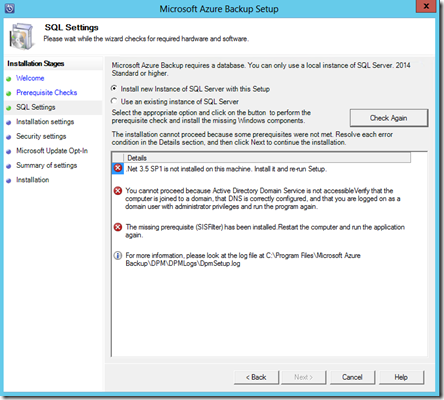
The backup software will need to store its data in an SQL database. You can either elect to install a new version of this or use an existing version. Typically, you’ll allow the installation to create a instance of SQL server and install the SQL software.
Select the Check and Install button in the top right to continue.
For Azure Backup software to install successfully you’ll need to ensure you have .Net 3.5 SP1 as well as ensuring that the machine can access a Domain Controller. Typically this means it is a member server in the network attached to the Domain Controller. You can install the software on a Domain Controller if you wish but you may need to take additional steps to accomplish this. Here is an article on this:
https://technet.microsoft.com/en-us/library/ff399416.aspx
If however, there are no red flags you should see a summary of the confirmation as shown above. Select Next to continue.
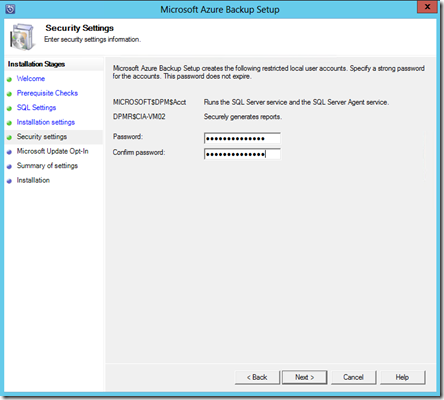
You’ll now need to specify a password that will be tied to a system account for the installed software. Enter and appropriate password and select Next to continue.
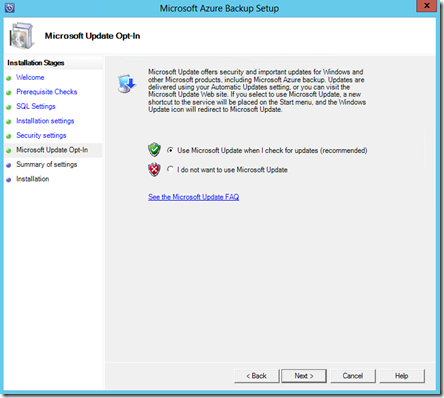
Typically select the option to allow Microsoft updates and select Next to continue.
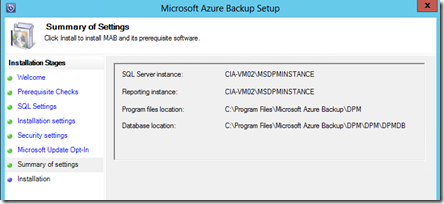
You will now see a summary of the installation. If all is good, select Next to continue.
The first step in the installation process will be the registration of the software with the Azure Recovery vault. You’ll need to browse to the location of the downloaded vault credentials. These will then be validated as shown above.
Select Next to continue.
As with the Azure Backup for files and folders, you’ll now need to enter or generate a strong passphrase to use to provide encryption of the backed up data.
Remember that you need to save this pass phrase in a location independent of the machine that you are currently using. If you lose the password you will be unable to restore the data you backup here, so best practice is to ensure you have multiple copies of the password.
Select Next to continue.
The registration process will now complete.
The installation process will then continue with the installation and configuration of SQL Server as shown above. The process will then proceed to complete the installation of the Azure Backup for applications.
When the process is complete you should all tasks have been completed successfully.
Press Close to complete the process.
You should see two icon now displayed on the desktop, one for the Azure Backup for applications program and one for an Azure Backup for applications PowerShell environment. Select the Azure Backup for applications program to launch the software.
You should now see Azure Backup for applications (basically Microsoft Data Protection Manager) as shown above.
Future articles will cover how to use this software to actually backup and restore from network locations.
In summary, if you are looking to backup more than files and folders to Azure you need to install Azure Backup for applications which means basically installed the Microsoft Data Protection software on a server in the network which is connected to an Azure Recovery Services vault configure using Azure Resource Manager.
For more details about using Azure Backup for applications see:
