Small and medium businesses (SMBs) with remote employees have shifted from a single “office network” model to a Zero Trust model. Microsoft 365 Business Premium (BPP) already includes extensive security layers – identity protection, device management, email scanning, and endpoint defenselearn.microsoft.comlearn.microsoft.com. With those controls fully configured, the traditional on-premises network perimeter (and thus an expensive firewall appliance) becomes far less critical. In practice, a standard router/NAT firewall combined with Windows/macOS built‑in firewalls and M365’s cloud protections can cost‑effectively secure a remote SMB. We explain how M365 BPP’s features cover typical firewall functions, and when a dedicated firewall (beyond a basic one) may not be needed.
Built-In Security in Microsoft 365 Business Premium
Microsoft 365 Business Premium bundles multiple security layers: endpoint protection, identity/access controls, device management, and more. Key built‑in features include:
Endpoint Security – Microsoft Defender for Business (included) provides next‑gen antivirus, threat detection/response and a host firewall on each devicelearn.microsoft.comlearn.microsoft.com. Devices (Windows, macOS, iOS, Android) get managed protection against ransomware, malware and network attacks.
Email and App Protection – Defender for Office 365 Plan 1 (included) scans email attachments and links for malware and phishing. Safe Links/Safe Attachments help stop threats before they reach userslearn.microsoft.com.
Identity and Access (Zero Trust) – Azure AD Premium P1 (included) enables Conditional Access policies and mandatory multi-factor authenticationmicrosoft.comlearn.microsoft.com. Only compliant, enrolled devices can access company resources, and admins/devices are always re‑authenticated.
Device Management – Microsoft Intune can enforce security policies on all devices: requiring device encryption (BitLocker), patching, endpoint firewalls, and even configuring VPN or Wi‑Fi profileslearn.microsoft.comlearn.microsoft.com. In short, Intune ensures every device meets the company’s security baseline before it connects.
Secure Remote Access – Azure AD Application Proxy (via Azure AD P1) publishes any on‑premises app through Azure AD, so remote users can reach internal resources without opening inbound firewall portssherweb.com. This often replaces a VPN or on‑site reverse proxy, making remote access simpler and safer.
These built-in layers cover most attack vectors. For example, M365 BPP’s Defender for Business includes a managed host-based firewall and web filtering, so each laptop is protected on any networklearn.microsoft.com. And Conditional Access can block sign-ins from unsecured locations or unregistered devices, effectively extending the network perimeter to only trusted endpoints.
Zero Trust and Remote Work
In a modern SMB, employees “can work anywhere,” so the old model of trusting the office LAN no longer applies. As Microsoft describes, traditional protections rely on firewalls and VPNs at fixed locations, whereas Zero Trust assumes no network is inherently safelearn.microsoft.com. Every sign-in is verified (via Azure AD) and every device is checked (via Intune) no matter where the user is.
In this diagram, a corporate firewall on the left no longer suffices when employees roam (right side)learn.microsoft.com. With Business Premium, identity and device policies take over: multifactor authentication and Conditional Access ensure only known users on compliant devices connectlearn.microsoft.commicrosoft.com. In effect, the organization’s “perimeter” is the cloud. Remote workers authenticate directly to Azure/Office 365 and receive Microsoft’s protection (e.g. encrypted tunnels, safe browser checks), rather than passing first through an on‑site firewall.
Host-Based Firewalls and Device Security
Even without a hardware firewall, devices must protect themselves on untrusted networks. All common operating systems include a built‑in firewall. Enabling these host firewalls is free and highly effective – many MSP guides advise turning on Windows Defender Firewall (and macOS’s) on every device before even buying a hardware applianceguardianangelit.com. Microsoft Defender for Business not only installs antivirus but can manage each device’s firewall settings: for instance, Intune can push a profile that blocks all inbound traffic except essential serviceslearn.microsoft.com.
By treating each endpoint as its own secured “network edge,” an SMB covers the user’s connection in coffee shops or home Wi‑Fi. For example, if a user’s laptop is on public Wi‑Fi, the Windows firewall (enforced by Defender policies) stops inbound attacks, while Defender’s web protection filters malicious sites. This layered endpoint approach (antivirus+EDR + host firewall + encrypted disk) significantly shrinks the need for a central firewall inspecting all traffic.
Network Perimeter and When to Use Firewalls
If an SMB still maintains an office or data closet, some firewall or router will normally be used for basic perimeter functions (NAT, DHCP, segmentation of guest networks, etc.). However, the level of firewall needed is typically minimal. A basic managed router or inexpensive UTM is often enough to separate IoT/guest Wi-Fi from internal staff, and to enforce outbound rules. Beyond that, heavy enterprise firewalls yield little benefit in a predominantly cloud-centric setup.
For remote-heavy SMBs, many experts suggest zero-trust access (e.g. VPN, ZTNA) instead of relying on office hardware. ControlD’s SMB security checklist, for instance, recommends ensuring VPN or Zero-Trust Network Access for remote employees, rather than expecting them to route through the office firewallcontrold.com. In other words, with cloud apps and M365-managed devices, the on‑site firewall sees only its local subnet – almost all work and threats are already handled by Microsoft’s cloud services and endpoint defenses.
Configuring M365 Business Premium as Your “Firewall”
A Business Premium tenant can be tuned to cover typical firewall functions:
Enroll and Update All Devices: Use Intune (part of BPP) to enroll every company device (Windows, Mac, mobile) and onboard them to Defender for Businesslearn.microsoft.comlearn.microsoft.com. Ensure full disk encryption (BitLocker/FileVault), automatic OS updates, and Defender real‑time protection are all enabled.
Enforce Host Firewalls: Create an Intune endpoint security policy that turns on Windows Defender Firewall for all profiles (Domain/Private/Public) and disables unnecessary inbound rulesguardianangelit.comlearn.microsoft.com. Similarly, enable the macOS firewall via Intune configuration. This ensures devices block unwanted network traffic by default.
Enable Multi-Factor Authentication & Conditional Access: Turn on Azure AD security defaults or define Conditional Access policies so that every login requires MFA and checks device compliancelearn.microsoft.commicrosoft.com. You can restrict access by device state or location, preventing unknown devices from even reaching company apps.
Protect Email and Apps: Activate Defender for Office 365 (Plan 1) to scan all incoming email and Teams messages. Safe Links/Attachments in Office documents serve as an additional layer that no firewall can providelearn.microsoft.com.
Use Application Proxy for Internal Apps: If you have any on-premises servers, install the Azure AD Application Proxy connector. This publishes apps (e.g. intranet, CRM) through Azure without punching holes in your firewallsherweb.com. Remote users then access the app via Azure AD login, with no need to maintain a VPN or open router ports.
Monitor and Respond: Use Microsoft 365 Defender’s security portal (included) to monitor alerts. Its threat analytics will flag unusual traffic or sign-ins. Automated investigation and remediation in Defender for Business can contain a threat on a device before it spreads.
Network-Level Protections (Optional): For extra DNS- or web-filtering, an SMB might add services like Microsoft Defender SmartScreen (built into Edge/Windows) or a cloud DNS filter. These complement – but don’t replace – the firewall; they block malicious domains at the device level.
In this configuration, each device and identity becomes a control point. The M365 stack effectively sits in front of your data, rather than hardware at the network perimeter.
Cost vs. Benefit of Dedicated Firewalls
Without regulatory mandates, a high-end firewall appliance is often not cost-justified for an SMB fully on M365. The hardware itself and ongoing subscriptions (threat feeds, VPN licenses, maintenance) add significant cost. Given that M365 Business Premium already provides next-generation protection on endpoints and enforces secure access, the marginal security gain from a $2k+ firewall is small for remote-centric SMBs.
That said, a simple firewall/router is still recommended for the office LAN. It can provide:
Basic NAT/segmentation: Separating staff devices from guest or IoT VLANs.
VPN termination (if needed): A site‑to‑site VPN or point‑to‑site gateway for branch offices or legacy systems (though Azure VPN with Azure AD is an alternative).
On‑prem device connectivity: If on-premises servers exist, the firewall can regulate incoming traffic.
For example, installing Azure AD Application Proxy (no cost beyond BPP license) often removes the need to expose an on‑site port for remote accesssherweb.com. Similarly, if home users connect via secure VPN with M365 credentials, the corporate firewall is bypassed by design.
In contrast, host-based security and cloud controls cover most threats: phishing and remote intrusion are handled by Defender and MFA, malware is stopped at the device, and data exfiltration is controlled by identity and DLP settings. As one MSP guide notes, for small businesses the built-in OS firewalls should be used before investing in hardware firewallsguardianangelit.com. In practice, the total protective overlap from Intune+Defender+Conditional Access can eliminate many risks that a hardware firewall is meant to address.
Conclusion
For a typical SMB with Microsoft 365 Business Premium fully enabled, the need for an expensive dedicated firewall is greatly reduced. M365 BPP delivers comprehensive security – endpoint protection, email filters, and zero-trust access – that, when properly configured, cover most attack vectorslearn.microsoft.comlearn.microsoft.com. A basic network firewall (even the one built into a router) is useful for simple segmentation, but beyond that most protections are handled by Microsoft’s cloud services and host firewalls. In short, by leveraging Business Premium’s features (Defender, Intune, Azure AD P1, etc.), an SMB can safely rely on default and cloud-managed defenses rather than purchasing a high-end firewall applianceguardianangelit.comsherweb.com.
Here are 10 tailored prompts you can use with your ASD Secure Cloud Blueprint agent to address common Microsoft 365 Business Premium security concerns for SMBs, with a focus on automated implementation using PowerShell:
🔐 Identity & Access Management
“What are the ASD Blueprint recommendations for securing user identities in M365 Business Premium, and how can I enforce MFA using PowerShell?”
“How does the ASD Blueprint suggest managing admin roles in M365 Business Premium, and what PowerShell scripts can I use to audit and restrict global admin access?”
📁 Data Protection & Information Governance
“What ASD Blueprint controls apply to protecting sensitive data in M365 Business Premium, and how can I automate DLP policy deployment with PowerShell?”
“How can I implement ASD Blueprint-compliant retention policies in Exchange and SharePoint using PowerShell for M365 Business Premium tenants?”
🛡️ Threat Protection
“What are the ASD Blueprint recommendations for Defender for Office 365 in Business Premium, and how can I configure anti-phishing and safe links policies via PowerShell?”
“How can I automate the deployment of Microsoft Defender Antivirus settings across endpoints in line with ASD Blueprint guidance using PowerShell?”
🔍 Auditing & Monitoring
“What audit logging standards does the ASD Blueprint recommend for M365 Business Premium, and how can I enable and export unified audit logs using PowerShell?”
“How can I use PowerShell to monitor mailbox access and detect suspicious activity in accordance with ASD Blueprint security controls?”
🔧 Configuration & Hardening
“What baseline security configurations for Exchange Online and SharePoint Online are recommended by the ASD Blueprint, and how can I apply them using PowerShell?”
“How can I automate the disabling of legacy authentication protocols in M365 Business Premium to meet ASD Blueprint standards using PowerShell?”
Here are 10 ready-to-use prompts you can ask your ASD-aligned security agent to tackle the most common SMB security issues in Microsoft 365 Business Premium tenants. Each prompt is engineered to:
Align with the ASD Secure Cloud Blueprint / Essential Eight and ACSC guidance
Use only features available in M365 Business Premium
Produce clear, step-by-step outcomes you can apply immediately
Avoid E5-only capabilities (e.g., Entra ID P2, Defender for Cloud Apps, Insider Risk, Auto-labelling P2, PIM)
Tip for your agent: For each prompt, request outputs in this structure: (a) Current state → (b) Gaps vs ASD control → (c) Recommended configuration (Business Premium–only) → (d) Click-path + PowerShell → (e) Validation tests & KPIs → (f) Exceptions & rollback.
Prompt: “Assess our tenant’s MFA and sign-in posture against ASD/ACSC guidance using only Microsoft 365 Business Premium features. Return: (1) Conditional Access policies to enforce MFA for all users, admins, and high-risk scenarios (without Entra ID P2); (2) exact assignments, conditions, grant/ session controls; (3) block legacy authentication; (4) break-glass account pattern; (5) click-paths in Entra admin portal and Exchange admin centre; (6) PowerShell for disabling per-user MFA legacy and enabling CA-based MFA; (7) how to validate via Sign-in logs and audit; (8) exceptions for service accounts and safe rollback.”
Prompt: “Create Intune compliance and configuration baselines for Windows/macOS/iOS/Android aligned to ASD/ACSC using Business Premium. Include: (1) Windows BitLocker and macOS FileVault enforcement; (2) OS version minimums, secure boot, tamper protection, firewall, Defender AV; (3) jailbreak/root detection; (4) role-based scope (admins stricter); (5) conditional access ‘require compliant device’ for admins; (6) click-paths and JSON/OMA-URI where needed; (7) validation using device compliance reports and Security baselines; (8) exceptions for servers/VDI and rollback.”
4) BYOD Data Protection (App Protection / MAM-WE)
Prompt: “Design BYOD app protection for iOS/Android using Intune App Protection Policies (without enrollment), aligned to ASD data protection guidance. Deliver: (1) policy sets for Outlook/Teams/OneDrive/Office mobile; (2) cut/copy/save restrictions, PIN/biometrics, encryption-at-rest, wipe on sign-out; (3) Conditional Access ‘require approved client app’ and ‘require app protection policy’; (4) blocking downloads to unmanaged locations; (5) step-by-step in Intune & Entra; (6) user experience notes; (7) validation and KPIs (unenrolled device access, selective wipe success).”
5) Endpoint Security with Defender for Business (EDR/NGAV/ASR)
Prompt: “Harden endpoints using Microsoft Defender for Business (included in Business Premium) to meet ASD controls. Return: (1) Onboarding method (Intune) and coverage; (2) Next-Gen AV, cloud-delivered protection, network protection; (3) Attack Surface Reduction rules profile (Business Premium-supported), Controlled Folder Access; (4) EDR enablement and Automated Investigation & Response scope; (5) threat & vulnerability management (TVM) priorities; (6) validation via MDE portal; (7) KPIs (exposure score, ASR rule hits, mean time to remediate).”
6) Patch & Update Strategy (ASD: Patch Apps/OS)
Prompt: “Produce a Windows Update for Business and Microsoft 365 Apps update strategy aligned to ASD Essential Eight for SMB. Include: (1) Intune update rings and deadlines; (2) quality vs feature update cadence, deferrals, safeguards; (3) Microsoft 365 Apps channel selection (e.g., Monthly Enterprise); (4) TVM-aligned prioritisation for CVEs; (5) rollout waves and piloting; (6) click-paths, policies, and sample assignments; (7) validation dashboards and KPIs (patch latency, update compliance, CVE closure time).”
7) External Sharing, DLP & Sensitivity Labels (ASD: Data Protection)
Prompt: “Lock down external sharing and implement Data Loss Prevention using Business Premium (no auto-labelling P2), aligned to ASD guidance. Deliver: (1) SharePoint/OneDrive external sharing defaults, link types, expiration; (2) guest access policies for Teams; (3) Purview DLP for Exchange/SharePoint/OneDrive—PII templates, alerting thresholds; (4) user-driven sensitivity labels (manual) for email/files with recommended taxonomy; (5) transport rules for sensitive emails to external recipients; (6) step-by-step portals; (7) validation & KPIs (external sharing volume, DLP matches, label adoption).”
8) Least Privilege Admin & Tenant Hygiene (ASD: Restrict Admin)
Prompt: “Review and remediate admin privileges and app consent using Business Premium-only controls. Provide: (1) role-by-role least privilege mapping (Global Admin, Exchange Admin, Helpdesk, etc.); (2) emergency access (‘break-glass’) accounts with exclusions and monitoring; (3) enforcement of user consent settings and admin consent workflow; (4) risky legacy protocols and SMTP AUTH usage review; (5) audit logging and alert policies; (6) step-by-step remediation; (7) validation and KPIs (admin count, app consents, unused privileged roles).”
9) Secure Score → ASD Gap Analysis & Roadmap
Prompt: “Map Microsoft Secure Score controls to ASD Essential Eight and generate a 90‑day remediation plan for Business Premium. Return: (1) Top risk-reducing actions feasible with Business Premium; (2) control-to-ASD mapping; (3) effort vs impact matrix; (4) owner, dependency, and rollout sequence; (5) expected Secure Score lift; (6) weekly KPIs and reporting pack (including recommended dashboards). Avoid recommending E5-only features—offer Business Premium alternatives.”
10) Detection & Response Playbooks (SMB-ready)
Prompt: “Create incident response playbooks using Defender for Business and Defender for Office 365 for common SMB threats (phishing, BEC, ransomware). Include: (1) alert sources and severities; (2) triage steps, evidence to collect, where to click; (3) auto-investigation actions available in Business Premium; (4) rapid containment (isolate device, revoke sessions, reset tokens, mailbox rules sweep); (5) user comms templates and legal/escalation paths; (6) post-incident hardening steps; (7) validation drills and success criteria.”
Optional meta‑prompt you can prepend to any of the above
“You are my ASD Secure Cloud Blueprint agent. Only recommend configurations available in Microsoft 365 Business Premium. If a control typically needs E5/P2, propose a Business Premium‑compatible alternative and flag the limitation. Return exact portal click-paths, policy names, JSON samples/PowerShell, validation steps, and KPIs suitable for SMBs.”
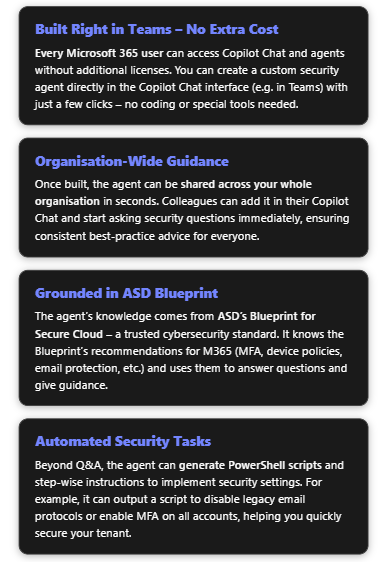
ASD’s Blueprint for Secure Cloud is a comprehensive set of security guidelines published by the Australian Signals Directorate. It details how to configure cloud services (including Microsoft 365) to meet high security standards, incorporating strategies like the Essential Eight. For Microsoft 365, the Blueprint covers everything from enforcing multi-factor authentication and blocking legacy authentication, to hardening Office 365 services (Exchange, SharePoint, Teams) and securing Windows devices via Intune policies[1][2]. By creating a dedicated Copilot Chat agent based on this Blueprint, you give your organisation an easy way to access all that expertise. The agent will act as a virtual security advisor: available through Microsoft Teams (Copilot Chat) to answer questions, provide configuration guidance, and even supply automation scripts – all for free using your existing M365 subscription.
Below is a step-by-step guide to build the agent within the Copilot Chat interface, followed by examples of how it can improve your Microsoft 365 security management.
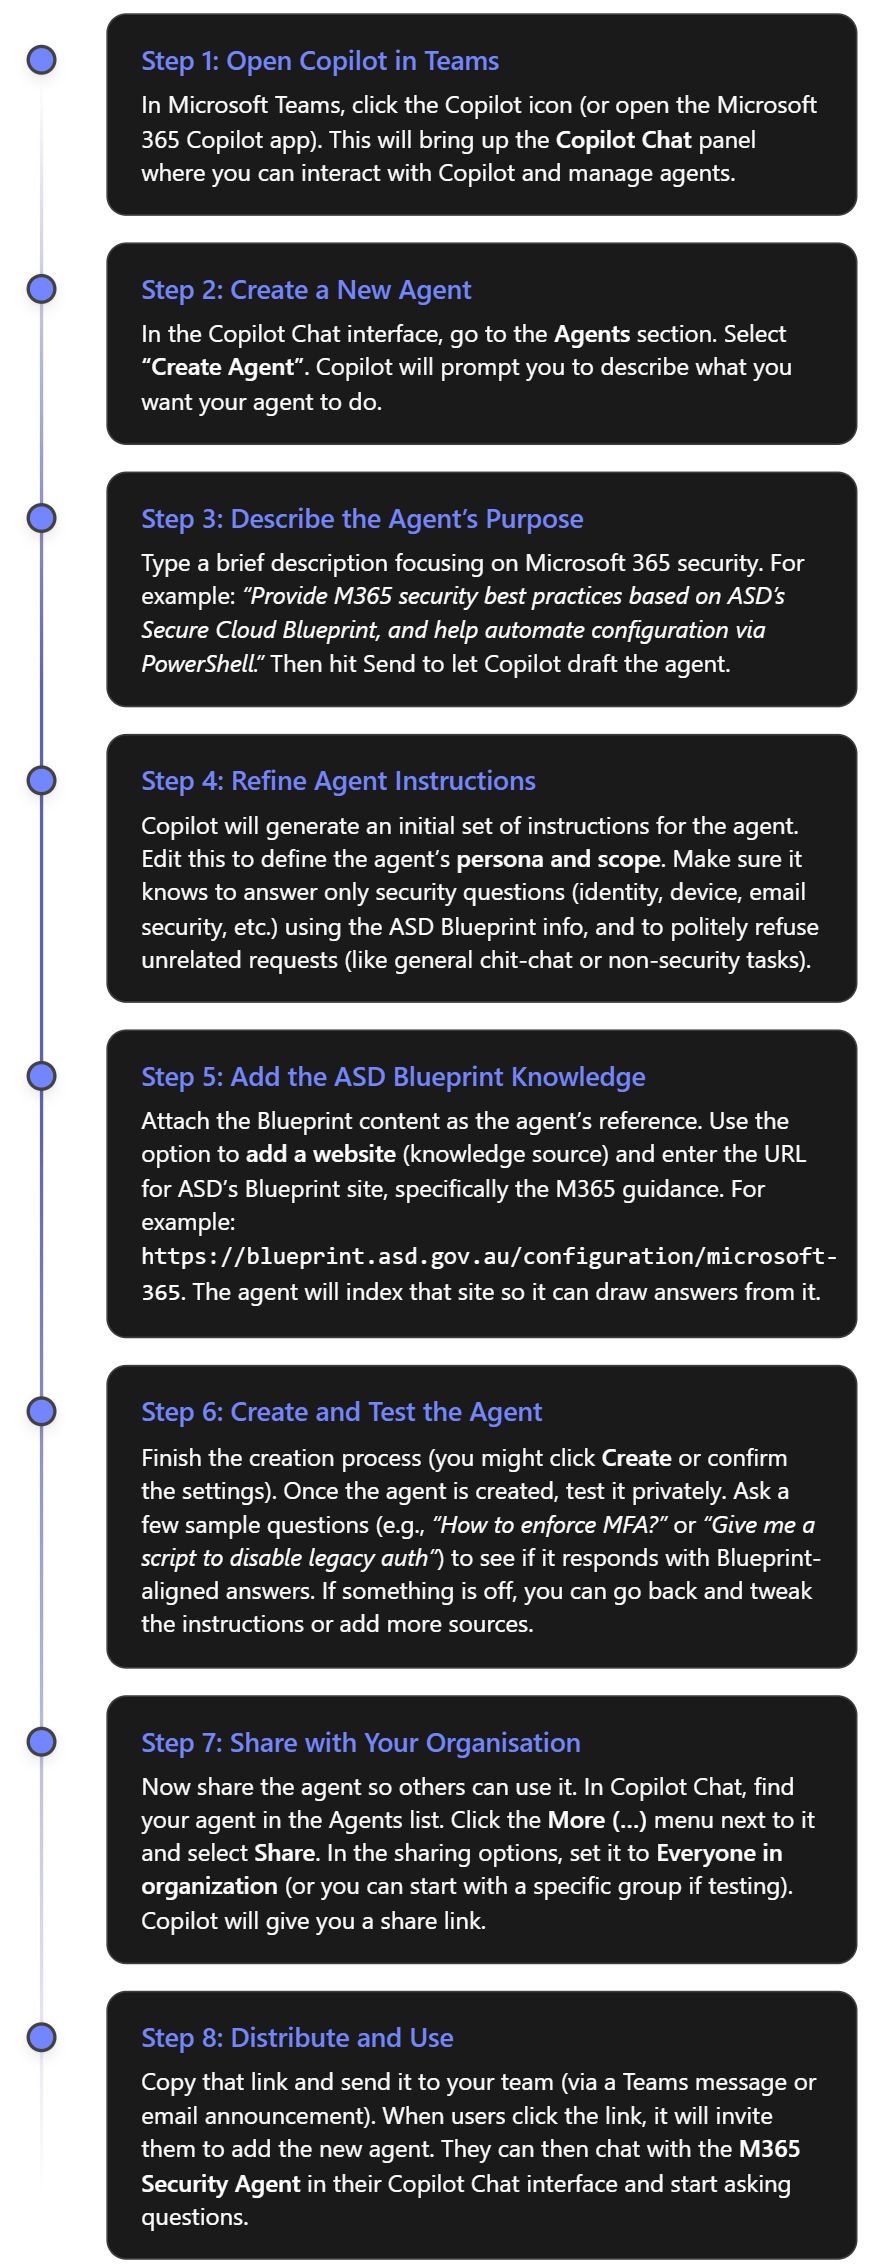
Step-by-Step: Creating the Copilot Agent in Teams Copilot Chat
You can create the agent entirely within the Microsoft 365 Copilot Chat interface (such as in Teams), using the built-in Agent Builder. There’s no need to use separate tools or write code. Here’s how to set it up quickly:
Note: The above assumes that the Copilot Agents feature is enabled in your tenant. Microsoft made Copilot Chat available to all users by 2025, but an admin might need to turn on custom agent creation if it’s in preview. Check your M365 admin settings for “Copilot” or “Agents” if you don’t see the option to create an agent. Once enabled, any user can build or use agents in Copilot Chat[3].
How the Agent Improves M365 Security
With your M365 Security Copilot agent up and running, your IT team (and potentially all employees) can leverage it in several ways to strengthen security. Here are some examples of what it can do:
1. Instant Q&A on Security Best Practices
The agent can answer questions about Microsoft 365 security configurations, drawing directly from the ASD Blueprint’s guidance and related Microsoft documentation. This is like having a security policy expert available 24/7.
Example:“What does the ASD Blueprint say about email protection?” – The agent might respond: “It recommends enabling Microsoft Defender for Office 365 features like Safe Links and Safe Attachments for all users[2]. Safe Links will check URLs in emails and documents for malicious content and redirect users if the link is unsafe. Safe Attachments will open email attachments in a sandbox to detect malware before delivering them to the recipient[2].” It would likely go on to mention anti-phishing policies as well. This guidance helps you know which settings to configure (e.g. turn on Safe Links and Safe Attachments in your Exchange Online security policies).
Example:“Do we allow legacy email protocols?” – Legacy protocols like IMAP/POP3 (which use Basic Auth) are a known security risk. The agent knows the Blueprint stance is to disable them in favour of Modern Authentication. It might answer: “No. According to ASD’s guidelines, legacy authentication protocols such as POP3 and IMAP should be disabled[4]. This prevents attackers from bypassing MFA. You should ensure only Modern Auth is allowed for Exchange Online.” The agent could even cite Microsoft’s policy that basic auth is deprecated. This reminds your team to verify those settings (or use the script the agent provides, which we’ll see below).
Example:“What are the password requirements for Windows 10 devices?” – The agent can pull from the Intune compliance policy Blueprint. It could respond: “The Blueprint’s baseline for Windows 10 requires a complex password of at least 15 characters[1]. Simple passwords are blocked, and the device must be encrypted with BitLocker[1]. It also enforces screen lock after 15 minutes of inactivity.” This gives a clear answer that aligns with your organisation’s policy (assuming you adopt the Blueprint settings).
Why this helps: It eliminates guesswork. Admins and helpdesk staff don’t have to search through lengthy documents or remember every detail. They can just ask the agent and get an authoritative answer with the reasoning included. This ensures consistent application of security best practices.
2. Guidance for Implementation and Automation
The agent doesn’t just cite policy – it can help you implement it. Through step-by-step guidance or actual code snippets, it translates the recommendations into action:
Step-by-Step Instructions: For instance, if you ask “How do I enforce MFA for all users?”, the agent will explain the methods. It might say: “To enforce MFA, you have options: (1) Enable Security Defaults in Azure AD, which require MFA for all users by default; or (2) create a Conditional Access policy that requires MFA for all sign-ins[2]. In Azure AD portal, go to Conditional Access -> New policy, assign to all users, cloud apps All, then under Access Controls, require MFA.” It will outline these steps clearly. If the Blueprint or Microsoft docs have a sequence, it will present it in order. This is like having a tutor walk you through the Azure AD configuration.
PowerShell Script Generation: Perhaps the biggest time-saver. The agent can generate scripts to configure settings across your tenant:
If you say, “Give me a PowerShell script to disable POP and IMAP for all mailboxes,” the agent can produce something like:
It knows from context that disabling these protocols is recommended, and the commands to do so. In fact, this script (getting all mailboxes and piping to Set-CASMailbox to turn off POP/IMAP) is a common solution[4]. The agent might add, “This script connects to Exchange Online and then disables POP and IMAP on every user’s mailbox.” With this, an admin can copy-paste and execute it in PowerShell to enforce the policy in seconds.
Another example: “Generate a script to require MFA for all users.” The agent could output a script using Azure AD PowerShell to set MFA on each account. For instance, it might use the MSOnline module:
And it would explain that this iterates through all users and enforces MFA. This aligns with the Blueprint’s mandate for MFA everywhere. The agent is effectively writing the code so you don’t have to. (As always, you should test such scripts in a safe environment, but it provides a solid starting point.) Not here that the MSOL module has been deprecated by Microsoft and you really should use the latest option. Always check your results from AI!
The agent can assist with device policies too. If you ask, “How can I deploy the Windows 10 baseline settings?”, apart from describing the steps in Intune, it might mention scriptable options (like exporting the Blueprint’s Intune configuration as JSON and using Graph API or PowerShell to import it). It will guide you to the appropriate tooling.
Why this helps: It automates tedious work and ensures it’s done right. Many IT admins know what they need to do conceptually, but writing a script or clicking through dozens of settings can be error-prone. The agent provides ready-made, Blueprint-aligned solutions. This speeds up implementation of secure configurations. Your team can focus on higher-level oversight rather than nitty-gritty syntax.
3. Organisation-Wide Security Awareness
By sharing the agent with the whole organisation, you extend its benefits beyond the IT/security team (if desired):
Empowering Helpdesk and Junior Staff: Frontline IT support can use the agent to answer user questions or to verify they’re giving correct advice. For example, if a user asks “Why can’t I use my old Outlook 2010 with company email?”, a helpdesk tech could consult the agent, which might answer: “Outlook 2010 uses legacy authentication which is not allowed because it doesn’t support modern security features. We require newer Outlook versions or clients that support Modern Auth to protect your account.” This backs up the helpdesk with authoritative reasoning.
Training New Team Members: New hires in the IT department can learn your security policies by interacting with the agent. They can ask it various “why do we do X” questions and get consistent answers. It’s like an interactive policy manual. Over time, this improves everyone’s understanding of security in the company.
Consistent Messaging: The agent will always refer to the Blueprint’s guidance. This means the language and recommendations are consistent. If two different people ask about, say, OneDrive sharing settings, they’ll get the same answer from the agent. Consistency is key in security – you don’t want conflicting info. The agent ensures one voice (that of the ASD Blueprint) is answering.
4. Keeping the Agent (and Advice) Up-to-Date
As threats evolve and the ASD Blueprint (or Microsoft’s recommendations) update, you can refresh the agent easily:
Periodically check the Blueprint site for updates. If new sections or changes appear (e.g., a new recommendation to use a particular security feature), you can update the agent’s knowledge. In Copilot’s agent settings, you can re-index the website or add new URLs if needed. For example, if a new “Design Decision” is added on the blueprint site about a feature, include it.
You might also feed the agent additional sources. Suppose Microsoft releases a detailed blog on a new M365 security feature not covered by the current Blueprint. You can add that blog URL to the agent’s sources. Now the agent can incorporate that into its answers as well.
Because you can edit the agent’s instructions at any time, you can also adjust its behavior. If your organisation decides on a custom policy that slightly deviates from the Blueprint, you can instruct the agent about that. For instance, “our company chooses to disable feature X due to internal reasons – reflect that in answers.”
All of this ensures the agent remains a living tool that adapts to the latest best practices and your organisation’s needs.
Example Questions & Agent Responses
To illustrate, here are some example questions you could ask your new security Copilot agent, and the kind of answers you can expect:
Question
Agent’s Response (Summary)
“How do I enforce MFA for all users?”
“Multi-Factor Authentication is mandatory for all users. The ASD Blueprint advises enabling it tenant-wide. You can do this by turning on Azure AD Security Defaults or creating a Conditional Access policy requiring MFA for all accounts. This ensures every login uses a second factor, which makes accounts 99.9% less likely to be compromised[5].” The agent would then guide through setting up the policy (as described in step-by-step above).
“Give me a script to disable legacy email auth.”
“To block legacy authentication (like basic auth for POP/IMAP) on Exchange Online, run the following PowerShell commands: Connect-ExchangeOnline -Credential (Get-Credential) Get-Mailbox -ResultSize Unlimited | Set-CASMailbox -PopEnabled $false -ImapEnabled $false This disables POP and IMAP for all mailboxes[4], forcing the use of Modern Authentication (which supports MFA).”
“What are the device security requirements?”
“For Windows 10/11 devices, the Blueprint baseline requires: BitLocker disk encryption enabled, a password of at least 15 characters with complexity, screen lock after 15 minutes, and up-to-date antivirus/antispyware protection[1]. Jailbroken or rooted mobile devices are not compliant. These ensure devices meet a strong security standard.”
“How can we protect email from phishing?”
“Use Microsoft Defender for Office 365. The Blueprint recommends Safe Links and Safe Attachments for all users[2]. Safe Links will scan and rewrite URLs in incoming emails to shield users from malicious sites. Safe Attachments will open email attachments in a virtual machine to detect malware. Enable these in your Office 365 security center under Threat Management > Policy.” The agent might also mention anti-phishing policies and user training reminders.
“Why do we insist on MFA for login?”
“Because it dramatically improves security. As Microsoft reports, an account is over 99.9% less likely to be hacked if MFA is enabled[5]. The ASD Blueprint therefore mandates MFA for all users. Even if a password is stolen, the attacker cannot get in without the second factor.” This kind of answer provides the rationale you can pass on to users or execs who ask the same question.
These examples show how the agent can be used in practice. It provides precise, actionable answers with evidence (often even citing the official guidance). By interacting with the agent, your IT staff can save time and ensure they’re following the correct procedures, and your end-users get consistent answers on why security measures are in place.
In summary, a dedicated Copilot Chat agent based on the ASD Secure Cloud Blueprint can greatly streamline your Microsoft 365 security operations. It’s free to set up (since Copilot Chat agents are available to all M365 users[3]), quick to distribute via Teams, and immediately useful for both answering questions and executing security tasks. Your organisation gets the benefit of an always-available expert that reflects approved best practices, helping you raise the security baseline across the board.
In this episode of the CIAOPS “Need to Know” podcast, we dive into the latest updates across Microsoft 365, GitHub Copilot, and SMB-focused strategies for scaling IT services. From new Teams features to deep dives into DLP alerts and co-partnering models for MSPs, this episode is packed with insights for IT professionals and small business tech leaders looking to stay ahead of the curve. I also take a look at building an agent to help you work with frameworks like the ASD Blueprint for Secure Cloud.
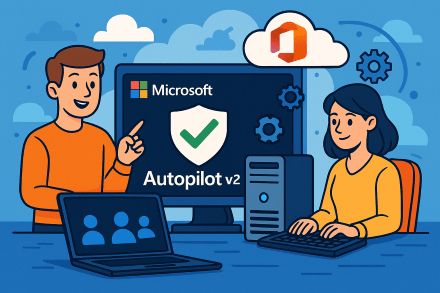
Microsoft’s Windows Autopilot is a cloud-based suite of technologies designed to streamline the deployment and configuration of new Windows devices for organizations[1]. This guide provides a detailed look at the latest updates to Windows Autopilot – specifically the new Autopilot v2 (officially called Windows Autopilot Device Preparation) – and offers step-by-step instructions for implementing it in a Microsoft 365 Business environment. We will cover the core concepts, new features in Autopilot v2, benefits for businesses, the implementation process (from prerequisites to deployment), troubleshooting tips, and best practices for managing devices with Autopilot v2.
1. Overview of Microsoft Autopilot and Its Purpose
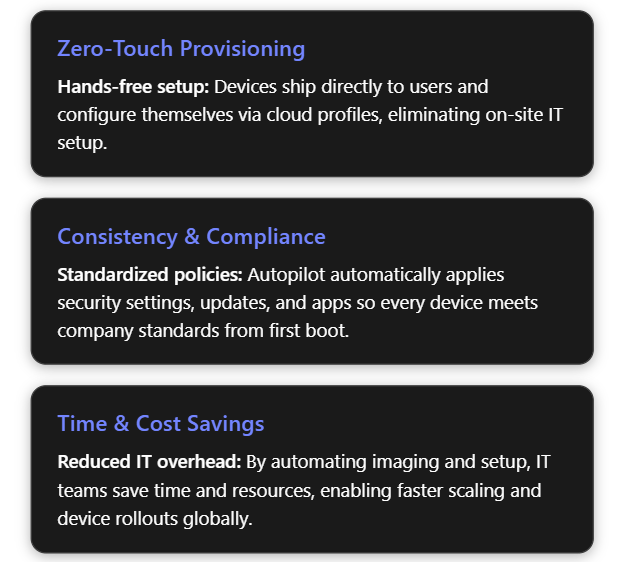
Windows Autopilot simplifies the Windows device lifecycle from initial deployment through end-of-life. It leverages cloud services (like Microsoft Intune and Microsoft Entra ID) to pre-configure devices out-of-box without traditional imaging. When a user unboxes a new Windows 10/11 device and connects to the internet, Autopilot can automatically join it to Azure/Microsoft Entra ID, enroll it in Intune (MDM), apply corporate policies, install required apps, and tailor the out-of-box experience (OOBE) to the organization[1][1]. This zero-touch deployment means IT personnel no longer need to manually image or set up each PC, drastically reducing deployment time and IT overhead[2]. In short, Autopilot’s purpose is to get new devices “business-ready” with minimal effort, offering benefits such as:
Reduced IT Effort – No need to maintain custom images for every model; devices use the OEM’s factory image and are configured via cloud policies[1][1].
Faster Deployment – Users only perform a few quick steps (like network connection and sign-in), and everything else is automated, so employees can start working sooner[1].
Consistency & Compliance – Ensures each device receives standard configurations, security policies, and applications, so they immediately meet organizational standards upon first use[2].
Lifecycle Management – Autopilot can also streamline device resets, repurposing for new users, or recovery scenarios (for example, using Autopilot Reset to wipe and redeploy a device)[1].
2. Latest Updates: Introduction of Autopilot v2 (Device Preparation)
Microsoft has recently introduced a next-generation Autopilot deployment experience called Windows Autopilot Device Preparation (commonly referred to as Autopilot v2). This new version is essentially a re-architected Autopilot aimed at simplifying and improving deployments based on customer feedback[3]. Autopilot v2 offers new capabilities and architectural changes that enhance consistency, speed, and reliability of device provisioning. Below is an overview of what’s new in Autopilot v2:
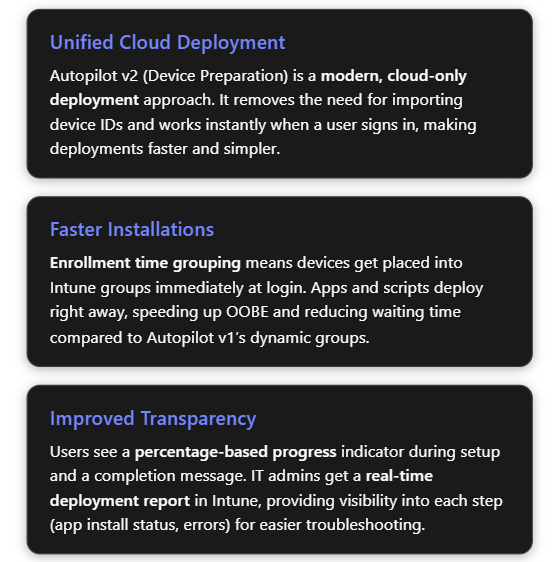
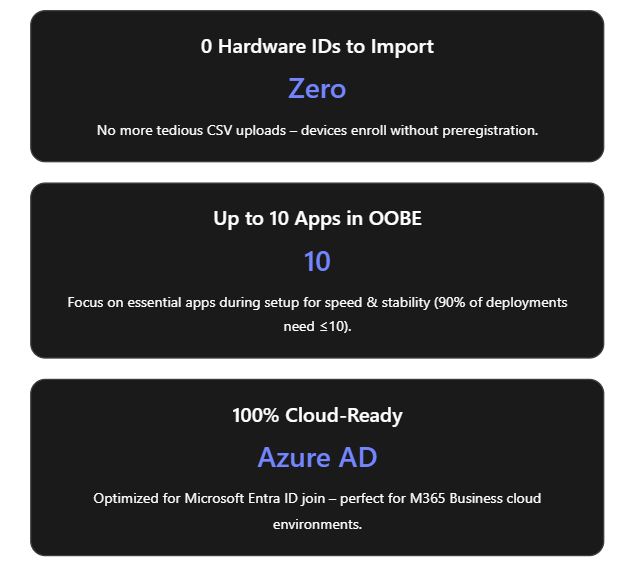
No Hardware Hash Import Required: Unlike the classic Autopilot (v1) which required IT admins or OEMs to register devices in Autopilot (upload device IDs/hardware hashes) beforehand, Autopilot v2 eliminates this step[4]. Devices do not need to be pre-registered in Intune; instead, enrollment can be triggered simply by the user logging in with their work account. This streamlines onboarding by removing the tedious hardware hash import process[3]. (If a device is already registered in the old Autopilot, the classic profile will take precedence – so using v2 means not importing the device beforehand[5].)
Cloud-Only (Entra ID) Join: Autopilot v2 currently supports Microsoft Entra ID (Azure AD) join only – it’s designed for cloud-based identity scenarios. Hybrid Azure AD Join (on-prem AD) is not supported in v2 at this time[3]. This focus on cloud join aligns with modern, cloud-first management in Microsoft 365 Business environments.
Single Unified Deployment Profile: The new Autopilot Device Preparation uses a single profile to define all deployment settings and OOBE customization, rather than separate “Deployment” and “ESP” profiles as in legacy Autopilot[3]. This unified profile encapsulates join type, user account type, and OOBE preferences, plus it lets you directly select which apps and scripts should install during the setup phase.
Enrollment Time Grouping: Autopilot v2 introduces an “Enrollment Time Grouping” mechanism. When a user signs in during OOBE, the device is automatically added to a specified Azure AD group on the fly, and any applications or configurations assigned to that group are immediately applied[5][5]. This replaces the old dependence on dynamic device groups (which could introduce delays while membership queries run). Result: faster and more predictable delivery of apps/policies during provisioning[5].
Selective App Installation (OOBE): With Autopilot v1, all targeted device apps would try to install during the initial device setup, possibly slowing things down. In Autopilot v2, the admin can pick up to 10 essential apps (Win32, MSI, Store apps, etc.) to install during OOBE; any apps not selected will be deferred until after the user reaches the desktop[3][6]. By limiting to 10 critical apps, Microsoft aimed to increase success rates and speed (as their telemetry showed ~90% of deployments use 10 or fewer apps initially)[6].
PowerShell Scripts Support in ESP: Autopilot v2 can also execute PowerShell scripts during the Enrollment Status Page (ESP) phase of setup[3]. This means custom configuration scripts can run as part of provisioning before the device is handed to the user – a capability that simplifies advanced setup tasks (like configuring registry settings, installing agent software, etc., via script).
Improved Progress & UX: The OOBE experience is updated – Autopilot v2 provides a simplified progress display (percentage complete) during provisioning[6]. Users can clearly see that the device is installing apps/configurations. Once the critical steps are done, it informs the user that setup is complete and they can start using the device[6][6]. (Because the device isn’t identified as Autopilot-managed until after the user sign-in, some initial Windows setup screens like EULA or privacy settings may appear in Autopilot v2 that were hidden in v1[3]. These are automatically suppressed only after the Autopilot policy arrives during login.)
Near Real-Time Deployment Reporting: Autopilot v2 greatly enhances monitoring. Intune now offers an Autopilot deployment report that shows status per device in near real time[6]. Administrators can see which devices have completed Autopilot, which stage they’re in, and detailed results for each selected app and script (success/failure), as well as overall deployment duration[5][5]. This granular reporting makes troubleshooting easier, as you can immediately identify if (for example) a particular app failed to install during OOBE[5][5].
Availability in Government Clouds: The new Device Preparation approach is available in GCC High and DoD government cloud environments[6][5], which was not possible with Autopilot previously. This broadens Autopilot use to more regulated customers and is one reason Microsoft undertook this redesign (Autopilot v2 originated as a project to meet government cloud requirements and then expanded to all customers)[7].
The table below summarizes key differences between Autopilot v1 (classic) and Autopilot v2:
Feature/Capability
Autopilot v1 (Classic)
Autopilot v2 (Device Preparation)
Device preregistration (Hardware hash upload)
Required (devices must be registered in Autopilot device list before use)[4]
Not required (user can enroll device directly; device should not be pre-added, or v2 profile won’t apply)[5]
Supported join types
Azure AD Join; Hybrid Azure AD Join (with Intune Connector)[3]
Azure/Microsoft Entra ID Join only (no on-prem AD support yet)[3]
Not supported in initial release[3] (future support is planned for these scenarios)
Deployment profiles
Separate Deployment Profile + ESP Profile (configuration split)
Single Device Preparation Policy (one profile for all settings: join, account type, OOBE, app selection)[3]
App installation during OOBE
Installs all required apps targeted to device (could be many; admin chooses which are “blocking”)
Installs selected apps only (up to 10) during OOBE; non-selected apps wait until after OOBE[3][6]
PowerShell scripts in OOBE
Not natively supported in ESP (workarounds needed)
Supported – can run PowerShell scripts during provisioning (via device prep profile)[3]
Policy application in OOBE
Some device policies (Wi-Fi, certs, etc.) could block in ESP; user-targeted configs had limited support
Device policies synced at OOBE (not blocking)[3]; user-targeted policies/apps install after user reaches desktop[3]
Out-of-Box experience (UI)
Branding and many Windows setup screens are skipped (when profile is applied from the start of OOBE)
Some Windows setup screens appear by default (since no profile until sign-in)[3]; afterwards, shows new progress bar and completion summary[6]
Reporting & Monitoring
Basic tracking via Enrollment Status Page; limited real-time info
Detailed deployment report in Intune with near real-time status of apps, scripts, and device info[5]
Why these updates? The changes in Autopilot v2 address common pain points from Autopilot v1. By removing the dependency on upfront registration and dynamic groups, Microsoft has made provisioning more robust and “hands-off”. The new architecture “locks in” the admin’s intended config at enrollment time and provides better error handling and reporting[6][6]. In summary, Autopilot v2 is simpler, faster, more observable, and more reliable – the guiding principles of its design[5] – making device onboarding easier for both IT admins and end-users.
3. Benefits of Using Autopilot v2 in a Microsoft 365 Business Environment
Implementing Autopilot v2 brings significant advantages, especially for organizations using Microsoft 365 Business or Business Premium (which include Intune for device management). Here are the key benefits:
Ease of Deployment – Less IT Effort: Autopilot v2’s no-registration model is ideal for businesses that procure devices ad-hoc or in small batches. IT admins no longer need to collect hardware hashes or coordinate with OEMs to register devices. A user can unbox a new Windows 11 device, connect to the internet, and sign in with their work account to trigger enrollment. This self-service enrollment reduces the workload on IT staff, which is especially valuable for small IT teams.
Faster Device Setup: By limiting installation to essential apps during OOBE and using enrollment time grouping, Autopilot v2 gets devices ready more quickly. End-users see a shorter setup time before reaching the desktop. They can start working sooner with all critical tools in place (e.g. Office apps, security software, etc. installed during setup)[7][7]. Non-critical apps or large software can install in the background later, avoiding long waits up-front.
Improved Reliability and Fewer Errors: The new deployment process is designed to “fail fast” with better error details[6]. If something is going to go wrong (for example, an app that fails to install), Autopilot v2 surfaces that information quickly in the Intune report and does not leave the user guessing. The enrollment time grouping also avoids timing issues that could occur with dynamic Azure AD groups. Overall, this means higher success rates for device provisioning and less troubleshooting compared to the old Autopilot. In addition, by standardizing on cloud join only, many potential complexities (like on-prem domain connectivity during OOBE) are removed.
Enhanced User Experience: Autopilot v2 provides a more transparent and reassuring experience to employees receiving new devices. The OOBE progress bar with a percentage complete indicator lets users know that the device is configuring (rather than appearing to be stuck). Once the critical setup is done, Autopilot informs the user that the device is ready to go[6]. This clarity can reduce helpdesk calls from users unsure if they should wait or reboot during setup. Also, because devices are delivered pre-configured with corporate settings and apps, users can be productive on Day 1 without needing IT to personally assist.
Better Monitoring for IT: In Microsoft 365 Business environments, often a single admin oversees device management. The Autopilot deployment report in Intune gives that admin a real-time dashboard to monitor deployments. They can see if a new laptop issued to an employee enrolled successfully, which apps/scripts ran, and if any step failed[5][5]. For any errors, the admin can drill down immediately and troubleshoot (for instance, if an app didn’t install, they know to check that installer or assign it differently). This reduces guesswork and allows proactive support, contributing to a smoother deployment process across the organization.
Security and Control: Autopilot v2 includes support for corporate device identification. By uploading known device identifiers (e.g., serial numbers) into Intune and enabling enrollment restrictions, a business can ensure only company-owned devices enroll via Autopilot[4][4]. This prevents personal or unauthorized devices from accidentally being enrolled. Although this requires a bit of setup (covered below), it gives small organizations an easy way to enforce that Autopilot v2 is used only for approved hardware, adding an extra layer of security and compliance. Furthermore, Autopilot v2 automatically makes the Azure AD account a standard user by default (not local admin), which improves security on the endpoint[5].
In summary, Autopilot v2 is well-suited for Microsoft 365 Business scenarios: it’s cloud-first and user-driven, aligning with the needs of modern SMBs that may not have complex on-prem infrastructure. It lowers the barrier to deploying new devices (no imaging or device ID admin work) while improving the speed, consistency, and security of device provisioning.
4. Implementing Autopilot v2: Step-by-Step Guide
In this section, we’ll walk through how to implement Windows Autopilot Device Preparation (Autopilot v2) in your Microsoft 365 Business/Intune environment. The process involves: verifying prerequisites, configuring Intune with the new profile and required settings, and then enrolling devices. Each step is detailed below.
4.1 Prerequisites and Initial Setup
Before enabling Autopilot v2, ensure the following prerequisites are met:
Windows Version Requirements: Autopilot v2 requires Windows 11. Supported versions are Windows 11 22H2 or 23H2 with the latest updates (specifically, installing KB5035942 or later)[3][5], or any later version (Windows 11 24H2+). New devices should be shipped with a compatible Windows 11 build (or be updated to one) to use Autopilot v2. Windows 10 devices cannot use Autopilot v2; they would fall back to the classic Autopilot method.
Microsoft Intune: You need an Intune subscription (Microsoft Endpoint Manager) as part of your M365 Business. Intune will serve as the Mobile Device Management (MDM) service to manage Autopilot profiles and device enrollment.
Azure AD/Microsoft Entra ID: Devices will be Azure AD joined. Ensure your users have Microsoft Entra ID accounts with appropriate Intune licenses (e.g., Microsoft 365 Business Premium includes Intune licensing) and that automatic MDM enrollment is enabled for Azure AD join. In Azure AD, under Mobility (MDM/MAM), Microsoft Intune should be set to Automatically enroll corporate devices for your users.
No Pre-Registration of Devices: Do not import the device hardware IDs into the Intune Autopilot devices list for devices you plan to enroll with v2. If you previously obtained a hardware hash (.CSV) from your device or your hardware vendor registered the device to your tenant, you should deregister those devices to allow Autopilot v2 to take over[5]. (Autopilot v2 will not apply if an Autopilot deployment profile from v1 is already assigned to the device.)
Intune Connector (If Hybrid not needed): Since Autopilot v2 doesn’t support Hybrid AD join, you do not need the Intune Connector for Active Directory for these devices. (If you have the connector running for other hybrid-join Autopilot scenarios, that’s fine; it simply won’t be used for v2 deployments.)
Network and Access: New devices must have internet connectivity during OOBE (Ethernet or Wi-Fi accessible from the initial setup). Ensure that the network allows connection to Azure AD and Intune endpoints. If using Wi-Fi, users will need to join a Wi-Fi network in the first OOBE steps. (Consider using a provisioning SSID or instructing users to connect to an available network.)
Plan for Device Identification (Optional but Recommended): Decide if you will restrict Autopilot enrollment to corporate-owned devices only. For better control (and to prevent personal device enrollment), it’s best practice to use Intune’s enrollment restrictions to block personal Windows enrollments and use Corporate device identifiers to flag your devices. We will cover how to set this up in the steps below. If you plan to use this, gather a list of device serial numbers (and manufacturers/models) for the PCs you intend to enroll.
4.2 Configuring the Autopilot v2 (Device Preparation) Profile in Intune
Once prerequisites are in place, the core setup work is done in Microsoft Intune. This involves creating Azure AD groups and then creating a Device Preparation profile (Autopilot v2 profile) and configuring it. Follow these steps:
1. Create Azure AD Groups for Autopilot: We need two security groups to manage Autopilot v2 deployment:
User Group – contains the users who will be enrolling devices via Autopilot v2.
Device Group – will dynamically receive devices at enrollment time and be used to assign apps/policies.
In the Azure AD or Intune portal, navigate to “Groups” and create a new group for users. For example, “Autopilot Device Preparation – Users”. Add all relevant user accounts (e.g., all employees or the subset who will use Autopilot) to this group[4]. Use Assigned membership for explicit control.
Next, create another security group for devices, e.g., “Autopilot Device Preparation – Devices”. Set this as a Dynamic Device group if possible, or Assigned (we will be adding devices automatically via the profile). An interesting detail: Intune’s Autopilot v2 mechanism uses an application identity called “Intune Provisioning Client” to add devices to this group during enrollment[4]. You can assign that as the owner of the group (though Intune may handle this automatically when the profile is used).
2. Create the Device Preparation (Autopilot v2) Profile: In the Intune admin center, go to Devices > Windows > Windows Enrollment (or Endpoint Management > Enrollment). There should be a section for “Windows Autopilot Device Preparation (Preview)” or “Device Preparation Policies”. Choose to Create a new profile/policy[4].
Name and Group Assignment: Give the profile a clear name (e.g., “Autopilot Device Prep Policy – Cloud PCs”). For the target group, select the Device group created in step 1 as the group to assign devices to at enrollment[4]. (In some interfaces, you might first choose the device group in the profile so the system knows where to add devices.)
Deployment Mode: Choose User-Driven (since user-driven Azure AD join is the scenario for M365 Business). Autopilot v2 also has an “Automatic” mode intended for Windows 365 Cloud PCs or scenarios without user interaction, but for physical devices in a business, user-driven is typical.
Join Type: Select Azure AD (Microsoft Entra ID) join. (This is the only option in v2 currently – Hybrid AD join is not available).
User Account Type: Choose whether the end user should be a standard user or local admin on the device. Best practice is to select Standard (non-admin) to enforce least privilege[5]. (In classic Autopilot, this was an option in the deployment profile as well. Autopilot v2 defaults to standard user by design, but confirm the setting if presented.)
Out-of-box Experience (OOBE) Settings: Configure the OOBE customization settings as desired:
You can typically configure Language/Region (or set to default to device’s settings), Privacy settings, End-User License Agreement (EULA) acceptance, and whether users see the option to configure for personal use vs. organization. Note: In Autopilot v2, some of these screens may not be fully suppressible as they are in v1, but set your preferences here. For instance, you might hide the privacy settings screen and accept EULA automatically to streamline user experience.
If the profile interface allows it, enable “Skip user enrollment if device is known corporate” or similar, to avoid the personal/work question (this ties in with using corporate identifiers).
Optionally, set a device naming template if available. However, Autopilot v2 may not support custom naming at this stage (and users can be given the ability to name the device during setup)[3]. Check Intune’s settings; if not present, plan to rename devices via Intune policy later if needed.
Applications & Scripts (Device Preparation): Select the apps and PowerShell scripts that you want to be installed during the device provisioning (OOBE) phase[4]. Intune will present a list of existing apps and scripts you’ve added to Intune. Here, pick only your critical or required applications – remember the limit is 10 apps max for the OOBE phase. Common choices are:
Company Portal (for user self-service and additional app access)[4].
Endpoint protection software (antivirus/EDR agent, if not already part of Windows).
Any other crucial line-of-business app that the user needs immediately. Also select any PowerShell onboarding scripts you want to run (for example, a script to set a custom registry or install a specific agent that’s not packaged as an app). These selected items will be tracked in the deployment. (Make sure any app you select is assigned in Intune to the device group we created, or available for all devices – more on app assignment in the next step.)
Assign the Profile: Finally, assign the Device Preparation profile to the User group created in step 1[4]. This targeting means any user in that group who signs into a Windows 11 device during OOBE will trigger this Autopilot profile. (The device will get added to the specified device group, and the selected apps will install.)
Save/create the profile. At this point, Intune has the Autopilot v2 policy in place, waiting to apply at next enrollment for your user group.
3. Assign Required Applications to Device Group: Creating the profile in step 2 defines which apps should install, but Intune still needs those apps to be deployed as “Required” to the device group for them to actually push down. In Intune:
Go to Apps > Windows (or Apps section in MEM portal).
For each critical app you included in the profile (Company Portal, Office, etc.), check its Properties > Assignments. Make sure to assign the app to the Autopilot Devices group (as Required installation)[4]. For example, set Company Portal – Required for [Autopilot Device Preparation – Devices][4].
Repeat for Microsoft 365 Apps and any other selected application[4]. If you created a PowerShell script configuration in Intune, ensure that script is assigned to the device group as well.
Essentially, this step ensures Intune knows to push those apps to any device that appears in the devices group. Autopilot v2 will add the new device to the group during enrollment, and Intune will then immediately start installing those required apps. (Without this step, the profile alone wouldn’t install apps, since the profile itself only “flags” which apps to wait for but the apps still need to be assigned to devices.)
4. Configure Enrollment Restrictions (Optional – Corporate-only): If you want to block personal devices from enrolling (so that only corporately owned devices can use Autopilot), set up an enrollment restriction in Intune:
In Intune portal, navigate to Devices > Enrollment restrictions.
Create a new Device Type or Platform restriction policy (or edit the existing default one) for Windows. Under Personal device enrollment, set Personally owned Windows enrollment to Blocked[4].
Assign this restriction to All Users (or at least all users in the Autopilot user group)[4].
This means if a user tries to Azure AD join a device that Intune doesn’t recognize as corporate, the enrollment will be refused. This is a good security measure, but it requires the next step (uploading corporate identifiers) to work smoothly with Autopilot v2.
5. Upload Corporate Device Identifiers: With personal devices blocked, you must tell Intune which devices are corporate. Since we are not pre-registering the full Autopilot hardware hash, Intune can rely on manufacturer, model, and serial number to recognize a device as corporate-owned during Autopilot v2 enrollment. To upload these identifiers:
Gather device info: For each new device, obtain the serial number, plus the manufacturer and model strings. You can get this from order information or by running a command on the device (e.g., on an example device, run wmic csproduct get vendor,name,identifyingnumber to output vendor (manufacturer), name (model), and identifying number (serial)[4]). Many OEMs provide this info in packing lists or you can scan a barcode from the box.
Prepare CSV: Create a CSV file with columns for Manufacturer, Model, Serial Number. List each device’s information on a separate line[4]. For example:\ Dell Inc.,Latitude 7440,ABCDEFG1234\ Microsoft Corporation,Surface Pro 9,1234567890\ (Use the exact strings as reported by the device/OEM to avoid mismatches.)
Upload in Intune: In the Intune admin center, go to Devices > Enrollment > Corporate device identifiers. Choose Add then Upload CSV. Select the format “Manufacturer, model, and serial number (Windows only)”[4] and upload your CSV file. Once processed, Intune will list those identifiers as corporate.
With this in place, when a user signs in on a device, Intune checks the device’s hardware info. If it matches one of these entries, it’s flagged as corporate-owned and allowed to enroll despite the personal device block[4][4]. If it’s not in the list, the enrollment will be blocked (the user will get a message that enrolling personal devices is not allowed). Important: Until you have corporate identifiers set up, do not enable the personal device block, or Autopilot device preparation will fail for new devices[6][6]. Always upload the identifiers first or simultaneously.
At this stage, you have completed the Intune configuration for Autopilot v2. You have:
A user group allowed to use Autopilot.
A device preparation profile linking that user group to a device group, with chosen settings and apps.
Required apps assigned to deploy.
Optional restrictions in place to ensure only known devices will enroll.
4.3 Enrollment and Device Setup Process (Using Autopilot v2)
With the above configuration done, the actual device enrollment process is straightforward for the end-user. Here’s what to expect when adding a new device to your Microsoft 365 environment via Autopilot v2:
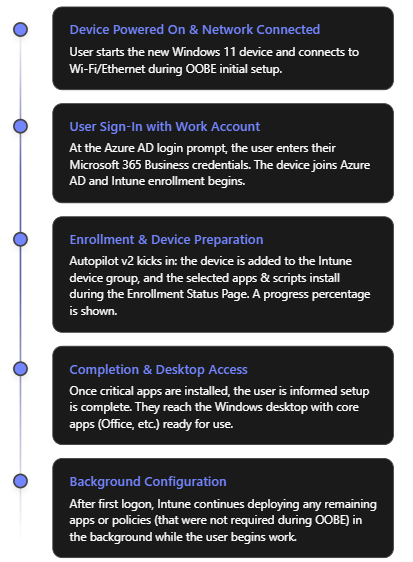
Out-of-Box Experience (Initial Screens): When the device is turned on for the first time (or after a factory reset), the Windows OOBE begins. The user will select their region and keyboard (unless the profile pre-configured these). The device will prompt for a network connection. The user should connect to the internet (Ethernet or Wi-Fi). Once connected, the device might check for updates briefly, then reach the “Sign in” screen.
User Sign-In (Azure AD): The user enters their work or school (Microsoft Entra ID/Azure AD) credentials – i.e., their Microsoft 365 Business account email and password. This is the trigger for Autopilot Device Preparation. Upon signing in, the device joins your organization’s Azure AD. Because the user is in the “Autopilot Users” group and an Autopilot Device Preparation profile is active, Intune will now kick off the device preparation process in the background.
Device Preparation Phase (ESP): After credentials are verified, the user sees the Enrollment Status Page (ESP) which now reflects “Device preparation” steps. In Autopilot v2, the ESP will show the progress of the configuration. A key difference in v2 is the presence of a percentage progress indicator that gives a clearer idea of progress[6]. Behind the scenes, several things happen:
The device is automatically added to the specified Device group (“Autopilot Device Preparation – Devices”) in Azure AD[5]. The “Intune Provisioning Agent” does this within seconds of the user signing in.
Intune immediately starts deploying the selected applications and PowerShell scripts to the device (those that were marked for installation during OOBE). The ESP screen will typically list the device setup steps, which may include device configuration, app installation, etc. The apps you marked as required (Company Portal, Office, etc.) will download and install one by one. Their status can often be viewed on the screen (e.g., “Installing Office 365… 50%”).
Any device configuration policies assigned to the device group (e.g., configuration profiles or compliance policies you set to target that group) will also begin to apply. Note: Autopilot v2 does not pause for all policies to complete; it mainly ensures the selected apps and scripts complete. Policies will apply in parallel or afterwards without blocking the ESP[3].
If you enabled BitLocker or other encryption policies, those might kick off during this phase as well (depending on your Intune configuration for encryption on Azure AD join).
The user remains at the ESP screen until the critical steps finish. With the 10-app limit and no dynamic group delay, this phase should complete relatively quickly (typically a few minutes to perhaps an hour for large Office downloads on slower connections). The progress bar will reach 100%.
Completion and First Desktop Launch: Once the selected apps and scripts have finished deploying, Autopilot signals that device setup is complete. The ESP will indicate it’s done, and the user will be allowed to proceed to log on to Windows (or it may automatically log them in if credentials were cached from step 2). In Autopilot v2, a final screen can notify the user that critical setup is finished and they can start using the device[6]. The user then arrives at the Windows desktop.
Post-Enrolment (Background tasks): Now the device is fully Azure AD joined and enrolled in Intune as a managed device. Any remaining apps or policies that were not part of the initial device preparation will continue to install in the background. For example, if you targeted some less critical user-specific apps (say, OneDrive client or Webex) via user groups, those will download via Intune management without interrupting the user. The user can begin working, and they’ll likely see additional apps appearing or software finishing installations within the first hour of use.
Verification: The IT admin can verify the device in the Intune portal. It should appear under Devices with the user assigned, and compliance/policies applying. The Autopilot deployment report in Intune will show this device’s status as successful if all selected apps/scripts succeeded, or flagged if any failures occurred[5]. The user should see applications like Office, Teams, Outlook, and the Company Portal already installed on the Start Menu[4]. If all looks good, the device is effectively ready and managed.
4.4 Troubleshooting Common Issues in Autopilot v2
While Autopilot v2 is designed to be simpler and more reliable, you may encounter some issues during setup. Here are common issues and how to address them:
Device is blocked as “personal” during enrollment: If you enabled the enrollment restriction to block personal devices, a new device might fail to enroll at user sign-in with a message that personal devices are not allowed. This typically means Intune did not recognize the device as corporate. Ensure you have uploaded the correct device serial, model, and manufacturer under corporate identifiers before the user attempts enrollment[4]. Typos or mismatches (e.g., “HP Inc.” vs “Hewlett-Packard”) can cause the check to fail. If an expected corporate device was blocked, double-check its identifier in Intune and re-upload if needed, then have the user try again (after a reset). If you cannot get the identifiers loaded in time, you may temporarily toggle the restriction to allow personal Windows enrollments to let the device through, then re-enable once fixed.
Autopilot profile not applying (device does standard Azure AD join without ESP): This can happen if the user is not in the group assigned to the Autopilot Device Prep profile, or if the device was already registered with a classic Autopilot profile. To troubleshoot:
Verify that the user who is signing in is indeed a member of the Autopilot Users group that you targeted. If not, add them and try again.
Check Intune’s Autopilot devices list. If the device’s hardware hash was previously imported and has an old deployment profile assigned, the device might be using Autopilot v1 behavior (which could skip the ESP or conflict). Solution: Remove the device from the Autopilot devices list (deregister it) so that v2 can proceed[5].
Also ensure the device meets OS requirements. If someone somehow tried with an out-of-date Windows 10, the new profile wouldn’t apply.
One of the apps failed to install during OOBE: If an app (or script) that was selected in the profile fails, the Autopilot ESP might show an error or might eventually time out. Autopilot v2 doesn’t explicitly block on policies, but it does expect the chosen apps to install. If an app installation fails (perhaps due to an MSI error or content download issue), the user may eventually be allowed to log in, but Intune’s deployment report will mark the deployment as failed for that device[5]. Use the Autopilot deployment report in Intune to see which app or step failed[5]. Then:
Check the Intune app assignment for that app. For instance, was the app installer file reachable and valid? Did it have correct detection rules? Remedy any packaging error.
If the issue was network (e.g., large app timed out), consider not deploying that app during OOBE (remove it from the profile’s selected apps so it installs later instead).
The user can still proceed to work after skipping the failed step (in many cases), but you’ll want to push the necessary app afterward or instruct the user to install via Company Portal if possible.
User sees unexpected OOBE screens (e.g., personal vs organization choice): As noted, Autopilot v2 can show some default Windows setup prompts that classic Autopilot hid. For example, early in OOBE the user might be asked “Is this a personal or work device?” If they see this, they should select Work/School (which leads to the Azure AD sign-in). Similarly, the user might have to accept the Windows 11 license agreement. To avoid confusion, prepare users with guidance that they may see a couple of extra screens and how to proceed. Once the user signs in, the rest will be automated. In future, after the device prep profile applies, those screens might not appear on subsequent resets, but on first run they can. This is expected behavior, not a failure.
Autopilot deployment hangs or takes too long: If the process seems stuck on the ESP for an inordinate time:
Check if it’s downloading a large update or app. Sometimes Windows might be applying a critical update in the background. If internet is slow, Office download (which can be ~2GB) might simply be taking time. If possible, ensure a faster connection or use Ethernet for initial setup.
If it’s truly hung (no progress increase for a long period), you may need to power cycle. The good news is Autopilot v2 is resilient – it has more retry logic for applying the profile[8]. On reboot, it often picks up where it left off, or attempts the step again. Frequent hanging might indicate a problematic step (again, refer to Intune’s report).
Ensure the device’s time and region were set correctly; incorrect time can cause Azure AD token issues. Autopilot v2 does try to sync time more reliably during ESP[8].
Post-enrollment policy issues: Because Autopilot v2 doesn’t wait for all policies, you might notice things like BitLocker taking place only after login, or certain configurations applying slightly later. This is normal. However, if certain device configurations never apply, verify that those policies are targeted correctly (likely to the device group). If they were user-targeted, they should apply after the user logs in. If something isn’t applying at all, treat it as a standard Intune troubleshooting case (e.g., check for scope tags, licensing, or conflicts).
Overall, many issues can be avoided by testing Autopilot v2 on a pilot device before mass rollout. Run through the deployment yourself with a test user and device to catch any application installation failures or unexpected prompts, and adjust your profile or process accordingly.
5. Best Practices for Maintaining and Managing Autopilot v2 Devices
After deploying devices with Windows Autopilot Device Preparation, your work isn’t done – you’ll want to manage and maintain those devices for the long term. Here are some best practices to ensure ongoing success:
Establish Clear Autopilot Processes: Because Autopilot v2 and v1 may coexist (for different use cases), document your process. For example, decide: will all new devices use Autopilot v2 going forward, or only certain ones? Communicate to your procurement and IT teams that new devices should not be registered via the old process. If you buy through an OEM with Autopilot registration service, pause that for devices you’ll enroll via v2 to avoid conflicts.
Keep Windows and Intune Updated: Autopilot v2 capabilities may expand with new Windows releases and Intune updates. Ensure devices get Windows quality updates regularly (this keeps the Autopilot agent up-to-date and compatible). Watch Microsoft Intune release notes for any Autopilot-related improvements or changes. For instance, if/when Microsoft enables features like self-deploying or hybrid join in Autopilot v2, it will likely come via an update[6] – staying current allows you to take advantage.
Limit and Optimize Apps in the Profile: Be strategic about the apps you include during the autopilot phase. The 10-app limit forces some discipline – include only truly essential software that users need immediately or that is required for security/compliance. Everything else can install later via normal Intune assignment or be made available in Company Portal. This ensures the provisioning is quick and has fewer chances to fail. Also prefer Win32 packaged apps for reliability and to avoid Windows Store dependencies during OOBE[2]. In general, simpler is better for the OOBE phase.
Use Device Categories/Tags if Needed: Intune supports tagging devices during enrollment (in classic Autopilot, there was “Convert all targeted devices to Autopilot” and grouping by order ID). In Autopilot v2, since devices aren’t pre-registered, you might use dynamic groups or naming conventions post-enrollment to organize devices (e.g., by department or location). Consider leveraging Azure AD group rules or Intune filters if you need to deploy different apps to different sets of devices after enrollment.
Monitor Deployment Reports and Logs: Take advantage of the new Autopilot deployment report in Intune for each rollout[5]. After onboarding a batch of new devices, review the report to see if any had issues (e.g., maybe one device’s Office install failed due to a network glitch). Address any failures proactively (rerun a script, push a missed app, etc.). Additionally, know that users or IT can export Autopilot logs easily from the device if needed[5] (there’s a troubleshooting option during the OOBE or via pressing certain key combos). Collecting logs can help Microsoft support or your IT team diagnose deeper issues.
Maintain Corporate Identifier Lists: If you’re using the corporate device identifiers method, keep your Azure AD device inventory synchronized with Intune’s list. For every new device coming in, add its identifiers. For devices being retired or sold, you might remove their identifiers. Also, coordinate this with the enrollment restriction – e.g., if a top executive wants to enroll their personal device and you have blocking enabled, you’d need to explicitly allow or bypass that (possibly by not applying the restriction to that user or by adding the device as corporate through some means). Regularly update the CSV as you purchase hardware to avoid last-minute scrambling when a user is setting up a new PC.
Plan for Feature Gaps: Recognize the current limitations of Autopilot v2 and plan accordingly:
If you require Hybrid AD Join (joining on-prem AD) for certain devices, those devices should continue using the classic Autopilot (with hardware hash and Intune Connector) for now, since v2 can’t do it[3].
If you utilize Autopilot Pre-Provisioning (White Glove) via IT staff or partner to pre-setup devices before handing to users (common for larger orgs or complex setups), note that Autopilot v2 doesn’t support that yet[3]. You might use Autopilot v1 for those scenarios until Microsoft adds it to v2.
Self-Deploying Mode (for kiosks or shared devices that enroll without user credentials) is also not in v2 presently[3]. Continue using classic Autopilot with TPM attestation for kiosk devices as needed. It’s perfectly fine to run both Autopilot methods side-by-side; just carefully target which devices or user groups use which method. Microsoft is likely to close these gaps in future updates, so keep an eye on announcements.
End-User Training and Communication: Even though Autopilot is automated, let your end-users know what to expect. Provide a one-page instruction with their new laptop: e.g., “1) Connect to Wi-Fi, 2) Log in with your work account, 3) Wait while we set up your device (about 15-30 minutes), 4) You’ll see a screen telling you when it’s ready.” Setting expectations helps reduce support tickets. Also inform them that the device will be managed by the company (which is standard, but transparency helps trust).
Device Management Post-Deployment: After Autopilot enrollment, manage the devices like any Intune-managed endpoints. Set up compliance policies (for OS version, AV status, etc.), Windows Update rings or feature update policies to keep them up-to-date, and use Intune’s Endpoint analytics or Windows Update for Business reports to track device health. Autopilot has done the job of onboarding; from then on, treat the devices as part of your standard device management lifecycle. For instance, if a device is reassigned to a new user, you can invoke Autopilot Reset via Intune to wipe user data and redo the OOBE for the new user—Autopilot v2 will once again apply (just ensure the new user is in the correct group).
Continuous Improvement: Gather feedback from users about the Autopilot process. If many report that a certain app wasn’t ready or some setting was missing on first login, adjust your Autopilot profile or Intune assignments. Autopilot v2’s flexibility allows you to tweak which apps/scripts are in the initial provision vs. post-login. Aim to find the right balance where devices are secure and usable as soon as possible, without overloading the provisioning. Also consider pilot testing Windows 11 feature updates early, since Autopilot behavior can change or improve with new releases (for example, a future Windows 11 update might reduce the appearance of some initial screens in Autopilot v2, etc.).
By following these best practices, you’ll ensure that your organization continues to benefit from Autopilot v2’s efficiencies long after the initial setup. The result is a modern device deployment strategy with minimal hassle, aligned to the cloud-first, zero-touch ethos of Microsoft 365.
Conclusion: Microsoft Autopilot v2 (Windows Autopilot Device Preparation) represents a significant step forward in simplifying device onboarding. By leveraging it in your Microsoft 365 Business environment, you can add new Windows 11 devices with ease – end-users take them out of the box, log in, and within minutes have a fully configured, policy-compliant workstation. The latest updates bring more reliability, insight, and speed to this process, making life easier for IT admins and employees alike. By understanding the new features, following the implementation steps, and adhering to best practices outlined in this guide, you can successfully deploy Autopilot v2 and streamline your device deployment workflow[4][5]. Happy deploying!
Microsoft Defender for Business is a security solution designed for small and medium businesses to protect against cyber threats. When issues arise, a systematic troubleshooting approach helps identify root causes and resolve problems efficiently. This guide provides a step-by-step process to troubleshoot common Defender for Business issues, highlights where to find relevant logs and alerts, and suggests advanced techniques for complex situations. All steps are factual and based on Microsoft’s latest guidance as of 2025.
These are some typical problems administrators encounter with Defender for Business:
Setup and Onboarding Failures: The initial setup or device onboarding process fails. An error like “Something went wrong, and we couldn’t complete your setup” may appear, indicating a configuration channel or integration issue (often with Intune)[1]. Devices that should be onboarded don’t show up in the portal.
Devices Showing As Unprotected: In the Microsoft Defender portal, you might see notifications that certain devices are not protected even though they were onboarded[1]. This often happens when real-time protection is turned off (for instance, if a non-Microsoft antivirus is running, it may disable Microsoft Defender’s real-time protection).
Mobile Device Onboarding Issues: Users cannot onboard their iOS or Android devices using the Microsoft Defender app. A symptom is that mobile enrollment doesn’t complete, possibly due to provisioning not finished on the backend[1]. For example, if the portal shows a message “Hang on! We’re preparing new spaces for your data…”, it means the Defender for Business service is still provisioning mobile support (which can take up to 24 hours) and devices cannot be added until provisioning is complete[1].
Defender App Errors on Mobile: The Microsoft Defender app on mobile devices may crash or show errors. Users report issues like app not updating threats or not connecting. (Microsoft provides separate troubleshooting guides for the mobile Defender for Endpoint app on Android/iOS in such cases[1].)
Policy Conflicts: If you have multiple security management tools, you might see conflicting policies. For instance, an admin who was managing devices via Intune and then enabled Defender for Business’s simplified configuration could encounter conflicts where settings in Intune and Defender for Business overlap or contradict[1]. This can result in devices flipping between policy states or compliance errors.
Intune Integration Errors: During the setup process, an error indicating an integration issue between Defender for Business and Microsoft Intune might occur[1]. This often requires enabling certain settings (detailed in Step 5 below) to establish a proper configuration channel.
Onboarding or Reporting Delays: A device appears to onboard successfully but doesn’t show up in the portal or is missing from the device list even after some time. This could indicate a communication issue where the device is not reporting in. It might be caused by connectivity problems or by an issue with the Microsoft Defender for Endpoint service (sensor) on the device.
Performance or Scan Issues: (Less common with Defender for Business, but possible) – Devices might experience high CPU or scans get stuck, which could indicate an issue with Defender Antivirus on the endpoint that needs further diagnosis (this overlaps with Defender for Endpoint troubleshooting).
Understanding which of these scenarios matches your situation will guide where to look first. Next, we’ll cover where to find the logs and alerts that contain clues for diagnosis.
Key Locations for Logs and Alerts
Effective troubleshooting relies on checking both cloud portal alerts and on-device logs. Microsoft Defender for Business provides information in multiple places:
Microsoft 365 Defender Portal (security.microsoft.com): This is the cloud portal where Defender for Business is managed. The Incidents & alerts section is especially important. Here you can monitor all security incidents and alerts in one place[2]. For each alert, you can click to see details in a flyout pane – including the alert title, severity, affected assets (devices or users), and timestamps[2]. The portal often provides recommended actions or one-click remediation for certain alerts[2]. It’s the first place to check if you suspect Defender is detecting threats or if something triggered an alert that correlates with the issue.
Device Logs via Windows Event Viewer: On each Windows device protected by Defender for Business, Windows keeps local event logs for Defender components. Access these by opening Event Viewer (Start > eventvwr.msc). Key logs include:
Microsoft-Windows-SENSE/Operational – This log records events from the Defender for Endpoint sensor (“SENSE” is the internal code name for the sensor)[3]. If a device isn’t showing up in the portal or has onboarding issues, this log is crucial. It contains events for service start/stop, onboarding success/failure, and connectivity to the cloud. For example, Event ID 6 means the service isn’t onboarded (no onboarding info found), which indicates the device failed to onboard and needs the onboarding script rerun[3]. Event ID 3 means the service failed to start entirely[3], and Event ID 5 means it couldn’t connect to the cloud (network issue)[3]. We will discuss how to interpret and act on these later.
Windows Defender/Operational – This is the standard Windows Defender Antivirus log under Applications and Services Logs > Microsoft > Windows > Windows Defender > Operational. It logs malware detections and actions taken on the device[4]. For troubleshooting, this log is helpful if you suspect Defender’s real-time protection or scans are causing an issue or to confirm if a threat was detected on a device. You might see events like “Malware detected” (Event ID 1116) or “Malware action taken” (Event ID 1117) which correspond to threats found and actions (like quarantine) taken[4]. This can explain, for instance, if a file was blocked and that’s impacting a user’s work.
Other system logs: Standard Windows logs (System, Application) might also record errors (for example, if a service fails or crashes, or if there are network connectivity issues that could affect Defender).
Alerts in Microsoft 365 Defender: Defender for Business surfaces alerts in the portal for various issues, not only malware. For example, if real-time protection is turned off on a device, the portal will flag that device as not fully protected[1]. If a device hasn’t reported in for a long time, it might show in the device inventory with a stale last-seen timestamp. Additionally, if an advanced attack is detected, multiple alerts will be correlated as an incident; an incident might be tagged with “Attack disruption” if Defender automatically contained devices to stop the spread[2] – such context can validate if an ongoing security issue is causing what you’re observing.
Intune or Endpoint Manager (if applicable): Since Defender for Business can integrate with Intune (Endpoint Manager) for device management and policy deployment, some issues (especially around onboarding and policy conflicts) may require checking Intune logs:
In Intune admin center, review the device’s Enrollment status and Device configuration profiles (for instance, if a security profile failed to apply, it could cause Defender settings to not take effect).
Intune’s Troubleshooting + support blade for a device can show error codes if a policy (like onboarding profile) failed.
If there’s a known integration issue (like the one mentioned earlier), ensure the Intune connection and settings are enabled as described in the next sections.
Advanced Hunting and Audit (for advanced users): If you have access to Microsoft 365 Defender’s advanced hunting (which might require an upgraded license beyond Defender for Business’s standard features), you could query logs (e.g., DeviceEvents, AlertEvents) for deeper investigation. Also, the Audit Logs in the Defender portal record configuration changes (useful to see if someone changed a policy right before issues started).
Now, with an understanding of where to get information, let’s proceed with a systematic troubleshooting process.
Step-by-Step Troubleshooting Process
The following steps outline a logical process to troubleshoot issues in Microsoft Defender for Business. Adjust the steps as needed based on the specific symptoms you are encountering.
Step 1: Identify the Issue and Gather Information
Before jumping into configuration changes, clearly define the problem. Understanding the nature of the issue will focus your investigation:
What are the symptoms? For example, “Device X is not appearing in the Defender portal”, “Users are getting no protection on their phones”, or “We see an alert that one device isn’t protected”, etc.
When did it start? Did it coincide with any changes (onboarding new devices, changing policies, installing another antivirus, etc.)?
Who or what is affected? A single device, multiple devices, all mobile devices, a specific user?
Any error messages? Note any message in the portal or on the device. For instance, an error code during setup, or the portal banner saying “some devices aren’t protected”[1]. These messages often hint at the cause.
Gathering this context will guide you on where to look first. For example, an issue with one device might mean checking that device’s status and logs, whereas a widespread issue might suggest a configuration problem affecting many devices.
Step 2: Check the Microsoft 365 Defender Portal for Alerts
Log in to the Microsoft 365 Defender portal (https://security.microsoft.com) with appropriate admin credentials. This centralized portal often surfaces the problem:
Go to Incidents & alerts: In the left navigation pane, click “Incidents & alerts”, then select “Alerts” (or “Incidents” for grouped alerts)[2]. Look for any recent alerts that correspond to your issue. For example, if a device isn’t protected or hasn’t reported, there may be an alert about that device.
Review alert details: If you see relevant alerts, click on one to open the details flyout. Check the alert title and description – these describe what triggered it (e.g. “Real-time protection disabled on Device123” or “Malware detected and quarantined”). Note the severity (Informational, Low, Medium, High) and the affected device or user[2]. The portal will list the device name and perhaps the user associated with it.
Take recommended actions: The alert flyout often includes recommended actions or a direct link to “Open incident page” or “Take action”. For instance, for a malware alert, it may suggest running a scan or isolating the device. For a configuration alert (like real-time protection off), it might recommend turning it back on. Make note of these suggestions as they directly address the issue described[2].
Check the device inventory: Still in the Defender portal, navigate to Devices (under Assets). Find the device in question. The device page can show its onboarding status, last seen time, OS, and any outstanding issues. If the device is missing entirely, that confirms an onboarding problem – skip to Step 4 to troubleshoot that.
**Inspect *Incidents***: If multiple alerts have been triggered around the same time or on the same device, the portal might have grouped them into an *Incident* (visible under the Incidents tab). Open the incident to see a timeline of what happened. This can give a broader context especially if a security threat is involved (e.g. an incident might show that a malware was detected and then real-time protection was turned off – indicating the malware might have attempted to disable Defender).
Example: Suppose the portal shows an alert “Real-time protection was turned off on DeviceXYZ”. This is a clear indicator – the device is onboarded but not actively protecting in real-time[1]. The recommended action would likely be to turn real-time protection back on. Alternatively, if an alert says “New malware found on DeviceXYZ”, you’d know the issue is a threat detection, and the portal might guide you to remediate or confirm that malware was handled. In both cases, you’ve gathered an essential clue before even touching the device.
If you do not see any alert or indicator in the portal related to your problem, the issue might not be something Defender is reporting on (for example, if the problem is an onboarding failure, there may not be an alert – the device just isn’t present at all). In such cases, proceed to the next steps.
Step 3: Verify Device Status and Protection Settings
Next, ensure that the devices in question are configured correctly and not in a state that would cause issues:
Confirm onboarding completion: If a device doesn’t appear in the portal’s device list, ensure that the onboarding process was done on that device. Re-run the onboarding script or package on the device if needed. (Defender for Business devices are typically onboarded via the local script, Intune, Group Policy, etc. If this step wasn’t done or failed, the device won’t show up in the portal.)
Check provisioning status for mobile: If the issue is with mobile devices (Android/iOS) not onboarding, verify that Defender for Business provisioning is complete. As mentioned, the portal (under Devices) might show a message “preparing new spaces for your data” if the service setup is still ongoing[1]. Provisioning can take up to 24 hours for a new tenant. If you see that message, the best course is to wait until it disappears (i.e., until provisioning finishes) before troubleshooting further. Once provisioning is done, the portal will prompt to onboard devices, and then users should be able to add their mobile devices normally[1].
Verify real-time protection setting: On any Windows device showing “not protected” in the portal, log onto that device and open Windows Security > Virus & threat protection. Check if Real-time protection is on. If it’s off and cannot be turned on, check if another antivirus is installed. By design, onboarding a device running a third-party AV can cause Defender’s real-time protection to be automatically disabled to avoid conflict[1]. In Defender for Business, Microsoft expects Defender Antivirus to be active alongside the service for best protection (“better together” scenario)[1]. If a third-party AV is present, decide if you will remove it or live with Defender in passive mode (which reduces protection and triggers those alerts). Ideally, ensure Microsoft Defender Antivirus is enabled.
Policy configuration review: If you suspect a policy conflict or misconfiguration, review the policies applied:
In the Microsoft 365 Defender portal, go to Endpoints > Settings > Rules & policies (or in Intune’s Endpoint security if that’s used). Ensure that you haven’t defined contradictory policies in multiple places. For example, if Intune had a policy disabling something but Defender for Business’s simplified setup has another setting, prefer one system. In a known scenario, an admin had Intune policies and then used the simplified Defender for Business policies concurrently, leading to conflicts[1]. The resolution was to delete or turn off the redundant policies in Intune and let Defender for Business policies take precedence (or vice versa) to eliminate conflicts[1].
Also verify tamper protection status – by default, tamper protection is on (preventing unauthorized changes to Defender settings). If someone turned it off for troubleshooting and forgot to re-enable, settings could be changed without notice.
Intune onboarding profile (if applicable): If devices were onboarded via Intune (which should be the case if you connected Defender for Business with Intune), check the Endpoint security > Microsoft Defender for Endpoint section in Intune. Ensure there’s an onboarding profile and that those devices show as onboarded. If a device is stuck in a pending state, you may need to re-enroll or manually onboard.
By verifying these settings, you either fix simple oversights (like turning real-time protection back on) or gather evidence of a deeper issue (for example, confirming a device is properly onboarded, yet still not visible, implying a reporting issue, or confirming there’s a policy conflict that needs resolution in the next step).
Step 4: Examine Device Logs (Event Viewer)
If the issue is not yet resolved by the above steps, or if you need more insight into why something is wrong, dive into the device’s event logs for Microsoft Defender. Perform these checks on an affected device (or a sample of affected devices if multiple):
Open Event Viewer (Local logs): On the Windows device, press Win + R, type eventvwr.msc and hit Enter. Navigate to Applications and Services Logs > Microsoft > Windows and scroll through the sub-folders.
Check “SENSE” Operational log: Locate Microsoft > Windows > SENSE > Operational and click it to open the Microsoft Defender for Endpoint service log[3]. Look for recent Error or Warning events in the list:
Event ID 3: “Microsoft Defender for Endpoint service failed to start.” This means the sensor service didn’t fully start on boot[3]. Check if the Sense service is running (in Services.msc). If not, an OS issue or missing prerequisites might be at fault.
Event ID 5: “Failed to connect to the server at \.” This indicates the endpoint could not reach the Defender cloud service URLs[3]. This can be a network or proxy issue – ensure the device has internet access and that security.microsoft.com and related endpoints are not blocked by firewall or proxy.
Event ID 6: “Service isn’t onboarded and no onboarding parameters were found.” This tells us the device never got the onboarding info – effectively it’s not onboarded in the service[3]. Possibly the onboarding script never ran successfully. Solution: rerun onboarding and ensure it completes (the event will change to ID 11 on success).
Event ID 7: “Service failed to read onboarding parameters”[3] – similar to ID 6, means something went wrong reading the config. Redeploy the onboarding package.
Other SENSE events might point to registry permission issues or feature missing (e.g., Event ID 15 could mean the SENSE service couldn’t start due to ELAM driver off or missing components – those cases are rare on modern systems, but the event description will usually suggest enabling a feature or a Windows update[5][5]).
Each event has a description. Compare the event’s description against Microsoft’s documentation for Defender for Endpoint event IDs to get specific guidance[3][3]. Many event descriptions (like examples above) already hint at the resolution (e.g., check connectivity, redeploy scripts, etc.).
Check “Windows Defender” Operational log: Next, open Microsoft > Windows > Windows Defender > Operational. Look for recent entries, especially around the time the issue occurred:
If the issue is related to threat detection or a failed update, you might see events in the 1000-2000 range (these correspond to malware detection events and update events).
For example, Event ID 1116 (MALWAREPROTECTION_STATE_MALWARE_DETECTED) means malware was detected, and ID 1117 means an action was taken on malware[4]. These confirm whether Defender actually caught something malicious, which might have triggered further issues.
You might also see events indicating if the user or admin turned settings off. Event ID 5001-5004 range often relates to settings changes (like if real-time protection was disabled, it might log an event).
The Windows Defender log is more about security events than errors; if your problem is purely a configuration or onboarding issue, this log might not show anything unusual. But it’s useful to confirm if, say, Defender is working up to the point of detecting threats or if it’s completely silent (which could mean it’s not running at all on that device).
Additional log locations: If troubleshooting a device connectivity or performance issue, also check the System log in Event Viewer for any relevant entries (e.g., Service Control Manager errors if the Defender service failed repeatedly). Also, the Security log might show Audit failures if, for example, Defender attempted an action.
Analyze patterns: If multiple devices have issues, compare logs. Are they all failing to contact the service (Event ID 5)? That could point to a common network issue. Are they all showing not onboarded (ID 6/7)? Maybe the onboarding instruction wasn’t applied to that group of devices or a script was misconfigured.
By scrutinizing Event Viewer, you gather concrete evidence of what’s happening at the device level. For instance, you might confirm “Device A isn’t in the portal because it has been failing to reach the Defender service due to proxy errors – as Event ID 5 shows.” Or “Device B had an event indicating onboarding never completed (Event 6), explaining why it’s missing from portal – need to re-onboard.” This will directly inform the fix.
Step 5: Resolve Configuration or Policy Issues
Armed with the information from the portal (Step 2), settings review (Step 3), and device logs (Step 4), you can now take targeted actions to fix the issue.
Depending on what you found, apply the relevant resolution below:
If Real-Time Protection Was Off: Re-enable it. In the Defender portal, ensure that your Next-generation protection policy has Real-time protection set to On. If a third-party antivirus is present and you want Defender active, consider uninstalling the third-party AV or check if it’s possible to run them side by side. Microsoft recommends using Defender AV alongside Defender for Business for optimal protection[1]. Once real-time protection is on, the portal should update and the “not protected” alert will clear.
If Devices Weren’t Onboarded Successfully: Re-initiate the onboarding:
For devices managed by Intune, you can trigger a re-enrollment or use the onboarding package again via a script/live response.
If using local scripts, run the onboarding script as Administrator on the PC. After running, check Event Viewer again for Event ID 11 (“Onboarding completed”)[3].
For any devices still not appearing, consider running the Microsoft Defender for Endpoint Client Analyzer on those machines – it’s a diagnostic tool that can identify issues (discussed in Advanced section).
If Event Logs Show Connectivity Errors (ID 5, 15): Ensure the device has internet access to Defender endpoints. Make sure no firewall is blocking:
URLs like *.security.microsoft.com, *windows.com related to Defender cloud. Proxy settings might need to allow the Defender service through. See Microsoft’s documentation on Defender for Endpoint network connections for required URLs.
After adjusting network settings, force the device to check in (you can reboot the device or restart the Sense service and watch Event Viewer to see if it connects successfully).
If Policy Conflicts are Detected: Decide on one policy source:
Option 1: Use Defender for Business’s simplified configuration exclusively. This means removing or disabling parallel Intune endpoint security policies that configure AV or Firewall or Device Security, to avoid overlap[1].
Option 2: Use Intune (Endpoint Manager) for all device security policies and avoid using the simplified settings in Defender for Business. In this case, go to the Defender portal settings and turn off the features you are managing elsewhere.
In practice, if you saw conflicts, a quick remedy is to delete duplicate policies. For example, if Intune had an Antivirus policy and Defender for Business also has one, pick one to keep. Microsoft’s guidance for a situation where an admin uses both was to delete existing Intune policies to resolve conflicts[1].
After aligning policies, give it some time for devices to update their policy and then check if the conflict alerts disappear.
If Integration with Intune Failed (Setup Error): Follow Microsoft’s recommended fix which involves three steps[1][1]:
In the Defender for Business portal, go to Settings > Endpoints > Advanced Features and ensure Microsoft Intune connection is toggled On[1].
Still under Settings > Endpoints, find Configuration management > Enforcement scope. Make sure Windows devices are selected to be managed by Defender for Endpoint (Defender for Business)[1]. This allows Defender to actually enforce policies on Windows clients.
In the Intune (Microsoft Endpoint Manager) portal, navigate to Endpoint security > Microsoft Defender for Endpoint. Enable the setting “Allow Microsoft Defender for Endpoint to enforce Endpoint Security Configurations” (set to On)[1]. This allows Intune to hand off certain security configuration enforcement to Defender for Business’s authority. These steps establish the necessary channels so that Defender for Business and Intune work in harmony. After doing this, retry the setup or onboarding that failed. The previous error message about the configuration channel should not recur.
If Onboarding Still Fails or Device Shows Errors: If after trying to onboard, the device still logs errors like Event 7 or 15 indicating issues, consider these:
Run the onboarding with local admin rights (ensure no permission issues).
Update the device’s Windows to latest patches (sometimes older Windows builds have known issues resolved in updates).
As a last resort, you can try an alternate onboarding method (e.g., if script fails, try via Group Policy or vice versa).
Microsoft also suggests if Security Management (the feature that allows Defender for Business to manage devices without full Intune enrollment) is causing trouble, you can temporarily manually onboard the device to the full Defender for Endpoint service using a local script as a workaround[1]. Then offboard and try again once conditions are corrected.
If a Threat Was Detected (Malware Incident): Ensure it’s fully remediated:
In the portal, check the Action Center (there is an Action center in Defender portal under “Actions & submissions”) to see if there are pending remediation actions (like undo quarantine, etc.).
Run a full scan on the device through the portal or locally.
Once threats are removed, verify if any residual impact remains (e.g., sometimes malware can turn off services – ensure the Windows Security app shows all green).
Perform the relevant fixes and monitor the outcome. Many changes (policy changes, enabling features) may take effect within minutes, but some might take an hour or more to propagate to all devices. You can speed up policy application by instructing devices to sync with Intune (if managed) or simply rebooting them.
Step 6: Verify Issue Resolution
After applying fixes, confirm that the issue is resolved:
Check the portal again: Go back to the Microsoft 365 Defender portal’s Incidents & alerts and Devices pages.
If there was an alert (e.g., device not protected), it should now clear or show as Resolved. Many alerts auto-resolve once the condition is fixed (for instance, turning real-time protection on will clear that alert after the next device check-in).
If you removed conflicts or fixed onboarding, any incident or alert about those should disappear. The device should now appear in the Devices list if it was missing, and its status should be healthy (no warnings).
If a malware incident was being shown, ensure it’s marked Remediated or Mitigated. You might need to mark it as resolved if it doesn’t automatically.
Confirm on the device: For device-specific issues, physically check the device:
Open Windows Security and verify no warning icons are present.
In Event Viewer, see if new events are positive. For example, Event ID 11 in SENSE log (“Onboarding completed”) confirms success[3]. Or Event ID 1122 in Windows Defender log might show a threat was removed.
If you restarted services or the system, ensure they stay running (the Sense service should be running and set to automatic).
Test functionality: Perform a quick test relevant to the issue:
If mobile devices couldn’t onboard, try onboarding one now that provisioning is fixed.
If real-time protection was off, intentionally place a test EICAR anti-malware file on the machine to see if Defender catches it (it should, if real-time protection is truly working).
If devices were not reporting, force a machine to check in (by running MpCmdRun -SignatureUpdate to also check connectivity).
These tests confirm that not only is the specific symptom gone, but the underlying protection is functioning as expected.
If everything looks good, congratulations – the immediate issue is resolved. Make sure to document what the cause was and how it was fixed, for future reference.
Step 7: Escalate to Advanced Troubleshooting if Needed
If the problem persists despite the above steps, or if logs are pointing to something unclear, it may require advanced troubleshooting:
Multiple attempts failed? For example, if a device still won’t onboard after trying everything, or an alert keeps returning with no obvious cause, then it’s time to dig deeper.
Use the Microsoft Defender Client Analyzer: Microsoft provides a Client Analyzer tool for Defender for Endpoint that collects extensive logs and configurations. In a Defender for Business context, you can run this tool via a Live Response session. Live Response is a feature that lets you run commands on a remote device from the Defender portal (available if the device is onboarded). You can upload the Client Analyzer scripts and execute them to gather a diagnostic package[6][6]. This package can highlight misconfigurations or environmental issues. For Windows, the script MDELiveAnalyzer.ps1 (and related modules like MDELiveAnalyzerAV.ps1 for AV-specific logs) will produce a zip file with results[6][6]. Review its findings for any errors (or provide it to Microsoft support).
Enable Troubleshooting Mode (if performance issue): If the issue is performance-related (e.g., you suspect Defender’s antivirus is causing an application to crash or high CPU), Microsoft Defender for Endpoint has a Troubleshooting mode that can temporarily relax certain protections for testing. This is more applicable to Defender for Endpoint P2, but if accessible, enabling troubleshooting mode on a device allows you to see if the problem still occurs without certain protections, thereby identifying if Defender was the culprit. Remember to turn it off afterwards.
Consult Microsoft Documentation: Sometimes a specific error or event ID might be documented in Microsoft’s knowledge base. For instance, Microsoft has a page listing Defender Antivirus event IDs and common error codes – check those if you have a particular code.
Community and Support Forums: It can be useful to see if others have hit the same issue. The Microsoft Tech Community forums or sites like Reddit (e.g., r/DefenderATP) might have threads. (For example, missing incidents/alerts were discussed on forums and might simply be a UI issue or permission issue in some cases.)
Open a Support Case: When all else fails, engage Microsoft Support. Defender for Business is a paid service; you can open a ticket through your Microsoft 365 admin portal. Provide them with:
A description of the issue and steps you’ve taken.
Logs (Event Viewer exports, the Client Analyzer output).
Tenant ID and device details, if requested. Microsoft’s support can analyze backend data and guide further. They may identify if it’s a known bug or something environment-specific.
Escalating ensures that more complex or rare issues (like a service bug, or a weird compatibility issue) are handled by those with deeper insight or patching ability.
Advanced Troubleshooting Techniques
For administrators comfortable with deeper analysis, here are a few advanced techniques and tools to troubleshoot Defender for Business issues:
Advanced Hunting: This is a query-based hunting tool available in Microsoft 365 Defender. If your tenant has it, you can run Kusto-style queries to search for events. For example, to find all devices that had real-time protection off, you could query the DeviceHealthStatus table for that signal. Or search DeviceTimeline for specific event IDs across machines. It’s powerful for finding hidden patterns (like if a certain update caused multiple devices to onboard late or if a specific error code appears on many machines).
Audit Logs: Especially useful if the issue might be due to an admin change. The audit log will show events like policy changes, onboarding package generated, settings toggled, who did it and when. It helps answer “did anything change right before this issue?” For instance, if an admin offboarded devices by mistake, the audit log would show that.
Integrations and Log Forwarding: Many enterprises use a SIEM for unified logging. While Defender for Business is a more streamlined product, its data can be integrated into solutions like Sentinel (with some licensing caveats)[7]. Even without Sentinel, you could use Windows Event Forwarding to send important Defender events to a central server. That way, you can spot if all devices are throwing error X in their logs. This is beyond immediate troubleshooting, but helps in ongoing monitoring and advanced analysis.
Deep Configuration Checks: Sometimes group policies or registry values can interfere. Ensure no Group Policy is disabling Windows Defender (check Turn off Windows Defender Antivirus policy). Verify that the device’s time and region settings are correct (an odd one, but significant time skew can cause cloud communication issues).
Use Troubleshooting Mode: Microsoft introduced a troubleshooting mode for Defender which, when enabled on a device, disables certain protections for a short window so you can, for example, install software that was being blocked or see if performance improves. After testing, it auto-resets. This is advanced and should be used carefully, but it’s another tool in the toolbox.
Using these advanced techniques can provide deeper insights or confirm whether the issue lies within Defender for Business or outside of it (for example, a network device blocking traffic). Always ensure that after advanced troubleshooting, you return the system to a fully secured state (re-enable anything you turned off, etc.).
Best Practices to Prevent Future Issues
Prevention and proper management can reduce the likelihood of Defender for Business issues:
Keep Defender Components Updated: Microsoft Defender AV updates its engine and intelligence regularly (multiple times a day for threat definitions). Ensure your devices are getting these updates automatically (they usually do via Windows Update or Microsoft Update service). Also, keep the OS patched so that the Defender for Endpoint agent (built into Windows 10/11) is up-to-date. New updates often fix known bugs or improve stability.
Use a Single Source for Policy: Avoid mixing multiple security management platforms for the same settings. If you’re using Defender for Business’s built-in policies, try not to also set those via Intune or Group Policy. Conversely, if you require the advanced control of Intune, consider using Microsoft Defender for Endpoint Plan 1 or 2 with Intune instead of Defender for Business’s simplified model. Consistency prevents conflicts.
Monitor the Portal Regularly: Make it a routine to check the Defender portal’s dashboard or set up email notifications for high-severity alerts. Early detection of an issue (like devices being marked unhealthy or a series of failed updates) can let you address it before it becomes a larger problem.
Educate Users on Defender Apps: If your users install the Defender app on mobile, ensure they know how to keep it updated and what it should do. Sometimes user confusion (like ignoring the onboarding prompt or not granting the app permissions) can look like a “technical issue”. Provide a simple guide for them if needed.
Test Changes in a Pilot: If you plan to change configurations (e.g., enable a new attack surface reduction rule, or integrate with a new management tool), test with a small set of devices/users first. Make sure those pilot devices don’t report new issues before rolling out more broadly.
Use “Better Together” Features: Microsoft often touts “better together” benefits – for example, using Defender Antivirus with Defender for Business for coordinated protection[1]. Embrace these recommendations. Features like Automatic Attack Disruption will contain devices during a detected attack[2], but only if all parts of the stack are active. Understand what features are available in your SKU and use them; missing out on a feature could mean missing a warning sign that something’s wrong.
Maintain Proper Licensing: Defender for Business is targeted for up to 300 users. If your org grows or needs more advanced features, consider upgrading to Microsoft Defender for Endpoint plans. This ensures you’re not hitting any platform limits and you get features like advanced hunting, threat analytics, etc., which can actually make troubleshooting easier by providing more data.
Document and Share Knowledge: Keep an internal wiki or document for your IT team about past issues and fixes. For example, note down “In Aug 2025, devices had conflict because both Intune and Defender portal policies were applied – resolved by turning off Intune policy X.” This way, if something similar recurs or a new team member encounters it, the solution is readily available.
By following best practices, you reduce misconfigurations and are quicker to catch problems, making the overall experience with Microsoft Defender for Business smoother and more reliable.
Additional Resources and Support
For further information and help on Microsoft Defender for Business:
Official Microsoft Learn Documentation: Microsoft’s docs are very useful. The page “Microsoft Defender for Business troubleshooting” on Microsoft Learn covers many of the issues we discussed (setup failures, device protection, mobile onboarding, policy conflicts) with step-by-step guidance[1][1]. The “View and manage incidents in Defender for Business” page explains how to use the portal to handle alerts and incidents[2]. These should be your first reference for any new or unclear issues.
Microsoft Tech Community & Forums: The Defender for Business community forum is a great place to see if others have similar questions. Microsoft MVPs and engineers often post walkthroughs and answer questions. For example, blogs like Jeffrey Appel’s have detailed guides on Defender for Endpoint/Business features and troubleshooting (common deployment mistakes, troubleshooting modes, etc.)[8].
Support Tickets: As mentioned, don’t hesitate to use your support contract. Through the Microsoft 365 admin center, you can start a service request. Provide detailed info and severity (e.g., if a security feature is non-functional, treat it with high importance).
Training and Workshops: Microsoft occasionally offers workshops or webinars on their security products. These can provide deeper insight into using the product effectively (e.g., a session on “Managing alerts and incidents” or “Endpoint protection best practices”). Keep an eye on the Microsoft Security community for such opportunities.
Up-to-date Security Blog: Microsoft’s Security blog and announcements (for example, on the TechCommunity) can have news of new features or known issues. A recent blog might announce a new logging improvement or a known issue being fixed in the next update – which could be directly relevant to troubleshooting.
In summary, Microsoft Defender for Business is a powerful solution, and with the step-by-step approach above, you can systematically troubleshoot issues that come up. Starting from the portal’s alerts, verifying configurations, checking device logs, and then applying fixes will resolve most common problems. And for more complex cases, Microsoft’s support and documentation ecosystem is there to assist. By understanding where to find information (both in the product and in documentation), you’ll be well-equipped to keep your business devices secure and healthy.
In today’s security landscape, it’s not uncommon for organizations to run Microsoft Defender for Business (the business-oriented version of Microsoft Defender Antivirus, part of Microsoft 365 Business Premium) alongside other third-party antivirus (AV) solutions. Below, we provide a detailed report on how Defender for Business operates when another AV is present, how to avoid conflicts between them, and why it’s important to keep Defender for Business installed on devices even if you use a second AV product.
How Defender for Business Interacts with Other Antivirus Solutions
Microsoft Defender for Business is designed to coexist with other antivirus products through an automatic role adjustment mechanism. When a non-Microsoft AV is present, Defender can detect it via the Windows Security Center and adjust its operation mode to avoid conflicts[1]. Here’s how this interaction works:
Active vs. Passive vs. Disabled Mode: On Windows 10 and 11 clients, Defender is enabled by default as the active antivirus unless another AV is installed[1]. If a third-party AV is installed and properly registered with Windows Security Center, Defender will automatically switch to disabled or passive mode[1][1]. In Passive Mode, Defender’s real-time protection and scheduled scans are turned off, allowing the third-party AV to be the primary active scanner[2][1]. (Defender’s services continue running in the background, and it still receives updates[2], but it won’t actively block threats in real-time so long as another AV is active.) If no other AV is present, Defender stays in Active Mode and fully protects the system by default.
🔎 Note: In Windows 11, the presence of certain features like Smart App Control can cause Defender to show “Passive” even without Defender for Business, but this is a special case. Generally, passive mode is only used when the device is onboarded to Defender for Endpoint/Business and a third-party AV is present[1][1].
Detection of Third-Party AV: Defender relies on the Windows Security Center service (also known as the Windows Security Center (wscsvc)) to detect other antivirus products. If the Security Center service is running, it will recognize a third-party AV and signal Defender to step back[1]. If this service is disabled or broken, Defender might not realize another AV is installed and will remain active, leading to two AVs running concurrently – an undesirable situation[1]. It’s crucial that Windows Security Center remains enabled so that Defender can correctly detect the third-party AV and avoid conflict[1].
Passive Mode Behavior: When Defender for Business is in passive mode (device onboarded to Defender and another AV is primary), it stops performing active scans and real-time protection, handing those duties to the other AV[2]. The Defender Antivirus user interface will indicate that another provider is active, and it will grey out or prevent changes to certain settings[2]. In passive mode, Defender still loads its engine and keeps its signatures up to date, but it does not remediate threats in real-time[2]. Think of it as running quietly in the background: it collects sensor data for Defender for Business (for things like Endpoint Detection and Response), but lets the other AV handle immediate threat blocking.
EDR and Monitoring in Passive Mode: Even while passive, Defender for Business’s endpoint detection and response (EDR) component remains functional. The system continues to monitor behavior and can record telemetry of suspicious activity. In fact, Microsoft Defender’s EDR can operate “behind the scenes” in passive mode. If a threat slips past the primary AV, Defender’s EDR may detect it and, if EDR in block mode is enabled, can step in to block or remediate the threat post-breach[1][1]. In security alerts, you might even see Defender listed as the source that blocked a threat, even though it was in passive mode, thanks to this EDR capability[1]. This highlights how Defender for Business continues to add value even when not the primary AV.
On Servers: Note that on Windows Server, Defender does not automatically enter passive mode when a third-party AV is installed (unless specific registry settings are configured)[1][1]. On servers that are onboarded to Defender for Endpoint/Business, you must manually set a registry key (ForceDefenderPassiveMode=1) before onboarding if you want Defender to run passive alongside another AV[1]. Otherwise, you risk having two active AVs on a server (which can cause conflicts), or you may choose to uninstall or disable one of them. Many organizations running third-party AV on servers will either disable Defender manually or set it to passive via policy to prevent overlap[1]. The key point: on clients, the process is mostly automatic; on servers, it requires admin action to configure passive mode.
In summary, Defender for Business is smart about coexisting with other AVs. It uses Windows’ built-in security framework to detect other security products and will yield primary control to avoid contention. By entering passive mode, it ensures your third-party AV can do its job without interference, while Defender continues to run in the background (for updates, EDR, and as a backup). This design provides layered security: you get the benefits of your chosen AV solution and still retain Defender’s visibility and advanced threat detection capabilities in the Microsoft 365 Defender portal.
Common Conflicts When Running Multiple Antivirus Programs
Running two antivirus solutions concurrently without proper coordination can lead to a number of issues. If misconfigured, multiple AVs can interfere with each other and degrade system performance, undermining the security they’re meant to provide. Here are some common conflicts and problems that occur when Defender and a third-party AV operate simultaneously (both in active scanning mode):
High CPU and Memory Usage: Two real-time scanners running at the same time can put a heavy load on system resources. Each will try to scan files as they are accessed, often both scanning the same files. This double-scanning leads to excessive CPU usage, disk I/O, and memory consumption. Users may experience slowdowns, applications taking much longer to open, or the entire system becoming sluggish. In some cases observed in practice, running multiple AV engines caused systems to nearly freeze or become unresponsive due to the constant competition for scanning every file (each thinking the other’s file operations might be malicious)[3][4].
System Instability and Crashes: Beyond just slowness, having two AVs can result in software conflicts that crash one or both of them (or even crash Windows). For example, one AV might hook into the file system to intercept reads/writes, and the second AV does the same. These low-level “hooks” can conflict, potentially causing errors or blue-screen crashes. It’s not uncommon for conflicts between antivirus drivers to lead to system instability, especially if they both try to quarantine or lock a file at the same time[3]. Essentially, the products trip over each other – one might treat the other’s actions as suspicious (a kind of false positive scenario where each thinks “Why is this other process modifying files I’m scanning?”).
False Positives on Each Other: AV programs maintain virus signature databases and often store these in definition files or quarantine folders. A poorly configured scenario could have Defender scanning the other AV’s quarantine or signature files, mistakenly flagging those as malicious (since they contain malware code samples in isolation). Likewise, the third-party AV might scan Defender’s files and flag something benign. Without proper exclusions (discussed later), antivirus engines can identify the artifacts of another AV as threats, leading to confusing alerts or even deleting/quarantining each other’s files.
Competition for Remediation: If a piece of malware is detected on the system, two active AVs might both attempt to take action (delete or quarantine the file). Best case, one succeeds and the other simply reports the file missing; worst case, they lock the file and deadlock, or one restores an item the other removed (thinking it was a necessary system file). This tug-of-war can result in incomplete malware removal or error messages. Conflicting remediation attempts can potentially leave a threat on the system if neither AV completes the cleanup properly due to interference.
User Experience Issues: With two AVs, users might be bombarded by duplicate notifications for the same threat or update. For instance, both Defender and the third-party might pop up “Virus detected!” alerts for the same event. This can confuse end users and IT admins – which one actually handled it? Did both need to be involved? It complicates the support scenario.
Overall Protection Gaps: Ironically, having two AV solutions can reduce overall protection if they conflict. They might each assume the other has handled a threat, or certain features might turn off. For example, earlier versions of Windows Defender (pre-Windows 10) would completely disable if another AV was installed, leaving only the third-party active. If that third-party were misconfigured or expired, and Defender stayed off, the system could be left exposed. Even with passive mode, if something isn’t set right (say Security Center didn’t register the third-party), you could end up with one AV effectively off and the other not fully on either. Misunderstandings of each product’s state could create an unexpected gap where neither is actively protecting as intended.
In short, running two full antivirus solutions in parallel without coordination is not recommended. As one internal cybersecurity memo succinctly put it, using multiple AV programs concurrently can “severely degrade system performance and stability” and often “reduces overall protection efficacy” due to conflicts[3]. The goal should be to have a primary AV and ensure any secondary security software (like Defender for Business in passive mode) is configured in a complementary way, not competing for the same role.
Best Practices to Avoid Conflicts Between Defender and Other AVs
To safely leverage Microsoft Defender for Business alongside another antivirus, you need to configure your environment so that the two solutions cooperate rather than collide. Below are the key steps and best practices to achieve this and prevent conflicts:
Allow Only One Real-Time AV – Rely on Passive Mode:Ensure that only one antivirus is actively performing real-time protection at a time. With Defender present, the simplest approach is to let the third-party AV be the active (primary) protection, and have Microsoft Defender in passive mode (if using Defender for Business/Endpoint). This happens automatically on Windows 10/11 clients when the device is onboarded to Defender for Business and a non-Microsoft AV is detected[1]. You should verify in the Windows Security settings or via PowerShell (Get-MpComputerStatus) that Defender’s status is “Passive” (or “No AV active” if third-party is seen as active in Security Center) on those devices. Do not attempt to force both to be “Active”. (On Windows 10/11, Defender will normally disable itself automatically when a third-party is active, so just let it do so. On servers, see the next step.) The bottom line: pick one AV to be the primary real-time scanner – running two concurrently is not supported or advised[1].
Configure Passive Mode on Servers (or Disable One): On Windows Server systems, manually configure Defender’s mode if you plan to run another AV. Windows Server won’t auto-switch to passive mode just because another AV is installed[1]. Thus, before installing or enabling a third-party AV on a server that’s onboarded to Defender for Business, set the registry key to force passive mode:\ HKLM\SOFTWARE\Policies\Microsoft\Windows Advanced Threat Protection\ForceDefenderPassiveMode = 1 (DWORD)[1].\ Then onboard the server to Defender for Business. This ensures Defender Antivirus runs in passive mode (so it won’t actively scan) even while the other product is active. If you skip this, you might end up with Defender still active alongside the other AV on a server, which can cause conflicts. Alternatively, some admins choose to completely uninstall or disable Defender on servers when using a third-party server AV, to avoid any chance of conflict[1]. Microsoft allows Defender to be removed on Windows Server if desired (via removing the Windows Defender feature)[1], but if you do this, make sure the third-party is always running and up to date, and consider the trade-off (losing Defender’s EDR on that server). In summary, for servers: explicitly set Defender to passive or uninstall it – don’t leave it in an ambiguous state.
Keep the Windows Security Center Service Enabled: As noted, the Windows Security Center (WSC) is the broker that tells Windows which antivirus is active. Never disable the Security Center service. If it’s turned off, Windows cannot correctly recognize the third-party AV, and Defender will not know to go passive – resulting in both AVs active and conflicting[1]. In a warning from Microsoft’s documentation: if WSC is disabled, Defender “can’t detect third-party AV installations and will stay Active,” leading to unsupported conflicts[1]. So, ensure group policies or scripts do not disable or tamper with wscsvc. In troubleshooting scenarios, if you find Defender and a third-party AV both active, check that the Security Center is running properly.
Apply Mutual Exclusions (Whitelist Each Other): To avoid the problem of AVs scanning each other’s files or quarantines, it’s wise to set up exclusions on both sides. In your third-party AV’s settings, add the recommended exclusions for Microsoft Defender Antivirus (for example, exclude %ProgramFiles%\Windows Defender or specific Defender processes like MsMpEng.exe)[1]. This prevents the third-party from mistakenly flagging Defender’s components. Likewise, ensure Defender (when active or even during passive periodic scans) excludes the other AV’s program folders, processes, and update directories. Many enterprise AV solutions publish a list of directories/processes to exclude for compatibility. Following these guidelines will reduce unnecessary friction – each AV will essentially ignore the other. Microsoft’s guidance specifically states to “Make sure to add Microsoft Defender Antivirus and Microsoft Defender for Endpoint binaries to the exclusion list of the non-Microsoft antivirus solution”[1]. Doing so means, even if a periodic scan occurs, the AVs won’t scan each other.
Disable Redundant Features to Prevent Overlap: Modern antivirus suites often include more than just file scanning – they might have their own firewall, web filtering, tamper protection, etc. Consider turning off overlapping features in one of the products to avoid confusion. For instance, if your third-party AV provides a firewall that you enable, you might keep the Windows Defender Firewall on or off based on support guidance (usually it’s fine to keep Windows Firewall on alongside, but not two third-party firewalls). Similarly, both Defender and some third-party AVs have ransomware protection (Controlled Folder Access in Defender, versus the third-party’s module). Running both ransomware protection modules might cause legitimate app blocks. Decide which product’s module to use. Coordinate things like exploit prevention or email protection – if you have Defender for Office 365 filtering email, maybe you don’t need the third-party’s Outlook plugin scanning attachments too (or vice versa). The goal is to configure a complementary setup, where each tool covers what the other does not, rather than both doing the same job twice.
Keep Both Solutions Updated: Even though Defender is in passive mode, do not neglect updating it. Microsoft Defender will continue to fetch security intelligence updates (malware definitions) and engine updates via Windows Update or your management tool[2]. Ensure your systems are still getting these. The reason is twofold: (a) if Defender needs to jump in (say the other AV is removed or a new threat appears), it’s armed with current definitions; and (b) the Defender EDR sensors use the AV engine to some extent for analysis, so having the latest engine version and definitions helps it recognize malicious patterns. Similarly, of course, keep the third-party AV fully updated. In short, update both engines regularly so that no matter which one is protecting or monitoring, it’s up to date with the latest threat intelligence. This also means maintaining valid licenses/subscriptions for the third-party AV – if it expires, Defender can take over, but it’s best not to have lapse periods.
Optionally Enable Periodic Scanning by Defender: Windows 10 and 11 have a feature called “Periodic scanning” (also known as Limited Periodic Scanning) where, even if another antivirus is active, Microsoft Defender will perform an occasional quick scan of the system as a second opinion. This is off by default in enterprise when another AV is registered, but an administrator can enable it via Windows Security settings or GPO. In passive mode specifically, scheduled scans are generally disabled (ignored)[1]. However, Windows has a fallback mechanism: by default, every 30 days Defender will do a quick scan if it’s installed (this is the “catch-up scan” default)[1]. If you want this added layer of assurance, you can leave that setting. If you do not want Defender doing any scanning at all (to fully avoid even periodic performance impact), you can disable these catch-up scans via policy[1]. Many organizations actually leave it as is, so that if the primary AV missed something for a while, Defender might catch it during a monthly scan. This periodic scanning is a lightweight safeguard – it shouldn’t conflict because it’s infrequent and by design it runs when the PC is idle. Just be aware of it; tune or disable it via group policy if your third-party vendor recommends turning it off.
By following the above steps, you ensure that Defender for Business and your third-party antivirus operate harmoniously: one provides active protection, the other stands by with auxiliary protection and insight. Properly configured, you won’t suffer slowdowns or weird conflicts, and you’ll still reap security benefits from both solutions.
Ensuring Continuous Protection and Real-Time Security
A major concern when using two security solutions is preserving continuous real-time protection – you want no gaps in coverage. With one AV in passive mode, how do you ensure the system is still protected at all times? Let’s clarify how Defender for Business works in tandem with a primary AV to maintain solid real-time defense:
Primary AV Handles Real-Time Scanning: In our scenario, the third-party AV is the primary real-time defender. It will intercept file events, scan for malware, and block threats in real-time. As long as it’s running normally, your system is actively protected by that AV. Microsoft Defender, being in passive mode, will not actively scan files or processes (it’s not duplicating the effort)[2]. This means no double-scanning overhead and no contention – the third-party product is in charge of first-line protection.
Microsoft Defender’s EDR Watches in the Background: Even though Defender’s anti-malware component is passive, its endpoint detection and response capabilities remain at work. Microsoft Defender for Business includes the same kind of EDR as Defender for Endpoint. This EDR works by analyzing behavioral signals on the system (for example, sequences of process executions, script behavior, registry changes that might indicate an attack in progress). Defender’s EDR operates continuously and is independent of whether Defender is the active AV or not[1][1]. So, while your primary AV might catch known malicious files, Defender’s EDR is observing patterns and can detect more subtle signs of an attack (like file-less malware or attacker techniques that don’t drop classic virus files).
EDR in Block Mode – Stopping What Others Miss: If you have enabled EDR in block mode (a feature in Defender for Endpoint/Business), Microsoft’s EDR will not just alert on suspicious activity – it can take action to contain the threat, even when Defender AV is passive. For example, suppose a piece of malware that wasn’t in the primary AV’s signature database executes on the machine. It starts exhibiting ransomware-like behavior (mass file modifications) or tries to inject into system processes. Defender’s EDR can detect this malicious behavior and step in to block or quarantine the offending process[1][1]. This is done using Defender’s antivirus engine in the background (“passive mode” doesn’t mean completely off – it can still kill a process via EDR). In such a case, you might see an alert in the Microsoft 365 Defender portal that says “Threat remediated by Microsoft Defender Antivirus (EDR block mode)” even though your primary AV was active. EDR in block mode essentially provides a safety net: it addresses threats that slip past traditional antivirus defenses, leveraging the behavioral sensors and cloud analysis. This ensures that real-time protection isn’t solely reliant on file signatures – advanced attacks can be stopped by Defender’s cloud-driven intelligence.
Automatic Fallback if Primary AV Fails: Another aspect of continuous protection is what happens if the primary AV is for some reason not running. Microsoft has designed Defender to act as a fail-safe. If the third-party AV is uninstalled or disabled (intentionally or by malware), Defender will sense the change via Security Center and can automatically switch from passive to active mode[1]. For instance, if an attacker tries to turn off your third-party antivirus, Windows will notice there’s no active AV and will re-activate Microsoft Defender Antivirus to ensure the machine isn’t left defenseless[1]. This is hugely important – it means there’s minimal gap in protection. Defender will pick up the real-time protection role almost immediately. (It’s also a reason to keep Defender updated; if it has to step in, you want it current.) So, whether due to a lapsed AV subscription, a user error, or attacker sabotage, Defender is waiting in the wings to auto-enable itself if needed.
Real-Time Cloud Lookups: Both your primary AV and Defender (in passive) likely use cloud-based threat intelligence for blocking brand new threats (Defender calls this Cloud-Delivered Protection or Block at First Sight). In passive mode, Defender’s cloud lookup for new files is generally off (since it’s not actively scanning)[1]. However, if EDR block mode engages or if you run a manual or periodic scan, Defender will utilize the cloud query to get the latest verdict on suspicious items. Meanwhile, your primary AV might have its own cloud lookup. Make sure that feature is enabled on the primary AV for maximum real-time efficacy. Defender’s presence doesn’t impede that.
Attack Surface Reduction and Other Preventive Policies: Some security features of Defender (like Attack Surface Reduction rules, controlled folder access, network protection, etc.) only function when Defender AV is active[1]. In passive mode, those specific Defender enforcement features are not active (since the assumption is that similar protections might be provided by the primary AV). To ensure you have similar real-time hardening, see if your third-party solution offers equivalents: e.g., exploit protection, web filtering, ransomware protection. If not, consider whether you actually want Defender to be the one providing those (which would require it to be active). We’ll cover these features more in the next section, but the key is: real-time protection is a combination of antivirus scanning and policy-based blocking of behaviors. With Defender passive, you rely on the third-party for those preventative controls or accept the risk of not having them active.
In essence, you maintain continuous protection by leveraging the strengths of both products: the third-party AV actively stops known threats, and Defender for Business supplies a second layer of defense through behavior-based detection and instant backup protection if the first layer falters. Done correctly, this hybrid approach can actually improve security – you have two sets of eyes (engines) on the system in different ways, without the two stepping on each other’s toes. The key is that Microsoft has built Defender for Endpoint/Business to augment third-party AV, not compete with it, thereby ensuring there’s no lapse in real-time security.
Additional Features and Benefits Defender for Business Provides (That Others Might Not)
Microsoft Defender for Business is more than just an antivirus scanner. It’s a whole platform of endpoint protection capabilities that can offer layers of defense and insight that some third-party AV solutions (especially basic or legacy ones) might lack. Even if you have another AV in place, keeping Defender for Business on your devices means you can leverage these additional features:
Endpoint Detection and Response (EDR): As discussed, Defender brings enterprise-grade EDR to your devices. Many traditional AVs (especially older or consumer-grade ones) focus on known malware and maybe some heuristic detection. Defender’s EDR, however, looks for anomalies and tactics often used by attackers (credential theft attempts, suspicious PowerShell usage, persistence mechanisms, etc.). It can then alert or automatically respond. This kind of capability is often missing in standalone AV products or only present in their premium enterprise editions. With Defender for Business (included in M365 Business Premium), you get EDR capabilities out-of-the-box[5], which is a big benefit for detecting advanced threats like human-operated ransomware or nation-state style attacks that evade signature-based AV.
Threat & Vulnerability Management (TVM): Defender for Business includes threat and vulnerability management features[5]. This means the system can assess your device’s software, configuration, and vulnerabilities and report back a risk score. For example, it might tell you that a certain machine is missing a critical patch or has an outdated application that attackers are exploiting, giving you a chance to fix that proactively. Third-party AV solutions typically do not provide this kind of IT hygiene or vulnerability mitigation guidance.
Attack Surface Reduction (ASR) Rules: Microsoft Defender has a set of ASR rules – special policies that block high-risk behaviors often used by malware. Examples include: blocking Office macros from creating executable content, blocking processes from injecting into others, or preventing scripts from launching downloaded content. These are powerful mitigations against zero-day or unknown threats. However, ASR rules only work when Defender Antivirus is active (or at least in audit mode)[1]. If Defender is passive, its ASR rules aren’t enforced. Some third-party security suites have analogous features (like “Exploit Guard” or behavior blockers), but not all do. By having Defender installed, you at least have the option to enable ASR rules if you decide to pivot Defender to active, or you can use Defender in a testing capacity to audit those rules. It’s worth noting that ASR rules have been very effective at blocking ransomware and script-based attacks in many cases – a capability you might be missing if you rely solely on a basic AV.
Cloud-Delivered Protection & ML: Defender leverages Microsoft’s cloud protection service which employs machine learning and enormous threat intelligence to make split-second decisions on new files (the Block at First Sight feature)[1]. When active, this can detect brand-new malware within seconds by analyzing it in the cloud. If your third-party AV doesn’t have a similar cloud analysis, having Defender available (even if passive) means Microsoft’s cloud brains are just a switch away. In fact, if you run a manual scan with Defender (even while it’s passive for real-time), it will use the cloud lookups to identify new threats. Microsoft’s threat researchers and AI constantly feed Defender new knowledge – by keeping it on your device, you tap into an industry-leading threat intelligence network. (Microsoft’s Defender has been a top scorer in independent AV tests for detection rates, largely thanks to this cloud intelligence.)[1]
Network Protection and Web Filtering: Defender for Endpoint/Business includes Network Protection, which can block outbound connections to dangerous domains or restrict scripts like JavaScript from accessing known malicious URLs[1]. It also offers Web Content Filtering categories (through Defender for Endpoint) to block certain types of web content enterprise-wide. These features require Defender’s network interception to be active; if Defender AV is fully passive, network protection won’t function[1]. But some third-party antiviruses don’t offer network-layer blocking at all. If Defender is installed, you could potentially enable web filtering for your users (note: works fully when Defender is active; in passive, you’d rely on the primary AV’s web protection, if any). Also, SmartScreen integration: Defender works with Windows SmartScreen to block phishing and malicious downloads. Keeping Defender means SmartScreen gets more signal (like reputation info) — for instance, Controlled Folder Access and network protection events can feed into central reporting when Defender is present[1].
Controlled Folder Access (CFA): This is Defender’s anti-ransomware file protection. It prevents untrusted applications from modifying files in protected folders (like Documents, Desktop). CFA is a last-resort shield; if ransomware slips by, it tries to stop it from encrypting your files. Like ASR, CFA only works with Defender active[1]. Many third-party AVs have their own anti-ransomware modules – if yours does, great, you have that protection. If not, know that CFA is available with Defender. Even if you run Defender passive daily, you might choose to temporarily enable Controlled Folder Access if you feel a spike in risk (or run Defender active on a subset of high-risk machines). Just having that feature on the system is a plus.
Integration with Microsoft 365 Ecosystem: Defender for Business integrates with other Microsoft 365 security components – like Defender for Office 365 (for email/phish protection), Azure AD Identity Protection, and Microsoft Cloud App Security. Alerts can be correlated across email, identity, and endpoint. For example, if a user opens a malicious email attachment that third-party AV didn’t flag, Defender’s sensor might detect suspicious behavior on the endpoint and the portal will tie it back to that email (if using 365). Microsoft’s security stack is designed to work together, so having at least the endpoint piece (Defender) present means you’ll get better end-to-end visibility. Third-party AVs often operate in a silo – you’d have to manually correlate an endpoint alert with an email, etc. The unified Microsoft 365 Defender portal will show incidents that combine signals from Defender for Business, making investigation and response more efficient for your IT team.
Centralized Logging and Audit: Defender provides rich audit logs of what it’s doing. If it’s active, it logs every detection, scan, or block in the Windows event logs and reports to the central console. Importantly, even in passive mode, it can report detection information (like if it sees a threat but doesn’t remediate, that info can still be sent to the portal, flagged as “not remediated by AV”). There’s also a note that certain audit events only get generated with Defender present[1]. For instance, tracking the status of AV signature updates on each machine – if Defender is absent, your ability to audit AV health via Microsoft tools might be limited. With Defender installed, Intune or the security portal can report on AV signature currency, regardless of third-party (assuming the third-party reports to Security Center, it may show up there too, but it’s often not as seamless). So for compliance and security ops, Defender ensures you have a baseline of telemetry and logs from the endpoint.
Automated Investigation and Remediation: Defender for Business (Plan 2 features) includes automated investigation capabilities. When an alert is raised (say by EDR or an AV detection), the system can automatically investigate the scope (checking for related evidence on the machine) and even remediate artifacts (like remove a file, kill processes) without waiting for admin intervention. Some third-party enterprise solutions do have automatic remediation, but if yours doesn’t, Defender’s presence means you can utilize this automation to contain threats faster. For example, if a suspicious file is found on one machine, Defender can automatically scan other machines for that file. This is part of the “XDR” (Extended Detection and Response) approach Microsoft uses. It’s an advantage of keeping Defender: you’re effectively adding an agent that can take smart actions across your environment driven by cloud intelligence.
Device Control (USB control): Defender allows for policies like blocking USB drives or only allowing authorized devices (through Intune endpoint security policies). It’s a capability tied into the Defender platform. If you need that kind of device control and your other AV doesn’t provide it, Defender’s agent can deliver those controls (even if the AV scanning part is passive).
In summary, Defender for Business offers a suite of advanced security features – from behavioral blocking, vulnerability management, to deep integration – that go beyond file scanning. Many third-party solutions aimed at SMBs are essentially just antivirus/anti-malware. By keeping Defender deployed, you ensure that you’re not missing out on these advanced protections. Even if you’re not using all of them while another AV is primary, you have the flexibility to turn them on as needed. And critically, if your third-party AV lacks any of these defenses, Defender can fill the gap (provided it’s allowed to operate in those areas).
It’s this breadth of capability that leads cybersecurity experts to often recommend using Defender as a primary defense. One internal analysis noted that adding a redundant third-party AV “introduces substantial security limitations by deactivating or sidelining the advanced, integrated capabilities inherent to the Microsoft 365 ecosystem”[6]. In plain terms: if a third-party AV causes Defender to go passive, you might lose out on the very features listed above (ASR, network protection, etc.). That’s one reason to carefully weigh which product you want in the driver’s seat.
Updates, Patches, and Maintenance in a Dual-AV Setup
Keeping security software up-to-date is critical, and when you have two solutions on a device, you need to maintain both. Here’s how updates and patches are handled for Defender for Business when another AV is installed, and what you should do to ensure smooth updating:
Defender Updates in Passive Mode: Even in passive mode, Microsoft Defender Antivirus continues to receive regular updates. This includes security intelligence (definition) updates and anti-malware engine updates[2]. These updates typically come through Windows Update or WSUS (or whatever update management you use). In the Windows Update settings, you’ll see “Microsoft Defender Antivirus Anti-malware platform updates” and “Definition updates” being applied periodically. Passive mode does not mean “not updated”. Microsoft explicitly advises to keep these updates flowing, because they keep Defender ready to jump in if needed, and also empower the EDR and passive scans with the latest info[2]. So, ensure your update policies allow Defender updates. In WSUS, for instance, don’t decline Defender definition updates thinking they’re unnecessary – they are necessary even if Defender is not the primary AV.
Platform Version Upgrades: Microsoft occasionally updates the Defender platform version (the core binaries). In passive mode, these will still install. They might come as part of cumulative Windows patches or separate installer via Microsoft Update. Keep an eye on them; usually there’s no issue, but just know that the Defender service on the box will occasionally upgrade itself, which could require a service restart. It shouldn’t interfere with the other AV, but it’s part of normal maintenance.
Third-Party AV Updates: Of course, continue to update the third-party AV just as you normally would. Most modern AVs have at least daily definition updates and regular product version updates. There is nothing special to do with Defender present – just apply updates per the vendor’s guidelines. Both Defender and the other AV can update independently without conflict. They typically update different files. If you have very tight change control, note that Defender’s daily definition updates can happen multiple times per day by default (Microsoft often pushes signature updates 2-3 times a day or more). This is usually fine and goes unnoticed, but in offline environments you might manually import them.
No Double-Writing to Disk: One thing to clarify: both AVs updating doesn’t mean double downloading gigabytes of data. Defender definitions are relatively small incremental packages, and third-party ones are similar. So bandwidth impact is minimal. And because one might wonder: “do they try to update at the exact same time and conflict?” – practically, no. Even if by coincidence they did, they’re updating different sets of files (each in their own directories). They aren’t locking the same files, so it’s not a problem.
Patch Compatibility: Generally, there are no special OS patch requirements for running in passive mode. Apply your Windows patches as normal. Microsoft Defender is a part of Windows, so OS patches can include improvements or fixes to it, but there’s no need to treat that differently because another AV is there.
Tamper Protection Consideration:Microsoft Defender Tamper Protection is a feature that prevents unauthorized changes to Defender settings (like disabling real-time protection, etc.). When another AV is active, Defender will be off, but Tamper Protection still guards Defender’s settings. This means even administrators or malware can’t easily re-enable Defender or change its configs unless done through proper channels. One scenario: if you wanted to manually set Defender to passive mode via registry on a device after onboarding (perhaps to troubleshoot), Tamper Protection might block the registry change[1][1]. In Windows 11, Tamper Protection is on by default. For the most part, this is a good thing (it stops malware from manipulating Defender). Just remember it exists. If you ever need to fully disable Defender or change its state and find it turning itself back on, Tamper Protection is likely why. You’d disable Tamper Protection via Intune or the security portal temporarily to make changes. Day-to-day, though, Tamper Protection doesn’t interfere with updates – it only protects settings. Both your AVs can update freely with it on.
Monitoring Update Status: In the Microsoft 365 Defender portal or Intune endpoint reports, you can monitor Defender’s status on each machine, including whether its definitions are up to date. If Defender is passive, it will still report its last update time. Use these tools to ensure no device is falling behind on updates. Similarly, monitor the third-party AV’s console for update compliance. It’s important that one solution being up to date isn’t considered sufficient; you want both updated so there’s never a weak link.
Avoiding Update Conflicts: It’s rare, but if both AV engines release an update that requires a reboot (happens maybe if a major version upgrade of the AV engine is installed), you might get two separate reboot notifications. To avoid surprise downtime, coordinate such upgrades during maintenance windows. With Defender, major engine updates are infrequent and usually included in normal Patch Tuesday. With third-party, you control those updates via its management console typically.
In summary, maintain a regular patching regimen for both Defender and the third-party AV. There’s little extra overhead in doing so, and it ensures that whichever solution needs to act at a given moment has the latest capabilities. Microsoft Defender in passive mode should be treated as an active component in terms of updates – feed it, water it, keep it healthy, even if it’s sleeping most of the time.
Known Compatibility Issues and Considerations
Microsoft Defender for Business is built to be compatible with third-party antivirus programs, but there are a few compatibility issues and considerations to be aware of:
Security Center Integration: The biggest “gotcha” is when a third-party antivirus does not properly register with Windows Security Center. Most well-known AV vendors integrate with Windows Security Center so that Windows knows they are installed. If your AV is obscure or not fully integrated, Windows might not recognize it as an active antivirus. In that case, Defender will stay active (since it thinks no other AV is protecting the system)[1]. This results in both running concurrently. The compatibility issue here is less about a bug and more about support: running two AVs is not supported by Microsoft or likely by the other vendor. To resolve this, ensure your AV is one that registers itself correctly. Almost all consumer and enterprise AVs do (Symantec, McAfee, Trend Micro, Sophos, Kaspersky, etc. all hook into Security Center). If you ever encounter an AV that doesn’t, consider switching to one that does, or be prepared to manually disable Defender via policy (with the downsides noted). This issue is rare nowadays.
Tamper Protection Confusion: As mentioned, Windows 11 enabling Tamper Protection by default caused some confusion in scenarios with third-party AV. Tamper Protection might prevent IT admins or deployment scripts from manually disabling Defender services or changing registry keys for Defender. For example, an admin might try to turn off Defender via Group Policy when deploying a third-party AV, but find that Defender keeps turning itself back on. This is because Tamper Protection is forbidding the policy change (since from Defender’s view, an unknown process is trying to turn it off). The compatibility tip here is: if you’re going to centrally disable Defender for some reason despite having Defender for Business, do it via the supported method (security center integration, or Intune “Allow Third-party” policy) rather than brute force, or deactivate Tamper Protection first. Newer versions of Defender are resilient to being turned off if Tamper Protection is on[1].
Double Filtering of Network Traffic: If your third-party AV includes a web filtering component (or a HTTPS scanning proxy), and you also have enabled Defender’s network protection, there could be conflicts in how web traffic is filtered. For instance, two different browser add-ons injecting into traffic might slow down or occasionally break secure connections. The compatibility solution is usually to choose one web filtering mechanism. In Intune or group policy, you might leave Defender’s network protection in audit mode if you prefer the third-party’s web filter, or vice versa. Some admins reported that with certain VPNs or proxies, having multiple network filters (one from Defender, one from another app) could cause websites not to load. In such cases, tune one off.
Email/Anti-Spam Overlap: Defender for Business itself doesn’t include email scanning (that’s handled by Defender for Office 365 in the cloud), but some desktop AV suites install plugins in Outlook to scan attachments. Running those alongside Defender shouldn’t conflict (Defender will see the plugin’s activity as just another program scanning files). But two different email scanners might fight (e.g., if you had two AVs, each might try to quarantine a bad attachment – similar to file conflicts). It’s best to use only one email filtering plugin. If you rely on Exchange Online with Defender for Office 365, you might not need any client-side email scanning at all.
Exclusion Lists Handling: One subtle compatibility note: If you or the third-party AV sets specific process exclusions, just ensure they aren’t too broad. For example, sometimes guidance says “exclude the other AV’s entire folder”. If that folder includes samples of malware (in quarantine), excluding it means Defender might ignore actual malware sitting in that folder. This is usually fine since it’s quarantined, but just something to remember. Also, when the third-party AV upgrades, verify the path/executable names in your exclusions are still correct (they rarely change, but after major version updates, just double-check the exclusions are still relevant).
Uninstallation/Reinstallation: If at some point you uninstall the third-party AV, Windows should automatically re-activate Defender in active mode. Occasionally, we’ve seen cases where after uninstalling one AV, Defender didn’t come back on (maybe due to a policy setting lingering that kept it off). Compatibility tip: if you remove the other AV, run a Defender “re-enable” check. You can do this by simply opening Windows Security and seeing if Defender is on, or using PowerShell Set-MpPreference -DisableRealtimeMonitoring 0 to turn it on. Or reboot – on boot, Security Center should turn Defender on within a few moments. If it doesn’t, you might have a GPO that’s disabling Defender (like “Turn off Windows Defender Antivirus” might have been set to Enabled by some old policy). Remove such policies to allow Defender to run.
Vendor Guidance: Some antivirus vendors in the past explicitly said to uninstall or disable Windows Defender when installing their product. This was common in Windows 7 era. With Windows 10/11, that guidance has changed for many, since Defender auto-disables itself. Nonetheless, always check the documentation of your third-party AV. If the vendor supports coexisting with Defender (most do now via passive mode), follow their best practices – they may have specific instructions or recommendations. If a vendor still insists that you must remove Defender, that’s a sign they might not support any coexistence, in which case running both even in passive might not be officially supported by them. However, since Defender is part of the OS, you really can’t fully remove it on Windows 10/11 (you can only disable it). Most vendors are fine with that.
Bugs and Edge Cases: In rare cases, there could be a bug where a particular version of a third-party AV and Defender have an issue. For example, a few years back there was an update that caused Defender’s passive mode to not engage properly with a specific AV, fixed by a patch later. Keeping both products up to date usually prevents hitting such bugs. If you suspect a compatibility glitch (e.g., after an update, users complain of performance issues again), check forums or support channels; you might need to update one or the other. Microsoft Learn “Defender AV compatibility” pages[1] and the third-party’s knowledge base are good resources.
In summary, the compatibility between Defender for Business and third-party AVs is generally smooth, given the design of passive mode. The main things to do are to ensure proper registration with Windows Security Center and avoid manually forcing things that the system will handle. By following the earlier best practices, most compatibility issues can be circumvented. Always treat both products as part of your security infrastructure – manage them intentionally.
Monitoring Performance and Health of Defender (with Another AV Present)
When running Microsoft Defender for Business alongside another AV, you’ll want to monitor both to ensure they’re performing well and not negatively impacting the system or each other. Here are some tips for monitoring the performance and health of Defender in this scenario:
Use Microsoft 365 Defender Portal and Intune: If your devices are onboarded to Defender for Business, you can see their status in the Microsoft 365 Defender security portal (security.microsoft.com) or in Microsoft Endpoint Manager (Intune) if you’re using it. Look at the Device inventory and Threat analytics. Even in passive mode, devices will show up as “onboarded” with Defender for Endpoint. The portal will indicate if the device’s primary AV is a non-Microsoft solution. It will also raise alerts if, say, the third-party AV is off or signatures out of date (Security Center feeds that info). In Intune’s Endpoint Security > Antivirus report, you might see devices listed with status like “Protected by third-party antivirus” vs “Protected by Defender” – that can help confirm things are as expected.
Monitor Defender’s Running Mode: You can periodically check a sample of devices to ensure Defender is indeed in the intended mode. A quick PowerShell command is:\ Get-MpComputerStatus | Select AMRunningMode\ This will return Normal, Passive, or EDR Block Mode as the current state of Defender AV[1]. In your scenario it should say “Passive” on clients (or “EDR Block Mode” if passive with block mode active). If you ever find it says “Active” when it shouldn’t, that warrants investigation (maybe the other AV isn’t being detected). If it says “Disabled”, that means Defender is turned off completely – which only happens if the device is not onboarded to Defender for Business in presence of another AV, or someone manually disabled it. Prefer passive over disabled, as disabled means no EDR.
Resource Usage Checks: Keep an eye on system performance counters. You can use Task Manager or Performance Monitor to watch the processes. MsMpEng.exe is the main Defender service. In passive mode, its CPU usage should normally be negligible (0% most of the time, maybe a tiny blip during definition updates or periodic scan). If you see MsMpEng.exe consuming a lot of CPU while another AV is also running, something might be off (it might have reverted to active mode, or is scanning something it shouldn’t). Also watch the third-party AV’s processes. It’s normal for one or the other to spike during a scan, but not constantly. Windows Performance Recorder or Analyzer can dig deep if there are complaints, but often just looking at Task Manager over time suffices.
Event Logs: Defender logs events to the Windows Event Log under Microsoft > Windows > Windows Defender/Operational. In passive mode, you might still see events like “Defender updated” or if a scan happened or if an EDR detection occurred. Review these if you suspect any issue. For example, if Defender had to jump in because it found the other AV off, you’d see an event about services starting. Also, if a user accidentally turned off the other AV and Defender turned on, it will log that it updated protection status. These logs can serve as a historical record of how often Defender had to do something.
Performance Baseline: It’s good to get a baseline performance measurement on a test machine with both AVs. Measure boot time, average CPU when idle, time to open common apps, etc. This gives you a reference. Ideally, having Defender passive should have minimal impact on performance beyond what the third-party AV already does. If you find boot is slower with both installed than with just one, consider if both are trying to do startup scans. Many AVs let you disable such startup scans or defragment their loading order. In practice, passive Defender is lightweight.
User Feedback: Don’t forget to gather anecdotal evidence. If users don’t notice any slowdowns or strange pop-ups, that’s a good sign your configuration is working. If they report “my PC seems slow and I see two antivirus icons” or something, then investigate. Ideally, only the third-party AV’s tray icon is visible (Defender doesn’t show a tray icon when a third-party is active; it will show a small Security Center shield if anything, which indicates overall security status). If users aren’t confused, you’ve likely hidden the complexity from them, which is good.
Regular Security Audits: Periodically, conduct a security audit. For example, simulate a threat or run a test EICAR virus file. See which AV catches it. (Note: In passive mode, Defender won’t actively block EICAR if the other AV is handling it. But if you disable the third-party momentarily, Defender should instantly catch it, proving it’s ready as a backup.) These drills can confirm Defender is functional and updated. Also check that alerts from either solution reach the IT admins (for third-party, maybe an email or console alert; for Defender, it would show in the portal).
Check for Conflicting Schedules: Ensure that if you do enable Defender’s periodic scan, it’s scheduled at a different time than the third-party’s full system scan (if that is scheduled). Overlapping full scans could still bog down a machine. Typically Defender’s quick scan is quick enough not to matter, but just to be safe, maybe schedule the third-party weekly full scan at say 2am Sunday, and ensure Defender’s monthly catch-up scan isn’t also Sunday 2am (the default catch-up is every 30 days from last run at any opportunistic time). You might even disable Defender’s scheduled tasks explicitly if you want only on-demand use.
Overall, monitoring a dual-AV setup is about verifying that the primary AV is active and effective, and that Defender remains healthy in the background. Microsoft provides you the tools to see Defender’s status deeply (via its logs and portal), and your third-party AV will have its own status readings. By staying vigilant, you can catch misconfigurations early (like Defender accidentally disabled, or two AVs active after an update) and ensure continued optimal performance.
Risks of Not Having Defender for Business Installed
Given all the above, one might ask: What if we just didn’t install or use Defender at all, since we have another AV? However, there are significant risks and disadvantages to not having Microsoft Defender for Business present on your devices:
Loss of a Backup Layer of Defense: Without Defender installed or enabled, if your primary antivirus fails for any reason, there’s no built-in fallback. Consider scenarios like the subscription for the third-party AV expires and it stops updating or functioning – the system would be left with no modern AV protection if Defender has been removed. Microsoft Defender is essentially the “last line” built into Windows; if it’s gone, an unprotected state is more likely. With Defender around, even if one product is compromised or turned off, the other can step up. If you remove Defender completely (which on Windows 10/11 requires special measures, as it’s core to OS), you are placing all your eggs in the third-party basket.
EDR and Advanced Detection Missing:Defender for Business can’t help you if it’s not there. You lose the entire EDR capability and rich telemetry that comes with the Defender platform. That means if an attacker evades your primary AV, you have much lower chances of detecting them through behavior. It’s like flying blind – without Defender’s sensors, those subtle breach indicators might not be collected at all. Many organizations have discovered breaches only because their EDR (like Defender) caught something unusual; without it, those incidents could run unchecked for longer. So not having Defender means giving up a critical detection mechanism that operates even when malware isn’t caught by traditional means[1][1].
Reduced Visibility and Central Management: If you don’t have Defender on endpoints, you cannot utilize the unified Microsoft 365 security portal for those devices. Your security team would then have to rely solely on the third-party’s console/logs, and potentially correlate with Microsoft 365 data manually. You’d lose the single pane of glass that Microsoft provides for correlating endpoint signals with identity, cloud app, and email signals. Lack of visibility can translate to slower response. For example, if a machine gets infected and it’s only running third-party AV, you might find out via a helpdesk call (“PC acting weird”) rather than an automatic alert in your central SIEM. And if the third-party AV only keeps logs locally (some simpler ones do), an attacker might disable it and erase those logs – you’d have no record, whereas Defender sends data to the cloud portal continuously (harder for an attacker to scrub that remotely stored data).
Missing Specialized Protections: As described before, features like ASR rules, Controlled Folder Access, etc., are not available at all if Defender isn’t installed. Many third-party AV solutions targeted at consumers or SMBs do not have equivalents to these. So if you forgo Defender, you might be forgoing entire classes of defense. For instance, without something like Controlled Folder Access, a new ransomware that slips past the AV could encrypt files freely. Without network protection, a malicious outbound connection to a C\&C server might go unblocked if the other AV isn’t inspecting that. The holistic defense posture is weaker in ways you may not immediately see.
Long-Term Strategic Risk: Microsoft’s security ecosystem (Defender family) is continuously evolving. By not having Defender deployed, you may find it harder in the future to adopt new Microsoft security innovations. For example, Microsoft could release a new feature that requires the Defender agent to be present to leverage hardware-based isolation or firmware scanning. If you’ve kept Defender off your machines, you’d have to scramble to deploy or enable it later to get those benefits. Keeping it on (even passive) “primes” your environment to easily toggle on new protections as they become available.
Compliance and Support: Some compliance standards (or cyber insurance policies) might require that all endpoints have a certain baseline of protection – and specifically, some might recognize Windows Defender as meeting an antivirus requirement. If you removed it, you have to show an alternative is present (which you do with third-party AV). But also consider Microsoft support: if you have an issue or breach, Microsoft’s support might be limited in how much they can help if their tools (Defender/EDR) weren’t present to collect data. Microsoft’s Detection and Response Team (DART) often uses Defender telemetry when investigating incidents. If not present, investigating after-the-fact becomes harder, possibly lengthening downtime or analysis in a serious incident.
No Quick Reaction if Primary AV is Breached: In some advanced attacks, adversaries target security software first – they might disable or bypass third-party antivirus agents (some malware specifically tries to unload common AV engines). Without Defender, once the attacker knocks out your primary AV, the system is completely naked. With Defender present, even if primary is disabled, as noted, Defender can auto-enable and at least provide some protection or alerting[1]. It forces the attacker to deal with two layers of defense, not just one. If you’ve removed it, you’ve made the attacker’s job easier – they have only one thing to circumvent.
Opportunity Cost: You’ve effectively already paid for Defender for Business (it’s included in your Microsoft 365 license), and it doesn’t cost performance when passive – so removing it doesn’t gain much. The risk here is giving up something that could save the day with minimal downside to keeping it. Many see that as not worth it. Using what you have is generally a good security practice – a layered approach.
In short, not having Defender for Business installed means relying solely on one line of defense. If that line is breached or fails, you have nothing behind it. Defense in depth is a core principle of cybersecurity; eliminating Defender removes one of those depths. The safer approach is to keep it around so that even if dormant, it’s ready to spring into action. The risks of not doing so are essentially the inverse of all the reasons to keep it we’ve discussed: fewer protections, fewer alerts, and greater exposure if something goes wrong.
Indeed, an internal team discussion at one organization concluded with a clear recommendation: “fully leverage the built-in Defender solution and avoid deploying redundant AV products” to maximize protection[3]. The reasoning was that adding a second AV (and thereby turning off parts of Defender) often “leaves security gaps” that the built-in solution would have covered[3].
Defender for Business and Overall Security Posture
Microsoft Defender for Business plays an important role in your overall security posture, even if you’re using a third-party antivirus. It provides enterprise-grade security enhancements that, when combined with another AV in a layered approach, can significantly strengthen your defense strategy:
Layered Security (“Defense in Depth”): Running Defender for Business alongside another AV embodies the principle of layered security. Different security tools have different detection algorithms and heuristics. What one misses, the other might catch. For example, your third-party AV might excel at catching known malware via signatures, whereas Defender’s cloud AI might catch a brand-new ransomware based on behavior. Together, they cover more ground. This layered approach reduces the risk of any single point of failure in your defenses[4]. It’s akin to having two independent alarm systems on a house – if one doesn’t go off, the other might.
Unified Security Framework: By keeping Defender in the mix, you tie your endpoints into Microsoft’s broader security framework. Microsoft 365 offers Secure Score metrics, incident management, threat analytics, and more – much of which draws on data from Defender for Endpoint. With Defender for Business on devices, you can leverage these tools to continually assess and improve your posture. For instance, Secure Score will suggest actions like “Turn on credential theft protection” (an ASR rule) – which you can only do if Defender is there to enforce it. Thus, Defender forms a backbone for implementing many best practices. It also means your endpoint security is integrated with identity protection (Azure AD), cloud app security, and Office 365 security, giving you a holistic posture instead of siloed protections.
Simplified Management (if used as primary): While currently you are using a third-party AV, some organizations eventually decide to consolidate to one solution. If at some point you opt to use Defender for Business as your sole AV, you can manage it through the same Microsoft 365 admin portals, reducing complexity. Even now, with a dual setup, using Intune or Group Policy to manage Defender settings is relatively straightforward. In contrast, not having Defender means deploying and managing another agent for EDR if you want those features, etc. Defender for Business lowers management overhead by being part of the existing Windows platform and Microsoft cloud management. Your security posture benefits from fewer moving parts and deeper integration.
Proven Protection Efficacy: Defender has matured to have protection efficacy on par with or exceeding many third-party AVs in independent tests[5]. It consistently scores high in malware detection, often 99%+ detection rates in AV-Test and AV-Comparatives evaluations. Knowing that Defender is active (even if passive mode) in your environment provides confidence that you’re not leaving protection on the table. It brings Microsoft’s massive threat intelligence (tracking 8+ trillion signals a day across Windows, Azure, etc.) to your endpoints. That contributes to your posture by ensuring you have world-class threat intel baked in. If your other AV slips, Defender likely knows about the new threat from its cloud intel.
Incident Response Readiness: In the event of a security incident, having Defender deployed can greatly assist in investigation and containment. Your overall posture isn’t just prevention, but also the ability to respond. With Defender for Business, you can isolate machines, collect forensic data, or run antivirus scans remotely from the portal. Many third-party AVs do have some remote actions, but they may not integrate as well with a full incident response workflow. By using Defender’s capabilities, you can respond faster and more uniformly. This is a significant posture advantage – it’s not just about lowering chances of breach, but minimizing impact if one occurs.
Cost Effectiveness and Coverage: From a business perspective, since Defender for Business is included in your Microsoft 365 Business Premium license (or available at low cost standalone), you are maximizing value by using it. Some companies pay considerable sums for separate EDR tools to layer on top of AV. If you use Defender, you already have an EDR. This means you can possibly streamline costs without sacrificing security, which indirectly improves your security posture by allowing budget to be spent on other areas (like user training or network security) rather than redundant AV tools. A Microsoft partner presentation noted that to get equivalent capabilities (like EDR, threat & vulnerability management, etc.) from many competitors, SMBs often have to buy more expensive enterprise products or multiple add-ons, whereas Defender for Business includes them all for one price[5]. In other words, Defender for Business offers an “enterprise-grade” security stack – as part of your suite – leveling up your posture to a big-business level at a small-business cost.
User and Device Trust (Zero Trust): Modern security models like Zero Trust require continuous assessment of device health. Defender for Business provides signals like “Is the device compromised? Is antivirus up to date? Are there active threats?” that can feed into conditional access policies. For example, you could enforce that only devices with Defender healthy (reporting no threats) can access certain sensitive cloud resources. Without Defender, you might not have a reliable device health attestation unless the third-party integrates with Azure AD (few do yet). Therefore, having Defender improves your posture by enabling stricter control over device-driven risk.
In conclusion, Defender for Business significantly bolsters your security posture by adding layers of detection, response, and integration. It helps transform your strategy from just “an antivirus on each PC” to “an intelligent, cloud-connected defense system.” Many businesses, especially SMBs, have found that leaning into the Microsoft Defender ecosystem gives them security capabilities they previously thought only large enterprises could afford or manage. It’s a key reason why even if you run another AV now, you’d still want Defender in play – it’s providing a safety net and broader protection context that stand-alone AV can’t match.
To quote a relevant statistic: Over 70% of small businesses now recognize that cyber threats are a serious business risk[7]. Solutions like Defender for Business, with its broad protective umbrella, directly address that concern by elevating an organization’s security posture to handle modern threats. Your posture is strongest when you are using all tools at your disposal in a coordinated way – and Defender is a crucial part of the Windows security toolkit.
Real-World Example and Case Study
Many organizations have navigated the decision of using Microsoft Defender alongside (or versus) another antivirus. One illustrative example is a small professional services firm (fictitiously, “Contoso Ltd”) which initially deployed a well-known third-party AV on all their PCs, with Microsoft Defender disabled. They later enabled Defender for Business in passive mode to see its benefits:
Initial Setup: Contoso had ThirdParty AV as the only active protection. They noticed occasional ransomware incidents where files on one PC got encrypted. ThirdParty AV caught some, but one incident slipped through via a new variant that the AV didn’t recognize.
Enabling Defender for Business: The IT team onboarded all devices to Microsoft Defender for Business (via their Microsoft 365 Business Premium subscription) while keeping ThirdParty AV as primary. Immediately, in the first month, Defender’s portal highlighted a couple of suspicious behaviors on PCs (PowerShell scripts running oddly) that ThirdParty AV did not flag. These turned out to be early-stage malware that hadn’t dropped an actual virus file yet. Defender’s EDR detected the attack in progress and alerted the team, who then intervened before damage was done. This was a turning point – it showed the value of having Defender’s second set of eyes.
Avoiding Conflicts: In this real-world scenario, they did encounter an issue at first: a few PCs became sluggish. On investigation, IT found that those PCs had an outdated build of ThirdParty AV that wasn’t properly registering with Windows Security Center. Defender wrongly stayed active, so both were scanning. After updating ThirdParty AV to the latest version, Defender correctly went passive and the performance issue vanished. This underscores the earlier advice about keeping software updated for compatibility.
Outcome: Over time, Contoso’s IT gained confidence in Defender. They appreciated the consolidated alerting and rich device timeline in the Defender portal (they could see exactly what an attacker tried to do, which ThirdParty AV’s console didn’t show). Eventually, in this case, they decided to run a pilot of using Defender as the sole AV on a subset of machines. They found performance was slightly better and the protection level equal or better (especially with ASR rules enabled). Within a year, Contoso phased out the third-party AV entirely, standardizing on Defender for Business for all endpoints – simplifying management and reducing costs, while still having top-tier protection. During that transition, they always had either one or both engines protecting devices, and never left a gap.
Another scenario to note comes from an internal IT advisory in an organization that had a mix of security tools. After reviewing incidents and system reports, the advisory concluded that running a third-party AV alongside Defender (and thus putting Defender in passive mode) was counterproductive: it “severely degraded performance” and “sidelined advanced threat protection features of Defender for Business, leaving security gaps”[3]. They provided guidance to their teams to minimize use of redundant AV and trust the integrated Defender platform[3]. The result was improved system performance and a more streamlined security posture, with fewer missed alerts.
These examples show that while you can run both, organizations often discover that fully leveraging one robust solution (like Defender for Business) is easier and just as safe, if not safer. Still, if regulatory or company policy demands a specific third-party AV, using Defender in the supportive role as we’ve described can certainly work well. Many businesses do this, especially during a transition period or to evaluate Defender.
The key takeaway from real-world experiences is that Defender for Business has proven itself capable as a full endpoint protection platform, and even in a secondary role it adds value. Companies have caught threats they would have otherwise missed by having that extra layer. And importantly – when configured correctly – running Defender and another AV together has been manageable and stable for those organizations.
Resources for Further Learning and Configuration Guidance
For IT administrators looking to dive deeper into configuring Microsoft Defender for Business alongside other antivirus solutions (or just to maximize Defender’s capabilities), here are some valuable resources and references:
Microsoft Learn Documentation – Defender AV Compatibility: Microsoft’s official docs have a detailed article, “Microsoft Defender Antivirus compatibility with other security products”, which we have referenced. It explains how Defender behaves with third-party AV, covering passive mode, requirements, and scenarios (client vs server) in depth[1][1]. This is a must-read for understanding the mechanics and supported configurations. (Microsoft Learn, updated June 2025).
Microsoft Learn – Defender for Endpoint with third-party AV: There is also content specifically about using Defender for Endpoint (which underpins Defender for Business) alongside other solutions[2][2]. It reiterates that you should keep Defender updated even when another AV is primary, and lists which features are disabled in passive mode. Search for “Antivirus compatibility Defender for Endpoint” on Microsoft Learn.
Microsoft Tech Community Blogs: The Microsoft Defender for Endpoint team posts blogs on the Tech Community. One particularly relevant post is “Microsoft Defender Antivirus: 12 reasons why you need it” by the Defender team[1]. It provides a lot of insight into why Microsoft believes running Defender (especially alongside EDR) is important, including scenarios where third-party AV was in place. URL: (techcommunity.microsoft.com > Microsoft Defender for Endpoint Blog). This is more narrative but very useful for justification and best practices.
Migration Guides: If you are considering moving from a third-party to Defender, Microsoft has a “Migrate to Microsoft Defender for Endpoint from non-Microsoft endpoint protection” guide (Microsoft Learn, updated 2025). It walks through co-existence strategies and phased migration, which is useful even if you’re not fully migrating – it shows how to run in tandem and then switch.
Microsoft 365 Defender Documentation: Since Defender for Business uses the same portal as Defender for Endpoint, Microsoft’s docs on how to use the Microsoft 365 Defender portal to set up policies, view incidents, and use automated investigation are very useful. Look up “Get started with Microsoft Defender for Business”[8] for guidance on deployment and initial setup, and “Use the Microsoft 365 Defender portal” for navigating incidents and alerts.
Vendor-Specific KBs: Check your third-party AV vendor’s knowledge base for any articles about Windows Defender or multiple antivirus. Many vendors have published articles like “Should I disable Windows Defender when using [Our Product]?” which give their official stance. For example, some enterprise AVs have guides for setting up mutual exclusions with Defender. These can save you time and ensure you follow supported steps.
Community and Q\&A: There are Q\&A forums on Microsoft’s Docs site (Microsoft Q\&A) and places like Reddit or Stack Exchange where IT pros discuss real experiences. Searching those for your AV name + Defender can surface specific tips (e.g., someone asking about “Defender passive mode with Symantec Endpoint Protection” might have an answer detailing required settings on Symantec).
Microsoft Support and DART: In the event of an incident or if you need help, Microsoft’s DART (Detection and Response Team) has publicly available guidance (some is on Microsoft Learn as well). While these are more about handling attacks, they often assume Defender is present. A resource: “Microsoft Defender for Endpoint – Investigation Tutorials” can educate you on using the toolset effectively, complementing your other AV.
In all, you have a wealth of information from Microsoft’s official documentation to community wisdom. Leverage the official docs first for configuration guidance, as they are authoritative on how Defender will behave. Then, use community forums to learn from others who have done similar deployments. Keeping knowledge up to date is important – both Defender and third-party AVs evolve, so stay tuned to their update notes and blogs (for instance, new Windows releases might tweak Defender’s behavior slightly, which Microsoft usually documents).
Lastly, as you maintain this dual setup, regularly review Microsoft’s and your AV vendor’s recommendations. Both want to keep customers secure and typically publish best practice guides that can enhance your deployment.
Conclusion: Running Microsoft Defender for Business concurrently with another antivirus solution can be achieved with careful configuration, and it offers significant security advantages by layering protections. By following best practices to avoid conflicts (one active AV at a time, using Defender’s passive mode, adding exclusions, etc.), you can enjoy a harmonious setup where your primary AV and Defender complement each other. This approach strengthens your security posture – Defender for Business brings advanced detection, response, and integration capabilities that fill gaps a standalone AV might leave[6][1], all while providing a safety net if the other solution falters[1].
In today’s threat environment, such a defense-in-depth strategy is extremely valuable. It ensures that your endpoints are not only protected by traditional signature-based methods, but also by cloud-powered intelligence and behavioral analysis. And should you ever choose to transition fully to Microsoft’s solution, you’ll be well-prepared, as Defender for Business will already be installed and familiar in your environment.
TL;DR:Use one antivirus as primary and let Microsoft Defender for Business run alongside in passive mode. Configure them not to conflict. This gives you the benefit of an extra set of eyes (and a ready backup) without the headache of dueling antiviruses. Always keep Defender installed – it’s tightly woven into Windows security and provides crucial layers of protection (like EDR, cloud analytics, and ransomware safeguards) that enhance your overall security. In the end, you’ll achieve stronger security resilience through this layered approach, which is greater than the sum of its parts.[3][1]