Connect Power Automate to Twitter using a Bring Your Own App approach

*** On July 29 the MS docs now say:

The default shared application (Twitter Client application maintained by Microsoft) is no longer available. The connector now supports only one authentication type – Bring your own application. As of June 2023, it requires a paid Enterprise tier application. However, Twitter’s pricing policy might continue to change.

https://learn.microsoft.com/en-us/connectors/twitter/

Twitter or X as it is now, costs are here:

https://developer.twitter.com/en

Enterprise plans will cost >$5,000 per month!


**** On July 19 2023 this configuration starting reporting errors and now no longer seems to work either!

As I have detailed previously:

Power Automate Twitter connector failing

I needed to regenerate the connection to Twitter in my Flows. The following is what worked for me and I hope it can help you as I didn’t find this set out clearly anywhere else. I found that you needed to create all new Twitter connections in your Flows, so remember to record how these are configured before you go and delete anything.

Step 1. Remove any existing Twitter connections in your Data

image

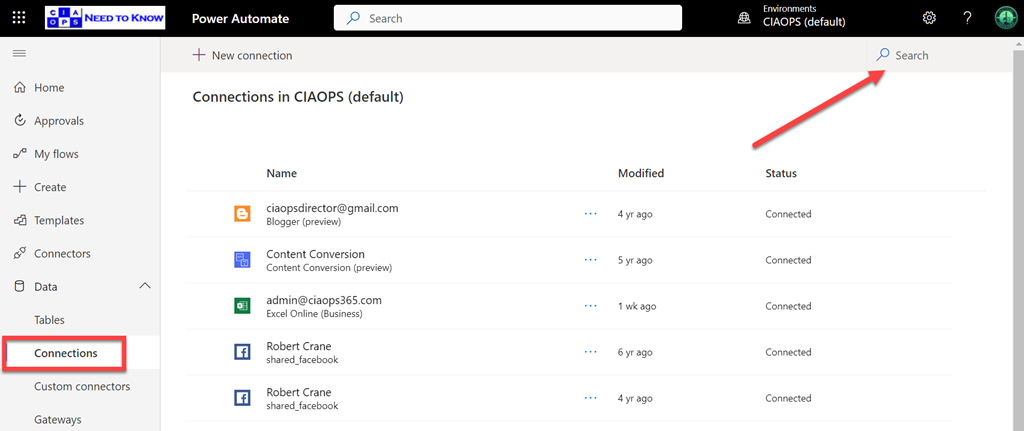
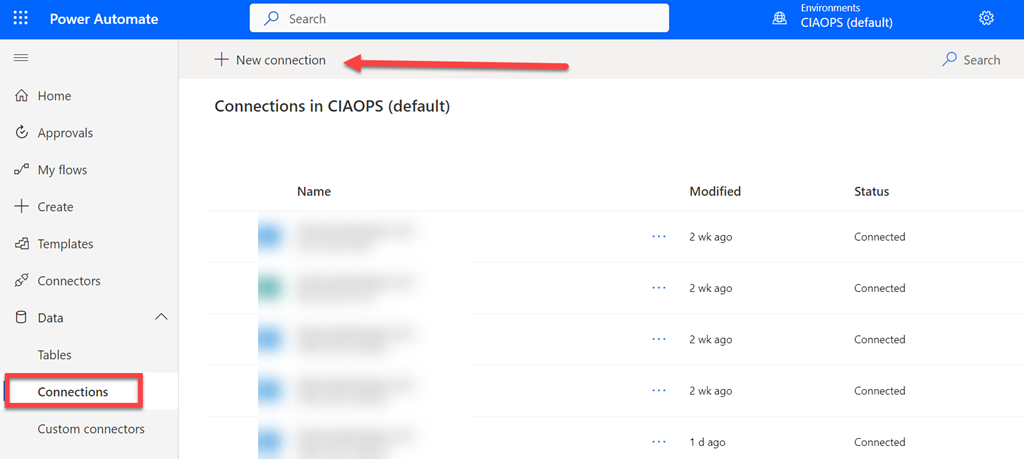
Navigate to Power Automate and select Data and then Connections from the menu on the left. In the top right of this screen you will find a Search box. Into this search box type:

Twitter

image

You should now see a list of all your existing Twitter connections. ALL of these will need to be removed and thus prior, ensure you have recorded what your Twitter actions do in your Flows, because once you delete the connection here you will NOT be able to see what the actions actually did. They will simply show as invalid.

image

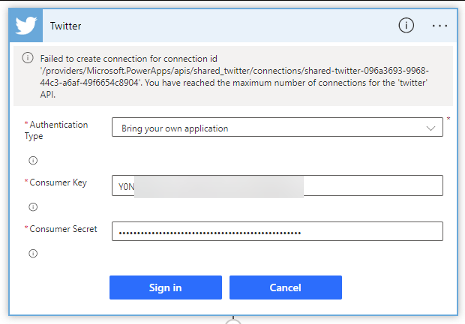
The reason you need to delete ALL the Twitter connections you find is the above error:

Failed to create connection for connection id ‘/providers/MicrosoftPowerApps/apps/shared_twitter/connections/shared-twitter-<guid>’. You have reached the maximum number of connections for the ‘twitter’ API.

I personally found I actually had two connectors. Both years apart, but all must be removed as Twitter now only supports one connection for free.

Step 2. Create Twitter API credentials

Microsoft does provide documentation on this here:

Authentication and Bring your own application

and to start with ensure you are logged into your Twitter account in the browser and navigate to:

https://developer.twitter.com/

image

Select Developer Portal in the top right as shown above.

image

Select the option to Sign up for a Free Account towards the bottom of he page.

image

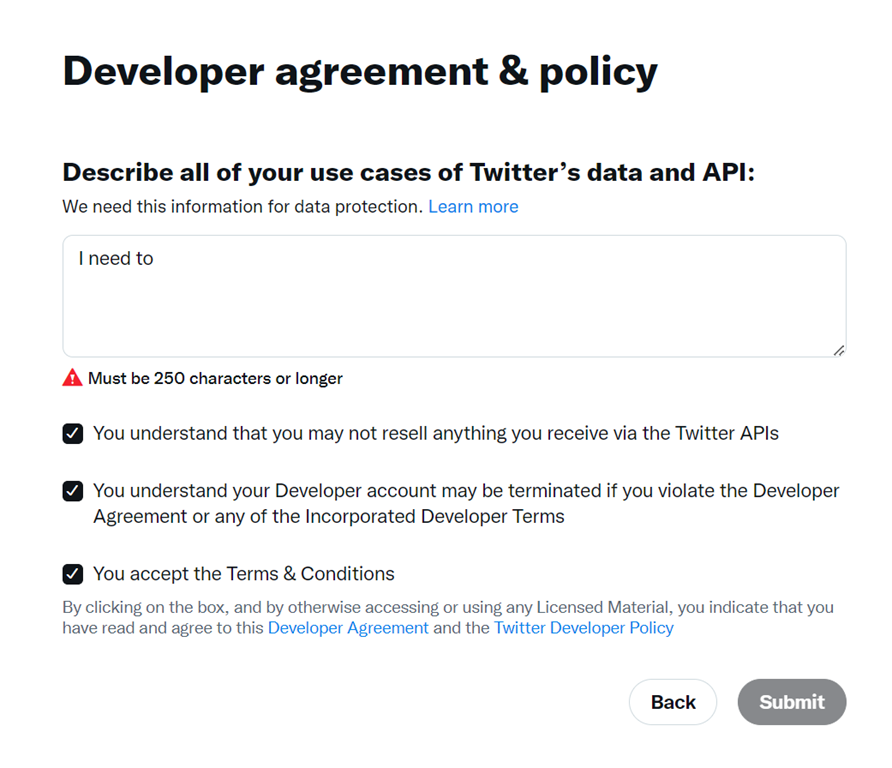
You’ll then need to write a 250 character or more essay and agree to to all the Terms and Conditions before you Submit.

image

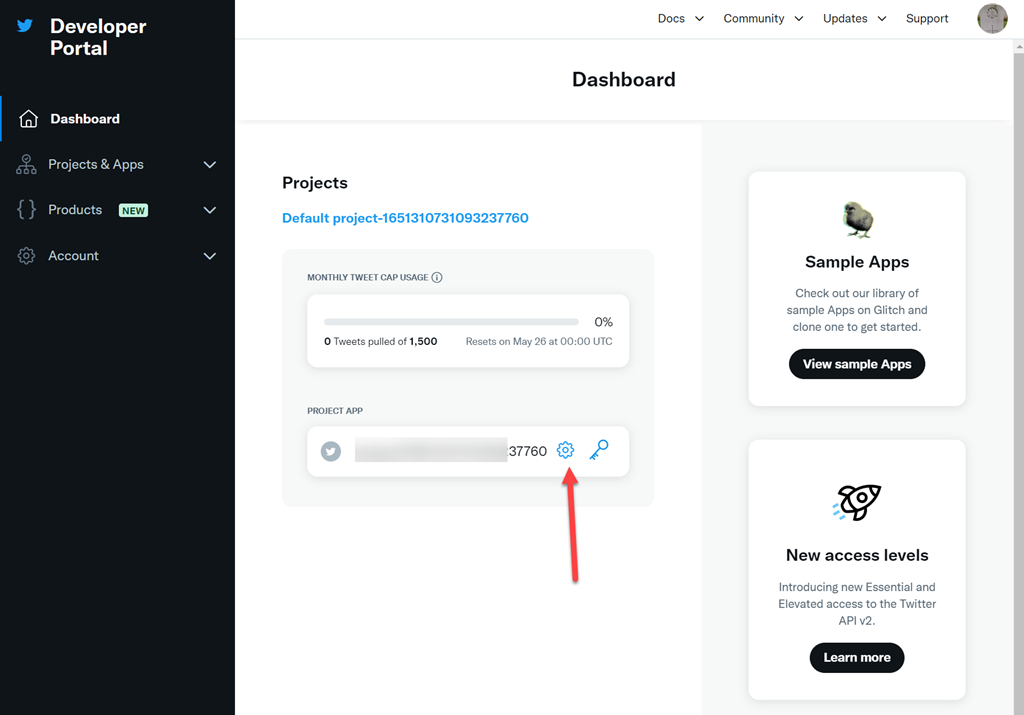
Now select the COG under the default project name that has been created for you as shown above.

image

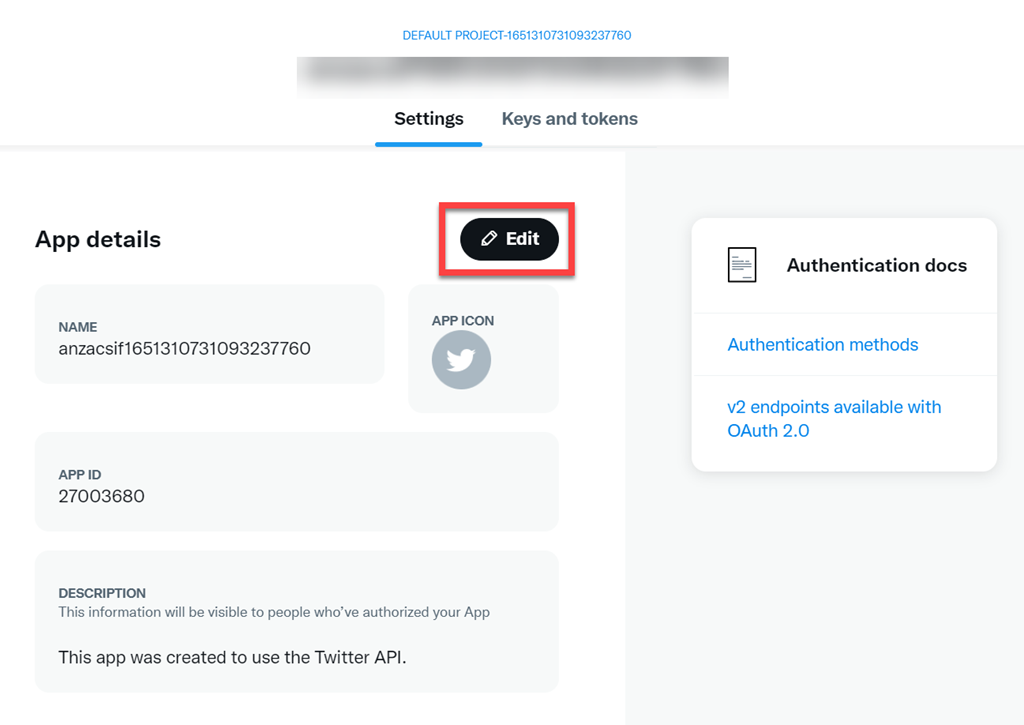
Select the Edit button as shown above.

image

Select the Delete App button at the bottom of the page. I found that the default app did not have the correct permissions and access so I removed it and created a new one with the right settings.

image

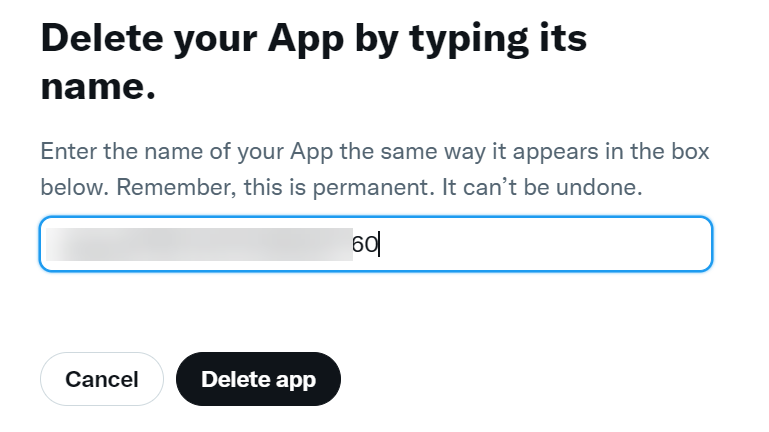
Make sure copy the name of the app because you’ll need to enter at the next dialog before pressing Delete app.

image

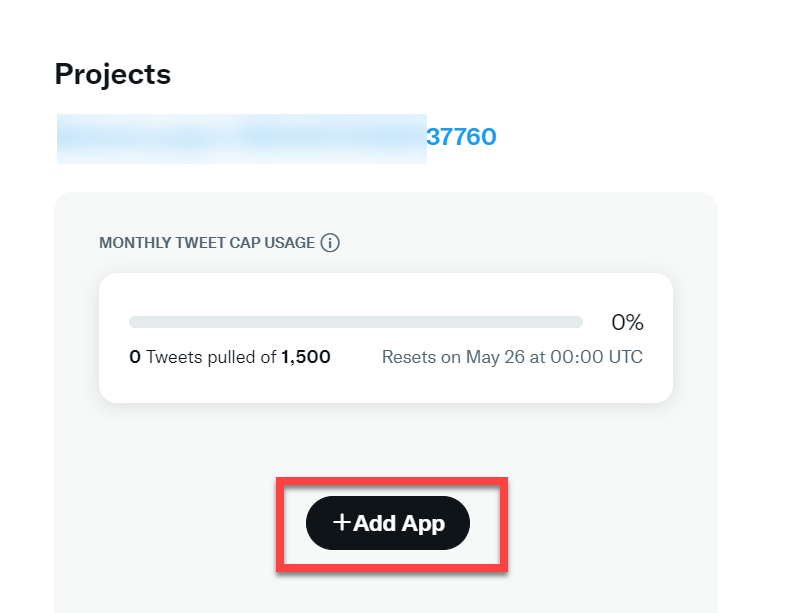
Back in the projects dashboard select Add an App as shown above.

image

Give the app a meaningful name select Next at the bottom of the page.

image

Copy the API Key and API Key Secret for later use. Make sure you DO SAVE both the API Key and API Key Secret as they’ll be needed back in Power Automate.Also, keep both of these secure as they control access to your Twitter account.

Select App settings at the bottom of the page to continue.

image

Select the Set up button under the User authentication settings towards the bottom of the page as shown above

image

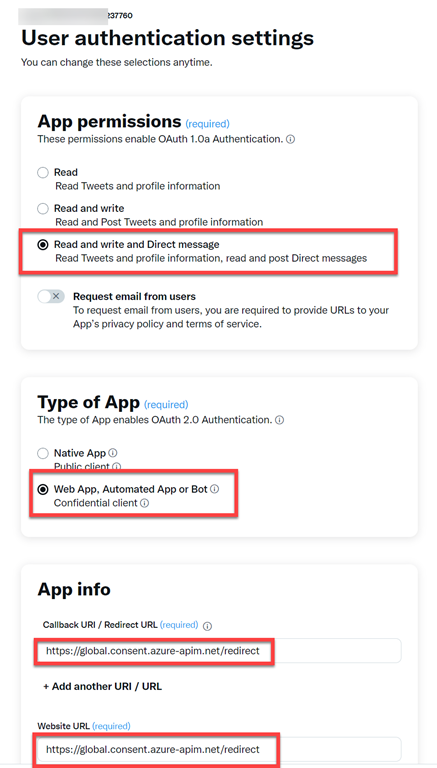
Ensure:

App permissions = Read and write and Direct message

Type of App = Web App, Automated App or Bot

Call Back URI / Redirect URI = https://global.consent.azure-apim.net/redirect

Website URL = https://global.consent.azure-apim.net/redirect

image

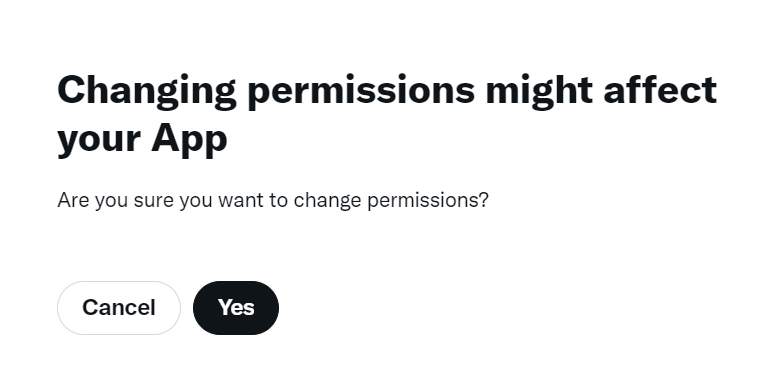
Select he option to Save at the bottom of the page. Select Yes when the above dialog appears to confirm.

image

You’ll now see a Client ID and Client Secret as shown above. You won’t need these so simply select Done to continue. You can re-create them if needed later.

image

Select Yes, I saved it to continue.

Step 3. Reconnect Twitter account in Power Automate

Return to Power Automate, Data, Connectors

image

Select New connection from the top of the page as shown above.

image

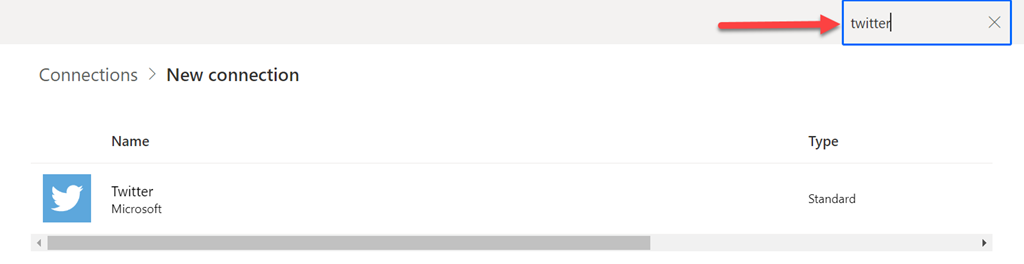
Search for Twitter using the Search box in the upper right. Then select the Twitter connector to configure it.

image

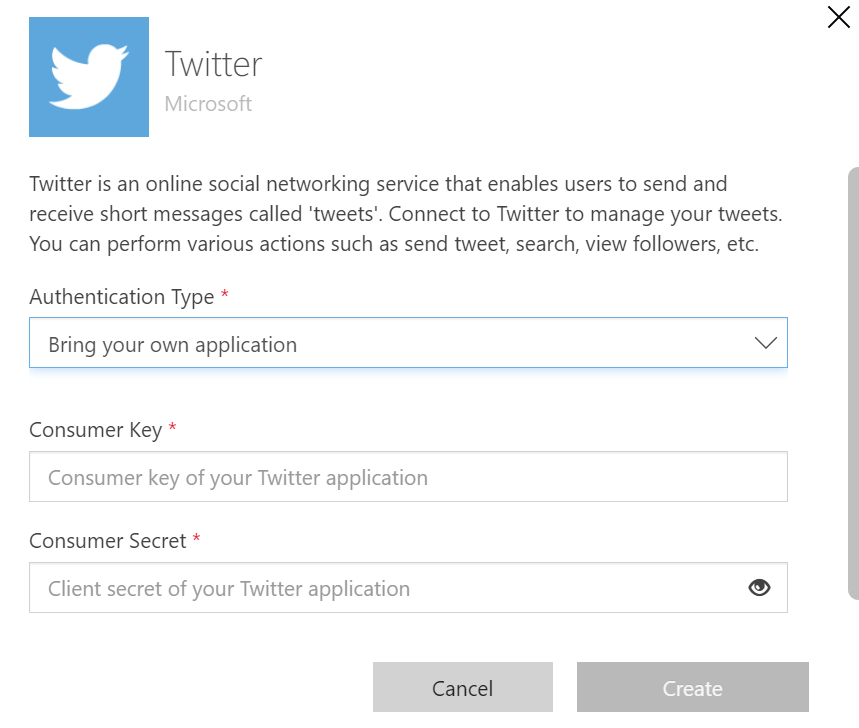
Ensure:

Authentication type = Bring your own application

Consumer key = API Key

Consumer secret = API Key Secret

image

A browser pop up will now appear asking you to authorize access to your Twitter account. You’ll need to login here with your Twitter account details. Enter you login details and select Authorize app.

You should then see a confirmation appear in this dialog and the browser pop up window will now close.

image

In the list of connections should now appear an entry for Twitter as shown above, and it it should show as Connected.

image

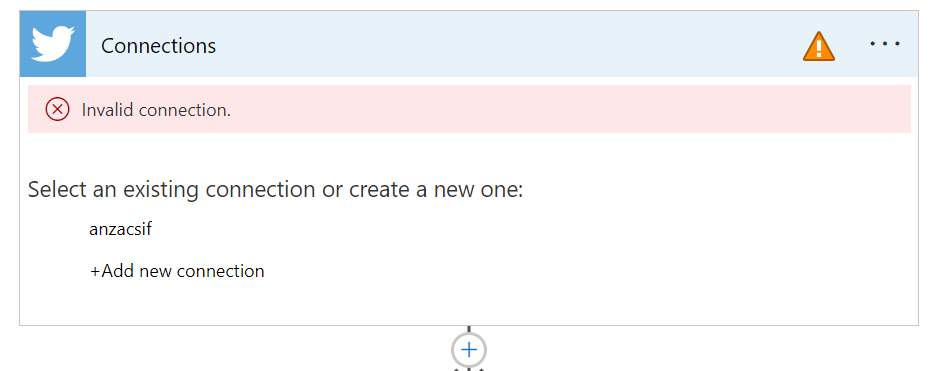
If you now navigate to where the Twitter action is inside your Flows you should see that the existing one is invalid as shown above.

image

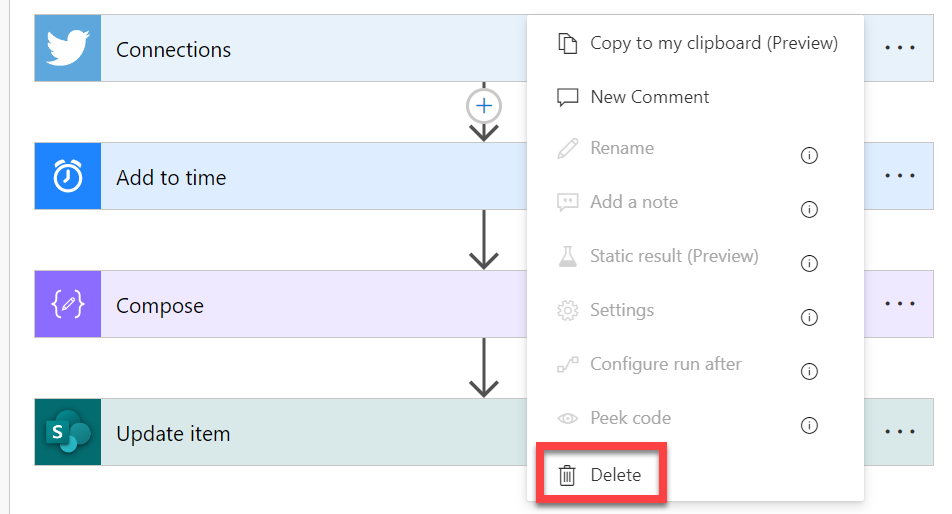
Select the ellipse in the top right hand corner and from the menu that appears select Delete. I found I had to minimise the Twitter action first to allow it to be deleted.

You can now create a new Twitter action which will use the new connector and API that was created.

With that all done you should now Save your Flow and test it to ensure it is working as expected.

In summary, you’ll firstly need to check the existing configuration for any Twitter actions you have in a Flow and record these. Next, you’ll need to remove any and all existing Twitter connections in Power Automate. Remember, there maybe more than one. Next, you’ll need to go Developer area in Twitter. There you’ll need to delete the default app that is created and create a new one. When you create a new one you’ll receive credentials you’ll need to save and use back in Power Automate. Once created you’ll need to configure it with a few additional settings. With that complete, you’ll return to Power Automate and create a new Twitter data connection with the credentials obtained. Finally, you’ll need to remove the old Twitter actions from your Flows and create new ones.

As I said, this process worked for me and I hope it does for you.

Power Automate Twitter connector failing

*** My resolution to this here – https://blog.ciaops.com/2023/04/27/connect-power-automate-to-twitter-using-a-bring-your-own-app-approach/

Since the 20th of April 2023 the Power Automate Twitter connector has been failing to authenticate. This means you get an error in your Flow that looks like:

image

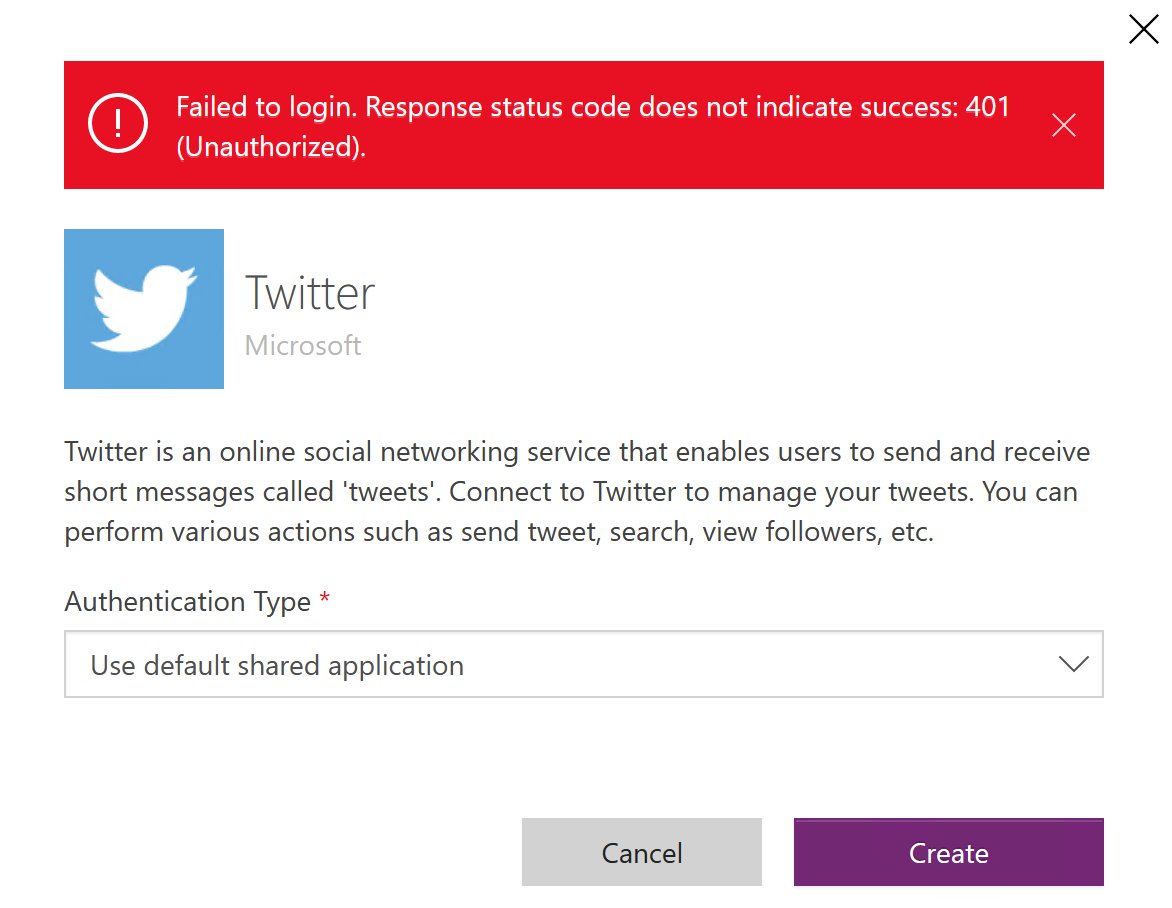
When I tried to fix the connector I am greeted by.

Image

There have no doubt been changes in the Twitter API which have caused this.

I’m trying to find an answer from Microsoft on how this will be handled going forward, but as yet I have not heard nothing back. If I find out, I’ll post here again.

CIAOPS Need to Know Microsoft 365 Webinar – November

laptop-eyes-technology-computer

Join me for the free monthly CIAOPS Need to Know webinar. Along with all the Microsoft Cloud news we’ll be taking a look at Power Automate.

Shortly after registering you should receive an automated email from Microsoft Teams confirming your registration, including all the event details as well as a calendar invite.

You can register for the regular monthly webinar here:

November Webinar Registrations

(If you are having issues with the above link copy and paste – https://bit.ly/n2k2211)

The details are:

CIAOPS Need to Know Webinar – November 2022
Friday 18th of November 2022
11.00am – 12.00am Sydney Time

All sessions are recorded and posted to the CIAOPS Academy.

The CIAOPS Need to Know Webinars are free to attend but if you want to receive the recording of the session you need to sign up as a CIAOPS patron which you can do here:

http://www.ciaopspatron.com

or purchase them individually at:

http://www.ciaopsacademy.com/

Also feel free at any stage to email me directly via director@ciaops.com with your webinar topic suggestions.

I’d also appreciate you sharing information about this webinar with anyone you feel may benefit from the session and I look forward to seeing you there.

Getting started automating Microsoft 365 administration with the Graph

https://www.youtube.com/watch?v=e1ypZGfifSQ

The Microsoft Graph is a unique and powerful way to administrate Microsoft 365. This session will provide you with a introduction to what the Microsoft Graph is, how to access it and how to use to improve the way you maybe currently administrating your customers environments. The session will also be jammed packed with live demonstrations and best practices for automating any Microsoft 365 environment. Save time, save money and save effort by viewing this session.

Power Automate Azure Key Vault access inconsistencies

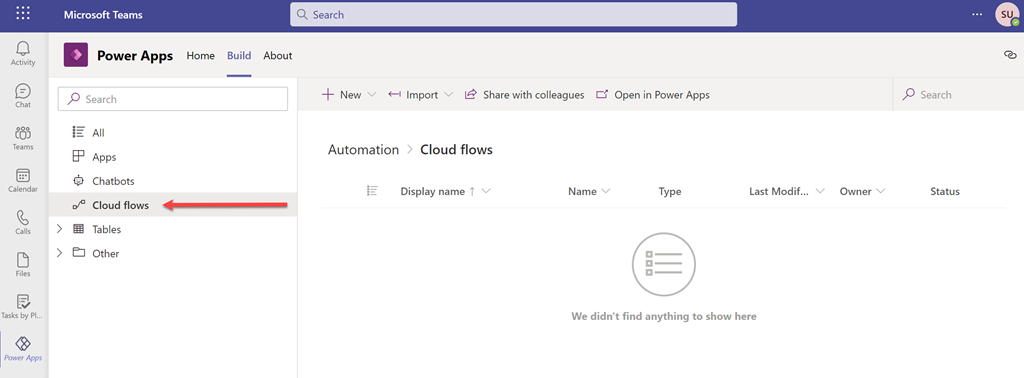
I’m in the process of building a Flow that connects to a Dataverse database inside a Microsoft Team. When you create this you get the ability to create Cloud Flows (aka Power Automate).

image

However, there is an issue when you try and use something like Azure Key Vault actions here.

image

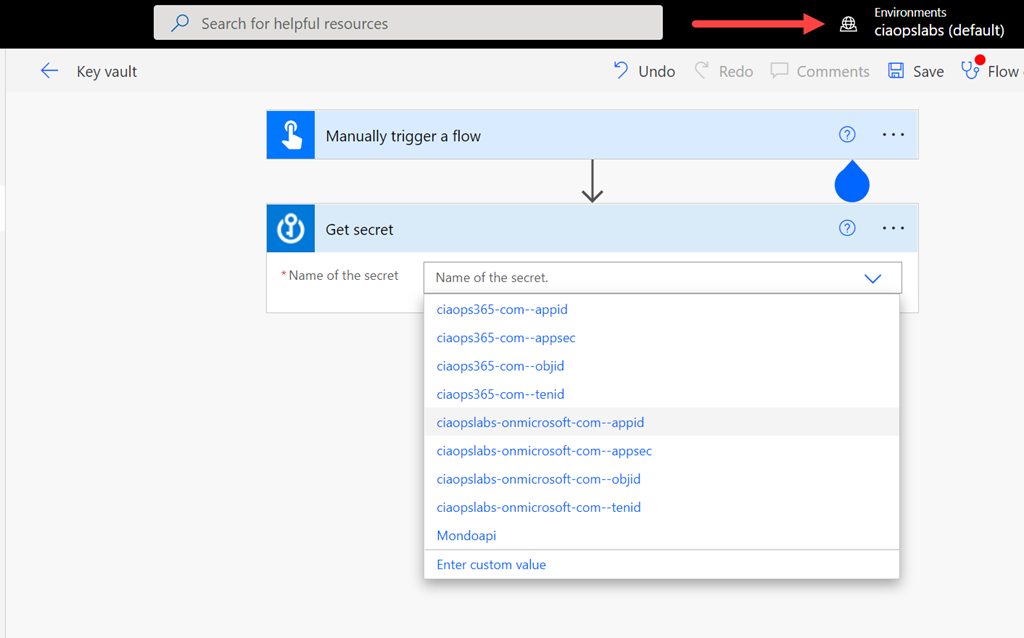
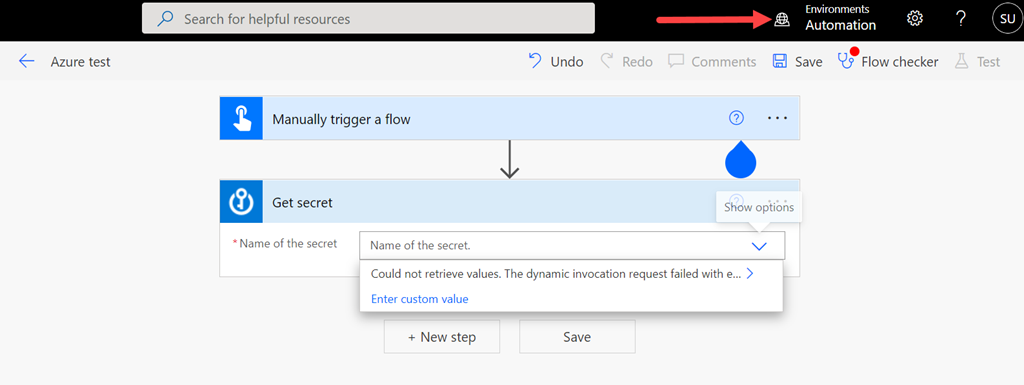
In the above, you can see that I’m in my default Power Automate environment and the Get secret action of Azure Key Vault is accessible as expected and shows all the items I have inside the vault.

image

However, if I swap to another environment that was created as part of a Team (here an environment called Automation), you’ll see that I can add the Azure Key Vault action Get Secret but I no longer see the items inside that vault as I did before! I am using the same user in both cases.

It has clearly something to do with the connection,

image

which shows up as invalid as you can see above.

image

If I try and add a new connection, I see the above dialog but can’t make any changes or enter any information. Looks like I might need to investigate the Connect with a service principal option perhaps?

However, for now, there seems to be a limit when you use the Azure Key vault actions inside anything that is not the default environment for the Power Platform in your tenant. I will assume this is because these environments are limited to Microsoft Teams and have innate restrictions that I’ll need to find information on. If you know what this is, I’d love to hear from you.
Using Power Automate to send SMS

I recently had the need to send an SMS programmatically. The reason I wanted to be able to do this si because Microsoft Bookings currently doesn’t send SMS reminders to attendees of a booking outside the US. That means, here in Australia, I needed to add the capability via another SMS integration option.
The most obvious choice, once again, is Power Automate. To handle the SMS component I needed to work with a SMS provider. The one who came to party was Mondotalk.

The first step was to consult the Mondotalk API to discover how to send an SMS using code. Luckily, their documentation contained a handy PowerShell script:

$messagebody1 = @{

id = $id

key = $key

username = $username

password = $password

to = “<phone>”

sender = “<phone>”

msg = “hello world”

replyto = director@ciaops.com

}

$url = <API url>

Invoke-RestMethod -Method POST -Uri $url -Body $messageBody1

In essence you create the body of the API request using an array and then you simply POST that to the API URL. Pretty straightforward and after I worked out all the variables like username, id and key, I had this working.

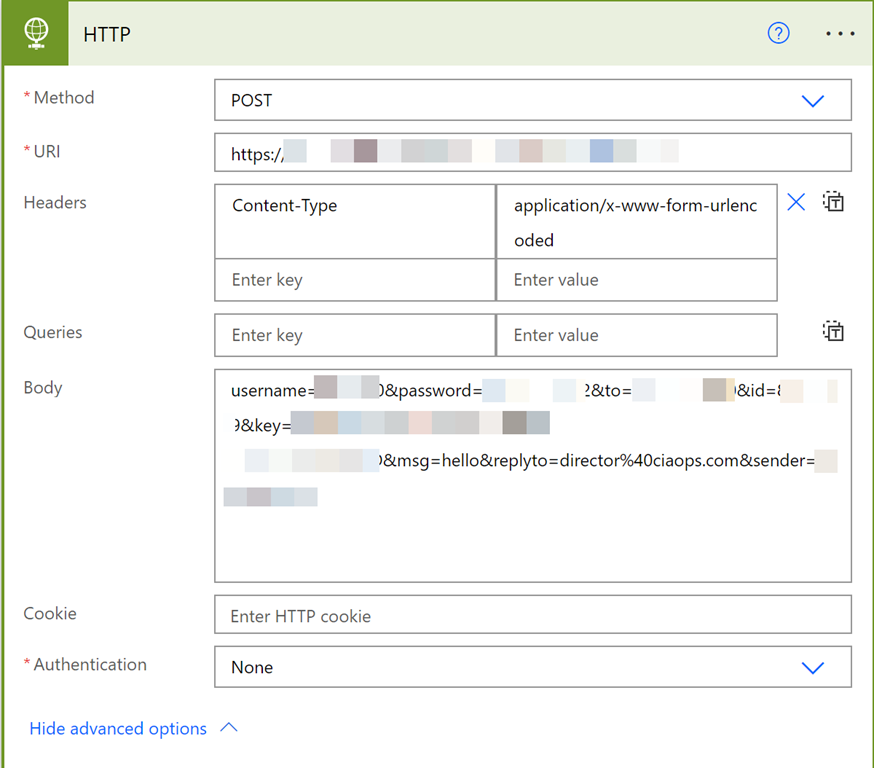
image

The key action is HTTP as shown above. It is important to remember that this a ‘premium’ connector and you may need a more advanced license to use this.

Initially, I thought I’d just bung in the parameters into the HTTP action as I have done before and it would be good to go. Not the case as it turned out. Everything I tried came back with a variation of the following error:

{“_meta”:{“status”:”ERROR”},”records”:{“errorCode”:401,”userMessage”:”Must login or provide credentials.”,”devMessage”:”Please provide credentials by either passing in a session token via cookie, or providing password and username via BASIC authentication.”,”more”:null,”applicationCode”:”Unauth:1″}}

In essence, the API is failing to login to my account to send the SMS. The PowerShell worked fine but Power Automate didn’t.

The solution ended up lying with adding a header field to the HTTP action:

Content type: application/x-www-form-urlencoded

and formatting the body with an ‘&’ between the fields i.e:

username=#####&password=*******&to=61######&id=#####&key=<GUID>msg=hello&replyto=director%40ciaops.com&sender=61########

as well as setting the authentication in the HTTP action to None as it was being done in the body of the request.

After all of that, I finally had success. The lesson here is that APIs don’t always want JSON!

image

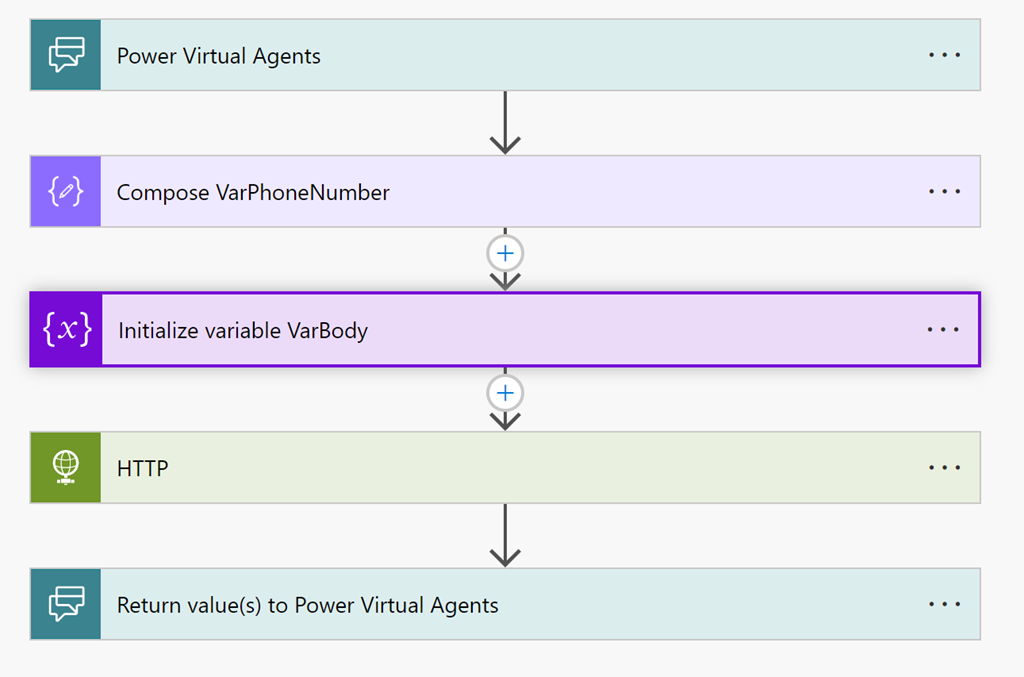
I then decided to wrap a Power Virtual Agent bot around the Flow and publish it into a Team to allow users to send SMS directly from Teams. They simply use a key phrase to call the bot and tell it when number to send to. The bot passes those details to the Flow and runs what I had worked out previously

image

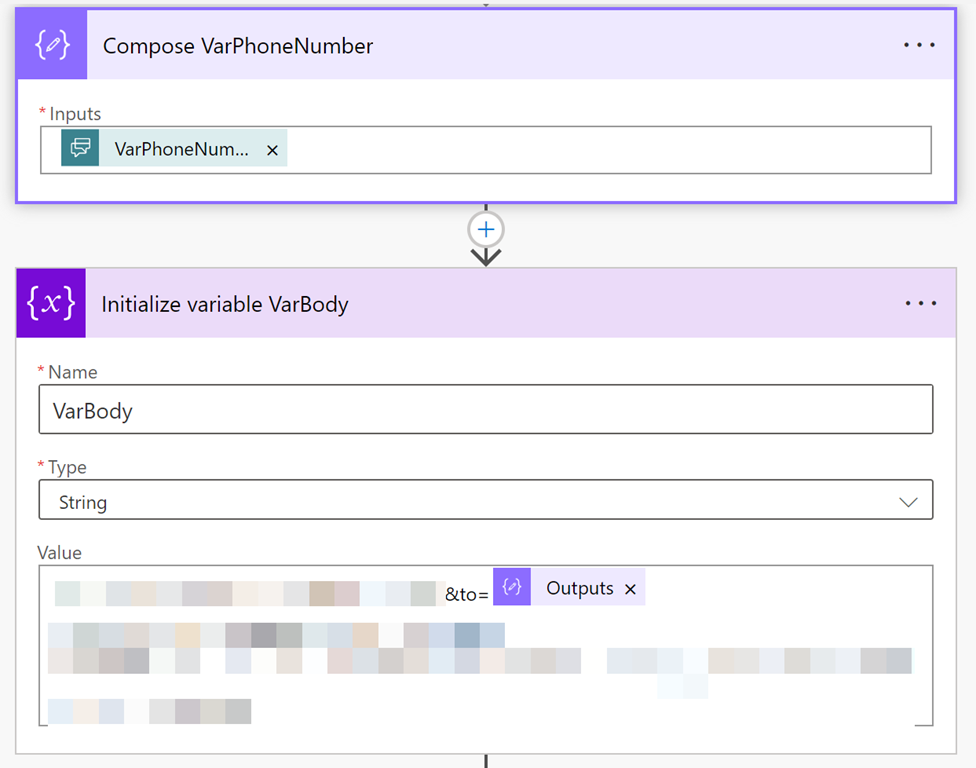
The only change here from the initial on demand Flow was the passing of a variable into the Flow from the bot and creating the body of the API request, also as a variable.

image

Again, it is important to get the body field in EXACTLY the right format for the API request when it is created.

So, that’s how you connect an SMS API gateway to Power Automate and Power Virtual Agents. The real trick was getting the right format of the API POST request which had to be deduced from the documentation. Hopefully, sharing that process here gives others a shortcut to getting it working in their environments because it took me a LONG time to work it out!

Thanks again to Mondotalk for being kind enough to give me a demo account and assist getting this working.

Displaying a percentage with two decimal places in Power Automate

image

In this section from my Power Automate I initialise two variables (currentscore and maxscore) with values using the Set variable action. I want a third variable, sspercentage, to be equal to:

(currentscore) / (maxscore) * 100

that is, a percentage but with only two decimal places. To do that I need to use the following formula in the Set variable 3 action:

formatNumber(mul(div(variables(‘currentscore’),variables(‘maxscore’)),100),’0.00′,’en-US’)

which you will note, if you look carefully, actually results in sspercentage being a string not a float!

(div(variables(‘currentscore’),variables(‘maxscore’))

handles the division

mul(div(variables(‘currentscore’),variables(‘maxscore’)),100)

multiples the division by 100 to get the percentage value.

The 0.00 in the formula is the actual formatting that you can adjust if you need and the en-US is the language format for the number. The Microsoft reference is for the formatnumber function is here:

https://docs.microsoft.com/en-us/azure/logic-apps/workflow-definition-language-functions-reference#formatNumber

The end result looks like:

image

If the formatnumber function is not used then the result contains a lot of numbers after the decimal place and remains of type float, which I would only need if I wanted to display the value of Pi!