Blocking Applications on Windows Devices using Intune (M365 Business Premium)

Blocking Applications on Windows Devices using Intune (M365 Business Premium)

Managing which applications can run on company devices is crucial for security and productivity. Microsoft Intune (part of Microsoft 365 Business Premium) offers powerful ways to block or restrict applications on Windows 10/11 devices. This guide explains the most effective method – using Intune’s Mobile Device Management (MDM) with AppLocker – in a step-by-step manner. We also cover an alternative app-level approach using Intune’s Mobile Application Management (MAM) for scenarios like BYOD.

Introduction and Key Concepts

Microsoft Intune is a cloud-based endpoint management service (included with M365 Business Premium along with Azure AD Premium P1) that provides both MDM and MAM capabilities[1]. In the context of blocking applications on Windows:

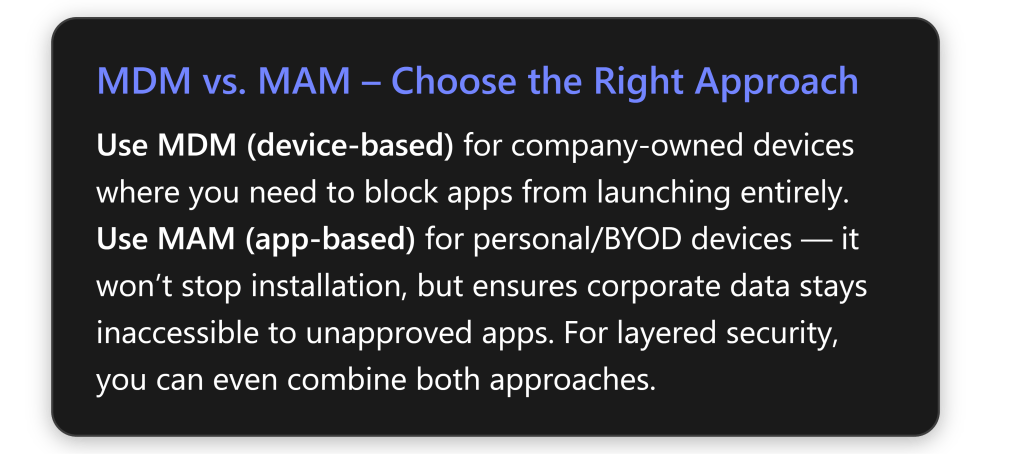
  • MDM (Mobile Device Management) means the Windows device is enrolled in Intune, allowing IT to enforce device-wide policies. With MDM, you can prevent an application from launching at all on the device[1][1]. Attempting to run a blocked app will result in a message like “This app has been blocked by your system administrator[1]. This is ideal for corp-owned devices where IT has full control.
  • MAM (Mobile Application Management) uses App Protection Policies to protect corporate data within apps without full device enrollment. Instead of stopping an app from running, MAM blocks the app from accessing or sharing company data[1][1]. Users can install any app for personal use, but if they try to open corporate content in an unapproved app, it will be prevented or the data will remain encrypted/inaccessible[1]. This is suited for BYOD scenarios.

Most Effective Method: In a typical small-business with M365 Business Premium, the MDM approach with AppLocker is the most direct way to block an application on Windows devices – it completely prevents the app from launching on managed PCs[1][1]. The MAM approach is effective for protecting data (especially on personal devices) but does not physically stop a user from installing or running an app for personal use[1]. Often, MDM is used on corporate devices and MAM on personal devices to cover both scenarios without overreaching on user’s personal device freedom[1][1].

Prerequisites and Setup

Before implementing application blocking, make sure you meet these prerequisites[1][1]:

  • Intune License: You have an appropriate Intune license. Microsoft 365 Business Premium includes Intune, so if you have M365 BP, you’re covered on licensing and have the necessary admin access to the Intune admin center[1][1].
  • Supported Windows Edition: Devices should be running Windows 10 or 11 Pro, Business, or Enterprise editions. (Windows Home is not supported for these management features[1].) Ensure devices are up to date – recent Windows 10/11 updates allow AppLocker enforcement even on Pro edition (the historical limitation to Enterprise has been removed)[1][1].
  • Device Enrollment (for MDM): For device-based blocking, Windows devices must be enrolled in Intune (via Azure AD join, Hybrid AD join, Autopilot, or manual enrollment)[1]. Enrollment gives Intune the control to push device configuration policies that block apps.
  • Azure AD and MAM Scope (for app protection): If using app protection (MAM) policies, users should exist in Azure AD and you need to configure the MAM User Scope so Intune can deliver app protection to their devices[1]. In Azure AD -> Mobility (MDM and MAM), set Intune as the MAM provider for the relevant users/groups. (Typically, for BYOD scenarios you might set MDM scope to a limited group or none, and MAM scope to all users[1].)
  • Administrative Access: Ensure you have Intune admin permissions. Log into the https://endpoint.microsoft.com (also known as Microsoft Endpoint Manager portal) with an admin account to create policies[1].
  • Test Environment: It’s wise to have a test or pilot device/group enrolled in Intune to trial the blocking policy before broad deployment[1]. Also, identify the application(s) you want to block and have one installed on a test machine for creating the policy.

With the basics in place, we can proceed with the blocking methods.

Method 1: Block Applications via Intune MDM (AppLocker Policy)

Overview: Using Intune’s device (MDM) capabilities, we will create an AppLocker policy to block a specific application and deploy that policy through Intune. AppLocker is a Windows feature that allows administrators to define which executables or apps are allowed or denied. Intune can deliver AppLocker rules to managed devices, effectively preventing targeted apps from running[1][1].

High-Level Steps (MDM + AppLocker):[1]

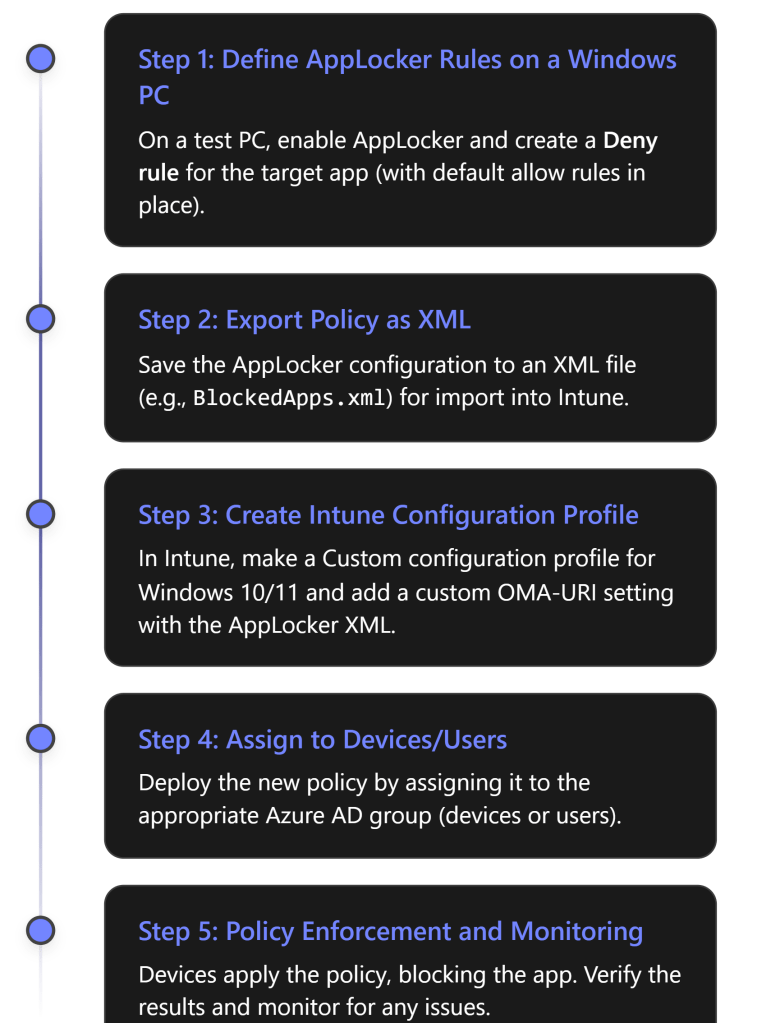
  1. Create an AppLocker rule on a reference Windows PC to deny the unwanted application.
  2. Export the AppLocker policy to an XML file.
  3. Create an Intune Device Configuration profile (Custom OMA-URI) in the Intune portal and import the AppLocker XML.
  4. Assign the profile to the target devices or user group.
  5. Monitor enforcement and adjust if necessary.

We will now go through these steps in detail:

Step 1: Create & Export an AppLocker Policy (Blocking Rule)

First, on a Windows 10/11 PC (your own admin machine or a lab device), set up the AppLocker rule to block the chosen application:

  • Open Local Security Policy: Log in as an administrator on the reference PC and run “Local Security Policy” (secpol.msc). Navigate to Security Settings > Application Control Policies > AppLocker[1].
  • Enable AppLocker & Default Rules: Right-click AppLocker and select “Properties.” For each rule category (Executable, Script, Windows Installer (.msi), Packaged app (*.appx)), check “Configured” and set it to “Enforce rules”, then click OK[1]. Next, create the default allow rules for each category: e.g., right-click Executable Rules and choose “Create Default Rules.” This adds baseline allow rules (e.g., allow all apps in %ProgramFiles% and Windows directories, and allow Administrators to run anything) so that you don’t inadvertently block essential system files or admin actions[1][1]. (Ensuring default rules exist is crucial to avoid locking down the system accidentally.)
  • Create a Deny Rule for the Application: Decide which app to block and under the appropriate category, right-click and select “Create New Rule…”[1]. This launches the AppLocker rule wizard:
    • Action: Choose “Deny” (we want to block the app)[1].
    • User or Group: Select “Everyone” (so the rule applies to all users on the device)[1]. (Alternatively, you could target a specific user or group if needed.)
    • Condition (Identification of the app): If it’s a classic Win32 app (an EXE), you can choose a Publisher rule (recommended for well-known signed apps), a Path rule, or a File hash rule. For a well-known signed app (e.g., Chrome, Zoom), choosing Publisher is ideal so that all versions of that app from that publisher get blocked[1][1]. You will be prompted to browse for the app’s executable on the system – select the main EXE (for example, chrome.exe in C:\Program Files\Google\Chrome\Application\chrome.exe for Google Chrome)[1][1]. The wizard will read the digital signature and populate the publisher and product info. You can adjust the slider to define the scope (e.g., blocking any version of Chrome vs. a specific version) – typically, slide to “File name” or “Product” level to block all versions of that app[1]. If blocking a Microsoft Store (UWP) app, switch to Packaged app Rules and select the app from the list of installed packages (e.g., TikTok if installed from Store)[1]. This will use the app’s package identity as the condition. (If the app isn’t installed on your ref machine to select, you can use a File hash, but Publisher rules are easier to maintain when possible[1].)
    • Complete the wizard by giving the rule a name and optional description (e.g., “Block Chrome”) and finish. You should now see your new Deny rule listed under the appropriate AppLocker rule category[1] (e.g., under Executable Rules for a .exe).
  • Confirm Rule Enforcement: Ensure AppLocker enforcement is enabled (the earlier step of setting to Enforced in Properties should handle this). With the deny rule created and default allow rules in place, the local policy will block the chosen app on this test machine.
  • Export the Policy: Now export these AppLocker settings to an XML file so we can deploy them via Intune. In the AppLocker console, right-click the AppLocker node and choose “Export Policy.” Save the file (e.g., BlockedApps.xml)[1][1]. This XML contains all AppLocker rules you configured.Tip: We only need the relevant portion of the XML for the rule category we configured (to avoid conflicts with categories we didn’t use). For example, if we only created an Executable rule, open the XML in a text editor and find the <RuleCollection Type="Exe" EnforcementMode="Enabled"> ... </RuleCollection> section[1]. Copy that entire <RuleCollection> block to use in Intune[1]. (Similarly, if blocking a packaged app, use the <RuleCollection Type="AppX"...> section, etc.) This way, we import just the necessary rules into Intune without overriding other categories that we didn’t configure[1][1].
Step 2: Deploy the AppLocker Policy via Intune

Now that we have our AppLocker XML snippet, we’ll create a Custom Device Configuration Profile in Intune to deliver this policy to devices:

  1. Create a Configuration Profile in Intune: Log in to the Intune admin center (Endpoint Manager portal) and navigate to Devices > Configuration Profiles (or Devices > Windows > Configuration Profiles). Click + Create profile.
    • Platform: Select Windows 10 and later.
    • Profile type: Choose Templates > Custom (because we’ll input a custom OMA-URI for AppLocker)[1][1].
    • Click Create and give the profile a name (e.g., “Block AppLocker Policy”) and an optional description[1][1].
  2. Add Custom OMA-URI Settings: In the profile editor, under Configuration settings, click Add to add a new setting. Enter the following details for the custom setting:
    • Name: A descriptive name like “AppLocker Exe Rule” (if blocking an EXE) or “AppLocker Store App Rule” depending on your target[1][1].
    • OMA-URI: This is the path that Intune uses to set the AppLocker policy via the Windows CSP. Use the path corresponding to your rule type:
      • For executable (.exe) apps:\ ./Vendor/MSFT/AppLocker/ApplicationLaunchRestrictions/Apps/EXE/Policy[1].
      • For Microsoft Store (packaged) apps:\ ./Vendor/MSFT/AppLocker/ApplicationLaunchRestrictions/Apps/StoreApps/Policy[1].
      • (If you were blocking other types, there are similar OMA-URI paths for Script, MSI, DLL under AppLocker CSP, but most common cases are EXE or StoreApps.)
    • Data type: Select String (we’ll be uploading the XML as a text string)[1].
    • Value: Paste the XML content of the <RuleCollection> that you copied earlier, including the <RuleCollection ...> tags. This is essentially the AppLocker policy definition in XML form[1]. Double-check that you included the opening and closing tags and that the XML is well-formed. (Intune will accept the large XML string here – if there’s a syntax error in the XML, the policy might fail to apply.)
    • Click Save after adding this OMA-URI setting.
  3. Complete Profile Creation: Click Next if additional pages appear (for Scope tags, etc., usually can leave default). On Assignments, choose the group of devices or users to which this blocking policy should apply:
    • For initial testing, you might assign it to a small pilot group or a single device group (perhaps an “IT Test Devices” group).
    • For full deployment, you could assign to All Devices or a broad group like “All Windows 10/11 PCs” if all devices should have this app blocked[1]. (Consider excluding IT admin devices or others if you need to ensure they can run the app, but generally “Everyone” was set in the rule so any device that gets this policy will block the app for all users on it.)
    • After selecting the group, click Next through to Review + Create, then click Create to finish creating the profile[1][1].

Intune will now deploy this policy to the targeted Windows endpoints. Typically, devices check in and apply policies within minutes if online (or the next time they come online).

Step 3: Policy Assignment and Enforcement

Once the profile is created and assigned, Intune will push the AppLocker policy to the devices. On each device:

  • The policy is applied via the Windows AppLocker Configuration Service Provider (CSP). When the device receives the policy, Windows integrates the new AppLocker rule.
  • If the user attempts to launch the blocked application, it will fail to open. On Windows, they will see a notification or error dialog stating the app is blocked by the administrator or system policy[1][1]. Essentially, the app is now inert on those machines – nothing happens when they try to run it (or it closes immediately with a message).

To summarize the MDM enforcement: the application itself is blocked from running on the device – the user cannot launch it at all on a managed, compliant device[1]. This provides a strong guarantee that the software can’t be used (preventing both intentional use and accidental use of unauthorized apps).

Example: If we deployed a policy to block Google Chrome, any attempt to open Chrome on those Intune-managed PCs will be prevented. The user will typically see a Windows pop-up in the lower-right saying something like “ has been blocked by your organization”[1]. They will not be able to use Chrome unless the policy is removed.

Note: Intune/MDM-based AppLocker policies apply to any user on the device by default. If multiple users use the same PC (as Azure AD users), the blocked app will be blocked for all (since we set the rule for Everyone). Keep this in mind if any shared devices are in scope.

Step 4: Testing, Monitoring and Verification

After deploying the policy, it’s important to verify it’s working correctly and monitor device compliance:

  • Test on a Pilot Device: On a test device that received the policy, try launching the blocked application. You should confirm that it does not run and that you receive the expected block message[1][1]. If the app still runs, double-check that the device is indeed Intune-managed, in the assigned group, and that the policy shows as successfully applied (see below).
  • Intune Policy Status: In the Intune admin center, go to the Configuration Profile you created and view Device status or Per-user status. Intune will report each targeted device with status “Succeeded” or “Error” for applying the policy[1][1]. Verify that devices show Success for the AppLocker profile. If there are errors, click on them to get more details. A common error might be malformatted XML or an unsupported setting on that OS edition.
  • Event Logs: On a Windows client, you can also check the Windows Event Viewer for AppLocker events. Look under Application and Services Logs > Microsoft > Windows > AppLocker > EXE and DLL. A successful block generates an event ID 8004 (“an application was blocked by policy”) in the AppLocker log[1][1]. This is useful for auditing and troubleshooting – you can see if the rule fired as expected. If you see event 8004 for your app when a user tried to open it, the policy is working.
  • Monitor Impact: Ensure no critical application was inadvertently affected. Thanks to the default allow rules, your policy should not block unrelated apps, but it’s good to get feedback from pilot users. Have IT or a pilot user attempt normal work and ensure nothing else is broken. If something necessary got blocked (e.g., perhaps the rule was too broad and blocked more than intended), you’ll need to adjust the AppLocker rule criteria (see Step 5).

Common issues and troubleshooting:\ Even with a straightforward setup, a few issues can arise:

  • Correct App Identification: Make sure the rule accurately identifies the app. If using a publisher rule for an EXE, it should cover all versions. If the app updates and the publisher info remains the same, it stays blocked. If you used a file hash rule, a new version (with a different hash) might bypass it – so publisher rules are generally preferred for well-known apps[1][1]. For Store apps, ensure you selected the correct app package or used the correct Package Family Name. Microsoft documentation suggests using the Store for Business or PowerShell to find the precise Package Identity if needed[1].
  • Application Identity Service: Windows has a service called Application Identity (AppIDSvc) that AppLocker relies on to function. This service should start automatically when AppLocker policies are present. If it’s disabled or not running, AppLocker enforcement will fail. Ensure the service is not disabled on your clients[1][1]. (By default it’s Manual trigger-start – Intune’s policy should cause it to run as needed.)
  • Windows Edition: Remember that Windows Home edition cannot enforce AppLocker policies[1]. Pro, Business, or Enterprise should be fine (if fully updated). If a device is not enforcing the policy, check that it’s not a Home edition.
  • Default Rules: Always have the AppLocker default allow rules in place (or equivalent allow rules) for all categories you enforce, otherwise you might end up blocking the OS components or all apps except your deny list. If you skipped creating default rules, go back and add them, then re-export the XML. Missing default rules can lead to “everything is blocked” scenarios which require recovery.
  • Multiple Policies: In Intune, if you apply multiple AppLocker policies (say two different profiles targeting the same device), they could conflict or override each other[1]. It’s best to consolidate blocked app rules into one policy if possible. If you must use separate policies for different groups, ensure they target mutually exclusive sets of devices or users. In a small business, one AppLocker policy for all devices is simpler[1].
  • Policy Application Timing: Intune policies should apply within a few minutes, but if a device is offline it will apply next time it connects. You can trigger a manual sync from the client (Company Portal app or in Windows settings under Work & School account > Info > Sync) to fetch policies immediately.
Step 5: Maintaining and Updating the Block Policy

Over time, you may need to adjust which applications are blocked (add new ones or remove some):

  • Updating the Policy: To change the list of blocked apps, you have two main options:
    1. Edit the AppLocker XML: On your reference PC, you can add or remove AppLocker rules (for example, create another Deny rule for a new app, or delete a rule) and export a new XML. Then, in Intune, edit the existing configuration profile – update the XML string in the Custom OMA-URI setting to the new XML (containing all current rules)[1][1]. Save and let it repush. The updated policy will overwrite the old rules on devices.
    2. Create a New Profile: Alternatively, you could create a new Intune profile for an additional blocked app. However, as noted, multiple AppLocker profiles can conflict. If it’s a completely separate rule set, Intune might merge them, but to keep things simple, it’s often easier to maintain one XML that contains all blocked app rules and update it in one profile[1]. For example, maintain a “BlockedApps.xml” with all forbidden apps listed, and just update that file and Intune profile as needed.
  • Removing a Block: If an application should no longer be blocked (e.g., business needs change or a false alarm), you can remove the rule from the AppLocker XML and update or remove the profile. Removing the Intune profile will remove the AppLocker policy from devices (restoring them to no AppLocker enforcement)[1][1]. However, note that Intune’s configuration profiles sometimes “tattoo” settings on a device (meaning the setting remains even after the profile is removed, until explicitly changed)[2]. AppLocker CSP settings typically are removed when the profile is removed while the device is still enrolled. If a device was removed from Intune without first removing the policy, the block might persist. In such a case, you’d need to either re-enroll and remove via Intune, or use a local method to clear AppLocker policy. Microsoft’s guidance for Windows Defender Application Control (WDAC) suggests deploying an “Allow all” policy to overwrite a blocking policy, then removing it[2]. Similarly, for AppLocker, the cleanest removal is: (a) push an updated policy that doesn’t have the deny rule (or explicitly allows the app), then (b) remove that policy. So, plan the removal carefully to avoid orphaned settings.
  • Communication to Users: When implementing or updating blocked apps, inform your users in advance if possible. Users might encounter a blocked application message and create helpdesk tickets if they weren’t expecting it. Ensure that your organizational policy documentation lists which apps are disallowed and why (e.g. security or compliance reasons), so employees know the rules. If an important app is blocked, have a process for exception requests or review.
  • User Support: Be prepared to handle cases where a user says “I need this app for my work.” Evaluate if that app can be allowed or if there’s an approved alternative. Sometimes an app might be blocked for most users but certain roles might need it – in such cases, consider scoping the Intune policy to exclude those users or create a separate policy for them with a different set of rules.

Best Practices:

  • Pilot first, then deploy broad: As emphasized, always test your blocking policy on a limited set of machines before rolling out company-wide[1]. This prevents any nasty surprises (like blocking critical software).
  • Document and Align with Policies: Ensure that the list of blocked apps aligns with written company security policies or compliance requirements. For example, many organizations ban apps like BitTorrent or certain social media or games for compliance/security[3]. Some bans might be regulatory (e.g., government directives to ban specific apps due to security concerns[4]) – make sure your Intune policies support those mandates.
  • Gather feedback: After deploying, gather feedback from users or IT support about any impact. Users should generally not be impacted outside of being unable to use the forbidden app (which is intended). If there’s confusion or pushback, it might require management communication – e.g., explaining “We blocked XYZ app because it poses a security risk or is against company policy.”
Alternative Device-Based Protections (Compliance & Conditional Access)

In addition to AppLocker, Intune provides a few other mechanisms to deter or react to forbidden apps on devices:

  • Compliance Policy with Script: Intune compliance policies for Windows can detect certain conditions and mark a device non-compliant if criteria are met. While there isn’t a built-in “app blacklist” compliance setting for Windows, admins can use custom compliance scripts to check for the presence of an .exe. For instance, a PowerShell script could check if a disallowed app is installed, and if yes, set the device’s compliance status accordingly[1]. Then you could create an Azure AD Conditional Access policy to block non-compliant devices from accessing corporate resources. This approach does not directly stop the app from running, but it creates a strong incentive for users not to install it: their device will lose access to email, Teams, SharePoint, etc., if that app is present[1][1]. This is more complex to set up and punitive rather than preventive, but can be useful for monitoring and enforcing policy on devices where you might not be ready to hard-block apps.
  • Microsoft Defender for Endpoint Integration: If your M365 Business Premium includes Defender for Endpoint P1, note that P1 doesn’t have all app control features of P2, but one thing you can do is use Defender for Endpoint (MDE) for network blocking. For example, if the unwanted “app” is actually accessing a service via web, you can use MDE’s Custom Network Indicators to block the URL or domain (which also prevents usage of that service or PWA)[4][4]. Microsoft’s guidance for the DeepSeek app, for instance, shows blocking the app’s web backend via Defender for Endpoint network protection, so even if installed it can’t connect[4][4]. MDE can also enforce web content filtering across browsers (with network protection enabled via Intune’s Settings Catalog)[4][4].
  • App Uninstall via Intune: If an unwanted app was deployed through Intune (for example, a store app pushed earlier), Intune can also uninstall it by changing the assignment to “Uninstall” for that app[4][4]. However, Intune cannot directly uninstall arbitrary software that it did not install. For Win32 apps not deployed by Intune, you’d need to use scripts or other tools if you wanted to actively remove them. In many cases, simply blocking execution via AppLocker (and leaving the stub installed) is sufficient and less disruptive[1][1].

These alternatives can complement the primary AppLocker method, but for immediate prevention, AppLocker remains the straightforward solution on managed devices[1].

Method 2: Block Applications via Intune MAM (App Protection for Data)

For scenarios where devices are not enrolled (personal PCs) or you prefer not to completely lock down the device, Intune’s App Protection Policies provide a way to ensure corporate data never ends up in unapproved apps. This doesn’t stop users from installing or running apps, but it effectively blocks those apps from ever seeing or using company information[1][1]. In practice, an unapproved app becomes useless for work – e.g., a user could install a personal Dropbox or a game on their BYOD PC, but they won’t be able to open any work files with it or copy any text out of Outlook into that app.

This approach uses a feature formerly known as Windows Information Protection (WIP) for Windows 10/11, integrated into Intune’s App Protection Policies. M365 Business Premium supports this since it includes the necessary Intune and Azure AD features.

Key points about MAM data protection:

  • It works by labeling data as “enterprise” vs “personal” on the fly. Any data from corporate sources (e.g., Office apps signed in with work account, files from OneDrive for Business, emails in Outlook) is considered corporate and is encrypted/protected when at rest on the device.
  • You define a set of “protected apps” (also called allowed apps) that are approved to access corporate data (typically Office apps, Edge browser, etc.)[1][1]. Only these apps can open or handle the corporate data.
  • If a user tries to open a corporate document or email attachment in an app not on the allowed list, it will be blocked — either it won’t open at all, or it opens encrypted gibberish. Similarly, actions like copy-paste from a work app to a personal app can be blocked[1][1].
  • Unlike MDM, this doesn’t require device enrollment. You can apply it to any Windows device where a user logs in with a work account in an app (Azure AD registered). Enforcement is strengthened by pairing with Conditional Access policies to ensure they can only access, say, O365 data if they are using a protected app[1].
  • This is ideal for BYOD: the user keeps full control of their device and personal apps, but the company data stays within a managed silo.

Note: Microsoft has announced that Windows Information Protection (WIP) is being deprecated eventually[1]. It’s still supported in current Windows 10/11 and Intune, so you can use it now, but be aware that long-term Microsoft is focusing on solutions like Purview Information Protection and other DLP (data loss prevention) strategies[1][1]. As of this writing, WIP-based MAM policies are the main method for protecting Windows data on unenrolled devices.

Step-by-Step: Configure Intune App Protection (MAM) Policy for Windows

Follow these steps to set up a policy that will “protect” corporate data and block its use in unapproved apps:

1. Enable MAM for Windows in Azure AD (if not already):\ In the Azure AD (Entra) admin center, ensure Intune MAM is activated for Windows users:

  • Navigate to Azure AD > Mobility (MDM and MAM). Find Microsoft Intune in the MAM section.
  • Set the MAM User Scope to include the users who will receive app protection (e.g., All users, or a specific group)[1][1]. This allows those users to use Intune App Protection on unenrolled devices.
  • Ensure the MDM User Scope is configured as you intend. For example, in a BYOD scenario, you might set MDM user scope to None (so personal devices don’t auto-enroll) and MAM user scope to All. In a mixed scenario, you can have both scopes enabled; an unenrolled device will simply only get MAM policies, whereas an enrolled device can have both MDM and MAM policies (though device-enrolled Windows will prefer device policies)[1][1].

2. Create a Windows App Protection Policy:\ In the Intune admin center:

  • Go to Apps > App protection policies and click Create Policy.
  • Platform: Select Windows 10 and later[1].
  • It will ask “Windows 10 device type:” – choose “Without enrollment” for targeting BYOD/personal devices (this means the policy applies via MAM on Azure AD-registered devices, not requiring full Intune enrollment)[1]. (If you also want to cover enrolled devices with similar restrictions, you could create a separate policy “with enrollment.” For now, we’ll assume without enrollment for personal device usage.)
  • Give the policy a Name (e.g., “Windows App Protection – Block Unapproved Apps”) and a description[1].

**3. Define *Protected Apps* (Allowed Apps):**\ Now specify which applications are considered *trusted for corporate data*. These apps will be allowed to access organization data; anything not in this list will be treated as untrusted.

  • In the policy settings, find the section to configure Protected apps (this might be under a heading like “Allowed apps” or similar). Click Add apps[1].
  • Intune provides a few ways to add apps:
    • Recommended apps: Intune offers a built-in list of common Microsoft apps that are “enlightened” for WIP (e.g., Office apps like Outlook, Word, Excel, PowerPoint, OneDrive, Microsoft Teams, the Edge browser, etc.). You can simply check the ones you want to allow (or Select All to allow the full suite of Microsoft 365 apps)[1][1]. This covers most needs: you’ll typically include Office 365 apps and Edge. Edge is particularly important if users access SharePoint or web-based email – Edge can enforce WIP, whereas third-party browsers cannot[1].
    • Store apps: If there’s a Microsoft Store app not in the recommended list that you need to allow, you can add it by searching the store. You’ll need the app’s Package Family Name and Publisher info. Intune’s interface may allow selection from the Store if the app is installed on a device or via the Store for Business integration[1][1].
    • Desktop apps (Win32): You can also specify classic desktop applications to allow by their binary info. This requires providing the app’s publisher certificate info and product name or file name. For example, if you have a specific line-of-business app (signed by your company), you can allow it by publisher name and product name so it’s treated as a protected app[1][1]. This can also be used to allow third-party apps (e.g. perhaps Adobe Acrobat, if you trust it with corporate data).
  • After adding all needed apps, you’ll see your list of protected apps. Common ones: Outlook, Word, Excel, PowerPoint, Teams, OneDrive, SharePoint, Skype for Business (if used), Edge. The idea is to include all apps that you want employees to use for work data. Data will be protected within and between these apps.
  • (Optional) Exempt Apps: Intune allows designation of exempt apps which bypass WIP entirely (meaning they can access corporate data without restriction)[1]. Generally do NOT exempt any app unless absolutely necessary (e.g., a legacy app that can’t function with encryption). Exempting defeats the purpose by allowing data leakage, so ideally leave this empty[1][1].

4. Configure Data Transfer Restrictions:\ The policy will have settings for what actions are allowed or blocked with corporate data:

  • Key setting: “Prevent data transfer to unprotected apps” – set this to Block (meaning no sharing of data from a protected app to any app that isn’t in the protected list)[1]. This ensures corporate content stays only in the allowed apps.
  • Clipboard (Cut/Copy/Paste): You likely want to Block copying data from a protected app to any non-protected app[1]. Intune might phrase this as “Allow cut/paste between corporate and personal apps” – set to Block, or “Policy managed apps only”.
  • Save As: Block users from saving corporate files to unmanaged locations (e.g., prevent “Save As” to a personal folder or USB drive). In Intune, this might be a setting like “Block data storage outside corporate locations”[1].
  • Screen capture: You can disable screenshots of protected apps on Windows. This might be less straightforward on Windows 10 (since WIP can do it on enlightened apps). Set Block screen capture if available[1].
  • Encryption: Ensure Encrypt corporate data is enabled so that any work files saved on the device are encrypted and only accessible by protected apps or when the user is logged in with the right account[1].
  • Application Mode (Enforcement level): WIP had modes like Block, Allow Overrides, Silent, Off[1]. In Intune’s UI, this might correspond to a setting called “Protection mode”. You will want Block mode for strict enforcement (no override)[1][1]. Allow Overrides would prompt users but let them bypass (not desirable if your goal is full blocking of data transfer). Silent would just log but not prevent. So choose the strictest option to truly block data leakage.
  • There are other settings like “Protected network domains” where you specify which domains’ data is considered corporate (often your Office 365 default domains are auto-included, e.g., anything from @yourcompany.com email or SharePoint site is corporate). Intune usually auto-populates these based on your Azure AD tenant for Windows policies. Double-check that your organization’s email domain and SharePoint/OneDrive domains are listed as corporate identity sources.
  • Set any other policy flags as needed (there are many options, such as requiring a PIN for access to protected apps after a idle time, etc., but those are more about app behavior than data transfer).

5. (Optional) Conditional Launch Conditions:\ Intune’s app protection policies may allow you to set conditional launch requirements – e.g., require device to have no high-risk threats detected, require devices to be compliant, etc. For Windows, a notable one is integrating with Microsoft Defender:

  • You could require that no malware is present or device is not jailbroken (not as relevant on Windows), or if malware is detected, you can have the policy either block access or wipe corporate data from the app[1][1].
  • These settings can enhance security (ensuring the app won’t function if the device is compromised). They rely on Defender on the client and can add complexity. Use as needed or stick to defaults for now[1][1].

6. Assign the App Protection Policy:\ Unlike device config which targets devices, app protection policies target users (because they apply when a user’s account data is in an app).

  • Choose one or more Azure AD user groups that should receive this policy[1]. For example, “All Employees” or all users with a Business Premium license. In a small business, targeting all users is common, so any user who signs into a Microsoft 365 app on a Windows device will have these rules applied.
  • If you want to pilot, you could target only IT or a subset first.

7. Enforce via Conditional Access (CA):\ This step is crucial: to ensure that users actually use these protected apps and not find a workaround, use Azure AD Conditional Access:

  • Create a CA policy that targets the cloud apps you want to secure (Exchange Online, SharePoint Online, Teams, etc.).
  • In conditions, scope it to users or groups (likely the same users you target with the MAM policy).
  • In Access controls, require “Approved client app” or “Require app protection policy” for access[1]. In the CA settings, Microsoft 365 services have a condition like “Require approved client app” which ensures only apps that are Intune-approved (they have a list, e.g., Outlook, Teams mobile, etc.) can be used. On Windows, a more fitting control is Require app protection policy (which ensures that if the device is not compliant (MDM-enrolled), then the app being used must have an app protection policy).
  • One common approach: Require managed device OR managed app. This means if a device is Intune enrolled (compliant), fine – they can use any client. If not, then the user must use a managed (MAM-protected) app to access. For example, you could say: if not on a compliant (MDM) device, then the session must come from an approved client app (which essentially enforces app protection; on Windows this correlates to WIP-protected apps)[1][1].
  • This ensures that if someone tries to use a random app or an unmanaged browser to access, say, Exchange or SharePoint, they will be blocked. They’ll be forced to use Outlook or Edge with the app protection policy in place.
  • Without CA, the user could potentially use web access as a loophole (e.g., log into Outlook Web Access via Chrome on an unmanaged device). CA closes that gap by requiring either the device to be enrolled or the app to be a known protected app.

8. User Experience and Monitoring:\ Once deployed, the user experience on a personal Windows device with this policy is:

  • The user can install Office apps or use the Office web, but if they try to use a non-approved app for corp data, it won’t work. For example, if they try to open a corporate SharePoint file in WordPad or copy text from Outlook to Notepad, the action will be blocked by WIP (they might just see nothing happens or a notice saying the action is not allowed).
  • They might see a brief notification like “Your organization is protecting data in this app” when they first use a protected app[1].
  • Their personal files and apps are unaffected. They can still use personal email or personal versions of apps freely; the protection only kicks in for data that is tagged as corporate (which originates from the company accounts)[1][1].
  • If they attempt something disallowed (like pasting company data into a personal app), it will silently fail or show a message. These events can be logged.

Admins should monitor logs to ensure the policy works:

  • Intune App Protection Reports: Intune provides some reporting for app protection policies (e.g., under Monitor section for App Protection, you might see reports of blocked actions).
  • Event Logs on device: WIP events might be logged in the local event viewer under Microsoft->Windows->EDP (Enterprise Data Protection).
  • Azure AD Sign-in logs: If Conditional Access is used, sign-in logs will show if a session was blocked due to CA policy, which helps confirm that CA rules are working[1][1].
  • Periodically review these logs, and also gather any user feedback if they experience prompts or have trouble accessing something so you can fine-tune the allowed app list or policy settings.

9. Maintain the MAM Policy:\ If you need to add another allowed app (say your company adopts a new tool that should be allowed to access corp data), just edit the App Protection Policy in Intune and add that app to the protected list. Policy updates apply near-real-time to usage. Removing an app from allowed list effectively immediately prevents it from opening new corporate data (though any already saved corporate data in that app would remain encrypted and inaccessible). If an employee leaves, removing their account or wiping corporate data from their device is possible from Intune (App Protection has a wipe function that will remove corporate data from the apps on the next launch).

Summary of MAM Approach: With Intune MAM, the app itself isn’t blocked from running, but it’s blocked from accessing any company info[1][1]. This is ideal if you don’t manage the entire device, such as personal devices. Even if a user installs an unapproved app, it cannot touch work data – making it effectively useless for work. The user retains the freedom to use their device for personal tasks, while IT ensures corporate data stays confined to secure apps[1][1]. This approach requires less device control and is generally more palatable for users worried about privacy on their own machines[1]. The trade-off is that it doesn’t prevent all risks (a user could still run risky software on their personal device – it just won’t have company data to abuse)[1][1].

Comparison of MDM vs MAM Approaches

To summarize the differences between the device-based blocking (MDM/AppLocker) and app-based blocking (MAM/App Protection) approach, consider the following comparison:

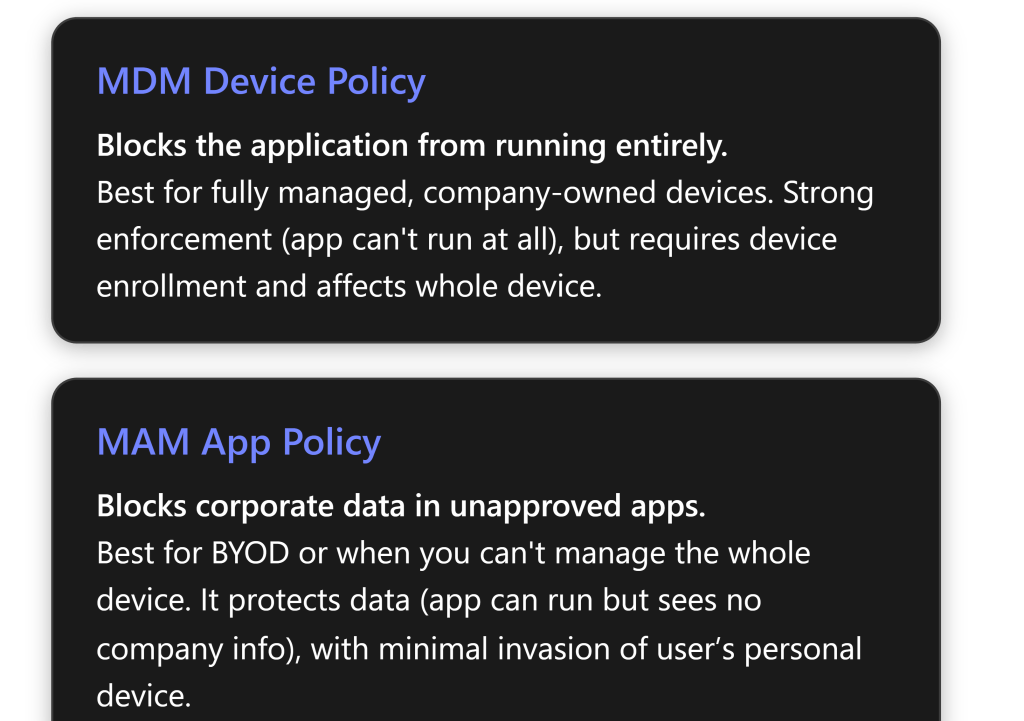
What is blocked: MDM completely blocks the application from launching on the device – the user clicks it, and nothing happens (or gets a “blocked by admin” notice)[1][1]. MAM allows the app to run, but blocks access to any protected (corp) data. The app can launch and be used for personal things, but if it tries to access work files or data, that access is denied or the data is unreadable[1][1].

Use case: MDM is best for company-owned devices under IT control where you want to outright ban certain software for security, licensing, or productivity reasons[1]. MAM is best for personal/BYOD devices (or to add a second layer on corporate devices) where you can’t or don’t want full control over the device, but still need to protect corporate information[1][1].

Implementation effort: MDM/Applocker requires a more technical setup initially (creating rules, exporting XML, etc.) – but once in place, it’s mostly “set and forget”, with occasional updates to the XML for changes[1][1]. It does require devices to be enrolled and on supported Windows editions[1]. MAM is configured through Intune’s UI (selecting apps and settings), which is a bit more straightforward. However, to be fully effective, you also need to configure Conditional Access, which can be complex to get right[1][1]. MAM doesn’t require device enrollment, just Azure AD sign-in.

User experience: With MDM blocking, if a user tries to open the app, it will not run at all. This could potentially disrupt work if, say, an important app was accidentally blocked – but otherwise the enforcement is silent/invisible until they actually try the blocked app[1][1]. With MAM, the user might see some prompts or restrictions in effect (like copy/paste blocked, or a message “your org protects data in this app”)[1][1]. Personal use of the device is unaffected, only when they deal with work data they encounter restrictions. This usually necessitates a bit of user education so they understand why certain actions are blocked[1][1].

Security strength: MDM’s AppLocker is very strong at preventing the app from causing any trouble on that device – if the app is malware or a forbidden tool, it simply can’t run[1][1]. It also means you could lockdown a device to only a whitelisted set of apps if you wanted (kiosk mode scenarios). MAM is very strong for data loss prevention – corporate content won’t leak to unapproved apps or cloud services[1][1]. However, it doesn’t stop a user from installing something risky on their own device for personal use (that risk is mitigated only to the extent that company data isn’t exposed). So to fully cover security, an enterprise might use MDM+MAM combined (MDM for device posture, antivirus, etc., and MAM for data protection on the edge cases).

Privacy impact: MDM is high impact on user privacy – IT can control many aspects of the device (and even wipe it entirely). So employees might resist MDM on personal devices[1][1]. MAM is low impact – it doesn’t touch personal files or apps at all, only corporate data within certain apps is managed[1][1]. If someone leaves the company, IT can remotely wipe the corporate data in the apps, but their personal stuff stays intact[1].

Licensing considerations: Both approaches are fully supported in M365 Business Premium. MDM with AppLocker needs Windows 10/11 Pro or higher (which Business Premium covers via Windows Business, essentially Pro)[1][1]. MAM for Windows needs Azure AD Premium (for CA) and Intune, which are included in Business Premium[1][1]. No extra licensing is needed unless you want advanced features like Defender for Endpoint P2 or Purview DLP in the future.

Additional Tips and Resources

  • Use Intune Reporting: Regularly check Intune’s Discovered Apps report (in Endpoint Manager under Apps > Monitor > Discovered apps). This report shows what software is found on your managed devices[3]. It can help identify if users have installed something that should be blocked, or to verify that a banned app is indeed not present.
  • Stay Informed on Updates: Intune and Windows are evolving. For example, new features like “App Control for Business” (a simplified interface for application control in Intune) or changes to WIP deprecation may come. Keep an eye on Microsoft 365 roadmap and Intune release notes so you can adapt your approach.
  • Training and Communication: Ensure that your IT support staff know how the policies work, so they can assist users. For instance, if a user tries to use a blocked app, the helpdesk should be able to explain “That application isn’t allowed by company policy” and suggest an approved alternative. Provide employees with a list of approved software and explain the process to request new software if needed (so they don’t attempt to install random tools).
  • Troubleshooting: If something isn’t working:
    • Microsoft’s documentation on https://learn.microsoft.com/windows/client-management/mdm/applocker-csp and https://learn.microsoft.com/intune/apps/app-protection-policy can be very helpful. The Recast Software guide references the AppLocker CSP documentation which details these OMA-URI settings[5].
    • The Microsoft Tech Community and Q\&A forums have real-world Q\&As. For example, handling removal of a stuck AppLocker policy was discussed in a community question[2][2].
    • The Microsoft Intune Customer Success blog has a post on “Blocking and removing apps on Intune managed devices” (Feb 2025) which provides guidance using a real example (blocking the DeepSeek AI app) across different platforms[4]. It’s a good supplemental read for advanced scenarios and cross-platform considerations.
  • Compliance and Legal: If your blocking is driven by compliance (e.g., a government ban on an app), ensure you archive proof of compliance. Intune logs and reports showing the policy applied can serve as evidence that you took required action. Also ensure your Acceptable Use Policy given to employees clearly states that certain applications are prohibited on work devices — this helps cover legal bases and user expectations.

Conclusion

With Microsoft 365 Business Premium, you have robust tools to control application usage on Windows devices. By leveraging Intune MDM with AppLocker, you can completely block unauthorized applications from running on company PCs, thereby enhancing security and productivity. The detailed steps above guide you through creating and deploying such a policy in a manageable way. Additionally, Intune’s App Protection (MAM) capabilities offer a complementary solution for protecting corporate data on devices you don’t fully manage, ensuring that even in BYOD situations, sensitive information remains in sanctioned apps.

In practice, many organizations will use a blend: e.g., require MDM for corporate laptops (where you enforce AppLocker to ban high-risk apps) and use MAM for any personal devices that access company data. The most effective method ultimately depends on your scenario, but with MDM and MAM at your disposal, M365 Business Premium provides a comprehensive toolkit to block or mitigate unapproved applications. By following the step-by-step processes and best practices outlined in this guide, IT administrators can confidently enforce application policies and adapt them as the organization’s needs evolve, all while keeping user impact and security compliance in balance.

References

[1] Blocking Applications on Windows Devices with Intune: MDM vs. MAM …

[2] Allowing a blocked app from Intune policy – Microsoft Q&A

[3] Practical Protection: Banning Apps with Intune | Practical365

[4] Blocking and removing apps on Intune managed devices (Windows, iOS …

[5] How to Block Apps with Intune – Recast Software

Onboarding Checklist for BYOD Windows Devices (Microsoft 365 Business Premium)

bp1

Introduction

Bring Your Own Device (BYOD) programs allow employees to use personal Windows laptops for work, but this flexibility demands strict security measures to protect company data. Microsoft 365 Business Premium provides integrated tools like Azure AD (for identity), Intune (Microsoft Endpoint Manager for device management), and Microsoft Defender for Business to secure both managed and unmanaged devices[1]. A comprehensive onboarding checklist helps IT departments ensure that every personal Windows device meets the organization’s security requirements and compliance standards before accessing corporate resources. This report outlines key steps and best practices for onboarding BYOD Windows 10/11 devices under M365 Business Premium, including installing security software, configuring security policies, and protecting company information at all stages.

Key Objectives: By following this checklist, organizations can: (1) Standardize the BYOD setup process to cover all critical security configurations, (2) Enforce best practices like encryption, up-to-date antivirus, and multi-factor authentication, and (3) Ensure ongoing compliance and support, including handling lost devices and user training. Adopting these measures helps maintain data integrity and regulatory compliance while enabling employees to work productively on their own devices[2][2].


Step-by-Step BYOD Onboarding Checklist

Below is an ordered checklist of steps to onboard a personal Windows device under M365 Business Premium. Each step is crucial to safeguard corporate information on that device from the start:

  1. Verify Device Requirements and Update OS: Ensure the personal PC meets minimum security requirements before enrollment. Check that the device is running a supported version of Windows 10 or 11, and install the latest system updates and patches. If the PC is on Windows Home edition, upgrade it to Windows 10/11 Pro because advanced security features like BitLocker encryption require Pro or Enterprise editions[1]. (M365 Business Premium includes upgrade rights from Windows 7/8/8.1 Pro to 10/11 Pro at no extra cost[1].) Confirm that Windows Update is enabled so the device continues to receive security patches regularly.

  2. Enable Multi-Factor Authentication (MFA) for User Accounts: Secure user identity before granting access to company data. Require all BYOD users to set up MFA on their Microsoft 365 accounts before or during device enrollment. Microsoft 365 Business Premium supports strong authentication policies – for example, using the Microsoft Authenticator mobile app for OTP codes or push notifications[1]. Helping every user enable MFA is one of the first and most important steps[3], as it significantly reduces the risk of account breaches by adding a verification step beyond just passwords. Administrators can enforce MFA through Azure AD Conditional Access or Security Defaults. Ensure users have registered at least two MFA methods (such as authenticator app and phone) and have tested that they can log in with MFA. This guarantees that even if a password is compromised, attackers cannot easily access corporate apps.

  3. Install Microsoft 365 Apps and Company Portal: Set up work applications and tools needed for a managed, secure experience. Instruct the user to install the latest Microsoft 365 Apps (Office suite including Outlook, Word, Excel, Teams, OneDrive, etc.) on the personal device[3]. These official apps are designed to work with M365 security controls. Additionally, have the user install the Intune Company Portal app (for Windows, it’s available from the Microsoft Store or as part of Windows settings) – this app will facilitate device enrollment in Microsoft Intune (Endpoint Manager) and allow the device to receive security policies. Using the Company Portal, the employee should sign in with their work account and register/enroll the device in Intune. This enrollment marks the device as known to the organization and allows IT to apply required configurations (while respecting privacy on personal data). If full enrollment is not desired for BYOD, consider using Windows device registration (Azure AD register instead of join) along with app protection policies; however, full Intune enrollment is recommended for comprehensive policy enforcement.

  4. Enroll the Device in Azure AD and Intune: Connect the device to the company’s Azure AD for identity and enable mobile device management. During or after Company Portal installation, guide the user to join or register the device to Azure AD (work account) and complete Intune enrollment. This process may involve navigating to Settings > Accounts > Access work or school on Windows and clicking “Connect” to add the work/school account. The user will authenticate (using MFA as set up earlier) and the device will become Azure AD joined or registered, and automatically enroll in Intune MDM if configured. Once enrolled, Intune will push down the organization’s security configurations and compliance policies to the BYOD device[1][1]. Tip: Have clear instructions or an enrollment wizard for users – possibly leverage Microsoft Autopilot for a smoother experience if the device is being set up from scratch[1]. Successful enrollment allows the device to be monitored and managed remotely by IT.

  5. Apply Security Configuration and Compliance Policies: Configure the device with all required security settings via Intune or guided manual steps. After enrollment, the device should receive Intune policies that enforce the organization’s security standards. Key security policies to configure include:

    • Device Encryption: Require full-disk encryption (BitLocker) on the BYOD Windows device. Intune compliance policy can mark a device non-compliant if BitLocker is not enabled. For devices that support device encryption (a lighter form available on some Windows Home/modern devices), ensure it’s turned on[4]. BitLocker (or Device Encryption) ensures that if the laptop is lost or stolen, data on the drive cannot be accessed without proper credentials. (Note: BitLocker requires Windows Pro or higher; this is why upgrading Home editions is necessary.)
    • Antivirus and Anti-malware: Ensure that Microsoft Defender Antivirus (Windows Security) is active and up-to-date on the device[4]. Intune’s Endpoint Security policies or Microsoft Defender for Business can enforce real-time protection and signature updates. Users should be prevented from disabling antivirus. If the organization opts for a third-party security suite, that should be installed at this stage. M365 Business Premium includes Microsoft Defender for Business, an endpoint protection platform with advanced threat detection; devices can be onboarded to this service for enhanced protection against malware, ransomware, and phishing[1].

    • Firewall: Verify that the Windows Defender Firewall is enabled on all network profiles[4]. Intune can configure firewall settings or a baseline security policy. A firewall helps block unauthorized network access, and it should remain on even if an alternative firewall is in use[4].

    • Device Access Requirements: Enforce a secure lock screen and sign-in policy. Intune configuration can require a strong PIN/password or Windows Hello for Business (biometric or PIN) for device login. This ensures the device is inaccessible to others if left unattended. Also configure idle timeouts (auto lock after a period of inactivity).

    • OS and App Updates: Use Intune policies or Windows Update for Business settings to force automatic updates for Windows OS and Microsoft 365 Apps. Keeping the system updated patches vulnerabilities regularly[1]. Enable Microsoft Store auto-updates as well, so other apps (like Company Portal) stay updated.

    • Application Protection: Optionally deploy App Protection Policies (MAM-WE) for sensitive apps. For example, require that company Outlook and OneDrive apps have additional PIN or only allow saving files to company-approved locations. This can contain corporate data within managed apps even on a personal device, adding a layer of data loss prevention.

    • Conditional Access Policies: Configure Azure AD Conditional Access to complement device policies. For BYOD scenarios, set policies that allow access to company cloud resources only if the device is marked compliant with Intune or if accessing via approved client apps. Also require MFA on unmanaged or new devices. Conditional Access ensures that devices not meeting security criteria (or unknown devices) are blocked from company email, SharePoint, Teams, etc., thereby protecting data.

    By applying these policies, the BYOD PC is transformed into a trusted device: it has encryption enabled, a firewall up, active malware protection, and adherence to password/MFA rules. Intune’s compliance reports will show if any device falls out of line (e.g., encryption turned off or OS outdated), enabling IT to take action[1].

  6. Install and Verify Security Software: Deploy and confirm all necessary security software is running correctly on the device. This includes:

    • Microsoft Defender Antivirus & Firewall: As noted, ensure the built-in Windows Security suite (Defender AV and Firewall) is enabled. No separate installation is needed on Windows 10/11 because these come pre-installed, but verify real-time protection is on and virus definitions are current[4]. In the Windows Security settings, check for any alerts or needed actions (update definitions, run an initial scan, etc.).

    • Microsoft Defender for Business (Endpoint): Since M365 Business Premium includes this advanced security, onboard the device to Defender for Business if not done via Intune. This can be achieved through Intune onboarding policies or via the Microsoft 365 Defender portal by downloading an onboarding script. Onboarding allows the device to report threats and be monitored for sophisticated attacks in the Defender portal[1]. Once onboarded, verify in the Microsoft 365 Defender Security Center that the device status is healthy (showing as onboarded/active) and that no threats are detected[1][1].

    • Additional Security Tools: If your organization uses additional security software (such as a VPN client for secure remote access, endpoint DLP agents, or device management agents), install those as part of onboarding. For example, install a corporate VPN and test that it connects successfully. Ensure any browser security extensions or configurations (like enabling SmartScreen filter in Edge or Chrome) are in place as required.

    • Verify Security Settings: After installation, run a security health check on the device. This could include verifying BitLocker status (e.g., using manage-bde -status command or via Windows settings), running a test malware scan with Defender, and confirming that firewall rules/policies have applied. Many of these can be reviewed in the Intune device record (which will list compliance with each setting) or directly on the PC.

    Document that security software is in place (via screenshots or compliance reports) for auditing. This step ensures the device is not only configured to be secure but actively running protections against threats on an ongoing basis.

  7. Test Access to Company Resources Securely: Before declaring the onboarding complete, verify that the user can access work resources under the new security constraints. For example, sign into Office 365 (Outlook, Teams, SharePoint) from the device. The login should prompt MFA if not already remembered (testing that MFA is working). Access email and ensure that any email security features (like Outlook’s phishing protection or Safe Links, if configured under Defender for Office 365) are active. Try opening a company document from OneDrive/SharePoint and ensure it opens in the managed Office app. If you have set up conditional access such that only compliant devices can download certain content, confirm that this device is allowed. Conversely, attempt an action that should be blocked (for instance, downloading a sensitive file to an unapproved location or using a non-managed app to access a secure file) to verify policies are effective. This practical test ensures that all configuration from previous steps is correctly enforced and the device is ready for productive use without exposing data.

  8. Communicate Usage Guidelines to the Employee: As the final onboarding step, educate the device owner on their responsibilities and how to stay within compliance. Review the BYOD policy and security best practices with the user as part of the hand-off. Key points to cover include: keeping the device password private, not disabling security settings (e.g., not turning off the firewall or antivirus), recognizing company data vs personal data on the device, and how to report issues or lost devices. Provide the employee with support resources (like IT helpdesk contact, or a quick-start guide) for using corporate apps on their Windows PC. Emphasize that while IT has enrolled and secured their laptop, the user plays a crucial role in maintaining security—through safe browsing habits, avoiding suspicious email links, and complying with all policies. Regular training and awareness are essential, since even the best technical measures can be undermined by user actions[2]. The user should feel confident about what is expected and what steps to take in various scenarios (e.g., if they see an unfamiliar device warning or if they need to install updates). This wraps up the onboarding, ensuring the employee is ready to work securely on their BYOD laptop.


Post-Onboarding Security Practices and Policies

Onboarding is just the beginning; maintaining security for BYOD devices is an ongoing process. After the initial setup, IT departments should enforce additional measures and be prepared for the full device lifecycle. Below are key practices and policy considerations to ensure company information remains protected on BYOD Windows devices:

  • Continuous Compliance Monitoring: Once devices are enrolled and in use, IT must continuously monitor their compliance and health status. Leverage the Microsoft 365 Defender portal and Intune for visibility[1][1]. Set up alerts or periodic reports for non-compliance (e.g., a device that falls out of encryption or misses updates). Microsoft Intune provides compliance dashboards showing which devices comply with policies and which don’t. Only compliant devices should retain access to sensitive resources – use Conditional Access rules so that if a device becomes non-compliant (say antivirus turns off or OS updates lapse), the device’s access is restricted until issues are resolved. Regularly review devices’ threat status in Defender for Business; if malware was detected on a BYOD machine, ensure it was successfully remediated and investigate if any data was compromised. Monitoring tools allow administrators to run remote antivirus scans or even isolate a device if a serious threat is detected[1].

  • Security Policy Updates and Patching: Threats evolve, and so should your policies. Periodically re-evaluate security policies in Intune/Endpoint Manager to incorporate new best practices or address any gaps. For instance, if a new Windows 11 security feature becomes available (such as improved ransomware protection or driver block rules), update your configuration profiles or baselines to enable it on BYOD devices. Ensure that patch management remains enforced – devices should be getting Windows security updates at least monthly. Intune can be configured to force updates outside active hours and even auto-reboot if needed (with user warnings). The organization should also push updates for Microsoft 365 Apps and any other managed applications. Keep all software (including third-party apps) up to date to reduce vulnerabilities[1]. This may involve user education for apps not managed by Intune, reminding them to update browsers, PDF readers, etc., which could pose risks if outdated.

  • Handling Lost or Stolen Devices: Despite precaution, a BYOD laptop might be lost or stolen – swift action is vital to protect data. Prepare a clear procedure for such incidents as part of the BYOD policy. Usually, the employee must report the loss to IT immediately. IT can then remotely wipe corporate data from the lost device using Intune’s “Retire” or “Selective Wipe” function, which removes company apps, email, and data without erasing personal files. In more severe cases or if the device is fully managed, a full remote wipe/reset might be executed to factory settings. Also, revoke the device’s access in Azure AD (mark it as lost, disable it, or remove it from the list of trusted devices). Because BitLocker encryption was enforced, data on the device’s drive remains inaccessible to unauthorized parties[4]. Nonetheless, monitor the Azure AD sign-in logs or Defender alerts for any unusual attempts from that device. Document the incident, and if appropriate, have the user file a police report. The key is to ensure that a lost BYOD machine cannot be a gateway to company information, thanks to the layered protections in place.

  • Secure Data Removal and Offboarding: When an employee leaves the company or a personal device is no longer used for work, securely remove all corporate information from that BYOD device. Intune provides a Retirement option which will scrub organization data: it removes managed email profiles, de-registers the device from Azure AD, and deletes any locally cached corporate files (for instance, it can wipe the work OneDrive folder if it was marked for enterprise wipe). In addition, ensure that any company licenses or access tokens are invalidated on that device: sign the user out of Office 365 apps (you can expire user sessions from the Microsoft 365 admin center or Azure AD). If BitLocker was used and the recovery key was escrowed to Azure AD, verify that key is revoked from user’s account. Have a checklist for employee exit that includes confirming all their BYOD devices are either wiped or returned to personal-only use. Instruct the user on how to uninstall Company Portal and any work apps if necessary. The goal is to prevent any residual corporate data from remaining on a personal device once it’s out of the BYOD program. This protects company information and also respects the employee’s device ownership going forward.

  • User Education and Training: A strong BYOD security posture combines technology with informed users. Regular security awareness training is crucial, because users who understand the importance of policies are less likely to violate them inadvertently[2]. Conduct periodic training sessions or send out tips covering topics like: how to spot phishing emails, safe internet habits on a work device, proper use of VPNs, and what to do if they suspect a security issue. Also, educate users on acceptable use policies – for instance, discourage storing work files on unapproved personal cloud services or sharing work data via personal email. Make sure employees know the boundaries of IT’s access to their BYOD device (for transparency and trust, clarify that IT manages only corporate data/configuration, and personal files/apps remain private). Provide a BYOD handbook or quick-reference guide that summarizes do’s and don’ts, security steps, and contact information for support. When users understand the “why” behind each security measure, they are more likely to cooperate and less likely to attempt workarounds[2][2].

  • Clear BYOD Policies and Compliance Requirements: Develop a formal BYOD policy document that employees must read and sign. This should outline security requirements (like those in this checklist), acceptable use guidelines, and consequences for non-compliance. From a compliance standpoint, the policy helps ensure the company meets legal and regulatory obligations by extending them to personal devices. Consider data protection laws relevant to your industry – for example, if subject to GDPR or other privacy regulations, the policy should mandate encryption and access controls on any device processing personal data, even if owned by employees. Many regulations (HIPAA for healthcare, PCI-DSS for payment data, etc.) require demonstrable protection of sensitive information; extending those controls to BYOD is essential to stay compliant. Make sure the BYOD program is vetted by the compliance and legal teams so that it aligns with any certifications or standards the company adheres to. In practice, this means personal devices must meet the same security bars as corporate devices – e.g., encryption, audit logging (where feasible), secure user authentication – to protect confidential information[2][2]. Regular audits or reviews of BYOD devices can be done to ensure compliance (with the user’s knowledge and consent as per the policy). Non-compliant devices should be compelled to comply or be blocked from access. This proactive stance and clear documentation help mitigate legal risks and demonstrate due diligence in protecting data.

  • Staying Updated on Threats and Best Practices: Technology and cyber threats evolve rapidly. IT departments should stay informed about the latest security advisories, updates, and best practices, especially related to Windows and Microsoft 365. Subscribe to official Microsoft security blogs or newsletters for updates on new features in Intune, Defender, Windows, etc. Leverage the Microsoft 365 Secure Score tool – it provides suggestions to improve security posture which can highlight areas to tighten in your BYOD policy. Attend webinars or training offered by Microsoft (or reputable security organizations) to continuously improve your BYOD management strategy. It’s also wise to periodically revisit this checklist and policy: at least annually, update it to include new controls or to address any incidents that occurred. For example, if there’s news of a particular type of attack targeting BYOD scenarios, ensure your defenses cover it (perhaps by adding a new rule or user training point). By keeping both IT staff and employees up-to-date on security knowledge, the organization creates a culture of security that extends to all devices. In summary, continuous improvement and vigilance are part of the BYOD security lifecycle – the checklist is a living document that should adapt to emerging risks and technological advancements.


Conclusion

Implementing a robust onboarding checklist for BYOD Windows devices ensures that personal devices meet corporate security standards from day one. Through Microsoft 365 Business Premium’s capabilities like Intune device management, Defender for Business, and Azure AD Conditional Access, organizations can achieve a balance where employees enjoy the convenience of using their own laptops while the company’s information remains well-protected. By following the steps outlined – from enforcing MFA and installing security software to enabling encryption and configuring policies – IT administrators can significantly reduce the risk of data breaches on personal machines. Equally important are the post-onboarding practices: continuous monitoring, user training, and clear policies will maintain security over time and address challenges such as lost devices or evolving compliance requirements.

In essence, securing BYOD is a shared responsibility[2]: IT provides the tools and guidance, and employees uphold the required practices. When done right, a BYOD program with a thorough security checklist can enhance productivity without compromising on security. This report and checklist serve as a comprehensive guide for IT departments to onboard and manage personal Windows devices confidently, ensuring that sensitive company data stays safe on any device, anywhere.。[2][4]

References

[1] Secure managed and unmanaged devices – Microsoft 365 Business Premium

[2] Securing BYOD with Microsoft Intune – A Practical Approach

[3] Set up unmanaged devices with Microsoft 365 Business Premium …

[4] Protect unmanaged devices with Microsoft 365 Business Premium

Managing BYOD Devices in an M365 Business Premium Environment

image

Effectively managing Bring Your Own Devices (BYOD) is crucial for organizations to balance flexibility with the security of company data. Microsoft 365 Business Premium provides a robust suite of tools, primarily through Microsoft Intune, to achieve this. The recommended approach focuses on Mobile Application Management (MAM) to protect corporate data at the application level without fully managing the user’s personal device, supplemented by Mobile Device Management (MDM) for certain scenarios and Conditional Access policies for granular control.

Here’s a comprehensive guide:

Recommended Approach: Prioritize App-Level Protection (MAM) for BYOD

For most BYOD scenarios, the least intrusive and generally recommended approach is to use Intune App Protection Policies (APP), also known as Mobile Application Management (MAM). This allows employees to use their personal devices to access company data within approved applications while ensuring that the data is protected.

Key Benefits of MAM for BYOD:

  • Data Protection: Corporate data is protected within managed apps (e.g., Outlook, Teams, OneDrive) regardless of the device’s management state.
  • User Privacy: Personal data and apps on the device remain separate and untouched by IT.
  • Flexibility: Users prefer this less intrusive approach on their personal devices.
  • Security: Prevents data leakage through copy/paste restrictions, mandating PINs for app access, and enabling remote wipe of corporate data from apps.

Core Components of the BYOD Strategy:

  1. Microsoft Entra ID (formerly Azure AD) for Identity and Access Management:

    • Ensure all users have M365 Business Premium licenses assigned.
    • Utilize Entra ID groups to target policies effectively (e.g., “BYOD Users”).
    • Enforce Multi-Factor Authentication (MFA) for all users.
  2. Intune App Protection Policies (APP/MAM):

    • Protect corporate data within specific applications on iOS, Android, and Windows devices.
  3. Intune Device Compliance Policies (Optional MDM for specific needs):

    • If users need to access resources that require full device management or if your organization has stricter compliance requirements, you can offer device enrollment (MDM). Clearly communicate the implications of device enrollment to users.
    • For BYOD, enrollment is typically voluntary.
  4. Conditional Access Policies:

    • Enforce access controls based on user identity, location, device health (if enrolled), and application.
    • Key for ensuring only approved apps and compliant configurations can access M365 services.
  5. Data Loss Prevention (DLP) Policies:

    • Further protect sensitive information by defining policies that prevent data from being inappropriately shared or moved.

Step-by-Step Configuration Guide:

Phase 1: Initial Setup and Prerequisites

  1. Ensure Licensing: Verify all users intended for BYOD access have Microsoft 365 Business Premium licenses assigned in the Microsoft 365 admin center.
  2. Configure MDM Authority (if not already set):
    • In the Microsoft Intune admin center (intune.microsoft.com), navigate to Tenant administration > Tenant status.
    • Ensure the MDM authority is set to Microsoft Intune. If not, you’ll need to set it (this is a one-time setup).
  3. Prepare User Groups:
    • In the Microsoft Entra admin center (entra.microsoft.com) or Microsoft 365 admin center, create user groups for policy assignments. For example, a group named “BYOD-Users” for users who will be using personal devices.

Phase 2: Configure Intune App Protection Policies (MAM)

These policies apply to applications, not the entire device, making them ideal for BYOD.

  1. Navigate to App Protection Policies:
    • In the Microsoft Intune admin center, go to Apps > App protection policies.
  2. Create a New Policy:
    • Click + Create policy and select the platform (iOS/iPadOS, Android, or Windows). It’s recommended to create separate policies for each platform for tailored settings.
  3. Basics:
    • Name: Give your policy a descriptive name (e.g., “BYOD iOS App Protection”).
    • Description: (Optional) Add a description.
    • Click Next.
  4. Apps:
    • Target policy to:
      • All public apps: Targets all Intune-aware public store apps.
      • Selected apps: Allows you to choose specific apps (recommended for control). Select key M365 apps like Outlook, OneDrive, SharePoint, Teams, Word, Excel, PowerPoint, and Microsoft Edge.
      • You can also add custom line-of-business (LOB) apps if they are integrated with the Intune SDK or wrapped.
    • Click Next.
  5. Data Protection: This is a critical section for BYOD.

    • Send org data to other apps:
      • Policy managed apps: Recommended. This restricts data sharing (like copy/paste) to other apps also managed by an App Protection Policy.
      • All apps: Less secure, allows data transfer to any app.
      • No apps: Most restrictive.
    • Receive data from other apps:
      • Policy managed apps: Recommended.
    • Save copies of org data:
      • Allow: If you want users to be able to save corporate data to local storage or other locations.
      • Block: Recommended for BYOD to prevent corporate data from being saved to unmanaged personal storage. If blocked, ensure users can save to approved corporate locations like OneDrive or SharePoint.
    • Restrict cut, copy, and paste between other apps:
      • Policy managed apps with paste in: Recommended. Allows copy/paste within policy-managed apps and allows pasting into managed apps from unmanaged apps but not the other way around for sensitive data.
      • Blocked: Most restrictive.
    • Screen capture and Google Assistant (Android) / Siri (iOS):
      • Block: Recommended to prevent data leakage via screenshots or voice assistants. Note that recent Intune SDK updates might enable blocking screen capture by default under certain conditions.
    • Encrypt org data: Require.
    • Sync policy managed app data with native apps or add-ins: Block or Allow based on your security posture. Blocking prevents potential data leakage to unmanaged native contact or calendar apps.
    • Printing org data: Block unless there’s a strong business need.
    • Restrict web content transfer with other apps: Configure which browsers are allowed to open web links from managed apps. It’s best to require links to open in a managed browser like Microsoft Edge.
    • Org data notifications: Choose how much information is shown in notifications. Block org data is the most secure.
    • Click Next.
  6. Access Requirements:
    • PIN for access: Require. Set PIN requirements (e.g., type, length, simple PIN, fingerprint/face ID).
    • Work or school account credentials for access: Can be required instead of or in addition to a PIN after a certain period of inactivity.
    • Recheck the access requirements after (minutes of inactivity): Define a timeout.
    • Conditional Launch:
      • Offline grace period: Define how long apps can run offline before requiring re-authentication.
      • Max PIN attempts: Set the number of attempts before an app reset or corporate data wipe.
      • Min app version: Specify minimum versions for apps to ensure security updates.
      • Disabled account: Action to take if the user account is disabled.
      • Jailbroken or rooted devices: Block access or Wipe data. Recommended to block.
      • Min OS version: Set minimum OS requirements.
      • Device model(s) (Android only): Can restrict specific device models if needed.
      • SafetyNet device attestation (Android): Required. Helps ensure the device integrity.
      • Require device lock (iOS): Ensure the device itself has a passcode.
    • Click Next.
  7. Assignments:
    • Click + Add groups and select the “BYOD-Users” group (or other appropriate groups) you created earlier.
    • Click Next.
  8. Review + create:
    • Review your settings and click Create.

Repeat these steps for each platform (Android, iOS/iPadOS, Windows). For Windows, App Protection Policies primarily apply to Microsoft Edge and other enlightened apps.

Phase 3: Configure Conditional Access Policies

Conditional Access policies act as a gatekeeper, ensuring specific conditions are met before granting access to M365 resources.

  1. Navigate to Conditional Access:
    • In the Microsoft Intune admin center, go to Endpoint security > Conditional Access. This will redirect you to the Microsoft Entra admin center. Alternatively, go directly to entra.microsoft.com > Protection > Conditional Access.
  2. Create a New Policy:
    • Click + Create new policy.
  3. Name: Give your policy a descriptive name (e.g., “BYOD – Require Approved App and App Protection”).
  4. Assignments:
    • Users:
      • Include: Select your “BYOD-Users” group.
      • Exclude: (Optional) Exclude emergency access accounts or specific service accounts.
    • Target resources (Cloud apps or actions):
      • Select Cloud apps.
      • Include: Choose All cloud apps (most comprehensive, but be careful not to lock yourself out – exclude your admin account during testing or use the “What If” tool). Alternatively, select specific apps like Office 365 Exchange Online, Office 365 SharePoint Online, Microsoft Teams, etc.
    • Conditions:
      • Device platforms:
        • Configure: Yes.
        • Include: Android and iOS. (And Windows if you have Windows BYOD).
      • Client apps:
        • Configure: Yes.
        • Select: Mobile apps and desktop clients and Browser. (Consider if you need to differentiate policies for browser access vs. app access).
  5. Access controls:
    • Grant:
      • Select Grant access.
      • Require approved client app: This ensures users are using apps that can be managed by Intune (e.g., Outlook mobile instead of native mail apps).
      • Require app protection policy: This is crucial. It ensures that the App Protection Policies you configured are applied to the app before access is granted.
      • For multiple controls: Select Require all the selected controls.
      • (Optional but Recommended for stronger security) Require multi-factor authentication: If not already enforced globally, this adds another layer of security.
      • (Optional, for enrolled devices) Require device to be marked as compliant: If you are also implementing device compliance policies for enrolled BYOD devices.
  6. Enable policy:
    • Set to Report-only initially to test the impact.
    • Once satisfied, change to On.
  7. Click Create.

Common Conditional Access Policies for BYOD:

  • Require MFA for all users accessing cloud apps. (A foundational policy)
  • Require approved client app and app protection policy for mobile access to M365. (As detailed above)
  • Block access from unsupported/non-compliant device platforms.
  • Limit session controls for unmanaged devices (e.g., block downloads using Microsoft Defender for Cloud Apps integration, though this requires additional licensing/configuration).

Phase 4: (Optional) Configure Device Enrollment and Compliance Policies (MDM for BYOD)

If you decide to support or require device enrollment for certain BYOD users or scenarios:

  1. Configure Enrollment Restrictions:
    • In the Intune admin center, go to Devices > Enroll devices > Enrollment device platform restrictions.
    • Create restrictions to allow or block personally owned devices for specific platforms (iOS/iPadOS, Android, Windows, macOS). For BYOD, you’d typically allow personally owned devices for the platforms you support.
  2. Create Device Compliance Policies:
    • Go to Devices > Compliance policies.
    • Click + Create policy. Select the platform.
    • Name: e.g., “BYOD iOS Device Compliance”.
    • Settings: Configure requirements such as:

      • Minimum/Maximum OS version.
      • Device passcode/PIN.
      • Device encryption (usually enabled by default on modern devices).
      • Jailbroken/rooted device detection (mark as non-compliant).
      • Microsoft Defender for Endpoint risk level (if integrated).
    • Actions for noncompliance:
      • Mark device noncompliant: Immediately or after a grace period.
      • Send email to end user: Notify them of non-compliance and how to remediate.
    • Assignments: Assign to your “BYOD-Users” group or a group specific to enrolled BYOD devices.
  3. Communicate Enrollment Process to Users:
    • Users typically enroll via the Intune Company Portal app, which they can download from their respective app stores.
    • Provide clear instructions on how to enroll and the implications (what IT can and cannot see/do on their device).
    • Windows BYOD Enrollment: Users can go to Settings > Accounts > Access work or school > Connect.
    • Android BYOD Enrollment: Typically uses Android Enterprise personally owned work profiles, which separates work and personal data at the OS level.
    • iOS/iPadOS BYOD Enrollment: Uses standard Apple MDM enrollment.

Phase 5: Configure Data Loss Prevention (DLP) (Optional but Recommended)

Microsoft Purview Data Loss Prevention can help prevent leakage of sensitive information.

  1. Navigate to Microsoft Purview:
  2. Data Loss Prevention:
    • Go to Data loss prevention > Policies.
    • Click + Create policy.
    • Use a template (e.g., for PII, financial data) or create a custom policy.
    • Name your policy.
    • Locations: Choose where the policy applies (e.g., Exchange email, SharePoint sites, OneDrive accounts, Teams chat and channel messages, Devices). For “Devices,” this applies to Windows endpoints with Purview DLP enabled.
    • Policy settings:
      • Define conditions (e.g., content contains sensitive info types like credit card numbers, social security numbers).
      • Define actions (e.g., restrict access, block sharing, show policy tips to users, send alerts to admins).
    • User notifications and overrides: Configure how users are informed and if they can override the policy with justification.
    • Incident reports: Set up alerts and reporting.
    • Test it out first or Turn it on right away.
    • Assign the policy.

DLP for BYOD scenarios often relies heavily on protecting data within the M365 services and through App Protection Policies. Endpoint DLP for Windows devices provides more direct control on the device itself.

Phase 6: User Communication and Training

  • Clearly communicate your BYOD policy to users.
  • Explain what data is being managed/protected and what remains private.
  • Provide instructions on how to install managed apps (like Outlook, Teams) and access corporate resources.
  • If offering device enrollment, explain the benefits and implications.
  • Train users on best practices for data security on their personal devices.

Phase 7: Monitoring and Maintenance

  • Monitor App Protection Policy status: In Intune, go to Apps > Monitor > App protection status.
  • Monitor Device Compliance: In Intune, go to Devices > Monitor > Device compliance status.
  • Review Conditional Access policy reports: Check sign-in logs in Entra ID to see how policies are being applied.
  • Review DLP alerts and reports in Microsoft Purview.
  • Keep policies updated as M365 features evolve and your security requirements change.
  • Regularly review user access and group memberships.

Important Considerations for M365 Business Premium:

  • Simplified Admin Console vs. Full Intune Console: M365 Business Premium offers a simplified admin experience. For more advanced Intune configurations, you might need to access the full Microsoft Intune admin center (intune.microsoft.com).
  • Microsoft Defender for Business: Included with M365 Business Premium, it provides endpoint security for devices, including those enrolled in Intune. This enhances protection against malware and other threats.
  • Windows Information Protection (WIP) was deprecated: The modern approach for data protection on Windows is through Intune App Protection Policies (especially for Edge) and Microsoft Purview DLP.

By implementing this layered approach, focusing on App Protection Policies for broad BYOD adoption and supplementing with Conditional Access and optional device enrollment/compliance, organizations using M365 Business Premium can effectively secure corporate data while providing users with the flexibility of using their personal devices.

Enforce device compliance and app protection policies on BYOD with M365 Business premium

image

M365 Business Premium is well-suited for this because it includes key components like:

  • Microsoft Intune (Part of Microsoft Endpoint Manager): For Mobile Device Management (MDM) and Mobile Application Management (MAM).

  • Azure Active Directory (Azure AD) Premium P1: Provides Conditional Access policies, which are crucial for enforcement.

  • Information Protection Features: For data security.

Here’s a step-by-step approach, focusing on the least intrusive but effective methods for BYOD:

Core Strategy: Prioritize App Protection Policies (MAM) without Full Device Enrollment (MDM)

This is often the preferred approach for BYOD because it protects corporate data within specific apps without taking full control over the user’s personal device. It respects user privacy while securing business information.

Steps:

  1. Configure App Protection Policies (APP / MAM Policies):

    • Go to the Microsoft Endpoint Manager admin center: (endpoint.microsoft.com)

    • Navigate: Apps > App protection policies.

    • Create Policy: Click “+ Create policy” and select the platform (iOS/iPadOS or Android).

    • Basics: Give the policy a descriptive name (e.g., “BYOD App Protection – Android”).

    • Apps:
      • Target policy to: Select “All Public Apps” or “Selected Apps”. For BYOD, often start with core Microsoft apps (Outlook, Teams, OneDrive, Edge, Office apps). You can add other MAM-enabled apps later.

      • Important: This policy only applies to apps that support Intune App Protection.
    • Data Protection: This is the core. Configure settings like:

      • Prevent backup: Block backing up work data to personal cloud storage (iCloud/Google Cloud).

      • Restrict cut, copy, paste: Control data movement between managed (work) apps and unmanaged (personal) apps. Often set to “Policy managed apps”.

      • Encryption: Ensure app data is encrypted. (Usually enabled by default).

      • Screen capture: Block screen capture for Android (iOS requires device management).

      • Save copies of org data: Prevent saving work files to local/personal storage. Allow saving only to managed locations like OneDrive for Business or SharePoint.

      • Receive data from other apps: Control if managed apps can receive data from unmanaged apps.

      • Open data in Org documents: Control which apps can open work documents.
    • Access Requirements: Define how users access the protected apps:

      • PIN for access: Require a separate PIN (or biometrics) to open the work apps. Configure PIN complexity and timeout.

      • Work or school account credentials for access: Force re-authentication after a period of inactivity.
    • Conditional Launch: Set conditions that must be met for the app to launch (e.g., block rooted/jailbroken devices, minimum OS version, app version).

    • Assignments:
      • Target: Assign the policy to specific Azure AD user groups containing your BYOD users. Do not assign to device groups for MAM-without-enrollment.
    • Review + Create: Finalize and create the policy.
  2. Configure Conditional Access Policies in Azure AD:

    • This is how you enforce the use of protected apps and check device state (even without full enrollment).

    • Go to the Microsoft Endpoint Manager admin center or Azure AD portal: (portal.azure.com)

    • Navigate: Endpoint Security > Conditional Access (in MEM) or Azure Active Directory > Security > Conditional Access (in Azure Portal).

    • Create New Policy:
      • Name: Give it a clear name (e.g., “CA – Require App Protection for Mobile Access”).

      • Assignments > Users and groups: Target the same user groups as your App Protection Policy.

      • Assignments > Cloud apps or actions: Select the specific M365 services you want to protect (e.g., Exchange Online, SharePoint Online, Teams). Start with “Office 365” (which covers multiple services).

      • Assignments > Conditions > Device platforms: Configure this policy to apply only to iOS and Android.

      • Assignments > Conditions > Client apps: Configure this to apply to “Mobile apps and desktop clients” > “Modern authentication clients” > Select “Mobile apps”.

      • Access Controls > Grant:
        • Select “Grant access”.

        • Choose “Require app protection policy”.

        • Optional but Recommended: Also choose “Require approved client app”. This ensures users are using MAM-capable apps (like Outlook Mobile instead of native mail clients).

        • For “Multiple controls”: Select “Require all the selected controls”.
      • Enable policy: Set to “On”.

      • Create: Save the policy.

User Experience with this Approach:

  1. The user installs a managed app (e.g., Outlook) from the public app store.

  2. They sign in with their work (Azure AD) account.

  3. Conditional Access checks if access is allowed. The policy requires an app protection policy.

  4. The user is prompted that their organization protects data in the app. They may be prompted to install the Microsoft Authenticator (on Android) or the Company Portal app (on iOS/Android). Crucially, they do NOT need to fully enroll their device via the Company Portal. The Company Portal app simply needs to be present to receive and report the APP status.

  5. The App Protection Policy settings are applied to the app (e.g., PIN required, copy/paste restrictions).

  6. The user can now securely access work data within that managed app. Their personal apps and data remain untouched and unmanaged.


Alternative/Additional Strategy: Device Compliance (Requires Enrollment – MDM)

If you need stronger device-level controls (e.g., enforcing screen lock complexity on the device itself, checking for device encryption, ensuring minimum OS), you need users to enroll their devices into Intune (MDM). This is more intrusive for BYOD and users might resist.

Steps (If Choosing Enrollment):

  1. Configure Enrollment Restrictions: (MEM Admin Center > Devices > Enroll devices > Enrollment device platform restrictions) Ensure personal iOS/Android devices are allowed to enroll if you intend to support this.

  2. Create Device Compliance Policies: (MEM Admin Center > Devices > Compliance policies)

    • Create separate policies for iOS and Android.

    • Configure settings like: Minimum/Maximum OS Version, Require PIN/Password, Require Encryption, Device Threat Level (if using Defender for Endpoint), Block rooted/jailbroken devices.

    • Assign these policies to user groups.
  3. Modify/Create Conditional Access Policies:
    • Instead of (or in addition to) “Require app protection policy,” add the grant control “Require device to be marked as compliant”.

    • You can combine these: Require a compliant device AND require app protection policy for maximum security on enrolled BYOD devices.

User Experience with Enrollment:

  1. User installs the Company Portal app.

  2. User signs in and follows the prompts to enroll their device. This grants Intune management capabilities over the device.

  3. Intune checks the device against the assigned Compliance Policy.

  4. If compliant, the device is marked as such in Azure AD.

  5. Conditional Access policies check for this compliance status before granting access to corporate resources.

  6. App Protection Policies can still be applied for layered data security within apps, even on enrolled devices.

Summary & Recommendation:

  • For BYOD, start with App Protection Policies (MAM) without enrollment, enforced by Conditional Access requiring App Protection and Approved Client Apps. This provides strong data security within work apps with minimal impact on the user’s personal device.

  • Use Device Compliance Policies (MDM) requiring enrollment only if you have specific, strong requirements for device-level settings and your users consent to this level of management on their personal devices.

  • Always communicate clearly with users about what is being managed and why, especially with BYOD.

  • Test thoroughly with pilot groups before rolling out broadly.

By leveraging App Protection Policies and Conditional Access, Microsoft 365 Business Premium offers a powerful and flexible way to secure corporate data on BYOD smartphones while respecting user privacy.

How to remove a Win32 application using Intune

This video:

https://www.youtube.com/watch?v=Xilp56PVltI

will show you the steps to remove an Win32app from a Windows 10 desktop. It will utilise an existing Intune Application deployment policy to achieve this. It is able to do so because part of creating the initial deployment policy was the requirement to specify how to uninstall that same application. Thus, when you create an Application deployment policy in Intune you can use to add and remove that application from your environment.

Modern Device Management with Microsoft 365 Business Premium–Part 9

Previous parts in this series have been:

Office 365 Mobile MDM – Modern Device Management with Microsoft 365 Business Premium–Part 1

Intune MDM – Modern Device Management with Microsoft 365 Business Premium – Part 2

Intune MAM – Modern Device Management with Microsoft 365 Business premium – Part 3

Endpoint Manager – Modern Device Management with Microsoft 365 Business Premium – Part 4

Baselines – Modern Device Management with Microsoft 365 Business Premium – Part 5

Deployment – Modern Device Management with Microsoft 365 Business Premium – Part 6

Autopilot admin – Modern Device Management with Microsoft 365 Business Premium – Part 7

Autopilot endpoint – Modern Device Management with Microsoft 365 Business Premium – Part 8

In part 3 I talked about Mobile Application Management (MAM) and in the last part, I talked about Windows deployment using Autopilot, now it is time to look at deploying applications to devices via Endpoint Manager.

image

This tasks will be accomplished via the All apps option inside the Apps menu in Microsoft Endpoint Manager as shown above.

image

Here you’ll see a list of existing applications, but what you’ll typically need to do is select Add from the menu at the top to add a custom application.

image

You’ll now need to select an app type, as you can see above, from the list that appears. Because we are dealing with applications across a wide range of platforms, you need to create a deployment policy for each app on each platform.

image

In this case, I’ll go with an application from the iOS store as shown above, just to keep things simple.

image

I’ll then need to select the link, as shown above, to Search the App Store for the desired application. Note that it doesn’t necessarily have to come from the store, but it is easier if it does.

image

Here, I’ll locate Microsoft Whiteboard as shown above and select it.

image

The details of the app are now populated as shown above. You can make any changes here you wish. Note, I have elected to feature this app in the Company Portal as well.

image

Next, I can target that application to be Required by users and or devices, which I have done as shown above. However, you see that it is possible to just make the application available (i.e. optional) for enrolled and non-enrolled devices as well as being able to uninstall the application if present.

image

You can now review the application settings and then press the Create button to complete the policy process.

image

In a short amount of time the device will process that policy as seen above. Here the user will be prompted that a required application will be installed. Press Install on device to continue.

image

The application will be installed.

image

The application is now ready for use on the device.

image

If you now look back at the All Apps area, as shown above, you should see the app that was just configured for deployment.

image

If you select this entry and then select Device install status, you should see a confirmation that the Status is installed as shown above.

image

If you take a look inside the Intune Company Portal App, you see the app is featured as shown above. The application can now be installed directly from here as well if needed.

image

To configure the settings for applications that are deployed, navigate to the the App configuration policies option as shown above and select the Add button that appears on the right.

image

Here, I will select Managed devices from the drop down menu that appears.

image

To keep things simple, I’ll choose to configure the Outlook app for iOS. This is because there are many different ways to configure applications, especially if they are not from Microsoft or not common apps like Outlook, Word, Excel, etc.

In this case, you need to click the Select app at the bottom of the page as shown.

image

Select the Outlook option from the menu that appears as shown.

image

Because this a ‘well-known’ app, I select Use configuration designer in the Configuration settings format field as shown. This presents a number of options I can now configure for that application.

image

You’ll then need to allocate this application configuration policy as shown above. Again, to keep this example simple, the option for All users and all devices has been selected but you can get more granular if you wish.

image

You can now Review and Create the policy.

image

The policy should then appear in the list of App configuration policies as shown above. You can select the policy name at any time to return to editing the policy.

image

The main take away is that you can use Endpoint Manager to create deployment and configuration policies for the different applications on the different platforms and apply them quickly and easily. As shown above, this also extends to granular configuration of the Office suite of apps.

It is important to remember that there can be a lot to configure here if you consider individual apps on individual platforms, so be prepared for some set up initially. But, once complete, deployment and configuration going forward across all platforms is easy. The main benefit is that both deployment and configuration can be done directly across the Internet for both enrolled and non-enrolled devices give good management of devices in the environment.

Modern Device Management with Microsoft 365 Business Premium – Part 10

Need to Know podcast–Episode 255

FAQ podcasts are shorter and more focused on a particular topic. In this episode I speak about some automation options that are available in the Microsoft Cloud.

This episode was recorded using Microsoft Teams and produced with Camtasia 2020

Take a listen and let us know what you think – feedback@needtoknow.cloud

You can listen directly to this episode at:

https://ciaops.podbean.com/e/episode-255-modern-device-management/

Subscribe via iTunes at:

https://itunes.apple.com/au/podcast/ciaops-need-to-know-podcasts/id406891445?mt=2

The podcast is also available on Stitcher at:

http://www.stitcher.com/podcast/ciaops/need-to-know-podcast?refid=stpr

Don’t forget to give the show a rating as well as send us any feedback or suggestions you may have for the show.

Resources

FAQ 17

Modern Device Management – Part 1

CIAOPS Patron Community

@directorcia