
This report examines each setting in the provided Intune Windows 10/11 compliance policy JSON and evaluates whether it represents best practice for strong security on a Windows device. For each setting, we explain its purpose, configuration options, and why the chosen value helps ensure maximum security.
Device Health Requirements (Boot Security & Encryption)
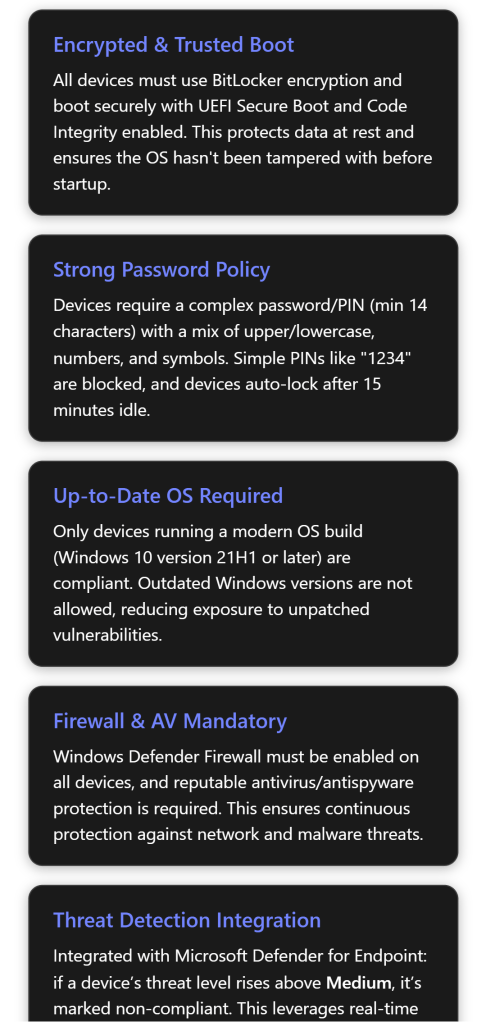
Require BitLocker – BitLocker Drive Encryption is mandated on the OS drive (Require BitLocker: Yes). BitLocker uses the system’s TPM to encrypt all data on disk and locks encryption keys unless the system’s integrity is verified at boot[1]. The policy setting “Require BitLocker” ensures that data at rest is protected – if a laptop is lost or stolen, an unauthorized person cannot read the disk contents without proper authorization[1]. Options: Not configured (default, don’t check encryption) or Require (device must be encrypted with BitLocker)[1]. Setting this to “Require” is considered best practice for strong security, as unencrypted devices pose a high data breach risk[1]. In our policy JSON, BitLocker is indeed required[2], aligning with industry recommendations to encrypt all sensitive devices.
Require Secure Boot – This ensures the PC is using UEFI Secure Boot (Require Secure Boot: Yes). Secure Boot forces the system to boot only trusted, signed bootloaders. During startup, the UEFI firmware will verify that bootloader and critical kernel files are signed by a trusted authority and have not been modified[1]. If any boot file is tampered with (e.g. by a bootkit or rootkit malware), Secure Boot will prevent the OS from booting[1]. Options: Not configured (don’t enforce) or Require (must boot in secure mode)[1]. The policy requires Secure Boot[2], which is a best-practice security measure to maintain boot-time integrity. This setting helps ensure the device boots to a trusted state and is not running malicious firmware or bootloaders[1]. Requiring Secure Boot is recommended in frameworks like Microsoft’s security baselines and the CIS benchmarks for Windows, provided the hardware supports it (most modern PCs do)[1].
Require Code Integrity – Code integrity (a Device Health Attestation setting) validates the integrity of Windows system binaries and drivers each time they are loaded into memory. Enforcing this (Require code integrity: Yes) means that if any system file or driver is unsigned or has been altered by malware, the device will be reported as non-compliant[1]. Essentially, it helps detect kernel-level rootkits or unauthorized modifications to critical system components. Options: Not configured or Require (must enforce code integrity)[1]. The policy requires code integrity to be enabled[2], which is a strong security practice. This setting complements Secure Boot by continuously verifying system integrity at runtime, not just at boot. Together, Secure Boot and Code Integrity reduce the risk of persistent malware or unauthorized OS tweaks going undetected[1].
By enabling BitLocker, Secure Boot, and Code Integrity, the compliance policy ensures devices have a trusted startup environment and encrypted storage – foundational elements of a secure endpoint. These Device Health requirements align with best practices like Microsoft’s recommended security baselines (which also require BitLocker and Secure Boot) and are critical to protect against firmware malware, bootkits, and data theft[1][1]. Note: Devices that lack a TPM or do not support Secure Boot will be marked noncompliant, meaning this policy effectively excludes older, less secure hardware from the compliant device pool – which is intentional for a high-security stance.
Device OS Version Requirements
Minimum OS version – This policy defines the oldest Windows OS build allowed on a device. In the JSON, the Minimum OS version is set to 10.0.19043.10000 (which corresponds roughly to Windows 10 21H1 with a certain patch level)[2]. Any Windows device reporting an OS version lower than this (e.g. 20H2 or an unpatched 21H1) will be marked non-compliant. The purpose is to block outdated Windows versions that lack recent security fixes. End users on older builds will be prompted to upgrade to regain compliance[1]. Options: admin can specify any version string; leaving it blank means no minimum enforcement[1]. Requiring a minimum OS version is a best practice to ensure devices have received important security patches and are not running end-of-life releases[1]. The chosen minimum (10.0.19043) suggests that Windows 10 versions older than 21H1 are not allowed, which is reasonable for strong security since Microsoft no longer supports very old builds. This helps reduce vulnerabilities – for example, a device stuck on an early 2019 build would miss years of defenses (like improved ransomware protection in later releases). The policy’s min OS requirement aligns with guidance to keep devices updated to at least the N-1 Windows version or newer.
Maximum OS version – In this policy, no maximum OS version is configured (set to “Not configured”)[2]. That means devices running newer OS versions than the admin initially tested are not automatically flagged noncompliant. This is usually best, because setting a max OS version is typically used only to temporarily block very new OS upgrades that might be unapproved. Leaving it not configured (no upper limit) is often a best practice unless there’s a known issue with a future Windows release[1]. In terms of strong security, not restricting the maximum OS allows devices to update to the latest Windows 10/11 feature releases, which usually improves security. (If an organization wanted to pause Windows 11 adoption, they might set a max version to 10.x temporarily, but that’s a business decision, not a security improvement.) So the policy’s approach – no max version limit – is fine and does align with security best practice in most cases, as it encourages up-to-date systems rather than preventing them.
Why enforce OS versions? Keeping OS versions current ensures known vulnerabilities are patched. For example, requiring at least build 19043 means any device on 19042 or earlier (which have known exposures fixed in 19043+) will be blocked until updated[1]. This reduces the attack surface. The compliance policy will show a noncompliant device “OS version too low” with guidance to upgrade[1], helping users self-remediate. Overall, the OS version rules in this policy push endpoints to stay on supported, secure Windows builds, which is a cornerstone of strong device security.
*(The policy also lists “Minimum/Maximum OS version for *mobile devices” with the same values (10.0.19043.10000 / Not configured)[2]. This likely refers to Windows 10 Mobile or Holographic devices. It’s largely moot since Windows 10 Mobile is deprecated, but having the same minimum for “mobile” ensures something like a HoloLens or Surface Hub also requires an up-to-date OS. In our case, both fields mirror the desktop OS requirement, which is fine.)
Configuration Manager Compliance (Co-Management)
Require device compliance from Configuration Manager – This setting is Not configured in the JSON (i.e. it’s left at default)[2]. It applies only if the Windows device is co-managed with Microsoft Endpoint Configuration Manager (ConfigMgr/SCCM) in addition to Intune. Options: Not configured (Intune ignores ConfigMgr’s compliance state) or Require (device must also meet all ConfigMgr compliance policies)[1].
In our policy, leaving it not configured means Intune will not check ConfigMgr status – effectively the device only has to satisfy the Intune rules to be marked compliant. Is this best practice? For purely Intune-managed environments, yes – if you aren’t using SCCM baselines, there’s no need to require this. If an organization is co-managed and has on-premises compliance settings in SCCM (like additional security baselines or antivirus status monitored by SCCM), a strong security stance might enable this to ensure those are met too[1]. However, enabling it without having ConfigMgr compliance policies could needlessly mark devices noncompliant as “not reporting” (Intune would wait for a ConfigMgr compliance signal that might not exist).
So, the best practice depends on context: In a cloud-only or lightly co-managed setup, leaving this off (Not Configured) is correct[1]. If the organization heavily uses Configuration Manager to enforce other critical security settings, then best practice would be to turn this on so Intune treats any SCCM failure as noncompliance. Since this policy likely assumes modern management primarily through Intune, Not configured is appropriate and not a security gap. (Admins should ensure that either Intune covers all needed checks, or if not, integrate ConfigMgr compliance by requiring it. Here Intune’s own checks are quite comprehensive.)
System Security: Password Requirements
A very important part of device security is controlling access with strong credentials. This policy enforces a strict device password/PIN policy under the “System Security” category:
- Require a password to unlock – Yes (Required). This means the device cannot be unlocked without a password or PIN. Users must authenticate on wake or login[1]. Options: Not configured (no compliance check on whether a device has a lock PIN/password set) or Require (device must have a lock screen password/PIN)[1]. Requiring a password is absolutely a baseline security requirement – a device with no lock screen PIN is extremely vulnerable (anyone with physical access could get in). The policy correctly sets this to Require[2]. Intune will flag any device without a password as noncompliant, likely forcing the user to set a Windows Hello PIN or password. This is undeniably best practice; all enterprise devices should be password/PIN protected.
- Block simple passwords – Yes (Block). “Simple passwords” refers to very easy PINs like
0000or1234or repeating characters. The setting is Simple passwords: Block[1]. When enabled, Intune will require that the user’s PIN/passcode is not one of those trivial patterns. Options: Not configured (allow any PIN) or Block (disallow common simple PINs)[1]. Best practice is to block simple PINs because those are easily guessable if someone steals the device. This policy does so[2], meaning a PIN like “1111” or “12345” would not be considered compliant. Instead, users must choose less predictable codes. This is a straightforward security best practice (also recommended by Microsoft’s baseline and many standards) to defeat casual guessing attacks. - Password type – Alphanumeric. This setting specifies what kinds of credentials are acceptable. “Alphanumeric” in Intune means the user must set a password or PIN that includes a mix of letters and numbers (not just digits)[1]. The other options are “Device default” (which on Windows typically allows a PIN of just numbers) or explicitly Numeric (only numbers allowed)[1]. Requiring Alphanumeric effectively forces a stronger Windows Hello PIN – it must include at least one letter or symbol in addition to digits. The policy sets this to Alphanumeric[2], which is a stronger stance than a simple numeric PIN. It expands the space of possible combinations, making it much harder for an attacker to brute-force or guess a PIN. This is aligned with best practice especially if using shorter PIN lengths – requiring letters and numbers significantly increases PIN entropy. (If a device only allows numeric PINs, a 6-digit PIN has a million possibilities; an alphanumeric 6-character PIN has far more.) By choosing Alphanumeric, the admin is opting for maximum complexity in credentials.
- Note: When Alphanumeric is required, Intune enables additional complexity rules (next setting) like requiring symbols, etc. If instead it was set to “Numeric”, those complexity sub-settings would not apply. So this choice unlocks the strongest password policy options[1].
- Password complexity requirements – Require digits, lowercase, uppercase, and special characters. This policy is using the most stringent complexity rule available. Under Intune, for alphanumeric passwords/PINs you can require various combinations: the default is “digits & lowercase letters”; but here it’s set to “require digits, lowercase, uppercase, and special characters”[1]. That means the user’s password (or PIN, if using Windows Hello PIN as an alphanumeric PIN) must include at least one lowercase letter, one uppercase letter, one number, and one symbol. This is essentially a classic complex password policy. Options: a range from requiring just some character types up to all four categories[1]. Requiring all four types is generally seen as a strict best practice for high security (it aligns with many compliance standards that mandate a mix of character types in passwords). The idea is to prevent users from choosing, say, all letters or all numbers; a mix of character types increases password strength. Our policy indeed sets the highest complexity level[2]. This ensures credentials are harder to crack via brute force or dictionary attacks, albeit at the cost of memorability. It’s worth noting modern NIST guidance allows passphrases (which might not have all char types) as an alternative, but in many organizations, this “at least one of each” rule remains a common security practice for device passwords.
- Minimum password length – 14 characters. This defines the shortest password or PIN allowed. The compliance policy requires the device’s unlock PIN/password to be 14 or more characters long[1]. Fourteen is a relatively high minimum; by comparison, many enterprise policies set min length 8 or 10. By enforcing 14, this policy is going for very strong password length, which is consistent with guidance for high-security environments (some standards suggest 12+ or 14+ characters for administrative or highly sensitive accounts). Options: 1–16 characters can be set (the admin chooses a number)[1]. Longer is stronger – increasing length exponentially strengthens resistance to brute-force cracking. At 14 characters with the complexity rules above, the space of possible passwords is enormous, making targeted cracking virtually infeasible. This is absolutely a best practice for strong security, though 14 might be considered slightly beyond typical user-friendly lengths. It aligns with guidance like using passphrases or very long PINs for device unlock. Our policy’s 14-char minimum[2] indicates a high level of security assurance (for context, the U.S. DoD STIGs often require 15 character passwords on Windows – 14 is on par with such strict standards).
- Maximum minutes of inactivity before password is required – 15 minutes. This controls the device’s idle timeout, i.e. how long a device can sit idle before it auto-locks and requires re-authentication. The policy sets 15 minutes[2]. Options: The admin can define a number of minutes; when not set, Intune doesn’t enforce an inactivity lock (though Windows may have its own default)[1]. Requiring a password after 15 minutes of inactivity is a common security practice to balance security with usability. It means if a user steps away, at most 15 minutes can pass before the device locks itself and demands a password again. Shorter timers (5 or 10 min) are more secure (less window for an attacker to sit at a logged-in machine), whereas longer (30+ min) are more convenient but risk someone opportunistically using an unlocked machine. 15 minutes is a reasonable best-practice value for enterprises – it’s short enough to limit unauthorized access, yet not so short that it frustrates users excessively. Many security frameworks recommend 15 minutes or less for session locks. This policy’s 15-minute setting is in line with those recommendations and thus supports a strong security posture. It ensures a lost or unattended laptop will lock itself in a timely manner, reducing the chance for misuse.
- Password expiration (days) – 365 days. This setting forces users to change their device password after a set period. Here it is one year[2]. Options: 1–730 days or not configured[1]. Requiring password change every 365 days is a moderate approach to password aging. Traditional policies often used 90 days, but that can lead to “password fatigue.” Modern NIST guidelines actually discourage frequent forced changes (unless there’s evidence of compromise) because overly frequent changes can cause users to choose weaker passwords or cycle old ones. However, annual expiration (365 days) is relatively relaxed and can be seen as a best practice in some environments to ensure stale credentials eventually get refreshed[1]. It’s basically saying “change your password once a year.” Many organizations still enforce yearly or biannual password changes as a precaution. In terms of strong security, this setting provides some safety net (in case a password was compromised without the user knowing, it won’t work indefinitely). It’s not as critical as the other settings; one could argue that with a 14-char complex password, forced expiration isn’t strictly necessary. But since it’s set, it reflects a security mindset of not letting any password live forever. Overall, 365 days is a reasonable compromise – it’s long enough that users can memorize a strong password, and short enough to ensure a refresh if by chance a password leaked over time. This is largely aligned with best practice, though some newer advice would allow no expiration if other controls (like multifactor auth) are in place. In a high-security context, annual changes remain common policy.
- Number of previous passwords to prevent reuse – 5. This means when a password is changed (due to expiration or manual change), the user cannot reuse any of their last 5 passwords[1]. Options: Typically can set a value like 1–50 previous passwords to disallow. The policy chose 5[2]. This is a standard part of password policy – preventing reuse of recent passwords helps ensure that when users do change their password, they don’t just alternate between a couple of favorites. A history of 5 is pretty typical in best practices (common ranges are 5–10) to enforce genuine password updates. This setting is definitely a best practice in any environment with password expiration – otherwise users might just swap back and forth between two passwords. By disallowing the last 5, it will take at least 6 cycles (in this case 6 years, given 365-day expiry) before one could reuse an old password, by which time it’s hoped that password would have lost any exposure or the user comes up with a new one entirely. The policy’s value of 5 is fine and commonly recommended.
- Require password when device returns from idle state – Yes (Required). This particularly applies to mobile or Holographic devices, but effectively it means a password is required upon device wake from an idle or sleep state[1]. On Windows PCs, this corresponds to the “require sign-in on wake” setting. Since our idle timeout is 15 minutes, this ensures that when the device is resumed (after sleeping or being idle past that threshold), the user must sign in again. Options: Not configured or Require[1]. The policy sets it to Require[2], which is certainly what we want – it’d be nonsensical to have all the above password rules but then not actually lock on wake! In short, this enforces that the password/PIN prompt appears after the idle period or sleep, which is absolutely a best practice. (Without this, a device could potentially wake up without a login prompt, which would undermine the idle timeout.) Windows desktop devices are indeed impacted by this on next sign-in after an idle, as noted in docs[1]. So this setting ties the loop on the secure password policy: not only must devices have strong credentials, but those credentials must be re-entered after a period of inactivity, ensuring continuous protection.
Summary of Password Policy: The compliance policy highly prioritizes strong access control. It mandates a login on every device (no password = noncompliant), and that login must be complex (not guessable, not short, contains diverse characters). The combination of Alphanumeric, 14+ chars, all character types, no simple PINs is about as strict as Windows Intune allows for user sign-in credentials[1][2]. This definitely meets the definition of best practice for strong security – it aligns with standards like CIS benchmarks which also suggest enforcing password complexity and length. Users might need to use passphrases or a mix of PIN with letters to meet this, but that is intended. The idle lock at 15 minutes and requirement to re-authenticate on wake ensure that even an authorized session can’t be casually accessed if left alone for long. The annual expiration and password history add an extra layer to prevent long-term use of any single password or recycling of old credentials, which is a common corporate security requirement.
One could consider slight adjustments: e.g., some security frameworks (like NIST SP 800-63) would possibly allow no expiration if the password is sufficiently long and unique (to avoid users writing it down or making minor changes). However, given this is a “strong security” profile, the chosen settings err on the side of caution, which is acceptable. Another improvement for extreme security could be shorter idle time (like 5 minutes) to lock down faster, but 15 minutes is generally acceptable and strikes a balance. Overall, these password settings significantly harden the device against unauthorized access and are consistent with best practices.
Encryption of Data Storage on Device
Require encryption of data storage on device – Yes (Required). Separate from the BitLocker requirement in Device Health, Intune also has a general encryption compliance rule. Enabling this means the device’s drives must be encrypted (with BitLocker, in the case of Windows) or else it’s noncompliant[1]. In our policy, “Encryption: Require” is set[2]. Options: Not configured or Require[1]. This is effectively a redundant safety net given BitLocker is also specifically required. According to Microsoft, the “Encryption of data storage” check looks for any encryption present (on the OS drive), and specifically on Windows it checks BitLocker status via a device report[1]. It’s slightly less robust than the Device Health attestation for BitLocker (which needs a reboot to register, etc.), but it covers the scenario generally[1].
From a security perspective, requiring device encryption is unquestionably best practice. It ensures that if a device’s drive isn’t encrypted (for example, BitLocker not enabled or turned off), the device will be flagged. This duplicates the BitLocker rule; having both doesn’t hurt – in fact, Microsoft documentation suggests the simpler encryption compliance might catch the state even if attestation hasn’t updated (though the BitLocker attestation is more reliable for TPM verification of encryption)[1].
In practice, an admin could use one or the other. This policy enables both, which indicates a belt-and-suspenders approach: either way, an unencrypted device will not slip through. This is absolutely aligned with strong security – all endpoints must have storage encryption, mitigating the risk of data exposure from lost or stolen hardware. Modern best practices (e.g. CIS, regulatory requirements like GDPR for laptops with personal data) often mandate full-disk encryption; here it’s enforced twice. The documentation even notes that relying on the BitLocker-specific attestation is more robust (it checks at the TPM level and knows the device booted with BitLocker enabled)[1][1]. The generic encryption check is a bit more broad but for Windows equates to BitLocker anyway. The key point is the policy requires encryption, which we already confirmed is a must-have security control. If BitLocker was somehow not supported on a device (very rare on Windows 10/11, since even Home edition has device encryption now), that device would simply fail compliance – again, meaning only devices capable of encryption and actually encrypted are allowed, which is appropriate for a secure environment.
(Note: Since both “Require BitLocker” and “Require encryption” are turned on, an Intune admin should be aware that a device might show two noncompliance messages for essentially the same issue if BitLocker is off. Users would see that they need to turn on encryption to comply. Once BitLocker is enabled and the device rebooted, both checks will pass[1][1]. The rationale for using both might be to ensure that even if the more advanced attestation didn’t report, the simpler check would catch it.)
Device Security Settings (Firewall, TPM, AV, Anti-spyware)
This section of the policy ensures that essential security features of Windows are active:
- Firewall – Require. The policy mandates that the Windows Defender Firewall is enabled on the device (
Firewall: Require)[1]. This means Intune will mark the device noncompliant if the firewall is turned off or if a user/app tries to disable it. Options: Not configured (do not check firewall status) or Require (firewall must be on)[1]. Requiring the firewall is definitely best practice – a host-based firewall is a critical first line of defense against network-based attacks. The Windows Firewall helps block unwanted inbound connections and can enforce outbound rules as well. By ensuring it’s always on (and preventing users from turning it off), the policy guards against scenarios where an employee might disable the firewall and expose the machine to threats[1]. This setting aligns with Microsoft recommendations and CIS Benchmarks, which also advise that Windows Firewall be enabled on all profiles. Our policy sets it to Require[2], which is correct for strong security. (One thing to note: if there were any conflicting GPO or config that turns the firewall off or allows all traffic, Intune would consider that noncompliant even if Intune’s own config profile tries to enable it[1] – essentially, Intune checks the effective state. Best practice is to avoid conflicts and keep the firewall defaults to block inbound unless necessary[1].) - Trusted Platform Module (TPM) – Require. This check ensures the device has a TPM chip present and enabled (
TPM: Require)[1]. Intune will look for a TPM security chip and mark the device noncompliant if none is found or it’s not active. Options: Not configured (don’t verify TPM) or Require (TPM must exist)[1]. TPM is a hardware security module used for storing cryptographic keys (like BitLocker keys) and for platform integrity (measured boot). Requiring a TPM is a strong security stance because it effectively disallows devices that lack modern hardware security support. Most Windows 10/11 PCs do have TPM 2.0 (Windows 11 even requires it), so this is feasible and aligns with best practices. It ensures features like BitLocker are using TPM protection and that the device can do hardware attestation. The policy sets TPM to required[2], which is a best practice consistent with Microsoft’s own baseline (they recommend excluding non-TPM machines, as those are typically older or less secure). By enforcing this, you guarantee that keys and sensitive operations can be hardware-isolated. A device without TPM could potentially store BitLocker keys in software (less secure) or not support advanced security like Windows Hello with hardware-backed credentials. So from a security viewpoint, this is the right call. Any device without a TPM (or with it disabled) will need remediation or replacement, which is acceptable in a high-security environment. This reflects a zero-trust hardware approach: only modern, TPM-equipped devices can be trusted fully[1]. - Antivirus – Require. The compliance policy requires that antivirus protection is active and up-to-date on the device (
Antivirus: Require)[1]. Intune checks the Windows Security Center status for antivirus. If no antivirus is registered, or if the AV is present but disabled/out-of-date, the device is noncompliant[1]. Options: Not configured (don’t check AV) or Require (must have AV on and updated)[1]. It’s hard to overstate the importance of this: running a reputable, active antivirus/antimalware is absolutely best practice on Windows. The policy’s requirement means every device must have an antivirus engine running and not report any “at risk” state. Windows Defender Antivirus or a third-party AV that registers with Security Center will satisfy this. If a user has accidentally turned off real-time protection or if the AV signatures are old, Intune will flag it[1]. Enforcing AV is a no-brainer for strong security. This matches all industry guidance (e.g., CIS Controls highlight the need for anti-malware on all endpoints). Our policy does enforce it[2]. - Antispyware – Require. Similar to antivirus, this ensures anti-spyware (malware protection) is on and healthy (
Antispyware: Require)[1]. In modern Windows terms, “antispyware” is essentially covered by Microsoft Defender Antivirus as well (Defender handles viruses, spyware, all malware). But Intune treats it as a separate compliance item to check in Security Center. This setting being required means the anti-malware software’s spyware detection component (like Defender’s real-time protection for spyware/PUPs) must also be enabled and not outdated[1]. Options: Not configured or Require, analogous to antivirus[1]. The policy sets it to Require[2]. This is again best practice – it ensures comprehensive malware protection is in place. In effect, having both AV and antispyware required just double-checks that the endpoint’s security suite is fully active. If using Defender, it covers both; if using a third-party suite, as long as it reports to Windows Security Center for both AV and antispyware status, it will count. This redundancy helps catch any scenario where maybe virus scanning is on but spyware definitions are off (though that’s rare with unified products). For our purposes, requiring antispyware is simply reinforcing the “must have anti-malware” rule – clearly aligned with strong security standards.
Collectively, these Device Security settings (Firewall, TPM, AV, antispyware) ensure that critical protective technologies are in place on every device:
- The firewall requirement guards against network attacks and unauthorized connections[1].
- The TPM requirement ensures hardware-based security for encryption and identity[1].
- The AV/antispyware requirements ensure continuous malware defense and that no device is left unprotected against viruses or spyware[1].
All are definitely considered best practices. In fact, running without any of these (no firewall, no AV, etc.) would be considered a serious security misconfiguration. This policy wisely enforces all of them. Any device not meeting these (e.g., someone attempts to disable Defender Firewall or uninstall AV) will get swiftly flagged, which is exactly what we want in a secure environment.
*(Side note: The policy’s reliance on Windows Security Center means it’s vendor-agnostic; e.g., if an organization uses Symantec or another AV, as long as that product reports a good status to Security Center, Intune will see the device as compliant for AV/antispyware. If a third-party AV is used that *disables* Windows Defender, that’s fine because Security Center will show another AV is active. The compliance rule will still require that one of them is active. So this is a flexible but strict enforcement of “you must have one”.)*
Microsoft Defender Anti-malware Requirements
The policy further specifies settings under Defender (Microsoft Defender Antivirus) to tighten control of the built-in anti-malware solution:
- Microsoft Defender Antimalware – Require. This means the Microsoft Defender Antivirus service must be running and cannot be turned off by the user[1]. If the device’s primary AV is Defender (as is default on Windows 10/11 when no other AV is installed), this ensures it stays on. Options: Not configured (Intune doesn’t ensure Defender is on) or Require (Defender AV must be enabled)[1]. Our policy sets it to Require[2], which is a strong choice. If a third-party AV is present, how does this behave? Typically, when a third-party AV is active, Defender goes into a passive mode but is still not “disabled” in Security Center terms – or it might hand over status. This setting primarily aims to prevent someone from turning off Defender without another AV in place. Requiring Defender antivirus to be on is a best practice if your organization relies on Defender as the standard AV. It ensures no one (intentionally or accidentally) shuts off Windows’ built-in protection[1]. It essentially overlaps with the “Antivirus: Require” setting, but is more specific. The fact that both are set implies this environment expects to use Microsoft Defender on all machines (which is common for many businesses). In a scenario where a user installed a 3rd party AV that doesn’t properly report to Security Center, having this required might actually conflict (because Defender might register as off due to third-party takeover, thus Intune might mark noncompliant). But assuming standard behavior, if third-party AV is present and reporting, Security Center usually shows “Another AV is active” – Intune might consider the AV check passed but the “Defender Antimalware” specifically could possibly see Defender as not the active engine and flag it. In any case, for strong security, the ideal is to have a consistent AV (Defender) across all devices. So requiring Defender is a fine security best practice, and our policy reflects that intention. It aligns with Microsoft’s own baseline for Intune when organizations standardize on Defender. If you weren’t standardized on Defender, you might leave this not configured and just rely on the generic AV requirement. Here it’s set, indicating a Defender-first strategy for antimalware.
- Microsoft Defender Antimalware minimum version – 4.18.0.0. This setting specifies the lowest acceptable version of the Defender Anti-Malware client. The policy has defined 4.18.0.0 as the minimum[2]. Effect: If a device has an older Defender engine below that version, it’s noncompliant. Version 4.18.x is basically the Defender client that ships with Windows 10 and above (Defender’s engine is updated through Windows Update periodically, but the major/minor version has been 4.18 for a long time). By setting 4.18.0.0, essentially any Windows 10/11 with Defender should meet it (since 4.18 was introduced years ago). This catches only truly outdated Defender installations (perhaps if a machine had not updated its Defender platform in a very long time, or is running Windows 8.1/7, which had older Defender versions – though those OS wouldn’t be in a Win10 policy anyway). Options: Admin can input a specific version string, or leave blank (no version enforcement)[1]. The policy chose 4.18.0.0, presumably because that covers all modern Windows builds (for example, Windows 10 21H2 uses Defender engine 4.18.x). Requiring a minimum Defender version is a good practice to ensure the anti-malware engine itself isn’t outdated. Microsoft occasionally releases new engine versions with improved capabilities; if a machine somehow fell way behind (e.g., an offline machine that missed engine updates), it could have known issues or be missing detection techniques. By enforcing a minimum, you compel those devices to update their Defender platform. Version 4.18.0.0 is effectively the baseline for Windows 10, so this is a reasonable choice. It’s likely every device will already have a later version (like 4.18.210 or similar). As a best practice, some organizations might set this to an even more recent build number if they want to ensure a certain monthly platform update is installed. In any case, including this setting in the policy shows thoroughness – it’s making sure Defender isn’t an old build. This contributes to security by catching devices that might have the Defender service but not the latest engine improvements. Since the policy’s value is low (4.18.0.0), practically all supported Windows 10/11 devices comply, but it sets a floor that excludes any unsupported OS or really old install. This aligns with best practice: keep security software up-to-date, both signatures and the engine. (The admin should update this minimum version over time if needed – e.g., if Microsoft releases Defender 4.19 or 5.x in the future, they might raise the bar.)
- Microsoft Defender security intelligence up-to-date – Require. This is basically ensuring Defender’s virus definitions (security intelligence) are current (
Security intelligence up-to-date: Yes)[1]. If Defender’s definitions are out of date, Intune will mark noncompliant. “Up-to-date” typically means the signature is not older than a certain threshold (usually a few days, defined by Windows Security Center’s criteria). Options: Not configured (don’t check definitions currency) or Require (must have latest definitions)[1]. It’s set to Require in our policy[2]. This is clearly a best practice – an antivirus is only as good as its latest definitions. Ensuring that the AV has the latest threat intelligence is critical. This setting will catch devices that, for instance, haven’t gone online in a while or are failing to update Defender signatures. Those devices would be at risk from newer malware until they update. By marking them noncompliant, it forces an admin/user to take action (e.g. connect to the internet to get updates)[1]. This contributes directly to security, keeping anti-malware defenses sharp. It aligns with common security guidelines that AV should be kept current. Since Windows usually updates Defender signatures daily (or more), this compliance rule likely treats a device as noncompliant if signatures are older than ~3 days (Security Center flag). This policy absolutely should have this on, and it does – another check in the box for strong security practice. - Real-time protection – Require. This ensures that Defender’s real-time protection is enabled (
Realtime protection: Require)[1]. Real-time protection means the antivirus actively scans files and processes as they are accessed, rather than only running periodic scans. If a user had manually turned off real-time protection (which Windows allows for troubleshooting, or sometimes malware tries to disable it), this compliance rule would flag the device. Options: Not configured or Require[1]. Our policy requires it[2]. This is a crucial setting: real-time protection is a must for proactive malware defense. Without it, viruses or spyware could execute without immediate detection, and you’d only catch them on the next scan (if at all). Best practice is to never leave real-time protection off except perhaps briefly to install certain software, and even then, compliance would catch that and mark the device not compliant with policy. So turning this on is definitely part of a strong security posture. The policy correctly enforces it. It matches Microsoft’s baseline and any sane security policy – you want continuous scanning for threats in real time. The Intune CSP for this ensures that the toggle in Windows Security (“Real-time protection”) stays on[1]. Even if a user is local admin, turning it off will flip the device to noncompliant (and possibly trigger Conditional Access to cut off corporate resource access), strongly incentivizing them not to do that. Good move.
In summary, the Defender-specific settings in this policy double-down on malware protection:
- The Defender AV engine must be active (and presumably they expect to use Defender on all devices)[1].
- Defender must stay updated – both engine version and malware definitions[1][1].
- Real-time scanning must be on at all times[1].
These are all clearly best practices for endpoint security. They ensure the built-in Windows security is fully utilized. The overlap with the general “Antivirus/Antenna” checks means there’s comprehensive coverage. Essentially, if a device doesn’t have Defender, the general AV required check would catch it; if it does have Defender, these specific settings enforce its quality and operation. No device should be running with outdated or disabled Defender in a secure environment, and this compliance policy guarantees that.
(If an organization did use a third-party AV instead of Defender, they might not use these Defender-specific settings. The presence of these in the JSON indicates alignment with using Microsoft Defender as the standard. That is indeed a good practice nowadays, as Defender has top-tier ratings and seamless integration. Many “best practice” guides, including government blueprints, now assume Defender is the AV to use, due to its strong performance and integration with Defender for Endpoint.)
Microsoft Defender for Endpoint (MDE) – Device Threat Risk Level
Finally, the policy integrates with Microsoft Defender for Endpoint (MDE) by using the setting:
- Require the device to be at or under the machine risk score – Medium. This ties into MDE’s threat intelligence, which assesses each managed device’s risk level (based on detected threats on that endpoint). The compliance policy is requiring that a device’s risk level be Medium or lower to be considered compliant[1]. If MDE flags a device as High risk, Intune will mark it noncompliant and can trigger protections (like Conditional Access blocking that device). Options: Not configured (don’t use MDE risk in compliance) or one of Clear, Low, Medium, High as the maximum allowed threat level[1]. The chosen value “Medium” means: any device with a threat rated High is noncompliant, while devices with Low or Medium threats are still compliant[1]. (Clear would be the most strict – requiring absolutely no threats; High would be least strict – tolerating even high threats)[1].
Setting this to Medium is a somewhat balanced security stance. Let’s interpret it: MDE categorizes threats on devices (malware, suspicious activity) into risk levels. By allowing up to Medium, the policy is saying if a device has only low or medium-level threats, we still consider it compliant; but if it has any high-level threat, that’s unacceptable. High usually indicates serious malware outbreaks or multiple alerts, whereas low may indicate minimal or contained threats. From a security best-practice perspective, using MDE’s risk as a compliance criterion is definitely recommended – it adds an active threat-aware dimension to compliance. The choice of Medium as the cutoff is probably to avoid overly frequent lockouts for minor issues, while still reacting to major incidents.
Many security experts would advocate for even stricter: e.g. require Low or Clear (meaning even medium threats would cause noncompliance), especially in highly secure environments where any malware is concerning. In fact, Microsoft’s documentation notes “Clear is the most secure, as the device can’t have any threats”[1]. Medium is a reasonable compromise – it will catch machines with serious infections but not penalize ones that had a low-severity event that might have already been remediated. For example, if a single low-level adware was detected and quarantined, risk might be low and the device remains compliant; but if ransomware or multiple high-severity alerts are active, risk goes high and the device is blocked until cleaned[1].
In our policy JSON, it’s set to Medium[2], which is in line with many best practice guides (some Microsoft baseline recommendations also use Medium as the default, to balance security and usability). This is still considered a strong security practice because any device under an active high threat will immediately be barred. It leverages real-time threat intelligence from Defender for Endpoint to enhance compliance beyond just configuration. That means even if a device meets all the config settings above, it could still be blocked if it’s actively compromised – which is exactly what we want. It’s an important part of a Zero Trust approach: continuously monitor device health and risk, not just initial compliance.
One could tighten this to Low for maximum security (meaning even medium threats cause noncompliance). If an organization has low tolerance for any malware, they might do that. However, Medium is often chosen to avoid too many disruptions. For our evaluation: The inclusion of this setting at all is a best practice (many might forget to use it). The threshold of Medium is acceptable for strong security, catching big problems while allowing IT some leeway to investigate mediums without immediate lockout. And importantly, if set to Medium, only devices with severe threats (like active malware not neutralized) will be cut off, which likely correlates with devices that indeed should be isolated until fixed.
To summarize, the Defender for Endpoint integration means this compliance policy isn’t just checking the device’s configuration, but also its security posture in real-time. This is a modern best practice: compliance isn’t static. The policy ensures that if a device is under attack or compromised (per MDE signals), it will lose its compliant status and thus can be auto-remediated or blocked from sensitive resources[1]. This greatly strengthens the security model. Medium risk tolerance is a balanced choice – it’s not the absolute strictest, but it is still a solid security stance and likely appropriate to avoid false positives blocking users unnecessarily.
(Note: Organizations must have Microsoft Defender for Endpoint properly set up and the devices onboarded for this to work. Given it’s in the policy, we assume that’s the case, which is itself a security best practice – having EDR (Endpoint Detection & Response) on all endpoints.)
Actions for Noncompliance and Additional Considerations
The JSON policy likely includes Actions for noncompliance (the blueprint shows an action “Mark device noncompliant (1)” meaning immediate)[2]. By default, Intune always marks a device as noncompliant if it fails a setting – which is what triggers Conditional Access or other responses. The policy can also be configured to send email notifications, or after X days perform device retire/wipe, etc. The snippet indicates the default action to mark noncompliant is at day 1 (immediately)[2]. This is standard and aligns with security best practice – you want noncompliant devices to be marked as such right away. Additional actions (like notifying user, or disabling the device) could be considered but are not listed.
It’s worth noting a few maintenance and dependency points:
- Updating the Policy: As new Windows versions release, the admin should review the Minimum OS version field and advance it when appropriate (for example, when Windows 10 21H1 becomes too old, they might raise the minimum to 21H2 or Windows 11). Similarly, the Defender minimum version can be updated over time. Best practice is to review compliance policies at least annually (or along with major new OS updates)[1][1] to keep them effective.
- Device Support: Some settings have hardware prerequisites (TPM, Secure Boot, etc.). In a strong security posture, devices that don’t meet these (older hardware) should ideally be phased out. This policy enforces that by design. If an organization still has a few legacy devices without TPM, they might temporarily drop the TPM requirement or grant an exception group – but from a pure security standpoint, it’s better to upgrade those devices.
- User Impact and Change Management: Enforcing these settings can pose adoption challenges. For example, requiring a 14-character complex password might generate more IT support queries or user friction initially. It is best practice to accompany such policy with user education and perhaps rollout in stages. The policy as given is quite strict, so ensuring leadership backing and possibly implementing self-service password reset (to handle expiry) would be wise. These aren’t policy settings per se, but operational best practices.
- Complementary Policies: A compliance policy like this ensures baseline security configuration, but it doesn’t directly configure the settings on the device (except for password requirement which the user is prompted to set). It checks and reports compliance. To actually turn on things like BitLocker or firewall if they’re off, one uses Configuration Profiles or Endpoint Security policies in Intune. Best practice is to pair compliance policies with configuration profiles that enable the desired settings. For instance, enabling BitLocker via an Endpoint Security policy and then compliance verifies it’s on. The question focuses on compliance policy, so our scope is those checks, but it’s assumed the organization will also deploy policies to turn on BitLocker, firewall, Defender, etc., making it easy for devices to become compliant.
- Protected Characteristics: Every setting here targets technical security and does not discriminate or involve user personal data, so no concerns there. From a privacy perspective, the compliance data is standard device security posture info.
Conclusion
Overall, each setting in this Windows compliance policy aligns with best practices for securing Windows 10/11 devices. The policy requires strong encryption, up-to-date and secure OS versions, robust password/PIN policies, active firewall and anti-malware, and even ties into advanced threat detection (Defender for Endpoint)[2][2]. These controls collectively harden the devices against unauthorized access, data loss, malware infections, and unpatched vulnerabilities.
Almost all configurations are set to their most secure option (e.g., requiring vs not, or maximum complexity) as one would expect in a high-security baseline:
- Data protection is ensured by BitLocker encryption on disk[1].
- Boot integrity is assured via Secure Boot and Code Integrity[1].
- Only modern, supported OS builds are allowed[1].
- Users must adhere to a strict password policy (complex, long, regularly changed)[1].
- Critical security features (firewall, AV, antispyware, TPM) must be in place[1][1].
- Endpoint Defender is kept running in real-time and up-to-date[1].
- Devices under serious threat are quarantined via noncompliance[1].
All these are considered best practices by standards such as the CIS Benchmark for Windows and government cybersecurity guidelines (for example, the ASD Essential Eight in Australia, which this policy closely mirrors, calls for application control, patching, and admin privilege restriction – many of which this policy supports by ensuring fundamental security hygiene on devices).
Are there any settings that might not align with best practice? Perhaps the only debatable one is the 365-day password expiration – modern NIST guidelines suggest you don’t force changes on a schedule unless needed. However, many organizations still view an annual password change as reasonable policy in a defense-in-depth approach. It’s a mild requirement and not draconian, so it doesn’t significantly detract from security; if anything, it adds a periodic refresh which can be seen as positive (with the understanding that user education is needed to avoid predictable changes). Thus, we wouldn’t call it a wrong practice – it’s an accepted practice in many “strong security” environments, even if some experts might opt not to expire passwords arbitrarily. Everything else is straightforwardly as per best practice or even exceeding typical baseline requirements (e.g., 14 char min is quite strong).
Improvements or additions: The policy as given is already thorough. An organization could consider tightening the Defender for Endpoint risk level to Low (meaning only absolutely clean devices are compliant) if they wanted to be extra careful – but that could increase operational noise if minor issues trigger noncompliance too often[1]. They could also reduce the idle timeout to, say, 5 or 10 minutes for devices in very sensitive environments (15 minutes is standard, though stricter is always an option). Another possible addition: enabling Jailbreak detection – not applicable for Windows (it’s more for mobile OS), Windows doesn’t have a jailbreak setting beyond what we covered (DHA covers some integrity). Everything major in Windows compliance is covered here.
One more setting outside of this device policy that’s a tenant-wide setting is “Mark devices with no compliance policy as noncompliant”, which we would assume is enabled at the Intune tenant level for strong security (so that any device that somehow doesn’t get this policy is still not trusted)[3]. The question didn’t include that, but it’s a part of best practices – likely the organization would have set it to Not compliant at the tenant setting to avoid unmanaged devices slipping through[3].
In conclusion, each listed setting is configured in line with strong security best practices for Windows devices. The policy reflects an aggressive security posture: it imposes strict requirements that greatly reduce the risk of compromise. Devices that meet all these conditions will be quite well-hardened against common threats. Conversely, any device failing these checks is rightfully flagged for remediation, which helps the IT team maintain a secure fleet. This compliance policy, especially when combined with Conditional Access (to prevent noncompliant devices from accessing corporate data) and proper configuration policies (to push these settings onto devices), provides an effective enforcement of security standards across the Windows estate[3][3]. It aligns with industry guidelines and should substantially mitigate risks such as data breaches, malware incidents, and unauthorized access. Each setting plays a role: from protecting data encryption and boot process to enforcing user credentials and system health – together forming a comprehensive security baseline that is indeed consistent with best practices.
References
[1] Windows compliance settings in Microsoft Intune
[2] Windows 10/11 Compliance Policy | ASD’s Blueprint for Secure Cloud


