In this episode of the CIAOPS “Need to Know” podcast, we dive into the latest updates across Microsoft 365, GitHub Copilot, and SMB-focused strategies for scaling IT services. From new Teams features to deep dives into DLP alerts and co-partnering models for MSPs, this episode is packed with insights for IT professionals and small business tech leaders looking to stay ahead of the curve. I also take a look at building an agent to help you work with frameworks like the ASD Blueprint for Secure Cloud.
If you found this valuable, the I’d appreciate a ‘like’ or perhaps a donation at https://ko-fi.com/ciaops. This helps me know that people enjoy what I have created and provides resources to allow me to create more content. If you have any feedback or suggestions around this, I’m all ears. You can also find me via email director@ciaops.com and on X (Twitter) at https://www.twitter.com/directorcia.
If you want to be part of a dedicated Microsoft Cloud community with information and interactions daily, then consider becoming a CIAOPS Patron – www.ciaopspatron.com.
Creating a Microsoft 365 Copilot agent (a custom AI assistant within Microsoft 365 Copilot) can dramatically streamline workflows. These agents are essentially customised versions of Copilot that combine specific instructions, knowledge, and skills to perform defined tasks or scenarios[1]. The goal here is to build an agent that multiple team members can collaboratively develop and easily maintain – even if the original creator leaves the business. This report provides:
Step-by-step guidelines to create a Copilot agent (using no-code/low-code tools).
Best practices for multi-user collaboration, including managing edit permissions.
Documentation and version control strategies for long-term maintainability.
Additional tips to ensure the agent remains robust and easy to update.
Step-by-Step Guide: Creating a Microsoft 365 Copilot Agent
To build your Copilot agent without code, you will use Microsoft 365 Copilot Studio’s Agent Builder. This tool provides a guided interface to define the agent’s behavior, knowledge, and appearance. Follow these steps to create your agent:
As a result of the steps above, you have a working Copilot agent with its name, description, instructions, and any connected data sources or capabilities configured. You built this agent in plain language and refined it with no code required, thanks to Copilot Studio’s declarative authoring interface[2].
Before rolling it out broadly, double-check the agent’s responses for accuracy and tone, especially if it’s using internal knowledge. Also verify that the knowledge sources cover the expected questions. (If the agent couldn’t answer a question in testing, you might need to add a missing document or adjust instructions.)
Note: Microsoft also provides pre-built templates in Copilot Studio that you can use as a starting point (for example, templates for an IT help desk bot, a sales assistant, etc.)[2]. Using a template can jump-start your project with common instructions and sample prompts already filled in, which you can then modify to suit your needs.
Collaborative Development and Access Management
One key to long-term maintainability is ensuring multiple people can access and work on the agent. You don’t want the agent tied solely to its creator. Microsoft 365 Copilot supports this through agent sharing and permission controls. Here’s how to enable collaboration and manage who can use or edit the agent:
Share the Agent for Co-Authoring: After creating the agent, the original author can invite colleagues as co-authors (editors). In Copilot Studio, use the Share menu on the agent and add specific users by name or email for “collaborative authoring” access[3]. (You can only add individuals for edit access, not groups, and those users must be within your organisation.) Once shared, these teammates are granted the necessary roles (Environment Maker/Bot Contributor in the underlying Power Platform environment) automatically so they can modify the agent[3]. Within a few minutes, the agent will appear in their Copilot Studio interface as well. Now your agent effectively has multiple owners — if one person leaves, others still have full editing rights.
Ensure Proper Permissions: When sharing for co-authoring, make sure the colleagues have appropriate permissions in the environment. Copilot Studio will handle most of this via the roles mentioned, but it’s good for an admin to know who has edit access. By design, editors can do everything the owner can: edit content, configure settings, and share the agent further. Viewers (users who are granted use but not edit rights) cannot make changes[4]. Use Editor roles for co-authors and Viewer roles for end users as needed to control access[4]. For example, you may grant your whole team viewer access to use the agent, but only a smaller group of power users get editor access to change it. (The platform currently only allows assigning Editor permission to individuals, not to a security group, for safety[4].)
Collaborative Editing in Real-Time: Once multiple people have edit access, Copilot Studio supports concurrent editing of the agent’s topics (the conversational flows or content nodes). The interface will show an “Editing” indicator with the co-authors’ avatars next to any topic being worked on[3]. This helps avoid stepping on each other’s toes. If two people do happen to edit the same piece at once, Copilot Studio prevents accidental overwrites by detecting the conflict and offering choices: you can discard your changes or save a copy of the topic[3]. For instance, if you and a colleague unknowingly both edited the FAQ topic, and they saved first, when you go to save, the system might tell you a newer version exists. You could then choose to keep your version as a separate copy, review differences, and merge as appropriate. This built-in change management ensures that multi-author collaboration is safe and manageable.
Sharing the Agent for Use: In addition to co-authors, you likely want to share the finished agent with other employees so they can use it in Copilot. You can share the agent via a link or through your tenant’s app catalog. In Copilot Studio’s share settings, choose who can chat with (use) the agent. Options include “Anyone in your organization” or specific security groups[5]. For example, you might initially share it with just the IT department group for a pilot, or with everyone if it’s broadly useful. When a user adds the shared agent, it will show up in their Microsoft 365 Copilot interface for them to interact with. Note that sharing for use does not grant edit rights – it only allows using the agent[5]. Keep the sharing scope to “Only me” if it’s a draft not ready for others, but otherwise switch it to an appropriate audience so the agent isn’t locked to one person’s account[5].
Manage Underlying Resources: If your agent uses additional resources like Power Automate flows (actions) or certain connectors that require separate permissions, remember to share those as well. Sharing an agent itself does not automatically share any connected flow or data source with co-authors[3]. For example, if the agent triggers a Power Automate flow to update a SharePoint list, you must go into that flow and add your colleagues as co-owners there too[3]. Otherwise, they might be able to edit the agent’s conversation, but not open or modify the flow. Similarly, ensure any SharePoint sites or files used as knowledge sources have the right sharing settings for your team. A good practice is to use common team-owned resources (not one person’s private OneDrive file) for any knowledge source, so access can be managed by the team or admins.
Administrative Oversight: Because these agents become part of your organisation’s tools, administrators have oversight of shared agents. In the Microsoft 365 admin center (under Integrated Apps > Shared Agents), admins can see a list of all agents that have been shared, along with their creators, status, and who they’re shared with[1]. This means if the original creator does leave the company, an admin can identify any orphaned agents and reassign ownership or manage them as needed. Admins can also block or disable an agent if it’s deemed insecure or no longer appropriate[1]. This governance is useful for ensuring continuity and compliance – your agent isn’t tied entirely to one user’s account. From a planning perspective, it’s wise to have at least two people with full access to every mission-critical agent (one primary and one backup person), plus ensure your IT admin team is aware of the agent’s existence.
By following these practices, you create a safety net around your Copilot agent. Multiple team members can improve or update it, and no single individual is irreplaceable for its maintenance. Should someone exit the team, the remaining editors (or an admin) can continue where they left off.
Documentation and Version Control Practices
Even with a collaborative platform, it’s important to document the agent’s design and maintain version control as if it were any other important piece of software. This ensures that knowledge about how the agent works is not lost and changes can be tracked over time. Here are key practices:
Create a Design & Usage Document: Begin a living document (e.g. in OneNote or a SharePoint wiki) that describes the agent in detail. This should include the agent’s purpose, the problems it solves, and its scope (what it will and won’t do). Document the instructions or logic you gave it – you might even copy the core parts of the agent’s instruction text into this document for reference. Also list the knowledge sources connected (e.g. “SharePoint site X – HR Policies”) and any capabilities/flows added. This way, if a new colleague takes over the agent, they can quickly understand its configuration and dependencies. Include screenshots of the agent’s setup from Copilot Studio if helpful. If the agent goes through iterations, note what changed in each version (“Changelog: e.g. Added new Q\&A section on 2025-08-16 to cover Covid policies”). This documentation will be invaluable if the original creator is not available to explain the agent’s behavior down the line.
Use Source Control for Agent Configuration (ALM): Treat the agent as a configurable solution that can be exported and versioned. Microsoft 365 Copilot agents built in Copilot Studio actually reside in the Power Platform environment, which means you can leverage Power Platform’s Application Lifecycle Management (ALM) features. Specifically, you can export the agent as a solution package and store that file for version control[6]. Using Copilot Studio, create a solution in the environment, add the agent to it, and export it as an unzip-able file. This exported solution contains the agent’s definition (topics, flows, etc.). You can keep these solution files in a source repository (like a GitHub or Azure DevOps repo) to track changes over time, similar to how you’d version code. Whenever you make significant updates to the agent, export an updated solution file (with a version number or date in the filename) and commit it to the repository. This provides a backup and a history. In case of any issue or if you need to restore or compare a previous version, you can import an older solution file into a sandbox environment[6]. Microsoft’s guidance explicitly supports moving agents between environments using this export/import method, which can double as a backup mechanism[6].
Implement CI/CD for Complex Projects (Optional): If your organisation has the capacity, you can integrate the agent development into a Continuous Integration/Continuous Deployment process. Using tools like Azure DevOps or GitHub Actions, you can automate the export/import of agent solutions between Dev, Test, and Prod environments. This kind of pipeline ensures that all changes are logged and pass through proper testing stages. Microsoft recommends maintaining healthy ALM processes with versioning and deployment automation for Copilot agents, just as you would for other software[7]. For example, you might do initial editing in a development environment, export the solution, have it reviewed in code review (even though it’s mostly configuration, you can still check the diff on the solution components), then import into a production environment for the live agent. This way, any change is traceable. While not every team will need full DevOps for a simple Copilot agent, this approach becomes crucial if your agent grows in complexity or business importance.
**Consider the Microsoft 365 *Agents SDK* for Code-Based Projects:** Another approach to maintainability is building the agent via code. Microsoft offers an Agents SDK that allows developers to create Copilot agents using languages like C#, JavaScript, or Python, and integrate custom AI logic (with frameworks like Semantic Kernel or LangChain)[8]. This is a more advanced route, but it has the advantage that your agent’s logic lives in code files that can be fully managed in source control. If your team has software engineers, they could use the SDK to implement the agent with standard dev practices (unit testing, code reviews, git version control, etc.). This isn’t a no-code solution, but it’s worth mentioning for completeness: a coded agent can be as collaborative and maintainable as any other software project. The SDK supports quick scaffolding of projects and deployment to Copilot, so you could even migrate a no-code agent to a coded one later if needed[8]. Only pursue this if you need functionality beyond what Copilot Studio offers or want deeper integration/testing – for most cases, the no-code approach is sufficient.
Keep the Documentation Updated: Whichever development path you choose, continuously update your documentation when changes occur. If a new knowledge source is added or a new capability toggled on, note it in the doc. Also record any design rationale (“We disabled the image generator on 2025-09-01 due to misuse”) so future maintainers understand past decisions. Good documentation ensures that even if original creators or key contributors leave, anyone new can come up to speed quickly by reading the material.
By maintaining both a digital paper trail (documents) and technical version control (solution exports or code repositories), you safeguard the project’s knowledge. This prevents the “single point of failure” scenario where only one person knows how the agent really works. It also makes onboarding new team members to work on the agent much easier.
Additional Tips for a Robust, Maintainable Agent
Finally, here are additional recommendations to ensure your Copilot agent remains reliable and easy to manage in the long run:
Define a Clear Scope and Boundaries: A common pitfall is trying to make one agent do too much. It’s often better to have a focused agent that excels at a specific set of tasks than a catch-all that becomes hard to maintain. Clearly state what user needs the agent addresses. If later you find the scope creeping beyond original intentions (for example, your HR bot is suddenly expected to handle IT helpdesk questions), consider creating a separate agent for the new domain or using multi-agent orchestration, rather than overloading one agent. This keeps each agent simpler to troubleshoot and update. Also use the agent’s instructions to explicitly guard against out-of-scope requests (e.g., instruct it to politely decline questions unrelated to its domain) so that maintenance remains focused.
Follow Best Practices in Instruction Design: Well-structured instructions not only help the AI give correct answers, but also make the agent’s logic easier for humans to understand later. Use clear and action-oriented language in your instructions and avoid unnecessary complexity[9]. For example, instead of a vague instruction like “help with leaves,” write a specific rule: “If user asks about leave status, retrieve their leave request record from SharePoint and display the status.” Break down the agent’s workflow into ordered steps where necessary (using bullet or numbered lists in the instructions)[9]. This modular approach (goal → action → outcome for each step) acts like commenting your code – it will be much easier for someone else to modify the behavior if they can follow a logical sequence. Additionally, include a couple of example user queries and desired responses in the instructions (few-shot examples) for clarity, especially if the agent’s task is complex. This reduces ambiguity for both the AI and future editors.
Test Thoroughly and Collect Feedback: Continuous testing is key to robustness. Even after deployment, encourage users (or the team internally) to provide feedback if the agent gives an incorrect or confusing response. Periodically review the agent’s performance: pose new questions to it or check logs (if available) to see how it’s handling real queries. Microsoft 365 Copilot doesn’t yet provide full conversation logs to admins, but you can glean some insight via any integrated telemetry. If you have access to Azure Application Insights or the Power Platform CoE kit, use them – Microsoft suggests integrating these to monitor usage, performance, and errors for Copilot agents[7]. For example, Application Insights can track how often certain flows are called or if errors occur, and the Power Platform Center of Excellence toolkit can inventory your agent and its usage metrics[7]. Monitoring tools help you catch issues early (like an action failing because of a permissions error) and measure the agent’s value (how often it’s used, peak times, etc.). Use this data to guide maintenance priorities.
Implement Governance and Compliance Checks: Since Copilot agents can access organisational data, ensure that all security and compliance requirements are met. From a maintainability perspective, this means the agent should be built in accordance with IT policies (e.g., respecting Data Loss Prevention rules, not exposing sensitive info). Work with your admin to double-check that the agent’s knowledge sources and actions comply with company policy. Also, have a plan for regular review of content – for instance, if one of the knowledge base documents the agent relies on is updated or replaced, update the agent’s knowledge source to point to the new info. Remove any knowledge source that is outdated or no longer approved. Keeping the agent’s inputs current and compliant will prevent headaches (or forced takedowns) later on.
Plan for Handover: Since the question specifically addresses if the original creator leaves, plan for a smooth handover. This includes everything we’ve discussed (multiple editors, documentation, version history). Additionally, consider a short training session or demo for the team members who will inherit the agent. Walk them through the agent’s flows in Copilot Studio, show how to edit a topic, how to republish updates, etc. This will give them confidence to manage it. Also, make sure the agent’s ownership is updated if needed. Currently, the original creator remains the “Owner” in the system. If that person’s account is to be deactivated, it may be wise to have an admin transfer any relevant assets or at least note that co-owners are in place. Since admins can see the creator’s name on the agent, proactively communicate to IT that the agent has co-owners who will take over maintenance. This can avoid a scenario where an admin might accidentally disable an agent assuming no one can maintain it.
Regular Maintenance Schedule: Treat the agent as a product that needs occasional maintenance. Every few months (or whatever cadence fits your business), review if the agent’s knowledge or instructions need updates. For example, if processes changed or new common questions have emerged, update the agent to cover them. Also verify that all co-authors still have access and that their permissions are up to date (especially if your company uses role-based access that might change with team reorgs). A little proactive upkeep will keep the agent effective and prevent it from becoming obsolete or broken without anyone noticing.
By following the above tips, your Microsoft 365 Copilot agent will be well-positioned to serve users over the long term, regardless of team changes. You’ve built it with a collaborative mindset, documented its inner workings, and set up processes to manage changes responsibly. This not only makes the agent easy to edit and enhance by multiple people, but also ensures it continues to deliver value even as your organisation evolves.
Conclusion: Building a Copilot agent that stands the test of time requires forethought in both technology and teamwork. Using Microsoft’s no-code Copilot Studio, you can quickly create a powerful assistant tailored to your needs. Equally important is opening up the project to your colleagues, setting the right permissions so it’s a shared effort. Invest in documentation and consider leveraging export/import or even coding options to keep control of the agent’s “source.” And always design with clarity and governance in mind. By doing so, you create not just a bot, but a maintainable asset for your organisation – one that any qualified team member can pick up and continue improving, long after the original creator’s tenure. With these steps and best practices, your Copilot agent will remain helpful, accurate, and up-to-date, no matter who comes or goes on the team.
Microsoft’s Windows Autopilot is a cloud-based suite of technologies designed to streamline the deployment and configuration of new Windows devices for organizations[1]. This guide provides a detailed look at the latest updates to Windows Autopilot – specifically the new Autopilot v2 (officially called Windows Autopilot Device Preparation) – and offers step-by-step instructions for implementing it in a Microsoft 365 Business environment. We will cover the core concepts, new features in Autopilot v2, benefits for businesses, the implementation process (from prerequisites to deployment), troubleshooting tips, and best practices for managing devices with Autopilot v2.
1. Overview of Microsoft Autopilot and Its Purpose
Windows Autopilot simplifies the Windows device lifecycle from initial deployment through end-of-life. It leverages cloud services (like Microsoft Intune and Microsoft Entra ID) to pre-configure devices out-of-box without traditional imaging. When a user unboxes a new Windows 10/11 device and connects to the internet, Autopilot can automatically join it to Azure/Microsoft Entra ID, enroll it in Intune (MDM), apply corporate policies, install required apps, and tailor the out-of-box experience (OOBE) to the organization[1][1]. This zero-touch deployment means IT personnel no longer need to manually image or set up each PC, drastically reducing deployment time and IT overhead[2]. In short, Autopilot’s purpose is to get new devices “business-ready” with minimal effort, offering benefits such as:
Reduced IT Effort – No need to maintain custom images for every model; devices use the OEM’s factory image and are configured via cloud policies[1][1].
Faster Deployment – Users only perform a few quick steps (like network connection and sign-in), and everything else is automated, so employees can start working sooner[1].
Consistency & Compliance – Ensures each device receives standard configurations, security policies, and applications, so they immediately meet organizational standards upon first use[2].
Lifecycle Management – Autopilot can also streamline device resets, repurposing for new users, or recovery scenarios (for example, using Autopilot Reset to wipe and redeploy a device)[1].
2. Latest Updates: Introduction of Autopilot v2 (Device Preparation)
Microsoft has recently introduced a next-generation Autopilot deployment experience called Windows Autopilot Device Preparation (commonly referred to as Autopilot v2). This new version is essentially a re-architected Autopilot aimed at simplifying and improving deployments based on customer feedback[3]. Autopilot v2 offers new capabilities and architectural changes that enhance consistency, speed, and reliability of device provisioning. Below is an overview of what’s new in Autopilot v2:
No Hardware Hash Import Required: Unlike the classic Autopilot (v1) which required IT admins or OEMs to register devices in Autopilot (upload device IDs/hardware hashes) beforehand, Autopilot v2 eliminates this step[4]. Devices do not need to be pre-registered in Intune; instead, enrollment can be triggered simply by the user logging in with their work account. This streamlines onboarding by removing the tedious hardware hash import process[3]. (If a device is already registered in the old Autopilot, the classic profile will take precedence – so using v2 means not importing the device beforehand[5].)
Cloud-Only (Entra ID) Join: Autopilot v2 currently supports Microsoft Entra ID (Azure AD) join only – it’s designed for cloud-based identity scenarios. Hybrid Azure AD Join (on-prem AD) is not supported in v2 at this time[3]. This focus on cloud join aligns with modern, cloud-first management in Microsoft 365 Business environments.
Single Unified Deployment Profile: The new Autopilot Device Preparation uses a single profile to define all deployment settings and OOBE customization, rather than separate “Deployment” and “ESP” profiles as in legacy Autopilot[3]. This unified profile encapsulates join type, user account type, and OOBE preferences, plus it lets you directly select which apps and scripts should install during the setup phase.
Enrollment Time Grouping: Autopilot v2 introduces an “Enrollment Time Grouping” mechanism. When a user signs in during OOBE, the device is automatically added to a specified Azure AD group on the fly, and any applications or configurations assigned to that group are immediately applied[5][5]. This replaces the old dependence on dynamic device groups (which could introduce delays while membership queries run). Result: faster and more predictable delivery of apps/policies during provisioning[5].
Selective App Installation (OOBE): With Autopilot v1, all targeted device apps would try to install during the initial device setup, possibly slowing things down. In Autopilot v2, the admin can pick up to 10 essential apps (Win32, MSI, Store apps, etc.) to install during OOBE; any apps not selected will be deferred until after the user reaches the desktop[3][6]. By limiting to 10 critical apps, Microsoft aimed to increase success rates and speed (as their telemetry showed ~90% of deployments use 10 or fewer apps initially)[6].
PowerShell Scripts Support in ESP: Autopilot v2 can also execute PowerShell scripts during the Enrollment Status Page (ESP) phase of setup[3]. This means custom configuration scripts can run as part of provisioning before the device is handed to the user – a capability that simplifies advanced setup tasks (like configuring registry settings, installing agent software, etc., via script).
Improved Progress & UX: The OOBE experience is updated – Autopilot v2 provides a simplified progress display (percentage complete) during provisioning[6]. Users can clearly see that the device is installing apps/configurations. Once the critical steps are done, it informs the user that setup is complete and they can start using the device[6][6]. (Because the device isn’t identified as Autopilot-managed until after the user sign-in, some initial Windows setup screens like EULA or privacy settings may appear in Autopilot v2 that were hidden in v1[3]. These are automatically suppressed only after the Autopilot policy arrives during login.)
Near Real-Time Deployment Reporting: Autopilot v2 greatly enhances monitoring. Intune now offers an Autopilot deployment report that shows status per device in near real time[6]. Administrators can see which devices have completed Autopilot, which stage they’re in, and detailed results for each selected app and script (success/failure), as well as overall deployment duration[5][5]. This granular reporting makes troubleshooting easier, as you can immediately identify if (for example) a particular app failed to install during OOBE[5][5].
Availability in Government Clouds: The new Device Preparation approach is available in GCC High and DoD government cloud environments[6][5], which was not possible with Autopilot previously. This broadens Autopilot use to more regulated customers and is one reason Microsoft undertook this redesign (Autopilot v2 originated as a project to meet government cloud requirements and then expanded to all customers)[7].
The table below summarizes key differences between Autopilot v1 (classic) and Autopilot v2:
Feature/Capability
Autopilot v1 (Classic)
Autopilot v2 (Device Preparation)
Device preregistration (Hardware hash upload)
Required (devices must be registered in Autopilot device list before use)[4]
Not required (user can enroll device directly; device should not be pre-added, or v2 profile won’t apply)[5]
Supported join types
Azure AD Join; Hybrid Azure AD Join (with Intune Connector)[3]
Azure/Microsoft Entra ID Join only (no on-prem AD support yet)[3]
Not supported in initial release[3] (future support is planned for these scenarios)
Deployment profiles
Separate Deployment Profile + ESP Profile (configuration split)
Single Device Preparation Policy (one profile for all settings: join, account type, OOBE, app selection)[3]
App installation during OOBE
Installs all required apps targeted to device (could be many; admin chooses which are “blocking”)
Installs selected apps only (up to 10) during OOBE; non-selected apps wait until after OOBE[3][6]
PowerShell scripts in OOBE
Not natively supported in ESP (workarounds needed)
Supported – can run PowerShell scripts during provisioning (via device prep profile)[3]
Policy application in OOBE
Some device policies (Wi-Fi, certs, etc.) could block in ESP; user-targeted configs had limited support
Device policies synced at OOBE (not blocking)[3]; user-targeted policies/apps install after user reaches desktop[3]
Out-of-Box experience (UI)
Branding and many Windows setup screens are skipped (when profile is applied from the start of OOBE)
Some Windows setup screens appear by default (since no profile until sign-in)[3]; afterwards, shows new progress bar and completion summary[6]
Reporting & Monitoring
Basic tracking via Enrollment Status Page; limited real-time info
Detailed deployment report in Intune with near real-time status of apps, scripts, and device info[5]
Why these updates? The changes in Autopilot v2 address common pain points from Autopilot v1. By removing the dependency on upfront registration and dynamic groups, Microsoft has made provisioning more robust and “hands-off”. The new architecture “locks in” the admin’s intended config at enrollment time and provides better error handling and reporting[6][6]. In summary, Autopilot v2 is simpler, faster, more observable, and more reliable – the guiding principles of its design[5] – making device onboarding easier for both IT admins and end-users.
3. Benefits of Using Autopilot v2 in a Microsoft 365 Business Environment
Implementing Autopilot v2 brings significant advantages, especially for organizations using Microsoft 365 Business or Business Premium (which include Intune for device management). Here are the key benefits:
Ease of Deployment – Less IT Effort: Autopilot v2’s no-registration model is ideal for businesses that procure devices ad-hoc or in small batches. IT admins no longer need to collect hardware hashes or coordinate with OEMs to register devices. A user can unbox a new Windows 11 device, connect to the internet, and sign in with their work account to trigger enrollment. This self-service enrollment reduces the workload on IT staff, which is especially valuable for small IT teams.
Faster Device Setup: By limiting installation to essential apps during OOBE and using enrollment time grouping, Autopilot v2 gets devices ready more quickly. End-users see a shorter setup time before reaching the desktop. They can start working sooner with all critical tools in place (e.g. Office apps, security software, etc. installed during setup)[7][7]. Non-critical apps or large software can install in the background later, avoiding long waits up-front.
Improved Reliability and Fewer Errors: The new deployment process is designed to “fail fast” with better error details[6]. If something is going to go wrong (for example, an app that fails to install), Autopilot v2 surfaces that information quickly in the Intune report and does not leave the user guessing. The enrollment time grouping also avoids timing issues that could occur with dynamic Azure AD groups. Overall, this means higher success rates for device provisioning and less troubleshooting compared to the old Autopilot. In addition, by standardizing on cloud join only, many potential complexities (like on-prem domain connectivity during OOBE) are removed.
Enhanced User Experience: Autopilot v2 provides a more transparent and reassuring experience to employees receiving new devices. The OOBE progress bar with a percentage complete indicator lets users know that the device is configuring (rather than appearing to be stuck). Once the critical setup is done, Autopilot informs the user that the device is ready to go[6]. This clarity can reduce helpdesk calls from users unsure if they should wait or reboot during setup. Also, because devices are delivered pre-configured with corporate settings and apps, users can be productive on Day 1 without needing IT to personally assist.
Better Monitoring for IT: In Microsoft 365 Business environments, often a single admin oversees device management. The Autopilot deployment report in Intune gives that admin a real-time dashboard to monitor deployments. They can see if a new laptop issued to an employee enrolled successfully, which apps/scripts ran, and if any step failed[5][5]. For any errors, the admin can drill down immediately and troubleshoot (for instance, if an app didn’t install, they know to check that installer or assign it differently). This reduces guesswork and allows proactive support, contributing to a smoother deployment process across the organization.
Security and Control: Autopilot v2 includes support for corporate device identification. By uploading known device identifiers (e.g., serial numbers) into Intune and enabling enrollment restrictions, a business can ensure only company-owned devices enroll via Autopilot[4][4]. This prevents personal or unauthorized devices from accidentally being enrolled. Although this requires a bit of setup (covered below), it gives small organizations an easy way to enforce that Autopilot v2 is used only for approved hardware, adding an extra layer of security and compliance. Furthermore, Autopilot v2 automatically makes the Azure AD account a standard user by default (not local admin), which improves security on the endpoint[5].
In summary, Autopilot v2 is well-suited for Microsoft 365 Business scenarios: it’s cloud-first and user-driven, aligning with the needs of modern SMBs that may not have complex on-prem infrastructure. It lowers the barrier to deploying new devices (no imaging or device ID admin work) while improving the speed, consistency, and security of device provisioning.
4. Implementing Autopilot v2: Step-by-Step Guide
In this section, we’ll walk through how to implement Windows Autopilot Device Preparation (Autopilot v2) in your Microsoft 365 Business/Intune environment. The process involves: verifying prerequisites, configuring Intune with the new profile and required settings, and then enrolling devices. Each step is detailed below.
4.1 Prerequisites and Initial Setup
Before enabling Autopilot v2, ensure the following prerequisites are met:
Windows Version Requirements: Autopilot v2 requires Windows 11. Supported versions are Windows 11 22H2 or 23H2 with the latest updates (specifically, installing KB5035942 or later)[3][5], or any later version (Windows 11 24H2+). New devices should be shipped with a compatible Windows 11 build (or be updated to one) to use Autopilot v2. Windows 10 devices cannot use Autopilot v2; they would fall back to the classic Autopilot method.
Microsoft Intune: You need an Intune subscription (Microsoft Endpoint Manager) as part of your M365 Business. Intune will serve as the Mobile Device Management (MDM) service to manage Autopilot profiles and device enrollment.
Azure AD/Microsoft Entra ID: Devices will be Azure AD joined. Ensure your users have Microsoft Entra ID accounts with appropriate Intune licenses (e.g., Microsoft 365 Business Premium includes Intune licensing) and that automatic MDM enrollment is enabled for Azure AD join. In Azure AD, under Mobility (MDM/MAM), Microsoft Intune should be set to Automatically enroll corporate devices for your users.
No Pre-Registration of Devices: Do not import the device hardware IDs into the Intune Autopilot devices list for devices you plan to enroll with v2. If you previously obtained a hardware hash (.CSV) from your device or your hardware vendor registered the device to your tenant, you should deregister those devices to allow Autopilot v2 to take over[5]. (Autopilot v2 will not apply if an Autopilot deployment profile from v1 is already assigned to the device.)
Intune Connector (If Hybrid not needed): Since Autopilot v2 doesn’t support Hybrid AD join, you do not need the Intune Connector for Active Directory for these devices. (If you have the connector running for other hybrid-join Autopilot scenarios, that’s fine; it simply won’t be used for v2 deployments.)
Network and Access: New devices must have internet connectivity during OOBE (Ethernet or Wi-Fi accessible from the initial setup). Ensure that the network allows connection to Azure AD and Intune endpoints. If using Wi-Fi, users will need to join a Wi-Fi network in the first OOBE steps. (Consider using a provisioning SSID or instructing users to connect to an available network.)
Plan for Device Identification (Optional but Recommended): Decide if you will restrict Autopilot enrollment to corporate-owned devices only. For better control (and to prevent personal device enrollment), it’s best practice to use Intune’s enrollment restrictions to block personal Windows enrollments and use Corporate device identifiers to flag your devices. We will cover how to set this up in the steps below. If you plan to use this, gather a list of device serial numbers (and manufacturers/models) for the PCs you intend to enroll.
4.2 Configuring the Autopilot v2 (Device Preparation) Profile in Intune
Once prerequisites are in place, the core setup work is done in Microsoft Intune. This involves creating Azure AD groups and then creating a Device Preparation profile (Autopilot v2 profile) and configuring it. Follow these steps:
1. Create Azure AD Groups for Autopilot: We need two security groups to manage Autopilot v2 deployment:
User Group – contains the users who will be enrolling devices via Autopilot v2.
Device Group – will dynamically receive devices at enrollment time and be used to assign apps/policies.
In the Azure AD or Intune portal, navigate to “Groups” and create a new group for users. For example, “Autopilot Device Preparation – Users”. Add all relevant user accounts (e.g., all employees or the subset who will use Autopilot) to this group[4]. Use Assigned membership for explicit control.
Next, create another security group for devices, e.g., “Autopilot Device Preparation – Devices”. Set this as a Dynamic Device group if possible, or Assigned (we will be adding devices automatically via the profile). An interesting detail: Intune’s Autopilot v2 mechanism uses an application identity called “Intune Provisioning Client” to add devices to this group during enrollment[4]. You can assign that as the owner of the group (though Intune may handle this automatically when the profile is used).
2. Create the Device Preparation (Autopilot v2) Profile: In the Intune admin center, go to Devices > Windows > Windows Enrollment (or Endpoint Management > Enrollment). There should be a section for “Windows Autopilot Device Preparation (Preview)” or “Device Preparation Policies”. Choose to Create a new profile/policy[4].
Name and Group Assignment: Give the profile a clear name (e.g., “Autopilot Device Prep Policy – Cloud PCs”). For the target group, select the Device group created in step 1 as the group to assign devices to at enrollment[4]. (In some interfaces, you might first choose the device group in the profile so the system knows where to add devices.)
Deployment Mode: Choose User-Driven (since user-driven Azure AD join is the scenario for M365 Business). Autopilot v2 also has an “Automatic” mode intended for Windows 365 Cloud PCs or scenarios without user interaction, but for physical devices in a business, user-driven is typical.
Join Type: Select Azure AD (Microsoft Entra ID) join. (This is the only option in v2 currently – Hybrid AD join is not available).
User Account Type: Choose whether the end user should be a standard user or local admin on the device. Best practice is to select Standard (non-admin) to enforce least privilege[5]. (In classic Autopilot, this was an option in the deployment profile as well. Autopilot v2 defaults to standard user by design, but confirm the setting if presented.)
Out-of-box Experience (OOBE) Settings: Configure the OOBE customization settings as desired:
You can typically configure Language/Region (or set to default to device’s settings), Privacy settings, End-User License Agreement (EULA) acceptance, and whether users see the option to configure for personal use vs. organization. Note: In Autopilot v2, some of these screens may not be fully suppressible as they are in v1, but set your preferences here. For instance, you might hide the privacy settings screen and accept EULA automatically to streamline user experience.
If the profile interface allows it, enable “Skip user enrollment if device is known corporate” or similar, to avoid the personal/work question (this ties in with using corporate identifiers).
Optionally, set a device naming template if available. However, Autopilot v2 may not support custom naming at this stage (and users can be given the ability to name the device during setup)[3]. Check Intune’s settings; if not present, plan to rename devices via Intune policy later if needed.
Applications & Scripts (Device Preparation): Select the apps and PowerShell scripts that you want to be installed during the device provisioning (OOBE) phase[4]. Intune will present a list of existing apps and scripts you’ve added to Intune. Here, pick only your critical or required applications – remember the limit is 10 apps max for the OOBE phase. Common choices are:
Company Portal (for user self-service and additional app access)[4].
Endpoint protection software (antivirus/EDR agent, if not already part of Windows).
Any other crucial line-of-business app that the user needs immediately. Also select any PowerShell onboarding scripts you want to run (for example, a script to set a custom registry or install a specific agent that’s not packaged as an app). These selected items will be tracked in the deployment. (Make sure any app you select is assigned in Intune to the device group we created, or available for all devices – more on app assignment in the next step.)
Assign the Profile: Finally, assign the Device Preparation profile to the User group created in step 1[4]. This targeting means any user in that group who signs into a Windows 11 device during OOBE will trigger this Autopilot profile. (The device will get added to the specified device group, and the selected apps will install.)
Save/create the profile. At this point, Intune has the Autopilot v2 policy in place, waiting to apply at next enrollment for your user group.
3. Assign Required Applications to Device Group: Creating the profile in step 2 defines which apps should install, but Intune still needs those apps to be deployed as “Required” to the device group for them to actually push down. In Intune:
Go to Apps > Windows (or Apps section in MEM portal).
For each critical app you included in the profile (Company Portal, Office, etc.), check its Properties > Assignments. Make sure to assign the app to the Autopilot Devices group (as Required installation)[4]. For example, set Company Portal – Required for [Autopilot Device Preparation – Devices][4].
Repeat for Microsoft 365 Apps and any other selected application[4]. If you created a PowerShell script configuration in Intune, ensure that script is assigned to the device group as well.
Essentially, this step ensures Intune knows to push those apps to any device that appears in the devices group. Autopilot v2 will add the new device to the group during enrollment, and Intune will then immediately start installing those required apps. (Without this step, the profile alone wouldn’t install apps, since the profile itself only “flags” which apps to wait for but the apps still need to be assigned to devices.)
4. Configure Enrollment Restrictions (Optional – Corporate-only): If you want to block personal devices from enrolling (so that only corporately owned devices can use Autopilot), set up an enrollment restriction in Intune:
In Intune portal, navigate to Devices > Enrollment restrictions.
Create a new Device Type or Platform restriction policy (or edit the existing default one) for Windows. Under Personal device enrollment, set Personally owned Windows enrollment to Blocked[4].
Assign this restriction to All Users (or at least all users in the Autopilot user group)[4].
This means if a user tries to Azure AD join a device that Intune doesn’t recognize as corporate, the enrollment will be refused. This is a good security measure, but it requires the next step (uploading corporate identifiers) to work smoothly with Autopilot v2.
5. Upload Corporate Device Identifiers: With personal devices blocked, you must tell Intune which devices are corporate. Since we are not pre-registering the full Autopilot hardware hash, Intune can rely on manufacturer, model, and serial number to recognize a device as corporate-owned during Autopilot v2 enrollment. To upload these identifiers:
Gather device info: For each new device, obtain the serial number, plus the manufacturer and model strings. You can get this from order information or by running a command on the device (e.g., on an example device, run wmic csproduct get vendor,name,identifyingnumber to output vendor (manufacturer), name (model), and identifying number (serial)[4]). Many OEMs provide this info in packing lists or you can scan a barcode from the box.
Prepare CSV: Create a CSV file with columns for Manufacturer, Model, Serial Number. List each device’s information on a separate line[4]. For example:\ Dell Inc.,Latitude 7440,ABCDEFG1234\ Microsoft Corporation,Surface Pro 9,1234567890\ (Use the exact strings as reported by the device/OEM to avoid mismatches.)
Upload in Intune: In the Intune admin center, go to Devices > Enrollment > Corporate device identifiers. Choose Add then Upload CSV. Select the format “Manufacturer, model, and serial number (Windows only)”[4] and upload your CSV file. Once processed, Intune will list those identifiers as corporate.
With this in place, when a user signs in on a device, Intune checks the device’s hardware info. If it matches one of these entries, it’s flagged as corporate-owned and allowed to enroll despite the personal device block[4][4]. If it’s not in the list, the enrollment will be blocked (the user will get a message that enrolling personal devices is not allowed). Important: Until you have corporate identifiers set up, do not enable the personal device block, or Autopilot device preparation will fail for new devices[6][6]. Always upload the identifiers first or simultaneously.
At this stage, you have completed the Intune configuration for Autopilot v2. You have:
A user group allowed to use Autopilot.
A device preparation profile linking that user group to a device group, with chosen settings and apps.
Required apps assigned to deploy.
Optional restrictions in place to ensure only known devices will enroll.
4.3 Enrollment and Device Setup Process (Using Autopilot v2)
With the above configuration done, the actual device enrollment process is straightforward for the end-user. Here’s what to expect when adding a new device to your Microsoft 365 environment via Autopilot v2:
Out-of-Box Experience (Initial Screens): When the device is turned on for the first time (or after a factory reset), the Windows OOBE begins. The user will select their region and keyboard (unless the profile pre-configured these). The device will prompt for a network connection. The user should connect to the internet (Ethernet or Wi-Fi). Once connected, the device might check for updates briefly, then reach the “Sign in” screen.
User Sign-In (Azure AD): The user enters their work or school (Microsoft Entra ID/Azure AD) credentials – i.e., their Microsoft 365 Business account email and password. This is the trigger for Autopilot Device Preparation. Upon signing in, the device joins your organization’s Azure AD. Because the user is in the “Autopilot Users” group and an Autopilot Device Preparation profile is active, Intune will now kick off the device preparation process in the background.
Device Preparation Phase (ESP): After credentials are verified, the user sees the Enrollment Status Page (ESP) which now reflects “Device preparation” steps. In Autopilot v2, the ESP will show the progress of the configuration. A key difference in v2 is the presence of a percentage progress indicator that gives a clearer idea of progress[6]. Behind the scenes, several things happen:
The device is automatically added to the specified Device group (“Autopilot Device Preparation – Devices”) in Azure AD[5]. The “Intune Provisioning Agent” does this within seconds of the user signing in.
Intune immediately starts deploying the selected applications and PowerShell scripts to the device (those that were marked for installation during OOBE). The ESP screen will typically list the device setup steps, which may include device configuration, app installation, etc. The apps you marked as required (Company Portal, Office, etc.) will download and install one by one. Their status can often be viewed on the screen (e.g., “Installing Office 365… 50%”).
Any device configuration policies assigned to the device group (e.g., configuration profiles or compliance policies you set to target that group) will also begin to apply. Note: Autopilot v2 does not pause for all policies to complete; it mainly ensures the selected apps and scripts complete. Policies will apply in parallel or afterwards without blocking the ESP[3].
If you enabled BitLocker or other encryption policies, those might kick off during this phase as well (depending on your Intune configuration for encryption on Azure AD join).
The user remains at the ESP screen until the critical steps finish. With the 10-app limit and no dynamic group delay, this phase should complete relatively quickly (typically a few minutes to perhaps an hour for large Office downloads on slower connections). The progress bar will reach 100%.
Completion and First Desktop Launch: Once the selected apps and scripts have finished deploying, Autopilot signals that device setup is complete. The ESP will indicate it’s done, and the user will be allowed to proceed to log on to Windows (or it may automatically log them in if credentials were cached from step 2). In Autopilot v2, a final screen can notify the user that critical setup is finished and they can start using the device[6]. The user then arrives at the Windows desktop.
Post-Enrolment (Background tasks): Now the device is fully Azure AD joined and enrolled in Intune as a managed device. Any remaining apps or policies that were not part of the initial device preparation will continue to install in the background. For example, if you targeted some less critical user-specific apps (say, OneDrive client or Webex) via user groups, those will download via Intune management without interrupting the user. The user can begin working, and they’ll likely see additional apps appearing or software finishing installations within the first hour of use.
Verification: The IT admin can verify the device in the Intune portal. It should appear under Devices with the user assigned, and compliance/policies applying. The Autopilot deployment report in Intune will show this device’s status as successful if all selected apps/scripts succeeded, or flagged if any failures occurred[5]. The user should see applications like Office, Teams, Outlook, and the Company Portal already installed on the Start Menu[4]. If all looks good, the device is effectively ready and managed.
4.4 Troubleshooting Common Issues in Autopilot v2
While Autopilot v2 is designed to be simpler and more reliable, you may encounter some issues during setup. Here are common issues and how to address them:
Device is blocked as “personal” during enrollment: If you enabled the enrollment restriction to block personal devices, a new device might fail to enroll at user sign-in with a message that personal devices are not allowed. This typically means Intune did not recognize the device as corporate. Ensure you have uploaded the correct device serial, model, and manufacturer under corporate identifiers before the user attempts enrollment[4]. Typos or mismatches (e.g., “HP Inc.” vs “Hewlett-Packard”) can cause the check to fail. If an expected corporate device was blocked, double-check its identifier in Intune and re-upload if needed, then have the user try again (after a reset). If you cannot get the identifiers loaded in time, you may temporarily toggle the restriction to allow personal Windows enrollments to let the device through, then re-enable once fixed.
Autopilot profile not applying (device does standard Azure AD join without ESP): This can happen if the user is not in the group assigned to the Autopilot Device Prep profile, or if the device was already registered with a classic Autopilot profile. To troubleshoot:
Verify that the user who is signing in is indeed a member of the Autopilot Users group that you targeted. If not, add them and try again.
Check Intune’s Autopilot devices list. If the device’s hardware hash was previously imported and has an old deployment profile assigned, the device might be using Autopilot v1 behavior (which could skip the ESP or conflict). Solution: Remove the device from the Autopilot devices list (deregister it) so that v2 can proceed[5].
Also ensure the device meets OS requirements. If someone somehow tried with an out-of-date Windows 10, the new profile wouldn’t apply.
One of the apps failed to install during OOBE: If an app (or script) that was selected in the profile fails, the Autopilot ESP might show an error or might eventually time out. Autopilot v2 doesn’t explicitly block on policies, but it does expect the chosen apps to install. If an app installation fails (perhaps due to an MSI error or content download issue), the user may eventually be allowed to log in, but Intune’s deployment report will mark the deployment as failed for that device[5]. Use the Autopilot deployment report in Intune to see which app or step failed[5]. Then:
Check the Intune app assignment for that app. For instance, was the app installer file reachable and valid? Did it have correct detection rules? Remedy any packaging error.
If the issue was network (e.g., large app timed out), consider not deploying that app during OOBE (remove it from the profile’s selected apps so it installs later instead).
The user can still proceed to work after skipping the failed step (in many cases), but you’ll want to push the necessary app afterward or instruct the user to install via Company Portal if possible.
User sees unexpected OOBE screens (e.g., personal vs organization choice): As noted, Autopilot v2 can show some default Windows setup prompts that classic Autopilot hid. For example, early in OOBE the user might be asked “Is this a personal or work device?” If they see this, they should select Work/School (which leads to the Azure AD sign-in). Similarly, the user might have to accept the Windows 11 license agreement. To avoid confusion, prepare users with guidance that they may see a couple of extra screens and how to proceed. Once the user signs in, the rest will be automated. In future, after the device prep profile applies, those screens might not appear on subsequent resets, but on first run they can. This is expected behavior, not a failure.
Autopilot deployment hangs or takes too long: If the process seems stuck on the ESP for an inordinate time:
Check if it’s downloading a large update or app. Sometimes Windows might be applying a critical update in the background. If internet is slow, Office download (which can be ~2GB) might simply be taking time. If possible, ensure a faster connection or use Ethernet for initial setup.
If it’s truly hung (no progress increase for a long period), you may need to power cycle. The good news is Autopilot v2 is resilient – it has more retry logic for applying the profile[8]. On reboot, it often picks up where it left off, or attempts the step again. Frequent hanging might indicate a problematic step (again, refer to Intune’s report).
Ensure the device’s time and region were set correctly; incorrect time can cause Azure AD token issues. Autopilot v2 does try to sync time more reliably during ESP[8].
Post-enrollment policy issues: Because Autopilot v2 doesn’t wait for all policies, you might notice things like BitLocker taking place only after login, or certain configurations applying slightly later. This is normal. However, if certain device configurations never apply, verify that those policies are targeted correctly (likely to the device group). If they were user-targeted, they should apply after the user logs in. If something isn’t applying at all, treat it as a standard Intune troubleshooting case (e.g., check for scope tags, licensing, or conflicts).
Overall, many issues can be avoided by testing Autopilot v2 on a pilot device before mass rollout. Run through the deployment yourself with a test user and device to catch any application installation failures or unexpected prompts, and adjust your profile or process accordingly.
5. Best Practices for Maintaining and Managing Autopilot v2 Devices
After deploying devices with Windows Autopilot Device Preparation, your work isn’t done – you’ll want to manage and maintain those devices for the long term. Here are some best practices to ensure ongoing success:
Establish Clear Autopilot Processes: Because Autopilot v2 and v1 may coexist (for different use cases), document your process. For example, decide: will all new devices use Autopilot v2 going forward, or only certain ones? Communicate to your procurement and IT teams that new devices should not be registered via the old process. If you buy through an OEM with Autopilot registration service, pause that for devices you’ll enroll via v2 to avoid conflicts.
Keep Windows and Intune Updated: Autopilot v2 capabilities may expand with new Windows releases and Intune updates. Ensure devices get Windows quality updates regularly (this keeps the Autopilot agent up-to-date and compatible). Watch Microsoft Intune release notes for any Autopilot-related improvements or changes. For instance, if/when Microsoft enables features like self-deploying or hybrid join in Autopilot v2, it will likely come via an update[6] – staying current allows you to take advantage.
Limit and Optimize Apps in the Profile: Be strategic about the apps you include during the autopilot phase. The 10-app limit forces some discipline – include only truly essential software that users need immediately or that is required for security/compliance. Everything else can install later via normal Intune assignment or be made available in Company Portal. This ensures the provisioning is quick and has fewer chances to fail. Also prefer Win32 packaged apps for reliability and to avoid Windows Store dependencies during OOBE[2]. In general, simpler is better for the OOBE phase.
Use Device Categories/Tags if Needed: Intune supports tagging devices during enrollment (in classic Autopilot, there was “Convert all targeted devices to Autopilot” and grouping by order ID). In Autopilot v2, since devices aren’t pre-registered, you might use dynamic groups or naming conventions post-enrollment to organize devices (e.g., by department or location). Consider leveraging Azure AD group rules or Intune filters if you need to deploy different apps to different sets of devices after enrollment.
Monitor Deployment Reports and Logs: Take advantage of the new Autopilot deployment report in Intune for each rollout[5]. After onboarding a batch of new devices, review the report to see if any had issues (e.g., maybe one device’s Office install failed due to a network glitch). Address any failures proactively (rerun a script, push a missed app, etc.). Additionally, know that users or IT can export Autopilot logs easily from the device if needed[5] (there’s a troubleshooting option during the OOBE or via pressing certain key combos). Collecting logs can help Microsoft support or your IT team diagnose deeper issues.
Maintain Corporate Identifier Lists: If you’re using the corporate device identifiers method, keep your Azure AD device inventory synchronized with Intune’s list. For every new device coming in, add its identifiers. For devices being retired or sold, you might remove their identifiers. Also, coordinate this with the enrollment restriction – e.g., if a top executive wants to enroll their personal device and you have blocking enabled, you’d need to explicitly allow or bypass that (possibly by not applying the restriction to that user or by adding the device as corporate through some means). Regularly update the CSV as you purchase hardware to avoid last-minute scrambling when a user is setting up a new PC.
Plan for Feature Gaps: Recognize the current limitations of Autopilot v2 and plan accordingly:
If you require Hybrid AD Join (joining on-prem AD) for certain devices, those devices should continue using the classic Autopilot (with hardware hash and Intune Connector) for now, since v2 can’t do it[3].
If you utilize Autopilot Pre-Provisioning (White Glove) via IT staff or partner to pre-setup devices before handing to users (common for larger orgs or complex setups), note that Autopilot v2 doesn’t support that yet[3]. You might use Autopilot v1 for those scenarios until Microsoft adds it to v2.
Self-Deploying Mode (for kiosks or shared devices that enroll without user credentials) is also not in v2 presently[3]. Continue using classic Autopilot with TPM attestation for kiosk devices as needed. It’s perfectly fine to run both Autopilot methods side-by-side; just carefully target which devices or user groups use which method. Microsoft is likely to close these gaps in future updates, so keep an eye on announcements.
End-User Training and Communication: Even though Autopilot is automated, let your end-users know what to expect. Provide a one-page instruction with their new laptop: e.g., “1) Connect to Wi-Fi, 2) Log in with your work account, 3) Wait while we set up your device (about 15-30 minutes), 4) You’ll see a screen telling you when it’s ready.” Setting expectations helps reduce support tickets. Also inform them that the device will be managed by the company (which is standard, but transparency helps trust).
Device Management Post-Deployment: After Autopilot enrollment, manage the devices like any Intune-managed endpoints. Set up compliance policies (for OS version, AV status, etc.), Windows Update rings or feature update policies to keep them up-to-date, and use Intune’s Endpoint analytics or Windows Update for Business reports to track device health. Autopilot has done the job of onboarding; from then on, treat the devices as part of your standard device management lifecycle. For instance, if a device is reassigned to a new user, you can invoke Autopilot Reset via Intune to wipe user data and redo the OOBE for the new user—Autopilot v2 will once again apply (just ensure the new user is in the correct group).
Continuous Improvement: Gather feedback from users about the Autopilot process. If many report that a certain app wasn’t ready or some setting was missing on first login, adjust your Autopilot profile or Intune assignments. Autopilot v2’s flexibility allows you to tweak which apps/scripts are in the initial provision vs. post-login. Aim to find the right balance where devices are secure and usable as soon as possible, without overloading the provisioning. Also consider pilot testing Windows 11 feature updates early, since Autopilot behavior can change or improve with new releases (for example, a future Windows 11 update might reduce the appearance of some initial screens in Autopilot v2, etc.).
By following these best practices, you’ll ensure that your organization continues to benefit from Autopilot v2’s efficiencies long after the initial setup. The result is a modern device deployment strategy with minimal hassle, aligned to the cloud-first, zero-touch ethos of Microsoft 365.
Conclusion: Microsoft Autopilot v2 (Windows Autopilot Device Preparation) represents a significant step forward in simplifying device onboarding. By leveraging it in your Microsoft 365 Business environment, you can add new Windows 11 devices with ease – end-users take them out of the box, log in, and within minutes have a fully configured, policy-compliant workstation. The latest updates bring more reliability, insight, and speed to this process, making life easier for IT admins and employees alike. By understanding the new features, following the implementation steps, and adhering to best practices outlined in this guide, you can successfully deploy Autopilot v2 and streamline your device deployment workflow[4][5]. Happy deploying!
If you found this valuable, the I’d appreciate a ‘like’ or perhaps a donation at https://ko-fi.com/ciaops. This helps me know that people enjoy what I have created and provides resources to allow me to create more content. If you have any feedback or suggestions around this, I’m all ears. You can also find me via email director@ciaops.com and on X (Twitter) at https://www.twitter.com/directorcia.
If you want to be part of a dedicated Microsoft Cloud community with information and interactions daily, then consider becoming a CIAOPS Patron – www.ciaopspatron.com.
Microsoft Defender for Business is a security solution designed for small and medium businesses to protect against cyber threats. When issues arise, a systematic troubleshooting approach helps identify root causes and resolve problems efficiently. This guide provides a step-by-step process to troubleshoot common Defender for Business issues, highlights where to find relevant logs and alerts, and suggests advanced techniques for complex situations. All steps are factual and based on Microsoft’s latest guidance as of 2025.
These are some typical problems administrators encounter with Defender for Business:
Setup and Onboarding Failures: The initial setup or device onboarding process fails. An error like “Something went wrong, and we couldn’t complete your setup” may appear, indicating a configuration channel or integration issue (often with Intune)[1]. Devices that should be onboarded don’t show up in the portal.
Devices Showing As Unprotected: In the Microsoft Defender portal, you might see notifications that certain devices are not protected even though they were onboarded[1]. This often happens when real-time protection is turned off (for instance, if a non-Microsoft antivirus is running, it may disable Microsoft Defender’s real-time protection).
Mobile Device Onboarding Issues: Users cannot onboard their iOS or Android devices using the Microsoft Defender app. A symptom is that mobile enrollment doesn’t complete, possibly due to provisioning not finished on the backend[1]. For example, if the portal shows a message “Hang on! We’re preparing new spaces for your data…”, it means the Defender for Business service is still provisioning mobile support (which can take up to 24 hours) and devices cannot be added until provisioning is complete[1].
Defender App Errors on Mobile: The Microsoft Defender app on mobile devices may crash or show errors. Users report issues like app not updating threats or not connecting. (Microsoft provides separate troubleshooting guides for the mobile Defender for Endpoint app on Android/iOS in such cases[1].)
Policy Conflicts: If you have multiple security management tools, you might see conflicting policies. For instance, an admin who was managing devices via Intune and then enabled Defender for Business’s simplified configuration could encounter conflicts where settings in Intune and Defender for Business overlap or contradict[1]. This can result in devices flipping between policy states or compliance errors.
Intune Integration Errors: During the setup process, an error indicating an integration issue between Defender for Business and Microsoft Intune might occur[1]. This often requires enabling certain settings (detailed in Step 5 below) to establish a proper configuration channel.
Onboarding or Reporting Delays: A device appears to onboard successfully but doesn’t show up in the portal or is missing from the device list even after some time. This could indicate a communication issue where the device is not reporting in. It might be caused by connectivity problems or by an issue with the Microsoft Defender for Endpoint service (sensor) on the device.
Performance or Scan Issues: (Less common with Defender for Business, but possible) – Devices might experience high CPU or scans get stuck, which could indicate an issue with Defender Antivirus on the endpoint that needs further diagnosis (this overlaps with Defender for Endpoint troubleshooting).
Understanding which of these scenarios matches your situation will guide where to look first. Next, we’ll cover where to find the logs and alerts that contain clues for diagnosis.
Key Locations for Logs and Alerts
Effective troubleshooting relies on checking both cloud portal alerts and on-device logs. Microsoft Defender for Business provides information in multiple places:
Microsoft 365 Defender Portal (security.microsoft.com): This is the cloud portal where Defender for Business is managed. The Incidents & alerts section is especially important. Here you can monitor all security incidents and alerts in one place[2]. For each alert, you can click to see details in a flyout pane – including the alert title, severity, affected assets (devices or users), and timestamps[2]. The portal often provides recommended actions or one-click remediation for certain alerts[2]. It’s the first place to check if you suspect Defender is detecting threats or if something triggered an alert that correlates with the issue.
Device Logs via Windows Event Viewer: On each Windows device protected by Defender for Business, Windows keeps local event logs for Defender components. Access these by opening Event Viewer (Start > eventvwr.msc). Key logs include:
Microsoft-Windows-SENSE/Operational – This log records events from the Defender for Endpoint sensor (“SENSE” is the internal code name for the sensor)[3]. If a device isn’t showing up in the portal or has onboarding issues, this log is crucial. It contains events for service start/stop, onboarding success/failure, and connectivity to the cloud. For example, Event ID 6 means the service isn’t onboarded (no onboarding info found), which indicates the device failed to onboard and needs the onboarding script rerun[3]. Event ID 3 means the service failed to start entirely[3], and Event ID 5 means it couldn’t connect to the cloud (network issue)[3]. We will discuss how to interpret and act on these later.
Windows Defender/Operational – This is the standard Windows Defender Antivirus log under Applications and Services Logs > Microsoft > Windows > Windows Defender > Operational. It logs malware detections and actions taken on the device[4]. For troubleshooting, this log is helpful if you suspect Defender’s real-time protection or scans are causing an issue or to confirm if a threat was detected on a device. You might see events like “Malware detected” (Event ID 1116) or “Malware action taken” (Event ID 1117) which correspond to threats found and actions (like quarantine) taken[4]. This can explain, for instance, if a file was blocked and that’s impacting a user’s work.
Other system logs: Standard Windows logs (System, Application) might also record errors (for example, if a service fails or crashes, or if there are network connectivity issues that could affect Defender).
Alerts in Microsoft 365 Defender: Defender for Business surfaces alerts in the portal for various issues, not only malware. For example, if real-time protection is turned off on a device, the portal will flag that device as not fully protected[1]. If a device hasn’t reported in for a long time, it might show in the device inventory with a stale last-seen timestamp. Additionally, if an advanced attack is detected, multiple alerts will be correlated as an incident; an incident might be tagged with “Attack disruption” if Defender automatically contained devices to stop the spread[2] – such context can validate if an ongoing security issue is causing what you’re observing.
Intune or Endpoint Manager (if applicable): Since Defender for Business can integrate with Intune (Endpoint Manager) for device management and policy deployment, some issues (especially around onboarding and policy conflicts) may require checking Intune logs:
In Intune admin center, review the device’s Enrollment status and Device configuration profiles (for instance, if a security profile failed to apply, it could cause Defender settings to not take effect).
Intune’s Troubleshooting + support blade for a device can show error codes if a policy (like onboarding profile) failed.
If there’s a known integration issue (like the one mentioned earlier), ensure the Intune connection and settings are enabled as described in the next sections.
Advanced Hunting and Audit (for advanced users): If you have access to Microsoft 365 Defender’s advanced hunting (which might require an upgraded license beyond Defender for Business’s standard features), you could query logs (e.g., DeviceEvents, AlertEvents) for deeper investigation. Also, the Audit Logs in the Defender portal record configuration changes (useful to see if someone changed a policy right before issues started).
Now, with an understanding of where to get information, let’s proceed with a systematic troubleshooting process.
Step-by-Step Troubleshooting Process
The following steps outline a logical process to troubleshoot issues in Microsoft Defender for Business. Adjust the steps as needed based on the specific symptoms you are encountering.
Step 1: Identify the Issue and Gather Information
Before jumping into configuration changes, clearly define the problem. Understanding the nature of the issue will focus your investigation:
What are the symptoms? For example, “Device X is not appearing in the Defender portal”, “Users are getting no protection on their phones”, or “We see an alert that one device isn’t protected”, etc.
When did it start? Did it coincide with any changes (onboarding new devices, changing policies, installing another antivirus, etc.)?
Who or what is affected? A single device, multiple devices, all mobile devices, a specific user?
Any error messages? Note any message in the portal or on the device. For instance, an error code during setup, or the portal banner saying “some devices aren’t protected”[1]. These messages often hint at the cause.
Gathering this context will guide you on where to look first. For example, an issue with one device might mean checking that device’s status and logs, whereas a widespread issue might suggest a configuration problem affecting many devices.
Step 2: Check the Microsoft 365 Defender Portal for Alerts
Log in to the Microsoft 365 Defender portal (https://security.microsoft.com) with appropriate admin credentials. This centralized portal often surfaces the problem:
Go to Incidents & alerts: In the left navigation pane, click “Incidents & alerts”, then select “Alerts” (or “Incidents” for grouped alerts)[2]. Look for any recent alerts that correspond to your issue. For example, if a device isn’t protected or hasn’t reported, there may be an alert about that device.
Review alert details: If you see relevant alerts, click on one to open the details flyout. Check the alert title and description – these describe what triggered it (e.g. “Real-time protection disabled on Device123” or “Malware detected and quarantined”). Note the severity (Informational, Low, Medium, High) and the affected device or user[2]. The portal will list the device name and perhaps the user associated with it.
Take recommended actions: The alert flyout often includes recommended actions or a direct link to “Open incident page” or “Take action”. For instance, for a malware alert, it may suggest running a scan or isolating the device. For a configuration alert (like real-time protection off), it might recommend turning it back on. Make note of these suggestions as they directly address the issue described[2].
Check the device inventory: Still in the Defender portal, navigate to Devices (under Assets). Find the device in question. The device page can show its onboarding status, last seen time, OS, and any outstanding issues. If the device is missing entirely, that confirms an onboarding problem – skip to Step 4 to troubleshoot that.
**Inspect *Incidents***: If multiple alerts have been triggered around the same time or on the same device, the portal might have grouped them into an *Incident* (visible under the Incidents tab). Open the incident to see a timeline of what happened. This can give a broader context especially if a security threat is involved (e.g. an incident might show that a malware was detected and then real-time protection was turned off – indicating the malware might have attempted to disable Defender).
Example: Suppose the portal shows an alert “Real-time protection was turned off on DeviceXYZ”. This is a clear indicator – the device is onboarded but not actively protecting in real-time[1]. The recommended action would likely be to turn real-time protection back on. Alternatively, if an alert says “New malware found on DeviceXYZ”, you’d know the issue is a threat detection, and the portal might guide you to remediate or confirm that malware was handled. In both cases, you’ve gathered an essential clue before even touching the device.
If you do not see any alert or indicator in the portal related to your problem, the issue might not be something Defender is reporting on (for example, if the problem is an onboarding failure, there may not be an alert – the device just isn’t present at all). In such cases, proceed to the next steps.
Step 3: Verify Device Status and Protection Settings
Next, ensure that the devices in question are configured correctly and not in a state that would cause issues:
Confirm onboarding completion: If a device doesn’t appear in the portal’s device list, ensure that the onboarding process was done on that device. Re-run the onboarding script or package on the device if needed. (Defender for Business devices are typically onboarded via the local script, Intune, Group Policy, etc. If this step wasn’t done or failed, the device won’t show up in the portal.)
Check provisioning status for mobile: If the issue is with mobile devices (Android/iOS) not onboarding, verify that Defender for Business provisioning is complete. As mentioned, the portal (under Devices) might show a message “preparing new spaces for your data” if the service setup is still ongoing[1]. Provisioning can take up to 24 hours for a new tenant. If you see that message, the best course is to wait until it disappears (i.e., until provisioning finishes) before troubleshooting further. Once provisioning is done, the portal will prompt to onboard devices, and then users should be able to add their mobile devices normally[1].
Verify real-time protection setting: On any Windows device showing “not protected” in the portal, log onto that device and open Windows Security > Virus & threat protection. Check if Real-time protection is on. If it’s off and cannot be turned on, check if another antivirus is installed. By design, onboarding a device running a third-party AV can cause Defender’s real-time protection to be automatically disabled to avoid conflict[1]. In Defender for Business, Microsoft expects Defender Antivirus to be active alongside the service for best protection (“better together” scenario)[1]. If a third-party AV is present, decide if you will remove it or live with Defender in passive mode (which reduces protection and triggers those alerts). Ideally, ensure Microsoft Defender Antivirus is enabled.
Policy configuration review: If you suspect a policy conflict or misconfiguration, review the policies applied:
In the Microsoft 365 Defender portal, go to Endpoints > Settings > Rules & policies (or in Intune’s Endpoint security if that’s used). Ensure that you haven’t defined contradictory policies in multiple places. For example, if Intune had a policy disabling something but Defender for Business’s simplified setup has another setting, prefer one system. In a known scenario, an admin had Intune policies and then used the simplified Defender for Business policies concurrently, leading to conflicts[1]. The resolution was to delete or turn off the redundant policies in Intune and let Defender for Business policies take precedence (or vice versa) to eliminate conflicts[1].
Also verify tamper protection status – by default, tamper protection is on (preventing unauthorized changes to Defender settings). If someone turned it off for troubleshooting and forgot to re-enable, settings could be changed without notice.
Intune onboarding profile (if applicable): If devices were onboarded via Intune (which should be the case if you connected Defender for Business with Intune), check the Endpoint security > Microsoft Defender for Endpoint section in Intune. Ensure there’s an onboarding profile and that those devices show as onboarded. If a device is stuck in a pending state, you may need to re-enroll or manually onboard.
By verifying these settings, you either fix simple oversights (like turning real-time protection back on) or gather evidence of a deeper issue (for example, confirming a device is properly onboarded, yet still not visible, implying a reporting issue, or confirming there’s a policy conflict that needs resolution in the next step).
Step 4: Examine Device Logs (Event Viewer)
If the issue is not yet resolved by the above steps, or if you need more insight into why something is wrong, dive into the device’s event logs for Microsoft Defender. Perform these checks on an affected device (or a sample of affected devices if multiple):
Open Event Viewer (Local logs): On the Windows device, press Win + R, type eventvwr.msc and hit Enter. Navigate to Applications and Services Logs > Microsoft > Windows and scroll through the sub-folders.
Check “SENSE” Operational log: Locate Microsoft > Windows > SENSE > Operational and click it to open the Microsoft Defender for Endpoint service log[3]. Look for recent Error or Warning events in the list:
Event ID 3: “Microsoft Defender for Endpoint service failed to start.” This means the sensor service didn’t fully start on boot[3]. Check if the Sense service is running (in Services.msc). If not, an OS issue or missing prerequisites might be at fault.
Event ID 5: “Failed to connect to the server at \.” This indicates the endpoint could not reach the Defender cloud service URLs[3]. This can be a network or proxy issue – ensure the device has internet access and that security.microsoft.com and related endpoints are not blocked by firewall or proxy.
Event ID 6: “Service isn’t onboarded and no onboarding parameters were found.” This tells us the device never got the onboarding info – effectively it’s not onboarded in the service[3]. Possibly the onboarding script never ran successfully. Solution: rerun onboarding and ensure it completes (the event will change to ID 11 on success).
Event ID 7: “Service failed to read onboarding parameters”[3] – similar to ID 6, means something went wrong reading the config. Redeploy the onboarding package.
Other SENSE events might point to registry permission issues or feature missing (e.g., Event ID 15 could mean the SENSE service couldn’t start due to ELAM driver off or missing components – those cases are rare on modern systems, but the event description will usually suggest enabling a feature or a Windows update[5][5]).
Each event has a description. Compare the event’s description against Microsoft’s documentation for Defender for Endpoint event IDs to get specific guidance[3][3]. Many event descriptions (like examples above) already hint at the resolution (e.g., check connectivity, redeploy scripts, etc.).
Check “Windows Defender” Operational log: Next, open Microsoft > Windows > Windows Defender > Operational. Look for recent entries, especially around the time the issue occurred:
If the issue is related to threat detection or a failed update, you might see events in the 1000-2000 range (these correspond to malware detection events and update events).
For example, Event ID 1116 (MALWAREPROTECTION_STATE_MALWARE_DETECTED) means malware was detected, and ID 1117 means an action was taken on malware[4]. These confirm whether Defender actually caught something malicious, which might have triggered further issues.
You might also see events indicating if the user or admin turned settings off. Event ID 5001-5004 range often relates to settings changes (like if real-time protection was disabled, it might log an event).
The Windows Defender log is more about security events than errors; if your problem is purely a configuration or onboarding issue, this log might not show anything unusual. But it’s useful to confirm if, say, Defender is working up to the point of detecting threats or if it’s completely silent (which could mean it’s not running at all on that device).
Additional log locations: If troubleshooting a device connectivity or performance issue, also check the System log in Event Viewer for any relevant entries (e.g., Service Control Manager errors if the Defender service failed repeatedly). Also, the Security log might show Audit failures if, for example, Defender attempted an action.
Analyze patterns: If multiple devices have issues, compare logs. Are they all failing to contact the service (Event ID 5)? That could point to a common network issue. Are they all showing not onboarded (ID 6/7)? Maybe the onboarding instruction wasn’t applied to that group of devices or a script was misconfigured.
By scrutinizing Event Viewer, you gather concrete evidence of what’s happening at the device level. For instance, you might confirm “Device A isn’t in the portal because it has been failing to reach the Defender service due to proxy errors – as Event ID 5 shows.” Or “Device B had an event indicating onboarding never completed (Event 6), explaining why it’s missing from portal – need to re-onboard.” This will directly inform the fix.
Step 5: Resolve Configuration or Policy Issues
Armed with the information from the portal (Step 2), settings review (Step 3), and device logs (Step 4), you can now take targeted actions to fix the issue.
Depending on what you found, apply the relevant resolution below:
If Real-Time Protection Was Off: Re-enable it. In the Defender portal, ensure that your Next-generation protection policy has Real-time protection set to On. If a third-party antivirus is present and you want Defender active, consider uninstalling the third-party AV or check if it’s possible to run them side by side. Microsoft recommends using Defender AV alongside Defender for Business for optimal protection[1]. Once real-time protection is on, the portal should update and the “not protected” alert will clear.
If Devices Weren’t Onboarded Successfully: Re-initiate the onboarding:
For devices managed by Intune, you can trigger a re-enrollment or use the onboarding package again via a script/live response.
If using local scripts, run the onboarding script as Administrator on the PC. After running, check Event Viewer again for Event ID 11 (“Onboarding completed”)[3].
For any devices still not appearing, consider running the Microsoft Defender for Endpoint Client Analyzer on those machines – it’s a diagnostic tool that can identify issues (discussed in Advanced section).
If Event Logs Show Connectivity Errors (ID 5, 15): Ensure the device has internet access to Defender endpoints. Make sure no firewall is blocking:
URLs like *.security.microsoft.com, *windows.com related to Defender cloud. Proxy settings might need to allow the Defender service through. See Microsoft’s documentation on Defender for Endpoint network connections for required URLs.
After adjusting network settings, force the device to check in (you can reboot the device or restart the Sense service and watch Event Viewer to see if it connects successfully).
If Policy Conflicts are Detected: Decide on one policy source:
Option 1: Use Defender for Business’s simplified configuration exclusively. This means removing or disabling parallel Intune endpoint security policies that configure AV or Firewall or Device Security, to avoid overlap[1].
Option 2: Use Intune (Endpoint Manager) for all device security policies and avoid using the simplified settings in Defender for Business. In this case, go to the Defender portal settings and turn off the features you are managing elsewhere.
In practice, if you saw conflicts, a quick remedy is to delete duplicate policies. For example, if Intune had an Antivirus policy and Defender for Business also has one, pick one to keep. Microsoft’s guidance for a situation where an admin uses both was to delete existing Intune policies to resolve conflicts[1].
After aligning policies, give it some time for devices to update their policy and then check if the conflict alerts disappear.
If Integration with Intune Failed (Setup Error): Follow Microsoft’s recommended fix which involves three steps[1][1]:
In the Defender for Business portal, go to Settings > Endpoints > Advanced Features and ensure Microsoft Intune connection is toggled On[1].
Still under Settings > Endpoints, find Configuration management > Enforcement scope. Make sure Windows devices are selected to be managed by Defender for Endpoint (Defender for Business)[1]. This allows Defender to actually enforce policies on Windows clients.
In the Intune (Microsoft Endpoint Manager) portal, navigate to Endpoint security > Microsoft Defender for Endpoint. Enable the setting “Allow Microsoft Defender for Endpoint to enforce Endpoint Security Configurations” (set to On)[1]. This allows Intune to hand off certain security configuration enforcement to Defender for Business’s authority. These steps establish the necessary channels so that Defender for Business and Intune work in harmony. After doing this, retry the setup or onboarding that failed. The previous error message about the configuration channel should not recur.
If Onboarding Still Fails or Device Shows Errors: If after trying to onboard, the device still logs errors like Event 7 or 15 indicating issues, consider these:
Run the onboarding with local admin rights (ensure no permission issues).
Update the device’s Windows to latest patches (sometimes older Windows builds have known issues resolved in updates).
As a last resort, you can try an alternate onboarding method (e.g., if script fails, try via Group Policy or vice versa).
Microsoft also suggests if Security Management (the feature that allows Defender for Business to manage devices without full Intune enrollment) is causing trouble, you can temporarily manually onboard the device to the full Defender for Endpoint service using a local script as a workaround[1]. Then offboard and try again once conditions are corrected.
If a Threat Was Detected (Malware Incident): Ensure it’s fully remediated:
In the portal, check the Action Center (there is an Action center in Defender portal under “Actions & submissions”) to see if there are pending remediation actions (like undo quarantine, etc.).
Run a full scan on the device through the portal or locally.
Once threats are removed, verify if any residual impact remains (e.g., sometimes malware can turn off services – ensure the Windows Security app shows all green).
Perform the relevant fixes and monitor the outcome. Many changes (policy changes, enabling features) may take effect within minutes, but some might take an hour or more to propagate to all devices. You can speed up policy application by instructing devices to sync with Intune (if managed) or simply rebooting them.
Step 6: Verify Issue Resolution
After applying fixes, confirm that the issue is resolved:
Check the portal again: Go back to the Microsoft 365 Defender portal’s Incidents & alerts and Devices pages.
If there was an alert (e.g., device not protected), it should now clear or show as Resolved. Many alerts auto-resolve once the condition is fixed (for instance, turning real-time protection on will clear that alert after the next device check-in).
If you removed conflicts or fixed onboarding, any incident or alert about those should disappear. The device should now appear in the Devices list if it was missing, and its status should be healthy (no warnings).
If a malware incident was being shown, ensure it’s marked Remediated or Mitigated. You might need to mark it as resolved if it doesn’t automatically.
Confirm on the device: For device-specific issues, physically check the device:
Open Windows Security and verify no warning icons are present.
In Event Viewer, see if new events are positive. For example, Event ID 11 in SENSE log (“Onboarding completed”) confirms success[3]. Or Event ID 1122 in Windows Defender log might show a threat was removed.
If you restarted services or the system, ensure they stay running (the Sense service should be running and set to automatic).
Test functionality: Perform a quick test relevant to the issue:
If mobile devices couldn’t onboard, try onboarding one now that provisioning is fixed.
If real-time protection was off, intentionally place a test EICAR anti-malware file on the machine to see if Defender catches it (it should, if real-time protection is truly working).
If devices were not reporting, force a machine to check in (by running MpCmdRun -SignatureUpdate to also check connectivity).
These tests confirm that not only is the specific symptom gone, but the underlying protection is functioning as expected.
If everything looks good, congratulations – the immediate issue is resolved. Make sure to document what the cause was and how it was fixed, for future reference.
Step 7: Escalate to Advanced Troubleshooting if Needed
If the problem persists despite the above steps, or if logs are pointing to something unclear, it may require advanced troubleshooting:
Multiple attempts failed? For example, if a device still won’t onboard after trying everything, or an alert keeps returning with no obvious cause, then it’s time to dig deeper.
Use the Microsoft Defender Client Analyzer: Microsoft provides a Client Analyzer tool for Defender for Endpoint that collects extensive logs and configurations. In a Defender for Business context, you can run this tool via a Live Response session. Live Response is a feature that lets you run commands on a remote device from the Defender portal (available if the device is onboarded). You can upload the Client Analyzer scripts and execute them to gather a diagnostic package[6][6]. This package can highlight misconfigurations or environmental issues. For Windows, the script MDELiveAnalyzer.ps1 (and related modules like MDELiveAnalyzerAV.ps1 for AV-specific logs) will produce a zip file with results[6][6]. Review its findings for any errors (or provide it to Microsoft support).
Enable Troubleshooting Mode (if performance issue): If the issue is performance-related (e.g., you suspect Defender’s antivirus is causing an application to crash or high CPU), Microsoft Defender for Endpoint has a Troubleshooting mode that can temporarily relax certain protections for testing. This is more applicable to Defender for Endpoint P2, but if accessible, enabling troubleshooting mode on a device allows you to see if the problem still occurs without certain protections, thereby identifying if Defender was the culprit. Remember to turn it off afterwards.
Consult Microsoft Documentation: Sometimes a specific error or event ID might be documented in Microsoft’s knowledge base. For instance, Microsoft has a page listing Defender Antivirus event IDs and common error codes – check those if you have a particular code.
Community and Support Forums: It can be useful to see if others have hit the same issue. The Microsoft Tech Community forums or sites like Reddit (e.g., r/DefenderATP) might have threads. (For example, missing incidents/alerts were discussed on forums and might simply be a UI issue or permission issue in some cases.)
Open a Support Case: When all else fails, engage Microsoft Support. Defender for Business is a paid service; you can open a ticket through your Microsoft 365 admin portal. Provide them with:
A description of the issue and steps you’ve taken.
Logs (Event Viewer exports, the Client Analyzer output).
Tenant ID and device details, if requested. Microsoft’s support can analyze backend data and guide further. They may identify if it’s a known bug or something environment-specific.
Escalating ensures that more complex or rare issues (like a service bug, or a weird compatibility issue) are handled by those with deeper insight or patching ability.
Advanced Troubleshooting Techniques
For administrators comfortable with deeper analysis, here are a few advanced techniques and tools to troubleshoot Defender for Business issues:
Advanced Hunting: This is a query-based hunting tool available in Microsoft 365 Defender. If your tenant has it, you can run Kusto-style queries to search for events. For example, to find all devices that had real-time protection off, you could query the DeviceHealthStatus table for that signal. Or search DeviceTimeline for specific event IDs across machines. It’s powerful for finding hidden patterns (like if a certain update caused multiple devices to onboard late or if a specific error code appears on many machines).
Audit Logs: Especially useful if the issue might be due to an admin change. The audit log will show events like policy changes, onboarding package generated, settings toggled, who did it and when. It helps answer “did anything change right before this issue?” For instance, if an admin offboarded devices by mistake, the audit log would show that.
Integrations and Log Forwarding: Many enterprises use a SIEM for unified logging. While Defender for Business is a more streamlined product, its data can be integrated into solutions like Sentinel (with some licensing caveats)[7]. Even without Sentinel, you could use Windows Event Forwarding to send important Defender events to a central server. That way, you can spot if all devices are throwing error X in their logs. This is beyond immediate troubleshooting, but helps in ongoing monitoring and advanced analysis.
Deep Configuration Checks: Sometimes group policies or registry values can interfere. Ensure no Group Policy is disabling Windows Defender (check Turn off Windows Defender Antivirus policy). Verify that the device’s time and region settings are correct (an odd one, but significant time skew can cause cloud communication issues).
Use Troubleshooting Mode: Microsoft introduced a troubleshooting mode for Defender which, when enabled on a device, disables certain protections for a short window so you can, for example, install software that was being blocked or see if performance improves. After testing, it auto-resets. This is advanced and should be used carefully, but it’s another tool in the toolbox.
Using these advanced techniques can provide deeper insights or confirm whether the issue lies within Defender for Business or outside of it (for example, a network device blocking traffic). Always ensure that after advanced troubleshooting, you return the system to a fully secured state (re-enable anything you turned off, etc.).
Best Practices to Prevent Future Issues
Prevention and proper management can reduce the likelihood of Defender for Business issues:
Keep Defender Components Updated: Microsoft Defender AV updates its engine and intelligence regularly (multiple times a day for threat definitions). Ensure your devices are getting these updates automatically (they usually do via Windows Update or Microsoft Update service). Also, keep the OS patched so that the Defender for Endpoint agent (built into Windows 10/11) is up-to-date. New updates often fix known bugs or improve stability.
Use a Single Source for Policy: Avoid mixing multiple security management platforms for the same settings. If you’re using Defender for Business’s built-in policies, try not to also set those via Intune or Group Policy. Conversely, if you require the advanced control of Intune, consider using Microsoft Defender for Endpoint Plan 1 or 2 with Intune instead of Defender for Business’s simplified model. Consistency prevents conflicts.
Monitor the Portal Regularly: Make it a routine to check the Defender portal’s dashboard or set up email notifications for high-severity alerts. Early detection of an issue (like devices being marked unhealthy or a series of failed updates) can let you address it before it becomes a larger problem.
Educate Users on Defender Apps: If your users install the Defender app on mobile, ensure they know how to keep it updated and what it should do. Sometimes user confusion (like ignoring the onboarding prompt or not granting the app permissions) can look like a “technical issue”. Provide a simple guide for them if needed.
Test Changes in a Pilot: If you plan to change configurations (e.g., enable a new attack surface reduction rule, or integrate with a new management tool), test with a small set of devices/users first. Make sure those pilot devices don’t report new issues before rolling out more broadly.
Use “Better Together” Features: Microsoft often touts “better together” benefits – for example, using Defender Antivirus with Defender for Business for coordinated protection[1]. Embrace these recommendations. Features like Automatic Attack Disruption will contain devices during a detected attack[2], but only if all parts of the stack are active. Understand what features are available in your SKU and use them; missing out on a feature could mean missing a warning sign that something’s wrong.
Maintain Proper Licensing: Defender for Business is targeted for up to 300 users. If your org grows or needs more advanced features, consider upgrading to Microsoft Defender for Endpoint plans. This ensures you’re not hitting any platform limits and you get features like advanced hunting, threat analytics, etc., which can actually make troubleshooting easier by providing more data.
Document and Share Knowledge: Keep an internal wiki or document for your IT team about past issues and fixes. For example, note down “In Aug 2025, devices had conflict because both Intune and Defender portal policies were applied – resolved by turning off Intune policy X.” This way, if something similar recurs or a new team member encounters it, the solution is readily available.
By following best practices, you reduce misconfigurations and are quicker to catch problems, making the overall experience with Microsoft Defender for Business smoother and more reliable.
Additional Resources and Support
For further information and help on Microsoft Defender for Business:
Official Microsoft Learn Documentation: Microsoft’s docs are very useful. The page “Microsoft Defender for Business troubleshooting” on Microsoft Learn covers many of the issues we discussed (setup failures, device protection, mobile onboarding, policy conflicts) with step-by-step guidance[1][1]. The “View and manage incidents in Defender for Business” page explains how to use the portal to handle alerts and incidents[2]. These should be your first reference for any new or unclear issues.
Microsoft Tech Community & Forums: The Defender for Business community forum is a great place to see if others have similar questions. Microsoft MVPs and engineers often post walkthroughs and answer questions. For example, blogs like Jeffrey Appel’s have detailed guides on Defender for Endpoint/Business features and troubleshooting (common deployment mistakes, troubleshooting modes, etc.)[8].
Support Tickets: As mentioned, don’t hesitate to use your support contract. Through the Microsoft 365 admin center, you can start a service request. Provide detailed info and severity (e.g., if a security feature is non-functional, treat it with high importance).
Training and Workshops: Microsoft occasionally offers workshops or webinars on their security products. These can provide deeper insight into using the product effectively (e.g., a session on “Managing alerts and incidents” or “Endpoint protection best practices”). Keep an eye on the Microsoft Security community for such opportunities.
Up-to-date Security Blog: Microsoft’s Security blog and announcements (for example, on the TechCommunity) can have news of new features or known issues. A recent blog might announce a new logging improvement or a known issue being fixed in the next update – which could be directly relevant to troubleshooting.
In summary, Microsoft Defender for Business is a powerful solution, and with the step-by-step approach above, you can systematically troubleshoot issues that come up. Starting from the portal’s alerts, verifying configurations, checking device logs, and then applying fixes will resolve most common problems. And for more complex cases, Microsoft’s support and documentation ecosystem is there to assist. By understanding where to find information (both in the product and in documentation), you’ll be well-equipped to keep your business devices secure and healthy.
Copilot Studio is Microsoft’s low-code platform for building AI-powered agents (custom “Copilots”) that extend Microsoft 365 Copilot’s capabilities[1]. These agents are specialized assistants with defined roles, tools, and knowledge, designed to help users with specific tasks or domains. A central element in building a successful agent is its instructions field – the set of written guidelines that define the agent’s behavior, capabilities, and boundaries. Getting this instructions field correct is absolutely critical for the agent to operate as designed.
In this report, we explain why well-crafted instructions are vital, illustrate good vs. bad instruction examples (and why they succeed or fail), and provide a detailed framework and best practices for writing effective instructions in Copilot Studio. We also cover how to test and refine instructions, accommodate different types of agents, and leverage resources to continuously improve your agent instructions.
Overview: Copilot Studio and the Instructions Field
What is Copilot Studio? Copilot Studio is a user-friendly environment (part of Microsoft Power Platform) that enables creators to build and deploy custom Copilot agents without extensive coding[1]. These agents leverage large language models (LLMs) and your configured tools/knowledge to assist users, but they are more scoped and specialized than the general-purpose Microsoft 365 Copilot[2]. For example, you could create an “IT Support Copilot” that helps employees troubleshoot tech issues, or a “Policy Copilot” that answers HR policy questions. Copilot Studio supports different agent types – commonly conversational agents (interactive chatbots that users converse with) and trigger/action agents (which run workflows or tasks based on triggers).
Role of the Instructions Field: Within Copilot Studio, the instructions field is where you define the agent’s guiding principles and behavior rules. Instructions are the central directions and parameters the agent follows[3]. In practice, this field serves as the agent’s “system prompt” or policy:
It establishes the agent’s identity, role, and purpose (what the agent is supposed to do and not do)[1].
It defines the agent’s capabilities and scope, referencing what tools or data sources to use (and in what situations)[3].
It sets the desired tone, style, and format of the agent’s responses (for consistent user experience).
It can include step-by-step workflows or decision logic the agent should follow for certain tasks[4].
It may impose restrictions or safety rules, such as avoiding certain content or escalating issues per policy[1].
In short, the instructions tell the agent how to behave and how to think when handling user queries or performing its automated tasks. Every time the agent receives a user input (or a trigger fires), the underlying AI references these instructions to decide:
What actions to take – e.g. which tool or knowledge base to consult, based on what the instructions emphasize[3].
How to execute those actions – e.g. filling in tool inputs with user context as instructed[3].
How to formulate the final answer – e.g. style guidelines, level of detail, format (bullet list, table, etc.), as specified in the instructions.
Because the agent’s reasoning is grounded in the instructions, those instructions need to be accurate, clear, and aligned with the agent’s intended design. An agent cannot obey instructions to use tools or data it doesn’t have access to; thus, instructions must also stay within the bounds of the agent’s configured tools/knowledge[3].
Why Getting the Instructions Right is Critical
Writing the instructions field correctly is critical because it directly determines whether your agent will operate as intended. If the instructions are poorly written or wrong, the agent will likely deviate from the desired behavior. Here are key reasons why correct instructions are so important:
They are the Foundation of Agent Behavior: The instructions form the foundation or “brain” of your agent. Microsoft’s guidance notes that agent instructions “serve as the foundation for agent behavior, defining personality, capabilities, and operational parameters.”[1]. A well-formulated instructions set essentially hardcodes your agent’s expertise (what it knows), its role (what it should do), and its style (how it interacts). If this foundation is shaky, the agent’s behavior will be unpredictable or ineffective.
Ensuring Relevant and Accurate Responses: Copilot agents rely on instructions to produce responses that are relevant, accurate, and contextually appropriate to user queries[5]. Good instructions tell the agent exactly how to use your configured knowledge sources and when to invoke specific actions. Without clear guidance, the AI might rely on generic model knowledge or make incorrect assumptions, leading to hallucinations (made-up info) or off-target answers. In contrast, precise instructions keep the agent’s answers on track and grounded in the right information.
Driving the Correct Use of Tools/Knowledge: In Copilot Studio, agents can be given “skills” (API plugins, enterprise data connectors, etc.). The instructions essentially orchestrate these skills. They might say, for example, “If the user asks about an IT issue, use the IT Knowledge Base search tool,” or “When needing current data, call the WebSearch capability.” If these directions aren’t specified or are misspecified, the agent may not utilize the tools correctly (or at all). The instructions are how you, the creator, impart logic to the agent’s decision-making about tools and data. Microsoft documentation emphasizes that agents depend on instructions to figure out which tool or knowledge source to call and how to fill in its inputs[3]. So, getting this right is essential for the agent to actually leverage its configured capabilities in solving user requests.
Maintaining Consistency and Compliance: A Copilot agent often needs to follow particular tone or policy rules (e.g., privacy guidelines, company policy compliance). The instructions field is where you encode these. For instance, you can instruct the agent to always use a polite tone, or to only provide answers based on certain trusted data sources. If these rules are not clearly stated, the agent might inadvertently produce responses that violate style expectations or compliance requirements. For example, if an agent should never answer medical questions beyond a provided medical knowledge base, the instructions must say so explicitly; otherwise the agent might try to answer from general training data – a big risk in regulated scenarios. In short, correct instructions protect against undesirable outputs by outlining do’s and don’ts (though as a rule of thumb, phrasing instructions in terms of positive actions is preferred – more on that later).
Optimal User Experience: Finally, the quality of the instructions directly translates to the quality of the user’s experience with the agent. With well-crafted instructions, the agent will ask the right clarifying questions, present information in a helpful format, and handle edge cases gracefully – all of which lead to higher user satisfaction. Conversely, bad instructions can cause an agent to be confusing, unhelpful, or even completely off-base. Users may get frustrated if the agent requires too much guidance (because the instructions didn’t prepare it well), or if the agent’s responses are messy or incorrect. Essentially, instructions are how you design the user’s interaction with your agent. As one expert succinctly put it, clear instructions ensure the AI understands the user’s intent and delivers the desired output[5] – which is exactly what users want.
Bottom line: If the instructions field is right, the agent will largely behave and perform as designed – using the correct data, following the intended workflow, and speaking in the intended voice. If the instructions are wrong or incomplete, the agent’s behavior can diverge, leading to mistakes or an experience that doesn’t meet your goals. Now, let’s explore what good instructions look like versus bad instructions, to illustrate these points in practice.
Good vs. Bad Instructions: Examples and Analysis
Writing effective agent instructions is somewhat of an art and science. To understand the difference it makes, consider the following examples of a good instruction set versus a bad instruction set for an agent. We’ll then analyze why the good one works well and why the bad one falls short.
Example of Good Instructions
Imagine we are creating an IT Support Agent that helps employees with common technical issues. A good instructions set for such an agent might look like this (simplified excerpt):
You are an IT support specialist focused on helping employees with common technical issues. You have access to the company’s IT knowledge base and troubleshooting guides.\ Your responsibilities include:\ – Providing step-by-step troubleshooting assistance.\ – Escalating complex issues to the IT helpdesk when necessary.\ – Maintaining a helpful and patient demeanor.\ – Ensuring solutions follow company security policies.\ When responding to requests:
Ask clarifying questions to understand the issue.
Provide clear, actionable solutions or instructions.
Verify whether the solution worked for the user.
If resolved, summarize the fix; if not, consider escalation or next steps.[1]
This is an example of well-crafted instructions. Notice several positive qualities:
Clear role and scope: It explicitly states the agent’s role (“IT support specialist”) and what it should do (help with tech issues using company knowledge)[1]. The agent’s domain and expertise are well-defined.
Specific responsibilities and guidelines: It lists responsibilities and constraints (step-by-step help, escalate if needed, be patient, follow security policy) in bullet form. This acts as general guidelines for behavior and ensures the agent adheres to important policies (like security rules)[1].
Actionable step-by-step approach: Under responding to requests, it breaks down the procedure into an ordered list of steps: ask clarifying questions, then give solutions, then verify, etc.[1]. This provides a clear workflow for the agent to follow on each query. Each step has a concrete action, reducing ambiguity.
Positive/constructive tone: The instructions focus on what the agent should do (“ask…”, “provide…”, “verify…”) rather than just what to avoid. This aligns with best practices that emphasize guiding the AI with affirmative actions[4]. (If there are things to avoid, they could be stated too, but in this example the necessary restrictions – like sticking to company guides and policies – are inherently covered.)
Aligned with configured capabilities: The instructions mention the knowledge base and troubleshooting guides, which presumably are set up as the agent’s connected data. Thus, the agent is directed to use available resources. (A good instruction set doesn’t tell the agent to do impossible things; here it wouldn’t, say, ask the agent to remote-control a PC unless such an action plugin exists.)
Overall, these instructions would likely lead the agent to behave helpfully and stay within bounds. It’s clear what the agent should do and how.
Example of Bad Instructions
Now consider a contrasting example. Suppose we tried to instruct the same kind of agent with this single instruction line:
“You are an agent that can help the user.”
This is obviously too vague and minimal, but it illustrates a “bad” instructions scenario. The agent is given virtually no guidance except a generic role. There are many issues here:
No clarification of domain or scope (help the user with what? anything?).
No detail on which resources or tools to use.
No workflow or process for handling queries.
No guidance on style, tone, or policy constraints. Such an agent would be flying blind. It might respond generically to any question, possibly hallucinate answers because it’s not instructed to stick to a knowledge base, and would not follow a consistent multi-step approach to problems. If a user asked it a technical question, the agent might not know to consult the IT knowledge base (since we never told it to). The result would be inconsistent and likely unsatisfactory.
Bad instructions can also occur in less obvious ways. Often, instructions are “bad” not because they are too short, but because they are unclear, overly complicated, or misaligned. For example, consider this more detailed but flawed instruction example (adapted from an official guidance of what not to do):
“If a user asks about coffee shops, focus on promoting Contoso Coffee in US locations, and list those shops in alphabetical order. Format the response as a series of steps, starting each step with Step 1:, Step 2: in bold. Don’t use a numbered list.”[6]
At first glance it’s detailed, but this is labeled as a weak instruction by Microsoft’s documentation. Why is this considered a bad/weak set of instructions?
It mixes multiple directives in one blob: It tells the agent what content to prioritize (Contoso Coffee in US) and prescribes a very specific formatting style (steps with “Step 1:”, but strangely “don’t use a numbered list” simultaneously). This could confuse the model or yield rigid responses. Good instructions would separate concerns (perhaps have a formatting rule separately and a content preference rule separately).
It’s too narrow and conditional: “If a user asks about coffee shops…” – what if the user asks something slightly different? The instruction is tied to a specific scenario, rather than a general principle. This reduces the agent’s flexibility or could even be ignored if the query doesn’t exactly match.
The presence of a negative directive (“Don’t use a numbered list”) could be stated in a clearer positive way. In general, saying what not to do is sometimes necessary, but overemphasizing negatives can lead the model to fixate incorrectly. (A better version might have been: “Format the list as bullet points rather than a numbered list.”)
In summary, bad instructions are those that lack clarity, completeness, or coherence. They might be too vague (leaving the AI to guess what you intended) or too convoluted/conditional (making it hard for the AI to parse the main intent). Bad instructions can also contradict the agent’s configuration (e.g., telling it to use a data source it doesn’t have) – such instructions will simply be ignored by the agent[3] but they waste precious prompt space and can confuse the model’s reasoning. Another failure mode is focusing only on what not to do without guiding what to do. For instance, an instructions set that says a lot of “Don’t do X, avoid Y, never say Z” and little else, may constrain the agent but not tell it how to succeed – the agent might then either do nothing useful or inadvertently do something outside the unmentioned bounds.
Why the Good Example Succeeds (and the Bad Fails):\ The good instructions provide specificity and structure – the agent knows its role, has a procedure to follow, and boundaries to respect. This reduces ambiguity and aligns with how the Copilot engine decides on actions and outputs[3]. The bad instructions give either no direction or confusing direction, which means the model might revert to its generic training (not your custom data) or produce unpredictable outputs. In essence:
Good instructions guide the agent step-by-step to fulfill its purpose, covering various scenarios (normal case, if issue unclear, if issue resolved or needs escalation, etc.).
Bad instructions leave gaps or introduce confusion, so the agent may not behave consistently with the designer’s intent.
Next, we’ll delve into common pitfalls to avoid when writing instructions, and then outline best practices and a framework to craft instructions akin to the “good” example above.
Common Pitfalls to Avoid in Agent Instructions
When designing your agent’s instructions field in Copilot Studio, be mindful to avoid these frequent pitfalls:
1. Being Too Vague or Brief: As shown in the bad example, overly minimal instructions (e.g. one-liners like “You are a helpful agent”) do not set your agent up for success. Ambiguity in instructions forces the AI to guess your intentions, often leading to irrelevant or inconsistent behavior. Always provide enough context and detail so that the agent doesn’t have to “infer” what you likely want – spell it out.
2. Overwhelming with Irrelevant Details: The opposite of being vague is packing the instructions with extraneous or scenario-specific detail that isn’t generally applicable. For instance, hardcoding a very specific response format for one narrow case (like the coffee shop example) can actually reduce the agent’s flexibility for other cases. Avoid overly verbose instructions that might distract or confuse the model; keep them focused on the general patterns of behavior you want.
3. Contradictory or Confusing Rules: Ensure your instructions don’t conflict with themselves. Telling the agent “be concise” in one line and then later “provide as much detail as possible” is a recipe for confusion. Similarly, avoid mixing positive and negative instructions that conflict (e.g. “List steps as Step 1, Step 2… but don’t number them” from the bad example). If the logic or formatting guidance is complex, clarify it with examples or break it into simpler rules. Consistency in your directives will lead to consistent agent responses.
4. Focusing on Don’ts Without Do’s: As a best practice, try to phrase instructions proactively (“Do X”) rather than just prohibitions (“Don’t do Y”)[4]. Listing many “don’ts” can box the agent in or lead to odd phrasings as it contorts to avoid forbidden words. It’s often more effective to tell the agent what it should do instead. For example, instead of only saying “Don’t use a casual tone,” a better instruction is “Use a formal, professional tone.” That said, if there are hard no-go areas (like “do not provide medical advice beyond the provided guidelines”), you should include them – just make sure you’ve also told the agent how to handle those cases (e.g., “if asked medical questions outside the guidelines, politely refuse and refer to a doctor”).
5. Not Covering Error Handling or Unknowns: A common oversight is failing to instruct the agent on what to do if it doesn’t have an answer or if a tool returns no result. If not guided, the AI might hallucinate an answer when it actually doesn’t know. Mitigate this by adding instructions like: “If you cannot find the answer in the knowledge base, admit that and ask the user if they want to escalate.” This kind of error handling guidance prevents the agent from stalling or giving false answers[4]. Similarly, if the agent uses tools, instruct it about when to call them and when not to – e.g. “Only call the database search if the query contains a product name” to avoid pointless tool calls[4].
6. Ignoring the Agent’s Configured Scope: Sometimes writers accidentally instruct the agent beyond its capabilities. For example, telling an agent “search the web for latest news” when the agent doesn’t have a web search skill configured. The agent will simply not do that (it can’t), and your instruction is wasted. Always align instructions with the actual skills/knowledge sources configured for the agent[3]. If you update the agent to add new data sources or actions, update the instructions to incorporate them as well.
7. No Iteration or Testing: Treating the first draft of instructions as final is a mistake (we expand on this later). It’s a pitfall to assume you’ve written the perfect prompt on the first try. In reality, you’ll likely discover gaps or ambiguities when you test the agent. Not iterating is a pitfall in itself – it leads to suboptimal agents. Avoid this by planning for multiple refine-and-test cycles.
By being aware of these pitfalls, you can double-check your instructions draft and revise it to dodge these common errors. Now let’s focus on what to do: the best practices and a structured framework for writing high-quality instructions.
Best Practices for Writing Effective Instructions
Writing great instructions for Copilot Studio agents requires clarity, structure, and an understanding of how the AI interprets your prompts. Below are established best practices, gathered from Microsoft’s guidance and successful agent designers:
Use Clear, Actionable Language: Write instructions in straightforward terms and use specific action verbs. The agent should immediately grasp what action is expected. Microsoft recommends using precise verbs like “ask,” “search,” “send,” “check,” or “use” when telling the agent what to do[4]. For example, “Search the HR policy database for any mention of parental leave,” is much clearer than “Find info about leave” – the former explicitly tells the agent which resource to use and what to look for. Avoid ambiguity: if your organization uses unique terminology or acronyms, define them in the instructions so the AI knows what they mean[4].
Focus on What the Agent Should Do (Positive Instructions): As noted, frame rules in terms of desirable actions whenever possible[4]. E.g., say “Provide a brief summary followed by two recommendations,” instead of “Do not ramble or give too many options.” Positive phrasing guides the model along the happy path. Include necessary restrictions (compliance, safety) but balance them by telling the agent how to succeed within those restrictions.
Provide a Structured Template or Workflow: It often helps to break the agent’s task into step-by-step instructions or sections. This could mean outlining the conversation flow in steps (Step 1, Step 2, etc.) or dividing the instructions into logical sections (like “Objective,” “Response Guidelines,” “Workflow Steps,” “Closing”)[4]. Using Markdown formatting (headers, numbered lists, bullet points) in the instructions field is supported, and it can improve clarity for the AI[4]. For instance, you might have:
A Purpose section: describing the agent’s goal and overall approach.
Rules/Guidelines: bullet points for style and policy (like the do’s and don’ts).
A stepwise Workflow: if the agent needs to go through a sequence of actions (as we did in the IT support example with steps 1-4).
Perhaps Error Handling instructions: what to do if things go wrong or info is missing.
Example interactions (see below). This structured approach helps the model follow your intended order of operations. Each step should be unambiguous and ideally say when to move to the next step (a “transition” condition)[4]. For example, “Step 1: Do X… (if outcome is Y, then proceed to Step 2; if not, respond with Z and end).”
Highlight Key Entities and Terms: If your agent will use particular tools or reference specific data sources, call them out clearly by name in the instructions. For example: “Use the <ToolName> action to retrieve inventory data,” or “Consult the PolicyWiki knowledge base for policy questions.” By naming the tool/knowledge, you help the AI choose the correct resource at runtime. In technical terms, the agent matches your words with the names/descriptions of the tools and data sources you attached[3]. So if your knowledge base is called “Contoso FAQ”, instruct “search the Contoso FAQ for relevant answers” – this makes a direct connection. Microsoft’s best practices suggest explicitly referencing capabilities or data sources involved at each step[4]. Also, if your instructions mention any uncommon jargon, define it so the AI doesn’t misunderstand (e.g., “Note: ‘HCS’ refers to the Health & Care Service platform in our context” as seen in a sample[1]).
Set the Tone and Style: Don’t forget to tell your agent how to talk to the user. Is the tone friendly and casual, or formal and professional? Should answers be brief or very detailed? State these as guidelines. For example: “Maintain a conversational and encouraging tone, using simple language” or “Respond in a formal style suitable for executive communications.” If formatting is important (like always giving answers in a table or starting with a summary bullet list), include that instruction. E.g., “Present the output as a table with columns X, Y, Z,” or “Whenever listing items, use bullet points for readability.” In our earlier IT agent example, instructions included “provide clear, concise explanations” as a response approach[1]. Such guidance ensures consistency in output regardless of which AI model iteration is behind the scenes.
Incorporate Examples (Few-Shot Prompting): For complex agents or those handling nuanced tasks, providing example dialogs or cases in the instructions can significantly improve performance. This technique is known as few-shot prompting. Essentially, you append one or more example interactions (a sample user query and how the agent should respond) in the instructions. This helps the AI understand the pattern or style you expect. Microsoft suggests using examples especially for complex scenarios or edge cases[4]. For instance, if building a legal Q\&A agent, you might give an example Q\&A where the user asks a legal question and the agent responds citing a specific policy clause, to show the desired behavior. Be careful not to include too many examples (which can eat up token space) – use representative ones. In practice, even 1–3 well-chosen examples can guide the model. If your agent requires multi-turn conversational ability (asking clarifying questions, etc.), you might include a short dialogue example illustrating that flow[7][7]. Examples make instructions much more concrete and minimize ambiguity about how to implement the rules.
Anticipate and Prevent Common Failures: Based on known LLM behaviors, watch out for issues like:
Over-eager tool usage: Sometimes the model might call a tool too early or without needed info. Solution: explicitly instruct conditions for tool use (e.g., “Only use the translation API if the user actually provided text to translate”)[4].
Repetition: The model might parrot an example wording in its response. To counter this, encourage it to vary phrasing or provide multiple examples so it generalizes the pattern rather than copying verbatim[4].
Over-verbosity: If you fear the agent will give overly long explanations, add a constraint like “Keep answers under 5 sentences when possible” or “Be concise and to-the-point.” Providing an example of a concise answer can reinforce this[4]. Many of these issues can be tuned by small tweaks in instructions. The key is to be aware of them and adjust wording accordingly. For example, to avoid verbose outputs, you might include a bullet: “Limit the response to the essential information; do not elaborate with unnecessary background.”
Use Markdown for Emphasis and Clarity: We touched on structure with Markdown headings and lists. Additionally, you can use bold text in instructions to highlight critical rules the agent absolutely must not miss[4]. For instance: “Always confirm with the user before closing the session.” Using bold can give that rule extra weight in the AI’s processing. You can also put specific terms in backticks to indicate things like literal values or code (e.g., “set status to Closed in the ticketing system”). These formatting touches help the AI distinguish instruction content from plain narrative.
Following these best practices will help you create a robust set of instructions. The next step is to approach the writing process systematically. We’ll introduce a simple framework to ensure you cover all bases when drafting instructions for a Copilot agent.
Framework for Crafting Agent Instructions (T-C-R Approach)
It can be helpful to follow a repeatable framework when drafting instructions for an agent. One useful approach is the T-C-R framework: Task – Clarity – Refine[5]:
Using this T-C-R framework ensures you tackle instruction-writing methodically:
Task: You don’t forget any part of the agent’s job.
Clarity: You articulate exactly what’s expected for each part.
Refine: You catch issues and continuously improve the prompt.
It’s similar to how one might approach writing requirements for a software program – be thorough and clear, then test and revise.
Testing and Validation of Agent Instructions
Even the best-written first draft of instructions can behave unexpectedly when put into practice. Therefore, rigorous testing and validation is a crucial phase in developing Copilot Studio agents.
Use the Testing Tools: Copilot Studio provides a Test Panel where you can interact with your agent in real time, and for trigger-based agents, you can use test payloads or scenarios[3]. As soon as you write or edit instructions, test the agent with a variety of inputs:
Start with simple, expected queries: Does the agent follow the steps? Does it call the intended tools (you might see this in logs or the response content)? Is the answer well-formatted?
Then try edge cases or slightly off-beat inputs: If something is ambiguous or missing in the user’s question, does the agent ask the clarifying question as instructed? If the user asks something outside the agent’s scope, does it handle it gracefully (e.g., with a refusal or a redirect as per instructions)?
If your agent has multiple distinct functionalities (say, it both can fetch data and also compose emails), test each function individually.
Validate Against Design Expectations: As you test, compare the agent’s actual behavior to the design you intended. This can be done by creating a checklist of expected behaviors drawn from your instructions. For example: “Did the agent greet the user? ✅”, “Did it avoid giving unsupported medical advice? ✅”, “When I asked a second follow-up question, did it remember context? ✅” etc. Microsoft suggests comparing the agent’s answers to a baseline, like Microsoft 365 Copilot’s answers, to see if your specialized agent is adding the value it should[4]. If your agent isn’t outperforming the generic copilot or isn’t following your rules, that’s a sign the instructions need tweaking or the agent needs additional knowledge.
RAI (Responsible AI) Validation: When you publish an agent, Microsoft 365’s platform will likely run some automated checks for responsible AI compliance (for instance, ensuring no obviously disallowed instructions are present)[4]. Usually, if you stick to professional content and the domain of your enterprise data, this won’t be an issue. But it’s good to double-check that your instructions themselves don’t violate any policies (e.g., telling the agent to do something unethical). This is part of validation – making sure your instructions are not only effective but also compliant.
Iterate Based on Results: It’s rare to get the instructions perfect on the first try. You might observe during testing that the agent does something odd or suboptimal. Use those observations to refine the instructions (this is the “Refine” step of the T-C-R framework). For example, if the agent’s answers are too verbose, you might add a line in instructions: “Be brief in your responses, focusing only on the solution.” Test again and see if that helped. Or if the agent didn’t use a tool when it should have, maybe you need to mention that tool by name more explicitly or adjust the phrasing that cues it. This experimental mindset – tweak, test, tweak, test – is essential. Microsoft’s documentation illustration for declarative agents shows an iterative loop of designing instructions, testing, and modifying instructions to improve outcomes[4][4].
Document Your Tests: As your instructions get more complex, it’s useful to maintain a set of test cases or scenarios with expected outcomes. Each time you refine instructions, run through your test cases to ensure nothing regressed and new changes work as intended. Over time, this becomes a regression test suite for your agent’s behavior.
By thoroughly testing and validating, you ensure the instructions truly yield an agent that operates as designed. Once initial testing is satisfactory, you can move to a pilot deployment or let some end-users try the agent, then gather their feedback – feeding into the next topic: improvement mechanisms.
Iteration and Feedback: Continuous Improvement of Instructions
An agent’s instructions are not a “write once, done forever” artifact. They should be viewed as living documentation that can evolve with user needs and as you discover what works best. Two key processes for continuous improvement are monitoring feedback and iterating instructions over time:
Gather User Feedback: After deploying the agent to real users (or a test group), collect feedback on its performance. This can be direct feedback (users rating responses or reporting issues) or indirect, like observing usage logs. Pay attention to questions the agent fails to answer or any time users seem confused by the agent’s output. These are golden clues that the instructions might need adjustment. For example, if users keep asking for clarification on the agent’s answers, maybe your instructions should tell the agent to be more explanatory on first attempt. If users trigger the agent in scenarios it wasn’t originally designed for, you might decide to broaden the instructions (or explicitly handle those out-of-scope cases in the instructions with a polite refusal).
Review Analytics and Logs: Copilot Studio (and related Power Platform tools) may provide analytics such as conversation transcripts, success rates of actions, etc. Microsoft advises to “regularly review your agent results and refine custom instructions based on desired outcomes.”[6]. For instance, if analytics show a particular tool call failing frequently, maybe the instructions need to better gate when that tool is used. Or if users drop off after the agent’s first answer, perhaps the agent is not engaging enough – you might tweak the tone or ask a question back in the instructions. Treat these data points as feedback for improvement.
Incremental Refinements: Incorporate the feedback into improved instructions, and update the agent. Because Copilot Studio allows you to edit and republish instructions easily[3], you can make iterative changes even after deployment. Just like software updates, push instruction updates to fix “bugs” in agent behavior. Always test changes in a controlled way (in the studio test panel or with a small user group) before rolling out widely.
Keep Iterating: The process of testing and refining is cyclical. Your agent can always get better as you discover new user requirements or corner cases. Microsoft’s guidance strongly encourages an iterative approach, as illustrated by their steps: create -> test -> verify -> modify -> test again[4][4]. Over time, these tweaks lead to a very polished set of instructions that anticipates many user needs and failure modes.
Version Control Your Instructions: It’s good practice to keep track of changes (what was added, removed, or rephrased in each iteration). This way if a change unexpectedly worsens the agent’s performance, you can rollback or adjust. You might use simple version comments or maintain the instructions text in a version-controlled repository (especially for complex custom agents).
In summary, don’t treat instruction-writing as a one-off task. Embrace user feedback and analytic insights to continually hone your agent. Many successful Copilot agents likely went through numerous instruction revisions. Each iteration brings the agent’s behavior closer to the ideal.
Tailoring Instructions to Different Agent Types and Scenarios
No one-size-fits-all set of instructions will work for every agent – the content and style of the instructions should be tailored to the type of agent you’re building and the scenario it operates in[3]. Consider the following variations and how instructions might differ:
Conversational Q\&A Agents: These are agents that engage in a back-and-forth chat with users (for example, a helpdesk chatbot or a personal finance Q\&A assistant). Instructions for conversational agents should prioritize dialog flow, context handling, and user interaction. They often include guidance like how to greet the user, how to ask clarifying questions one at a time, how to not overwhelm the user with too much info at once, and how to confirm if the user’s need was met. The example instructions we discussed (IT support agent, ShowExpert recommendation agent) fall in this category – note how they included steps for asking questions and confirming understanding[4][1]. Also, conversational agents might need instructions on maintaining context over multiple turns (e.g. “remember the user’s last answer about their preference when formulating the next suggestion”).
Task/Action (Trigger) Agents: Some Copilot Studio agents aren’t chatting with a user in natural dialogue, but instead get triggered by an event or command and then perform a series of actions silently or output a result. For instance, an agent that, when triggered, gathers data from various sources and emails a report. Instructions for these agents may be more like a script of what to do: step 1 do X, step 2 do Y, etc., with less emphasis on language tone and conversation, and more on correct execution. You’d focus on instructions that detail workflow logic and error handling, since user interaction is minimal. However, you might still include some instruction about how to format the final output or what to log.
Declarative vs Custom Agents: In Copilot Studio, Declarative agents use mostly natural language instructions to declare their behavior (with the platform handling orchestration), whereas Custom agents might involve more developer-defined logic or even code. Declarative agent instructions might be more verbose and rich in language (since the model is reading them to drive logic), whereas a custom agent might offload some logic to code and use instructions mainly for higher-level guidance. That said, in both cases the principles of clarity and completeness apply. Declarative agents, in particular, benefit from well-structured instructions since they heavily rely on them for generative reasoning[7].
Different Domains Require Different Details: An agent’s domain will dictate what must be included in instructions. For example, a medical information agent should have instructions emphasizing accuracy, sourcing from medical guidelines, and perhaps disclaimers (and definitely instructions not to venture outside provided medical content)[1][1]. A customer service agent might need a friendly empathetic tone and instructions to always ask if the user is satisfied at the end. A coding assistant agent might have instructions to format answers in code blocks and not to provide theoretical info not found in the documentation provided. Always infuse domain-specific best practices into the instruction. If unsure, consult with subject matter experts about what an agent in that domain must or must not do.
In essence, know your agent’s context and tailor the instructions accordingly. Copilot Studio’s own documentation notes that “How best to write your instructions depends on the type of agent and your goals for the agent.”[3]. An easy way to approach this is to imagine a user interacting with your agent and consider what that agent needs to excel in that scenario – then ensure those points are in the instructions.
Resources and Tools for Improving Agent Instructions
Writing effective AI agent instructions is a skill you can develop by learning from others and using available tools. Here are some resources and aids:
Official Microsoft Documentation: Microsoft Learn has extensive materials on Copilot Studio and writing instructions. Key articles include “Write agent instructions”[3], “Write effective instructions for declarative agents”[4], and “Optimize prompts with custom instructions”[6]. These provide best practices (many cited in this report) straight from the source. They often include examples, do’s and don’ts, and are updated as the platform evolves. Make it a point to read these guides; they reinforce many of the principles we’ve discussed.
Copilot Prompt Gallery/Library: There are community-driven repositories of prompt examples. In the Copilot community, a “Prompt Library” has been referenced[7] which contains sample agent prompts. Browsing such examples can inspire how to structure your instructions. Microsoft’s Copilot Developer Camp content (like the one for ShowExpert we cited) is an excellent, practical walkthrough of iteratively improving instructions[7][7]. Following those labs can give you hands-on practice.
GitHub Best Practice Repos: The community has also created best practice guides, such as the Agents Best Practices repo[1]. This provides a comprehensive guide with examples of good instructions for various scenarios (IT support, HR policy, etc.)[1][1]. Seeing multiple examples of “sample agent instructions” can help you discern patterns of effective prompts.
Peer and Expert Reviews: If possible, get a colleague to review your instructions. A fresh pair of eyes can spot ambiguities or potential misunderstandings you overlooked. Within a large organization, you might even form a small “prompt review board” when developing important agents – to ensure instructions align with business needs and are clearly written. There are also growing online forums (such as the Microsoft Tech Community for Power Platform/Copilot) where you could ask for advice (without sharing sensitive details).
AI Prompt Engineering Tools: Some tools can simulate how an LLM might parse your instructions. For example, prompt analysis tools (often used in general AI prompt engineering) can highlight which words are influencing the model. While not specific to Copilot Studio, experimenting with your instruction text in something like the Azure OpenAI Playground with the same model (if known) can give insight. Keep in mind Copilot Studio has its own orchestration (like combining with user query and tool descriptions), so results outside may not exactly match – but it’s a way to sanity-check if any wording is confusing.
Testing Harness: Use the Copilot Studio test chat repeatedly as a tool. Try intentionally weird inputs to see how your agent handles them. If your agent is a Teams bot, you might sideload it in Teams and test the user experience there as well. Treat the test framework as a tool to refine your prompt – it’s essentially a rapid feedback loop.
Telemetry and Analytics: Post-deployment, the telemetry (if available) is a tool. Some enterprises integrate Copilot agent interactions with Application Insights or other monitoring. Those logs can reveal how the agent is being used and where it falls short, guiding you to adjust instructions.
Keep Example Collections: Over time, accumulate a personal collection of instruction snippets that worked well. You can often reuse patterns (for example, the generic structure of “Your responsibilities include: X, Y, Z” or a nicely phrased workflow step). Microsoft’s examples (like those in this text and docs) are a great starting point.
By leveraging these resources and tools, you can improve not only a given agent’s instructions but your overall skill in writing effective AI instructions.
Staying Updated with Best Practices
The field of generative AI and platforms like Copilot Studio is rapidly evolving. New features, models, or techniques can emerge that change how we should write instructions. It’s important to stay updated on best practices:
Follow Official Updates: Keep an eye on the official Microsoft Copilot Studio documentation site and blog announcements. Microsoft often publishes new guidelines or examples as they learn from real-world usage. The documentation pages we referenced have dates (e.g., updated June 2025) – revisiting them periodically can inform you of new tips (for instance, newer versions might have refined advice on formatting or new capabilities you can instruct the agent to use).
Community and Forums: Join communities of makers who are building Copilot agents. Microsoft’s Power Platform community forums, LinkedIn groups, or even Twitter (following hashtags like #CopilotStudio) can surface discussions where people share experiences. The Practical 365 blog[2] and the Power Platform Learners YouTube series are examples of community-driven content that can provide insights and updates. Engaging in these communities allows you to ask questions and learn from others’ mistakes and successes.
Continuous Learning: Microsoft sometimes offers training modules or events (like hackathons, the Powerful Devs series, etc.) around Copilot Studio. Participating in these can expose you to the latest features. For instance, if Microsoft releases a new type of “skill” that agents can use, there might be new instruction patterns associated with that – you’d want to incorporate those.
Experimentation: Finally, don’t hesitate to experiment on your own. Create small test agents to try out new instruction techniques or to see how a particular phrasing affects outcome. The more you play with the system, the more intuitive writing good instructions will become. Keep notes of what you learn and share it where appropriate so others can benefit (and also validate your findings).
By staying informed and agile, you ensure that your agents continue to perform well as the underlying technology or user expectations change over time.
Conclusion: Writing the instructions field for a Copilot Studio agent is a critical task that requires careful thought and iteration. The instructions are effectively the “source code” of your AI agent’s behavior. When done right, they enable the agent to use its tools and knowledge effectively, interact with users appropriately, and achieve the intended outcomes. We’ve examined how good instructions are constructed (clear role, rules, steps, examples) and why bad instructions fail. We established best practices and a T-C-R framework to approach writing instructions systematically. We also emphasized testing and continuous refinement – because even with guidelines, every use case may need fine-tuning. By avoiding common pitfalls and leveraging available resources and feedback loops, you can craft instructions that make your Copilot agent a reliable and powerful assistant. In sum, getting the instructions field correct is crucial because it is the single most important factor in whether your Copilot Studio agent operates as designed or not. With the insights and methods outlined here, you’re well-equipped to write instructions that set your agent up for success. Good luck with your Copilot agent, and happy prompting!
Empower attendees to design, build, and deploy intelligent chat agents using Copilot Studio’s Agent Builder, with a focus on real-world automation, integration, and user experience
What you’ll learn
Understand the architecture and capabilities of Copilot Chat Agents
Build and customise agents using triggers, topics, and actions
Deploy agents across Teams, websites, and other channels
Monitor performance and continuously improve user experience
Apply governance and security best practices for enterprise-grade bots
Who should attend?
This session is perfect for:
IT administrators and support staff
Business owners
People looking to get more done with Microsoft 365
Anyone looking to automate their daily grind
Save the Date
Date: Friday the 29th of August
Time: 9:30 AM Sydney AU time
Location: Online (link will be provided upon registration)




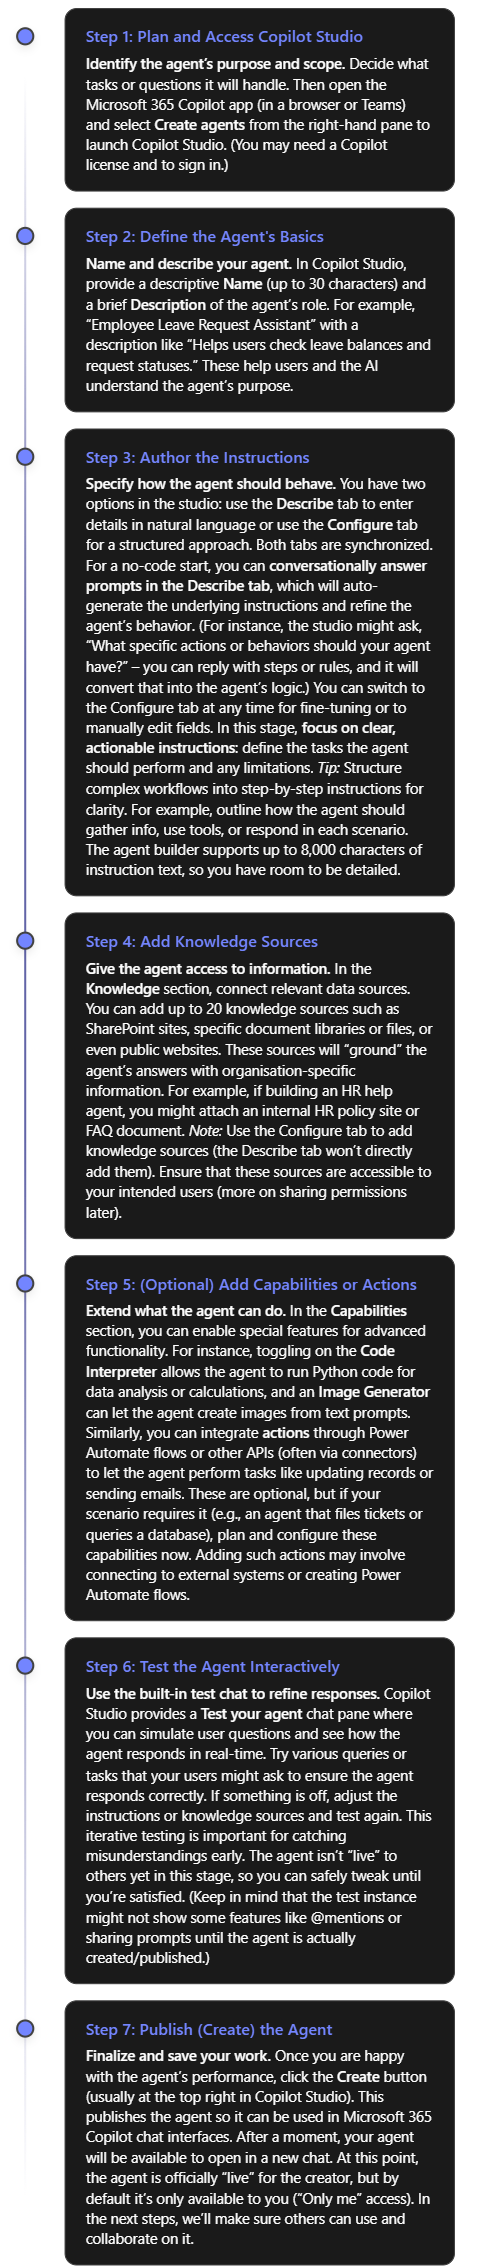
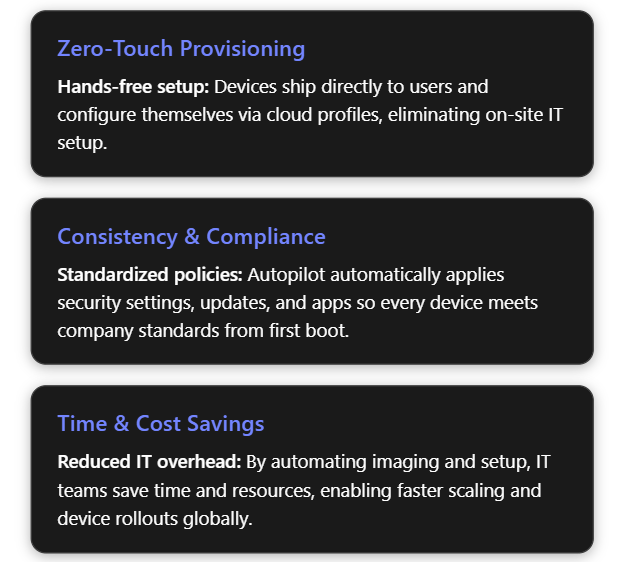
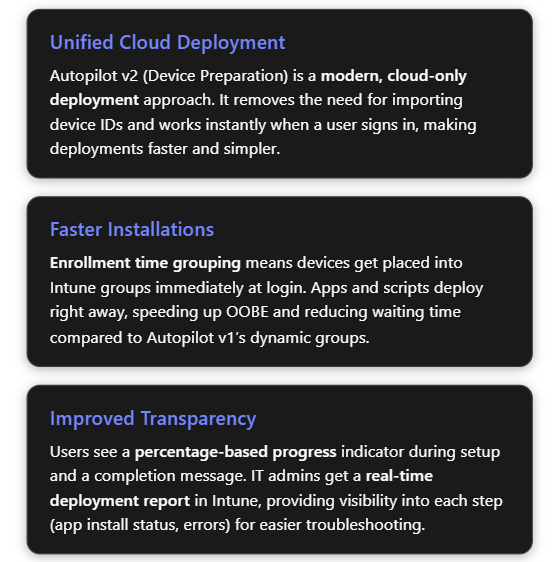
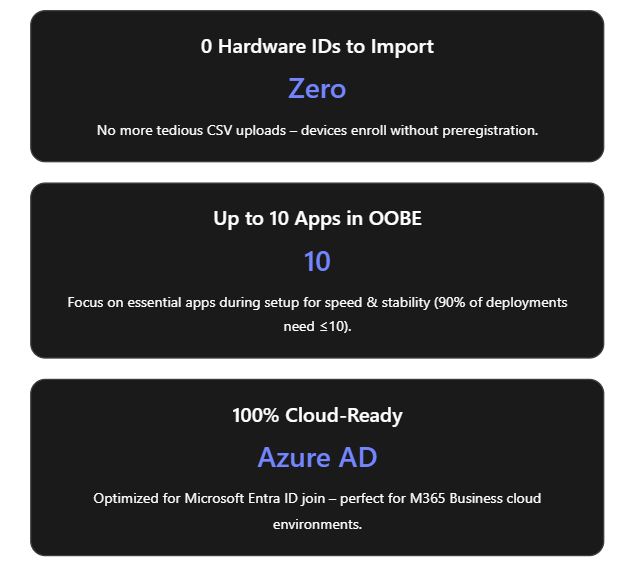
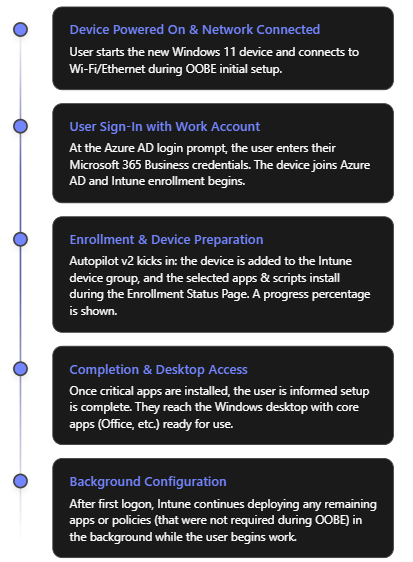


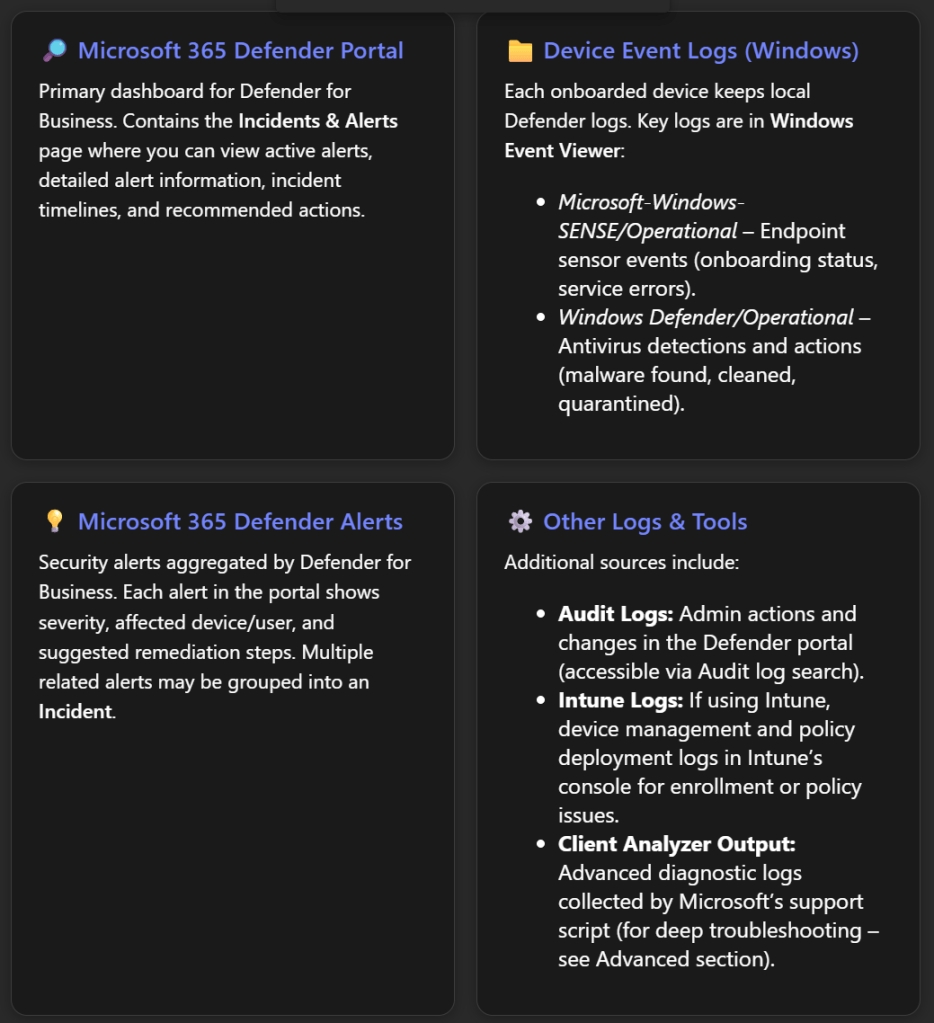
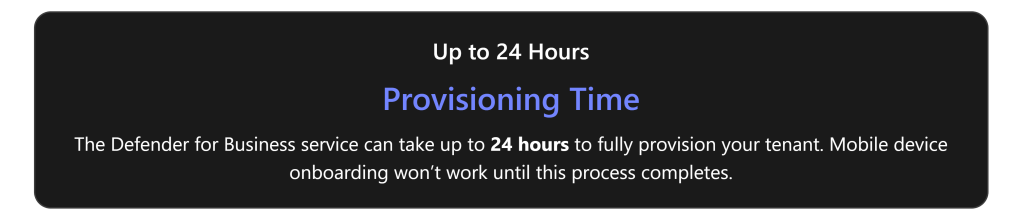
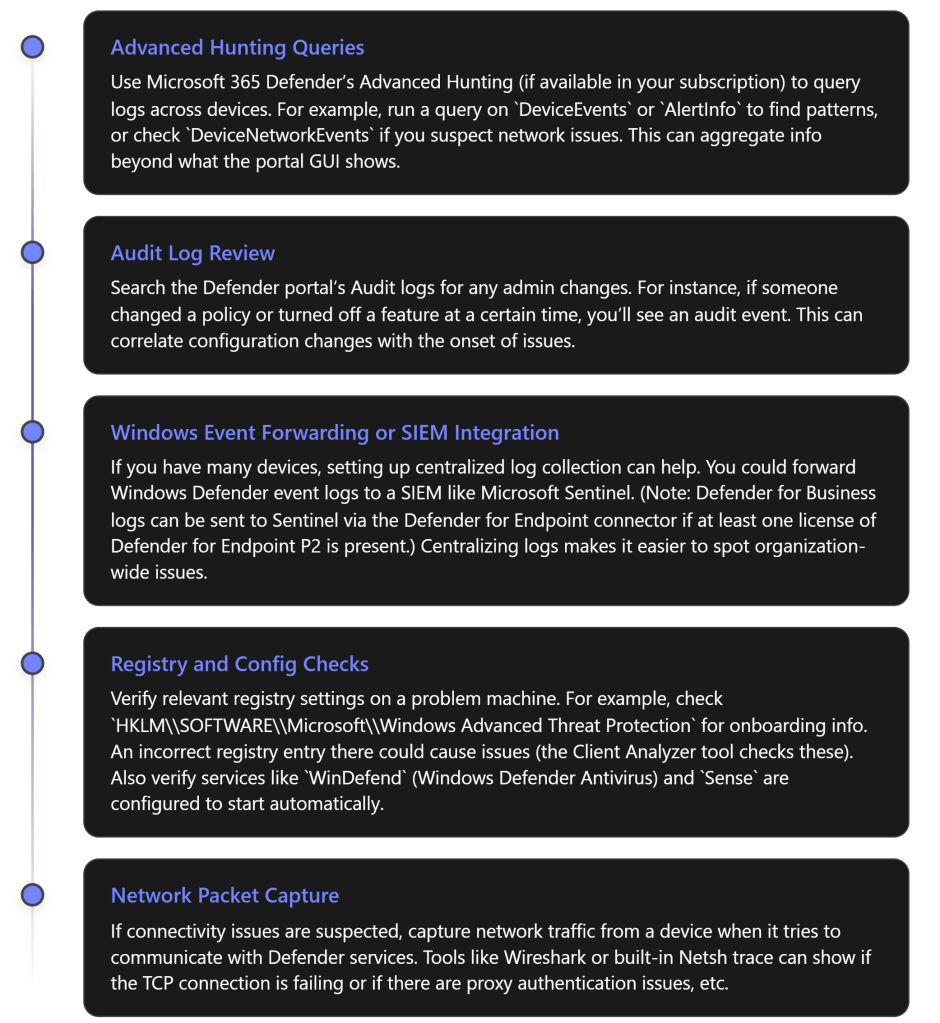


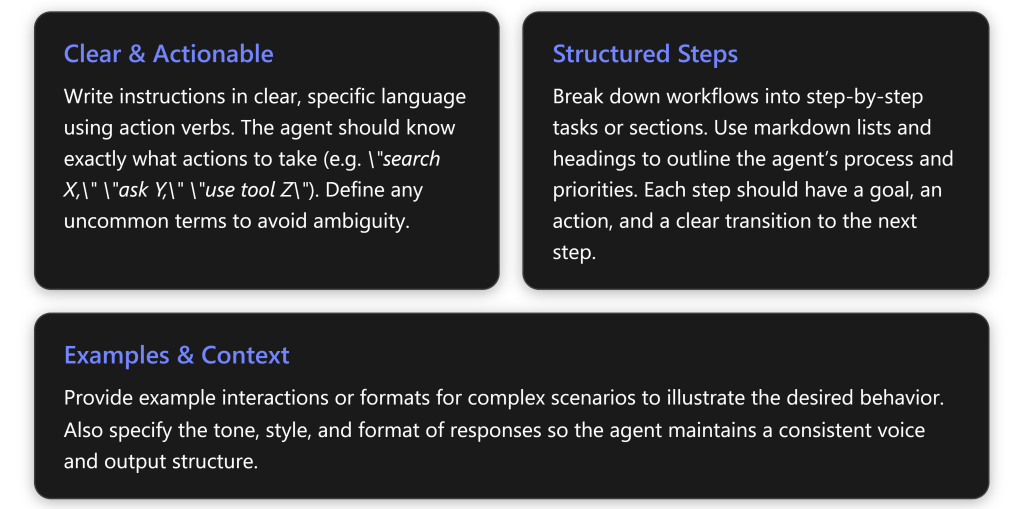
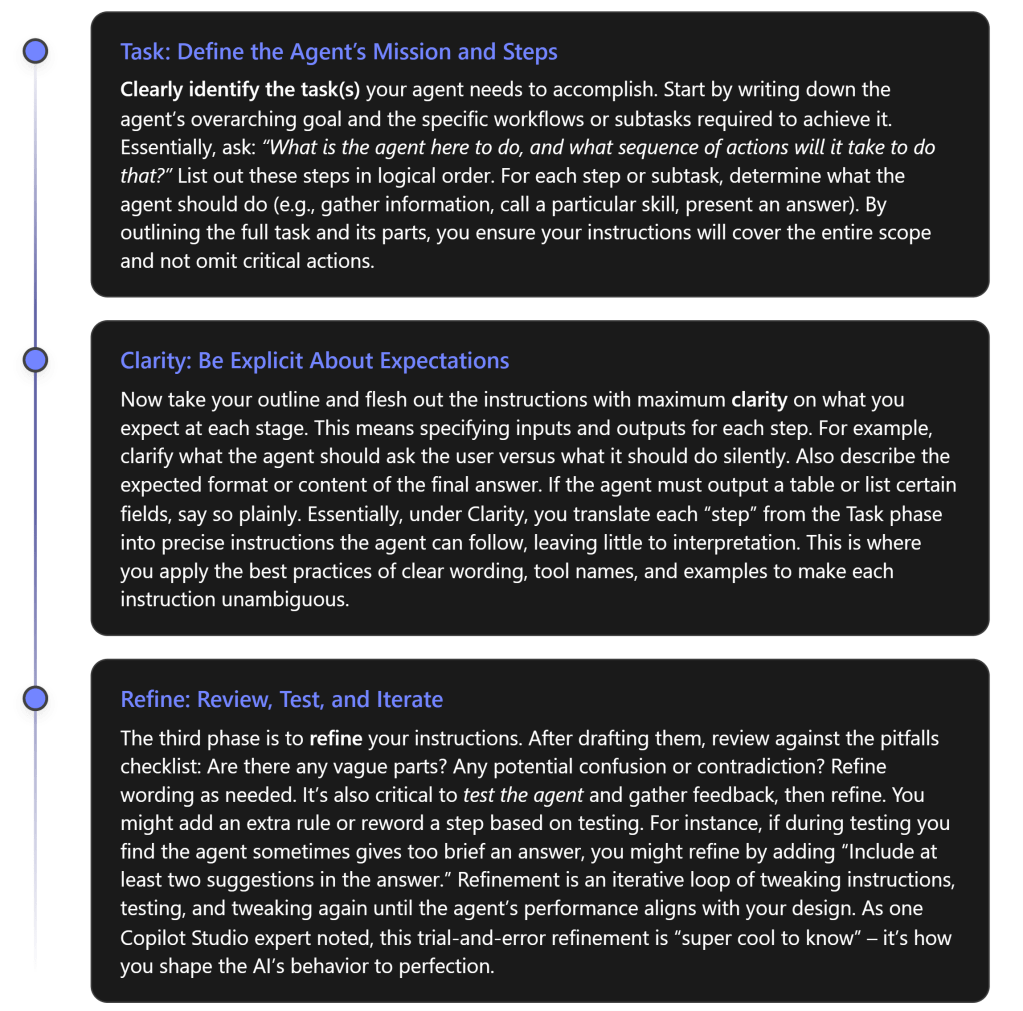
 CIAOPS