One of the handy features that many third party webinar products provide is the ability for people to register on a web page and then receive confirmation of that registration via email. Unfortunately, if you are looking to run a public Skype for Business meeting this feature is currently not really available. However, Office 365 does provides some tools that allows you to build an even more powerful solution than the one provided by third parties
The tool to do this with is Microsoft Flow, which you can access via:
You can then login with your Office 365 credentials.
If you then select the My Flows option from the menu bar in the top left you should see a screen as shown above. Here select Create from blank.
Flow allows me to connect to external web services such as Typeform, which is what I have used to create the public registration page. Basically, the Typeform registration will ask for First Name, Last Name and Email address.
I can search for the service I wish to use in the box as shown above. In this case I enter typeform.
I’ll need to authorise and connect to that third party web service. In the the case of Typeform, I’ll need to locate and insert the API key from my Typeform account into my flow.
Once the service is connected to my flow I can select the registration form I’m going to use to capture my data. Here, I’m using an existing Typeform form called “Flow demo” which I can select from a drop down list of all the TYpeforms I have set up.
This flow will start when a new response is submitted to this form.
Now select the + New step button below.
From the items that appear, select Add an action.
From the search box that appears I enter “Office 365” and select the Send an email option as shown.
You may need to authorise the connection to email but once that is done you will see the fields To:, Subject and Body that you can now fill.
I can now insert dynamic content into these regions. Dynamic content effectively means fields from the connected services. which appear on the right that I can now select.
So, I click in the To: field in the flow and then select the appropriate question from the Typeform form on the right that will yield the register’s email address. Thus, I will be sending a reply email to the registration email address that was collected from Typeform.
I then complete the rest of the information I want to go out in the confirmation email as shown above.
Now, here’s where Flow is superior to other third party registration services. I have a custom list in my Team Site that I also want to populate with the registration details so I have a copy. This list is just the name and email address as you see above.
I go back to my flow and Add an action again.
Into the search box that appears I enter “SharePoint” and select the option Create item that appears.
I now enter the Team Site URL and the list within that Team Site I want to populate from Typeform.
You will then see the fields from that list appear (here Email and Name), which again I can now populate with dynamic content from Typeform.
I could continue on and add more steps if I wanted but I’ll now give this Flow a name and select the Create flow option in the top right to save the changes and activate the automation.
Now one of things that you may get is an error like the above. From what I understand, this is telling you something about the dynamic content, in my case Typeform, isn’t quite right. I’ll need to do more digging to understand why this happens but if it does you’ll need to debug your flow.
In may case, for some reason, Flow doesn’t like the Typeform First name or Last response, which is weird as the email response is fine. Something I need to investigate further. For the time being I simply deleted these Typeform fields from my flow.
If all is good you should receive a message like that shown above and you can select the Done link on the right.
The flow you just created should now appear in My Flows as shown above. You can view, edit, disable and track the flow from here if needed.
So if I now go and complete the Typeform registration, it should kick off my flow.
If I look at the status of my flow I indeed see it has executed successfully as shown above.
If I now check my Team Site list I can see that item has been added as shown above.
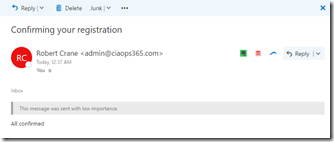
The person registering has also received an email (above),
and I also have a the sent item in my inbox as seen above.
So there you have it, a pretty quick way to create a registration confirmation process with the added benefit of saving registration information into a Team Site list.
There of course limits to what can be done with Flow at this stage but it is improving rapidly and I am keen to spend more time with the service to improve my knowledge because it provides a great opportunity to automate business processes. The ability for Flow to connect to third party applications like Typeform shown here is where the real power lies I believe.
I look forward to the continued improvement in Flow and suggest that if you have Office 365 you should start looking at it to help automate more of your business.


The problem you experienced with the First name field might be caused by the single quote in the question from the form. Just a theory.
LikeLike