SharePoint Online Permissions: Troubleshooting & Best Practices for SMB

Introduction

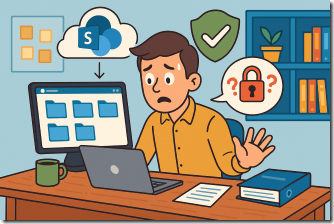
Managing SharePoint Online permissions is critical for secure and efficient collaboration, but it can be challenging – especially for small and medium businesses (SMBs). SharePoint’s permission system is powerful yet complex, with hierarchical inheritance and numerous sharing options[1]. Many administrators find themselves asking “Who has access to this, and why?” when permissions issues arise[1]. Common scenarios include users getting “Access Denied” errors or, conversely, sensitive content being accessible to unintended people due to misconfigured sharing[2][1]. This report provides an SMB-focused guide to troubleshoot permission issues, check and audit existing permissions, and structure permissions in a way that is easy to maintain. We’ll cover best practices (like using groups and inheritance wisely), recommendations for reviewing permissions, and step-by-step instructions for common permission management tasks.

Common SharePoint Permission Challenges: As highlighted above, typical permission issues include users being mistakenly left without access (or given too much access), confusion from broken inheritance, and limited visibility into current permission assignments. For example, breaking permissions on a folder or file for one person can snowball into many custom exceptions, resulting in an “unwieldy spiderweb” of unique permissions over time[1]. Similarly, overly permissive sharing links (like “Anyone with the link”) can lead to files being forwarded broadly without oversight[1]. SMBs often have lean IT teams, so keeping permissions simple and consistent is key. In the next sections, we’ll outline best practices to preempt these issues and keep your SharePoint Online permissions both secure and manageable.


Best Practices for SharePoint Online Permissions Management (SMB)

Adopting clear permission strategies will prevent many issues before they occur. Below are the top best practices to ensure an easy-to-maintain permission structure, tailored for SMB needs:

• Use Groups for Permissions, Not Individuals: “Granting permissions directly to individual users can make management overly complex over time.” Instead, assign permissions to SharePoint security groups or Microsoft 365 Groups, and then add users to those groups[3]. This centralizes management – you can change a group’s access in one step rather than updating many individual entries. For example, rather than giving 10 people each Edit rights on a site, put them in a “Site Members” group that has Edit permission. SharePoint comes with three default groups per site (Owners, Members, Visitors), which correspond to common role levels (Full Control, Edit, Read)[4]. For communication sites or classic sites, use these built-in groups for assigning access[5]. For team sites connected to Microsoft 365 (Office) Groups, manage access via the group’s membership (Owners and Members) to keep consistency across Teams, SharePoint, and other services[1]. Using groups makes it easier to audit who has access and ensures consistency across your site collections.

• Keep Permissions Inherited at Site Level Whenever Possible: The best practice is to manage security at the site level, not at the individual file or folder level[6]. In SharePoint, subsites, document libraries, and items by default inherit permissions from their parent site. Breaking this inheritance in many places leads to a confusing patchwork of permissions. It’s recommended to grant access at the highest level (site or library) that makes sense for your content[1]. Avoid creating unique per-item permissions unless absolutely necessary. If you must grant an exception (say, a confidential folder within a site), document it and periodically review it[3]. A simpler structure (e.g. whole site or whole library access) is much easier for a small team to maintain than dozens of item-specific rules.

• Leverage Default Roles and Group Memberships: Take advantage of SharePoint’s standard roles: Owners (Full Control), Members (Edit/contribute), and Visitors (Read)[7]. For most SMB scenarios, these cover the needed levels of access. In a Microsoft 365 Group-connected Team site, all group Owners automatically become site owners and group Members become site members[7]. Use that mechanism to manage who can access the site: adding someone to the M365 Group gives them site access, and removing them revokes it, which keeps SharePoint and Teams in sync[1]. For a communication site (which isn’t M365 group-connected), assign users to one of the three SharePoint groups via the Site Permissions panel[7]. Sticking to these default structures means you rarely need to define custom permission levels or unique groups, reducing complexity. Only if a set of users needs a very different level of access than the default groups provide should you create a new SharePoint group or custom role.

• Restrict and Monitor External Sharing: SMBs often collaborate with external clients or partners, but it’s important to control this carefully. Review your SharePoint external sharing settings at both the tenant and site level to match your security comfort level[3]. It’s usually best to avoid “Anyone with the link” sharing in favor of more restricted options. Use “Specific People” links when sharing documents with external users so that only intended individuals can use the link[3]. You can also set expiration dates on external sharing links (for example, 30 days) to prevent indefinite access[1]. In the SharePoint Admin Center, you can define the default sharing link type (e.g. internal only by default)[1]. For each site, consider disabling external sharing entirely if it contains sensitive data that should never leave the organization. Regularly audit external access: SharePoint provides an ability to review files or sites shared externally (for instance, via the “Shared with external users” report in site usage, or using PowerShell) – use these to keep tabs on what’s been shared outside.

• Follow the Principle of Least Privilege: Grant each user the minimum level of permission they need to do their job[6]. In practice, this means, for example, giving read-only access to users who only need to consume information, rather than edit access. Avoid the temptation to give everyone higher privileges “just in case” – unnecessary Full Control or Edit rights can lead to accidental changes or deletions[6]. Especially never put all users in the Owners group; Full Control allows deletion of the site or changing settings[6]. Instead, limit Full Control to a select few administrators. If the built-in roles don’t meet a specific need, you can create a custom permission level (for instance, a role that can edit but not delete items)[3]. SharePoint Online provides five main predefined levels (Full Control, Edit, Contribute, Read, and more) and supports defining custom levels[4]. It’s best to add new custom levels rather than modify the defaults, so you retain a known baseline[4]. In general, start with the lowest necessary access and only elevate if required.

• Review and Clean Up Permissions Regularly: Permissions tend to “drift” over time – people change roles or leave, and content gets reshuffled. Make it a routine to audit your SharePoint permissions on a schedule (e.g. quarterly or biannually)[3]. An admin or site owner should list who currently has access and verify it’s still appropriate. Remove users who no longer need access – for example, if a temporary contractor’s project ended, ensure their permissions (or guest account) are revoked[6]. Office 365’s audit log or third-party tools can help identify when users last accessed content, which is useful for clean-up. Some organizations use scripts or tools to generate permission reports (one example: a tool like DeliverPoint can report SharePoint access rights[3]) – SMBs might not need fancy software, but even a manual review of group memberships and shared links is valuable. Document any unusual permission setups (like if inheritance was broken deliberately) so that the context isn’t lost and can be revisited later[3]. Finally, train site owners or managers on these practices[3]. In an SMB, the person managing SharePoint might also wear other hats; investing a bit of time to understand permission concepts pays off by preventing mistakes.

By adhering to these best practices – using groups, simplifying inheritance, locking down external sharing, least-privilege assignments, and regular reviews – SMBs can maintain a secure yet flexible SharePoint environment that doesn’t require constant firefighting.


Checking and Auditing Existing Permissions

To troubleshoot or maintain SharePoint permissions, you first need to see what permissions are in place. SharePoint Online provides built-in ways to check who has access to sites, libraries, or even individual files/folders:

  • Site Permissions Page (Site-Level Overview): If you are a site owner, you can view the overall site permissions via Settings (gear icon) > Site Permissions. This will show the three default SharePoint groups (Owners, Members, Visitors) and who is in each group[7]. On modern team sites, it also shows the Microsoft 365 Group membership (Owners/Members). By expanding each group, you can review which users or AD security groups are members. This page also allows inviting new people and will add them to the selected group automatically (e.g. choosing “Read” adds them to Visitors)[7]. For a quick audit, list out the members of each group and ensure they are correct for the site’s purpose.
  • “Manage Access” Panel (File/Folder-Level Sharing): For individual files or folders, SharePoint’s Manage Access feature shows exactly who can access that item. To use it, navigate to the document library, select the file or folder, and click the “ Manage access” option (often found in the info/details pane or via the context menu). This panel has tabs for People, Groups, and Links[8]:
    • The Groups tab shows which SharePoint groups have access (and their permission level) inherited from the site. This tells you, for instance, that all members of “Site Members” group can edit the file[8].
    • The People tab lists any individuals who have unique access to that item (for example, directly shared via the Share dialog)[8].
    • The Links tab lists any share links that grant access (like anyone-with-link or specific-people links) and who has used those links[8]. This is a convenient way to audit sharing on a specific file/folder: you might discover that a file was shared with a guest external user or via a link open to your whole organization, and then take action to remove or tighten that if needed.
  • Check Permissions Tool (Effective Access for a User): SharePoint has a built-in “Check Permissions” feature that lets you input a user or group’s name and see what level of access they have and how they have it. To use this, go to the site’s Advanced permissions settings (from Site Permissions page, click the Advanced permissions link, which brings you to the classic permissions page). On that page, click the Check Permissions button, enter the user or group name, and click Check Now[8]. The result will show something like: “User X: has Contribute access via ” or “has access via sharing link”[8]. For example, it might say “Mary has Edit access to this item as a member of Site Members group.”[8] If the user has no access at all, it will show None[8]. This tool is extremely useful to troubleshoot – if a user says they can’t get into a site or file, run Check Permissions on them at the site (or item) to confirm if they are indeed missing permission and, if they do have permission, which group or link is granting it. (It might reveal that they do have access through a group, which means their issue might be elsewhere, like a sync/login problem, or they’re looking at the wrong location.)
  • Understanding “Limited Access” Entries: When reviewing site permissions, you might encounter a user listed with Limited Access. This status appears when a user has access to a specific item (like a single file or folder) but not to the parent site or library as a whole[5]. SharePoint gives them a behind-the-scenes limited access so they can reach the item. For instance, if you share one document to an external user, that user will show up with Limited Access at the site level. Limited Access by itself isn’t a full permission level — it’s a placeholder that allows the unique permission on the item to function. If you see many users with Limited Access, it’s a sign that there are lots of item-level shares; you might review those to ensure they’re all still needed. You can click “Show users” next to the limited access message to see which items are shared uniquely[5].
  • Audit Logs and Reports: Office 365 provides audit logging that can capture permission changes and access events. An admin (with appropriate roles) can search the Unified Audit Log for events like “Shared file, added user to group, removed user from site” etc. While this isn’t a real-time view of permissions, it’s useful for after-the-fact auditing or monitoring unusual changes. Additionally, in the SharePoint Admin Center, you can see external users and their access, and for each site, you can retrieve a report of what has been shared externally. For a broader insight, you might use PowerShell scripts (for example, using Get-SPOUser and Get-SPOSite cmdlets) to enumerate who has access to what on your sites[1]. SMBs with fewer sites might not need a full tenant-level report often, but if you suspect some sites have overly permissive settings, it might be worth running a script or using a third-party reporting tool to get a full picture[1].

Tip: It’s a good practice to periodically audit permissions on key sites. For each important site (like those with sensitive data), have the site owner or admin:

  • Review the members of Owners, Members, Visitors groups.
  • Check if any unique permissions exist on libraries or folders (Site Permissions > Advanced > look for any message about “some items have unique permissions”[5](https://support.microsoft.com/en-us/office/customize-permissions-for-a-sharepoint-list-or-library-02d770f3-59eb-4910-a608-5f84cc297782)).
  • Use Check Permissions for a couple of sample users (e.g., a regular team member, an external partner) to verify the setup is as expected.
  • Document any irregularities (e.g., “Folder X in Documents library is shared with external user Y with edit rights”) and decide if they are still necessary.

By proactively checking, you can catch issues like someone still having access after they left the company, or a confidential file that was accidentally shared too broadly. This reduces the chance of permission problems and also makes troubleshooting easier since the environment stays tidy.


Troubleshooting Permission Issues: Step-by-Step Approach

Even with good practices, permission issues can occur. When a user reports a problem (like “I can’t access the site/folder” or “User X shouldn’t see Y document”), a systematic troubleshooting process helps identify and resolve the issue efficiently. Below is a step-by-step approach:

  1. Gather Information from the User: Start by clearly identifying which site or content the user is trying to access and what error or outcome they are seeing. Are they getting an “Access Denied” message, or perhaps they can see a site but not a particular folder? Also note the user’s role (are they an internal employee, a guest, part of a specific department?). Understanding the scope of the issue (one file vs. entire site) will guide your investigation[2]. If the user sees an “Access Request” (they clicked a link and it let them send a request for access), that indicates they currently have no permission there at all.
  2. Verify the Permissions Hierarchy: Check the permission inheritance and structure for the resource in question. Determine the nearest parent site or library that controls permissions. For example, if the issue is with a file, see if that library has unique permissions or inherits from the site. Ensure the user has access at each level: site -> library -> folder -> item[2]. If at any parent level the user is not included, that would cause a denial downstream. For instance, if a document library is set to only allow a “HR Team” group and the user isn’t in that group, the user will be denied for all files in that library. Use the Check Permissions tool on the site or library to see the user’s access (or lack thereof) as described earlier[8]. If the site itself denies the user, focus on fixing site-level membership; if the site is fine but a subfolder is unique, the issue is at that subfolder.
  3. Examine Group Memberships: Most permissions in SharePoint come via group membership. Verify which groups the affected user belongs to. Compare that to which groups should have access. For example, if the site’s Members group has edit rights, confirm if the user is in that Members group. It’s possible the user was never added, or was removed. Conversely, if a user is seeing something they shouldn’t, check if they were accidentally added to a group that grants that access (e.g., their name might have been added to the Visitors group of a site they shouldn’t view). In an Office 365 Group-backed site, check the Office 365 Group membership list. In classic sites, check the user’s entry via Site Permissions > Check Permissions which will list groups[8]. If the user is missing from the expected group, that’s likely the cause of “no access.” Add them to the appropriate group (see the guide in the next section) and have them retry. On the other hand, if the user has unwanted access through a group, you’ll need to remove them from that group or adjust that group’s privileges (covered below under removal). Keep an eye out for group sync issues as well – if using AD security groups, ensure the user is in the right AD group; if there’s a delay in Azure AD syncing, the SharePoint site may not “see” their updated membership immediately[2].
  4. Identify Unique or Broken Permissions: If group membership isn’t the issue, consider whether unique permissions are at play. Has someone broken inheritance on a particular subsite, library, or folder? These “permission break” points can cause inconsistencies. For example, maybe the user was added to the site, but a specific library was set to unique permissions and they weren’t included there – result: they can access the site homepage but get denied in that library. Navigate to the relevant library or folder and check its permissions (Settings > Library Settings > Permissions for this library). If you see a message “This library has unique permissions” or users listed directly, then inheritance was broken. Review those unique permissions: is the user (or a group they belong to) present? If not, that’s the gap[2]. You can choose to add the user/group there or possibly re-inherit permissions if the unique setup was not needed (restoring inheritance will make it match the parent site’s permissions again). Conversely, if troubleshooting someone seeing too much, look for unique grants that might have given broader access than intended (for instance, a folder shared with “Everyone”). Unique permission configurations should be carefully audited here.
  5. Check for Deny or Policy Settings: SharePoint allows explicit deny permissions or other advanced policies, though these are less common in SharePoint Online (more typical in on-premises). If someone set up a permission policy that denies certain groups, it could override other permissions and cause unexpected access issues[2]. For example, if a “Deny Edit” permission was applied to a user on a particular list, that user cannot edit even if a group says they should. In Office 365, explicit denies would usually come from things like Information Rights Management or conditional access policies rather than SharePoint’s UI. It’s rare in an SMB scenario, but if all else fails, verify that there are no special deny entries (the classic permission page would show a red cross icon if a deny is in effect). Also, check site-level settings such as site collection read-only locks or missing licenses for the user – but those are edge cases. Typically, a straightforward SharePoint Online site won’t have deny rules set unless an admin specifically added one via advanced settings or code.
  6. Review External Sharing Settings (if applicable): If the user in question is an external guest who can’t access something, the issue might be the site’s external sharing setting. Each site (especially new-style sites) can allow or disallow guest access. If a site disallows externals and you try to share with a guest, they’ll be unable to enter even if they got an invite. Similarly, if a guest can access the site but not open a document, it could be that the document is using a sharing link type they can’t use (like “Organization only” link, which guests can’t open). Ensure the site’s sharing setting is at least as permissive as needed (e.g., set to allow existing guests or new guests as appropriate). For internal users, also consider if the content is in a site they have never been given access to – maybe the user assumed they should have access but the site owner hasn’t shared it with them yet (communication gap). In such a case, the solution is simply to grant them access following governance procedures.
  7. Use the Tools to Pinpoint the Issue: At this stage, leverage the tools described in the previous section:
    • Run Check Permissions for the user on the site and on the specific item (if it’s a single file/folder issue). This will explicitly tell you if the user has any access and through what means[8].
    • Look at the Manage Access panel on the item in question to see if perhaps a sharing link was expected but not in place, or if the user was mistakenly removed.
    • Check if the user appears in the Site Members or Visitors list. If not, that’s the red flag. These tools often pinpoint the exact cause (e.g., “None” in Check Permissions means the user needs to be added somewhere).
  8. Apply the Fix – Adjust Permissions: Once you’ve identified the likely cause, fix the permissions configuration:
    • If the user was not in the appropriate group, add them to the site’s Members/Visitors (or relevant) group to grant access (or if inappropriate access, remove them from a group).
    • If inheritance was broken and the user needs access there, either add the user (or a group they are in) to the unique permissions on that library/folder or if the unique setup is unnecessary or overly complicated, restore inheritance to simplify and then add the user via the normal group.
    • If a sharing link was too permissive (e.g., “Anyone” link causing unintended access), consider disabling that link and using a tighter one.
    • If the user’s access is through a link and they need permanent access, a better fix is to formally add them to the site or relevant group instead of relying on a link.
    • In any case, aim to resolve by aligning with best practices (for example, if you find a user was given direct permissions, you might move them into a group for cleaner future management). While making changes, be mindful of the interface limitations: If you try to edit a user’s permissions on an item and see the option is greyed out, it’s likely because that item currently inherits permissions – you’d need to break inheritance first to individually modify or remove a user[9]. Similarly, if the site is group-connected, you typically manage members via the M365 group rather than the SharePoint UI (the UI will prompt you accordingly).
  9. Test and Confirm Resolution: After making permission changes, verify that the issue is resolved. Have the user try accessing the resource again. If possible, test it yourself by logging in as a test account with similar permissions. Note that permission changes might not take effect instantaneously on the user’s end due to caching[10]. SharePoint Online’s interface can sometimes take a few minutes to reflect new access (for example, a user added to a group might need to sign out and back in, or close their browser, to pick up the new token)[10][9]. If the user still cannot access after being added, have them clear their browser cache or try an incognito window/different browser[9] – this often bypasses any cached credentials and forces a fresh permissions check. Likewise, if you removed someone’s access, double-check they truly can’t get in (you might use the Check Permissions tool again for their name to confirm it now shows “None”). In case the user still has access after removal, it means they still belong to a group granting it or a link is still active – re-check group memberships and sharing links for any you might have missed[9].
  10. Document and Prevent Future Issues: Once resolved, take note of what the issue was and how it was fixed. Was it a process mistake (user never added to the site) that you can address by improving your onboarding checklist? Or was it a rare scenario of someone needing access outside of normal groups (maybe consider creating a new group if that’s a recurring need)? Document any permission changes you made, especially if you had to create new unique permissions or groups, so that this knowledge isn’t lost[2]. Keep an eye on the situation to ensure the fix sticks – for example, if the problem was due to a broken inheritance that you decided to remove (restore inheritance), make sure site owners don’t break it again without a good reason. If multiple similar issues arise, it might point to a need for user training or revisiting your permission architecture (see best practices above). For SMBs, a brief guide to site owners on how to manage access (and the importance of using the correct groups) can greatly reduce permission mishaps.

If you follow this systematic approach, most permission issues can be identified and resolved logically. It boils down to finding where the permission break is – at what level is the user’s access cutoff or opened – and then correcting it in line with your governance. Often, the fix is simply adding the user to the right place or removing an unintended permission. By carefully checking each layer and using SharePoint’s tools (Manage Access, Check Permissions), you remove the guesswork and zero in on the cause of the issue.


Step-by-Step Guide: Common Permission Management Tasks

In this section, we provide concise, step-by-step instructions for key tasks to manage SharePoint Online permissions. These tasks will help implement the best practices and fixes discussed above, and are geared toward administrators or site owners in SMB environments.

Checking a User’s Permissions on a Site or Item

To troubleshoot or audit, you often need to confirm what access a particular user has.

To check a user’s permissions on a SharePoint site:

  1. Navigate to Site Permissions: Go to the site in question. Click the Settings (gear) icon in the top right, then choose Site permissions. In the site permissions pane, click Advanced permissions settings (this opens the classic permissions page for the site).
  2. Use “Check Permissions”: On the Ribbon of the classic permissions page, click Check Permissions. In the dialog, enter the user’s name or email and click Check Now[8].
  3. Review Effective Access: The result will show what permissions that user has on the site and through which group or mechanism[8]. For example, it might say the user “has Read access via group” or “None” if they have no access[8]. It may list multiple entries if the user has access via different paths (e.g., via a group and via a sharing link).

To check a user’s permissions on a specific file or folder:

  1. Navigate to the library where the item resides and locate the file or folder.
  2. Click the “…” (ellipses) or select the item and open the Details/Information pane (often an “i” icon). In the details pane, find the Manage Access section[10].
  3. In Manage Access, click Advanced (usually an option if you scroll the Manage Access dialog/pane)[10]. This will take you to the item’s permission page (which looks similar to a site’s permission page).
  4. On the item’s permission page, click Check Permissions and enter the user’s name, then Check Now[10].
  5. Read the effective permissions as in the site case. This will tell you if the user has access to that item and if so, by what means (group, or direct share, etc.)[8].

Alternatively, on modern SharePoint, there’s a quicker way: in the Manage Access panel itself, you can use the search box “Enter a name or email” under the People section – typing a user’s name there will show if they have access and at what level (this effectively surfaces similar info).

Using these steps, you can quickly verify “does user X have access here, and how?” which is fundamental for deciding any permission changes.

Granting a User Access to a Site

When a new team member or an existing user needs access to a SharePoint site (or you discover someone lacks access during troubleshooting), the recommended method is to add them to an appropriate group for the site rather than granting individual rights.

For a Communication Site or classic SharePoint site (no Microsoft 365 group):

  1. Go to the site and click the Settings (gear) icon > Site permissions.
  2. Click Invite people (in modern UI) or Share site. Enter the user’s name or email.[7]
  3. Select permission level: Choose the level of access – options typically are Full Control, Edit, or Read. (In modern Share dialog, these map to adding the user to Owners, Members, or Visitors groups respectively[7].) For example, choose Read to give view-only access (this will add the user to the Visitors group automatically).
  4. (Optional) Uncheck the box to notify by email if you don’t want to send an email invitation (you might do this if you’ve already communicated access to the person).
  5. Click Add or Share. The user will be added to the site’s permission group at the level specified[7]. They can now access the site according to that group’s rights.

Under the hood, this process is adding the user into one of the site’s SharePoint groups. You can verify by expanding the group list on the Site permissions page – the user’s name will appear under Owners, Members, or Visitors depending on what you chose[7].

For a Team Site connected to a Microsoft 365 Group (e.g., created via Teams or Office 365):\ In this case, the preferred method is to manage membership through the Microsoft 365 Group:

  1. Open the site (or the associated Team in Microsoft Teams). On the SharePoint site, you may see a “Members” link or icon in the top right corner (it might show the current members’ icons). Click Members (or alternately, in Teams, go to the team’s Manage team > Members).
  2. Click Add members. In SharePoint’s interface, this might prompt a panel to add members to the Microsoft 365 Group[7][7].
  3. Enter the person’s name/email. Choose whether to add them as a Member (default, which gives edit rights on the site) or an Owner (which is like site admin)[7].
  4. Click Save or Add. This action adds the user to the Microsoft 365 Group, which in turn grants them access to the SharePoint site (and other connected services like the Team, Planner, etc.)[7].

Because Microsoft 365 group sites don’t have a Visitors role via the group, if you need to give someone read-only access without making them a full member, you have two options:

  • Option 1: Temporarily treat the site like a standalone site and use Site permissions > Grant Access (as per communication site steps) to directly add the user with Read. This will add them to the Visitors group of the site without adding to the M365 group (SharePoint Maven calls this “Option 3” – sharing the site only)[7].
  • Option 2: Create a separate communication site for read-only audiences if applicable. Most SMBs just add needed users as members even for read, or use the first option for ad-hoc read access.

After adding a user, they should receive an email notification (if you kept that option checked) and can access the site by navigating to its URL. Always ensure you add users to the correct site (it’s a common mistake to add someone to a similarly named site or group by accident).

Creating and Using Permission Groups

While default groups suffice in many cases, sometimes you’ll want a custom SharePoint group – for example, a “Project Alpha Members” group for a subset of people who need access to only one library. Creating a SharePoint group allows you to re-use that group on various parts of the site or even across sites (if you assign it permissions).

To create a new SharePoint security group on a site:

  1. Go to Site permissions > Advanced permissions settings (classic permissions page).
  2. Click Create Group (usually in the Ribbon or near the top of the groups list).
  3. On the Create Group page, enter a Name for the group (e.g., “Project Alpha Members”). You can add a description if desired.
  4. Set the Group Owner (by default, the person creating it or site owners can be owners of the group).
  5. Choose group settings: e.g., who can view or edit the membership (usually keep default so only owners can edit membership).
  6. Assign a Permission Level to this group for the site. You’ll see a list of permission levels (Full Control, Edit, Contribute, Read, etc.). Select the appropriate level that this group should have on the site. For instance, if this group is meant to edit content, choose Edit; if read-only, choose Read.
  7. Click Create.

This will create the group and automatically grant it whatever permission level you chose on the site. Initially the group is empty, so next:

  1. Add users to the group: After creating, you’ll be taken to the group’s page (or you can access any group by clicking on it from the Advanced permissions page). Use the New > Add Users button (in classic interface) or “Add members” in modern interfaces to add people to this group. Enter the names/emails of users (or even other AD groups) to include, and confirm. Now those users are members of the new group.

You can use the new group to grant permissions elsewhere if needed. For example, you could break permission on a particular library and assign your new group Access just to that library (giving that group maybe higher or lower rights there as needed). This approach is cleaner than adding each of those individuals one by one to the library.

SMB Tip: Avoid proliferation of too many custom groups on a small tenant – stick to a clear naming convention and only create a group if you know you’ll manage it separately from existing ones. Each site’s groups are local to that site (unless you explicitly use the same named AD security group). So, “Project Alpha Members” group on Site A won’t automatically grant anything on Site B unless you also add it there. For cross-site consistency, you might use an Azure AD Security Group added into SharePoint groups, but that requires Azure AD management. Many SMBs find a few well-chosen SharePoint groups per site strikes the right balance.

Modifying Permissions for a Library or List (Breaking Inheritance)

Sometimes you want a specific document library or list within a site to have different permissions than the rest of the site. For example, in a team site, you might have a library that only managers should see. This requires breaking permission inheritance and then setting unique permissions on that library.

To set unique permissions on a document library (or list):

  1. Navigate to the library (or list) on the site. Click the Settings (gear) icon > Library settings (or List settings for a list)[5]. In modern UI, you might need to click Settings > Site contents > … > Settings gear on the library.
  2. On the Library Settings page, under Permissions and Management, click Permissions for this document library (or similar for list)[5]. You’ll see the library’s permission page, which by default will state it inherits from the parent (site).
  3. Click Stop Inheriting Permissions (on the Ribbon “Permissions” tab). Confirm the prompt. Now the library’s permissions are independent from the site[5].
  4. Immediately after breaking inheritance, the library will have a copy of the parent site’s permissions (everyone who had access to the site still has it here, but now you can change it). Adjust the permissions as needed:
    • Remove any groups or users that should not have access to this library. For example, if you want to restrict it from regular members, you might remove the “Site Members” group from the library’s permissions.
    • Grant access to specific group or users that need access if they aren’t already listed. For example, if this library is for managers, you might have a “Managers” group – click Grant Permissions, enter “Managers” group, and assign (perhaps Edit or Read as appropriate).
    • You can also change permission levels for a group on this library. For instance, maybe on the site “Members” have Edit, but on this library you want members to only have Read – you can edit the “Site Members” group entry here and lower it to Read.
  5. Click OK/Save if necessary for any dialogs. The library now has a tailored permission set. Only the groups/users listed on its permission page have access; it no longer automatically includes everyone from the parent site.

To restore inheritance: If later you decide this unique permission setup is too much to manage, you can reverse it by going back to the library’s Permissions page and clicking Delete unique permissions / Inherit Permissions (the button may say “Delete unique permissions”, which essentially means “restore inheritance”). This will wipe out the custom settings on that library and re-inherit from the parent site’s current permissions[3]. Use this carefully – if you had very specific grants, you will lose them. It’s wise to document or screenshot the custom permissions before inheriting in case you need to reference what was there.

Note: Avoid breaking permissions at too granular a level (like individual items) frequently, as noted earlier. If you do break inheritance at a subfolder or item level, the steps are similar: go to that folder’s manage permissions and stop inheritance, then adjust. But manage such exceptions sparingly.

Removing or Revoking User Access

When someone should no longer have access to a site or content (e.g., they changed teams or left the organization), you’ll want to remove their permissions.

To remove a user from a site:

  • If the user was given access via a SharePoint Group: Remove them from that group. Go to Site permissions > Advanced, click the group name (e.g., Site Members), select the user, and choose Remove User from group. This revokes their access that was via that group.
  • If the user was given direct permissions (uncommon in SMB best practice, but possible via the Share dialog or someone adding them explicitly): Go to Site permissions > Advanced. If you see the user’s name listed individually with a permission level, check the box next to their name and click Remove User Permissions. In modern UI, the site permissions pane might list “Guests or individual people” if any – you can remove them there as well.
  • If the site is an M365 Group site: remove the user from the Microsoft 365 Group (via Outlook, Azure AD, or the Members panel). Once they’re no longer a member, they lose access to the site automatically.

To remove a user’s access to a shared file or folder:

  • Use the Manage Access panel on that item. Under the People section, if the user is listed with access, click the dropdown by their name and select Stop Sharing or Remove[8]. If their access was via a link you gave them, you might instead disable that link in the Links section.
  • If you had broken inheritance on a folder and added a user directly, you’d remove them on the folder’s permission page similar to above (select and remove).

After removal, the user might still show up with Limited Access on the site (due to sharing history) until all their direct links are removed. The key verification is using Check Permissions for that user – it should now show “None” for the site or item[8]. If it still shows access, it means they have it through some other route (perhaps another group). For example, an employee who moved departments should be removed not only from the site’s Members group, but also from any other groups (maybe a custom group) on that site or others that still grant access[9].

External Users: Removing an external user’s access can be done by removing them from the site’s guests (same as removing from groups or direct as above). Additionally, you might want to delete their guest account from your tenant if they no longer should have any access. This is done in the Microsoft 365 Admin Center (Azure Active Directory). However, simply removing them from SharePoint permissions will suffice for that site/library.

Always double-check by attempting to access as that user or using Check Permissions to ensure the removal is effective.

Customizing Permission Levels (Advanced)

SharePoint provides a set of default permission levels (Full Control, Edit, Contribute, Read, etc.) which cover most needs[4]. In some cases, you might require a custom level – for instance, a “Review” role that can edit content but not delete, or a “Contribute without delete” role. This is advanced and should be done sparingly (and only by experienced admins) because overly granular roles can confuse management. But here’s how to do it:

To create a custom permission level on a site:

  1. Go to Site permissions > Advanced permissions settings. In the Ribbon, click Permission Levels[4].
  2. You will see a list of existing permission levels. It’s best not to modify the built-in ones; instead click Add a Permission Level (or you can copy an existing level to start from its settings).
  3. Give the new permission level a Name and description.
  4. In the list of granular permissions (a long list of checkboxes like List Permissions, Site Permissions, Personal Permissions etc.), check the actions that you want to allow for this level. For example, to create “Edit without delete”, you might start with Edit and then uncheck “Delete Items” and “Delete Versions”.
  5. Scroll to bottom and click Create (or Save).

Now you have a new permission level available on this site. You can assign it to users or (better) to groups via the usual permission assignment dialog. For instance, you could create a group, and when granting that group permission, choose your new custom level from the drop-down instead of the standard ones.

Note: Custom levels are scoped to the site collection. And remember the advice: only create custom levels if default ones don’t align with your needs, and do not edit or delete the default levels[4][3]. For SMB scenarios, custom roles aren’t often needed unless you have a very specific workflow (because they increase complexity). But the option is there.

Monitoring and Auditing Permissions Over Time

Managing permissions is not a one-and-done task. You should monitor changes and review access regularly to ensure the permission structure remains healthy:

  • Use Audit Logs: As mentioned, enable and utilize Office 365’s Unified Audit Log. Search for activities like “Added member to SharePoint group”, “Shared file externally”, “Site permission modified” etc. This helps you keep track of who is changing permissions or sharing content. For example, if an owner on one site keeps breaking inheritance or adding individuals, you might need to coach them on best practices.
  • Schedule Reviews: Set periodic reminders (perhaps every 6 months) to review each site’s permissions, especially for critical sites. Have site owners confirm the current membership of their groups is still valid. This can catch things like stale accounts or overly broad access. Microsoft’s recommendation and real-world best practice is to conduct regular permission reviews[3][1].
  • External Access Report: On the SharePoint Admin Center, you can get a report of files shared with external users. SMBs can use this to make sure ex-employees or old partners don’t retain access. Similarly, checking the list of guest users in your tenant periodically and validating if those accounts are still needed is wise.
  • Adhere to Governance Policies: If your organization has a security policy (even if informal), align your permission reviews with that. For instance, if policy says “Remove access immediately when someone leaves”, ensure your offboarding IT checklist includes removing from SharePoint groups. If policy says “client data sites must not be shared externally”, use the admin settings to enforce external sharing off on those sites.
  • Tools for Insight: If built-in capabilities aren’t enough, there are third-party tools (like Orchestry, ShareGate, etc.) that provide dashboards of SharePoint permissions and can alert you to issues. These can be overkill for some SMBs, but they highlight that the biggest challenge is often visibility – make sure you at least document your sites and who the primary owners are, so nothing falls through the cracks[1]. You can also maintain a simple spreadsheet inventory of sites with columns for Owners, Members, any special access, external sharing enabled, last review date, etc. This manual step can greatly help in tracking the state of permissions.

By continuously monitoring in these ways, you’ll catch and fix issues proactively. That means fewer surprise “I can see something I shouldn’t” or “I can’t get to my file” support tickets.


Conclusion

SharePoint Online permissions management for SMBs doesn’t have to be overwhelming. By understanding the common pitfalls (like too many unique permissions or oversharing) and following best practices (like group-based assignments and least privilege), you can set up a permission structure that is both secure and maintainable. Always start by planning your permissions at the site level – decide who should be owners, members, visitors – and try to keep to that model. Use the built-in tools to check and audit permissions, so you always know “who has access.” And when issues do arise, approach them methodically: verify the user’s access at each level, adjust group membership or inheritance as needed, and document the changes.

With regular reviews and a bit of training for those who manage sites, your SharePoint Online environment will stay clean and under control. In an SMB setting, resources are limited, but the steps outlined (which leverage mostly out-of-the-box features) are usually sufficient to handle permissions without needing expensive solutions. Stick to the fundamentals – clear structure, careful granting, and consistent reviews – and you’ll mitigate most permission problems before they impact your users[3][3]. This ensures that your team can collaborate efficiently on SharePoint, with the right people accessing the right content.

By implementing these best practices and using the step-by-step guidance, you’ll be well-equipped to troubleshoot permission issues and manage SharePoint Online permissions like a pro, keeping your SMB’s data both accessible and secure. [3][1]

References

[1] SharePoint Permissions Management: Best Practices Made Simple

[2] Troubleshooting Access Control Issues in SharePoint – Reco

[3] Top 5 Common SharePoint Permissions Mistakes and How to Fix Them

[4] How to set SharePoint Permissions – Complete Guide – LazyAdmin

[5] Customize permissions for a SharePoint list or library

[6] Top 10 SharePoint permissions best practices

[7] How to properly set up Permissions on a SharePoint Site

[8] How to check user access and permissions for a file or folder on a …

[9] How to Set User Permissions in SharePoint: Your Step-by-Step Guide

[10] TROUBLESHOOTING 101 for 365 | SHAREPOINT – CHECKING ITEM PERMISSIONS

Configuring and Using Encrypted Email (Office 365 Message Encryption) with M365 Business Premium

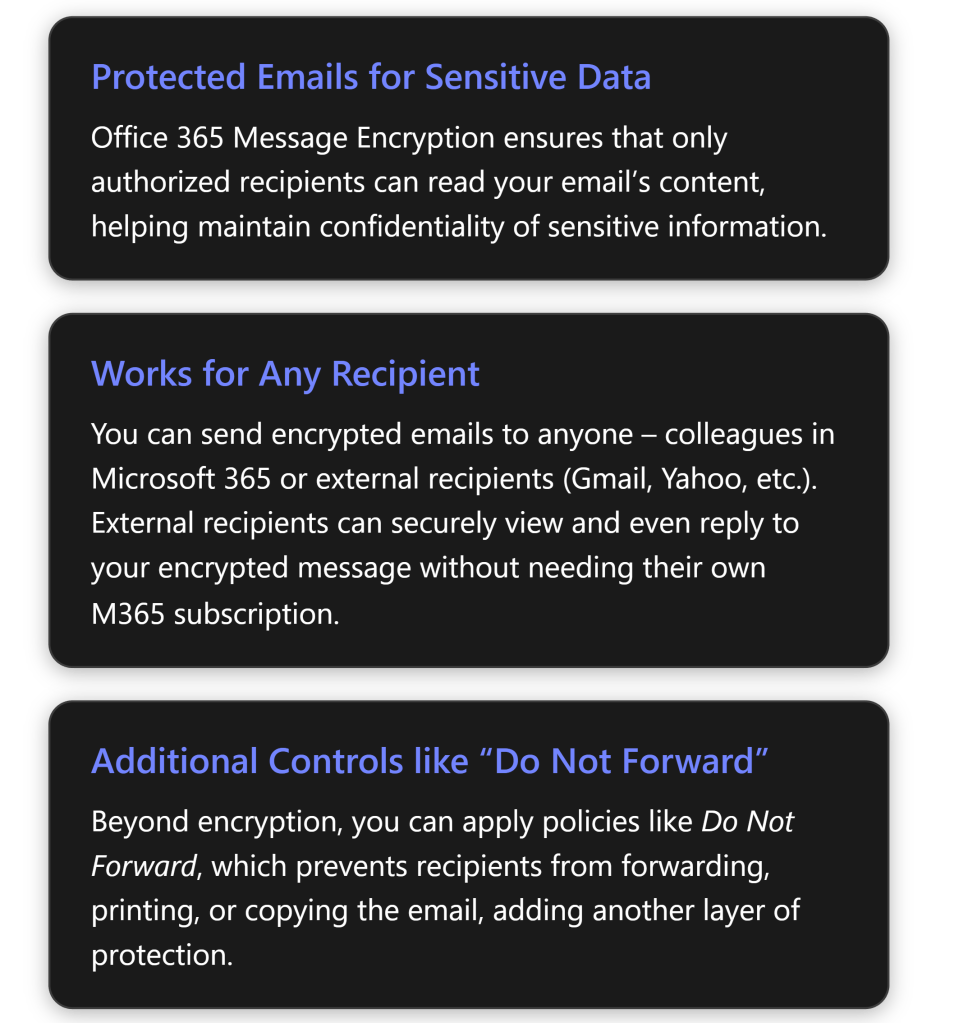
Office 365 Message Encryption (OME) is a Microsoft 365 feature that protects email content by converting it into indecipherable text that only authorized recipients can read[1]. Microsoft 365 Business Premium includes this capability, allowing you to send confidential emails that only intended recipients (inside or outside your organization) can access. This report provides a step-by-step guide to enable and use OME, and a complete walkthrough of sending and receiving encrypted emails for both Microsoft 365 users and external (non-M365) recipients, along with best practices and troubleshooting tips.

Prerequisites and Setup for Office Message Encryption

Before using OME, ensure your Microsoft 365 environment meets the requirements and is configured correctly:

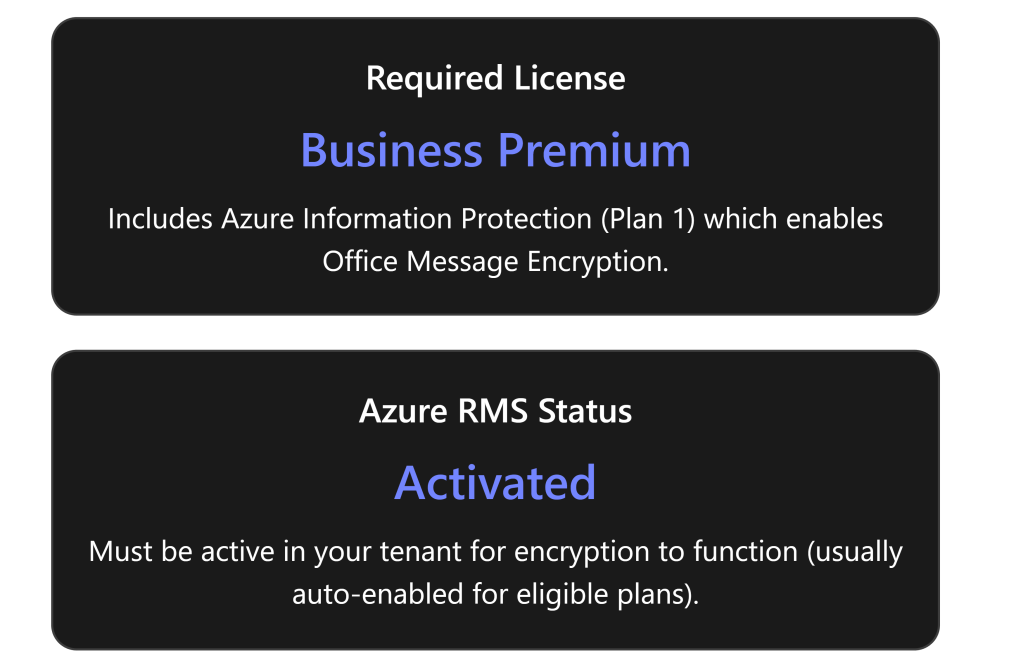
  • Eligible Microsoft 365 Subscription: Microsoft 365 Business Premium includes Office Message Encryption rights out-of-the-box[2]. (It comes with Azure Information Protection Plan 1, which OME leverages.) Other plans that include OME are Office 365/M365 E3 and E5, Office 365 A1/A3/A5, etc.[2]. If you are on a plan like Business Standard or Exchange Online-only, you would need to add Azure Information Protection Plan 1 to get OME functionality[2]. Each user who will send encrypted emails must have a valid license that supports OME[2].
  • Azure Rights Management (Azure RMS) Activation: OME is built on Azure RMS (the protection technology of Azure Information Protection)[3]. Azure RMS must be active in your tenant for encryption to work. In most cases, eligible subscriptions have Azure RMS automatically activated by Microsoft[3]. However, if it was turned off or not enabled, an administrator should activate it. You can activate Azure RMS via the Microsoft Purview compliance portal or Azure portal (the option “Activate” under Azure Information Protection)[3]. Once Azure RMS is active, Microsoft 365 automatically enables OME for your organization[3].
  • Verify configuration (Admin step): As an admin, it’s good to verify that encryption is enabled. For example, you can use Exchange Online PowerShell to run Get-IRMConfiguration; the output AzureRMSLicensingEnabled should be True (meaning OME is enabled in the tenant)[3][3]. If it’s False, run Set-IRMConfiguration -AzureRMSLicensingEnabled $true to enable OME[3][3]. (By default this shouldn’t be needed for Business Premium, but it’s a useful check in troubleshooting scenarios.)
  • User mail client requirements: Users can send/view encrypted emails using Outlook on the web or recent versions of Outlook desktop/mobile. For the best experience (including the newer “encrypt-only” capabilities), users should have Outlook 365 (subscription version) or Outlook 2019/2021. Older Outlook clients (e.g. 2016) also support OME but may not support the newest policy (like encrypt-only) without updates[4]. Ensure Office is updated so that the “Encrypt” button or permission options appear in the client. In Outlook on the web (OWA), the Encrypt option is available in the compose toolbar by default; if not, an admin may need to ensure the OWA mailbox policy has IRM enabled[5] (this is usually true by default).
  • (Optional) Configure automatic encryption policies: After ensuring OME is active, admins can set up policies to apply encryption automatically in certain cases. This isn’t required for basic usage (users can always manually encrypt an email), but it’s a useful configuration:
    • Mail flow rules (transport rules) in Exchange Admin Center can automatically encrypt emails that match specific conditions. For example, an admin might create a rule to encrypt all emails sent externally or any email containing certain keywords (like “Confidential”)[1][1]. These rules use Microsoft Purview Message Encryption as the action to protect messages automatically.
    • Sensitivity labels (from Microsoft Purview Information Protection) can be configured to apply encryption. In Business Premium, you can create labels such as “Confidential – Encrypt” that, when a user applies the label to an email, it automatically encrypts that message. This is a more user-friendly and consistent way to invoke encryption and can also enforce permissions (e.g., restrict forwarding).
    • Branding (optional): Administrators can customize the appearance of encrypted mail notifications sent to external recipients. For instance, you can add your organization’s logo, custom title, or instructions to the encryption portal email template[6]. Branding is configured via PowerShell (Set-OMEConfiguration) and is a best practice so that recipients recognize the secure message as coming from your company.

Sending Encrypted Emails (Step-by-Step Guide)

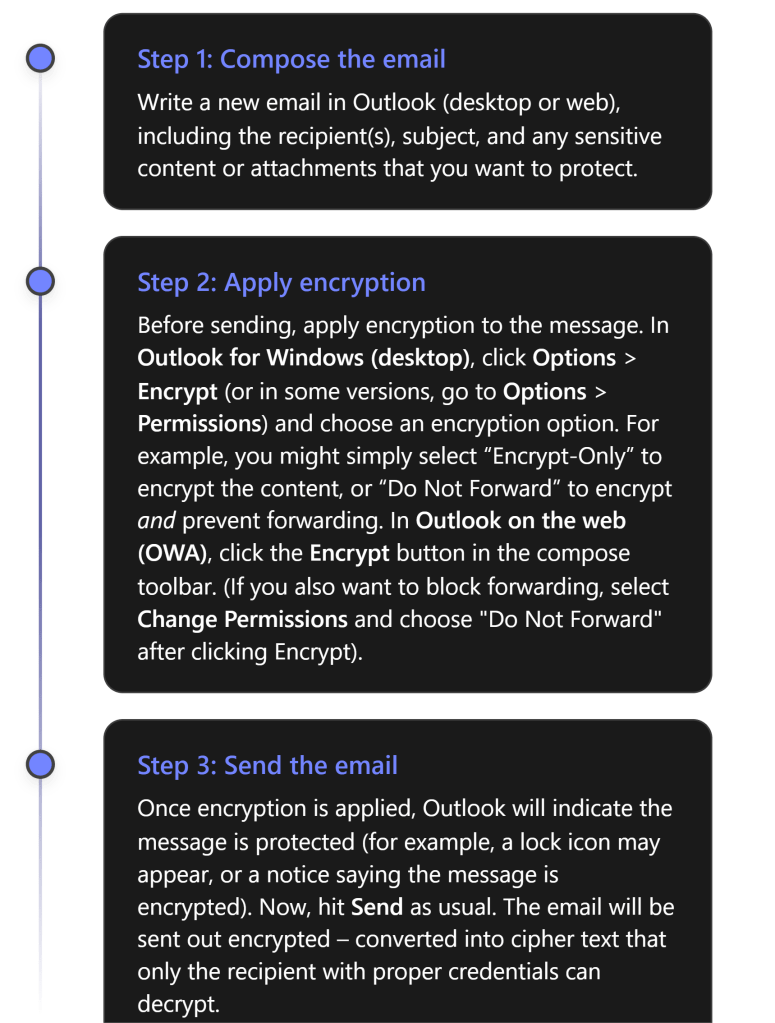
Once OME is enabled for your account, sending an encrypted email is straightforward. You do not need to manage any encryption keys yourself – the encryption is handled by Microsoft’s service in the background. Here’s how to send an encrypted email using Outlook:

Encryption Options: When applying encryption in Step 2, you may have a few choices depending on your configuration:

  • Encrypt-Only – Encrypts the email (and attachments) so that only authorized recipients can read it, but does not restrict what recipients can do with the content. Recipients could potentially copy or forward the content after decrypting, so use this when you want confidentiality but don’t need to restrict sharing.[4][4]
  • Do Not Forward – Encrypts the email and applies Information Rights Management restrictions prohibiting the recipient from forwarding, printing, or copying the email’s content[6]. The recipient can read and reply, but cannot share it further. This is ideal for highly sensitive emails where you want to keep tight control.
  • Sensitivity Labels – If your organization uses labels (like “Confidential”) configured to apply encryption, you might see those as options (for example, an email labeled Confidential might auto-encrypt and restrict to internal employees only). These will function similarly to the above, with preset scopes and restrictions defined by your admin.

Note: You do not need to exchange certificates or use special plugins to send encrypted mail using OME. As long as you have a supported M365 account with OME enabled, the feature is built into Outlook. This is much simpler than using S/MIME certificates, which require exchanging keys. With OME, just clicking “Encrypt” in Outlook is enough – Microsoft manages the encryption keys behind the scenes[6][6].

After sending, you might want to verify that your message was encrypted. In your Sent Items, the message should show an icon or text indicating it is protected. For instance, Outlook might display a small padlock icon or a banner “Do Not Forward” on the sent email if that was applied. Additionally, if you try to open the email from Sent Items, it may show that you (as sender) have full permissions. You can also double-check with a test recipient that they received an encrypted message (they will see indications on their side, described next).

Receiving and Opening Encrypted Emails

When a recipient gets an encrypted email, their experience will vary slightly depending on whether they are using a Microsoft 365/Outlook account or a third-party email service. We outline both scenarios below.

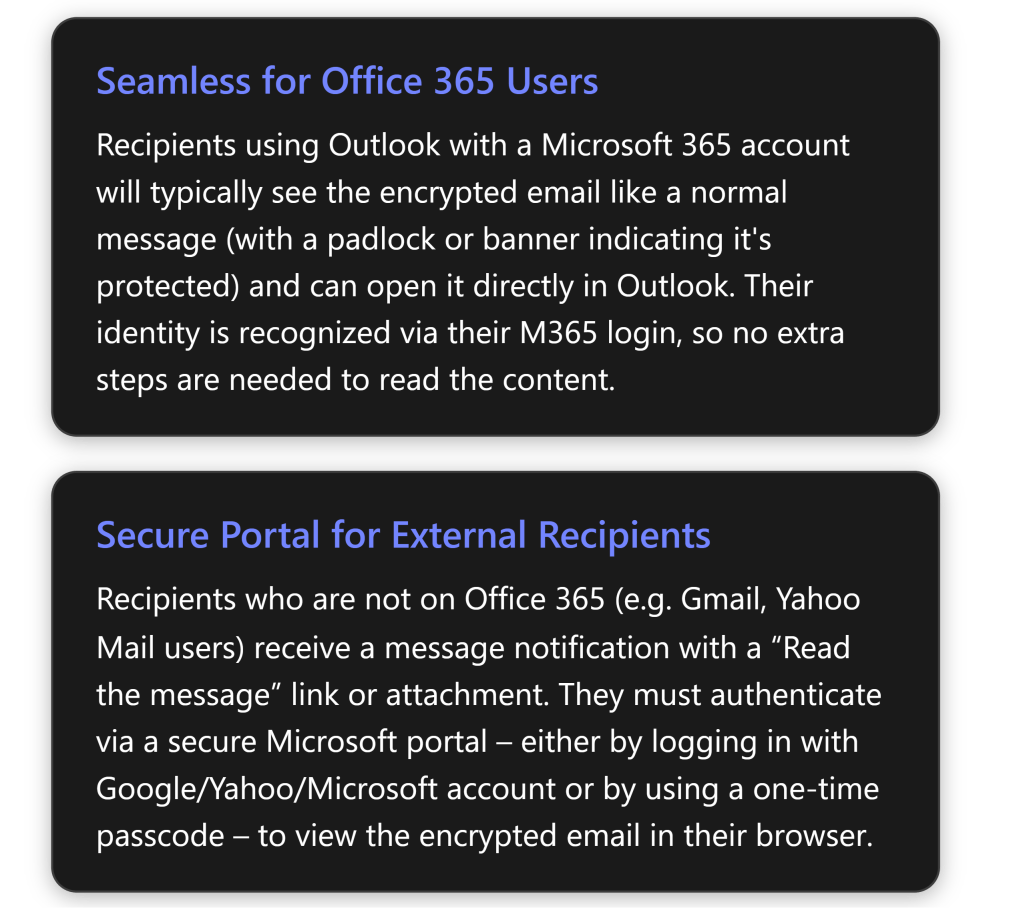
1. Microsoft 365/Office users (Internal or External with M365 accounts): If the recipient uses Outlook and has a Microsoft 365 account (either in your organization or another organization that uses Azure AD), the encrypted email arrives in their inbox like a regular email. In Outlook 2016 or later, they will see an alert in the Reading Pane that the message has restricted permissions[4] (for example, “Encrypt-Only” or “Do Not Forward” noted). They can simply open the email normally – Outlook will automatically retrieve the decryption key in the background using their credentials. After opening, the content is readable within Outlook just like any other email[4]. In short, for M365 users, reading an OME email is usually one-click: open it and read. For Outlook on the web or mobile, it’s similar – they click the message and, as long as they’re logged in with the authorized account, the message opens. (If by chance their client cannot display it directly – e.g., an older Outlook not fully updated – the email will instead contain a “Read Message” link guiding them to the web portal. But as of recent updates, Outlook 2019/M365 apps support the direct decrypt in the client for the Encrypt-Only policy[4].)

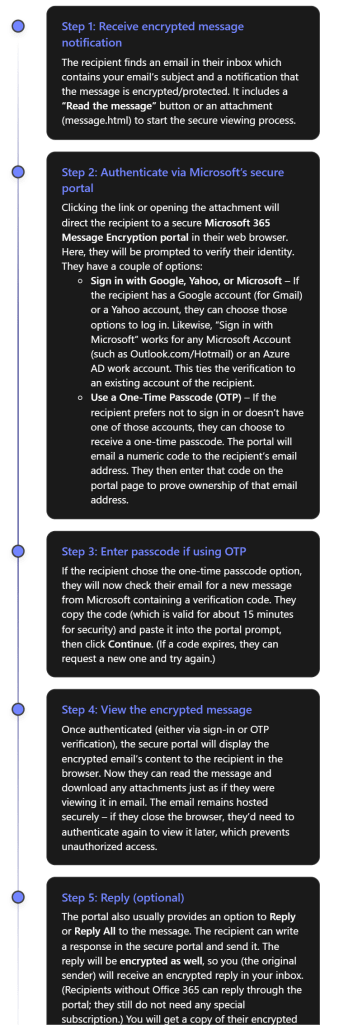
2. External or non-Microsoft recipients: If the recipient is outside M365 (for example, using Gmail, Yahoo, or any other email provider), they will receive an email letting them know you sent an encrypted message. The email will typically show your original subject line and a body message like: “\ has sent you a protected message” with a button or link that says “Read the message” (or an HTML attachment that they need to open)[6].

From the external recipient’s perspective, these are the steps to open an encrypted mail:

As seen above, Microsoft has designed OME so that even external recipients have a user-friendly (if slightly multi-step) way to access encrypted mail. They do not have to install anything; a web browser is enough. They either sign in with an existing email account or use a one-time code sent to their email[4][4]. Once that is done, they can read and even respond securely. This approach means you can confidently send sensitive data to clients or partners using Gmail, Yahoo, etc., and know that only they (not an unintended person) can read it.

Important: Certain parts of the email are not encrypted for practical reasons: the email subject line and metadata (sender, timestamp) are visible in the notification email. Only the body and attachments are encrypted. Therefore, as a best practice, do not put highly sensitive info in the subject line of an email – keep it generic and put details in the body or attachments which will be encrypted.

Also note, if an external recipient tries to forward the original notification email itself, it won’t help others read the message because only the intended recipient can authenticate to view the content. If you applied “Do Not Forward” protection, an external recipient cannot forward the content from the portal either (the portal will enforce no forwarding). If a Microsoft 365 recipient tries to forward a “Do Not Forward” encrypted email, the forwarded message will be unreadable to the new third-party, since they aren’t authorized – the system will either block it or send a protected email that the new recipient cannot open[6].

Best Practices for Using OME Effectively

Using Office Message Encryption adds security, but it’s important to use it correctly. Here are some best practices and tips:

  • Train users and set expectations: Educate anyone sending encrypted emails on how OME works and when to use it (e.g. for personal data, financial info, confidential documents). Likewise, prepare external recipients if possible. For instance, if you’re emailing a client securely for the first time, you might call or text them beforehand, saying “You’ll receive a secure encrypted email from me with a link – it’s safe to open.” This helps external recipients not mistake your encrypted email for a phishing attempt.
  • Use “Do Not Forward” for highly sensitive content: If you want to ensure the information doesn’t get re-shared, use the Do Not Forward option (or a similar rights-protected label). This way, even if a recipient’s account were compromised or someone was tempted to share the email, the protected content cannot be opened by unauthorized people[6]. It adds an extra layer beyond encryption alone.
  • Avoid sensitive details in subject or preview text: As noted, the email subject is visible to anyone who might intercept the message (or just in the recipient’s inbox preview). Keep subjects generic and put sensitive info only in the encrypted body/attachments.
  • Verify encryption on outgoing emails: When you send an encrypted email, double-check that Outlook shows it’s encrypted (look for the lock icon or a permissions message in the compose window)[6]. If you don’t see the encryption indicator, you may have missed a step. Also, you can send a test email to yourself (to a separate account) to see how the experience looks for recipients.
  • Consider sensitivity labels for consistency: If your organization frequently encrypts emails, using sensitivity labels can make it easier and more standardized. For example, a label “Private – Recipients Only” could automatically encrypt and set Do Not Forward, in one click for the user. It ensures the correct policy is applied and also might apply visual markings to the email. Business Premium allows configuring such labels in the Purview compliance center.
  • Be cautious with group emails: OME can encrypt emails sent to multiple people, but ensure each recipient is intended. If you send to a distribution list or a group, all members will be able to read it; if someone is later added to that group, they may not access past encrypted mail. For external groups, OME might not resolve all members. Ideally, send encrypted mail to individual addresses to maintain clarity over who can decrypt it.
  • External recipient guidance: Some external recipients might struggle with the process (for example, the one-time passcode email might land in their spam folder or they may not realize they can use a Google login). Be ready to guide them. Microsoft’s support page “Open encrypted and protected messages” is a useful reference to share if someone has trouble.
  • Remove encryption if needed: If you accidentally sent an email with encryption but later need to share the content openly, you (the sender) have the ability to remove encryption after sending. In Outlook, find the sent encrypted message, open it, go to File > Permissions (or Encrypt) and choose “Unrestricted Access” (for Outlook desktop)[6]. This essentially decrypts the message for all recipients, allowing them to view it without the special process. Use this carefully – it will make that content accessible just like a normal email.
  • Leverage branding for trust: As mentioned, consider adding your organization’s branding to encrypted emails (logo, custom instructions)[6]. This helps recipients trust that the encryption message is legitimately from your company and not a phishing scam. The branding appears on the “Read the message” page and in the email that contains the link.
  • Stay updated: Microsoft continually improves OME. For example, the “Encrypt-Only” mode was added to allow direct decryption in modern Outlook apps[4]. Keep your Outlook client updated to benefit from the latest improvements (e.g., some older versions required always using the web portal; newer versions can decrypt in-app). Similarly, stay informed via Microsoft 365 updates for any changes to the encryption experience.

Monitoring, Management, and Compliance Considerations

From an IT administration and compliance perspective, encrypted emails introduce some new considerations. Here’s how to manage and monitor OME usage in your organization and ensure compliance requirements are met:

  • Tracking encrypted messages: Administrators may want to know when and how often users are sending encrypted emails (for example, to ensure policies are followed). Microsoft 365 provides an Encryption Report in the compliance center (Purview portal) that shows statistics and details of encrypted emails. In the Microsoft Purview portal, under Data Loss Prevention or Reports, you can find a report for Message Encryption usage[7]. This report can show which emails were encrypted, by whom, and if they were automatically encrypted by a rule or manually. It can typically be scheduled to be sent via email or viewed on demand[7]. Use this to monitor adoption and detect any anomalies (like an unusual spike in encrypted emails, which might indicate users handling a lot of sensitive info).
  • Audit logs: Each time a user sends an encrypted email, an event is recorded in the Unified Audit Log in Microsoft 365 (if auditing is enabled). Admins can search the audit log for activities related to OME (such as the “Applied sensitivity label” event if labels are used, or mail flow rule events). There isn’t a special “encryption” event per se for each message, but the encryption report mentioned above is a higher-level view. If deeper investigation is needed (e.g., for a specific incident), administrators with proper permissions could also access the content (see eDiscovery below).
  • eDiscovery and compliance searches: Encrypted emails are still stored in mailboxes (in an encrypted form). Compliance officers may worry: can we perform eDiscovery on encrypted content? The answer is yes – Microsoft Purview eDiscovery tools can decrypt encrypted emails so that compliance or legal reviewers can search and read them, provided the reviewer has the necessary permissions (specifically, the “RMS Decrypt” permission in Purview)[8][8]. In practice, during a content search or eDiscovery case, the system will decrypt the content of OME emails when exporting results or adding items to a review set, so that the reviewer can see the actual email text[8][8]. This ensures that using OME doesn’t impede your organization’s ability to fulfill legal discovery or compliance obligations, as long as authorized personnel are doing the searching.
  • Data Protection and compliance standards: Using OME can help your organization comply with regulations that require protection of sensitive data in transit (such as GDPR, HIPAA for healthcare communications, or financial privacy laws). The encryption ensures that even if an email is inadvertently sent to the wrong party or intercepted, it cannot be read by unauthorized persons. That said, encryption is one piece of the puzzle – you should still enforce data loss prevention policies and train users on handling sensitive info. OME works in tandem with Data Loss Prevention (DLP) policies: for instance, a DLP policy detecting a credit card number could automatically trigger encryption of the email instead of blocking it, allowing the email to go out securely rather than in plain text[1].
  • Advanced Message Encryption: For organizations with higher-end licenses (E5 or as an add-on), Advanced Message Encryption provides additional management capabilities. This includes the ability for admins to revoke access to a sent encrypted email or set it to expire after a certain time. For example, if an employee sent an encrypted email externally by mistake, an admin with Advanced Message Encryption could revoke that message, so that when the recipient tries to read it, they get a notice that the message is no longer available. Business Premium does not include Advanced Message Encryption (that’s an E5 feature), but it’s useful to know such features exist in case your compliance needs grow in the future.
  • Ensuring availability of encryption features: If users report that they can’t find the Encrypt button or that encrypted emails aren’t opening, revisit the configuration:
    • Make sure the user is logged into their Outlook with the correct account that has the Business Premium license. If not, have them sign out and sign back in with their licensed account[5][5].
    • Check that the Outlook on the web policy has IRM enabled (an admin can do Get-OwaMailboxPolicy -Identity OwaMailboxPolicy-Default | FL IRMEnabled. It should be True. If not, set it to true to expose the Encrypt option in OWA)[5].
    • Ensure there are no older Active Directory Rights Management (on-premises AD RMS) configurations interfering – Microsoft’s OME will not work simultaneously with an old AD RMS setup. If you previously used AD RMS, you should migrate those keys to Azure RMS[3].
  • Internal monitoring and scanning: Note that Exchange Online can still scan encrypted emails for malware and spam before encryption is applied. If you manually encrypt a message and send it, the content gets encrypted after it passes through the Outbox, meaning Microsoft’s server has the plaintext to scan for viruses. If an admin sets up an automatic encryption rule, it typically applies at the transport stage after other filters. So your use of OME shouldn’t reduce the effectiveness of Exchange Online Protection (EOP) for anti-malware. However, once encrypted, other systems (like a recipient’s email server or a journaling system outside Microsoft) can’t inspect the content. Keep this in mind if your enterprise routes mail through any gateway that needs to inspect content – you may need to allow that encryption happens at the final stage.

In summary, Microsoft 365 Business Premium provides a robust encryption capability for email. By configuring it properly and following the best practices above, you can greatly reduce the risk of sensitive information leaking via email, while still maintaining usability for your users and external contacts. Always balance security with practicality – use encryption when it’s truly needed (so users take it seriously), and make sure to support recipients who might be unfamiliar with the process. With OME, you empower users to protect data on their own, which is a powerful tool in your organization’s security arsenal.

Further Resources

For more information and support on Office 365 Message Encryption, consider these resources:

  • Microsoft Learn – Email encryption in Microsoft 365: An overview of all email encryption options in M365, including OME, S/MIME, and IRM[9]. This is useful for understanding how OME compares to other encryption methods.
  • Microsoft Learn – Set up Message Encryption: Step-by-step guidance for admins to enable and test OME in a tenant[3][3].
  • Microsoft 365 Business Premium Training – Protect Email with OME: Microsoft offers a training module on using OME (protecting email) as part of their Business Premium documentation[1][1].
  • Troubleshoot OME (Microsoft Support): Common issues and solutions if encrypted messages can’t be opened or the encrypt option is missing[5][5].
  • User Guide – Send, View, and Reply to Encrypted Emails: Microsoft support article for end-users on how to send and read encrypted messages in Outlook[4][4] – this can be shared with new users or external recipients if they need guidance.

Each of these resources can provide deeper insights or up-to-date instructions as OME evolves. By following the steps and tips in this report, you should be well-equipped to configure Office Message Encryption in Microsoft 365 Business Premium and use it to securely send/receive sensitive emails with confidence. Enjoy the peace of mind that comes from that extra layer of security on your communications! [4][4]

References

[1] Send encrypted email with Microsoft 365 Business Premium – Microsoft …

[2] Message Encryption FAQ | Microsoft Learn

[3] Set up Microsoft Purview Message Encryption | Microsoft Learn

[4] Send, view, and reply to encrypted messages in Outlook for PC

[5] Resolve Microsoft Purview Message Encryption issues

[6] How to Encrypt Emails in Outlook and Office 365 — LazyAdmin

[7] O365 Encrypted Email – How can I tell which outgoing emails were …

[8] Decryption in Microsoft Purview eDiscovery tools

[9] Email encryption in Microsoft 365 | Microsoft Learn

Need to Know podcast–Episode 350

In Episode 350 of the CIAOPS “Need to Know” podcast, along with the latest news from the Microsoft Cloud, we explore how Microsoft Power Pages is revolutionising web development for SMBs. Learn how this low-code platform enables businesses to build secure, scalable portals—without needing full-stack developers. From customer support portals to partner onboarding, discover real-world use cases, a step-by-step guide to building your first portal, and how Managed Service Providers (MSPs) can offer Power Pages as a service. This episode is a must-listen for IT professionals, MSPs, and business leaders driving digital transformation.

Brought to you by www.ciaopspatron.com

you can listen directly to this episode at:

https://ciaops.podbean.com/e/episode-350-power-up/

Subscribe via iTunes at:

https://itunes.apple.com/au/podcast/ciaops-need-to-know-podcasts/id406891445?mt=2

or Spotify:

https://open.spotify.com/show/7ejj00cOuw8977GnnE2lPb

Don’t forget to give the show a rating as well as send me any feedback or suggestions you may have for the show.

Resources

CIAOPS Need to Know podcast – CIAOPS – Need to Know podcasts | CIAOPS

X – https://www.twitter.com/directorcia

Join my Teams shared channel – Join my Teams Shared Channel – CIAOPS

CIAOPS Merch store – CIAOPS

Become a CIAOPS Patron – CIAOPS Patron

CIAOPS Blog – CIAOPS – Information about SharePoint, Microsoft 365, Azure, Mobility and Productivity from the Computer Information Agency

CIAOPS Brief – CIA Brief – CIAOPS

CIAOPS Labs – CIAOPS Labs – The Special Activities Division of the CIAOPS

Support CIAOPS – https://ko-fi.com/ciaops

Get your M365 questions answered via email

Show Notes

Security & Compliance
AI & Copilot
Learning & Productivity
Threat Intelligence
Platform & Tools
Recognition & Industry Updates
AI Governance & Design
Media & Branding

Test Your Microsoft 365 Speed in Seconds — For Free!

bp1

Ever wondered if your Microsoft 365 experience is running as fast as it should? Whether you’re dealing with slow Outlook syncs, Teams lag, or SharePoint delays, the culprit might be your connection to Microsoft’s cloud.

That’s where my new Microsoft 365 Connection Speed Test script comes in — a free, no-fuss tool that gives you a clear picture of how well your network connects to Microsoft 365.


️ What Is It?

This PowerShell script, created CIAOPS, runs a quick diagnostic to test your connection speed to Microsoft 365 services. It checks latency, download speed, and other key metrics — all from your own machine.


Why Should You Use It?
  • Spot Bottlenecks: Identify if your network is slowing down your Microsoft 365 apps.

  • Troubleshoot Smarter: Get real data to help IT support pinpoint issues faster.

  • Work from Anywhere: Test performance from home, the office, or on the go.

  • No Guesswork: Know exactly how your connection stacks up — no tech jargon required.


Who’s It For?

Anyone using Microsoft 365! Whether you’re an IT admin, a remote worker, or just someone who wants Teams to stop freezing mid-call — this tool is for you.


How to Get It
  1. Head to the GitHub page: Microsoft 365 Speed Test Script
  2. Follow the simple instructions to run the script using PowerShell as well as reading the online documentation for the script.
  3. Review your results and take action if needed.


✅ Final Thoughts

This script is a great example of how a little tech can go a long way in improving your daily workflow. It’s free, fast, and incredibly useful — especially if you rely on Microsoft 365 to get things done.

Want help running it or interpreting the results? Just let me know — I’m here to help!

A final note – you have the option to upload the results securely to my BLOB storage in Azure at the end of the script. I’m planning to use AI to analyse these results and providing a results dashboard and potentially providing benchmarking feedback as part of the results. So, I’d love it if you would share your results back to me so I can keep improving and enhancing this for all.

Everyday Copilot example prompts for SMB

bp1

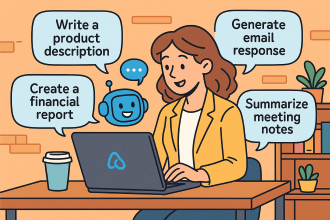
Microsoft 365 Copilot is a powerful AI assistant integrated into the Microsoft 365 apps you already use, designed to boost productivity, creativity, and efficiency. For small businesses, it can act as a virtual team member, automating routine tasks and providing intelligent assistance across various functions.

Here’s a breakdown of practical examples and a step-by-step implementation guide for a small business to leverage Copilot for increased productivity:

Practical Examples of Microsoft 365 Copilot in a Small Business

Here are concrete scenarios where a small business can use Copilot to be more productive:

1. Marketing & Content Creation:

  • Scenario: A small online retail business needs to create engaging product descriptions for new inventory and draft a marketing email campaign.

  • Copilot Use:

    • Word: “Draft 10 unique, SEO-friendly product descriptions for a new line of organic bath bombs, highlighting their natural ingredients and calming properties.” Copilot generates initial drafts, which the team can then refine.

    • Outlook: “Based on the organic bath bomb product descriptions, write a promotional email to our subscriber list, including a special launch discount and a clear call to action to visit our website.” Copilot drafts the email, saving significant time.

    • PowerPoint: “Create a presentation for an upcoming local market vendor event, showcasing our brand story and top 5 best-selling products. Include images and key benefits.” Copilot helps generate slides, suggest layouts, and even find relevant stock images.

2. Sales & Customer Management:

  • Scenario: A freelance graphic designer needs to prepare a tailored proposal for a new client and summarize a long email thread about project revisions.

  • Copilot Use:

    • Word: “Generate a comprehensive project proposal for [Client Name] for their new brand identity project. Include sections for scope of work, timeline, deliverables, and pricing, referencing our standard pricing guide.” Copilot quickly builds the proposal structure and fills in details.

    • Outlook: In a long email thread about client feedback, “Summarize the key decisions made and action items from this email conversation regarding the logo design revisions for [Client Name].” Copilot provides a concise summary, preventing missed details.

    • Teams: After a client meeting, “Summarize this Teams meeting about the website redesign, highlighting key agreements, outstanding questions, and assigned tasks to each team member.” Copilot generates meeting minutes and action items.

3. Finance & Operations:

  • Scenario: A small consulting firm needs to analyze quarterly sales data in Excel and draft a memo to employees about new expense policies.

  • Copilot Use:

    • Excel: “Analyze this sales data in Sheet1 to identify the top 3 performing services and visualize monthly revenue trends.” Copilot can suggest formulas, create charts, and even interpret the data, turning raw numbers into actionable insights.

    • Word: “Draft a clear and concise memo to all employees outlining the new expense reimbursement policy, effective next month. Emphasize the need for itemized receipts and submission deadlines.” Copilot helps draft the policy document quickly and accurately.

    • Microsoft 365 Chat: “What are the latest updates to the company’s Q2 budget in the ‘Finance Reports’ SharePoint folder?” Copilot can search across your M365 environment to retrieve and summarize relevant information.

4. Human Resources (HR) & Internal Communications:

  • Scenario: A small accounting firm needs to create an onboarding checklist for new hires and respond to common employee queries about leave policies.

  • Copilot Use:

    • Word: “Create a detailed onboarding checklist for new hires, covering IT setup, HR paperwork, team introductions, and initial training modules.” Copilot provides a structured checklist to ensure a smooth onboarding process.

    • Outlook: When an employee asks about personal leave, “Draft an email response to [Employee Name] explaining the company’s personal leave policy, referencing the relevant section in the employee handbook, and attaching the leave request form.” Copilot helps generate accurate and consistent responses.

Step-by-Step Implementation of Microsoft 365 Copilot in a Small Business

Implementing Copilot effectively involves more than just enabling licenses. It requires preparation, user adoption strategies, and ongoing monitoring.

Phase 1: Preparation and Readiness

  1. Assess Your Microsoft 365 Environment:

    • Data Governance: Copilot inherits your existing Microsoft 365 security, privacy, and compliance settings. Ensure your data is well-organized, permissions are correctly set, and sensitive information is protected (e.g., using sensitivity labels). This is crucial to prevent “oversharing” of information through Copilot.

    • Licensing: Verify you have an eligible Microsoft 365 subscription (e.g., Microsoft 365 Business Standard or Business Premium). Copilot is an add-on, so you’ll need to purchase licenses ($30 per user per month, as of my last update).

    • Network Readiness: Ensure your internet connection and Microsoft 365 services are robust enough to handle the increased AI processing.

  2. Identify Key Use Cases and Pilot Users:

    • Define Needs: Pinpoint specific pain points and areas where AI can provide the most immediate value for your business (e.g., slow report generation, repetitive email drafting, meeting summaries).

    • Select Pilot Group: Choose a small group of enthusiastic users from different departments who are heavy Microsoft 365 users and open to new technologies. These “champions” will be crucial for early feedback and encouraging wider adoption.

  3. Establish an “AI Council” (Even for a Small Business):

    • This doesn’t need to be formal or large. It could be 1-2 owners/managers and a key IT contact (internal or external).

    • Their role: Define clear goals for Copilot, oversee implementation, address challenges, and communicate the vision.

Phase 2: Deployment and Onboarding

  1. Assign Copilot Licenses:

    • Go to the Microsoft 365 admin center.

    • Navigate to Billing > Licenses.

    • Select Microsoft 365 Copilot and assign licenses to your chosen pilot users.

    • Note: It might take up to 24 hours for Copilot to appear in all apps for users. They may need to restart or refresh the apps.

  2. Provide Training and Resources:

    • Basic Prompting: Train users on how to craft effective prompts. Emphasize clarity, context, and specifying the desired outcome.

    • Role-Specific Examples: Provide examples of how Copilot can be used in their specific roles (e.g., marketers: “draft a social media post,” sales: “summarize this client email”). Microsoft provides an “SMB Success Kit” and online quick-start training (aka.ms/quickstartcopilot) that can be valuable.

    • “When to use Copilot” vs. “When not to”: Help users understand when Copilot is a valuable assistant and when human judgment or expertise is still paramount.

    • Encourage Experimentation: Foster a culture where users feel comfortable experimenting with Copilot.

  3. Establish a User Community (informal):

    • Even in a small business, create a dedicated chat channel (e.g., in Microsoft Teams) for users to share tips, ask questions, and celebrate “Copilot wins.” This peer-to-peer learning is highly effective.

Phase 3: Monitor, Refine, and Expand

  1. Gather Feedback:

    • Regularly check in with your pilot users. What’s working well? What are the challenges? What new ideas do they have?

    • Qualitative feedback (discussions, surveys) is just as important as quantitative data.

  2. Monitor Usage (Microsoft Copilot Dashboard):

    • The Microsoft Copilot Dashboard provides insights into Copilot usage, including which apps it’s used in most and active user counts. Use this to understand adoption trends and identify areas for further training or focus.

  3. Iterate and Optimize:

    • Based on feedback and usage data, refine your training materials, prompt guidelines, and use cases.

    • Address any data governance issues that arise.

  4. Gradual Rollout (or full deployment):

    • Once the pilot is successful and you’ve addressed initial challenges, gradually expand Copilot access to more users or the entire team.

    • Continue to provide ongoing support and training as new users come online.

  5. Celebrate Successes:

    • Share stories of how Copilot has helped employees save time, improve quality, or achieve business goals. This builds enthusiasm and encourages wider adoption.

By following these practical examples and a structured implementation approach, even small businesses can effectively harness the power of Microsoft 365 Copilot to significantly boost their productivity and gain a competitive edge.

CIA Brief 20250720

image

Understanding Apple enrollment methods in Microsoft Intune –

https://techcommunity.microsoft.com/blog/intunecustomersuccess/understanding-apple-enrollment-methods-in-microsoft-intune/4434586

New tools for Security Copilot management and capacity planning –

https://techcommunity.microsoft.com/blog/securitycopilotblog/new-tools-for-security-copilot-management-and-capacity-planning/4432723

Learning the new Outlook: Managing the Calendar surface –

https://www.youtube.com/watch?v=5kA72Vs8Zo0

Web vs work grounding in Microsoft 365 Copilot –

https://www.youtube.com/watch?v=y03QC8PCAfE

Protecting Cloud Storage in the Age of AI –

https://techcommunity.microsoft.com/blog/MicrosoftDefenderCloudBlog/protecting-cloud-storage-in-the-age-of-ai/4433854

Microsoft 365 Insider Round-Up: July 2025 –

https://www.linkedin.com/pulse/microsoft-365-insider-round-up-july-2025-microsoft-365-insider-epw2c/

Microsoft Purview Powering Data Security and Compliance for Security Copilot –

https://techcommunity.microsoft.com/blog/microsoft-security-blog/microsoft-purview-powering-data-security-and-compliance-for-security-copilot/4433522

Transparency on Microsoft Defender for Office 365 email security effectiveness –

https://www.microsoft.com/en-us/security/blog/2025/07/17/transparency-on-microsoft-defender-for-office-365-email-security-effectiveness/

Now Generally Available: Microsoft Security Copilot in Surface Management Portal –

https://techcommunity.microsoft.com/blog/surfaceitpro/now-generally-available-microsoft-security-copilot-in-surface-management-portal/4429558

Stay ahead of emerging threats with Microsoft Defender Experts for Hunting –

https://www.youtube.com/watch?v=iqlxXf6JeQg

Learning the new Outlook: Configuring Notifications and Reminders –

https://www.youtube.com/watch?v=ov7x5p4FQGE

Deceived, not hacked: Why keeping people safe online now starts with smarter design –

https://news.microsoft.com/source/features/ai/deceived-not-hacked-why-keeping-people-safe-online-now-starts-with-smarter-design/

Automating Microsoft Sentinel: Playbook Fundamentals –

https://techcommunity.microsoft.com/blog/microsoftsentinelblog/automating-microsoft-sentinel-playbook-fundamentals/4424475

Protecting customers from Octo Tempest attacks across multiple industries –

https://www.microsoft.com/en-us/security/blog/2025/07/16/protecting-customers-from-octo-tempest-attacks-across-multiple-industries/

Introducing Copilot Memory: A More Productive and Personalized AI for the Way You Work –

https://techcommunity.microsoft.com/blog/microsoft365copilotblog/introducing-copilot-memory-a-more-productive-and-personalized-ai-for-the-way-you/4432059

Microsoft Stream and Microsoft Clipchamp: Brand unification update for Microsoft 365 video –

https://techcommunity.microsoft.com/blog/microsoft_365blog/microsoft-stream-and-microsoft-clipchamp-brand-unification-update-for-microsoft-/4433155

Learning the new Outlook: Adding Shared mailboxes –

https://www.youtube.com/watch?v=g7Z37I1ZIKY

Secure and govern AI apps and agents with Microsoft Purview –

https://techcommunity.microsoft.com/blog/microsoft-security-blog/secure-and-govern-ai-apps-and-agents-with-microsoft-purview/4429925

Mastering Agent Governance in Microsoft 365 –

https://techcommunity.microsoft.com/blog/healthcareandlifesciencesblog/mastering-agent-governance-in-microsoft-365/4416620

Get the most out of Microsoft Forms with these little-known features –

https://techcommunity.microsoft.com/blog/microsoft365insiderblog/get-the-most-out-of-microsoft-forms-with-these-little-known-features/4432179

Microsoft Security Copilot in Intune deep dive – Part 3: Explore and act on your Intune data with AI –

https://techcommunity.microsoft.com/blog/intunecustomersuccess/microsoft-security-copilot-in-intune-deep-dive—part-3-explore-and-act-on-your-/4433019

After hours

Tech Promised Everything. Did it deliver? | Scott Hanselman – https://www.youtube.com/watch?v=dVG8W-0p6vg

Editorial

If you found this valuable, the I’d appreciate a ‘like’ or perhaps a donation at https://ko-fi.com/ciaops. This helps me know that people enjoy what I have created and provides resources to allow me to create more content. If you have any feedback or suggestions around this, I’m all ears. You can also find me via email director@ciaops.com and on X (Twitter) at https://www.twitter.com/directorcia.

If you want to be part of a dedicated Microsoft Cloud community with information and interactions daily, then consider becoming a CIAOPS Patron – www.ciaopspatron.com.

Watch out for the next CIA Brief next week

How SMBs can use AI with security

bp1

Microsoft 365 Business Premium offers a robust suite of security features, many of which are enhanced by Artificial Intelligence (AI) and machine learning. For SMBs, leveraging these AI capabilities can significantly bolster their cybersecurity posture. Here’s how:

1. AI-Powered Threat Detection and Prevention (Microsoft Defender for Business & Office 365):

  • Advanced Malware and Ransomware Protection: Microsoft Defender for Business (included in M365 Business Premium) uses AI and machine learning to analyze endpoint behavior (PCs, Macs, mobile devices) and detect suspicious activity indicative of malware, ransomware, and other advanced threats. It provides real-time threat detection and automated response capabilities to mitigate issues before they escalate [1, 2].

  • Phishing and Zero-Day Attack Protection: Microsoft Defender for Office 365 (Plan 1, also included) employs AI to identify and block sophisticated phishing attempts, including those crafted with Generative AI to appear more convincing. It uses “Safe Links” to scan URLs in emails and documents at the time of click, and “Safe Attachments” to open email attachments in a virtual environment to detect malicious content before it reaches users. This AI helps interpret email language and intent to classify threats at machine speed [1, 3].

  • Behavioral Anomaly Detection: AI models continuously learn normal user and system behavior. Any deviation from this baseline, such as unusual login patterns, large data downloads, or access from unfamiliar locations, can trigger alerts and automated responses, indicating potential account compromise or insider threats [3].

2. Identity and Access Management (Microsoft Entra ID Premium P1):

  • Risk-Based Conditional Access: AI plays a crucial role in Conditional Access policies. It analyzes factors like user location, device compliance, and detected risk levels (e.g., impossible travel, anomalous login times, leaked credentials) to determine if access to resources should be granted, denied, or require additional verification (like MFA). This proactive approach significantly reduces the risk of unauthorized access even if credentials are stolen [1, 4]. Microsoft Entra ID Protection categorizes risk into low, medium, and high confidence levels, using machine learning to inform these assessments [4].

  • Multi-Factor Authentication (MFA) Enforcement: While MFA itself isn’t AI, the AI in Entra ID (formerly Azure Active Directory) can recommend and enforce MFA based on detected risks, making it a critical layer of defense against identity attacks [1, 4].

3. Data Loss Prevention (DLP) and Information Protection (Microsoft Purview):

  • Intelligent Data Classification: AI in Microsoft Purview Information Protection can automatically identify and classify sensitive data (e.g., credit card numbers, health information, personally identifiable information) across Outlook, SharePoint, and Teams. This helps ensure that sensitive data is appropriately protected, encrypted, and prevented from leaving the organization, whether maliciously or accidentally [1, 5]. Sensitive information types and trainable classifiers leverage AI to find sensitive data in user prompts and responses when they use AI apps [5].

  • Automated Policy Enforcement: Based on the AI-driven classification, DLP policies can be automatically enforced, preventing sharing of sensitive information with unauthorized external parties or even internally if policies dictate [5]. DLP also uses machine learning algorithms to detect content that matches your DLP policies [5].

4. Device Management and Compliance (Microsoft Intune):

  • Automated Security Policy Deployment: While Intune primarily manages devices, AI can inform and automate the deployment of security policies, ensuring devices are compliant before accessing company resources. It can also help detect and flag non-compliant devices, preventing them from becoming entry points for attacks [1].

  • Remote Wipe and Data Protection: In case of lost or stolen devices, Intune allows for remote wiping of company data, which, while not directly AI-powered, is a critical security measure supported by the device management framework [1].

  • AI-powered insights for device management: Microsoft Intune leverages real-time data and AI-powered insights (e.g., in Endpoint analytics and with Copilot in Intune) to help proactively manage and secure devices, pinpoint problems, identify vulnerabilities, and deploy remediations [6].

5. AI for Security Operations (Microsoft 365 Copilot & Analytics):

  • Microsoft 365 Copilot (Add-on): While primarily a productivity tool, Copilot, when integrated with Microsoft 365 Business Premium, can contribute to security by:

    • Summarizing Security Alerts: Quickly digest and understand complex security alerts and incident reports [7].

    • Threat Intelligence Analysis: Help analyze security logs and data to identify potential threats and vulnerabilities [7].

    • Generating Security Policies/Documentation: Assist in drafting security policies, guidelines, or incident response plans [7].

    • Adhering to existing security controls: Copilot inherits existing Microsoft 365 security, privacy, identity, and compliance requirements, ensuring users only see what they have permission to access [7].

  • Security Analytics and Reporting: The underlying AI within M365’s security features continuously collects and analyzes vast amounts of security data. This allows for better insights into the organization’s security posture, identifies trends in attacks, and helps predict potential vulnerabilities, enabling SMBs to make informed security decisions [2].

How SMBs can best leverage this AI:

  • Enable and Configure: Don’t just subscribe to M365 Business Premium; actively enable and configure its security features. Many of the AI-powered capabilities need to be turned on and customized to your business’s needs.

  • Prioritize MFA and Conditional Access: These are foundational and highly effective in preventing identity-based attacks [1, 4, 7].

  • Educate Employees: Even with AI, human error is a significant vulnerability. Train employees on phishing awareness, data handling best practices, and the importance of reporting suspicious activity.

  • Regularly Review Security Reports: Pay attention to the security insights and recommendations generated by M365, as these are often powered by AI analysis.

  • Consider Professional Assistance: For complex configurations or if you lack in-house IT expertise, consider working with a Managed Service Provider (MSP) who specializes in Microsoft 365 security. They can help optimize your security posture and ensure you’re getting the most out of the AI-powered features.

  • Stay Updated: Microsoft continuously updates its security features. Keep your M365 environment updated to benefit from the latest AI enhancements.

By proactively utilizing the AI capabilities within Microsoft 365 Business Premium, SMBs can significantly enhance their defenses against evolving cyber threats, protecting their data, devices, and ultimately, their business continuity.


References:

[1] Security Features of Microsoft Business Premium | Smile IT. (n.d.). Retrieved from https://www.smileit.com.au/cybersecurity/security-features-of-microsoft-business-premium/

[2] Microsoft Defender for Business | Microsoft Security. (n.d.). Retrieved from https://www.microsoft.com/en-au/security/business/endpoint-security/microsoft-defender-business

[3] Microsoft Defender for Office 365 | Microsoft Security. (n.d.). Retrieved from https://www.microsoft.com/en-au/security/business/siem-and-xdr/microsoft-defender-office-365

[4] What are risks in Microsoft Entra ID Protection. (n.d.). Retrieved from https://learn.microsoft.com/en-us/entra/id-protection/concept-identity-protection-risks

[5] Use Microsoft Purview to manage data security & compliance for Entra-registered AI apps. (n.d.). Retrieved from https://learn.microsoft.com/en-us/purview/ai-entra-registered

[6] Microsoft Intune data-driven management | Device Query & Copilot – Mechanics Team. (n.d.). Retrieved from https://officegarageitpro.medium.com/microsoft-intune-data-driven-management-device-query-copilot-fc6b958a5e83

[7] Securing Microsoft 365 Copilot in a Small Business Environment – CIAOPS. (n.d.). Retrieved from https://blog.ciaops.com/2025/07/07/securing-microsoft-365-copilot-in-a-small-business-environment/

Unlocking Productivity: SharePoint, Teams, and OneDrive Best Practices for SMBs with M365 Business Premium

bp1

For Small and Medium Businesses (SMBs) leveraging Microsoft 365 Business Premium, the suite of tools – SharePoint, Teams, and OneDrive for Business – offers an incredible opportunity to transform collaboration and boost productivity. But simply having the tools isn’t enough; strategic configuration and a well-designed collaboration structure are key to unlocking their full potential. This blog post will guide you through the recommended best practices and provide detailed steps to configure your environment for maximum efficiency.

Understanding the Trio: SharePoint, Teams, and OneDrive

Before diving into configuration, it’s crucial to understand the distinct roles of each platform:

  • OneDrive for Business: Think of this as your personal cloud storage. It’s ideal for individual work files, drafts, and documents you’re not yet ready to share broadly. It provides seamless synchronization across devices and robust versioning.
  • SharePoint Online: This is your organization’s intranet and document management system. SharePoint sites are perfect for structured, long-term document storage, company-wide resources, policies, and departmental information. Every Microsoft Team gets an associated SharePoint Team Site.
  • Microsoft Teams: The hub for teamwork. Teams brings together chat, meetings, calls, and collaboration on files. It’s designed for dynamic, real-time collaboration within specific groups or projects, with the underlying file storage powered by SharePoint.

Designing Your Collaboration Structure: The “When to Use What” Guide

A common pitfall is using these tools interchangeably. A clear “when to use what” guideline is essential for user adoption and efficient collaboration.

  • Your Personal Work & Drafts: OneDrive for Business
  • Immediate Team/Project Collaboration: Microsoft Teams (with files stored in the connected SharePoint Team Site’s document library)
  • Company-wide Information & Structured Document Management: SharePoint Communication Sites (for intranets, HR portals) and SharePoint Team Sites (for departmental or long-term project repositories not necessarily tied to a daily Teams chat).
  • Formal/External Communication: Outlook (for email and calendaring)
  • Task Management: Microsoft Planner (for team tasks, integrated into Teams) and Microsoft To Do (for personal tasks).

Detailed Steps: Configuring Your Collaboration Environment

Phase 1: Foundation & Security (Admin-Focused)
  1. Initial Setup & Domain Verification: Ensure your Microsoft 365 tenant is fully set up, and your custom domain is verified. This is typically done during your initial M365 Business Premium subscription setup.
  2. User Management & Licensing:
    • Go to the Microsoft 365 Admin Center https://admin.microsoft.com
    • Navigate to Users > Active Users.
    • Add users and assign the appropriate Microsoft 365 Business Premium licenses. Ensure display names and usernames are consistent.
  3. Enable Multi-Factor Authentication (MFA) for ALL Users: This is non-negotiable for SMB security.

    • From the Admin Center, go to Azure Active Directory (now Microsoft Entra ID).
    • Under Security > Conditional Access or Identity > Users > Per-user MFA, enable MFA for all users. Consider setting up Conditional Access policies to enforce MFA based on location or device.
  4. Configure OneDrive for Business Default Settings:
    • In the Microsoft 365 Admin Center, go to Show all > SharePoint > Settings > OneDrive sync.
    • Ensure the OneDrive sync app is recommended and consider enabling Known Folder Move to automatically back up users’ Desktop, Documents, and Pictures folders to OneDrive.
    • Set appropriate retention policies for OneDrive files in the Microsoft Purview compliance portal.
    • Review external sharing settings for OneDrive. For SMBs, it’s often best to restrict external sharing to specific domains or require sign-in for external users.
  5. SharePoint Online Default Settings:

    • In the Microsoft 365 Admin Center, go to Show all > SharePoint > Policies > Sharing.
    • Set your default external sharing level (e.g., “Existing guests” or “New and existing guests”). Avoid “Anyone” links for sensitive data.
    • Implement retention policies for SharePoint sites and libraries in the Microsoft Purview compliance portal.
    • Consider configuring data loss prevention (DLP) policies to prevent sensitive information from being shared inappropriately.

    Microsoft Teams Default Settings:

    • Go to the Microsoft Teams Admin Center https://admin.teams.microsoft.com
    • Under Teams > Teams settings, define guest access permissions. Be clear on who can invite guests and what guests can do.
    • Establish Team and channel naming conventions (e.g., Dept-Marketing, Project-LaunchX). This helps with organization and searchability. Communicate these clearly to users.
    • Consider governance policies for Team creation (e.g., restricting who can create new Teams or requiring approval for new Teams). This prevents sprawl.
    • Review app availability. Limit or approve third-party apps based on your company’s security and productivity needs.
Phase 2: Structuring for Collaboration (User & Admin Collaboration)
  1. Identify Collaboration Needs & Groups:
    • Gather key stakeholders from different departments or projects.
    • Determine how teams currently communicate and share files.
    • Identify logical groups for collaboration (e.g., Sales Team, Marketing Team, Project X Team, Leadership).
  2. Create Microsoft 365 Groups/Teams:
    • For each identified collaboration group, create a Microsoft Team in the Teams Admin Center or directly in the Teams application.
    • When you create a Team, it automatically creates a corresponding Microsoft 365 Group (which includes a SharePoint Team Site, Exchange mailbox, Planner, etc.).
    • Best Practice: Start with a few core Teams (e.g., by department or major function) and add specific channels within them. Avoid creating a Team for every single small project initially.
  3. Organize Channels within Teams:
    • Within each Team, create Standard Channels for different topics, workstreams, or sub-projects.
    • Use the “General” channel for announcements and onboarding.
    • Private Channels should be used sparingly for sensitive discussions or files involving a subset of the Team members.
    • Shared Channels (if applicable) allow seamless collaboration with specific internal or external teams without granting full access to the parent Team. Ideal for client projects or vendor collaborations.
  4. Leverage SharePoint for Structured Content:
    • Team Sites (Connected to Teams): The “Files” tab in each Teams channel is powered by a document library in the connected SharePoint Team Site. Encourage users to store all Team-related documents here. Use folders within these libraries for further organization.
    • Communication Sites: Create dedicated SharePoint Communication Sites for company-wide news, HR resources, IT support, or marketing collateral that needs to be broadly accessible but controlled by a smaller group of content creators. Link these sites from within Teams using tabs or a central intranet portal.
  5. Integrate Apps & Tabs in Teams:
    • Pin frequently used files, SharePoint pages/lists, Planner boards, OneNote notebooks, or websites as tabs within relevant Teams channels.
    • For example, add a Planner tab to a project channel to track tasks, or a OneNote tab for meeting notes.
  6. Document Co-authoring Best Practices:
    • Encourage users to co-author documents directly in Teams or SharePoint Online instead of sending attachments via email.
    • Remind users to use the @mention feature in documents and Teams chats to notify specific colleagues.
    • Utilize version history in SharePoint and OneDrive for easy rollbacks and tracking changes.

Phase 3: Adoption & Ongoing Management (Continuous Improvement)
  1. User Training & Education: This is perhaps the most critical step.

    • Conduct internal workshops or provide clear, concise training on “when to use what” for OneDrive, SharePoint, and Teams.
    • Provide quick-reference guides, FAQs, and short video tutorials.
    • Leverage Microsoft Learn resources, which offer extensive free training materials.
    • Focus on practical scenarios: e.g., “How to share a document for team collaboration,” “How to find company policies,” “How to conduct a project meeting.”
  2. Establish “Champions” Program:
    • Identify enthusiastic users in different departments who can become internal experts and advocates.
    • They can help answer questions, promote best practices, and gather feedback.
  3. Regular Review & Optimization:
    • Periodically review your Microsoft 365 usage from the Admin Center. Identify underutilized features or areas of confusion.
    • Gather feedback from users regularly to understand their pain points and suggestions for improvement.
    • Stay updated with new Microsoft 365 features and enhancements, and communicate relevant updates to your team.
    • Conduct content audits in SharePoint to ensure information remains relevant and accurate.
  4. Data Governance & Compliance:
    • Regularly review and enforce retention and deletion policies to manage data lifecycle and compliance.
    • Monitor audit logs in the Microsoft Purview compliance portal for suspicious activities or data breaches.

Conclusion

Microsoft 365 Business Premium offers a powerful toolkit for SMBs to foster a highly productive and secure collaboration environment. By thoughtfully designing your collaboration structure and diligently applying these best practices for SharePoint, Teams, and OneDrive for Business, you can empower your employees, streamline workflows, and ultimately drive greater success for your business. Remember, it’s an ongoing journey of refinement and user engagement, so keep learning and adapting!