Basic event capture in Microsoft 365

If you want to be able to find out what has happened in Microsoft 365 you’ll need to ensure that you have enabled the appropriate logs as well as being able to view information there when needed. This video shows you the basic locations for logs in Microsoft 365 as well as the different services that cane be used to query and report on these. It is important to have all your logging enabled well in advance of when you’ll need it. This video should get you started.

Video link – https://www.youtube.com/watch?v=-YSHlo4Cvgo

Need to Know podcast–Episode 305

Join me for an update of the Microsoft Cloud news as well as some thoughts around the importance and approach to managing logs in Microsoft Cloud Services.

Join me for the latest news and updates from the Microsoft Cloud and then a look at Application Control and how you consider implementing it.

This episode was recorded using Microsoft Teams and produced with Camtasia 2023.

You can listen directly to this episode at:

https://ciaops.podbean.com/e/episode-305-logs/

Subscribe via iTunes at:

https://itunes.apple.com/au/podcast/ciaops-need-to-know-podcasts/id406891445?mt=2

The podcast is also available on Stitcher at:

http://www.stitcher.com/podcast/ciaops/need-to-know-podcast?refid=stpr

Don’t forget to give the show a rating as well as send me any feedback or suggestions you may have for the show.

This episode was recorded using Microsoft Teams and produced with Camtasia 2023.

Brought to you by www.ciaopspatron.com

Resources

@directorcia

@directorcia@twit.social

Join my shared channel

CIAOPS merch store

Become a CIAOPS Patron

CIAOPS Blog

New CIAOPS Power Automate course

PowerShell connection to M365 Compliance center no longer users WinRM

Basic Windows Application Control using Intune policies

Change in the share to specific users process in SharePoint Online and OneDrive for Business

Microsoft Inspire – July 18-19

Microsoft Confirms Recent Cloud Outages Caused By Storm-1359 DDoS Attacks

MAM for Microsoft Edge for Business on Windows

New home experience in OneNote on iPhone

Forrester names Microsoft a Leader in the 2023 Enterprise Email Security Wave

Defender Application control in Endpoint Security

Unified Audit logs

Email logs

PowerShell connection to M365 Compliance center no longer users WinRM

image

For the longest time, if you needed to connect to the Microsoft 365 Security and Compliance center with PowerShell you needed to allow WinRM to use basic authentication.

If you therefore ran my connection script:

https://github.com/directorcia/Office365/blob/master/o365-connect-sac.ps1

you’d see the above error if you didn’t have WinRM enabled for basic authentication.

Having WinRM enabled with basic authentication is not a best practice for security, and I’m happy to report that if you update you ExchangeOnlineManagement PowerShell to version 3.2.0 you’ll now no longer need WinRM at all!

image

My connection script will auto update your environment for you when it runs.

I’m glad to see this update as it means I can again connect to the Microsoft Security and Compliance center in my locked down environment.

Basic Windows Application Control using Intune policies

Application control is a great way to make your Windows devices more secure. However, it can be challenging to create and roll out policies. The good news is that you can apply Application Control using Intune policies. I made this video:

https://www.youtube.com/watch?v=gh0wRZGjnd4

in which I run through the whole process from end to end. I also cover off some of the challenges using this approach as well as some handy troubleshoot tips, especially how to successfully remove the Application Control settings if needed.

Follow along for an easy way to deploy Application Control across your Windows devices using Intune.

Change in the share to specific users process in SharePoint Online and OneDrive for Business

Recently, this appeared in the Microsoft 365 message center:

[OneDrive for Business, SharePoint Online] New Tenants as of March 31 will have Azure B2B Integration with SharePoint enabled by Default [MC526130]

Description

Message ID: MC526130

Published date: 11/03/2023

Category: Stay informed

Tags: Admin impact

Relevance: Processing

We’re making some changes to the default configuration for new tenants for Azure B2B integration with SharePoint & OneDrive.

When this will happen:

Starting March 31, 2023, new tenants will have Azure B2B Integration with SharePoint & OneDrive enabled by default.

How this will affect your organization:

This message is for your information and there is no impact to existing tenants or tenants created before March 31, 2023.

What you need to do to prepare:

No change is needed for existing customers. New tenants can opt out of using Azure B2B Integration using the SharePoint Online Management Shell.Please click Additional Information to learn more.

The major impact of this is that going forward, all newly created tenants will have this Azure B2B integration enabled by DEFAULT. That changes the way many have become familiar with when it comes to sharing files with specific users via an email address.

With this Azure B2B integration enabled the process now looks like:

image

The initial sharing process is identical. You select the files to share from the source location. Next, select the external user to share the file with, typically using their email address. Then you share the file as per usual. Nothing different yet.

image

The external user (in this case a Gmail account) gets a normal sharing message like shown above. They click on the link as usual and see:

image

They click Next and see:

image

They then select Send code to obtain an access code via email. Still nothing appears to be different.

image

In the background however, things are quite different. As you can see above, an Azure B2B account is created in the source Azure AD for this external user.

image

After the destination user enters the sharing code they receive in email, the experience changes.

image

Because the sharing process has created a new guest Azure B2B account in the source tenant, all the security of the source Azure AD environment is enforced.

In this example, the tenant has Security defaults enabled, which is also now on by default in new M365 environments.

image

This will force the destination user who wants access to the document to enrol in MFA for M365 as shown above.

image

Only after they complete that process are they able to view the document as seen above.

image

Depending on how the source environment where the originating sharing is coming from is configured, the external user may also need to Accept the permission consent like shown above.

The key change now is that Azure B2B integration with SharePoint & OneDrive. is now ON by default.

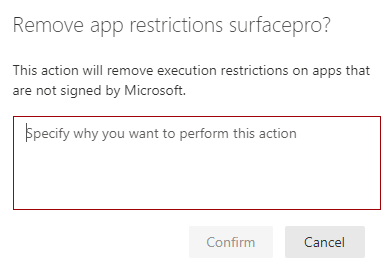
The other unfortunate thing is that I don’t believe there is option where you can control this in the M365 administration portal. You must use PowerShell.

image

To view whether Azure B2B integration is on, you’ll need to connect to SharePoint Online with PowerShell. You can use my free script to do so here:

https://github.com/directorcia/Office365/blob/master/o365-connect-spo.ps1

Once you have successfully done that, as shown above, run the command:

Get-SPOTenant | Select *B2B*

image

If the result of this is True as shown above, then Azure B2B integration is enabled.

In summary then, if you have a new tenant in Microsoft 365 it will have Azure B2B integration with SharePoint and ODFB ENABLED and Security defaults ENABLED. That means when you share a file with a specific email address, that user will be required to complete MFA enrolment.

If you have a tenant that also includes Conditional Access, which would be operating in place of Security defaults, then the external user that the document is shared will be subject to your Conditional Access policies like any other user!  This means, for example, if you have a Conditional Access policy that does location blocking (by IP address typically), and the external user is outside the allowed configured locations, their access to that document will be blocked.

For example, if you have a Conditional Access policy that only allows compliant devices, the email received by the external looks like:

image

and clicking on the document link results in:

image

given that the device the external user is on is not compliant as it is not part of the source Azure AD.

The official Microsoft documentation on this is here:

SharePoint and OneDrive integration with Azure AD B2B

and importantly, if you want to disable the Azure AD B2B integration you must return to PowerShell and run the command:

Set-SPOTenant -EnableAzureADB2BIntegration $false

When the Azure B2B Integration feature is enabled is makes a big change to the way that specific sharing is done. Having that now enabled by default on tenants is going to be a surprise to those who are not aware of this. Hopefully though, given you have read this far, you’ll be prepared for and can make an informed decision as to whether you want the additional security for external user sharing to be subject to your Azure AD policies. You’ll also know how to turn it off if you don’t want it.

Need to Know podcast–Episode 304

Join me for the latest news and updates from the Microsoft Cloud and then a look at Application Control and how you consider implementing it.

This episode was recorded using Microsoft Teams and produced with Camtasia 2023.

You can listen directly to this episode at:

https://ciaops.podbean.com/e/episode-304-application-control/

Subscribe via iTunes at:

https://itunes.apple.com/au/podcast/ciaops-need-to-know-podcasts/id406891445?mt=2

The podcast is also available on Stitcher at:

http://www.stitcher.com/podcast/ciaops/need-to-know-podcast?refid=stpr

Don’t forget to give the show a rating as well as send me any feedback or suggestions you may have for the show

Brought to you by www.ciaopspatron.com

Resources

@directorcia

@directorcia@twit.social

Join my shared channel

CIAOPS merch store

Become a CIAOPS Patron

CIAOPS Blog

New CIAOPS Power Automate course

Device actions during an incident

CIAOPS June Need to Know webinar

New Microsoft 365 apps security baseline profile and updates to the Microsoft Edge baseline

Update to Microsoft Intune PowerShell example script repository on GitHub

Detecting and mitigating a multi-stage AiTM phishing and BEC campaign

SharePoint roadmap pitstop: May 2023

Increasing Transparency into Azure Active Directory’s Resilience Model

Microsoft 365 Lighthouse provides deployment insights across all tenants on a single pane of glass

ITDR with Microsoft: Identity threat-level detections and automatic attack response

XDR meets IAM: Comprehensive identity threat detection and response with Microsoft

Conditional Access authentication strength is now Generally Available!

AppLocker vs WDAC

Windows AppLocker basics

Basics of deploying Windows AppLocker using Intune

Windows Defender Application Control (WDAC) Basics

Basics of deploying Windows Defender Application Control (WDAC) using Intune

WDAC basics

Microsoft recommended block rules

Microsoft recommended drive block rules

Announcing the CIAOPS Power Automate online course

image

I have just released my new Introduction to Power Automate course which you can find here:

https://www.ciaopsacademy.com/p/introduction-to-power-automate

The course is designed to give you a kick start into the world of automation with Microsoft 365. You’ll learn what Power Automate and Flows are including how to create the different types as well as use connectors to work with data from a variety of sources.

Inside you’ll find a variety of resources including video tutorials, web references, quizzes, examples and more. Upon completion, you will have the confidence to start automating many processes in your business.

Once you get started with Power Automate you’ll be amazed at how much time you’ll save, all using the tools that come with Microsoft 365.

Start here. Start today. And get more time in your day.

Device actions during an incident

Much of the protection with Microsoft Defender for Endpoint is taken care of for you automatically, but let’s say you want to conduct an investigation/remediation process manually. How would you achieve this?

image

Step 1

Login to the Microsoft 365 Security admin portal with the appropriate permissions. Select Devices from the Assets menu on the left.

You should see a list of the devices that Defender for Endpoint knows about. Select the machine in question to display it’s detailed information as shown above.

In the top right of this dialog on the right you will see an ellipse (three dots). Select these three dots to reveal an actions menu.

Step 2

Now you need to decide how aggressive you want to be during this investigation as that will have a direct impact on the end users experience on the device.

Level 1

image

The most aggressive option, that will have the greatest impact on the user is select the Isolate Device from the menu as shown above.

image

On the dialog that appears, enter a comment and select the Confirm button. Don’t select the option to Allow Outlook, Teams and Skype for Business while device is isolated.

This device isolation feature disconnects the compromised device from the network while retaining connectivity to the Defender for Endpoint service, which continues to monitor the device. This allow you to initiate a live response session. It also prevents an attacker from accessing the device remotely.

More information – Microsoft Defender for Endpoint device isolation

More information – Defender for Endpoint device execution restrictions

Level 2

This is less impactful to the end user and similar to the previous step.

image

Select the Isolate Device from the menu as shown above.

image

Here, select the option to Allow Outlook, Teams and Skype for Business while device is isolated.

Enter a comment and select the Confirm button.

This device isolation feature disconnects the compromised device from the network while retaining connectivity to the Defender for Endpoint service, which continues to monitor the device. This allow you to initiate a live response session, while preventing an attacker gaining remote access. It will also allow the end user to continue using Outlook, Teams and Skype for Business while you conduct the investigation. However, it does not permit connection to anywhere else, including the Internet.

More information – Microsoft Defender for Endpoint device isolation

More information – Defender for Endpoint device execution restrictions

Level 3

image

From the menu select Restrict App Execution as shown above.

This applies a code integrity policy remotely that only allows files to run if they are signed by a Microsoft issued certificate. This method of restriction can help prevent an attacker from controlling compromised devices and performing further malicious activities. Thus, Office applications (Word, Excel, Outlook, etc), Edge browser, etc can now run without restriction. However, non Microsoft signed applications can’t.

Typically, a malicious program on the device can now not execute however the user can still continue to work inside certified Microsoft applications.

image

Enter a comment and select the Confirm button to complete the restriction process.

More information – Microsoft defender for Endpoint Restrict app execution

More information – Defender for Endpoint device execution restrictions

Step 3

image

The device will display a notification like that shown above.

Step 4

You can now take whatever actions you need to complete the investigation ready for return to service

Step 5

Remove any restrictions. To do, all you need to do to achieve this is return to the ellipse menu and select option to remove the restriction.

Here that would be Remove app restriction as shown above.

You’ll again simply need to add comment and select the Confirm button to remove the restriction.

So, that’s how you can intervene manually with security incidents if you need to at different impact levels for end users.