Unlock Effortless Compliance for Australian Small Businesses with Microsoft 365 Business Premium!
Are you a small business owner navigating the complex world of Australian data privacy, security, and regulatory compliance? The “Microsoft 365 Business Premium Compliance Guide for Australian Small Businesses” is your essential resource for mastering the Privacy Act 1988, the Notifiable Data Breaches (NDB) scheme, and the ACSC Essential Eight cybersecurity framework—all with practical, step-by-step instructions.
What’s Inside:
Clear, actionable guidance on configuring Microsoft 365 Business Premium for compliance with Australian laws and standards.
Comprehensive coverage of key regulations, including the Privacy Act, NDB scheme, and Essential Eight, mapped directly to Microsoft 365 features.
Step-by-step setup instructions for multi-factor authentication, device management, data loss prevention, sensitivity labels, retention policies, secure collaboration, and more.
Quick start checklists and implementation roadmaps to accelerate your compliance journey.
Expert tips on overcoming licensing limitations and preparing for upcoming regulatory changes.
Perfect for:
Australian small businesses and health service providers
IT consultants and managed service providers
Business leaders seeking peace of mind on compliance and data protection
Why Choose This Guide?
Written specifically for the Australian regulatory landscape
Focused on practical, real-world solutions using Microsoft 365 Business Premium
Helps you achieve ACSC Essential Eight Maturity Level 2 and full compliance with the 13 Australian Privacy Principles
Stay ahead of regulatory changes and protect your business with confidence.
Get your copy of “Using M365BP for Compliance” today and turn Microsoft 365 Business Premium into your compliance powerhouse!
Just completed a simple 2 page comparison table of the features of M365 Business and the new add ons, Defender and Purview suites. It shows what M365 Business Premium provides already and then what each suite add across all the features in a single 2 page PDF download for free.
To get a copy of the PDF emailed to you just complete this form:
Microsoft Purview Message Encryption is a cloud-based email encryption and rights management solution that helps protect sensitive emails in Microsoft 365. This report explains what Purview Message Encryption is, how it works, and provides step-by-step guidance to set it up and use it effectively in a small or medium-sized business (SMB) with Microsoft 365 Business Premium. We also cover policy configuration (mail flow rules and sensitivity labels), licensing considerations (assuming the organisation already has Business Premium), and best practices. All pricing is provided in Australian dollars (AUD) for clarity.
What is Microsoft Purview Message Encryption?
Microsoft Purview Message Encryption (formerly known as Office 365 Message Encryption, OME) is an online email protection service built on Azure Rights Management (Azure RMS)[1]. It combines strong encryption with fine-grained access controls (rights management) to secure email communication. With Purview Message Encryption enabled, users can send encrypted emails to recipients inside and outside the organisation. The encryption is enforced such that only recipients who authenticate with the allowed credentials (e.g. their Microsoft 365 or Gmail account, as specified by the policy) can decrypt and read the message; anyone else who intercepts it sees indecipherable content[2].
Purview Message Encryption enhances the default security of email in Microsoft 365. By default, Microsoft 365 already encrypts data in transit between its data centers and uses TLS encryption for emails in transport. However, Purview Message Encryption goes further by encrypting the message content itself and applying persistent protection. This means the protection stays with the email even after it leaves Microsoft’s servers, and it can enforce restrictions like “Do Not Forward”. For example, you can send an email that cannot be forwarded or printed by the recipient, or an email that only specific people (inside or outside your company) are permitted to open[3]. The encryption persists regardless of where the email goes – it remains encrypted at rest in mailboxes and in transit over the internet[3].
How it works: Purview Message Encryption uses Azure RMS (part of Microsoft Purview Information Protection) to encrypt the email and any attachments, and to apply rights policies. When an authorised recipient attempts to open an encrypted email, Outlook (or the viewer portal) checks their identity against the email’s permissions. If permitted, the service silently decrypts the content for viewing; if not, access is denied[3]. Internally, Office apps like Outlook, Outlook on the web, or mobile Outlook provide a seamless reading experience – users see the content normally if they have access rights. External recipients (for example, a client using Gmail) receive an email notification (often branded with your company’s details) stating that they’ve received an encrypted message. They are prompted to authenticate (using a one-time passcode or by signing in with a Google/Microsoft account) on the encrypted message portal, after which they can read and respond securely through that portal[1]. This approach means you can safely send confidential data to any email address.
Comparison to traditional encryption: Unlike S/MIME encryption (which requires exchanging certificates) or manual password-protected attachments, Purview Message Encryption is centrally managed and user-friendly. The sender doesn’t need the recipient’s public key or a shared secret; instead, the encryption and key management are handled by Azure RMS. The recipient just needs to verify their identity. Purview Message Encryption was introduced as an evolution of the legacy OME and Information Rights Management (IRM) features in Exchange. In fact, Office 365 Message Encryption (OME) was retired in July 2023 and automatically replaced by Purview Message Encryption, which provides a more streamlined experience[4]. Key improvements in the new Purview solution include an “Encrypt-Only” option (allowing encryption without restricting recipient actions, for easier collaboration), the ability for users to manually encrypt emails directly in Outlook (not only via admin rules)[4], and a unified experience for both internal and external recipients (no more downloading of HTML attachments; external users use a web portal)[4].
Example use cases: An SMB might use Purview Message Encryption to protect emails that include personally identifiable information (PII) like customer contact details or tax file numbers, financial data like bank account or credit card numbers, or any confidential business information. For instance: an accounting firm can ensure that all emails containing tax file numbers or financial statements are encrypted; a healthcare clinic can automatically encrypt emails with patient data to comply with privacy laws; or staff could manually choose a “Confidential – Recipients Only” label when sending internal strategy documents to prevent those emails from being forwarded outside the company.
Licensing and Requirements
One of the advantages for SMBs with Microsoft 365 Business Premium is that Purview Message Encryption is already included in your subscription[4]. Business Premium includes Azure Information Protection (AIP) Plan 1[5][5], which provides the rights management and labeling capabilities underpinning Purview Message Encryption. This means you do not need to purchase any additional licenses to use the standard email encryption features.
To clarify how Purview Message Encryption is licensed, the table below compares Business Premium with other Microsoft 365 plans in context:
Plan or License
Email Encryption Availability
Additional Requirements?
Price (AUD)*
Microsoft 365 Business Premium
Included – Purview Message Encryption via AIP Plan 1[4]
No extra license needed. Azure RMS is automatically available.
Included – Rights Management (AIP P1) is part of E3[1].
No extra license needed for standard encryption features.
~$32.80 user/month (ex. GST) for Office 365 E3[7].
Office 365 E5 / Microsoft 365 E5
Included – AIP Plan 2 is included, which adds Advanced Message Encryption.
No extra license needed; advanced features available (e.g. decrypting/revoking email).
~$56.40 user/month (ex. GST) for Office 365 E5[7].
*Prices are per-user, per-month in Australian dollars. Business plans are listed at annual commitment rates excluding GST[5]; enterprise plan prices are approximate. GST in Australia is 10%, so e.g. Business Premium is about $36.19 including GST.
As shown above, Microsoft 365 Business Premium already covers the necessary licensing. If an organisation had Business Standard or Business Basic, they would need to add Azure Information Protection Plan 1 licenses (approximately A$3 per user per month) to get the encryption capability[4][6]. Enterprise E3 plans include it by default, and E5 plans include even more capabilities (more on Advanced Message Encryption below). Each user who sends or reads encrypted emails should be licensed appropriately[4].
Technical requirements: The core requirement to use Purview Message Encryption is that the Azure Rights Management service is activated for your tenant[8]. In most cases, for eligible plans like Business Premium, this service is activated automatically by Microsoft, so no manual step is needed[8]. It’s essentially “on” if you have the right license. However, if your organisation previously used on-premises Active Directory Rights Management Services (AD RMS) or had deliberately turned off Azure RMS, you may need to activate it or migrate to Azure RMS first[4][8]. (This is uncommon for SMBs; it typically applies to larger organisations that had older on-prem infrastructure. In an SMB cloud-only environment, you can assume Azure RMS is enabled by default.)
To double-check, an admin can run a simple PowerShell command in Exchange Online:
Get-IRMConfiguration – this should show AzureRMSLicensingEnabled : True if Azure RMS (and thus Purview encryption) is enabled for your tenant[8].
If it’s False, you can enable it by running Set-IRMConfiguration -AzureRMSLicensingEnabled $True[8]. You might also run Test-IRMConfiguration -Sender <user> -Recipient <user> (using any two user emails in your org) to verify that encryption and decryption tests pass and that it finds the default RMS templates (like “Contoso – Confidential” or “Do Not Forward”)[8]. A successful test confirms that your tenant is correctly configured for Purview Message Encryption.
Advanced Message Encryption (AME): It’s worth noting that Microsoft offers an Advanced Message Encryption feature set for organisations with higher compliance needs. AME is included with the top-tier E5 licenses (or as an add-on via the Microsoft 365 E5 Compliance suite for others)[9]. It builds upon the standard encryption features by allowing more control over encrypted emails. For example, admins can define multiple custom branding templates for different purposes, set expiration dates on encrypted emails, or revoke access to an already-sent encrypted email via the admin portal[9][9]. These advanced controls are particularly useful if you need to automatically expire sensitive emails after a period or track and revoke messages for compliance. However, Advanced Message Encryption is not included in Business Premium, and for most SMB scenarios, the standard encryption (already provided) is sufficient. We will focus on the out-of-the-box capabilities available with Business Premium.
Step-by-Step Setup Guide for Purview Message Encryption
Setting up Purview Message Encryption in a Business Premium tenant involves a few one-time configuration steps by an administrator. Below is an overview timeline of the key steps, followed by detailed guidance:
Let’s dive into each of these steps in detail:
Step 1: Activate (or Verify) Azure Rights Management Service
Why: Purview Message Encryption relies on Azure Rights Management (the encryption engine of Azure Information Protection) to do the encryption and decryption. If Azure RMS isn’t active, encryption will not work.
What to do: In a Business Premium tenant, Azure RMS is typically already activated[8]. To double-check, you can go to the Microsoft Purview compliance portal, navigate to Information Protection > Overview. If you see a banner or option to “Activate” Azure Information Protection, go ahead and activate it. (If everything is already active, there may be no such prompt.)
For a programmatic verification, use PowerShell: Connect to Exchange Online (with an admin account) and run:
Additionally, if your organisation had been using an on-premises AD RMS server in the past and you haven’t yet switched, you must migrate to Azure RMS first[4]. (This likely doesn’t apply to a cloud-based SMB setup.)
Optional – Bring Your Own Key: By default, Microsoft manages the cryptographic keys used for encryption. Some organisations (usually larger or highly regulated ones) prefer to manage their own root key for encryption (a process called BYOK – Bring Your Own Key). This is complex and typically not necessary for an SMB. Microsoft recommends most customers let the service manage keys[8]. If BYOK is desired for compliance reasons, it should be done before broad deployment of encryption. (BYOK setup involves Azure Key Vault and is beyond the scope of this guide, but it’s supported[8].)
Step 2: Verify Configuration with Test Commands
After activation, it’s good practice to verify that encryption is fully functional in your tenant:
Run Test-IRMConfiguration -Sender <user@yourorg.com> -Recipient <user@yourorg.com> in Exchange Online PowerShell (substitute any valid sender and recipient in your organisation)[8]. This test attempts to acquire RMS templates, then encrypt and decrypt a sample message internally. You should see output with PASS results for acquiring templates, encryption, decryption, and IRM being enabled[8]. Typically, it will list available templates such as “ – Confidential”, “Do Not Forward”, etc., and conclude with “Overall Result: PASS”.
If the test fails with an error like “Failed to acquire RMS templates”, it may indicate Azure RMS wasn’t enabled or there’s a configuration issue. The Microsoft documentation provides additional PowerShell steps to troubleshoot this (for example, connecting to the AIPService module to set the licensing location)[8]. In most cases, with Business Premium, this step will pass on the first try if your licenses are assigned properly.
This verification ensures that your tenant is ready to start encrypting emails.
Step 3: Create Mail Flow Rules to Encrypt Emails (Automatic Encryption)
Mail flow rules (also known as transport rules) allow administrators to automatically apply encryption to emails that meet certain conditions. This is the primary way to enforce encryption consistently without relying solely on users. You can create rules, for example, to:
Encrypt all outbound emails sent to recipients outside your organisation (external email).
Encrypt messages that contain certain sensitive keywords or data (like “Confidential”, or credit card numbers, etc.).
Encrypt emails sent to specific recipients or domains (for instance, always encrypt emails sent to a particular partner organisation or a specific client’s email address).
Prevent recipients from forwarding certain emails by using a “Do Not Forward” template.
How to set up a new rule: Use the Exchange Admin Center (EAC) for a GUI approach or PowerShell for scripting. In the new EAC (https://admin.exchange.microsoft.com) go to Mail flow > Rules and click + Add a rule. Give the rule a name (e.g. “Encrypt outgoing financial data”). Then:
Conditions: Under “Apply this rule if…”, choose the condition that triggers encryption. Common conditions are:
“The recipient is located – Outside the organization” (to target external emails)[10].
“The subject or body includes – ” or “The message contains sensitive information – ” (to target specific content).
“The recipient domain is – \” (to target specific partner domains).
You can combine multiple conditions with Add condition for specificity (e.g. external + contains “Project X”)[10][1].
Actions: Under “Do the following…”, select Modify the message security > Apply Office 365 Message Encryption and rights protection[10]. Once you select this, another drop-down appears to choose an RMS template. Here you will see options like Encrypt, Do Not Forward, and any custom templates/labels you have.
Choose Encrypt if you just want to encrypt (allowing recipients to forward or reply normally, but the message stays encrypted).
Choose Do Not Forward if you want to encrypt and restrict recipients from forwarding or copying the content.
(If you had published sensitivity labels that include encryption, their names might also appear here as available templates.)
After selecting the template, click Save.
You can add additional actions if needed (for example, adding a footer to notify the recipient that the message was encrypted). But typically just applying encryption is enough.
Exceptions (optional): You may add exceptions if there are cases you don’t want to encrypt even if conditions match. For example, you might exclude a specific internal sender or a trusted external domain from the rule.
Mode: Set the rule to Active (or test in audit mode first if you prefer). Save the rule.
Once enabled, any new email that meets the conditions will be automatically encrypted as it’s sent out. For instance, if you created a rule to encrypt all external mail, whenever a user sends an email to an @gmail.com or any non-company address, Exchange will apply encryption before delivering the message. These rules are enforced on the server side, so they work regardless of whether the user is on Outlook desktop, mobile, or another client.
Important: Mail flow rules cannot encrypt messages incoming from outside senders to you – they only act on messages your users send. If, for example, an external partner sends you an unencrypted email with sensitive info, the Exchange Online transport rule can’t retroactively encrypt that inbound message[10]. It will be delivered as is. (Transport rules in Exchange Online don’t support encryption as an action on incoming mail from outside, by design.) To protect inbound communications, you’d have to rely on the sender encrypting it on their side or use other methods (like asking them to use a secure portal).
You can create multiple mail flow rules for different scenarios as needed. Microsoft’s rules are quite flexible – you can combine conditions (AND/OR logic) and have multiple separate rules to handle various needs[1]. When you have more than one encryption rule, be mindful of their order and if any might overlap; rules can be ordered and if two rules apply encryption, the result is the same (the email is encrypted once). Also, consider adding a rule to strip encryption in certain cases if needed (for example, some organisations add a rule to decrypt emails sent to an internal archiving mailbox or certain internal tools, so that those systems can index or scan the content). Microsoft provides guidance on creating a rule to remove encryption as well[10], but for most SMB scenarios this may not be necessary.
After setting up your encryption mail flow rules, you effectively have automatic encryption policies in place. This is great for compliance: it doesn’t rely on employees remembering to do anything. For example, you could enforce that all emails leaving your company with an attachment get encrypted, or any email mentioning “Payroll” that goes externally is encrypted.
Tip – using Data Loss Prevention (DLP): In Business Premium, you also have Microsoft Purview Data Loss Prevention available. A DLP policy can detect sensitive info (like credit card or TFN numbers) and one of the possible actions is to encrypt the message. This is essentially another way to create content-based encryption rules, with a richer interface for detecting sensitive info types. For instance, a DLP policy could automatically encrypt any email that contains a tax file number or health record. This achieves a similar outcome as mail flow rules. In fact, one recommended approach (for scenarios like HIPAA in healthcare) is to use DLP as a “smart filter” that scans emails and then triggers encryption when a sensitive data pattern is found[11]. The advantage of using Purview DLP policies for this is that you get benefits like detailed incident logging and user notifications. According to a case study, this delivers “zero user effort” (encryption happens even if staff forget), central control (one admin policy covers all mailboxes), and audit-ready logs of every encryption action[11]. In summary, DLP and mail flow rules both can automatically apply encryption – you can choose whichever method fits your admin comfort. (Mail flow rules are simpler to set up for straightforward conditions; DLP is powerful for detecting specific data types.)
Step 4: Set Up Sensitivity Labels for Encryption (Manual User-Driven Encryption)
While mail flow rules handle automatic encryption, you also likely want to empower users to manually encrypt emails when they choose. Business Premium allows you to create sensitivity labels in the Purview Compliance portal, which users can apply to emails or documents. These labels can be configured to include encryption.
For example, you might create a label called “Confidential – All Employees” that, when applied to an email, automatically encrypts it and only allows people within your organisation to open or read it. Or a label “Highly Confidential – No external sharing” that not only encrypts the email but also uses the “Do Not Forward” policy so recipients (even internal ones) cannot forward or copy the content.
How to create a sensitivity label with encryption:
In the Microsoft Purview compliance portal (https://compliance.microsoft.com), go to Information Protection > Labels and click + Create a label.
Give the label a name (e.g. “Confidential – Company Only”) and description for users.
For the label scope, make sure Emails (and files, if desired) is selected, so that this label can apply to email content[3].
In the configuration, you’ll have options for adding encryption. Enable the setting to “Encrypt content” (in older interface this might be a checkbox like “Protect content” or “Control access to content”[3]).
You will be asked to choose how to assign permissions:
Assign permissions now: You as the admin specify exactly who can do what with content under this label. For instance, you can state “Only users inside my organisation can view this email; they cannot forward or print it” (which is effectively an internal-only, do-not-forward policy). You could also allow some group full rights and others read-only. This is static; end users applying the label don’t get to change the permissions.
Let users assign permissions when they apply the label: This option is useful if you want to give users some flexibility. With this, when a user applies the label in Outlook, they will be prompted to enter who should be able to access the content (they could type in specific email addresses or choose from a directory) and what permissions to give. This is akin to users creating an ad-hoc encryption rule on the fly, within the bounds you allow[3].
For simplicity in an SMB, the first option (assign now) is commonly used. For example, define that the label encrypts the email and allows “All internal users” to read it (so any external recipients would not be able to decrypt it). Or define a label that allows only certain departments.
If assigning permissions now, configure the specifics:
Choose the users or groups who will be granted access when this label is applied (e.g. All members of for all internal).
Choose their permissions: e.g. Viewer (read-only), or Editor (read and modify), etc. For email scenarios, typically read-only is used if you want to prevent forwarding, whereas if you just want to allow normal usage, giving view + edit might be fine (edit in context of email means ability to reply/forward I believe).
If relevant, you can tick an option “Do not allow forwarding” which automatically restricts forwarding and copying from the email (this is essentially the Do Not Forward template enforced via the label).
You can also set content expiration here (e.g., email content expires after 30 days) if using Azure Information Protection P2, but with P1 (Business Premium) this might not be available in sensitivity labels interface. Typically expiration is an advanced feature.
You might see an option for offline access or the number of days a user can access the content without re-authenticating – these are fine-tuning options.
Finish the label creation. Then, publish the label by creating a Label Policy (in Information Protection > Label Policies, include the new label and target it to the desired users or whole organisation). This causes the label to appear in end-user apps.
Once published (it may take a little time or a restart of Office apps to show up), users will see the sensitivity label in their Outlook (on the ribbon or under the Sensitivity button). They can apply it to an email just like they would mark it Confidential. Behind the scenes, as soon as they send an email with that label, the Exchange service will encrypt the message according to the rules you configured.
End-user experience (manual): If no sensitivity labels are defined, users in Business Premium will still typically have an “Encrypt” button in Outlook on the web or under Outlook’s Options > Permissions menu, giving them at least the default Encrypt-Only and Do Not Forward choices[1]. However, using custom labels allows you to present more user-friendly or scenario-specific options (with your own descriptions) and to integrate encryption with your classification scheme (e.g. a single label might also add a footer/tag like “Confidential” in addition to encryption).
For example, after the above setup, a user writing an email in Outlook can click the Sensitivity drop-down and choose “Confidential – Company Only”. Immediately, Outlook will show a small lock icon or a note indicating that encryption and forwarding restrictions are applied. When that user sends the email, it will be encrypted and only other people within the company tenant will be able to open it. If they accidentally sent it to an external address, that external recipient would get a message stating the email is protected and they are not authorised to view it (since our hypothetical label didn’t grant external access).
Important considerations with labels:
Exchange IRM Configuration: To get the full benefits of using sensitivity labels to encrypt emails, you should ensure IRM is enabled in Exchange (which we did in Step 1)[3]. Otherwise, certain clients might not be able to open encrypted mails and search indexing might not work. We covered this, but it’s worth noting that enabling IRM (AzureRMS in Exchange Online) is what allows even mobile Outlook and web to open these labeled emails seamlessly.
Multiple encryption methods: If a user applies a sensitivity label that encrypts an email, you do not need a mail flow rule to also encrypt it (and vice versa). They won’t conflict – the mail flow rule will typically detect the mail is already encrypted and skip, or it will apply encryption to an already encrypted mail which is fine (it remains encrypted). However, generally design your strategy to use either automatic rules for certain scenarios and labels for user-driven ones. They solve different problems (one doesn’t rely on the user at all, the other gives user flexibility).
User training: It’s a good idea to show your staff how to use the new sensitivity labels in Outlook. For instance, explain that when they have a particularly sensitive email to send, they should apply the Confidential label before sending. The first time, some may be confused by the experience for external recipients (e.g. “The client said they had to click a link to view my email”). Include that in training so they and the recipient know it’s normal due to encryption.
Step 5: Test the Encryption Setup
Before rolling out broadly, test the configuration:
Internal test: Have two users (or use your test account) within the company send encrypted emails to each other. They should be able to open them normally in Outlook (perhaps a small banner might indicate the message is encrypted). This ensures internal access isn’t inadvertently blocked by a policy.
External test: Send an email from inside to an outside email (e.g., a personal Gmail or Outlook.com account) that should trigger encryption – for example, an email containing a sensitive keyword if you made that rule, or just any email if you encrypted all external mail. Confirm that:
The external recipient gets a mail notification that’s branded (by default it will show your organisation name) saying “You’ve received an encrypted message”[11].
The external recipient can follow the link or the instructions to authenticate and read the message in the browser. They might use a one-time passcode or sign in with a Google/Microsoft account. Test both if possible.
Check that the content of the message is correct when they do see it (formatting, attachments if any).
Reply as the external user through the portal and ensure the internal user can read the reply (the reply will also be encrypted).
Policy tuning: If the external email did not arrive encrypted when it should have, double-check the conditions of your mail flow rule or DLP policy (maybe the test didn’t meet the condition exactly)[11]. Also verify the sender has the appropriate license (Business Premium assigned, etc.), since each sender needs a license for encryption to apply[11].
Everything working? Great. Now you can confidently roll this out knowing that protected emails actually reach their destination securely.
Step 6: User Awareness and Best Practices for Effective Use
Finally, effective use of Purview Message Encryption in an SMB isn’t just about configuration – it’s about incorporating it into your organisation’s workflows and culture. Here are some best practices and tips to get the most value:
Educate your team: Introduce the feature to your users. Let them know that some emails will now be encrypted and what that means. For example, explain that if they see a lock icon or a banner that says “This message is encrypted” in an email, it’s expected. Likewise, if they send an encrypted email to a client, that client may contact them about the extra step to open it – your user should be able to reassure them it’s for security. Microsoft provides user-friendly guides on how to https://support.microsoft.com/office/cb882d70-47c1-4da6-b7da-4bb6ee4893b4 and how to open one, which you can circulate. In Outlook on the web, the user just clicks Encrypt under the compose options; in desktop Outlook, they can select an Options > Permissions setting or use the Sensitivity button if labels are deployed.
Start with clear policies: When deciding what to encrypt, start with the most sensitive or regulated information. Don’t over-encrypt everything, or users might get frustrated with extra steps for trivial email. Common starting points are: encrypt all external emails (if your business frequently sends confidential data externally), or encrypt based on keywords (like “Confidential”, project names) or sensitivity types (like any email with a 9-digit number might be a TFN – treat accordingly). Make sure these rules are well-communicated. For instance, if you choose to automatically encrypt all external mail, users should know every email to a customer will have that behaviour (so they’re not caught off guard by a client’s questions).
Use branding for familiarity: You have the option to customise the branding of the encrypted message mail and portal – for example, adding your company logo and a friendly message. This is done via the Set-OMEConfiguration cmdlet (for the standard single template) or in the Purview portal for advanced branding. Consider doing this so that when an external recipient gets an encrypted mail, they see your company’s name or logo on the portal. It helps them trust that it’s legitimate and from you. (Branding is an included feature for one template; multiple templates require AME/E5.)
Integrate with DLP for compliance (if needed): As discussed, if you have compliance requirements (like HIPAA for health info, or need to protect credit card data under PCI DSS), leverage DLP policies. DLP can not only encrypt but also notify the sender (policy tip) that “This email was automatically encrypted because it contains XYZ”. This educates users over time on what triggers protection, and it provides an audit trail. In Business Premium, DLP for email is available[2][2] and can be a powerful ally in preventing data leaks.
Test periodically: Make encryption testing part of your routine, especially after any Exchange or compliance configuration changes. Ensure new employees have the appropriate license and can use encryption if needed.
Monitor and adjust: Check the reports in the Purview Compliance portal. There are audit logs and reports that can show label usage and DLP policy matches. For example, you can see how often your encryption rule triggers, or if any emails were blocked or had encryption removed. This can help fine-tune conditions (to reduce false positives, etc.). In an SMB, volume may be low, but it’s good to keep an eye that it’s working as intended.
Know the limits: Be aware of a few limitations: The maximum message size for an encrypted email (including attachments) is 25 MB[4]. This is lower than the regular Exchange Online limit for non-encrypted mail. Very large files might need to be shared via SharePoint/OneDrive instead of email if they can’t be sent due to this limit. Also, if you send to many recipients via BCC, note that in some cases those BCC addresses might be dropped before encryption (an edge case with certain routing scenarios)[4] – generally not an issue unless you do mass BCC mailings.
Advanced controls (if ever needed): If one day your SMB grows or has needs to revoke or expire emails, consider advanced message encryption capabilities. For instance, if an employee accidentally sent an encrypted email to the wrong external person, you as an admin could revoke access to that message (if you had Advanced Message Encryption via an E5 Compliance add-on)[9]. This isn’t available in Business Premium by default, but it’s something to be aware of as a potential upgrade if such scenarios are critical.
By following these steps and best practices, even a small organisation can leverage enterprise-grade email encryption with Microsoft 365 Business Premium. You’ll be keeping sensitive communications secure and meeting compliance obligations, all using tools that integrate natively with the email clients your users already use every day.
Conclusion: Microsoft Purview Message Encryption provides SMBs a robust yet user-friendly way to secure email communications. With Business Premium, you have all the needed components (Azure Information Protection P1, Exchange Online, etc.) to deploy it without additional cost. By carefully configuring the service – enabling it, creating sensible mail flow rules, and utilizing sensitivity labels – you can ensure that confidential information in emails is accessible only to authorised recipients, helping protect your business and your customers. Best of all, it achieves this in a manner that is largely seamless to end users and external partners once set up. In summary, Purview Message Encryption, when set up and used effectively, can significantly enhance your organisation’s data protection posture for email with minimal disruption and excellent integration into your existing Microsoft 365 environment.
Small and medium-sized businesses (SMBs) today face increasingly sophisticated cyber threats and complex data regulations[1][2]. Microsoft 365 Business Premium already provides a secure productivity foundation for SMBs – including Office apps, Teams, device management, and baseline security like Defender for Business[2]. However, until recently, achieving enterprise-grade compliance and data protection meant costly upgrades to enterprise licenses. To bridge this gap, Microsoft introduced the Microsoft Purview Suite as an add-on to Business Premium, bringing advanced compliance, risk, and data governance capabilities “without the enterprise price tag.”[2] This report details the features included in the Purview Suite for Business Premium, how an SMB can effectively use them, and why they provide real value to a typical SMB.
Business Premium Baseline vs. Purview Suite Add-on
Microsoft 365 Business Premium (base subscription) includes some core compliance capabilities, but with limitations. Out-of-the-box, Business Premium provides Microsoft Purview Information Protection (sensitivity labels and classification) and Office 365 Data Loss Prevention (DLP) policies for Exchange, SharePoint, and OneDrive[3]. It also offers basic eDiscovery for content search and simple legal hold, and basic audit logs (90-day retention) in the compliance portal[3]. These features are useful for controlling information in Microsoft 365 apps – for example, an SMB admin can apply a sensitivity label to mark a document as “Confidential” or set a DLP rule to prevent emails with credit card numbers from leaving the organisation[3]. However, advanced compliance features are not included in the base plan – endpoint DLP (monitoring files on devices), auto-labeling of content, advanced auditing, and insider risk tools all require higher-tier licensing[3].
By contrast, the Purview Suite for Business Premium is a comprehensive compliance add-on (approximately $10 per user/month) that unlocks Microsoft’s E5-level compliance and data governance features for Business Premium subscribers[4][5]. In essence, this add-on brings the full Microsoft Purview capabilities – comparable to what large enterprises get with Microsoft 365 E5 Compliance – into the SMB realm. Key additions include: advanced Information Protection & Governance, Insider Risk Management, Communication Compliance, eDiscovery (Premium), Audit (Premium), and more[4]. The table below highlights the difference between Business Premium’s built-in compliance features and those enabled by the Purview Suite:
Table 1. Key Compliance Features: Business Premium vs. Purview Suite
Compliance Feature
Business Premium (Base)
+ Purview Suite Add-on
Data Loss Prevention (DLP)
✔️ DLP for Exchange email, SharePoint, OneDrive[3]. No Teams chat or device-based DLP.
✔️ DLP across M365 (incl. Teams chats) and on endpoints (Windows devices)[1][4] – preventing sensitive data leaks via any channel.
✔️ Auto-classification of sensitive content using AI and templates; enforce encryption with Microsoft Purview Message Encryption; bring your own key via Customer Key for email/data encryption[2][2].
Insider Risk Management
❌ Not included.
✔️ Insider Risk Management dashboards and policies to detect suspicious activities (e.g. mass file downloads) by users and alert admins[2]. Privacy controls built-in to protect user identities during investigation.
Communication Compliance
❌ Not included.
✔️ Communication Compliance to monitor and flag internal communications (Teams, email) for harassment, sensitive info sharing, or policy violations[2] – useful for HR and compliance oversight.
Records & Data Lifecycle
✔️ Basic retention policies for email and files (manual setup)[2].
✔️ Advanced Records Management capabilities: classify files as official records, apply retention or deletion with event-based triggers and disposition reviews[2]. Ensures data is kept or disposed according to policy.
✔️ eDiscovery (Premium) – full case management, legal hold, Teams conversation threading, relevance analytics, and export tools for legal investigations[2]. Simplifies responding to lawsuits or internal investigations.
Audit Logging
✔️ Standard audit logs (90 days of log retention) for user/activity tracking.
✔️ Audit (Premium) – extended audit logs retained for 1 year with more detailed events (e.g. document read/access events)[2]. Critical for forensic investigations and compliance audits.
Compliance Manager
✔️ Access to Compliance Manager (basic level) with some assessments.
✔️ Full Microsoft Purview Compliance Manager suite with detailed regulation templates and improvement actions tracking[4]. Helps manage GDPR, HIPAA, ISO 27001 and other compliance requirements in one portal.
Notes: Business Premium includes Azure Information Protection Plan 1 (for manual labels) but not Plan 2 features like auto-labeling[5]. The Purview Suite effectively activates the Microsoft 365 E5 Compliance suite (Information Protection & Governance, Insider Risk, eDiscovery & Audit) on top of Business Premium[5][5]. These add-ons are available only to customers with Business Premium and are limited to 300 users (matching the SMB seat cap)[5][5].
Key Purview Suite Features and Effective SMB Use Cases
With the Purview Suite enabled, an SMB gains a broad set of tools to protect data, manage risks, and demonstrate compliance. Below, we explain each major feature area in detail and illustrate how it can be used in an SMB environment:
1. Information Protection & Data Loss Prevention (DLP)
What it is:Information Protection in Microsoft Purview allows organisations to classify and label data based on sensitivity. Labels (such as “Public”, “Confidential”, or “Highly Sensitive”) can be applied manually by users or automatically by the system, and can enforce encryption or access restrictions. Data Loss Prevention policies monitor and prevent the sharing of sensitive information across email, cloud storage, Teams chats, and even on endpoints.
How it helps: This is fundamental for compliance with data protection regulations (like GDPR or HIPAA) and for safeguarding intellectual property. For example, using Purview’s auto-labeling, an SMB can configure rules to automatically detect personal identifiers (like NI numbers or credit card data) in documents and emails and tag them as sensitive[2]. Once labeled, the data carries protections wherever it goes – “a ‘security tag’ stays attached to a document whether it’s stored in OneDrive, shared in Teams, or emailed outside the company”[2]. Policies tied to these labels can block oversharing of sensitive files, ensuring that, say, a file tagged “Confidential – Finance” can only be accessed by the finance team and not emailed externally[2][2].
Purview DLP extends these protections. It runs in the background to stop sensitive information from being shared with unauthorised people[2]. In practice, an SMB can enable templates (Microsoft provides many built-in sensitive info types, e.g. UK National Insurance number, credit card, health record, etc.) so that if an employee tries to email out a client’s personal data or copy it to a USB drive, the DLP policy will warn or block the action. This greatly reduces the likelihood of accidental data breaches. Even Microsoft Teams chats are covered – if someone tries to post confidential customer info in a Teams channel, the message can be prevented from sending (with a notice to the user) under a DLP rule.
Additional benefits: The Purview Suite also adds Microsoft Purview Message Encryption and Customer Key features. Message Encryption allows an SMB to send encrypted emails to any recipient (even outside the organisation) such that only the intended recipient can read it[2]. This is useful when sharing sensitive info with external partners or clients. Customer Key gives the business control over the encryption keys used for Microsoft 365 data, an extra layer of control often needed for strict regulatory compliance[2] (e.g. some finance or legal firms might require holding their own keys for data stored in cloud services). For an SMB dealing with confidential client data, these capabilities provide peace of mind that their emails and files are secure both inside and outside Microsoft’s cloud.
SMB use case example:A small medical clinic (50 staff) must comply with HIPAA privacy rules. Using Purview Information Protection, they label all files containing patient health information as “PHI – Highly Sensitive”. The labels auto-apply encryption, so even if a file is stolen or forwarded, it remains encrypted. DLP policies detect any attempt to email or Teams-chat those files outside the clinic’s domain and block it, preventing accidental leaks. The clinic’s admin also uses Customer Key to manage their own encryption keys for added control over patient data security. This way, even a modest-sized business can enforce data handling rules on par with large hospitals, avoiding compliance violations and costly data breaches.
2. Insider Risk Management & Communication Compliance
What it is:Insider Risk Management (IRM) in Purview uses behavioural analytics to identify risky activities by users within the organisation. It aggregates signals from across Microsoft 365 (file downloads, email forwarding, DLP alerts, etc.) to detect patterns that might indicate a potential insider threat – for example, an unhappy employee exfiltrating data before resignation. Communication Compliance is a related feature that specifically scans internal communications (Teams, Outlook email, Yammer) for policy violations such as harassment, sensitive data sharing, or other misconduct.
How it helps: Together, these tools enable an SMB to spot internal problems early and take action before they escalate. For instance, Microsoft Purview IRM can automatically flag when “an employee [is] downloading large volumes of files before leaving the company”[2] or if someone suddenly starts accessing files they never normally use. The system can generate an alert or case for a designated reviewer (e.g. the IT admin or an HR manager) to investigate. This is extremely valuable for SMBs who often have small IT/security teams – rather than manually combing logs, the tool surfaces suspicious behavior for them. Privacy controls ensure that these investigations don’t unnecessarily expose employees’ personal data; for example, usernames can be pseudonymised until a certain risk threshold is met[2], maintaining trust while enabling oversight.
With Communication Compliance, even without a dedicated compliance officer, an SMB can automatically monitor workplace communications for issues. Suppose a company has a policy against sharing customer credit card numbers in chat – a compliance policy can detect if anyone types a 16-digit number in Teams and flag it. Or, for HR purposes, it can detect profanity or harassment signals in messages, helping the business ensure a respectful workplace. These capabilities help SMBs meet obligations to prevent hostile work environments and protect confidential information in communications. If an issue arises (say, an allegation of harassment or a leak of confidential info via chat), the company already has a system in place to capture and review relevant communications, which is crucial evidence for internal investigations or legal proceedings.
SMB use case example:The owner of a 100-person design agency is concerned about employees taking client designs with them if they leave to a competitor. With Insider Risk Management, the owner sets up a policy to watch for massive file downloads or multiple deletions. Shortly after an engineer gives two weeks’ notice, Purview generates an alert: the employee downloaded an unusually high number of files and saved them to a personal cloud drive. The alert prompts the owner to intervene early, preventing potential IP theft[2]. In another scenario, Communication Compliance flags a series of messages in which a manager used inappropriate language toward a staff member. The HR team is alerted and can address the issue before it worsens, demonstrating the company’s proactive stance against harassment. These examples show how even without a large security staff, SMBs can effectively mitigate insider risks and uphold policies using Purview’s analytics.
3. Records & Data Lifecycle Management (Data Governance)
What it is:Records Management and Data Lifecycle features in Purview help organisations intelligently retain or delete information in accordance with laws and internal policies. This includes retention labels/policies (to keep data for a set period or indefinitely) and disposition rules (to review and approve deletion of important records). In essence, it is about governing the life cycle of data – from creation to disposal – to meet regulatory and business requirements.
How it helps: Many SMBs struggle with data governance – deciding what data to keep, for how long, and ensuring old or irrelevant data is properly disposed of. Purview’s capabilities give SMBs a framework to automate these decisions. For example, an SMB in a legal or financial field might be required to retain certain documents for 7 years. With Purview, they can apply a retention label (say “Finance – 7yr Retention”) to relevant folders or SharePoint sites. All content with that label will be retained for the specified period, overriding user deletions. Conversely, they might have a policy to delete emails that are older than 3 years to reduce liability. A policy can be set to auto-delete or archive such items, ensuring the company isn’t inadvertently hoarding data longer than allowed.
Purview’s Records Management goes further by letting you declare specific documents as “records” – meaning they are locked from editing or deletion. This is useful for preserving final contract documents or official meeting minutes that must remain unaltered for compliance. Disposition review workflows can be enabled so that when the retention period expires, a manager is notified to approve the deletion or extension of the record. All these actions are logged, providing an audit trail that the SMB can show regulators or auditors to prove compliance with data retention laws[2].
This level of automation and oversight is of real value to SMBs. It reduces the manual burden on staff to clean up files or ensure everyone is following policy. It also lowers risk – data that should be deleted isn’t accidentally kept forever (which could be a liability in a breach), and data that must be retained won’t be prematurely lost. For regulated SMBs (e.g., an accounting firm adhering to IRS or HMRC rules, or a government contractor following data retention regulations), these tools help avoid hefty fines by systematically enforcing the rules. Even for less regulated businesses, having good data hygiene saves storage costs and streamlines operations.
SMB use case example:A small investment advisory firm needs to comply with financial regulations that client records be kept for at least 6 years. They use Purview’s data lifecycle management to auto-tag all client correspondence and reports with a 6-year retention label[2]. This ensures even if an employee tries to delete an old email or document, it stays preserved until the retention period lapses. The system then flags it for disposition, and a compliance officer reviews and approves its deletion. At the same time, they have a policy to purge emails that are not client-related after 2 years, which Purview executes automatically. In their annual compliance audit, the firm can show auditors reports from Compliance Manager and Records Management demonstrating that all required data is retained and old data properly disposed of – giving a level of assurance (and proof) that would be hard to achieve manually in a small organisation.
4. eDiscovery (Premium) and Audit (Premium)
What it is:Microsoft Purview eDiscovery (Premium) is an advanced tool for legal discovery and internal investigations. It allows you to create cases, search across mailboxes, Teams, SharePoint, etc., apply legal hold to preserve data, and then review, tag, and export content responsive to a case. Microsoft Purview Audit (Premium) extends the standard audit logging by capturing more detailed user activity events and retaining audit logs for up to a year.
How it helps: These features ensure an SMB is “investigation-ready”[2]. In the event of a legal dispute, regulatory inquiry, or a serious internal incident, the company can respond quickly and thoroughly. With eDiscovery Premium, an SMB’s IT admin or legal delegate can centrally search all relevant data (emails, documents, chat history) related to a matter, without needing to involve expensive external consultants. They can place a legal hold on a former employee’s mailbox and OneDrive as soon as litigation is anticipated, stopping any deletion of content[2]. They can then review the collected data using built-in filters and analytics (for example, find all emails in a certain date range that contain a specific client name) and export the results for their lawyers. This is the same eDiscovery capability that large enterprises use; with the Purview add-on, a 50-person company gets it right inside their Microsoft 365 portal.
For internal investigations, eDiscovery is just as useful. Suppose there’s an internal fraud suspicion or an HR investigation – the tool allows a small HR or IT team to gather all necessary communications and files quietly and preserve evidence, rather than relying on ad-hoc forwarding of emails. Audit (Premium), on the other hand, is like a detailed activity log that can be critical in forensic analysis. Standard Microsoft 365 auditing might tell you that “User A deleted file X” but only retains such an event for 90 days. With Audit Premium enabled, audit records are kept for 365 days and include many more events (like when someone reads a file or replies to a message)[2]. For an SMB, this means if they discover a problem or receive an legal notice months after an incident, they can still retrieve the log data to understand what happened. It also means having evidence to demonstrate compliance or to trace the chain of events in a security incident.
SMB use case example:A 25-person architecture firm receives a client allegation that a staff member deleted important project files. With Audit (Premium), the firm’s IT admin can pull up a log showing exactly which files were deleted, when, and by whom, even if the event happened 8 months ago[2]. The audit reveals the files were actually deleted by a different user by mistake, helping resolve the dispute. In another scenario, a small retail company faces a wrongful dismissal lawsuit and must present employee communications as evidence. With eDiscovery Premium, the company quickly initiates a case, puts the ex-employee’s emails and Teams chats on hold, and searches across their data for any mentions related to the case. They export the relevant messages and documents to provide to their legal counsel[2]. Without Purview, an SMB might have to hire external eDiscovery services or might risk not finding all the needed information in time. By using the Purview suite, they not only save cost and effort, but also ensure no critical data slips through the cracks during an investigation[2].
5. Compliance Manager and Additional Tools
What it is:Microsoft Purview Compliance Manager is a dashboard and toolset that maps Microsoft 365’s controls to various regulatory requirements. It provides assessments for standards like GDPR, ISO 27001, PCI-DSS, etc., letting organisations track their compliance status and receive guidance on improving. Each action in Compliance Manager is a recommended control (for example, “Enable DLP for GDPR Article 32”) that can be checked off once implemented, contributing to an overall compliance score.
How it helps: For SMBs without dedicated compliance specialists, Compliance Manager serves as a virtual checklist and consultant. It translates complex regulations into a set of actionable tasks. An SMB can select relevant regulatory templates (e.g. GDPR if they handle EU personal data, or perhaps UK Cyber Essentials, or CCPA for California customers) and the tool will list out what they should do in Microsoft 365 to meet those requirements[4]. Many actions are technical (like configuring labels, DLP, MFA, etc.), which align well with the Purview and security features at their disposal. The Compliance Manager will also show what controls Microsoft covers (for cloud infrastructure) and what the customer needs to cover. Over time, the SMB can improve their compliance score in the dashboard, which quantifies their progress. This is very useful evidence for audits or even to show clients that the company takes compliance seriously.
Consider an SMB consulting firm aiming for ISO 27001 certification. Compliance Manager can provide the framework of controls needed and track that the firm has, say, set up an incident response plan, enabled required security features, done staff training, etc. It essentially centralises compliance project management. Additionally, since Compliance Manager is part of Purview, it integrates with the other features – as the SMB implements a DLP policy or creates a retention label, those can automatically satisfy certain compliance controls in the assessments.
Other supporting tools included in Purview Suite (and worth noting) are Microsoft Purview Data Map and Content Explorer which give insights into where sensitive data lives in your organisation, and Sensitivity Label analytics (through Purview reports) that show how labels and DLP are being used. While more auxiliary, these help an SMB discover their data landscape – for example, finding files containing personal data that they weren’t aware of, so that appropriate labels/policies can be applied.
Overall, Compliance Manager and related insights tools ensure that an SMB not only has the capabilities to protect and govern data, but also the visibility and guidance to use those capabilities effectively in pursuit of compliance.
Practical Use Cases for SMBs and Purview Solutions
SMBs in various industries can benefit from Purview Suite features in concrete ways. The table below summarizes some practical scenarios and how the Purview tools address them, providing value beyond what the base Business Premium offers:
Table 2. Common SMB Challenges vs. Purview Suite Solutions
SMB Challenge or Scenario
Purview Feature(s) Utilized
Benefit to the Business
Protecting personal data under regulations (e.g. GDPR, HIPAA) – The company handles customers’ personal information and must prevent leaks or improper access.
Sensitivity Labels and Encryption; DLP Policies (including auto-detection of PII)[2][2]; Customer Key for encryption control[2].
Ensures data privacy and compliance: Automatically classifies and protects personal data so it’s only accessible by authorised people. Prevents accidental sharing of sensitive info (e.g. blocking emails with credit card numbers)[2]. Helps avoid regulatory fines by enforcing GDPR/HIPAA rules through technology rather than relying on employee diligence.
Insider data theft or unauthorised access – A staff member might intentionally or unintentionally take sensitive files (intellectual property, client lists) out of the company.
Insider Risk Management analytics and alerts[2]; Audit (Premium) logs of file activities[2]; Endpoint DLP blocking files copied to USB or personal cloud[1].
Mitigates internal risks: Detects risky behavior early (e.g. bulk file downloads before an employee resigns) and notifies management[2]. Blocks common exfiltration routes (like copying files to flash drives). Detailed audit trails help investigate and prove if data was accessed or exported, acting as a deterrent and forensic tool.
Inappropriate or non-compliant communications – Need to ensure employees follow conduct policies and no confidential data is shared in chat.
Communication Compliance policies scanning Teams and Exchange chats[2]; DLP for Teams chat content.
Enforces compliant communication: Flags harassment, sensitive data sharing, or other violations in messages so management can intervene early[2]. Supports a respectful workplace culture and protects the company by addressing issues (like insider trading discussions or client data sent over chat) proactively.
Legal inquiry or investigation response – The business receives a legal hold notice or needs to gather records for a lawsuit/internal audit.
eDiscovery (Premium) case management, legal hold, content search[2]; Audit (Premium) for historical user actions[2].
Streamlined investigations: Allows the SMB to quickly find all relevant emails, documents, and chats across M365 and preserve them in-place[2]. Saves time and cost compared to outsourcing eDiscovery. Comprehensive log data (1 year) means critical evidence from months ago is available[2], increasing the chance of a successful response to legal or compliance inquiries.
Data retention and lifecycle requirements – The business must keep certain records for X years and clean out data that’s no longer needed.
Retention & Records Management policies with automatic deletion or retention[2]; Disposition review workflow.
Automated data governance: Ensures the company consistently complies with retention laws (e.g. deleting customer data after 7 years) without manual effort. Reduces storage bloat and risk by purging old data on schedule. Provides proof of compliant data handling if audited, via reports and audit trails[2].
As shown above, the Purview Suite’s features align closely with real-world challenges SMBs face in protecting data and meeting compliance obligations. In each scenario, having these tools in place can mean the difference between a minor issue and a major incident (or penalty). They bring a level of control and insight that smaller organisations typically lack, thereby significantly reducing risk.
Licensing and Cost Considerations
For SMBs evaluating the Purview Suite, cost and licensing are important factors. The Purview Suite for Business Premium is an add-on license that requires each user to also have a Business Premium subscription. Microsoft prices this compliance suite at roughly $10 USD per user/month (in addition to the $22 for Business Premium)[4][6]. There is also a combined Defender + Purview Suite bundle for $15 user/month that includes both the security and compliance add-ons, which is a further discount if an organisation needs both sets of capabilities[4][4]. All these add-ons are capped at 300 users, the same limit as Business Premium itself[5]. (Notably, Microsoft requires a minimum of 25 seats for these add-ons[2], so very small clients might need to purchase for 25 users even if, say, only 10 users are on Business Premium.)
Compared to other Microsoft 365 licensing options, the Purview Suite add-on is cost-effective for what it delivers. To get equivalent compliance features without this add-on, an SMB would typically have to upgrade to Microsoft 365 E5 or buy a bundle like “E5 Compliance” for each user. Microsoft 365 E5 (which includes the full Purview feature set along with advanced security and other tools) is priced at about $57 per user/month – nearly double the cost of Business Premium + Purview Suite (~$32). In other words, Business Premium + Purview (~$32) gives you the compliance power of E5 Compliance, at ~40% lower cost than a full E5 license[2]. Moreover, it avoids the need to transition to an Enterprise agreement; you can stay on the Business Premium (SMB) platform. Table 3 provides a quick comparison:
Table 3. Pricing and Plan Comparison
Plan / License
Key Compliance Features
Cost (USD)
Microsoft 365 Business Premium (Base)
Basic compliance included (manual labels, Exchange/SharePoint DLP, basic eDiscovery, 90-day audit)[3]. Suitable starting point for security & productivity.
+ Purview Suite Add-on (Business Premium with advanced compliance)
All Microsoft Purview features (Information Protection & auto-labeling, DLP across all channels, Insider Risk, Communication Compliance, Records Mgmt, eDiscovery & Audit Premium)[4][4]. Requires Business Premium as a prerequisite.
Includes advanced compliance (equivalent to Purview Suite) and advanced security, analytics, etc. No 300-seat limit (enterprise scale).
~$57 user/month
Pricing note: The above costs are indicative list prices as of 2025. Volume discounts or regional pricing may vary. The Purview Suite and Defender Suite add-ons were introduced in September 2025[5], so they are relatively new offers – positioned to give Business Premium customers a cheaper route to E5 capabilities.[4] Microsoft cites savings of ~47% compared to buying equivalent compliance features standalone, and up to ~68% savings when opting for the combined Defender+Purview bundle[1][2].
In summary, from a licensing standpoint, the Purview Suite add-on is highly compelling for SMBs who need these capabilities. It avoids the jump to expensive enterprise plans, and one can choose the compliance add-on, the security add-on, or both, depending on the business’s priorities (data protection vs. threat protection, or both)[4]. It’s also flexible – if an organisation outgrows the 300-user limit, they can transition to enterprise plans over time (Microsoft allows some grace for exceeding 300 users mid-term, but recommends moving to E3/E5 as you scale beyond SMB limits)[5][5]. For most typical SMBs under 300 employees, however, Business Premium plus Purview Suite will cover their needs at a fraction of the enterprise cost.
Why Purview Suite is Valuable to a Typical SMB
Traditional thinking might be that advanced compliance and risk management tools are only for big enterprises with dedicated compliance departments. Microsoft Purview Suite for Business Premium challenges that notion by tailoring enterprise-grade capabilities to SMB needs and constraints[2]. Here are key reasons a typical SMB should consider this add-on and the tangible value it provides:
Stronger Data Protection & Regulatory Compliance: Every business, large or small, is responsible for protecting sensitive data. Regulations like GDPR do not exempt small companies – in fact, SMBs can face devastating fines or reputational damage from a data breach. Purview Suite gives an SMB the ability to know exactly where their sensitive data is and control how it’s used. Features like auto-labeling and DLP act as an automated safety net against human error, which is a leading cause of data leaks. By ensuring that personal data isn’t mishandled, and by retaining the proper records, an SMB can confidently demonstrate compliance to regulators and customers[2][2]. This level of data governance can be a competitive advantage, as clients increasingly want assurance that their data is safe.
Internal Risk Reduction and Proactive Oversight: Small businesses often operate on trust, but risky insider behavior or simple staff mistakes can and do happen. Without tools like insider risk detection or communication monitoring, a lot can go unnoticed until it’s too late. The Purview Suite essentially gives an SMB an early warning system for internal risks – something that was previously out of reach without a security operations team. Stopping an insider-caused breach or catching a compliance issue early can save a company from financial loss and legal troubles. Even the presence of these controls can act as a deterrent (employees knowing that unusual downloads are flagged, for example, may be dissuaded from taking data). Ultimately, it helps foster a culture of accountability and security within the organisation.
Efficiency in Legal and Compliance Workflow: When an SMB without eDiscovery tools faces a lawsuit or audit, they often have to scramble – manually searching Outlook mailboxes, asking employees to forward emails, etc., which is inefficient and unreliable. With Purview eDiscovery, SMBs can respond to legal requests with the same rigor as a large enterprise, but without hiring extra personnel or consultants[2]. Everything needed (search, hold, export) is in one place, reducing turnaround time and ensuring nothing important is overlooked[2]. The Audit log improvements likewise mean an SMB can investigate incidents in-depth on their own. This self-service ability in compliance matters can translate to significant cost savings (avoiding external legal discovery costs) and better outcomes (since the company can find exonerating or relevant evidence quickly).
Integrated Solution (Less Complexity): SMB IT teams wear many hats. Introducing multiple point solutions for DLP, for archiving, for monitoring, etc., could increase complexity and management overhead. The Purview Suite, however, is integrated into the Microsoft 365 platform that the business already uses. The compliance center is unified – one login to manage labels, DLP, risk, eDiscovery, etc. – and the tools work together (for example, a single label can both encrypt a file and apply a retention period). This integration is invaluable for lean teams. It means no separate servers or third-party services to maintain, and it leverages the cloud intelligence Microsoft provides (like continually updated sensitive info detection, AI for classification). In short, Purview allows a small organisation to achieve a robust compliance posture without adding a lot of operational burden[4].
Enterprise-Level Assurance for Clients and Partners: Having Purview Suite features in place can be a selling point or requirement in some industries. For instance, a small law firm could win more corporate clients if it can demonstrate that it uses the same caliber of data protection tools as those clients do. In some cases, cyber insurance providers, customers, or partners may ask what data security measures an SMB has – being able to cite DLP, encryption, insider risk controls, etc., can positively impact those evaluations. Essentially, it lets an SMB say: “We operate with the same compliance standards as a Fortune 500, using Microsoft’s top-tier solutions”[2]. That builds trust and could open doors to opportunities that might otherwise be risky for a small company.
Future-Proofing (AI and Beyond): Looking ahead, SMBs adopting new technology like AI-driven cloud services also need to guard against new risks (for example, employees feeding confidential data into AI chatbots). Microsoft Purview is evolving to address these scenarios too – for example, integration with Defender for Cloud Apps can reveal if users are uploading sensitive data to unapproved AI apps[2]. By establishing a strong data governance foundation with Purview now, SMBs set themselves up to safely leverage tools like Microsoft 365 Copilot (the AI assistant that uses your organisation’s data). Well-defined labels and DLP policies mean Copilot will only access information that is allowed and won’t expose confidential data in its responses[1][1]. In short, Purview helps ensure that as the business grows and adopts new tools, its data remains well-managed and protected.
Bottom Line: For a typical SMB, the Microsoft Purview Suite add-on brings tangible, real-world benefits that go well beyond tick-box compliance. It helps protect the business’s crown jewels (its data), reduces the likelihood of costly incidents (breaches, lawsuits, fines), and does so in a way that is manageable for small IT teams and affordable for small-business budgets[2][2]. In an environment where SMBs are expected to meet many of the same data protection standards as large enterprises, Purview provides an equaliser – enabling “the same level of compliance and data protection as large enterprises but simplified for smaller teams and tighter budgets.”[2] By considering this add-on to their Microsoft 365 Business Premium subscription, SMBs can significantly elevate their compliance and risk management stance, turning what could be a vulnerability into a strength for the organisation.
Microsoft Purview’s Data Lifecycle Management (DLM) and Records Management solutions provide a comprehensive toolkit to help organisations keep the data they need and delete the data they don’t – critical for meeting regulatory requirements and managing information in Small and Medium-sized Businesses (SMBs)[1]. This report details the full range of features offered by these solutions, how to set them up and use them effectively in an Australian SMB context, and the licensing options (and costs in AUD) for Microsoft 365 Business Premium customers. Practical examples are included to illustrate common use cases like email retention policies, protecting sensitive documents, and automated labelling.
Features and Capabilities of Purview DLM and Records Management
Microsoft Purview Data Lifecycle Management focuses on broad retention and deletion policies for Microsoft 365 data, ensuring your organisation “keeps what you need and deletes what you don’t”[1]. Microsoft Purview Records Management builds on this by managing high-value or regulated content as formal records, with stricter controls and tracking[1]. Below is a comprehensive overview of their capabilities:
Data Lifecycle Management (Retention and Archiving)
Retention Policies (across Microsoft 365) – Create organisation-wide or location-specific retention policies to automatically retain or delete data at scale[1]. A single policy can cover multiple workloads (Exchange email, SharePoint sites, OneDrive, Teams chats, Viva Engage/Yammer, etc.) so that content is kept for a required period or removed when it’s no longer needed. These policies apply at the service or container level (mailbox, site, etc.), ensuring all items in those locations inherit the retention settings[1]. For example, an SMB could apply a 7-year retention policy to all Exchange mailboxes to meet record-keeping rules. (Note: For Teams messages, Business Premium supports retention ≥30 days by policy[2].)
Retention Labels (for exceptions) – In addition to broad policies, you can use retention labels for more granular control as exceptions. A retention label is applied to individual items (a specific document or email) and travels with that item, even if moved across locations[1]. Labels can have their own retention period and action (retain or delete), overriding any general policy. For instance, most content might be covered by a 3-year policy, but you could label certain files as “Keep 7 Years” individually. (Basic manual labelling is included in Business Premium[3] – advanced auto-labeling requires additional licensing, discussed later.)
Mailbox Archiving (Online Archive) – Archive mailboxes provide additional storage for email beyond the primary 50 GB mailbox. Business Premium includes Exchange Online Plan 2 capabilities, meaning each user gets a 50 GB archive mailbox and the option to enable auto-expanding archiving up to 1.5 TB[2]. This effectively gives users a long-term email storage solution separate from their active inbox. Admins can enable the archive for users in the Exchange admin center; once enabled, older emails can be moved automatically via retention or manually by the user to the archive folder. Archive mailboxes ensure older emails are retained without cluttering the main mailbox.
Inactive Mailboxes – When an employee leaves, you can retain their mailbox content without paying for an active license by leveraging inactive mailboxes. This is achieved by placing a retention policy (or hold) on the mailbox before the user’s account is removed; once the user license is removed, Exchange converts it to an inactive mailbox that preserves the data as per the policy[1]. Administrators and compliance officers can still search and access this mailbox data for compliance or legal needs[1]. For example, an SMB can retain ex-employee John’s emails for 7 years after departure by ensuring a retention policy covers his mailbox; after John’s account is deleted, his mailbox remains searchable as inactive. (No extra licence is required for inactive mailboxes, but only content covered by a retention policy or hold is kept.)
Importing PST Files – Purview DLM includes an import service for PSTs to help bring legacy email data into Exchange Online[1]. SMBs often have old Outlook PST archives on network drives; using the PST Import feature, you can upload these files (via network upload or drive shipping) and ingest emails into designated mailboxes or archives. This ensures historical emails are now governed by retention policies and searchable. This is useful during migration or to consolidate compliance data. (Business Premium users have rights to use the PST import service since it’s part of Exchange Plan 2 functionality[1].)
Records Management (Retention Labels & Records Lifecycle)
Retention Labels & Item-Level Retention – At the core of Records Management are retention labels that you create and configure with specific retention periods and actions. These can be published for users to manually apply in Outlook, SharePoint, OneDrive, etc., or applied by default to certain locations (e.g. a SharePoint library)[4][4]. Retention labels support flexible schedules – you can base retention on when an item was created or last modified, or even when a custom event occurs (see below)[5]. They also define what happens after the period: deletion, retention (do nothing), or even a review before deletion. Importantly, labels can be configured to mark content as a record or regulatory record (this adds controls; see next points). Publishing and using retention labels allows a consistent retention strategy at the item level, complementing broader policies[1]. For example, an “HR Record – 7 years” label could be applied to specific employee files, irrespective of where they reside. (Business Premium supports creating and publishing retention labels for manual use[3], while certain advanced settings noted below require additional licensing[2].)
Marking Items as Records – A retention label can be configured to declare content as a record. When an item is labelled as a record, certain actions on that item are blocked or restricted to preserve its integrity[5][5]. For example, if a SharePoint document or an email is marked as a record, users cannot delete it and, depending on settings, might be prevented from editing its content or metadata while the record label is in effect[5]. All modifications are logged for audit purposes[5]. This helps ensure important documents (legal, financial, etc.) remain unaltered and are retained for the required period. An SMB might use this for contracts or policy documents that must remain unchanged. By default, records in SharePoint/OneDrive can be unlocked by a Records Manager (to allow edits) and then relocked – this is called record versioning[5][5]. (Record declaration via labels requires an advanced compliance license – see Licensing section – as it’s not available with just Business Premium[2].)
Regulatory Records – A regulatory record is a special (more strict) type of record for the most sensitive needs. If a label is set as a regulatory record, nobody – not even a global administrator – can remove that label or delete the content before the retention period ends[5]. The retention period on such a label becomes locked (you cannot reduce it once set)[5]. This provides an immutable retention hold, often needed for certain regulated data. For example, in an industry where law mandates certain data must be absolutely undeletable for 7 years, a regulatory record label can enforce that. (Because of its irreversible nature, this option is disabled by default and must be enabled via PowerShell if needed[5]. Regulatory record labels also cannot be auto-applied and must be manually published and applied[5]. Using regulatory records requires E5-level licensing.)
File Plan & Label Management – Purview provides a File Plan interface to manage retention labels in bulk. It lets you import a spreadsheet of retention schedule details to create multiple labels at once, each with metadata like category, department, etc., and you can export the plan for analysis or documentation[1]. This is especially useful if your organisation already has a records retention schedule (e.g., from a policy document) – you can mirror that in Purview. The file plan also allows adding descriptive info to each label (like a reference to legal citation, record category, etc.) for tracking regulatory requirements[1]. An SMB with a simple retention schedule might not need bulk import, but a file plan can still document what each label is for. (The file plan import/export capability is considered an advanced feature – available with E5 compliance licensing[2].)
Event-Based Retention – With Records Management, retention can be triggered by real-world events. An admin can define an event type (e.g. “Employee Departure” or “Contract Closed”) and then, when such an event is registered in the system with a date and associated items, it will start the retention period for those items[5]. For example, you might have documents labeled to retain for 5 years after an employee leaves. When the employee leaves and an “Employee Departure” event is triggered for that person, all items tagged to that employee can start their 5-year countdown from that date. Common event scenarios include employee leaving, contract expiration, or project end. Event-based retention ensures the clock starts at a meaningful time rather than at creation or modification of the content[5]. (This feature requires advanced licensing – not available with just Business Premium[2]. It’s typically used alongside retention labels and events must be managed in the Purview portal.)
Disposition Reviews and Proof of Deletion – At the end of a retention period, instead of auto-deleting content sight unseen, Purview can require a disposition review. This means designated reviewers (e.g. a records manager or content owner) get to manually approve the deletion of each item labeled for review[1]. They can examine the content and decide to delete it, extend retention, or re-label it. This is especially helpful for records where human judgment is needed before disposal. All items that are deleted (whether via automatic expiration or after a review) are logged, and Purview provides proof of disposition – an audit trail showing what was deleted and when[1][5]. This proof can be exported for compliance evidence[5]. For example, an SMB in finance could have a disposition review for all client files prior to deletion, to ensure no required records are mistakenly purged. (Disposition review capability is an E5-level feature; Business Premium users would need an add-on to use it[2].)
Automatic Application of Labels – Rather than relying only on users to apply labels, Purview can auto-classify content and apply retention labels based on conditions. There are three main methods:
Sensitive info detection: e.g. automatically tag any document containing a credit card number or tax file number with a “Financial Data – Retain 7 Years” label.
Keyword or query-based: e.g. auto-apply a label to items containing specific keywords (like “Confidential” or project codes), or to specific content types or metadata properties.
Trainable classifiers: using AI models to identify content by concept (for example, a classifier that recognises resumes/CVs or contracts and applies a relevant label). Auto-labeling greatly eases policy enforcement – ensuring items are labeled even if users forget. For instance, you could configure Purview to automatically label any email with an attachment containing personal data as a record to be retained for compliance. However, these auto-labeling features require advanced licensing (Microsoft 365 E5 Compliance or the E5 Information Protection & Governance add-on)[2]. Business Premium includes the ability to create and use retention labels manually[3], but auto-apply (by sensitive info, keywords, or classifiers) is unlocked only with the add-on[2]. Auto-applying by default to all content in a location (e.g. default label for a SharePoint library) also falls under this requirement[2].
Monitoring and Analytics – Purview provides some monitoring tools for retention. In the Records Management section, you can see the label usage across your tenant and track items pending disposition, etc. Additionally, Activity Explorer (in the Data Classification section of Purview) can show label application events. These help admins ensure policies are in effect. (These are available with appropriate permissions; some advanced analytics might need higher SKUs, but basic audit of label actions is present with any retention usage[5].)
How These Features Work Together
In practice, Data Lifecycle Management features (like broad retention policies, email archive, etc.) are used to establish baseline data governance for all users, while Records Management features (retention labels, records, disposition) are used for specific content that needs special handling. For example, an SMB might use a retention policy to delete all emails older than 5 years (general cleanup) and use retention labels to mark certain emails (like executive correspondence or legal notices) to be retained for 10 years as records despite the general policy.
It’s important to note that retention policies and retention labels can coexist. If both apply to an item, the most retentive action wins (content won’t be deleted before the longest retention period applicable). Also, if something is marked as a record, that takes precedence and prevents deletion until the record schedule is up. This layered approach gives flexibility: use broad policies for general compliance, and labels for exceptions or special categories.
Setting Up Purview Compliance (Records & Retention) in an SMB
Implementing Microsoft Purview’s retention and records capabilities in an SMB environment involves a series of steps to configure the policies, labels, and ensure compliance processes are in place. Below is a step-by-step guide for setup and effective use, from planning through to monitoring:
Step 1: Define Requirements. Start by documenting retention requirements. This includes legal mandates (for example, Australian tax law might require keeping financial records for 7 years, and email records could fall under discovery rules) as well as business needs (e.g. “we want to delete old Teams chats after 1 year to reduce clutter unless flagged as record”). Classify the types of data you have and decide how long each type should be kept. Tip: It’s often better to involve leadership or compliance officers in this discussion to ensure the retention schedule aligns with business policy.
Step 2: Assign Compliance Roles. Next, ensure the right people have access to set up and manage Purview features. It’s recommended not to use the global admin account for day-to-day records management. Instead, add your responsible users to the Records Management role group or Compliance Administrator role in the Purview portal[4][6]. The Records Management role group grants the ability to manage retention labels, records, disposition, etc. (including adaptive scopes and disposition reviews)[4]. If someone should only view records info and not change it, use the View-Only roles (e.g. View-Only Record Management)[4]. For general retention policies without record functionalities, the Retention Management role would suffice[6]. In an SMB, this might just be one or two people (e.g. the IT admin and perhaps a compliance officer). Setting these roles up ensures audit accountability (actions are tracked under those roles) and limits risk.
Step 3: Implement Baseline Retention Policies. With requirements set, create broad Retention Policies in Purview for each type of location:
Go to Data Lifecycle Management > Retention policies in the Purview compliance portal.
Add a new policy, give it a name and description (e.g. “All Exchange Mailboxes – 7yr retain, then delete”).
Choose locations: you can target All or specific locations/users for Exchange email, SharePoint sites, OneDrive, Teams (chats or channel messages), etc., as needed.
Set the retention period (a number of days, months, or years, or choose “Forever” if no deletion is to occur). For example, 7 years = 2555 days.
Choose the action: e.g. “Retain items for 7 years, then delete permanently” or “Only delete items older than 7 years” or “Only retain (don’t delete after)” depending on your scenario. (Retain+delete means items are kept for at least 7 years and auto-deleted after; Delete only means items older than 7 years are purged even if not retained before, and Retain only means keep for 7 years then do nothing – user could delete after that point.)
If using advanced scopes (available with E5 add-on), you could create adaptive scope policies (for instance, apply a policy to all users in Department = X). But for most SMB scenarios, static scopes (all or select list of locations) are used. Business Premium supports static includes/excludes for policies[2].
Save the policy and let it deploy (can take up to 1 day to fully take effect across all content).
For example, you might configure:
Email: Retain all Exchange Online mail for 7 years and then delete. This means even if a user deletes an email, it’s preserved in a hidden Recoverable Items store until the 7 years are up (ensuring compliance), and at 7 years, the service will purge it[1].
SharePoint/OneDrive: Retain content for 5 years after last modification, then delete. This would clean up old files five years after they were last edited, which might suit an SMB’s data lifecycle.
Teams: Perhaps, if no compliance need to keep chats, you might just delete Teams messages after 1 year (no retention). Note: As mentioned, Teams chat retention policies for <30 days aren’t available for Business Premium (shorter periods require enterprise licenses)[2], but 30 days or more is fine. Many SMBs choose 1 year or more for Teams if they retain at all, due to these limitations and to preserve conversation history for a while.
Step 4: Create Retention Labels (and File Plan). Now address the more specific needs via retention labels:
In the Purview portal, go to Records Management > File plan (Labels). You can create labels one by one here or import a CSV file with multiple label definitions if you planned them externally.
For each retention label, define the name (e.g. “Legal Hold – 10yr record”, “General Docs – 3yr”), a description for admins and users (so it’s clear when to use it), and the retention settings.
Choose if the label will mark the item as a record or regulatory record (if you have advanced licensing and truly need regulatory-level immutability).
Set the retention duration (finite number or “Never delete” if it should be kept indefinitely).
Set when the retention period begins: either when the content was created, last modified, or when an event is triggered (if using event-based retention)[5].
Select the action after period: delete the content automatically, or trigger a disposition review (for a human to decide at that time)[1]. If neither, you can just have the label indicate “ensure it’s retained for at least X years” without auto-deletion.
(Advanced) Optionally, configure what happens after deletion – e.g. you can have it auto-apply a different label after deletion (relabeling), but this is a niche scenario and requires higher licensing.
If using the file plan import, fill in the template with all labels and their settings and import in bulk[1].
Once labels are created, you might organise them in the file plan with categories or reference IDs if useful, but that’s optional metadata for administrative ease.
For SMBs, you might only need a handful of labels. Example set: – “Standard Record – 7 years”: marks as record, 7-year retention from creation, auto-delete, with disposition review enabled (so someone checks before final deletion). – “Financial Record – 7 years (Regulatory)”: marks as regulatory record (for things like tax or financial statements that must not be altered), 7-year retention from year-end, auto-delete without review. – “Transient – 1 year delete”: not a record, just a label to tag data that should purge sooner (could be applied to trivial files or communications). – “Permanent”: perhaps a label for things that should be kept indefinitely until manually reviewed (retain only, no deletion). Use sparingly – “keep forever” can be risky unless truly needed.
Step 5: Publish and Apply Labels. After defining labels, they must be published so they become usable:
Create a Retention label policy (in Records Management > Label policies). Add the labels you want to deploy, then choose the locations: you can select all Exchange mailboxes, or specific SharePoint sites, etc., or even specific users’ OneDrives or specific Microsoft 365 Groups. For broad deployment, you might publish to “All” for simplicity (so the label is available everywhere content lives)[4].
Once published (this can take up to a day to appear to end users), users will see these labels in the Compliance or Retention settings of Outlook, SharePoint, OneDrive, or Office apps (depending on the app, they might appear under File -> Info for documents, or in Outlook’s Assign Policy menu).
If you have labels you want automatically applied and you have the license for it:
Set up an auto-labeling policy (under Records Management or Information Governance, “Auto-apply retention label”). Here you choose a label and define the conditions (specific words, a built-in sensitive info type like “Credit Card Number”, or choose a trainable classifier if one is prepared)[2].
Alternatively, to auto-apply by location, you can configure default label on a SharePoint document library or to all content in an Exchange folder. For SharePoint libraries, this is done in the library’s settings (requires that the label is published to that site). For Exchange default folder (like default for Inbox), this can be done via PowerShell or the Compliance portal’s label policy settings. Both are considered “auto-application” methods that require the advanced license as well[2].
Make sure to inform users (if relevant) about how to manually apply labels. Typically, for SharePoint/OneDrive, users can right-click a document > Details pane > Apply label; in Outlook, they can assign retention labels to emails if you enable that in Outlook’s compliance settings.
Step 6: Enable Archive Mailboxes. In the Exchange Admin Center (EAC), check under Recipients > Mailboxes for each user that the Archive is enabled. For Business Premium, the archive mailbox feature is available[2], but it may not be auto-on. You can multi-select mailboxes and click “Enable archive” to turn it on for all. Once enabled:
Optionally enable auto-expanding archiving (via PowerShell or the Purview portal’s Exchange settings). This allows mailboxes to grow beyond 100 GB by automatically adding additional storage as needed[2].
Ensure your users are aware of how the archive works – by default, nothing moves to archive automatically unless you use a Retention Tag (an older Exchange feature) or a retention policy that explicitly moves items to archive after X days. Purview retention policies do not move emails to archive (they only delete/not delete). If you want messages to move to archive after, say, 2 years, you must configure an MRM policy with an archive tag (this is separate from Purview retention and configured in Exchange’s Messaging Records Management). Many organisations skip this – archive is often used as user-driven storage or for auto copying old mail via Microsoft’s Default Archive and Retention policy (which by default moves mail >2 years to archive). Verify or adjust those settings in Exchange if needed[6][6].
With archiving enabled, if your retention policy is “delete after 7 years”, users can still offload older emails to archive (which is still subject to the retention policy) but at least their primary mailbox stays smaller. Inactive mailbox functionality also relies on the mailbox having had retention in place (with archive, it preserves everything in primary + archive).
Step 7: (Advanced) Configure Event-Based Retention. If you decided some content should start the clock based on events like employee leaving or contract closure, set up event types:
In Purview’s Records Management > Events, create a new Event Type (e.g. “Employee Departure”). Provide a description and perhaps link it to a particular retention label if that label will use this event.
Ensure your retention label from Step 4 is configured to start on that event.
When an actual event happens (say Alice leaves on Oct 1, 2025), you need to trigger the event. This can be done by going to the Events page, creating a new Event instance for “Employee Departure”, date = Oct 1, 2025, and add references to Alice’s content (likely her mailbox or OneDrive URL). You can also do bulk via PowerShell if multiple items. After submission, the service marks those items so that their retention period starts counting from Oct 1, 2025.
From then, those items will behave as per their label (e.g. retain 3 years from that date, then delete).
If using this for many users frequently (like every time someone leaves), it can be a bit of overhead without automation – larger organisations integrate HR systems to call the compliance API, but SMBs might handle events manually on a case-by-case basis.
Step 8: Import Legacy Data (if needed). Many SMBs migrating to Microsoft 365 have old data silos:
To import PST files: In Purview > Data Lifecycle Management > Import, use Network upload for PST. This provides an Azure Storage SAS URL to upload PSTs. You upload them (e.g. using Azure Storage Explorer or AzCopy tool). Then you use the Import wizard to map each PST to a target mailbox (either to the primary mailbox or archive of a user). Once you finalize, Microsoft will ingest those PSTs into the mailboxes[6].
After import, those emails become part of Exchange Online and your retention policies will include them (e.g. if you imported 10-year-old emails and your policy deletes after 7 years, those older-than-7 emails might get deleted soon after import unless you adjust policies for them – consider that in planning).
For old documents (if coming from file servers), you might manually migrate them to SharePoint/OneDrive libraries and then apply appropriate retention labels/policies to those libraries.
The goal is to bring all important data under Purview management, so you’re not leaving things out and uncategorised.
Step 9: Monitor and Refine. With everything deployed:
Regularly check the Disposition tab in Records Management if you configured any labels with disposition review. This will list files or emails whose retention period ended and are pending approval for deletion. Reviewers can go in, inspect content, and approve or postpone deletions. Ensure this process is followed so records don’t sit indefinitely awaiting review.
Use audit logs to verify retention actions. For instance, you can search the Unified Audit Log for events like ”Retention label applied” or ”Record deleted”.
Spot-check that users are indeed seeing the labels. Go into a few SharePoint sites or Exchange mailboxes and verify the labels appear in the UI.
Over time, gather feedback: Are any important items getting deleted too soon? (If so, you may need to prolong retention or ensure those items get a special label.) Are you keeping too much redundant data? (Maybe shorten a policy if storage or legal considerations warrant.)
Also ensure new content locations are covered – e.g. if a new SharePoint site is created and your policy was not set to “All sites” but specific ones, you’ll need to update it or change scope.
By following these steps, an SMB can methodically configure Microsoft Purview to manage data lifecycle and records in line with its needs. The key is to start with broad strokes (policies) then refine with labels where needed. This hybrid approach ensures compliance (nothing important is lost) while also enabling data minimisation (old stuff is cleaned up when permitted).
Licensing Considerations and Pricing (AUD)
Microsoft 365 Business Premium includes core compliance features, but some of the advanced capabilities of Purview Records Management require additional licensing. Below we outline what is included in Business Premium versus what requires an upgrade or add-on, and provide a comparison of licensing options relevant to retention and records management. All prices are in Australian dollars (AUD) and are per user per month (estimated retail costs).
Pricing notes:A$32.90 is the approximate price per Business Premium licence per month (excluding GST) as of early 2024[7]. The add-on prices (~A$13 and ~A$18) are approximate conversions/estimates based on typical Microsoft USD pricing ($8–$12 USD) and available Australian pricing info, as Microsoft’s MSRP in AUD can vary. These add-ons are purchased on top of Business Premium for only those users who need the capabilities.
Included with Business Premium: Microsoft 365 Business Premium covers many standard compliance features out-of-the-box. For data retention, a Business Premium user already has rights to:
Exchange Online Archiving (Plan 2) – i.e. 50GB archive mailbox and auto-expand up to 1.5TB[2] (this is part of the Exchange license within Business Premium).
Core retention policies – You can create organisation-wide or location-based retention policies covering Exchange, SharePoint, OneDrive, Teams, etc. Business Premium (like Office 365 E3) allows these baseline policies[2][3].
Manual retention labels – You can create and publish retention labels for users to manually apply, and use them to enforce retention or deletion (except the settings that specifically need E5). Basic label usage is included[3].
In-place records management (basic) – Essentially, you can implement a rudimentary records management by instructing users to not delete certain content and using retention policies to protect it. However, the explicit “Declare as record” functionality via label is not active without E5.
Data Loss Prevention (DLP) for emails & files – (Though not our focus here, note that Business Premium includes DLP for Exchange, SharePoint, OneDrive – this complements retention by preventing improper sharing of info[3].)
Sensitivity Labels (AIP P1) – Again tangential, but Business Premium includes sensitivity labels (without auto-label) which is separate from retention labels but often used in the same Purview portal for classifying data.
In short, Business Premium provides retention policies and manual labeling – the fundamental tools to implement a retention strategy[3]. What it lacks are the more automated and advanced governance capabilities (which are typically reserved for E5 Compliance or the add-on).
Add-On: Microsoft 365 E5 Information Protection & Governance – This is a specific add-on licence that “offers the same information protection and governance capabilities as E5 Compliance, but at a lower cost” (it excludes things like eDiscovery, Audit, Insider Risk)[3]. By adding this to a Business Premium user, you unlock Purview’s advanced retention and records management features, namely:
Auto-apply retention labels based on sensitive info or keywords[2].
“Priority” retention policies (to override other policies in special cases)[2].
For an SMB, the most relevant of these are auto-labeling, record immutability, event triggers, and disposition – all enabled by this add-on. The E5 Info Protection & Governance add-on is generally cheaper than the full E5 Compliance; as of 2023 its global list price was about US$8 user/month (versus US$12 for E5 Compliance), which we’ve estimated around A$12–13.
Add-On: Microsoft 365 E5 Compliance – This is a superset that includes all compliance features: everything in Info Prot & Gov plus things like Insider Risk Management, Communication Compliance, eDiscovery (Premium), Audit (Premium), Customer Key, etc. If an SMB also needs those (which is less common unless in highly regulated industry or legal proceedings heavy), they might opt for the full E5 Compliance. Price is roughly ~A$17–18 per user/month (ex GST) in Australia for commercial customers (it can be purchased as an add-on to Business Premium or Office 365 E3, etc.)[8]. It requires that the user already has a base licence (which Business Premium satisfies).
For the scope of Records Management and Data Lifecycle, either the E5 Compliance or the E5 Information Protection & Governance add-on will give the needed features. The Info Prot & Gov add-on is more cost-effective if you don’t need the other fluff. Microsoft documentation notes that many customers are unaware of the IP\&G add-on, but it can “reduce costs by about $5 per month per license” for the same retention features[3].
Below is a feature-by-feature breakdown of what Business Premium offers versus what the E5 Compliance add-on provides, specifically for Purview retention and records functions:
Table: Purview Retention/Records features in Business Premium vs E5 Compliance Add-on. (✔ = available, ❌ = not available)
Key Takeaways:
With Business Premium alone, you can do a lot: implement retention policies and use retention labels manually. This covers fundamental compliance needs for many SMBs (e.g. keep email 7 years, allow manual tagging of a few records).
By adding the E5 Information Protection & Governance or E5 Compliance add-on for specific users (e.g. those managing records or those mailboxes that need auto-classification), you gain the automation and stricter record controls. This is often worth it if your regulatory environment is complex or you have a high volume of content to manage.
If you only need one or two features (like just auto-labeling), you still have to purchase the whole add-on – Microsoft doesn’t sell these capabilities standalone. However, you can choose to license just a subset of users. Only users who ”benefit from the service” need to be licensed[2]. For example, if only the compliance officer is doing disposition reviews, and records labels are applied tenant-wide (affecting all mailboxes), technically all mailboxes with a record label benefit from Records Management features, so Microsoft’s guidelines suggest those users should be licensed. It can be a grey area, but generally for compliance features, if a user’s content is subject to an advanced policy (like auto-label or record), that user should have the add-on. In practice, some SMBs license just the admin and a few key users, but formally one should license everyone whose data is being governed by those advanced features[2].
Finally, Microsoft offers a 90-day free trial of Purview add-ons for up to 25 users[4]. It’s a great way for an SMB to test out auto-labeling, event retention, etc., before deciding to purchase the add-on. You can activate this trial in the Compliance admin center (look for the Purview solutions trial banner).
Practical Examples and Use Cases for SMBs
To illustrate how Microsoft Purview’s Records Management and Data Lifecycle features can be used in a small or mid-sized business, here are a few common scenarios:
Managing Email Records (Compliance with Law): An Australian accounting firm with 20 staff uses Exchange Online (via Business Premium) and is obligated under tax law to retain correspondence for 7 years. They configure a 7-year Exchange retention policy to cover all mailboxes[1]. This means if an accountant accidentally deletes an email about a client’s tax return, the email remains in the recoverable items for 7 years and can be produced if needed. After the 7 years, Exchange auto-deletes it, so the firm isn’t keeping data longer than necessary. They also enable online archives for all users to ensure mailbox size isn’t an issue over that period. In practice, this has made compliance automatic – users continue using email normally, and the system transparently takes care of retention. If a legal discovery request arises, the admin can search the mailboxes knowing even deleted mails within 7 years will be available.
Securing Important Documents as Immutable Records: A construction company often deals with multi-year projects and legal contracts. They use SharePoint to store project documents. For each new project, the project contract and blueprint files are labeled as records using a retention label (e.g. “Project Contract – 6yr Record”). Once applied, no one at the company can delete those files or alter their contents[5]. Employees can still read them and even update minor metadata if allowed, but the critical content is locked. After 6 years (starting from project completion date, set via an event trigger), a records manager will get a notification in the Purview portal to review the contract file. Only upon approval will the document be deleted, and a proof of deletion is logged. This process protects the documents from tampering – which is crucial if there’s a future dispute about what was agreed in the contract – and it also means the company isn’t holding onto contracts indefinitely. They have a defensible deletion process after 6 years, reducing storage and liability.
Cleaning Up Chat Data: A 50-person tech startup uses Microsoft Teams heavily for daily communication. Not all those chats need to live forever (and they could pose a risk if kept). With Business Premium, they set a Teams retention policy to delete Teams channel messages and chat messages after 1 year. They chose 1 year since Business Premium allows ≥30 days for Teams retention[2] and they figured one year is enough history for any practical business need. Now, any Teams message older than 365 days is automatically removed. Users see a notice if they scroll back in a chat that older messages have been deleted due to policy. This keeps their Teams environment more performant and minimizes old irrelevant messages. They combine this with a policy that SharePoint (where files shared in Teams channels reside) retains files for 3 years, ensuring that any file shared isn’t lost too soon. Essentially, routine conversation is cleaned up, while important files or discussions can be saved separately if needed.
Automated Labelling of Sensitive Files: A small law firm deals with sensitive case files in Word and PDF format. They created a trainable classifier in Purview to detect “legal case files” based on samples, or they could simply use a query (Subject: Case# OR contains words like 'Privileged'). With the E5 Compliance add-on, they set up an auto-label policy: any document in their SharePoint or OneDrive that matches the pattern of a legal case file is automatically tagged with a “Legal – Retain 10 years” label and marked as a record. Now lawyers don’t have to remember to tag each file; if a paralegal creates a new file and it has indicators of being a case document, within a day or so, Purview will label it. This label prevents premature deletion – even if someone tried to delete it, retention will keep it for the period. It also helps the firm demonstrate to clients that their data management is strict. (Before using auto-label, they often relied on manual practice which was hit-or-miss. Now it’s consistent.)
Lifecycle for Employee Data (Event-based): A human resources consulting company needs to purge personal data when it’s no longer needed. They keep employee data for 2 years after an employee leaves, per their data retention policy. They use event-based retention to manage this: All employee files in a particular SharePoint folder (“Alumni Records”) are labeled “Former Employee – 2yr”. The retention is configured to start when an “Employee Departure” event is triggered for that employee. When an employee leaves, the HR manager goes into Purview > Events, triggers “Employee Departure” for that person effective on their leave date. Now all documents related to that employee (which are labeled accordingly) will be retained for exactly 2 years from that date, then subject to deletion. Purview will list them for disposition, and the HR manager can approve deletion knowing the policy was to keep for 2 years. This ensures the company isn’t holding personal data longer than allowed, aiding GDPR-like compliance and saving space. Without event-based capability, they would have to calculate dates manually or keep a spreadsheet – the system now automates it. (This requires the add-on for the event trigger functionality.)
Proving Compliance via Disposition Logs: A medical clinic (SMB with 15 staff) must delete certain health records 8 years after a patient’s last visit. They tag those in Teams or SharePoint with appropriate labels. When the time comes, they use disposition review to double-check and then delete the records. Purview then provides a disposition report (CSV or Excel) that lists each item deleted, with its label and date[5]. The clinic’s compliance officer downloads this report annually and files it. If ever audited by health regulators, they can produce this report as evidence that, for example, “All patient records from 2015 were indeed disposed of in 2023 as per our policy.” This kind of audit trail is something they never had when using shared folders on a server – it adds confidence and transparency to their data lifecycle management.
Each of these scenarios demonstrates how Purview’s tools can be applied in a practical, business-centric way. For SMBs, the strategy is often to start simple (broad strokes like email retention) and progressively layer on more controls (like records and auto-labeling) as needed. Microsoft Purview’s integration into Microsoft 365 means even smaller organisations can leverage enterprise-grade compliance features – tailoring them to ensure regulatory peace of mind without onerous manual processes.
References:
The information and best practices above were based on Microsoft’s official documentation and licensing guidance, including Microsoft Learn articles on Purview Records Management[5][1] and Data Lifecycle Management[1], as well as the Microsoft 365 licensing guide for security & compliance[2][2]. Pricing references were drawn from Australian price lists and partner sources[7][3]. All feature descriptions correspond to capabilities as of September 2025. Always consult the latest Microsoft documentation for updates, especially since Purview features (and licensing) evolve regularly.
Securing Data in the Age of AI – Features, Setup, Policies, Licensing & Use Cases
Introduction
Adopting generative AI tools like Microsoft 365 Copilot and ChatGPT brings powerful productivity gains, but also new data security challenges[1]. Organisations need not choose between productivity and protection – Microsoft Purview’s Data Security Posture Management (DSPM) for AI is designed to let businesses embrace AI safely[2]. This solution provides a central dashboard in the Purview compliance portal to secure data for AI applications and proactively monitor AI use across both Microsoft and third-party AI services[2]. In an SMB environment, where IT teams are lean, Purview DSPM for AI offers ready-to-use policies and insights to balance the benefits of AI with robust data governance[1][2].
Overview of DSPM for AI Features
Microsoft Purview’s DSPM for AI builds on existing data protection capabilities (like information protection and DLP) with AI-specific monitoring and controls. Key features include:
Sensitivity Labelling: Integrates with Microsoft Purview Information Protection to classify and label data (e.g. Confidential, Highly Confidential)[1]. Labeled content is respected by AI tools – for example, admins can prevent Copilot from processing documents tagged with certain sensitivity labels[3]. This ensures that AI systems handle data according to its sensitivity level.
Auditing & Activity Logs: Leverages Purview’s unified audit to capture AI-related activities[3]. All interactions with AI (prompts, responses, file accesses by Copilot, etc.) can be logged and reviewed. Auditing is enabled by default in Microsoft 365; once Copilot licenses are assigned, AI interaction events (including prompt and response text) start appearing in the audit logs and DSPM reports[2][3].
Data Classification & Discovery: Automatically discovers and classifies sensitive information across your data estate. DSPM for AI performs real-time data classification of AI interactions[1] – for example, if a user’s Copilot prompt or ChatGPT query contains credit card numbers or customer PII, Purview will detect those sensitive info types. This continuous classification provides insight into what sensitive data is being accessed or shared via AI[1].
Risk Identification & Assessment: Identifies potential data exposure risks (e.g. oversharing or policy violations) related to AI usage. Purview runs a weekly Data Risk Assessment on the top 100 SharePoint sites to flag if sensitive data in those sites might be over-exposed or shared too broadly[2]. It surfaces vulnerabilities – for instance, detecting if a confidential file is open to all employees or if an AI app accessed unusually large volumes of sensitive records[2][1]. These risk insights allow proactive remediation (such as tightening permissions or adding encryption).
Access Permissions Evaluation: DSPM for AI evaluates how AI apps access data and who has access to sensitive information. It correlates sensitivity of data with its access scope to find oversharing – e.g. if an AI is pulling data from a SharePoint site that many users have access to, that could indicate unnecessary exposure[2]. By analyzing permissions and usage patterns, Purview can recommend restricting access or applying labels to secure content that AI is touching.
Proactive Monitoring & Alerts:Real-time monitoring detects when users interact with AI in ways that break policy[1]. Purview DSPM includes one-click, ready-to-use policies that automatically watch for sensitive data in AI prompts and trigger protective actions[2][1]. For example, if an employee tries to paste sensitive text into an AI web app, a DLP policy can immediately warn or block them[3]. This immediate detection and response helps stop data leaks as they happen, not after the fact. Administrators also get alerts and actionable insights on potential incidents (e.g. a spike in AI usage by one user might flag a possible data dump)[1].
Policy Recommendations & One-Click Policies: The DSPM for AI dashboard provides guided recommendations to improve your security posture[2]. It can suggest enabling certain controls or creating policies based on your environment. In fact, Microsoft provides preconfigured “one-click” policies covering common AI scenarios[2]. With a single activation, you can deploy multiple policies – for instance, to detect sensitive info being shared with AI, to block Copilot from processing labeled confidential data, or to monitor risky or unethical AI use[3][3]. These default policies (which can later be tweaked) accelerate the setup of robust protections even for small IT teams.
Compliance and Regulatory Support: Purview DSPM for AI is built with compliance in mind, helping SMBs uphold regulations like GDPR, HIPAA, or Australian Privacy laws even when using AI. It integrates with Microsoft Compliance Manager to map AI activities to regulatory controls[2]. For example, it provides a template checklist for “AI regulations” so you can ensure you have the proper auditing, consent, and data handling measures in place for using AI[2]. It also supports features like retention policies and records management for AI-generated content, and can capture AI interactions for eDiscovery in case of audits or legal needs[3]. In short, it extends your compliance program to cover AI usage, with continuous monitoring and recommendations to maintain compliant data handling and storage practices[2].
These features work together to ensure AI applications adhere to your organisation’s security policies and regulatory standards[1]. With DSPM for AI, an SMB gains visibility into how tools like Copilot, ChatGPT, or Google’s Gemini are accessing and using company data, and the means to prevent misuse or leakage of sensitive information in those AI interactions[1].
Deployment and Configuration in an SMB Environment
Setting up Microsoft Purview DSPM for AI in a small or mid-size business involves enabling the feature, meeting a few prerequisites, and then configuring policies to suit your needs. Below is a step-by-step guide for SMBs to get started and use DSPM for AI effectively.
Step-by-Step Setup Instructions
Step 1: Prepare Licensing and Admin Access. First, verify that your Microsoft 365 tenant has the appropriate licenses for the features you plan to use (see Licensing section below for details). At minimum, Business Premium includes core Purview features like sensitivity labels and DLP[4], but advanced AI-specific capabilities (like content capture and insider risk analytics) require the Purview compliance add-on or an E5 licence[5]. Ensure you are assigned a role with compliance management permissions (e.g. Compliance Administrator) in Entra ID (Azure AD), since DSPM for AI is managed from the Purview compliance portal[2].
Next, double-check that Unified Audit Logging is enabled for your organisation. In new Microsoft 365 tenants, auditing is on by default, but it’s worth confirming via the Compliance Center settings[2]. Audit data is crucial because many DSPM for AI insights (like Copilot prompt/response logs) rely on audit events being recorded[3].
Step 2: Enable Auditing (if needed) and Onboard Devices. In the Purview portal (https://compliance.microsoft.com), navigate to Solutions > DSPM for AI[2]. The overview page will list any prerequisites not yet met. If audit is off, turn it on following Microsoft’s instructions (this may take a few hours to take effect)[2].
For monitoring third-party AI websites, you need to set up endpoint monitoring: this means onboarding user devices to Purview and deploying the Purview browser extension. Onboard devices – typically Windows 10/11 PCs – via the Microsoft Purview compliance portal or Microsoft Defender for Endpoint, so that they can report activity to Purview[3]. Onboarded devices allow Purview’s Endpoint DLP to inspect content users might copy to external apps. Then deploy the Purview browser extension (available for Edge and Chrome) to those devices[2]. This extension lets Purview detect when users visit or use known AI web services. It’s required for capturing web activities like someone pasting text into ChatGPT in a browser[3]. On Microsoft Edge, you may also need to set an Edge policy to activate the DLP integration[3]. For example, once devices and the extension are in place, Purview can detect if a user tries to input a credit card number into an AI site and trigger a DLP action[3].
Step 3: Access DSPM for AI and Activate One-Click Policies. With prerequisites done, go to the DSPM for AI page in the Purview portal. Ensure “All AI apps” view is selected to get a comprehensive overview[2]. You’ll see a “Get started” section listing immediate actions. Microsoft provides built-in one-click policies here to jump-start your AI protection[2]. For instance, an “Extend your insights” button will create default policies to collect information on users visiting third-party AI sites and detect if they send sensitive info there[2]. Click through each recommended action – such as enabling AI activity analytics, turning on AI DLP monitoring, etc. – and follow the prompts to activate the corresponding policies.
Behind the scenes, these one-click steps deploy multiple Purview policies across different areas (DLP, Insider Risk Management, Communication Compliance, etc.) pre-configured for AI scenarios[3]. For example, activating “Extend your insights” will create:
a DLP policy in Audit mode that discovers sensitive content copied to AI web apps (covering all users)[3], and
an Insider Risk Management policy that logs whenever a user visits an AI site[3].
Similarly, other recommended one-click actions will set up policies like “Detect risky AI usage” (uses Insider Risk to flag users with potentially risky prompts or AI interactions)[3], or “Detect unethical behavior in AI apps” (a Communication Compliance policy that looks at AI prompt/response content for things like sensitive data or code-of-conduct violations)[3]. Each policy is created with safe defaults, usually initially in a monitoring (audit) mode. You can review and fine-tune them later. Allow about 24 hours after enabling for these policies to start gathering data and populating the DSPM for AI dashboards[2].
Step 4: Configure Sensitivity Labels and AI-specific DLP Rules. A crucial part of protecting data in AI is having a data classification scheme in place. If your organisation hasn’t defined sensitivity labels, DSPM for AI can help you create a basic set quickly[2]. Under the recommendations, there may be an option like “Protect your data with sensitivity labels” – selecting this will auto-generate a few default labels (e.g. Public, General, Confidential, Highly Confidential) and publish them to all users, including enabling auto-labeling on documents/email using some standard patterns[2]. You can accept these defaults or customise labels as needed (e.g. creating labels specific to customer data or HR data). Make sure to also configure label policies (to assign labels to users/locations) and consider auto-labeling rules for SharePoint/OneDrive content if you have the capability – auto-labeling requires the advanced Information Protection (available with the Purview add-on/E5)[5]. Even without auto-classification, users can manually apply these labels in Office apps to tag sensitive content.
Next, set up targeted DLP policies for AI scenarios. The one-click setup in Step 3 already created some base DLP policies in audit mode (for monitoring AI usage)[3]. You should now add or adjust preventive DLP rules according to your risk tolerance. Two important examples:
DLP for Copilot: In Purview’s DLP policy section, you can create a policy scoped to the “Microsoft 365 Copilot” location (a new location type)[6]. Configure this policy to detect your highest sensitivity labels or specific sensitive info types, and set the action to “block Copilot” from accessing or outputting that content[3][6]. Microsoft has introduced the ability to block Copilot from processing items (emails, files) that bear certain sensitivity labels[3]. For example, you might specify that anything labeled Highly Confidential or ITAR Restricted is not allowed to be used by Copilot. This means if a user asks Copilot about a document with that label, Copilot will be unable to include that data in its response[3]. (Internally, Copilot will skip or redact such content rather than risk exposing it.) Enabling this type of DLP rule ensures sensitive files or emails stay out of AI-driven summaries.
DLP for Third-Party AI (Web): Create or edit a DLP policy to cover endpoint activities in browsers. Microsoft provides a template via DSPM for AI (the “Fortify your data security” recommendation) that you may have enabled, which includes a policy to block sensitive info from being input into AI web apps via Edge[3]. If not already active, define a new DLP policy with the Endpoint location (which covers Windows 10/11 devices that are onboarded to Purview) and specifically target web traffic (Purview DLP can filter by domain or category of site). You can use Microsoft’s managed list of “AI sites” (which includes popular generative AI services like chat.openai.com, Bard, etc.) as the trigger. The policy condition should look for sensitive info (e.g. built-in sensitive info types like credit card numbers, tax file numbers, health records, or any data classified with your sensitive labels). Set the action to block or block with override. For example, you might block outright if it’s highly sensitive (like >10 customer records), or allow the user to override with justification for lower sensitivity cases. This ensures that if an employee attempts to paste confidential text into, say, ChatGPT, the content will be blocked before leaving the endpoint[3]. In fact, with Adaptive Protection (an E5 feature), the policy can automatically apply stricter controls to high-risk users – e.g. if a user is already flagged as an insider risk, the DLP will outright block the action, whereas a low-risk user might just see a warning[3].
After setting up these policies, use the Purview “Policies” page under DSPM for AI to verify all are enabled and healthy[2]. You can click into each policy (it will take you to the respective solution area in Purview) to adjust scope or rules. For instance, during initial testing you might scope policies to a few pilot users or exclude certain trusted service accounts. Over time, refine the policies: add any custom sensitive info types unique to your business (like project codes or proprietary formulas) and tweak the blocking logic so it’s appropriately strict without hampering legitimate work.
Step 5: Monitor AI Usage Reports and Refine as Needed. Once DSPM for AI is running, the Purview portal will start showing data under the Reports section of DSPM for AI[2]. Allow at least 24 hours for initial data collection. You will then see insightful charts, for example: “Total AI interactions over time” (how often users are engaging with Copilot or other AI apps), “Sensitive interactions per AI app” (e.g. how often sensitive content appears in ChatGPT vs. Copilot), and “Top sensitivity labels in Copilot” (which labels are most commonly involved in Copilot queries)[1][1]. These reports help identify patterns – for instance, if Highly Confidential data is appearing frequently in AI prompts, that might signal users are attempting to use AI with very sensitive info, and you may need to educate them or tighten policies.
Regularly review the Recommendations section on the DSPM for AI dashboard as well[2]. Purview will surface ongoing suggestions. For example, it may suggest running an on-demand data risk assessment across more SharePoint sites if it detects possible oversharing, or recommend enabling an Azure OpenAI integration if you deploy your own AI app. Each recommendation comes with an explanation and often a one-click action to implement it[2]. SMBs should treat these as a guided checklist for continuous improvement.
Also utilize Activity Explorer (within Purview) filtered for AI activities[2]. Here you can see log entries for specific events like “AI website visit”, “AI interaction”, or DLP triggers[3]. For example, if a DLP policy was tripped by a user’s action, you’ll see a “DLP rule match” event with details of what was blocked[3]. You might discover, say, a particular department frequently trying to use a certain AI tool – insight that could inform training or whitelisting a corporate-approved AI solution.
Continuously refine your configuration: if you find too many false positives (blocks on benign content), adjust the DLP rules or train users on proper procedures (e.g. using anonymised data in prompts). If you find gaps – e.g. an AI service not covered by the default list – you can add its URL or integrate it via Microsoft Defender for Cloud Apps (to extend visibility). Purview DSPM for AI is an ongoing program: as your business starts using AI more, periodically update your sensitivity labels taxonomy, expand policies to new AI apps, and leverage compliance manager assessments to ensure you meet any new regulations or internal policies for responsible AI use[2].
Policy Configuration for Microsoft 365 Copilot and Third-Party AI Tools
A core strength of Purview DSPM for AI is that it extends your data protection policies directly into AI scenarios. Here we provide specific guidance on configuring policies for Microsoft 365 Copilot and for external AI applications in an SMB context.
Protecting Data Used by Microsoft 365 Copilot: By design, Copilot abides by Microsoft 365’s existing security framework. It will only access data that the requesting user has permission to access, and it respects sensitivity labels and DLP policies[2][6]. Admins can create explicit policies to control Copilot’s behavior:
Sensitivity Label-based Restrictions: Use Purview DLP to create a rule that targets the Copilot service. In the DLP rule, set a condition like “If content’s sensitivity label is X, then block Copilot from processing it.” Microsoft’s new DLP feature (in Preview mid-2025, GA by Aug 2025) allows detection of sensitivity labels in content that Copilot might use[6]. When such a label is found, Copilot is automatically denied access to that item[6]. For example, if an email is labeled Privileged (using a sensitivity label), a DLP policy can ensure that Copilot will not read or include that email in response to a prompt[6]. This configuration is done in the Purview Compliance Portal under Data Loss Prevention by choosing ‘Microsoft 365 Copilot’ as a policy location and specifying the sensitive labels or data types to act on[6]. Notably, Microsoft has made it such that you don’t need a Copilot license to set up these protective policies – any organization can create Copilot-targeted DLP rules to prepare in advance[6] (though of course Copilot will only be active if you have purchased it).
Data Type-based Restrictions: In addition to labels, consider using sensitive info types. For instance, you might want to prevent Copilot from ever revealing personally identifiable information (PII) like tax file numbers or health record numbers. You can configure a DLP policy: If Copilot’s output would include data matching ‘Australian Tax File Number’ or ‘AU Driver’s License Number’, then block it. This is essentially treating Copilot as another channel (like email or Teams) where DLP rules apply. In practice, Copilot won’t include that content in its responses if blocked – the user might see a message that some content was excluded due to policy.
Retention/Exposure Controls: Leverage Purview’s Retention and Records policies for Copilot interactions if needed. For example, if your industry regulation requires that certain data not be maintained, you can set a retention label to auto-delete Copilot chat content after X days. Also, if using Security Copilot or Copilot in Fabric, enabling the recommended Purview collection policy captures their prompts and responses for compliance auditing[3].
After configuring these, test Copilot’s behavior: e.g., label a document as Secret and try asking Copilot about it with a user account. You should find Copilot refuses or gives a generic answer if policies are correctly in place. Over time, review Copilot-related DLP events in Purview reports to see if it attempted to access something blocked – this indicates your policies are actively protecting data.
Policies for Third-Party AI Tools (e.g. ChatGPT, Bard, etc.): Third-party AI apps are outside the Microsoft 365 ecosystem, so policies focus on monitoring and preventing sensitive data from leaving your environment:
Endpoint DLP for AI Websites: As discussed in the setup, configure Endpoint DLP rules to cover major AI sites. Microsoft Purview comes with a built-in list of “supported AI sites”[2] (this includes OpenAI’s ChatGPT, Google Bard, Claude, Microsoft Bing Chat, etc.). You can use this list in your DLP conditions so that the rule triggers when any of those sites are detected. The policy can be in block mode or user override mode. For SMBs, a common approach is to warn/justify – i.e. when an employee tries to paste corporate data into ChatGPT, show a warning: “This action may expose sensitive data. Are you sure?” The user can then either cancel or proceed with justification, and the event is logged[3]. High-risk or highly sensitive cases should be outright blocked and logged. Purview’s one-click “Block sensitive info from AI apps in Edge” policy uses exactly this approach, targeting a set of common sensitive info types (financial info, IDs, etc.) and blocking those from being submitted to AI web apps via Edge[3]. You can customize the sensitive info types and message per your needs. For example, you might add keywords unique to your company (like project codenames) to the policy to ensure those cannot be shared with external AI.
Insider Risk Management (IRM): For an SMB with an E5 Compliance/Purview add-on, Insider Risk Management policies can complement DLP. An IRM policy can watch for patterns that suggest risky behavior, even if individual DLP rules weren’t violated. For AI, Microsoft provides a template “Detect risky AI usage” – this looks at prompt and response content from Copilot and other AI and if a user is frequently attempting to input or extract large amounts of sensitive data, it raises their risk level[3]. It essentially correlates multiple AI interactions over time. If an employee starts copy-pasting client lists into various AI tools, IRM might flag that user for a potential data leakage risk, prompting further investigation or mitigation (like removing their access to certain data). While setting up IRM can be complex (requires defining risk indicators, etc.), the preset AI-focused policy simplifies it for you. SMBs should consider enabling it if they have the license, as it provides an additional safety net beyond point-in-time DLP rules.
Communication Compliance: Another advanced feature (in E5/Purview suite) is Communication Compliance, which can now analyze AI-generated content. For instance, a policy can detect if employees use inappropriate or regulated content in AI prompts or outputs[3]. Microsoft’s default “Unethical behavior in AI apps” policy looks for sensitive info in prompts/responses, which can catch things like attempts to misuse AI for illicit activities or to share confidential data inappropriately[3]. In an SMB, this could be used to ensure employees aren’t, say, asking an AI to generate harassing language or to divulge another department’s secrets. While not directly a data protection in the sense of preventing data loss, it does enforce broader usage policies and can be part of a responsible AI governance approach.
Cloud App Security (optional): If your organisation uses Microsoft Defender for Cloud Apps (formerly MCAS), you can leverage its Shadow IT discovery and app control features alongside Purview. Defender for Cloud Apps can identify usage of various AI SaaS applications in your environment (by analyzing log traffic from firewalls/proxies or directly via API if using sanctioned apps). You could combine this with Purview DLP by using Cloud Apps’ capability to route session traffic through a conditional access app control, enabling real-time monitoring of what users upload to AI web apps. This is more of an advanced setup, but the Purview DSPM dashboard might highlight to you which AI apps are most accessed by your users[1], helping you focus your Cloud App Control policies accordingly.
In summary, for Microsoft 365 Copilot, focus on label-based and content-based DLP policies and let Copilot’s compliance integration handle the rest. For third-party AI tools, rely on Endpoint DLP to police what data leaves your endpoints, and consider Insider Risk and Communication Compliance for broader oversight. Microsoft has provided templates for all these – by reviewing the pre-created DSPM for AI policies in your portal, you can see concrete examples of configurations for each scenario and adjust them to fit your organisational policies[3][3].
Licensing and Pricing Considerations
Implementing Purview DSPM for AI touches on several Microsoft 365 services, so it’s important to understand licensing. Small and mid-sized businesses often use Microsoft 365 Business Premium, and Microsoft now offers add-ons to bring advanced Purview capabilities to that tier without requiring full Enterprise E5 licenses. Below we compare what features different licenses provide and the respective costs (prices are per user, per month, in Australian dollars):
Covers the enterprise basics similar to Business Premium: Purview Information Protection P1 and standard DLP (cloud), retention, basic Audit (90 days), Core eDiscovery. Does **not** include Insider Risk or advanced analytics. M365 E3 is roughly analogous to Business Premium in compliance features; the main differences are in device management and security (E3 lacks some features Business Premium has, and vice versa).
~AU$50–55** (est.)
Microsoft 365 E5
Includes the full range of Purview compliance & security features. For data protection, that means Information Protection P2, Auto-labeling, **Endpoint DLP**, Insider Risk, Communication Compliance, Advanced eDiscovery, long-term audit, Compliance Manager, and DSPM for AI – all **built-in**. No add-ons needed (E5 covers both what the Defender and Purview suites offer)[7](https://diamondit.com.au/microsoft-security-addons/). M365 E5 effectively gives the same capabilities an SMB would get by combining Business Premium + the Defender and Purview add-ons[7](https://diamondit.com.au/microsoft-security-addons/).
~AU$85–90** (est.)
Pricing Notes: Microsoft 365 Business Premium has a list price around A$30.20 per user/month in Australia (excluding GST). The newly introduced Purview Suite add-on for Business Premium is priced at US$10, which is roughly AU$15 per user/month[5]. (Similarly, a Defender security add-on is US$10 ~AU$15, or both bundled for US$15 ~AU$22.50.) These add-ons are available as of September 2025 and can be applied to up to 300 users (the Business Premium tenant limit)[5][5]. By comparison, an M365 E5 license that natively includes all Purview features costs about US$57 (~AU$88) per user/month, so for many SMBs it’s far more economical to keep Business Premium and add Purview rather than jumping to E5. In fact, Microsoft quotes that the combined Defender+Purview add-on (at ~$22 AUD) provides roughly a 68% cost saving versus buying equivalent E5 licenses or individual products[8][8].
Feature Availability by License: In practical terms, if you have Business Premium without add-ons, you can still use Purview DSPM for AI in a limited capacity. You will be able to see the DSPM for AI page and get some insights (since you do have basic DLP and labeling). For example, you can label data and apply DLP to Copilot to restrict labeled content[4][6]. However, certain features will not fully function: the one-click policies that leverage Insider Risk or Communication Compliance won’t do anything without those licenses. You also won’t be able to capture the actual prompt/response content from Copilot or other AI (content capture for eDiscovery requires the collection feature which is part of E5). Essentially, Business Premium gives you foundational protection, but the Purview add-on (or E5) is needed for the “full” DSPM for AI experience – including the fancy dashboards of AI usage and the advanced policies for insider risk and content capture[5][1].
For many SMBs, the sweet spot is Business Premium + Purview Suite add-on. This combination unlocks all the E5 compliance capabilities at a fraction of the cost of an E5 license, while allowing the organisation to stay within the 300-user SMB licensing model. It means your Business Premium users get enterprise-grade tools like auto-labeling (which can automatically label or encrypt documents that Copilot might access), advanced DLP actions on endpoints (to stop data going to unsanctioned AI), and insight into AI usage trends – all integrated in the same Microsoft 365 admin experience[5][5].
(Note: The above prices are approximate and current as of 2025. Australian pricing may vary slightly based on exchange rates and whether billed annually or monthly. GST is typically not included in listed Microsoft prices. Always check with Microsoft or a licensing partner for the latest local pricing.)
Example SMB Use Cases and Benefits
To illustrate how Microsoft Purview DSPM for AI can protect a small/medium business’s data, here are several common use cases and how the features come into play:
Use Case 1: Protecting Customer Data. Imagine a sales manager tries to use ChatGPT to draft a proposal and copies in a list of customer names and phone numbers. This action could leak personally identifiable information (PII). With Purview DSPM for AI, the moment the manager attempts to paste that data into the ChatGPT site, the Endpoint DLP policy kicks in. For example, it might detect the pattern of phone numbers or customer names marked as sensitive and immediately block the transfer in the browser[3]. A notification would pop up on the manager’s screen explaining that company policy prevents sharing such data with external apps. In the Purview portal, an alert or event log is generated showing that “Sensitive info (Customer List) was blocked from being shared to chat.openai.com”. The manager is thus prevented from inadvertently exposing customer data, fulfilling the company’s privacy commitments. Later, the IT admin sees this event in the DSPM report, and can follow up to ensure the manager uses a safer approach (perhaps using anonymised data with the AI). In essence, Purview acted as a last line of defense to keep customer data in-house[3].
Use Case 2: Safeguarding Financial Records. A mid-sized investment firm (say 50 employees) uses Business Premium and has started deploying Microsoft 365 Copilot to employees. The CFO is using Copilot to get summaries of financial spreadsheets. Purview’s sensitivity labels have been applied to certain highly sensitive financial documents – e.g. the quarterly financial statement is labeled Highly Confidential. When the CFO (or anyone) tries to ask Copilot “Summarize the Q4 Financial Statement,” Copilot checks if it’s allowed to use that document. Thanks to a DLP policy we set (Copilot location blocking that label), Copilot will refuse, perhaps responding with “I’m sorry, I cannot access that content.” The CFO’s request is not fulfilled, which is exactly the intended outcome: that report is too sensitive to feed into any AI. Meanwhile, less sensitive data (like aggregated sales figures labeled “Internal”) might be allowed. Additionally, Purview’s auditing logs record that Copilot attempted to access a labeled item and was blocked[3]. If needed, later on the compliance officer can show auditors that “Even our AI assistants cannot touch certain financial records,” demonstrating strong controls. This scenario shows how DSPM for AI prevents accidental exposure of financial data via AI while still letting Copilot be useful on other data.
Use Case 3: Protecting Intellectual Property (IP). Consider a small engineering firm that has proprietary CAD designs and source code. They classify these files under a label “Trade Secret – No AI”. They also worry about developers using public coding assistants (like GitHub Copilot or ChatGPT) and potentially pasting in chunks of internal code. With Purview, they enable a policy to detect their code patterns (they could even use a custom sensitive info type that matches code syntax or specific project keywords). If a developer tries to feed a snippet of secret code into an AI code assistant in the browser, Purview can intercept that and block it. On the flip side, if the company builds its own secure AI (maybe using Azure OpenAI), they can register it as an “enterprise AI app” in Purview – and Purview DSPM will capture all prompts and outputs from that app for audit[3][3]. That means if any IP is used within that internal AI, it’s still tracked and remains within their controlled environment. Overall, the firm gets to leverage AI for boosting developer productivity on non-secret stuff, while ensuring trade secrets never slip out via AI.
Use Case 4: Securing Employee Information. A human resources team might use Copilot in Microsoft Word to help draft salary review documents or summarise employee feedback. These documents naturally contain highly sensitive personal data. Purview’s role here is twofold: it can automatically classify and label such content (e.g. detect presence of salary figures or personal IDs and apply “Confidential – HR Only” label), and it can enforce policies so that AI cannot misuse it. For instance, an admin can configure that the label “Confidential – HR Only” is in Copilot’s blocked list[3]. So even if an HR staff member tries to use Copilot on a file containing an employee’s medical leave details, Copilot will not process it. Furthermore, if the HR person tries to share any text from that file to an outsider or to a different AI, DLP would intervene. Compliance Manager in Purview also helps here by providing regulatory templates – e.g. if under GDPR, the company should limit automated processing of personal data, the tool will remind the admins of requirements and suggest controls to put in place[2]. Thanks to these measures, the company can confidently use AI internally for HR efficiency while maintaining compliance with privacy laws and keeping employee data safe.
In all these scenarios, Microsoft Purview DSPM for AI acts as a safety harness – it gives SMBs the visibility and control needed to embrace modern AI tools responsibly. By leveraging sensitivity labels, DLP, and intelligent monitoring, even smaller organisations can enforce “our data stays protected, no matter if it’s a person or an AI accessing it.”[1][1] The result is that SMBs can benefit from AI-driven productivity (be it drafting content, analyzing data, or assisting customers) with assurance that confidential information won’t slip through the cracks. Purview DSPM for AI essentially brings enterprise-grade data governance into the AI era, allowing SMBs to innovate with AI securely and in compliance[5][1].
Microsoft Purview Communication Compliance is an insider risk and compliance solution that helps organisations detect and remediate problematic communications within Microsoft 365[1]. It evaluates text and images in employee communications across email (Exchange Online), chat (Microsoft Teams), communities (Viva Engage/Yammer), and even supported third-party platforms (like WhatsApp or others via connectors)[2]. The goal is to foster a safe, compliant workplace by automatically flagging messages that violate internal policies or regulatory requirements – for example, harassing or threatening language, the sharing of sensitive confidential information, or communications that suggest regulatory breaches[1].
Key features: Communication Compliance uses a combination of machine learning classifiers and keyword matching to identify potential issues in messages[2]. It comes with built-in policy templates (for common scenarios like harassment, sensitive data leaks, etc.) and can also be customised to an organisation’s needs. Notably, the solution is “privacy by design” – user identities are hidden (pseudonymised) from compliance reviewers by default, and strict role-based access controls ensure only authorised investigators can review flagged content[1][3]. All reviewer actions (like reading a message or removing it) are logged in audit trails for accountability[1]. If a policy violation is confirmed, authorized reviewers can take remediation actions directly, such as removing an inappropriate message from Teams or notifying the sender’s manager about the misconduct[2]. Overall, the tool helps SMBs enforce their code of conduct and prevent small issues from growing into serious legal or compliance problems[3].
In the sections below, we’ll cover how to set up Communication Compliance in a Microsoft 365 environment step by step, outline common policies and effective usage tips (with examples like detecting harassment and data leaks), compare licensing options and costs in AUD for SMBs, and provide best practices for configuring policies and managing the review process.
Step-by-Step Setup in an SMB Environment
Setting up Communication Compliance in Microsoft 365 involves preparing your environment with the right licenses and permissions, then creating policies in the Purview compliance portal. The following steps assume you are an IT administrator or compliance officer for an SMB using Microsoft 365:
Tip: Before deploying company-wide, consider testing your policy on a small group. For example, create a pilot policy for the IT department to ensure the settings catch the intended content without overwhelming reviewers with false positives. You can refine dictionaries or severity thresholds, then expand the policy’s scope to all users.
By the end of this setup, you will have Communication Compliance actively monitoring the chosen communications in your SMB tenant. Next, we’ll look at how to use and manage these policies effectively on an ongoing basis.
Using Communication Compliance Effectively
Once policies are in place, the day-to-day value comes from how well the organisation manages the alerts and acts on them. Here’s how to use Communication Compliance in practice, along with common policy examples and use cases relevant to SMBs:
Alert Review and Remediation Workflow
When a message (or series of messages) triggers a Communication Compliance policy, it generates an alert in the Purview Compliance portal. Reviewers (the persons assigned in the policy) will be able to see these alerts in the Communication Compliance dashboard. Key aspects of the review process:
Alert details: An alert will show the policy that was triggered, the number of message hits, the severity, and other metadata. Reviewers can drill into the alert to see the actual content that was flagged. User identities in the content are masked by default (you might see usernames as “User1,” “User2,” etc.) to reduce bias[3]. A reviewer with sufficient privilege can de-pseudonymise the usernames if needed (typically after determining the issue is real and needs escalation).
Reviewing content: The reviewer reads the flagged communication in its context. For example, if an alert flagged a Teams chat message with a certain offensive phrase, the system will show a snippet of that chat conversation. This helps the reviewer understand the context (was it truly harmful or just joking banter, etc.). The system may also indicate which condition was matched – e.g. it might tag that a message matched the “Harassing language” classifier or contained a credit card number, etc., to help the reviewer understand why it was flagged.
Decision and action: The reviewer must then decide what to do:
If the content is a false positive or benign, they can mark the alert as “Resolved – no issues”. (They would typically add a note, e.g. “Flagged phrase was used out of context, not a policy violation.”)
If the content violates policy, the reviewer takes appropriate action. Communication Compliance provides built-in remediation actions:
Remove message: For Microsoft Teams chats or Yammer posts, the reviewer can delete the offending message from the user chat/channel directly from the interface[2]. (The user is notified that their message was removed due to a policy).
Notify user or manager: The reviewer can send a notification email to the person who sent the message, and/or that person’s manager, describing that the message was found to violate policy and what next steps are (this notice can be a gentle warning for first-time minor offenses, for example).
Escalate: If the issue is serious, the reviewer might escalate the case – for example, forwarding details to HR or legal department. If your organisation also uses Insider Risk Management, the reviewer can flag the user or incident for further investigation under that system (Communication Compliance can integrate with Insider Risk Management to share signals)[4].
Resolve with other remediation: Sometimes the action is outside the tool – e.g., a coaching conversation with the employee. The reviewer can still mark the alert as “Resolved” and note that HR will follow up offline.
Case management: Communication Compliance allows the reviewer to group related items into a case if needed (especially in regulated scenarios where a formal case file is needed, similar to eDiscovery cases). For SMB use, you might not need formal cases for each alert, but the option is there to bundle multiple related messages or continue tracking an ongoing investigation.
Continuous Improvement: As reviewers resolve alerts, they should flag if a particular policy is generating too many false positives or if users find creative ways to circumvent detection. For example, if employees start using code words to harass each other (to evade known keywords), the compliance team might need to add those to keyword dictionaries. Conversely, if harmless messages are frequently flagged, adjust the policy to be less sensitive (or refine the keyword list).
Common Policy Scenarios and Examples
Communication Compliance can address a variety of communication risks. Here are some common policies – likely relevant to SMBs – and how they work in practice:
Other scenarios: Microsoft also provides a “Conflict of interest” policy template aimed at preventing communication between two groups that should stay separate (for example, to enforce information barriers between a sales team and a procurement team during a tender). This template typically flags communications if members of Group A and Group B are in the same thread[4]. However, note that for strict separation, Information Barriers (a separate feature) can be configured to technically block such communications outright[5]. Communication Compliance in this case acts as a backstop or monitoring tool in case some channels aren’t covered by information barriers.
Additionally, a new capability in Teams and Viva Engage allows users to report messages they find inappropriate. When enabled, users can click “Report inappropriate content” on a Teams message, which submits it to Communication Compliance for review[4]. These user-reported incidents are collected under a special policy in Communication Compliance (with AI classifiers helping to categorise the reported content)[4]. This feature can greatly augment automated policies – especially in SMBs where the volume of messages is lower, empowering employees to flag issues helps the compliance team catch things that automated policies might miss (like subtle context or new slang). We recommend training your staff on how to use the Teams “report” feature and fostering a culture where people are comfortable reporting misconduct.
Ongoing Management
To use Communication Compliance effectively, treat it as an ongoing program, not a “set and forget” tool. Some tips for SMBs:
Regularly check the Compliance dashboard – Ensure assigned reviewers have a schedule (daily or weekly, depending on alert volume) to review new alerts promptly. Delayed responses diminish the value of catching issues early.
Leverage the reports – The Purview Compliance portal provides overview dashboards and detailed reports of policy matches over time[1]. These can highlight trends, like a spike in attempts to send sensitive data, or recurring harassment issues in a particular team, etc. Use these insights to inform management – e.g., maybe the company needs a reminder training on harassment if there are many instances being flagged.
Adjust policies as needed – As your business grows or regulations change, you may need to update who is covered by policies or add new ones. For instance, if your SMB enters a new industry or starts handling health data, you might introduce a HIPAA-related communication compliance policy. Microsoft continually updates classifiers (and adds new sensitive info types or AI models), so keep an eye on the Communication Compliance release notes for improvements that you can take advantage of.
Next, we will look at the licensing requirements for Communication Compliance and how SMBs can obtain these capabilities in a cost-effective way, including a comparison of Microsoft 365 plans.
Licensing and Pricing (AUD) for SMBs
Because Communication Compliance is an advanced feature, it’s only included in certain Microsoft 365 plans or add-ons. SMBs have a few options to license it. Below is a comparison of plans relevant to small and mid-sized businesses, their capabilities with respect to Purview compliance, and approximate pricing in Australian dollars (AUD):
Available Licensing Options:
Microsoft 365 Business Premium – Aimed at SMBs (up to 300 users). This plan includes all Office apps and many security features, and some baseline compliance features (like Office 365 DLP, information protection labels, and basic eDiscovery)[6]. However, it does not include Microsoft Purview Communication Compliance or other advanced Purview solutions by default[6]. Business Premium users can add certain functionality via add-ons (see below).
Microsoft 365 E3 – An enterprise plan (no user limit) that includes Office apps and standard enterprise security/compliance features. Like Business Premium, E3 on its own does not include Communication Compliance – it provides core compliance (DLP, retention, eDiscovery Standard, etc.) but not the Insider Risk solutions[6]. To get Communication Compliance, an E3 customer would need to purchase an add-on such as “E5 Compliance” or “Insider Risk Management” for the relevant users.
Microsoft 365 E5 – The top-tier Microsoft 365 plan. E5 includes Communication Compliance natively, along with the full suite of Purview compliance features (Insider Risk Management, Advanced eDiscovery, Audit (Premium), Records Management, etc.) and all advanced security features. Essentially, E5 gives you everything – but at a higher cost. Many larger organisations choose E5 for its breadth. SMBs may consider it if they have high compliance requirements and budget.
Purview Add-ons – Microsoft offers add-on licenses that extend the capabilities of lower-tier plans without requiring a full upgrade to E5. Key add-ons:
Microsoft 365 E5 Compliance – This add-on includes the entire set of E5 compliance features (Information Protection & Governance, Communication Compliance/Insider Risk, eDiscovery & Audit) for a user. It can be added to Business Premium, E3, or even Office 365 plans. If an SMB only needs the compliance features (and not the E5 security features), this is a cost-effective route. Pricing: roughly A$18 per user/month (≈A$216 per user/year) for this add-on in Australia[5].
Microsoft 365 E5 Insider Risk Management – a more focused (and slightly cheaper) add-on that specifically includes Insider Risk Management and Communication Compliance features[7][7]. This could be an option if you don’t need the full compliance suite. (For example, you might pair this with Business Premium to get just the insider risk solutions).
Microsoft 365 E5 Information Protection & Governance – includes labeling, encryption, DLP, records management (but not Communication Compliance, since that falls under the Insider Risk category). This is more for advanced data protection without the comm surveillance piece.
It’s important to note that any user whose communications are being monitored, or who is performing reviews, must be licensed for the feature[8]. In practice, this means if you apply a Communication Compliance policy to all employees, all those employees need a license that covers it (either via E5 or an add-on). If only a subset of users are monitored (say, just the finance department), only those users need the advanced compliance license. Reviewers also need a license. You don’t have to license users who are completely outside the scope of any Communication Compliance policies.
Below is a summary table comparing the plans:
Plan / Add-on
Purview Compliance Features
Includes Comm. Compliance?
Price (AUD)
Microsoft 365 Business Premium
– Office apps, EMS security (Defender for Business, etc.) – Basic compliance: data classification, DLP (Office 365), retention, eDiscovery (standard).
No. Lacks advanced Purview solutions like Communication Compliance, Insider Risk, Advanced Audit.
~A$36.19 per user/month
Microsoft 365 E3
– Office apps, EMS (Azure AD P1, etc.) – Compliance: Includes all Business Premium features plus mail archiving, legal hold, SharePoint and Teams audit/search, etc. – Lacks advanced AI-driven compliance tools.
No. (Requires add-on for Comm. Compliance).
~A$58.63 per user/month
Microsoft 365 E5
– All E3 features plus: Advanced Compliance: Communication Compliance, Insider Risk Mgmt, Advanced eDiscovery, Audit (1yr retention), Records Mgmt. Advanced Security: Defender for Endpoint, Defender for O365 P2, Azure AD P2, etc. Phone System, Audio Conferencing.
Yes. Fully included (Communication Compliance and all Purview features are active).
~A$90.09 per user/month
M365 E5 Compliance Add-on
– Adds all E5 Compliance suite to lower plans: Communication Compliance, Insider Risk Advanced eDiscovery, Audit (Premium) Records management, Information Protection (auto-labeling, etc.) (Does not include E5 security features)
Yes. (When combined with, e.g., E3 or Biz Premium, it lights up Comm. Compliance features).
~A$18.00 per user/month
1Approximate per-user monthly price, based on Australian commercial pricing (annual commitment). Actual prices may vary slightly by provider; e.g., one Australian partner lists Business Premium at A$36.19 and E5 at A$90.09[2]. These may be ex-GST.\ 2A$216 per user/year, as listed for an annual license[5].
In summary, SMBs with Business Premium can access Communication Compliance by either upgrading specific users to an E5 plan or more economically by adding the E5 Compliance add-on for those users. For instance, a 100-person company might license 5 HR and IT staff with E5 Compliance add-ons (so they can monitor all communications) and the rest remain on Business Premium. SMBs with E3 (perhaps those who’ve outgrown the 300 user cap of Business Premium) can do similarly – purchase E5 Compliance add-ons for the users that need these capabilities, or consider full E5 for broadest coverage.
If you are unsure, Microsoft does offer a 90-day trial of Purview Compliance features for up to 25 users[1]. This is a great way for an SMB to pilot Communication Compliance (and other features like Insider Risk Management) to assess its value before committing to the additional licensing cost.
Best Practices for Configuration and Review Workflows
Implementing Communication Compliance effectively requires more than just technology – it involves process and policy decisions. Here are some best practices for SMBs to get the most value while respecting employee trust:
Align Policies with Company Culture and Risk: Tailor your communication compliance policies to the actual risks and culture of your organisation. For example, if your company has a zero-tolerance stance on harassment, ensure your policies for offensive language are comprehensive. If you handle sensitive client data, focus on data leakage policies. Avoid overly broad surveillance that isn’t warranted – monitor what matters most to your business’s compliance and ethical requirements.
Be Transparent with Employees: It’s generally advisable (and legally prudent in many jurisdictions, including Australia) to have an acceptable use policy that notifies employees that their communications may be monitored for compliance purposes. Transparency helps maintain trust. Emphasise that these tools exist to protect the company and employees from risks (like a hostile work environment or inadvertent data breaches), not to snoop on personal matters. In an Australian context, employee privacy laws allow monitoring with proper purpose and employee notification, so make sure to document this in your employee handbook or IT policy.
Limit Access – Need to Know: Only a small, designated team should have access to Communication Compliance results. Typically, this might be HR and a compliance officer, or an IT security lead. Because the content can be sensitive (personal conversations, etc.), minimise the number of eyes on it. Use the role-based access controls – e.g., only members of the “Compliance Investigators” role group can review messages[1]. Having too many people with access could both violate privacy principles and increase the risk of internal leaks or gossip. Always uphold the principle that privacy is protected except when a genuine compliance concern justifies escalation.
Tune for Signal over Noise: When first enabling a policy, you might get a lot of alerts – not all will be true issues. It’s important to fine-tune policies to reduce false positives. Leverage the classifier confidence levels (if available) or add exclusion keywords if needed. For example, innocent phrases can sometimes trigger a harassment policy (e.g., the word “shoot” in “shoot me an email” could technically trigger a violence classifier). If you see these patterns, update the policy to refine the logic (such as excluding certain contexts or words). Microsoft’s AI models will also learn and improve – you can provide feedback by marking things as false positives which helps the system adapt over time.
Regular Reviewer Training: Ensure the people reviewing the alerts know how to interpret and handle them. They should be familiar with company policies (HR and compliance guidelines) so they can judge whether something truly constitutes a violation. For instance, distinguishing between a joke and harassment can be subtle – context is key. Reviewers should also know the remediation steps: e.g., how to remove a Teams message, how to notify a user properly, and when to involve higher authorities. Microsoft provides documentation and even certification training for compliance features, which can be useful if the stakes are high (though in a small business, on-the-job training and clear internal procedures may suffice).
Workflow Integration: Define what happens after a reviewer flags something as a real issue. Do they notify HR formally? Do they create a case file? SMBs might not have a formal compliance committee, but you should decide, for example: “If a serious harassment incident is detected, HR will handle disciplinary action as per our policies. If a data leak is detected, IT will immediately contain it (like blocking that email) and we’ll inform the client if required by law.” Having these procedures in place ensures that the tool actually triggers effective responses and isn’t just generating alerts that no one follows up on.
Balance Monitoring with Trust: Communication Compliance is a powerful tool – but use it responsibly. Avoid the temptation to over-monitor. For example, it’s usually not productive to flag every instance of casual swearing between teammates as an “HR incident” if that’s part of the office culture in harmless ways. You might set the harassment policy to catch direct insults or slurs rather than every profanity. This way, employees don’t feel overly policed for minor things, and when an alert does come, it’s taken seriously. In short, calibrate the policies so that they catch truly problematic behavior and ignore the trivial.
Periodic Policy Reviews and Audits: Schedule a regular review (say, every quarter) of your Communication Compliance setup:
Check if the policies are still aligned with any new regulations or internal policy changes.
Review metrics: How many alerts per policy? False positive rate? Use these to adjust thresholds.
Ensure all licensed users still need to be covered – e.g., if someone left the company or changed roles, update your scopes.
Consider if new communication channels being adopted (maybe your org starts using a new third-party app – you might ingest that via a connector into Purview so it’s also monitored).
Combine with Other Purview Solutions: Communication Compliance is one piece of a broader compliance strategy. SMBs should also take advantage of related tools:
Data Loss Prevention (DLP): While Communication Compliance can catch data leaks after the fact, DLP policies (in Exchange, Teams, etc.) can prevent or block sensitive info from being sent in the first place. Use DLP and Communication Compliance together – DLP to block obvious policy violations in real-time, and Communication Compliance to review more nuanced or contextual issues that slip past DLP.
Insider Risk Management: If you have E5 add-ons, Insider Risk Management can correlate communication signals with other signals (like file downloads, odd user activity) to flag high-risk patterns (e.g., an employee who is about to quit and is behaving suspiciously). A Communication Compliance alert (like someone emailing themselves a client list) can increase an insider risk score. For an SMB, this might be overkill, but for those dealing with very sensitive data, it’s worth exploring.
Compliance Manager & Audit: Use Compliance Manager to track your overall compliance posture and improvement actions. Use Audit (Standard/Premium) to search log data if you need to investigate how a particular incident happened beyond the communication itself.
Document and Communicate Outcomes: When Communication Compliance does surface a real issue and it’s dealt with, consider if there’s a lesson for the wider organisation. For instance, if several people were flagged for discussing confidential project details in a public Teams channel, maybe send a gentle company-wide reminder about information handling guidelines (without naming anyone, of course). The tool’s purpose is partly preventive – but educating users will amplify its effectiveness by reducing incidents in the first place.
By following these best practices, an SMB can effectively use Microsoft Purview Communication Compliance to maintain a professional and secure communications environment. The end result is a workplace where employees are protected from harassment, sensitive data is protected from slipping out, and the organisation stays on the right side of compliance requirements – all without unduly infringing on privacy or trust. With the right licensing in place[6] and a thoughtful implementation, even a smaller organisation can benefit from the same level of oversight and protection that large enterprises enjoy with Microsoft’s compliance solutions.
References: All information in this report was gathered from Microsoft’s official documentation and licensing guides, as well as industry sources, to ensure accuracy and relevance for an Australian SMB context. Microsoft Learn documentation on Communication Compliance[1][4], Microsoft’s service descriptions and licensing FAQs[2][6], and expert commentary were used throughout to provide a comprehensive overview. Pricing information was referenced from Australian Microsoft 365 partners and Microsoft’s own pricing disclosures[2][5] (all prices are in AUD). Please consult with a Microsoft licensing specialist for the latest pricing and compliance requirements, as these can change over time.
Microsoft Purview Insider Risk Management (IRM) is a solution in the Microsoft Purview compliance suite designed to help organisations proactively identify and mitigate internal threats. This report provides an overview of IRM, guidance on deploying it in a small or medium-sized business (SMB) environment, best practices for effective use (including privacy and integration considerations), licensing/cost details in Australian dollars (AUD), and a summary of recent enhancements relevant to SMBs.
1. Overview: What is Microsoft Purview Insider Risk Management?
Microsoft Purview Insider Risk Management (IRM) is a cloud-based insider threat detection and mitigation solution within Microsoft 365’s Purview (compliance) suite. Its purpose is to help organisations minimise internal risks by detecting, investigating, and acting on potentially malicious or inadvertent activities performed by users[1]. IRM addresses modern workplace risks such as data leaks, intellectual property (IP) theft, confidentiality or policy violations, insider trading, fraud, and other inappropriate internal actions[1]. Unlike perimeter security tools, IRM focuses on authorised insiders (employees or contractors) whose behaviour might pose a threat, whether intentionally or by accident.
Key Features and Capabilities: Microsoft Purview IRM provides a rich set of features to monitor and manage insider risks:
Machine-Learning-Driven Signals: IRM correlates a broad range of user activity signals across Microsoft 365 and Windows endpoints (and even some third-party platforms) to identify suspicious patterns[1]. For example, it can track file downloads from SharePoint, unusual email forwarding, mass file deletions, copying of files to USB devices, or abnormal Teams communications. These signals are analysed to generate risk indicators (such as “download of sensitive files” or “mass deletion”) and are evaluated by built-in analytics to determine if they deviate from normal behaviour[2][1].
Risk Policies with Templates: Administrators can create insider risk policies using a set of predefined templates that target common scenarios[1]. There are over 10 ready-to-use policy templates covering cases like Data theft by departing users, Data leaks (general or by privileged users), Security policy violations, and specialised cases (e.g. “Risky AI usage” and “Patient data misuse”)[1]. Each policy defines the conditions (triggering events and risk indicators) to watch for – for instance, a “Departing user” policy might trigger when an employee is added to an HR exit list and starts downloading large amounts of confidential data. Policies also define which users or groups are in scope, which services/locations to prioritise (SharePoint, Exchange, endpoint, etc.), and the time window to observe. These templates enable quick deployment of industry-standard detection rules, which can then be customised to the organisation’s needs.
Risk Scores, Alerts and Dashboards: When user activities match a policy’s conditions, IRM will generate an alert. The alert includes a risk score/severity (low, medium, high) calculated based on the frequency and criticality of the activities[1]. All active alerts are visible in the Insider Risk Management dashboard in the Purview compliance portal, where a risk analyst can triage them. The dashboard provides an overview of alerts by status, severity, time detected, and indicates any associated risk factors[1] (e.g. if the user has a history of prior incidents). This allows the organisation’s designated reviewers to quickly identify and prioritise alerts that need investigation. Alerts can be filtered and sorted to focus on those needing immediate attention (for example, all “High severity” alerts in the last 24 hours)[1].
Case Management and Investigation Tools: For each alert (or group of related alerts) that warrants deeper investigation, IRM allows creation of a case. A case in IRM is a container that holds all information and evidence related to a particular insider risk incident. The Cases dashboard shows all ongoing cases, trends over time, and stats like average time to closure[1][3]. Inside a case, investigators have a rich toolkit:
A user activity timeline that charts the sequence of risk events by date and risk level[1]. Investigators can interactively explore what the user did (e.g. accessed 50 files, attempted to print a confidential document, etc.) before and after the alert, helping identify patterns or escalation.
Content explorer that automatically collects copies of files, emails, or messages related to the policy violation[1]. For example, if the alert was triggered by file downloads, the actual files or filenames can be reviewed; if it was an email-forwarding incident, the email content can be inspected. This provides crucial evidence in context.
Built-in workflow actions, such as the ability to dismiss benign activities, add notes, or escalate the case to eDiscovery (now called Advanced eDiscovery) for further legal hold and forensic investigation[1]. Escalation to eDiscovery (Premium) is useful if the incident might lead to legal action or requires broader content search beyond what IRM automatically collected.
User Privacy and Role Separation: A fundamental principle of IRM is privacy by design. By default, usernames are pseudonymised in the IRM dashboard (e.g. shown as “User1”, “User2”) so that risk investigators focus on the behaviours first, reducing potential bias[1]. Investigators cannot see the actual user identity until they explicitly “Unlock” it (which is an auditable action) or if they have appropriate permissions to de-anonymise. Additionally, only users in specific Purview role groups (such as “Insider Risk Management Admin” or “Insider Risk Analyst”) can access IRM data[4][4]. This role-based access control ensures that insider risk investigations are handled by authorised personnel (for example, a security officer or HR investigator) and not visible to those who shouldn’t see sensitive details. All actions in IRM (viewing an alert, resolving a case, etc.) are logged for audit purposes to ensure accountability[1]. This privacy-focused design helps organisations implement insider monitoring ethically and in compliance with privacy laws, which is especially important in regions (like the EU or Australia) that have strict regulations on employee monitoring.
Integration with Other Purview and Security Solutions: IRM does not operate in isolation; it benefits from and contributes to other Microsoft 365 security and compliance tools:
It leverages Microsoft 365 audit logs and other services as inputs. IRM uses the logs and events from Exchange, SharePoint, OneDrive, Teams, Windows, and even Defender for Cloud Apps to gather the signals it needs[1]. For instance, if you have Microsoft Purview Data Loss Prevention (DLP) policies, an act that triggers a DLP alert (like an attempt to email out a credit card number) can be consumed as a signal in IRM as well. In this way, IRM correlates with DLP – DLP might block or warn on a specific activity, while IRM looks at the pattern of activities around it to gauge user risk.
IRM is closely related to Communication Compliance, another Purview feature that scans communications (email, Teams chats) for policy violations like harassment or sensitive data sharing. While Communication Compliance focuses on reviewing message content, IRM focuses on user behaviour patterns. They complement each other: for example, if Communication Compliance flags a user for attempting to share confidential info via Teams, IRM can take that into account as a risk indicator. Microsoft even provides a combined workflow (via Microsoft Mechanics) to show how these solutions work together[1].
For serious incidents, IRM cases can be escalated to eDiscovery (Premium) as mentioned. This integration ensures that if legal investigation is required, all data collected by IRM flows into the eDiscovery workflow seamlessly[1].
Adaptive Protection: A newer capability in Purview allows dynamic adjustment of DLP or other controls based on IRM’s risk score for a user. For example, if IRM deems a user “high risk” (perhaps they have multiple serious alerts), the system can automatically impose stricter DLP rules on that user (like blocking any external sharing of files) via Adaptive Protection policies[3][3]. This showcases a powerful integration where IRM’s analytics inform preventative controls in real time.
Microsoft Defender Integration: In a security operations centre (SOC) scenario, insider incidents can appear similar to external attacks. IRM now integrates with Microsoft Defender XDR (Extended Detection & Response) tools used by SOC analysts. IRM’s insights (like the user’s risk level or history of data downloads) are surfaced in Defender’s incident pages[2][2]. This helps the SOC distinguish between a compromised account vs. a malicious insider. (We discuss this more under recent enhancements.) In short, IRM is part of the broader Microsoft 365 “inside-out” defence strategy, working hand-in-hand with other tools to provide a 360-degree view of risks.
In summary, Microsoft Purview Insider Risk Management serves as a centralized internal risk management hub – it enables SMBs to spot risky user behaviour early, investigate incidents thoroughly (with minimal privacy intrusion until necessary), and respond decisively (either by corrective action, enforcement through other tools, or involving HR/legal teams). It fits within the Microsoft Purview compliance suite as the solution focused specifically on people-centric risks inside the organisation, complementing other solutions that focus on data protection and external threats.
2. Step-by-Step Deployment Guide for an SMB
Deploying Insider Risk Management in an SMB environment involves preparing the tenant, configuring the tool, and tuning it to your organisation’s needs. Below is a step-by-step guide covering prerequisites, setup, and initial policy configuration.
Step 1: Licensing and Permissions. Before anything else, ensure your organisation’s Microsoft 365 subscription includes Insider Risk Management. IRM is considered an advanced compliance feature and is not included in the base SMB plans by default (for example, it’s not part of Microsoft 365 Business Premium)[5]. The section on Licensing and Costs later in this report details the options; commonly, SMBs will either utilize a Microsoft 365 E5 plan or a Microsoft 365 E5 Compliance add-on to get IRM. If you don’t yet have the licenses, Microsoft offers a 90-day trial for Purview solutions which could be used to pilot IRM at no cost[4]. Once licensing is in place, assign the IRM licenses to the user accounts that will be monitored and to the admins who will manage the system (typically you’d license all users for compliance features like IRM to be safe). Next, set up permissions: in the Microsoft Purview compliance portal, navigate to Roles and add the appropriate people to Insider Risk Management roles (e.g. “Insider Risk Management Admin” for those who configure policies, and “Insider Risk Management Analysts” for those who will review alerts)[4]. By design, Global Admins do not automatically see IRM—you must be in one of these IRM-specific role groups to access the insider risk dashboards.
Step 2: Turn on Audit Logging. IRM draws on M365’s unified audit log to get much of its signal data. For IRM to function, audit logging must be enabled for your tenant[4]. Most tenants have this on by default (and any Microsoft 365 Business Premium or E3/E5 tenant will have basic audit capabilities), but verify by going to the Audit section in the compliance portal. If it’s off, turn it on (note: after enabling, it may take a few hours to start recording events)[4]. Without audit logs, IRM policies won’t trigger because they have no data to analyze. Also ensure that users and administrators are aware that audit logging is active (for transparency).
Step 3: Optional – Insider Risk Analytics. Microsoft Purview IRM includes an Analytics feature that can be run in “analysis mode” without any active policies. This is optional but highly recommended, especially for first-time setup. The analytics scan combs through your existing audit logs to identify any activities or users that appear risky before you even configure formal policies[4]. Think of it as a baseline risk assessment. For example, analytics might surface that a particular user has been mass downloading files or that there’s an unusual spike in permission changes in SharePoint. Running this can help you pinpoint where to focus your policies (perhaps your organisation has more of a data leakage issue vs. HR-related issues, for instance). You can start an analytics scan from the IRM Overview page in the Purview portal by enabling “Insider risk analytics”. Give it at least a day or two (up to 48 hours) to complete the scan and generate the analytics report[4]. The output will highlight top risk factors and potentially recommend policy templates to implement. This step is particularly useful for an SMB to right-size their approach and not enable every policy blindly. (It’s worth noting that the analytics feature might require the higher-tier license as well, since it’s part of the IRM solution.)
Step 4: Configure Connectors & Indicators (if needed). Out-of-the-box, IRM will already use many internal signals from M365 workloads. However, you should consider if you need to configure any connectors for additional signals:
HR Connector for Departing Users: If you plan to use policies related to employees leaving the company, you should feed IRM with information about separations. In an enterprise, this is often done via an HR system connector (e.g. connecting Workday or SAP SuccessFactors into Azure AD or directly into Purview). In an SMB, you might not have a fancy HR system – but you can still inform IRM of departure events by using the “User resignation” data connector in Purview or simply by updating the user’s profile in Azure AD with a termination date. Microsoft Purview can import a CSV or use Azure AD attributes to mark someone as scheduled to leave[6], which triggers the “departing user” condition in relevant IRM policies. Configuring this ensures that when someone is put on notice or given their resignation, IRM policies for departing users will properly scope that person and apply heightened monitoring during the critical window around their exit.
Endpoint and Cloud App Indicators: If your organisation wants to monitor actions like files being copied to USB drives, printed, or uploaded to cloud services like Dropbox, ensure that Microsoft Defender for Endpoint (if available via your license) is deployed on your user devices. For SMBs using Microsoft 365 Business Premium, Defender for Business provides some endpoint DLP capabilities that integrate with Purview. Check that devices are onboarded in the Microsoft 365 Defender portal so that endpoint signal (like device file events) flow into IRM. Similarly, if you want multi-cloud visibility (e.g., to get alerts when someone moves files to an unsanctioned cloud service), you might have had to enable a preview connector. As of late 2024, IRM introduced multi-cloud indicators (for Box, Dropbox, Google Drive, AWS, etc.) that can be toggled on, provided you link an Azure subscription for billing (more on this in Recent Updates)[7][7]. Decide which of these indicators are relevant to your SMB and enable them in Insider Risk Management > Settings if needed. Many SMBs may primarily focus on the core Microsoft 365 signals, but it’s good to know the system can extend to other cloud sources if your users commonly use them (for example, if some departments still use Dropbox for file sharing, you’d want IRM to catch risky moves there as well).
Step 5: Create and Customise Policies. With groundwork laid, proceed to create your insider risk policies:
Navigate to the Insider Risk Management section in the compliance portal and select “Policies”. Click “+ Create policy”. A wizard will guide you.
Choose a Template: Pick a template that aligns with a risk you’re concerned about. For an SMB just starting, two common ones are “Data leaks” (to catch general exfiltration of sensitive info) and “Data theft by departing users” (to monitor users who leave). The template will pre-select a set of indicators and a trigger. For example, Data leaks might look at things like mass file downloads, sharing files externally, etc., without needing a specific trigger event. Departing users template, on the other hand, will focus on users flagged as leaving.
Name and Description: Give the policy a meaningful name (e.g. “Contoso – Departing User Data Theft Policy”) and description so others know its purpose.
Scope (Users/Groups): Decide which users the policy will apply to. You can include or exclude users or Azure AD groups. In SMBs, it might be fine to include everyone initially. Alternatively, you might exclude executive accounts at first if you’re concerned about privacy, or vice versa mark only a certain group as “priority users.” (IRM has a concept of priority users for heightened monitoring of key roles – you can configure a list of priority users in the settings. There are also separate template variants for priority users[1]).
Indicators and Triggering Events: Depending on the template, you may have options to refine what activities to watch. For example, in a Data leaks policy you can choose to monitor only files with certain sensitivity labels or only activities in specific SharePoint sites. In a Departing user policy, you will confirm what constitutes the “flight risk” trigger (usually it’s when the user is added to the HR departure list or disabled account). Ensure the indicators (like file downloads, printing, emailing attachments, etc.) make sense for your environment. Microsoft’s defaults are usually a good start, covering a broad range of risky actions.
Timeframe: Set how far back and forward to look around a trigger event (for policies that have one). For instance, watch 30 days before and 30 days after a user’s termination date. For continuous policies (like Data leaks), you’ll set a monitoring interval (e.g. alert on risky activities within a 7-day window).
Thresholds and Alerting: Some policies let you adjust thresholds – e.g., only alert if more than 100 files are downloaded in a day. Initially, you might keep the default values until you gather some data on what’s normal. Templates often come with research-based defaults. You can also set whether to alert on every event or only if a certain combination of events occur. Keep in mind SMBs might have fewer events overall, so you might lower certain thresholds (e.g., 20 files downloaded by one user might already be unusual in a 10-person company, whereas in a 1000-person company it’s not).
Review and Create: Finish the wizard to create the policy, and make sure to turn it from “Test” mode to “Active” if you want real alerts. (There is a mode where you can simulate policies without generating alerts, but in SMBs it’s usually fine to go live, especially after doing an Analytics scan).
Repeat the above to create multiple policies if needed. A cautious approach for SMBs is to start with one or two policies that address your top concerns rather than enabling everything at once – this prevents overwhelming your team with alerts. Over time, you can add more policies (for different scenarios) as you become comfortable managing them.
Step 6: Monitoring Alerts and Tuning Policies. Once policies are active, IRM will begin monitoring user activities. Alerts will appear on the IRM Alerts page. At this stage:
Establish a routine for alert review. For example, your IT manager or security officer might check the IRM dashboard daily or get email notifications (you can configure alert digest emails) if something triggers. In a small business, the person in charge of IT or compliance often takes on this role.
When an alert comes in, click into it to see details: which user (pseudonymised as UserX until you reveal), what activities triggered it, and why it was flagged (e.g. “User downloaded 50 confidential files and uploaded 10 files to a personal Dropbox” might be listed under activities). Each alert shows the severity (low, medium, high) and the status (e.g. “Needs review”)[1].
Triage the alert: Determine if it’s a true risk or a false positive. For example, maybe an employee legitimately moved documents to a SharePoint site but IRM flagged it as unusual – upon checking, you realise it’s part of their job. You can then resolve the alert as benign (dismiss it). If it’s potentially concerning (not obviously benign), leave it open for deeper investigation (or immediately escalate to a case if it looks very serious).
As you handle alerts, you’ll learn whether your policies are too sensitive or not sensitive enough. Adjust the policies accordingly in the Purview portal. This might include: changing thresholds (maybe require 200 files downloaded before alert to cut down noise), adding an exclusion (e.g. exclude the Finance group from a particular policy if their large data exports are always causing alerts but are expected), or including additional indicators to catch missed incidents. Policy tuning is an iterative process. The goal is to reach a point where when an IRM alert fires, it is something truly worth looking at. Microsoft provides guidance in the dashboard via the Analytics feature which can suggest threshold changes (if you enabled Analytics, it can recommend tuning adjustments in real-time)[3].
Step 7: Investigating Incidents and Taking Action. For alerts that are confirmed as actual issues, use IRM’s case management to dig deeper:
Create a Case from the alert (or add the alert to an existing case if it’s related to an ongoing investigation). In SMBs, it’s unlikely you have too many simultaneous cases, but using the case feature helps keep a record of what’s been investigated.
In the case view, examine the User Activity timeline to reconstruct the user’s sequence of actions[1]. For example, you might see the user signed into their account at 8 AM from a new location, then at 9 AM downloaded a customer list from SharePoint, at 9:30 AM copied that to a USB drive, and at 10 AM attempted to delete a bunch of files. Plotting this out can tell a story – maybe they were preparing to leave and tried covering tracks, or maybe their account was compromised by an attacker (compare with their usual pattern).
Use the Content Explorer to open or download copies of the files in question[1]. Check if the content is indeed sensitive. Sometimes IRM might flag a bulk action that isn’t actually harmful if the files are benign. Conversely, it might find the user also emailed those files out – the content explorer would show the email.
Document findings in the case notes. If multiple people are involved in response (maybe an external IT consultant or a manager), you can share the case report with them (there’s an option to email a link to the case or export a summary).
Decide on the response: Since SMBs may not have dedicated HR or security investigators, this likely involves leadership. You might have a conversation with the user to get an explanation, or you might immediately revoke their access if malfeasance is evident. IRM itself can’t automatically punish a user, but you can integrate it with other tools for response. For example, if you confirm that a user is leaking data intentionally, you could create a Power Automate flow that, when an IRM alert is tagged high severity, it alerts management and locks the user’s account. In smaller setups, manual action (disabling account, asking the user’s manager to follow up, etc.) is more likely.
If the incident could have legal implications (e.g. theft of intellectual property), escalate the case to eDiscovery (Premium). With a click, IRM can send all its collected data to an eDiscovery case where legal teams can do a broader content search, preserve data (legal hold), and eventually export data for legal proceedings[1]. This is more relevant if you plan to pursue the matter legally or need to provide evidence to authorities.
Completing these steps sets up Microsoft Purview IRM in your SMB environment and initiates an ongoing cycle of monitoring and improvement. Remember that insider risk management is not a “set and forget” tool – it requires active management and periodic reassessment of policies as your business evolves. That said, after the initial heavy lift of configuration and tuning, many SMBs find that only a modest amount of time each week is needed to review IRM alerts once the system is calibrated to your normal operations.
3. Best Practices for Effective Use in SMBs
Implementing Insider Risk Management is not just a technical exercise – it also involves process and culture. Here are recommendations and best practices tailored for SMBs to use IRM effectively:
Target the Most Relevant Risks: Align IRM with your specific business context. For example, if you’re a software development startup, source code leakage might be your top concern – focus on policies that watch for large code repository downloads or sharing code outside approved channels. If you’re a professional services firm, client data confidentiality would be key – a policy for detecting bulk client file downloads or unusual email forwarding might be priority. Start with 1-3 core policies that cover your greatest “insider worry” scenarios rather than enabling all templates. This keeps management manageable and addresses the issues you care about most. You can always broaden coverage later as needed.
Tune Noise Down, Signal Up: In a smaller organisation, certain defaults may be too broad or trigger too often. Don’t hesitate to adjust sensitivity. For instance, a template might consider 5 deleted files as a risk – but if every employee typically deletes dozens of files (like cleaning up folders), that threshold is too low for you. Increase it to something more meaningful. Conversely, if something is very sensitive in your context (say any email sent to a personal address should be flagged), you might tighten a rule. Take advantage of IRM’s analytics recommendations if available – the system can suggest threshold changes to reduce unnecessary alerts[3]. The end goal is that when an alert comes through, it truly requires attention. During initial rollout, plan to spend a few weeks refining the policies. This investment will pay off by saving you time later and avoiding “alert fatigue”.
Regular Alert Triage and Response: For IRM to be effective, you need a consistent process to handle its output. Define who will review alerts and how often. In an SMB, this could be a role for the IT administrator, security officer if you have one, or a managed service provider (MSP) if you use one. Treat it similarly to how you handle antivirus or firewall alerts – it’s part of the security monitoring routine. We recommend checking the IRM dashboard at least once a day or set up email notifications for new High severity alerts, so you don’t miss something critical. When reviewing:
Document decisions: If you dismiss an alert as false positive, add a note why (IRM allows notes on alerts/cases). This builds a knowledge base, so if another admin steps in, they understand the history. It also helps if you later need to explain your monitoring actions (for audit or compliance).
Use the case management even for moderate incidents. It keeps things organised. For example, if User A triggers small alerts that on their own aren’t alarming but collectively seem suspicious, open a case to tie them together. You can keep that case open and see if a pattern emerges.
Follow through on remediation: An alert that turned out valid should result in an action. That action might be as light as a coaching conversation with the employee or as heavy as termination or legal action, depending on severity. Make sure there’s a feedback loop – if an incident occurs, assess if additional controls are needed to prevent it in future (more training for staff, new DLP rule, etc.). IRM’s job is to shine a light on risky behaviour; it’s up to the organisation to remedy the root cause.
Privacy, Ethics, and Communication: SMBs often have close-knit teams, and introducing insider monitoring can raise trust concerns. While IRM is designed with privacy features (e.g. pseudonymisation) to mitigate this, it’s wise to be transparent with your employees to the extent possible. Best practice is to include a section in your employee handbook or IT policy stating that “the company may monitor user activities and communications for security and compliance purposes.” Emphasise that this is to protect the business and employees from risks, not because of lack of trust. In some jurisdictions (like certain Australian states, EU countries, etc.), employee monitoring requires consent or at least notification – make sure you comply with any such requirements. Avoid over-monitoring: use IRM to address genuine risks and not to spy on trivial matters. For example, do not use it punitively to track minor policy infractions unrelated to security (like using office internet for personal browsing – that’s not what IRM is for). Maintaining professionalism and respecting privacy will help ensure that IRM does not erode workplace morale. Only a very small group (maybe just one person in IT plus a manager or HR partner) should have access to IRM data. This prevents gossip or misuse of the sensitive information that could come up during an investigation. All these measures build an environment where employees can accept the idea of monitoring as a safety net rather than feeling constantly surveilled.
Leverage Integration with Other Tools: Use IRM in concert with the rest of your Microsoft 365 security stack:
If you have Microsoft Defender for Endpoint (part of Business Premium or as an add-on), ensure its features like endpoint DLP are enabled. This will feed IRM with rich device-level events (e.g. copying to USB, printing docs) that purely cloud-based monitoring might miss. It also allows you to take device-focused actions if needed (like isolating a machine).
Consider enabling Microsoft Purview Communication Compliance (if licensed) for things like acceptable use monitoring (e.g. detecting harassment in Teams or inappropriate sharing of data in chat). While communication compliance is separate, any serious findings there (like someone repeatedly trying to share confidential info via chat) can inform your insider risk picture. In fact, Microsoft has enabled certain Communication Compliance signals to flow into IRM as of recent updates[3]. For example, if a user is warned by a communication policy for attempting to share sensitive info, IRM can treat that as an indicator of potential risk.
Use Azure AD (Entra ID) risk signals in conjunction: If Azure AD Identity Protection flags a user as high risk (say their credentials were detected in a leak), be extra vigilant with their insider risk alerts – it could mean an external actor is using an insider’s account. Interestingly, IRM now shows Entra ID compromised user alerts within its dashboard for enriched context[3]. So a best practice is to monitor those correlations; a user with both an IRM alert and an Identity Protection alert might point to account compromise rather than malicious intent.
If you have Microsoft Teams or email flows set up for IT, you might integrate IRM alerts there for quicker response. For instance, you could use Power Automate to post a message in a private IT Teams channel whenever a high-severity IRM alert occurs, ensuring it’s seen promptly even if admins are not watching the portal.
Respond holistically: IRM might highlight a problem that requires changes elsewhere. If, for example, IRM alerts show a user accessing a confidential SharePoint site they shouldn’t, the fix might be to adjust SharePoint permissions for that site (a preventive measure), not just to chastise the user. Similarly, frequent near-miss incidents (where IRM catches risky behaviour) might signal a need for employee training on security policies. Use IRM as feedback to improve your overall security posture.
Periodically Review and Update IRM Configuration: At least twice a year (or whenever major changes happen in your org), review your IRM settings:
Are the right people in the IRM roles? (E.g., if an admin left the company, remove their access.)
Do the policies still align with current business priorities and threats? You might add new ones as new risks emerge (for example, if you adopt a new tool or if there’s a rise in a certain risky behaviour industry-wide).
Check Microsoft’s updates to IRM (see next section) – new features or policy templates might be available that could benefit your SMB. Incorporating new capabilities (like the new “Risky browser usage” template or improved analytics) can increase the effectiveness of your insider risk program.
Overall, effective insider risk management in an SMB boils down to focus, balance, and follow-through: focus on the biggest risks, balance security with privacy and culture, and follow through on alerts with consistent action. When implemented with care, IRM becomes a valuable early-warning system for internal issues and fosters a security-conscious workplace.
4. Licensing and Cost Considerations (AUD) for SMBs
Microsoft Purview Insider Risk Management is available to SMBs, but it typically requires premium licensing. This section outlines the licensing options and costs, with prices in Australian dollars (AUD). All prices are per user, per month (excluding GST unless stated otherwise).
License Options for IRM in SMB:
License Plan or Add-on
Insider Risk Management Availability?
Approx. Price (AUD) per user/month (ex. GST)
Microsoft 365 Business Premium (SMB)
Not included (no IRM by default)
A$36.19 (inc GST) ~ A$33 ex GST
Microsoft 365 E5 Compliance Add-on
Yes – adds IRM + other compliance features to Business Premium or E3
~A$18 ex GST (≈ A$19.80 inc)
Microsoft 365 E5 (Full suite, Enterprise)
Yes – IRM included out-of-the-box
A$81.90 ex GST (A$90.09 inc GST)
Table: Licensing tiers for Insider Risk Management and their approximate costs in Australia. Business Premium (the common SMB Microsoft 365 plan) does not include IRM; an add-on or upgrade is required.
Microsoft 365 Business Premium: This is the typical Microsoft 365 subscription for SMBs (up to 300 users), and it costs around A$36.19 per user per month in Australia (including GST)[8]. However, Business Premium does not include Insider Risk Management or other advanced Purview compliance features by default. It provides core security/compliance like basic DLP and sensitivity labels, but Insider Risk Management is absent in this plan. To get IRM, you have two choices: either purchase an add-on for the needed features or switch to an enterprise license tier.
Microsoft 365 E5 Compliance Add-on: Microsoft offers add-on licenses that SMBs can attach to their Business Premium (or E3) subscriptions to unlock E5-level capabilities without a full E5 upgrade. The M365 E5 Compliance add-on includes the advanced compliance suite – which covers Insider Risk Management, Advanced Auditing, eDiscovery (Premium), Communication Compliance, Advanced DLP, etc. Essentially, it brings your compliance features to E5 parity[5]. For an SMB on Business Premium, this is a popular route to get IRM. In Australia, the E5 Compliance add-on is roughly A$18 per user/month (about A$216 per user per year)[9], though prices can vary slightly by provider and whether you have annual commitments. This add-on requires that the user already has a base license like Business Premium or E3; it can’t be used alone. One nice aspect is that you can choose to buy it just for specific users who you want to monitor, but beware: if you only license some employees for IRM, officially you are only supposed to apply IRM policies to those licensed users. (In practice, many orgs will simply license everyone who has access to sensitive data, to cover their bases.)
Microsoft 365 E5 (Enterprise): This is Microsoft’s top-tier enterprise plan and includes all IRM capabilities natively (no add-on needed). It also includes a host of other advanced security tools (Defender for Endpoint P2, Defender for Office P2, etc.). SMBs (even with under 300 seats) can purchase E5, though it’s often more than what a small business needs or budgets for. The cost is approximately A$81.90 per user/month (annual commitment, excluding GST)[10] – around A$90/user/month including GST[8]. This is significantly higher than Business Premium’s cost, so most SMBs won’t go full E5 just for insider risk features. However, for a growing company that foresees needing multiple advanced security and compliance features, moving up to E5 can sometimes be justified. Microsoft also occasionally runs promotions (for example, a 50% off for certain compliance add-ons if you’re also trying their new services like Copilot – these come and go).
Other Add-ons and Plans: Microsoft also has a standalone “Insider Risk Management” add-on and an “Information Protection & Governance” add-on. These were mentioned in some licensing guides, aimed at flexibility (for instance, you could add just the Insider Risk component without the full E5 Compliance suite). In practice, the E5 Compliance bundle is more common and covers everything. If an SMB works with a Microsoft licensing partner, they can price out the option of the “Microsoft 365 E5 Insider Risk Management” add-on specifically – it would likely be slightly cheaper than the full compliance bundle, but note it only gives IRM (and possibly a couple of related pieces) without things like Advanced eDiscovery. The combination of “E5 Information Protection & Governance” + “E5 Insider Risk Management” add-ons together essentially equals the E5 Compliance features[6]. Licensing can be complex, so consulting with a Microsoft provider to find the most cost-effective option is advisable.
Education and Nonprofit Plans: (Not the focus here, but for completeness) – If you are an educational institution using A5 or a nonprofit, similar IRM rights come with those top-tier plans. For SMB corporate usage, those don’t apply, but it’s worth noting in case an organisation mistakenly thinks E5 is only for huge enterprises – it’s also used in large schools (A5) and can be scaled down to small seat counts if needed.
Cost Considerations: From a budget perspective, SMBs should weigh the cost vs. benefit. Adding IRM (via an add-on or E5) will increase your Microsoft 365 subscription costs. For example, Business Premium at ~$33 ex GST + E5 Compliance add-on ~$18 means about ~A$51 per user/month for those users to have IRM and all other compliance features. That is roughly half the price of full E5 (which is ~$82 ex). If you don’t need the security parts of E5 (since Business Premium already has many security features, just not the advanced compliance ones), the add-on route is cost-efficient.
The good news is you don’t have to license all users if you have some that truly don’t create any risk (although strictly speaking, any user could potentially cause an incident). Microsoft’s licensing guidance is that any user being monitored by an insider risk policy should be licensed. In a small company, it might be simplest (and fairest) to license everyone who uses a company device or data. But if budget is tight, you could decide to license only certain roles (for instance, only the executives and people in sensitive roles like finance or engineering). Keep in mind though, an unlicensed user won’t show up in IRM and could theoretically be an blind spot.
Trials and Scaling: Microsoft Purview IRM can be tried for free via the Purview trial program (90 days)[4], which is a smart way for an SMB to test the waters and see value before buying. If you anticipate only needing IRM for a short-term project or during a particular high-risk period, that trial might even cover your needs in the short run. Just remember to either remove the policies or get proper licenses after the trial to stay in compliance.
Finally, from a cost perspective, consider the potential cost of insider incidents. While IRM has a direct licensing cost, it may prevent expensive incidents (data breaches can cost organisations hundreds of thousands of dollars or more, and even a small breach can have outsized impact on a small business). Seen in that light, the licensing fee can be a prudent investment. Of course, every business needs to balance this with other priorities; many SMBs start with more pressing security needs like phishing protection and basic backups, then layer in insider risk management once they have the fundamentals and as they grow or handle more sensitive data.
5. Recent Updates and Enhancements Relevant to SMBs
Microsoft is continually improving Purview Insider Risk Management. In the last year or two (2024–2025), several new features and enhancements have been introduced. Here we highlight the most noteworthy updates, particularly those that could be useful for small and mid-sized organisations:
New Policy Templates (AI and Browser Risk): As work patterns evolve, Microsoft has added policy templates to address emerging risks. In late 2024, “Risky AI usage” and “Risky browser usage” templates were introduced (initially in preview)[1]. The Risky AI usage policy is designed to detect when users might be entering sensitive information into generative AI tools (like Microsoft 365 Copilot or even external ones like ChatGPT) or when AI outputs contain sensitive data[3][3]. With the surge in AI tool adoption, this helps organisations prevent accidental leaks via AI platforms. The policy includes indicators such as “Copilot prompts containing sensitive info” or “GPT responses with sensitive data”[3][3]. Similarly, the Risky browser usage template focuses on activities like using unmanaged or unapproved browsers to handle sensitive info, possibly indicating attempts to bypass security. For an SMB, these templates can be very useful if you allow use of AI or bring-your-own devices. For example, an employee trying out ChatGPT might unknowingly paste client data – IRM can flag that now. These templates are available alongside the standard ones, ready to be enabled if relevant.
Integration with Microsoft Defender XDR (SOC Integration): In October 2024, Microsoft announced a significant integration: Insider Risk Management alerts and insights are now integrated into Microsoft Defender XDR (the extended detection and response suite that combines signals from endpoints, identities, etc.)[2][3]. What this means: if you or your managed service provider uses Defender XDR to manage security incidents, insider risk alerts will show up in the same incident queue with your other security alerts. The Defender XDR user page for an account now can show the IRM risk level and recent insider risk activities for that user[2]. This helps a SOC analyst to determine if an alert (like data exfiltration from a device) is due to an insider acting maliciously or an external attacker who compromised the account[2][2]. For SMBs that might use a unified security operations console (perhaps via Microsoft 365 Defender portal or an MSP’s tools), this integration brings insider risk into the central security workflow. It can improve response times and ensure nothing falls through the cracks. Even if you don’t have a formal SOC, this integration shows Microsoft’s focus on breaking down silos between compliance and security – useful if in the future you ramp up your security operations.
Advanced Sequence Detection and Fewer False Positives: Microsoft has improved IRM’s analytics models over time to better catch complex sequences of behaviour and reduce noisy alerts. For instance, IRM can now recognize multi-step patterns (like a user who downloads files, then emails them to personal email, then deletes the originals) as a single incident rather than three separate alerts. The integration of multiple signals into single “alerts” and the correlation logic have improved, meaning you are more likely to see one comprehensive alert with a higher severity than many minor alerts. Additionally, features like “alert triage assistant” (in preview) give a quick summary of why an alert was triggered and suggest next steps, which can aid admins in SMBs who may not be insider risk experts.
Improved Analytics & Reporting: In late 2024, Microsoft enhanced the reporting capabilities for IRM. The new operational reports provide insights into alert trends over time, breakdown by departments, and average time to resolve cases[3]. For example, you can see if November saw a spike in alerts compared to October, or if a particular department (say IT or Sales) is triggering the most incidents. This is useful for SMB leadership to track the effectiveness of their insider risk program and identify if additional training or controls are needed in certain areas. Also, the IRM Analytics dashboard now highlights top emerging risks (including the aforementioned AI usage) directly and can even recommend creating a policy if it detects a pattern with no policy covering it[3].
Risky Users and Adaptive Protection: Another enhancement beneficial to SMBs is how IRM works with Adaptive Protection (which automatically adjusts DLP policies based on user risk levels). As of early 2025, IRM risk scores can directly feed into Adaptive Protection in general availability. For example, if IRM classifies a user as “high risk,” you can have a rule that automatically tightens that user’s DLP policy (perhaps blocking all downloads to USB for 30 days for that user)[3][3]. This dynamic response can be powerful for a small IT team – it’s like having the system automatically put a user on a “watch list” and restrict certain actions until they are back to normal. It’s an advanced feature (requires the full compliance suite and possibly Defender integration), but noteworthy as it brings enterprise-grade adaptive security to organisations of all sizes.
Multi-Cloud and Third-Party Support (Pay-as-you-go model): Recognising that not all data resides in Microsoft 365, IRM introduced multicloud support in preview, with the ability to monitor activities in third-party services like Box, Dropbox, Google Drive, and even AWS cloud services and Power BI[7]. In 2024, this feature moved to a pay-as-you-go model[7]. For SMBs, this is actually good news: you don’t have to purchase an expensive license to cover these, you can simply pay per activity monitored if you opt in. To use it, an admin links an Azure subscription to Purview for billing, and then you opt-in to whichever third-party indicators you need (say your company uses Box, you toggle on the Box indicators). From November 2024, Microsoft charges based on the volume of events it processes for those connectors[7][7]. The cost is generally low for small volumes (and if no one uses Dropbox in a month, you pay nothing that month, for example). This flexibility is great for SMBs who might have a few users on non-Microsoft platforms – you can still include their activities in IRM’s purview without licensing your whole organisation for an expensive third-party archiving solution. Keep an eye on the Azure bill if you enable this, but typically the costs for occasional usage are minimal. Microsoft has not published the exact per-action cost publicly in those announcements, but it’s designed to be consumption-based.
Entra ID (Azure AD) Compromised User Signals: A recent addition is that IRM now can show if a user was flagged by Microsoft Entra ID Identity Protection as compromised. If one of your users had their password leaked or was behaving like a breached account, Identity Protection generates an alert. IRM will display that info in the user’s risk profile[3]. For a small business, this is super useful – it connects the dots between external threat and insider threat. You might see that a user’s account is acting risky in IRM and also see a compromised indicator – telling you this might not be the employee acting maliciously but rather a hacker using their account. This helps you respond correctly (you’d reset their credentials and investigate the external breach, rather than, say, disciplining the employee).
Case Management and Multi-Tenant Support: Microsoft has improved the case management experience, for example by allowing easier export of case data and (for those who manage multiple tenants, like service providers) the ability to manage cases across tenants in the Defender portal was announced. For an individual SMB, multi-tenant isn’t likely applicable, but if you’re a partner managing security for multiple clients, this is handy.
User Activity Reports (Preview): Another feature in preview is User Activity Reports[1]. This lets an investigator generate an on-demand report of all activities by a specific user over a time period, even if that user isn’t currently triggering a policy. It’s useful if, say, you get a tip about a user and want to proactively see if they’ve done anything risky without making a formal policy for them. It’s currently a preview tool, but it can save time by giving a quick snapshot of a user’s recent file, email, and chat activities in one place.
In summary, Microsoft Purview IRM is becoming more powerful and versatile. Features that might have been considered “enterprise-only” – like AI monitoring or multi-cloud signals – are now accessible to smaller organisations with the proper licensing, often on flexible terms. Microsoft’s ongoing enhancements (especially those around automation and integration) mean that an SMB using IRM can benefit from state-of-the-art technology with relatively low administrative overhead. It’s wise to stay updated via Microsoft’s documentation or blog announcements for Purview (for instance, Microsoft’s “What’s New in Purview” page or the Tech Community blogs), as new improvements roll out frequently (monthly, in some cases).
By leveraging these updates, SMBs can continually strengthen their insider risk posture – keeping the organisation’s data secure while enabling employees to work productively and confidently.
Sources: The information in this report is based on Microsoft’s official documentation, blog announcements, and licensing guides, including Microsoft Learn content on Purview IRM[1][1], Microsoft Tech Community blogs (Oct & Nov 2024) for feature updates[2][3], and Microsoft licensing literature and partner pricing for cost details[5][10]. These references are cited throughout the report to provide further reading and verification of the details provided.


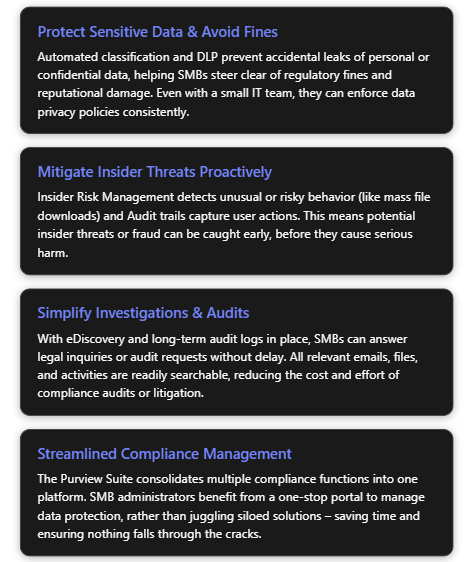

")
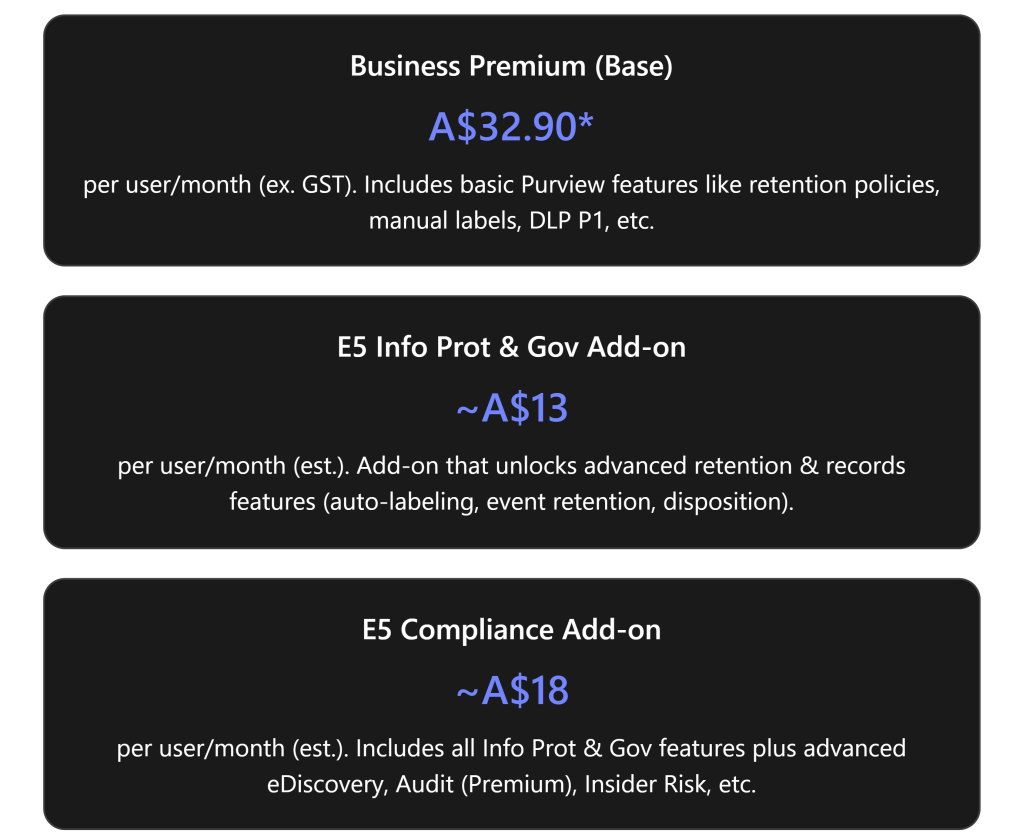
")
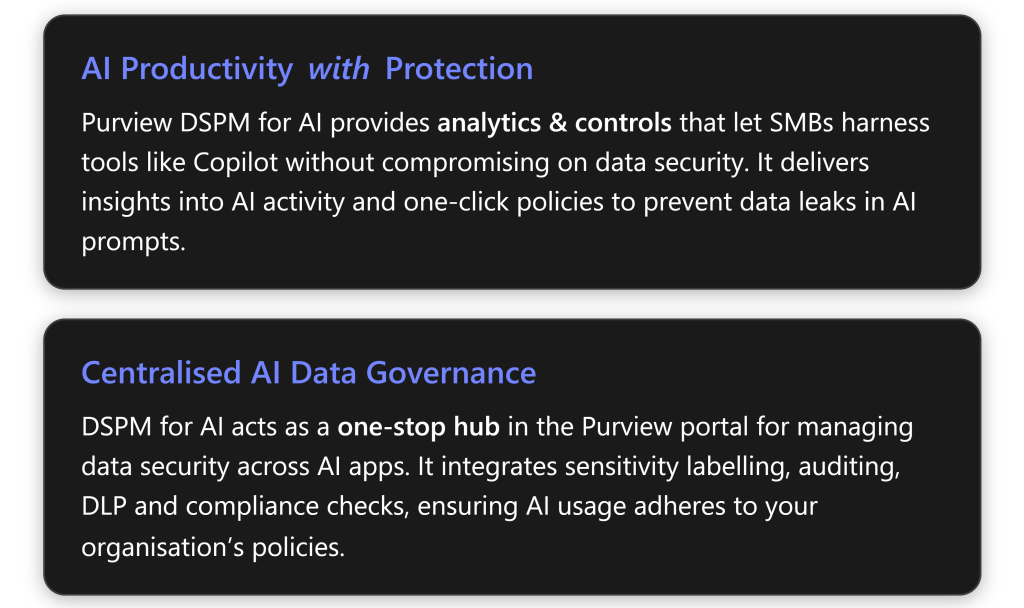
")
")
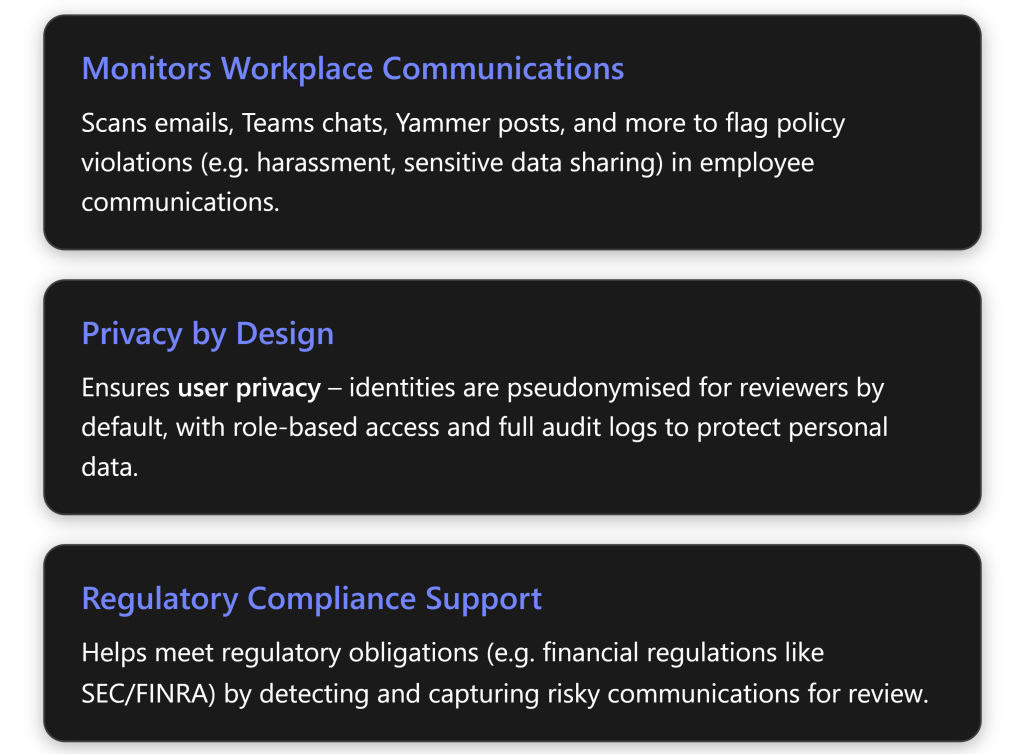
")
")
")
