If you’re running M365 Business Premium for clients, Safe Links and Safe Attachments are already doing work — whether you configured them or not. The Built-in protection preset applies to every mailbox the moment Defender for Office 365 is licensed. The question isn’t “is it on?” — it’s “is it tuned for the way your client actually receives mail?” Out of the box, it’s closer to a safety net than a security control.
Prerequisites MSPs skip
Before you touch a single policy, confirm three things. First, mail has to flow through Exchange Online Protection. Hybrid tenants with a third-party gateway in front (Mimecast, Proofpoint, anything rewriting URLs) will often cause Safe Links to skip wrapping — Microsoft explicitly warns that pre-wrapping can prevent Safe Links from processing the link at all. Second, confirm licensing: Safe Links and Safe Attachments require Defender for Office 365 Plan 1 (included in Business Premium). Plan 2 features (Safe Documents, Threat Explorer real-time detections) need separate entitlement. Third, set quarantine notifications up before you tighten policies — users need end-user spam notifications or a quarantine policy with access enabled, or your service desk gets the entire phishing queue.
Where to configure — Standard preset, not custom, 90% of the time
The Microsoft Defender portal is your canonical surface: security.microsoft.com → Email & collaboration → Policies & rules → Threat policies. From there:
Preset security policies for 90% of clients. Enable Standard, assign to all recipients by domain.
Safe Links and Safe Attachments tiles are for custom policies — only use them when a specific user group needs different behaviour (execs on Strict, a lab OU excluded, etc.).
Configuration analyzer — this is the tile most MSPs never click. It diffs your current policies against Standard and Strict baselines and flags every setting that’s weaker than Microsoft’s recommendation.
Don’t flip Strict on Monday morning. Use a three-ring rollout:
Ring 1 — IT and security-aware staff (week 1). Assign Standard preset. Watch quarantine, false-positive submissions, and user complaints. This ring tolerates noise.
Ring 2 — a tolerant business unit (week 2–3). Finance is usually a bad pilot (high-volume invoices with wrapped URLs confuse people). Pick sales ops, marketing, or IT-adjacent teams.
Ring 3 — everyone else (week 4+). By now you have a real signal on which domains need Tenant Allow/Block entries.
For Strict preset, add a fourth ring limited to exec and finance groups — or leave it off. Strict’s aggressive bulk thresholds (BCL 4) will blow up newsletters and marketing workflows. Details at Preset security policies.
Top three pitfalls
1. Custom policies silently overriding presets. Preset security policies have the highest priority except when a custom policy explicitly targets the same user. If you inherited a tenant with a custom Safe Links policy from 2019 that says AllowClickThrough = true, it beats your shiny new Standard preset. Audit first: open every existing policy before assigning presets.
2. Over-allowlisting domains. Every entry in “Do not rewrite the following URLs” is a permanent click-through exception. Treat it like firewall rules — justify, document, review annually. A forgotten *.sharepointdomain.com wildcard is how payloads land.
3. Ignoring the Configuration analyzer. Run it quarterly. Tenants drift: an admin raises a threshold to silence a complaint, nobody reverses it, six months later the baseline is gone. The Configuration analyzer surfaces this in one screen.
Tune deliberately, measure through Threat Explorer, and treat preset policies as your default — the time to build a custom policy is when you can describe exactly which preset setting it’s overriding and why.
Smart App Control (SAC) is a pre‑execution application control layer built into Windows 11 that blocks untrusted software before it runs. It lives in Windows Security → App & browser control, and operates independently from Microsoft Defender Antivirus and SmartScreen. [support.mi…rosoft.com], [computerworld.com]
This is important:
Smart App Control is not antivirus. It is policy‑enforced app allow/deny at launch time, based on trust and reputation.
Think of it as Microsoft sneaking a consumer‑friendly WDAC‑lite into Windows 11.
The security model: how SAC makes decisions
When any executable (EXE, DLL, MSI, script, etc.) attempts to run, Smart App Control applies a deterministic trust pipeline:
1. Cloud reputation check first
Windows queries Microsoft’s cloud‑based app intelligence service, which analyses signals from billions of executions worldwide. [support.mi…rosoft.com], [computerworld.com]
If the app is:
Known good
Widely deployed
Previously classified as safe
➡ It runs
2. Certificate trust validation
If cloud intelligence cannot confidently classify the app, SAC checks:
There is no “Run anyway”, no whitelist, and no user override in enforcement mode. That is entirely by design. [computerworld.com], [howtogeek.com]
The three Smart App Control states (this matters)
SAC operates in three mutually exclusive modes:
1. Evaluation mode
SAC runs silently
Nothing is blocked
Windows observes your real‑world app usage
SAC decides if your system is “compatible” with strict enforcement
This was originally only triggered on clean installs. [howtogeek.com]
2. Enforcement (On)
Unknown or untrusted apps are blocked at launch
No user bypass
No per‑app exceptions
Logs are written to Windows Security / Event Viewer
This is where SAC actually provides protection.
3. Off
No checks
No enforcement
Until recently, this was permanent without OS reinstall
Why Smart App Control was widely ignored (until now)
From a pure security model perspective, SAC was solid. From a real‑world usability perspective, it was borderline hostile.
Until early 2026:
If you disabled SAC once, it could never be turned back on
Re‑enablement required a full Windows reinstall or reset
Upgraded systems were locked to Off
MSPs, developers, and power users effectively couldn’t touch it
Microsoft openly acknowledged this rigidity in its own documentation. [support.mi…rosoft.com]
So the result?
Everyone who actually understands Windows workflows turned it off permanently.
What changed in 2026 (this is the big deal)
April 2026 Windows 11 security updates fundamentally changed SAC’s lifecycle
Microsoft removed the “one‑way switch” limitation.
As of the April 2026 Windows 11 updates (24H2 / 25H2):
✅ Smart App Control can now be turned ON after install ✅ Smart App Control can be re‑enabled after being turned off ✅ No OS reinstall required ✅ Managed via Windows Security UI
Unlock Enterprise-Grade Security for Every Business—No Matter the Size
Are you ready to transform your security posture and deliver true peace of mind to your organization or clients? The Microsoft Defender for Business Implementation Guide (v8) is your definitive, step-by-step playbook for deploying, configuring, and mastering Microsoft’s most powerful endpoint protection platform—tailored specifically for small and medium-sized businesses (SMBs) and managed service providers (MSPs).
Why This Guide?
Comprehensive & Current: Authored and reviewed against Microsoft’s latest documentation (March 2026), this guide incorporates all the newest features, compliance frameworks, and product naming conventions—including Microsoft Entra ID and Security Copilot integration.
Role-Based Clarity: Whether you’re L1 helpdesk, L2 systems technician, or L3 security engineer, you’ll find clear responsibilities, escalation policies, and best practices for every technical level.
Seven-Phase Deployment Blueprint: Follow a proven, auditable process from pre-implementation planning and licensing, through device onboarding and advanced feature enablement, to post-deployment validation and compliance tracking.
Real-World, Actionable Steps: Includes quick-start checklists, decision tables, escalation criteria, and step-by-step procedures for Windows, macOS, iOS, Android, and Linux environments.
MSP-Ready: Features dedicated guidance for multi-tenant management, Microsoft 365 Lighthouse, and compliance with the latest GDAP requirements.
Security Without Compromise: Learn how to implement next-generation antimalware, firewall management, attack surface reduction, endpoint detection and response (EDR), vulnerability management, and automated investigation and remediation (AIR)—all in one unified platform.
Audit-Ready & Best Practice Driven: Ensure every deployment is systematic, documented, and compliant with SMB1001 and Microsoft’s own recommendations.
Who Should Buy This Guide?
IT Managers & Security Leads in SMBs seeking enterprise-grade protection without enterprise complexity.
MSPs looking to standardize and scale secure deployments across multiple clients.
Technicians at All Levels—from helpdesk to security architects—who need clear, actionable instructions and escalation paths.
Organizations Pursuing Compliance and audit-readiness in today’s evolving threat landscape.
What You’ll Achieve
Rapid, error-free deployments with minimal downtime.
Consistent, auditable security operations and compliance.
Reduced analyst workload through intelligent automation.
Confident, well-trained teams ready to respond to any incident.
Don’t leave your business or clients exposed. Equip your team with the only guide that delivers both the “how” and the “why” of Microsoft Defender for Business—backed by real-world expertise and the latest best practices.
Just completed a simple 2 page comparison table of the features of M365 Business and the new add ons, Defender and Purview suites. It shows what M365 Business Premium provides already and then what each suite add across all the features in a single 2 page PDF download for free.
To get a copy of the PDF emailed to you just complete this form:
Microsoft Defender for Business is a security solution designed for small and medium businesses to protect against cyber threats. When issues arise, a systematic troubleshooting approach helps identify root causes and resolve problems efficiently. This guide provides a step-by-step process to troubleshoot common Defender for Business issues, highlights where to find relevant logs and alerts, and suggests advanced techniques for complex situations. All steps are factual and based on Microsoft’s latest guidance as of 2025.
These are some typical problems administrators encounter with Defender for Business:
Setup and Onboarding Failures: The initial setup or device onboarding process fails. An error like “Something went wrong, and we couldn’t complete your setup” may appear, indicating a configuration channel or integration issue (often with Intune)[1]. Devices that should be onboarded don’t show up in the portal.
Devices Showing As Unprotected: In the Microsoft Defender portal, you might see notifications that certain devices are not protected even though they were onboarded[1]. This often happens when real-time protection is turned off (for instance, if a non-Microsoft antivirus is running, it may disable Microsoft Defender’s real-time protection).
Mobile Device Onboarding Issues: Users cannot onboard their iOS or Android devices using the Microsoft Defender app. A symptom is that mobile enrollment doesn’t complete, possibly due to provisioning not finished on the backend[1]. For example, if the portal shows a message “Hang on! We’re preparing new spaces for your data…”, it means the Defender for Business service is still provisioning mobile support (which can take up to 24 hours) and devices cannot be added until provisioning is complete[1].
Defender App Errors on Mobile: The Microsoft Defender app on mobile devices may crash or show errors. Users report issues like app not updating threats or not connecting. (Microsoft provides separate troubleshooting guides for the mobile Defender for Endpoint app on Android/iOS in such cases[1].)
Policy Conflicts: If you have multiple security management tools, you might see conflicting policies. For instance, an admin who was managing devices via Intune and then enabled Defender for Business’s simplified configuration could encounter conflicts where settings in Intune and Defender for Business overlap or contradict[1]. This can result in devices flipping between policy states or compliance errors.
Intune Integration Errors: During the setup process, an error indicating an integration issue between Defender for Business and Microsoft Intune might occur[1]. This often requires enabling certain settings (detailed in Step 5 below) to establish a proper configuration channel.
Onboarding or Reporting Delays: A device appears to onboard successfully but doesn’t show up in the portal or is missing from the device list even after some time. This could indicate a communication issue where the device is not reporting in. It might be caused by connectivity problems or by an issue with the Microsoft Defender for Endpoint service (sensor) on the device.
Performance or Scan Issues: (Less common with Defender for Business, but possible) – Devices might experience high CPU or scans get stuck, which could indicate an issue with Defender Antivirus on the endpoint that needs further diagnosis (this overlaps with Defender for Endpoint troubleshooting).
Understanding which of these scenarios matches your situation will guide where to look first. Next, we’ll cover where to find the logs and alerts that contain clues for diagnosis.
Key Locations for Logs and Alerts
Effective troubleshooting relies on checking both cloud portal alerts and on-device logs. Microsoft Defender for Business provides information in multiple places:
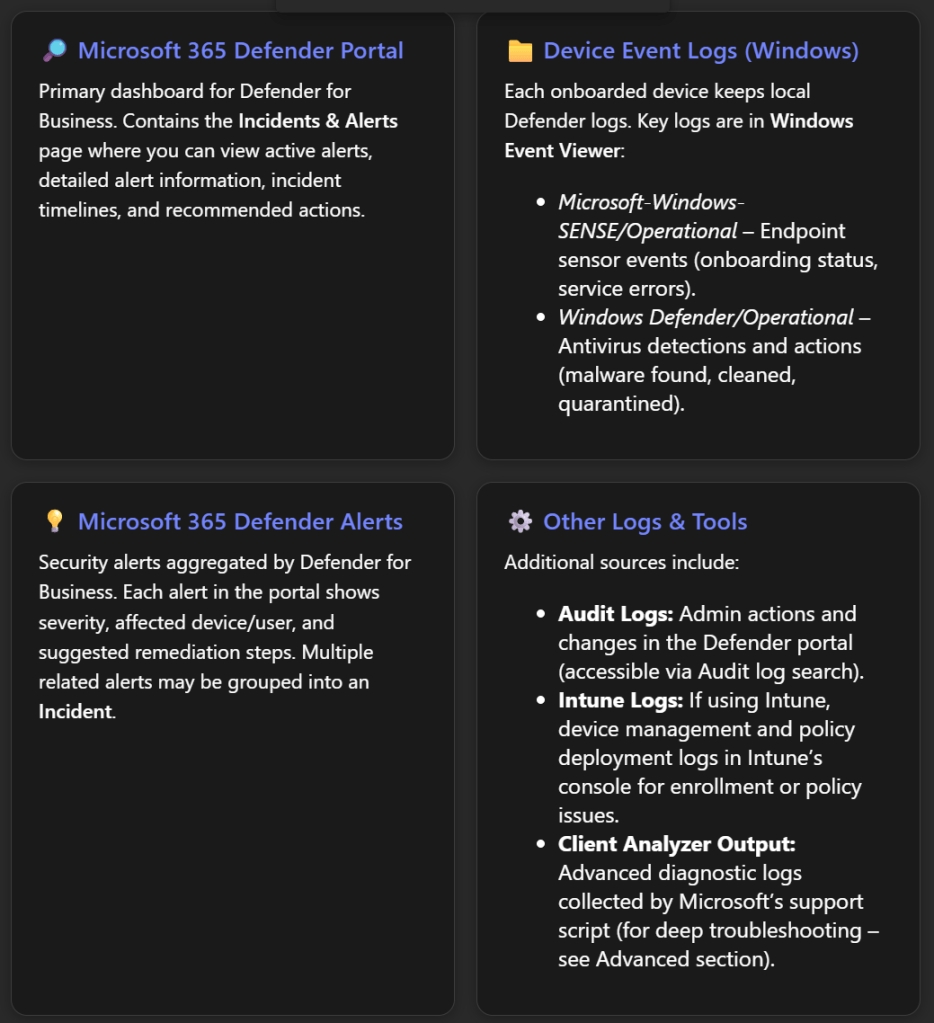
Microsoft 365 Defender Portal (security.microsoft.com): This is the cloud portal where Defender for Business is managed. The Incidents & alerts section is especially important. Here you can monitor all security incidents and alerts in one place[2]. For each alert, you can click to see details in a flyout pane – including the alert title, severity, affected assets (devices or users), and timestamps[2]. The portal often provides recommended actions or one-click remediation for certain alerts[2]. It’s the first place to check if you suspect Defender is detecting threats or if something triggered an alert that correlates with the issue.
Device Logs via Windows Event Viewer: On each Windows device protected by Defender for Business, Windows keeps local event logs for Defender components. Access these by opening Event Viewer (Start > eventvwr.msc). Key logs include:
Microsoft-Windows-SENSE/Operational – This log records events from the Defender for Endpoint sensor (“SENSE” is the internal code name for the sensor)[3]. If a device isn’t showing up in the portal or has onboarding issues, this log is crucial. It contains events for service start/stop, onboarding success/failure, and connectivity to the cloud. For example, Event ID 6 means the service isn’t onboarded (no onboarding info found), which indicates the device failed to onboard and needs the onboarding script rerun[3]. Event ID 3 means the service failed to start entirely[3], and Event ID 5 means it couldn’t connect to the cloud (network issue)[3]. We will discuss how to interpret and act on these later.
Windows Defender/Operational – This is the standard Windows Defender Antivirus log under Applications and Services Logs > Microsoft > Windows > Windows Defender > Operational. It logs malware detections and actions taken on the device[4]. For troubleshooting, this log is helpful if you suspect Defender’s real-time protection or scans are causing an issue or to confirm if a threat was detected on a device. You might see events like “Malware detected” (Event ID 1116) or “Malware action taken” (Event ID 1117) which correspond to threats found and actions (like quarantine) taken[4]. This can explain, for instance, if a file was blocked and that’s impacting a user’s work.
Other system logs: Standard Windows logs (System, Application) might also record errors (for example, if a service fails or crashes, or if there are network connectivity issues that could affect Defender).
Alerts in Microsoft 365 Defender: Defender for Business surfaces alerts in the portal for various issues, not only malware. For example, if real-time protection is turned off on a device, the portal will flag that device as not fully protected[1]. If a device hasn’t reported in for a long time, it might show in the device inventory with a stale last-seen timestamp. Additionally, if an advanced attack is detected, multiple alerts will be correlated as an incident; an incident might be tagged with “Attack disruption” if Defender automatically contained devices to stop the spread[2] – such context can validate if an ongoing security issue is causing what you’re observing.
Intune or Endpoint Manager (if applicable): Since Defender for Business can integrate with Intune (Endpoint Manager) for device management and policy deployment, some issues (especially around onboarding and policy conflicts) may require checking Intune logs:
In Intune admin center, review the device’s Enrollment status and Device configuration profiles (for instance, if a security profile failed to apply, it could cause Defender settings to not take effect).
Intune’s Troubleshooting + support blade for a device can show error codes if a policy (like onboarding profile) failed.
If there’s a known integration issue (like the one mentioned earlier), ensure the Intune connection and settings are enabled as described in the next sections.
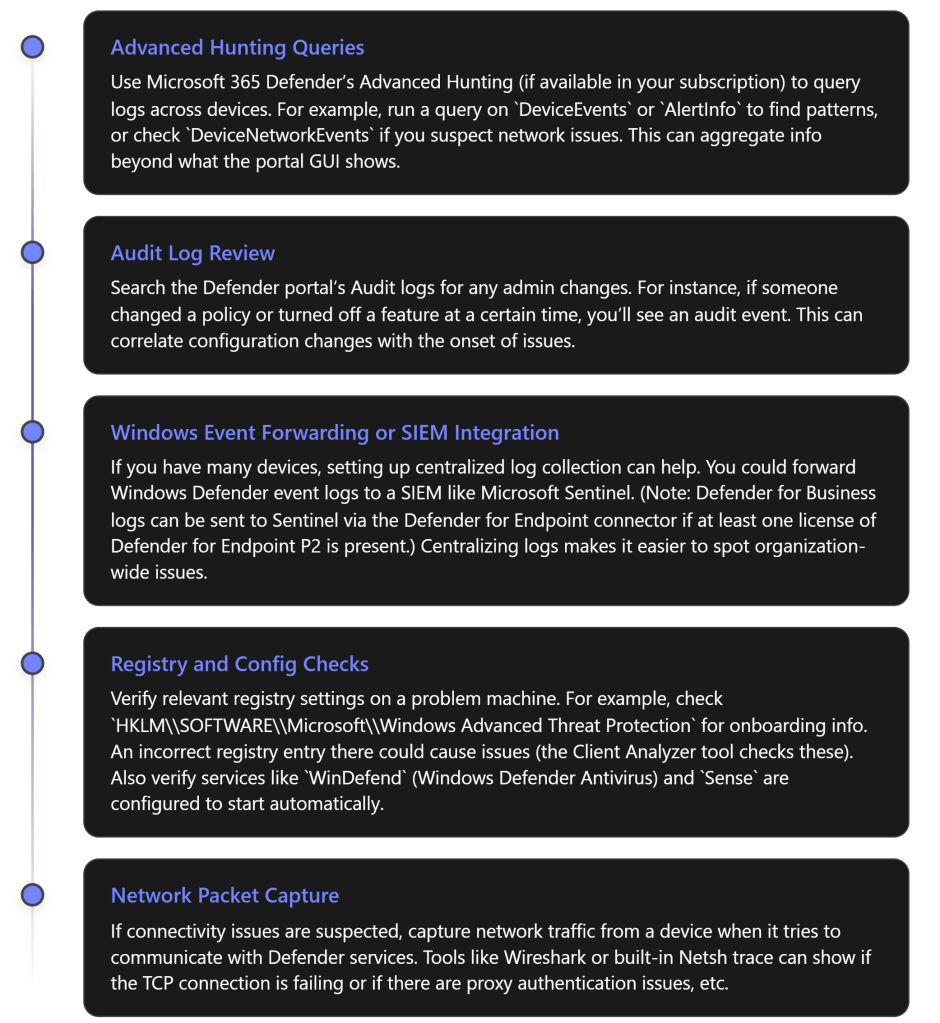
Advanced Hunting and Audit (for advanced users): If you have access to Microsoft 365 Defender’s advanced hunting (which might require an upgraded license beyond Defender for Business’s standard features), you could query logs (e.g., DeviceEvents, AlertEvents) for deeper investigation. Also, the Audit Logs in the Defender portal record configuration changes (useful to see if someone changed a policy right before issues started).
Now, with an understanding of where to get information, let’s proceed with a systematic troubleshooting process.
Step-by-Step Troubleshooting Process
The following steps outline a logical process to troubleshoot issues in Microsoft Defender for Business. Adjust the steps as needed based on the specific symptoms you are encountering.
Step 1: Identify the Issue and Gather Information
Before jumping into configuration changes, clearly define the problem. Understanding the nature of the issue will focus your investigation:
What are the symptoms? For example, “Device X is not appearing in the Defender portal”, “Users are getting no protection on their phones”, or “We see an alert that one device isn’t protected”, etc.
When did it start? Did it coincide with any changes (onboarding new devices, changing policies, installing another antivirus, etc.)?
Who or what is affected? A single device, multiple devices, all mobile devices, a specific user?
Any error messages? Note any message in the portal or on the device. For instance, an error code during setup, or the portal banner saying “some devices aren’t protected”[1]. These messages often hint at the cause.
Gathering this context will guide you on where to look first. For example, an issue with one device might mean checking that device’s status and logs, whereas a widespread issue might suggest a configuration problem affecting many devices.
Step 2: Check the Microsoft 365 Defender Portal for Alerts
Log in to the Microsoft 365 Defender portal (https://security.microsoft.com) with appropriate admin credentials. This centralized portal often surfaces the problem:
Go to Incidents & alerts: In the left navigation pane, click “Incidents & alerts”, then select “Alerts” (or “Incidents” for grouped alerts)[2]. Look for any recent alerts that correspond to your issue. For example, if a device isn’t protected or hasn’t reported, there may be an alert about that device.
Review alert details: If you see relevant alerts, click on one to open the details flyout. Check the alert title and description – these describe what triggered it (e.g. “Real-time protection disabled on Device123” or “Malware detected and quarantined”). Note the severity (Informational, Low, Medium, High) and the affected device or user[2]. The portal will list the device name and perhaps the user associated with it.
Take recommended actions: The alert flyout often includes recommended actions or a direct link to “Open incident page” or “Take action”. For instance, for a malware alert, it may suggest running a scan or isolating the device. For a configuration alert (like real-time protection off), it might recommend turning it back on. Make note of these suggestions as they directly address the issue described[2].
Check the device inventory: Still in the Defender portal, navigate to Devices (under Assets). Find the device in question. The device page can show its onboarding status, last seen time, OS, and any outstanding issues. If the device is missing entirely, that confirms an onboarding problem – skip to Step 4 to troubleshoot that.
**Inspect *Incidents***: If multiple alerts have been triggered around the same time or on the same device, the portal might have grouped them into an *Incident* (visible under the Incidents tab). Open the incident to see a timeline of what happened. This can give a broader context especially if a security threat is involved (e.g. an incident might show that a malware was detected and then real-time protection was turned off – indicating the malware might have attempted to disable Defender).
Example: Suppose the portal shows an alert “Real-time protection was turned off on DeviceXYZ”. This is a clear indicator – the device is onboarded but not actively protecting in real-time[1]. The recommended action would likely be to turn real-time protection back on. Alternatively, if an alert says “New malware found on DeviceXYZ”, you’d know the issue is a threat detection, and the portal might guide you to remediate or confirm that malware was handled. In both cases, you’ve gathered an essential clue before even touching the device.
If you do not see any alert or indicator in the portal related to your problem, the issue might not be something Defender is reporting on (for example, if the problem is an onboarding failure, there may not be an alert – the device just isn’t present at all). In such cases, proceed to the next steps.
Step 3: Verify Device Status and Protection Settings
Next, ensure that the devices in question are configured correctly and not in a state that would cause issues:
Confirm onboarding completion: If a device doesn’t appear in the portal’s device list, ensure that the onboarding process was done on that device. Re-run the onboarding script or package on the device if needed. (Defender for Business devices are typically onboarded via the local script, Intune, Group Policy, etc. If this step wasn’t done or failed, the device won’t show up in the portal.)
Check provisioning status for mobile: If the issue is with mobile devices (Android/iOS) not onboarding, verify that Defender for Business provisioning is complete. As mentioned, the portal (under Devices) might show a message “preparing new spaces for your data” if the service setup is still ongoing[1]. Provisioning can take up to 24 hours for a new tenant. If you see that message, the best course is to wait until it disappears (i.e., until provisioning finishes) before troubleshooting further. Once provisioning is done, the portal will prompt to onboard devices, and then users should be able to add their mobile devices normally[1].
Verify real-time protection setting: On any Windows device showing “not protected” in the portal, log onto that device and open Windows Security > Virus & threat protection. Check if Real-time protection is on. If it’s off and cannot be turned on, check if another antivirus is installed. By design, onboarding a device running a third-party AV can cause Defender’s real-time protection to be automatically disabled to avoid conflict[1]. In Defender for Business, Microsoft expects Defender Antivirus to be active alongside the service for best protection (“better together” scenario)[1]. If a third-party AV is present, decide if you will remove it or live with Defender in passive mode (which reduces protection and triggers those alerts). Ideally, ensure Microsoft Defender Antivirus is enabled.
Policy configuration review: If you suspect a policy conflict or misconfiguration, review the policies applied:
In the Microsoft 365 Defender portal, go to Endpoints > Settings > Rules & policies (or in Intune’s Endpoint security if that’s used). Ensure that you haven’t defined contradictory policies in multiple places. For example, if Intune had a policy disabling something but Defender for Business’s simplified setup has another setting, prefer one system. In a known scenario, an admin had Intune policies and then used the simplified Defender for Business policies concurrently, leading to conflicts[1]. The resolution was to delete or turn off the redundant policies in Intune and let Defender for Business policies take precedence (or vice versa) to eliminate conflicts[1].
Also verify tamper protection status – by default, tamper protection is on (preventing unauthorized changes to Defender settings). If someone turned it off for troubleshooting and forgot to re-enable, settings could be changed without notice.
Intune onboarding profile (if applicable): If devices were onboarded via Intune (which should be the case if you connected Defender for Business with Intune), check the Endpoint security > Microsoft Defender for Endpoint section in Intune. Ensure there’s an onboarding profile and that those devices show as onboarded. If a device is stuck in a pending state, you may need to re-enroll or manually onboard.
By verifying these settings, you either fix simple oversights (like turning real-time protection back on) or gather evidence of a deeper issue (for example, confirming a device is properly onboarded, yet still not visible, implying a reporting issue, or confirming there’s a policy conflict that needs resolution in the next step).
Step 4: Examine Device Logs (Event Viewer)
If the issue is not yet resolved by the above steps, or if you need more insight into why something is wrong, dive into the device’s event logs for Microsoft Defender. Perform these checks on an affected device (or a sample of affected devices if multiple):
Open Event Viewer (Local logs): On the Windows device, press Win + R, type eventvwr.msc and hit Enter. Navigate to Applications and Services Logs > Microsoft > Windows and scroll through the sub-folders.
Check “SENSE” Operational log: Locate Microsoft > Windows > SENSE > Operational and click it to open the Microsoft Defender for Endpoint service log[3]. Look for recent Error or Warning events in the list:
Event ID 3: “Microsoft Defender for Endpoint service failed to start.” This means the sensor service didn’t fully start on boot[3]. Check if the Sense service is running (in Services.msc). If not, an OS issue or missing prerequisites might be at fault.
Event ID 5: “Failed to connect to the server at \.” This indicates the endpoint could not reach the Defender cloud service URLs[3]. This can be a network or proxy issue – ensure the device has internet access and that security.microsoft.com and related endpoints are not blocked by firewall or proxy.
Event ID 6: “Service isn’t onboarded and no onboarding parameters were found.” This tells us the device never got the onboarding info – effectively it’s not onboarded in the service[3]. Possibly the onboarding script never ran successfully. Solution: rerun onboarding and ensure it completes (the event will change to ID 11 on success).
Event ID 7: “Service failed to read onboarding parameters”[3] – similar to ID 6, means something went wrong reading the config. Redeploy the onboarding package.
Other SENSE events might point to registry permission issues or feature missing (e.g., Event ID 15 could mean the SENSE service couldn’t start due to ELAM driver off or missing components – those cases are rare on modern systems, but the event description will usually suggest enabling a feature or a Windows update[5][5]).
Each event has a description. Compare the event’s description against Microsoft’s documentation for Defender for Endpoint event IDs to get specific guidance[3][3]. Many event descriptions (like examples above) already hint at the resolution (e.g., check connectivity, redeploy scripts, etc.).
Check “Windows Defender” Operational log: Next, open Microsoft > Windows > Windows Defender > Operational. Look for recent entries, especially around the time the issue occurred:
If the issue is related to threat detection or a failed update, you might see events in the 1000-2000 range (these correspond to malware detection events and update events).
For example, Event ID 1116 (MALWAREPROTECTION_STATE_MALWARE_DETECTED) means malware was detected, and ID 1117 means an action was taken on malware[4]. These confirm whether Defender actually caught something malicious, which might have triggered further issues.
You might also see events indicating if the user or admin turned settings off. Event ID 5001-5004 range often relates to settings changes (like if real-time protection was disabled, it might log an event).
The Windows Defender log is more about security events than errors; if your problem is purely a configuration or onboarding issue, this log might not show anything unusual. But it’s useful to confirm if, say, Defender is working up to the point of detecting threats or if it’s completely silent (which could mean it’s not running at all on that device).
Additional log locations: If troubleshooting a device connectivity or performance issue, also check the System log in Event Viewer for any relevant entries (e.g., Service Control Manager errors if the Defender service failed repeatedly). Also, the Security log might show Audit failures if, for example, Defender attempted an action.
Analyze patterns: If multiple devices have issues, compare logs. Are they all failing to contact the service (Event ID 5)? That could point to a common network issue. Are they all showing not onboarded (ID 6/7)? Maybe the onboarding instruction wasn’t applied to that group of devices or a script was misconfigured.
By scrutinizing Event Viewer, you gather concrete evidence of what’s happening at the device level. For instance, you might confirm “Device A isn’t in the portal because it has been failing to reach the Defender service due to proxy errors – as Event ID 5 shows.” Or “Device B had an event indicating onboarding never completed (Event 6), explaining why it’s missing from portal – need to re-onboard.” This will directly inform the fix.
Step 5: Resolve Configuration or Policy Issues
Armed with the information from the portal (Step 2), settings review (Step 3), and device logs (Step 4), you can now take targeted actions to fix the issue.
Depending on what you found, apply the relevant resolution below:
If Real-Time Protection Was Off: Re-enable it. In the Defender portal, ensure that your Next-generation protection policy has Real-time protection set to On. If a third-party antivirus is present and you want Defender active, consider uninstalling the third-party AV or check if it’s possible to run them side by side. Microsoft recommends using Defender AV alongside Defender for Business for optimal protection[1]. Once real-time protection is on, the portal should update and the “not protected” alert will clear.
If Devices Weren’t Onboarded Successfully: Re-initiate the onboarding:
For devices managed by Intune, you can trigger a re-enrollment or use the onboarding package again via a script/live response.
If using local scripts, run the onboarding script as Administrator on the PC. After running, check Event Viewer again for Event ID 11 (“Onboarding completed”)[3].
For any devices still not appearing, consider running the Microsoft Defender for Endpoint Client Analyzer on those machines – it’s a diagnostic tool that can identify issues (discussed in Advanced section).
If Event Logs Show Connectivity Errors (ID 5, 15): Ensure the device has internet access to Defender endpoints. Make sure no firewall is blocking:
URLs like *.security.microsoft.com, *windows.com related to Defender cloud. Proxy settings might need to allow the Defender service through. See Microsoft’s documentation on Defender for Endpoint network connections for required URLs.
After adjusting network settings, force the device to check in (you can reboot the device or restart the Sense service and watch Event Viewer to see if it connects successfully).
If Policy Conflicts are Detected: Decide on one policy source:
Option 1: Use Defender for Business’s simplified configuration exclusively. This means removing or disabling parallel Intune endpoint security policies that configure AV or Firewall or Device Security, to avoid overlap[1].
Option 2: Use Intune (Endpoint Manager) for all device security policies and avoid using the simplified settings in Defender for Business. In this case, go to the Defender portal settings and turn off the features you are managing elsewhere.
In practice, if you saw conflicts, a quick remedy is to delete duplicate policies. For example, if Intune had an Antivirus policy and Defender for Business also has one, pick one to keep. Microsoft’s guidance for a situation where an admin uses both was to delete existing Intune policies to resolve conflicts[1].
After aligning policies, give it some time for devices to update their policy and then check if the conflict alerts disappear.
If Integration with Intune Failed (Setup Error): Follow Microsoft’s recommended fix which involves three steps[1][1]:
In the Defender for Business portal, go to Settings > Endpoints > Advanced Features and ensure Microsoft Intune connection is toggled On[1].
Still under Settings > Endpoints, find Configuration management > Enforcement scope. Make sure Windows devices are selected to be managed by Defender for Endpoint (Defender for Business)[1]. This allows Defender to actually enforce policies on Windows clients.
In the Intune (Microsoft Endpoint Manager) portal, navigate to Endpoint security > Microsoft Defender for Endpoint. Enable the setting “Allow Microsoft Defender for Endpoint to enforce Endpoint Security Configurations” (set to On)[1]. This allows Intune to hand off certain security configuration enforcement to Defender for Business’s authority. These steps establish the necessary channels so that Defender for Business and Intune work in harmony. After doing this, retry the setup or onboarding that failed. The previous error message about the configuration channel should not recur.
If Onboarding Still Fails or Device Shows Errors: If after trying to onboard, the device still logs errors like Event 7 or 15 indicating issues, consider these:
Run the onboarding with local admin rights (ensure no permission issues).
Update the device’s Windows to latest patches (sometimes older Windows builds have known issues resolved in updates).
As a last resort, you can try an alternate onboarding method (e.g., if script fails, try via Group Policy or vice versa).
Microsoft also suggests if Security Management (the feature that allows Defender for Business to manage devices without full Intune enrollment) is causing trouble, you can temporarily manually onboard the device to the full Defender for Endpoint service using a local script as a workaround[1]. Then offboard and try again once conditions are corrected.
If a Threat Was Detected (Malware Incident): Ensure it’s fully remediated:
In the portal, check the Action Center (there is an Action center in Defender portal under “Actions & submissions”) to see if there are pending remediation actions (like undo quarantine, etc.).
Run a full scan on the device through the portal or locally.
Once threats are removed, verify if any residual impact remains (e.g., sometimes malware can turn off services – ensure the Windows Security app shows all green).
Perform the relevant fixes and monitor the outcome. Many changes (policy changes, enabling features) may take effect within minutes, but some might take an hour or more to propagate to all devices. You can speed up policy application by instructing devices to sync with Intune (if managed) or simply rebooting them.
Step 6: Verify Issue Resolution
After applying fixes, confirm that the issue is resolved:
Check the portal again: Go back to the Microsoft 365 Defender portal’s Incidents & alerts and Devices pages.
If there was an alert (e.g., device not protected), it should now clear or show as Resolved. Many alerts auto-resolve once the condition is fixed (for instance, turning real-time protection on will clear that alert after the next device check-in).
If you removed conflicts or fixed onboarding, any incident or alert about those should disappear. The device should now appear in the Devices list if it was missing, and its status should be healthy (no warnings).
If a malware incident was being shown, ensure it’s marked Remediated or Mitigated. You might need to mark it as resolved if it doesn’t automatically.
Confirm on the device: For device-specific issues, physically check the device:
Open Windows Security and verify no warning icons are present.
In Event Viewer, see if new events are positive. For example, Event ID 11 in SENSE log (“Onboarding completed”) confirms success[3]. Or Event ID 1122 in Windows Defender log might show a threat was removed.
If you restarted services or the system, ensure they stay running (the Sense service should be running and set to automatic).
Test functionality: Perform a quick test relevant to the issue:
If mobile devices couldn’t onboard, try onboarding one now that provisioning is fixed.
If real-time protection was off, intentionally place a test EICAR anti-malware file on the machine to see if Defender catches it (it should, if real-time protection is truly working).
If devices were not reporting, force a machine to check in (by running MpCmdRun -SignatureUpdate to also check connectivity).
These tests confirm that not only is the specific symptom gone, but the underlying protection is functioning as expected.
If everything looks good, congratulations – the immediate issue is resolved. Make sure to document what the cause was and how it was fixed, for future reference.
Step 7: Escalate to Advanced Troubleshooting if Needed
If the problem persists despite the above steps, or if logs are pointing to something unclear, it may require advanced troubleshooting:
Multiple attempts failed? For example, if a device still won’t onboard after trying everything, or an alert keeps returning with no obvious cause, then it’s time to dig deeper.
Use the Microsoft Defender Client Analyzer: Microsoft provides a Client Analyzer tool for Defender for Endpoint that collects extensive logs and configurations. In a Defender for Business context, you can run this tool via a Live Response session. Live Response is a feature that lets you run commands on a remote device from the Defender portal (available if the device is onboarded). You can upload the Client Analyzer scripts and execute them to gather a diagnostic package[6][6]. This package can highlight misconfigurations or environmental issues. For Windows, the script MDELiveAnalyzer.ps1 (and related modules like MDELiveAnalyzerAV.ps1 for AV-specific logs) will produce a zip file with results[6][6]. Review its findings for any errors (or provide it to Microsoft support).
Enable Troubleshooting Mode (if performance issue): If the issue is performance-related (e.g., you suspect Defender’s antivirus is causing an application to crash or high CPU), Microsoft Defender for Endpoint has a Troubleshooting mode that can temporarily relax certain protections for testing. This is more applicable to Defender for Endpoint P2, but if accessible, enabling troubleshooting mode on a device allows you to see if the problem still occurs without certain protections, thereby identifying if Defender was the culprit. Remember to turn it off afterwards.
Consult Microsoft Documentation: Sometimes a specific error or event ID might be documented in Microsoft’s knowledge base. For instance, Microsoft has a page listing Defender Antivirus event IDs and common error codes – check those if you have a particular code.
Community and Support Forums: It can be useful to see if others have hit the same issue. The Microsoft Tech Community forums or sites like Reddit (e.g., r/DefenderATP) might have threads. (For example, missing incidents/alerts were discussed on forums and might simply be a UI issue or permission issue in some cases.)
Open a Support Case: When all else fails, engage Microsoft Support. Defender for Business is a paid service; you can open a ticket through your Microsoft 365 admin portal. Provide them with:
A description of the issue and steps you’ve taken.
Logs (Event Viewer exports, the Client Analyzer output).
Tenant ID and device details, if requested. Microsoft’s support can analyze backend data and guide further. They may identify if it’s a known bug or something environment-specific.
Escalating ensures that more complex or rare issues (like a service bug, or a weird compatibility issue) are handled by those with deeper insight or patching ability.
Advanced Troubleshooting Techniques
For administrators comfortable with deeper analysis, here are a few advanced techniques and tools to troubleshoot Defender for Business issues:
Advanced Hunting: This is a query-based hunting tool available in Microsoft 365 Defender. If your tenant has it, you can run Kusto-style queries to search for events. For example, to find all devices that had real-time protection off, you could query the DeviceHealthStatus table for that signal. Or search DeviceTimeline for specific event IDs across machines. It’s powerful for finding hidden patterns (like if a certain update caused multiple devices to onboard late or if a specific error code appears on many machines).
Audit Logs: Especially useful if the issue might be due to an admin change. The audit log will show events like policy changes, onboarding package generated, settings toggled, who did it and when. It helps answer “did anything change right before this issue?” For instance, if an admin offboarded devices by mistake, the audit log would show that.
Integrations and Log Forwarding: Many enterprises use a SIEM for unified logging. While Defender for Business is a more streamlined product, its data can be integrated into solutions like Sentinel (with some licensing caveats)[7]. Even without Sentinel, you could use Windows Event Forwarding to send important Defender events to a central server. That way, you can spot if all devices are throwing error X in their logs. This is beyond immediate troubleshooting, but helps in ongoing monitoring and advanced analysis.
Deep Configuration Checks: Sometimes group policies or registry values can interfere. Ensure no Group Policy is disabling Windows Defender (check Turn off Windows Defender Antivirus policy). Verify that the device’s time and region settings are correct (an odd one, but significant time skew can cause cloud communication issues).
Use Troubleshooting Mode: Microsoft introduced a troubleshooting mode for Defender which, when enabled on a device, disables certain protections for a short window so you can, for example, install software that was being blocked or see if performance improves. After testing, it auto-resets. This is advanced and should be used carefully, but it’s another tool in the toolbox.
Using these advanced techniques can provide deeper insights or confirm whether the issue lies within Defender for Business or outside of it (for example, a network device blocking traffic). Always ensure that after advanced troubleshooting, you return the system to a fully secured state (re-enable anything you turned off, etc.).
Best Practices to Prevent Future Issues
Prevention and proper management can reduce the likelihood of Defender for Business issues:
Keep Defender Components Updated: Microsoft Defender AV updates its engine and intelligence regularly (multiple times a day for threat definitions). Ensure your devices are getting these updates automatically (they usually do via Windows Update or Microsoft Update service). Also, keep the OS patched so that the Defender for Endpoint agent (built into Windows 10/11) is up-to-date. New updates often fix known bugs or improve stability.
Use a Single Source for Policy: Avoid mixing multiple security management platforms for the same settings. If you’re using Defender for Business’s built-in policies, try not to also set those via Intune or Group Policy. Conversely, if you require the advanced control of Intune, consider using Microsoft Defender for Endpoint Plan 1 or 2 with Intune instead of Defender for Business’s simplified model. Consistency prevents conflicts.
Monitor the Portal Regularly: Make it a routine to check the Defender portal’s dashboard or set up email notifications for high-severity alerts. Early detection of an issue (like devices being marked unhealthy or a series of failed updates) can let you address it before it becomes a larger problem.
Educate Users on Defender Apps: If your users install the Defender app on mobile, ensure they know how to keep it updated and what it should do. Sometimes user confusion (like ignoring the onboarding prompt or not granting the app permissions) can look like a “technical issue”. Provide a simple guide for them if needed.
Test Changes in a Pilot: If you plan to change configurations (e.g., enable a new attack surface reduction rule, or integrate with a new management tool), test with a small set of devices/users first. Make sure those pilot devices don’t report new issues before rolling out more broadly.
Use “Better Together” Features: Microsoft often touts “better together” benefits – for example, using Defender Antivirus with Defender for Business for coordinated protection[1]. Embrace these recommendations. Features like Automatic Attack Disruption will contain devices during a detected attack[2], but only if all parts of the stack are active. Understand what features are available in your SKU and use them; missing out on a feature could mean missing a warning sign that something’s wrong.
Maintain Proper Licensing: Defender for Business is targeted for up to 300 users. If your org grows or needs more advanced features, consider upgrading to Microsoft Defender for Endpoint plans. This ensures you’re not hitting any platform limits and you get features like advanced hunting, threat analytics, etc., which can actually make troubleshooting easier by providing more data.
Document and Share Knowledge: Keep an internal wiki or document for your IT team about past issues and fixes. For example, note down “In Aug 2025, devices had conflict because both Intune and Defender portal policies were applied – resolved by turning off Intune policy X.” This way, if something similar recurs or a new team member encounters it, the solution is readily available.
By following best practices, you reduce misconfigurations and are quicker to catch problems, making the overall experience with Microsoft Defender for Business smoother and more reliable.
Additional Resources and Support
For further information and help on Microsoft Defender for Business:
Official Microsoft Learn Documentation: Microsoft’s docs are very useful. The page “Microsoft Defender for Business troubleshooting” on Microsoft Learn covers many of the issues we discussed (setup failures, device protection, mobile onboarding, policy conflicts) with step-by-step guidance[1][1]. The “View and manage incidents in Defender for Business” page explains how to use the portal to handle alerts and incidents[2]. These should be your first reference for any new or unclear issues.
Microsoft Tech Community & Forums: The Defender for Business community forum is a great place to see if others have similar questions. Microsoft MVPs and engineers often post walkthroughs and answer questions. For example, blogs like Jeffrey Appel’s have detailed guides on Defender for Endpoint/Business features and troubleshooting (common deployment mistakes, troubleshooting modes, etc.)[8].
Support Tickets: As mentioned, don’t hesitate to use your support contract. Through the Microsoft 365 admin center, you can start a service request. Provide detailed info and severity (e.g., if a security feature is non-functional, treat it with high importance).
Training and Workshops: Microsoft occasionally offers workshops or webinars on their security products. These can provide deeper insight into using the product effectively (e.g., a session on “Managing alerts and incidents” or “Endpoint protection best practices”). Keep an eye on the Microsoft Security community for such opportunities.
Up-to-date Security Blog: Microsoft’s Security blog and announcements (for example, on the TechCommunity) can have news of new features or known issues. A recent blog might announce a new logging improvement or a known issue being fixed in the next update – which could be directly relevant to troubleshooting.
In summary, Microsoft Defender for Business is a powerful solution, and with the step-by-step approach above, you can systematically troubleshoot issues that come up. Starting from the portal’s alerts, verifying configurations, checking device logs, and then applying fixes will resolve most common problems. And for more complex cases, Microsoft’s support and documentation ecosystem is there to assist. By understanding where to find information (both in the product and in documentation), you’ll be well-equipped to keep your business devices secure and healthy.
Microsoft 365 Business Premium offers a robust suite of security features, many of which are enhanced by Artificial Intelligence (AI) and machine learning. For SMBs, leveraging these AI capabilities can significantly bolster their cybersecurity posture. Here’s how:
1. AI-Powered Threat Detection and Prevention (Microsoft Defender for Business & Office 365):
Advanced Malware and Ransomware Protection: Microsoft Defender for Business (included in M365 Business Premium) uses AI and machine learning to analyze endpoint behavior (PCs, Macs, mobile devices) and detect suspicious activity indicative of malware, ransomware, and other advanced threats. It provides real-time threat detection and automated response capabilities to mitigate issues before they escalate [1, 2].
Phishing and Zero-Day Attack Protection: Microsoft Defender for Office 365 (Plan 1, also included) employs AI to identify and block sophisticated phishing attempts, including those crafted with Generative AI to appear more convincing. It uses “Safe Links” to scan URLs in emails and documents at the time of click, and “Safe Attachments” to open email attachments in a virtual environment to detect malicious content before it reaches users. This AI helps interpret email language and intent to classify threats at machine speed [1, 3].
Behavioral Anomaly Detection: AI models continuously learn normal user and system behavior. Any deviation from this baseline, such as unusual login patterns, large data downloads, or access from unfamiliar locations, can trigger alerts and automated responses, indicating potential account compromise or insider threats [3].
2. Identity and Access Management (Microsoft Entra ID Premium P1):
Risk-Based Conditional Access: AI plays a crucial role in Conditional Access policies. It analyzes factors like user location, device compliance, and detected risk levels (e.g., impossible travel, anomalous login times, leaked credentials) to determine if access to resources should be granted, denied, or require additional verification (like MFA). This proactive approach significantly reduces the risk of unauthorized access even if credentials are stolen [1, 4]. Microsoft Entra ID Protection categorizes risk into low, medium, and high confidence levels, using machine learning to inform these assessments [4].
Multi-Factor Authentication (MFA) Enforcement: While MFA itself isn’t AI, the AI in Entra ID (formerly Azure Active Directory) can recommend and enforce MFA based on detected risks, making it a critical layer of defense against identity attacks [1, 4].
3. Data Loss Prevention (DLP) and Information Protection (Microsoft Purview):
Intelligent Data Classification: AI in Microsoft Purview Information Protection can automatically identify and classify sensitive data (e.g., credit card numbers, health information, personally identifiable information) across Outlook, SharePoint, and Teams. This helps ensure that sensitive data is appropriately protected, encrypted, and prevented from leaving the organization, whether maliciously or accidentally [1, 5]. Sensitive information types and trainable classifiers leverage AI to find sensitive data in user prompts and responses when they use AI apps [5].
Automated Policy Enforcement: Based on the AI-driven classification, DLP policies can be automatically enforced, preventing sharing of sensitive information with unauthorized external parties or even internally if policies dictate [5]. DLP also uses machine learning algorithms to detect content that matches your DLP policies [5].
4. Device Management and Compliance (Microsoft Intune):
Automated Security Policy Deployment: While Intune primarily manages devices, AI can inform and automate the deployment of security policies, ensuring devices are compliant before accessing company resources. It can also help detect and flag non-compliant devices, preventing them from becoming entry points for attacks [1].
Remote Wipe and Data Protection: In case of lost or stolen devices, Intune allows for remote wiping of company data, which, while not directly AI-powered, is a critical security measure supported by the device management framework [1].
AI-powered insights for device management: Microsoft Intune leverages real-time data and AI-powered insights (e.g., in Endpoint analytics and with Copilot in Intune) to help proactively manage and secure devices, pinpoint problems, identify vulnerabilities, and deploy remediations [6].
5. AI for Security Operations (Microsoft 365 Copilot & Analytics):
Microsoft 365 Copilot (Add-on): While primarily a productivity tool, Copilot, when integrated with Microsoft 365 Business Premium, can contribute to security by:
Summarizing Security Alerts: Quickly digest and understand complex security alerts and incident reports [7].
Threat Intelligence Analysis: Help analyze security logs and data to identify potential threats and vulnerabilities [7].
Generating Security Policies/Documentation: Assist in drafting security policies, guidelines, or incident response plans [7].
Adhering to existing security controls: Copilot inherits existing Microsoft 365 security, privacy, identity, and compliance requirements, ensuring users only see what they have permission to access [7].
Security Analytics and Reporting: The underlying AI within M365’s security features continuously collects and analyzes vast amounts of security data. This allows for better insights into the organization’s security posture, identifies trends in attacks, and helps predict potential vulnerabilities, enabling SMBs to make informed security decisions [2].
How SMBs can best leverage this AI:
Enable and Configure: Don’t just subscribe to M365 Business Premium; actively enable and configure its security features. Many of the AI-powered capabilities need to be turned on and customized to your business’s needs.
Prioritize MFA and Conditional Access: These are foundational and highly effective in preventing identity-based attacks [1, 4, 7].
Educate Employees: Even with AI, human error is a significant vulnerability. Train employees on phishing awareness, data handling best practices, and the importance of reporting suspicious activity.
Regularly Review Security Reports: Pay attention to the security insights and recommendations generated by M365, as these are often powered by AI analysis.
Consider Professional Assistance: For complex configurations or if you lack in-house IT expertise, consider working with a Managed Service Provider (MSP) who specializes in Microsoft 365 security. They can help optimize your security posture and ensure you’re getting the most out of the AI-powered features.
Stay Updated: Microsoft continuously updates its security features. Keep your M365 environment updated to benefit from the latest AI enhancements.
By proactively utilizing the AI capabilities within Microsoft 365 Business Premium, SMBs can significantly enhance their defenses against evolving cyber threats, protecting their data, devices, and ultimately, their business continuity.
Browser extensions can introduce security vulnerabilities if not properly managed. Malicious or vulnerable extensions can steal data, hijack accounts, or serve as an entry point for attacks[2]. In an organization using Microsoft 365 Business Premium (which includes Defender for Business endpoint protection), it’s important to understand what is covered out-of-the-box and how to fill any gaps in protection. This report examines whether Microsoft 365 Business Premium’s security features include Microsoft Defender Vulnerability Management (MDVM) for scanning browser extensions, and if not, the most cost-effective ways to enable this capability. It also covers alternative solutions, best practices for browser extension security, and recommendations for ongoing protection.
Microsoft 365 Business Premium Security Features
Microsoft 365 Business Premium is a comprehensive plan for small and medium businesses that combines productivity apps with advanced security. Key included features are:
Office 365 Applications and Services: Email, cloud storage, and the full suite of Office apps, enabling productivity and collaboration.
Azure AD Premium P1: Enhanced identity and access management (for example, conditional access and multi-factor authentication policies).
Microsoft Intune (Endpoint Manager): Mobile device and PC management to enforce security policies on devices and apps.
Microsoft Defender for Office 365 (Plan 1): Protection against phishing, unsafe attachments, and malicious links in email.
Microsoft Defender for Business (Endpoint Protection): An enterprise-grade, AI-powered endpoint security solution optimized for SMBs. This provides next-generation antivirus, endpoint detection and response (EDR), and threat & vulnerability management capabilities[8].
Note:Defender for Business is essentially a subset of Microsoft Defender for Endpoint features tailored for Business Premium. It does include basic vulnerability management (VM) capabilities, such as detecting OS and application vulnerabilities on devices[7]. However, as discussed below, some advanced VM features are not included.
Microsoft Defender Vulnerability Management (MDVM) Capabilities
Microsoft Defender Vulnerability Management is an add-on service that enhances Defender’s built-in vulnerability management with more advanced, risk-based scanning and asset inventory. Core capabilities of MDVM (some of which overlap with Defender for Business) include[6]:
Device and Software Inventory: Discovering devices and software in your environment, and listing installed applications and versions.
Vulnerability & Configuration Assessment: Identifying known vulnerabilities (e.g., missing patches or CVEs) and misconfigurations on endpoints[6].
Risk-Based Prioritization: Evaluating which vulnerabilities pose the highest risk, so security efforts can focus on the most critical issues[6].
Remediation Tracking: Providing guidance and tracking the status of fixes for identified issues.
Continuous Monitoring: Ongoing scanning to catch new vulnerabilities as they arise.
Premium MDVM capabilities extend this further and are available with a specific MDVM license (or add-on). These premium features include advanced asset insights such as[6]:
Browser Extensions Assessment: Visibility into browser extensions installed on endpoints and their associated risks.
Digital Certificates Assessment: Inventory and risk info for certificates on devices.
Network Shares, Hardware/Firmware Assessment: Scanning for vulnerabilities in network share configurations and device firmware.
Security Baselines Assessment & Blocking Vulnerable Apps: Checking compliance with security baseline settings and enabling the ability to block applications or browser add-ons known to be vulnerable[6].
Does Business Premium Include Browser Extension Scanning?
Out-of-the-box, Microsoft 365 Business Premium does not include the specialized capability to scan browser extensions for vulnerabilities. Business Premium’s Defender for Business provides “core” vulnerability management (covering OS and software vulnerabilities), but the Browser Extensions Assessment feature is only available with the Defender Vulnerability Management premium add-on or standalone license[6]. In Microsoft’s terminology, Business Premium gets you “Vulnerability Management Core” features, whereas Browser Extension assessments are a premium feature not included in the core set[6].
In fact, Microsoft documentation explicitly notes that Defender Vulnerability Management (MDVM) is not currently available to Defender for Business customers without an add-on[6]. This means that while your Business Premium subscription offers strong endpoint protection and some vulnerability scanning, it will not automatically discover or report vulnerable browser extensions in Microsoft Edge (or other browsers) unless you extend its capabilities.
Supported Browsers: When MDVM’s Browser Extension Assessment is enabled (via the appropriate license), it covers extensions in Microsoft Edge, Google Chrome, and Mozilla Firefox on Windows devices[5][2]. The Microsoft Defender for Endpoint sensor on Windows collects the list of installed extensions in those browsers, including their names, versions, the devices and users where they’re installed, and the permissions they require[5]. This data is then available in the security portal under Endpoints > Vulnerability Management > Inventories > Browser extensions, where security teams can review extension details and risk levels[5]. Without the MDVM add-on, Business Premium admins will not see this Browser extensions page or related insights in the Defender security portal.
Edge-Specific Considerations: Microsoft Edge shares its extension framework with Chrome (both are Chromium-based), so MDVM’s approach for extension scanning in Edge is similar to Chrome’s. The MDVM extension inventory will include Edge extensions (whether from the Microsoft Store or Chrome Web Store) and assess their requested permissions. It will indicate if an extension has high-risk permissions (for example, the ability to read all data on websites could be flagged as higher risk)[2]. However, note that this assessment is about visibility and risk reporting – it does not automatically block any extension. It helps admins decide if they should allow or remove a given extension.
How to Enable Browser Extension Vulnerability Scanning in Business Premium
Since M365 Business Premium doesn’t include browser extension scanning by default, you have a few options to gain this capability in a cost-effective way:
Option 1: Add Microsoft Defender Vulnerability Management
The most straightforward method is to purchase a Microsoft Defender Vulnerability Management license for your endpoints. Microsoft offers two licensing options:
Defender Vulnerability Management Add-on: For customers who already have Microsoft Defender for Endpoint Plan 2 (e.g., E5 customers), the MDVM add-on enables the premium features for about $2.00 USD per user per month (annual commitment)[3]. This would unlock browser extension assessments in their existing environment.
Defender Vulnerability Management Standalone: For customers without Defender for Endpoint P2 (for example, Business Premium users, since they have a different edition), Microsoft provides a standalone MDVM subscription at roughly $3.00 USD per user per month[3]. This standalone license includes all MDVM capabilities for your devices, working alongside your current Defender for Business endpoint protection. It’s designed to complement any EDR solution, which means you can use it with the Defender agents you already run on Business Premium endpoints[6].
Cost-Effectiveness: In terms of cost, this is much more affordable than upgrading all the way to an E5 plan. For a Business Premium environment, adding MDVM standalone at ~$3/user/month is the most cost-effective Microsoft-native solution to gain extension vulnerability scanning[3]. It avoids having to pay for a full Microsoft 365 E5 license (which is significantly more expensive per user). You can selectively license only the users/devices that need this capability. Microsoft also offers a 90-day free trial for MDVM add-on/standalone to evaluate its value[2].
Once MDVM is enabled in your tenant, you would get:
A “Browser extensions” inventory in the Defender portal listing all extensions discovered across Edge/Chrome/Firefox[5].
Details per extension: which devices and users have it, whether it’s enabled, its version, and a risk rating based on permissions[5][2].
The ability to run advanced hunting queries or reports on extensions organization-wide (for example, find all devices with a particular extension)[2].
Insights to decide if an extension should be allowed or if it poses enough risk to justify blocking or removal.
If you prefer not to purchase MDVM licenses, there are third-party solutions that can help monitor and secure browser extensions. Some notable approaches include:
CrowdStrike Falcon Spotlight – Browser Extension Assessment: CrowdStrike’s Exposure Management platform offers a feature to inventory and assess browser extensions similar to MDVM. It provides a comprehensive view of extensions and flags high-risk extensions with dangerous permissions, plus workflows to alert and remediate risks. Adopting this would require using CrowdStrike’s agent and platform in addition to or instead of Defender on endpoints.
Spin.AI SpinOne and SpinMonitor: Spin.AI provides a SaaS security platform that includes browser extension risk assessments. Notably, Spin.AI’s solution can integrate with Chrome Enterprise. For example, the SpinOne platform continuously evaluates Chrome extensions and even assigns risk scores[1]. Outbrain (a tech company) implemented Chrome Enterprise with Spin.AI to automate extension reviews, allowing employees to request extensions and have security teams approve or deny them based on risk reports[1]. Spin.AI also offers a free Extension Security Checker (SpinMonitor) that detects and assesses the risk of all browser extensions installed in an organization, giving visibility into potential security and compliance risks. This free tool can be a cost-effective way to get basic insight into extensions, though a paid tier may be needed for continuous monitoring and policy enforcement.
Duo Security (CRXcavator/Extend): Duo Security (now part of Cisco) created a free tool called CRXcavator (and its successor, Cisco’s “Extend” tool) which analyzes Chrome extensions for known vulnerabilities and risky permissions. This can provide security ratings for extensions in use. While it may require some integration work (and primarily focuses on Chrome), it’s another low-cost way to evaluate extension safety in your environment.
Traditional Vulnerability Scanners: Some vulnerability management tools like Tenable or Qualys may include checks or scripts to enumerate browser extensions on endpoints during scans. These are not as tailored as the above solutions but can sometimes be configured to pull extension information as part of an endpoint scan and flag known vulnerable versions.
Cost and Integration Considerations: Many third-party solutions might require separate licensing. For instance, if you already use a third-party EDR or are considering one, see if extension visibility is included. The Spin.AI SpinMonitor tool is free, making it attractive cost-wise; whereas full platforms (CrowdStrike, SpinOne, etc.) will have associated costs and integration effort. It’s important to weigh how well these solutions integrate with your existing M365 Business Premium setup. Using MDVM has the advantage of tight integration with Microsoft Defender and Intune, whereas third-party tools might involve deploying additional agents or using separate management consoles.
Option 3: Manual or Policy-Based Approaches
In addition to or instead of dedicated extension-scanning tools, consider using the management capabilities you already have:
Intune Scripting: With Microsoft Intune (included in Business Premium), you can deploy PowerShell scripts to endpoints to collect a list of installed browser extensions. For example, community scripts exist that enumerate extensions by checking the file system or registry locations for Edge/Chrome user profiles[4]. These scripts can report back data (for instance, writing to a log or a spreadsheet via a Logic App, as one admin described[4]). While this method doesn’t provide real-time continuous monitoring, it can be run periodically to generate an inventory of extensions at no extra license cost (just the effort to set it up).
Edge and Chrome Enterprise Policies: Without needing any new tool, you can leverage built-in group policies or Intune configuration profiles to control extension usage. Both Microsoft Edge and Google Chrome support policies to block or allow specific extensions by their extension ID. You could use Intune’s Settings Catalog to deploy a policy that blocks all extensions except a pre-approved list (a “whitelist”)[2][2]. This approach doesn’t scan for vulnerable extensions per se, but it prevents users from installing unvetted extensions and even removes any extensions that are not on the allowed list[2]. For instance, you can enforce that only certain productivity or security extensions are permitted, and everything else is automatically disabled. This dramatically reduces the risk, since unknown or risky extensions never get a foothold. The downside is administrative overhead in maintaining the allowed list and potentially limiting user flexibility or productivity if they need an extension that isn’t yet approved.
In summary, the most direct way to gain extension vulnerability scanning within a Business Premium environment is to invest in MDVM (Standalone), which is relatively low-cost and integrates with your existing Defender for Business setup[3]. If budgets are zero, using Intune policies to restrict extensions and maybe running periodic audits via scripts or free tools can partially compensate, though with more manual effort and less comprehensiveness.
Best Practices for Ongoing Browser Extension Security
Regardless of which solution you choose to implement, consider these best practices to ensure the ongoing security of browser extensions in your organization:
Implement Extension Allow/Block Lists:Limit extension installations to a pre-approved list wherever practical[2][2]. By whitelisting known safe extensions and blocking all others, you prevent employees from inadvertently installing malicious or unvetted add-ons. Both Edge and Chrome allow policy-based control of extensions, which can be pushed via Intune or Group Policy. This proactive measure greatly reduces exposure.
Regularly Review Extension Inventory: Keep track of what extensions are in use. If you have MDVM or a similar tool, schedule periodic reviews of the extension inventory and risk reports. Without an automated tool, perform audits (using scripts or free scanners) quarterly or whenever a major vulnerability is announced. Look for any extensions that should be removed (e.g., those no longer needed or found to be risky).
Educate Users: Train your users about the risks of browser extensions. Make sure they understand that even extensions from official stores can sometimes be compromised or malicious. Encourage them to only request or use extensions that are necessary for work, and to avoid installing extensions for personal use on work browsers. Users should report if they see any strange browser behavior (which might indicate a rogue extension).
Keep Browsers and Extensions Updated: Ensure that browsers (Edge/Chrome/Firefox) are kept up-to-date with the latest version – Business Premium can enforce Edge updates and you can use Microsoft Update policies for others. Also, allow extensions to auto-update. Many security issues in extensions get patched by developers; having the latest version can mitigate known vulnerabilities.
Leverage SmartScreen and Reputation Services: Microsoft Edge’s SmartScreen (and Chrome’s Safe Browsing) can block known malicious extensions or warn about them. Ensure these protective features are enabled. Additionally, if using MDVM, pay attention to the Permissions risk ratings it provides[5][2] – an extension asking for very broad or sensitive permissions might warrant blocking even if it’s not explicitly flagged as “malicious.”
Minimize Browser Diversity: Every additional browser in use is another surface to secure. If possible, standardize on one or two browsers for your organization. For example, if everyone uses Edge (and Chrome only for legacy app needs), it’s easier to manage extensions via one set of policies. Fewer browsers mean fewer places for risky add-ons to hide (this was suggested by admins noting that having Edge, Chrome, Firefox, Brave, etc., all in use made extension control unwieldy[4]).
Monitor Threat Alerts: Stay informed about emerging threats related to browser extensions. Subscribe to security advisories or threat intelligence feeds. Microsoft’s security alerts or the MDVM dashboard might notify you if a particular extension is identified as harmful in the wild. If you hear news of a compromised popular extension (as happened with examples like *“Where is Cookie?” or certain password managers[2]), immediately search your environment for that extension and remove or block it.
By implementing these practices, you create multiple layers of defense: preventing most problems up front (via policy and education) and quickly detecting/mitigating any issues that do slip through (via scanning and audits).
Risks of Not Securing Browser Extensions
To underscore the importance of the above, consider the risks if browser extensions are left unchecked:
Data Theft and Privacy Breaches: Extensions run with significant privileges in the browser. A malicious extension can read everything on the web pages you visit, including sensitive corporate information or personal data. It could quietly siphon this data out to an attacker. For example, some malicious extensions have been caught stealing cookies and credentials from over 600,000 users[2], leading to compromise of online accounts. In a business context, that could mean leaks of customer data or confidential documents.
Account Compromise: If an attacker controls an extension, they can potentially hijack sessions (via stolen cookies) or act as the user on important sites. An extension could, for instance, take over a logged-in email session or a financial web app session, leading to fraud or unauthorized transactions.
Malware Installation and Lateral Movement: Vulnerable extensions (even those that aren’t outright malicious initially) can be exploited by malware. An attacker might exploit a flaw in an extension to run arbitrary code on the endpoint, effectively breaching that computer. From there, malware could spread or persist in the environment. Additionally, some extensions may download and execute additional payloads.
Evasion of Detection: Extensions operate at the browser level, which might not always be monitored by traditional antivirus. A well-crafted malicious extension can maintain a low profile, making it harder for standard security tools to notice. Without specific extension visibility, your IT team might be blind to an ongoing attack vector.
Non-Compliance and Legal Risks: For organizations under regulations (GDPR, HIPAA, etc.), a data breach via a browser extension could still result in compliance violations and fines. Moreover, some extensions could be inadvertently transmitting data to third-party servers (for example, an extension that injects ads or tracking), which might violate company policy or privacy laws if not authorized.
Productivity and Performance Issues: Beyond security, unregulated extensions can impact browsers’ stability and performance, and by extension employee productivity. While this is a secondary concern, excessive or poorly coded extensions can slow down systems or cause conflicts – another reason to keep a handle on what’s installed.
In short, the browser is effectively another attack surface. Treat extensions just like you treat installed applications: they should be inventoried, vetted, kept updated, and limited to what’s necessary. Ignoring this area could undermine your otherwise strong security posture from Business Premium’s protections.
Recommendations and Conclusion
1. Enable Extension Visibility: Given that Microsoft 365 Business Premium does not natively include extension vulnerability scanning, it is recommended to augment your security with Microsoft Defender Vulnerability Management. The Stand-alone MDVM license (~$3/user/month)[3] is a cost-effective solution to gain full visibility into browser extensions and other advanced vulnerability insights without a major license overhaul. Start with a pilot or trial to see the benefits; once enabled, review the Browser Extension inventory and address any high-risk extensions identified. This will directly answer your need to “scan browser extensions for vulnerabilities” on an ongoing basis.
2. Implement Policy Controls Now: In parallel to planning or deploying MDVM, take immediate action by using Intune (Endpoint Manager) to set up extension control policies for Microsoft Edge (and Chrome, if used). For example, consider enforcing a rule that blocks all extensions except a defined allowed list of essential extensions[2]. At the very least, you might block known disallowed extensions or categories (e.g., prevent installation of extensions not from the official store, or block those with remote administration capabilities). This ensures that while you work toward improved visibility, you are already reducing the risk surface. Microsoft’s documentation and community scripts can help implement these policies and even remove unapproved extensions from user browsers automatically[2][2].
3. Evaluate Third-Party Tools as Supplements: If budget allows or if your environment has multi-browser complexity, evaluate third-party solutions like SpinOne or security browser platforms. These can provide an extra layer of analysis (such as risk scoring of extensions) and may integrate with non-Microsoft ecosystems (e.g., Google Workspace) if that’s relevant to you. For instance, Spin.AI’s free extension risk scanner could be run to get an initial risk report of extensions in your organization right away. While the preference in an M365 environment would be to leverage Microsoft’s own tooling, a third-party tool could fill any specific gaps (for example, if you have a lot of Google Chrome usage with Google’s management, SpinOne’s integration might be appealing[1]).
4. Maintain an Extension Security Policy: Develop an internal policy regarding browser extensions. This policy should state that only authorized extensions are allowed for use on company devices/browsers. Have a process for employees to request new extensions, where the security team reviews the extension’s necessity and safety (taking into account information from MDVM or other sources – e.g., if MDVM shows an extension has a “Critical” permission risk level, you might deny the request). This policy formalizes the governance around extensions and sets expectations for users. Outbrain’s case showed that having a workflow for extension requests coupled with automated risk assessment greatly improved their security posture[1].
5. Continuously Monitor and Update: Security is an ongoing process. Ensure that whatever solution you implement (MDVM, third-party, or a manual process) is continuously used. Regularly check the dashboards or reports for new extensions or vulnerabilities. Update your allow/block lists as new trusted extensions are required or if formerly safe extensions become risky. Also keep an eye on Microsoft’s updates; Defender for Business and related services get updated capabilities over time (for example, Microsoft could extend some MDVM features to Business in the future, or release new policies for Edge). Staying current will help you take advantage of improvements in the platform you already pay for.
Conclusion: Microsoft 365 Business Premium delivers robust security for SMBs, but it does not include everything – specifically, browser extension vulnerability management is one gap. By investing in a small add-on license for MDVM or carefully using third-party/free tools and Intune policies, you can close this gap cost-effectively. The goal should be a layered defense: gain visibility into what extensions are present and their risks, actively control what can be installed, and keep users informed of the dangers. Following the strategies above will significantly enhance the security of browser usage in your organization, ensuring that browser extensions do not become the weak link in your defense.
Microsoft Defender for Office 365 (included with Microsoft 365 Business Premium) is an advanced security solution that protects email and collaboration tools from phishing, malware, and other threats[1][3]. When a malicious email arrives, Defender for Office 365 engages multiple layers of defense to identify and neutralize the threat, preventing compromise of user accounts and devices. This report provides a detailed technical walkthrough of how Defender for Office 365 handles a malicious email step by step, and outlines best-practice configurations and recommendations for administrators to maximize protection.
Did you know?Over 90% of cyberattacks start with an email, making robust email protection critical for safeguarding organizational data and operations[4].
Email Threat Protection Pipeline: Step-by-Step Process
When an email is received, Defender for Office 365 processes it through multiple stages to detect and block malicious content before it reaches the user. Each stage builds on the previous, combining filtering, analysis, and dynamic protection measures[2]. Below is the step-by-step process that occurs when a potentially malicious email arrives:
Edge Protection – Connection and IP Filtering:Initial blocking at the mail gateway. As soon as the email hits the Office 365 service, Edge Protection checks the sender’s IP address and domain reputation[2]. Known malicious senders are blocked outright at this stage:
IP/Domain Reputation: If the sender’s IP or domain is on a known-bad list (such as spam sources or malware distributors), the connection is rejected before the email enters the system[2]. This prevents a large volume of spam or malware-laden emails from ever reaching user mailboxes.
Throttle & Block: Bulk attacks are throttled or dropped. For example, if a source sends an unusually high volume of messages in a short time (potential Denial of Service attempt), it’s throttled to protect the email infrastructure[2]. Messages from untrustworthy sources can be temporarily blocked unless configured otherwise (e.g. via connectors for trusted partners).
Directory Edge Blocking: Attempts to send to invalid recipients are blocked to prevent directory enumeration attacks[2].
Outcome: Many obvious threats are filtered out at the network edge without user impact. Legitimate emails move to the next phase.
Sender Intelligence – Authentication & Impersonation Checks:Analyzing who the email is from. In this phase, Defender for Office 365 evaluates the sender’s legitimacy using email authentication and behavioral analysis[2]:
SPF/DKIM/DMARC Verification: The service checks SPF records, DKIM signatures, and DMARC policy compliance to ensure the email is actually coming from who it claims to be[2]. If authentication fails (e.g. a spoofed domain that doesn’t align with these records), the message is flagged or rejected.
Spoof Intelligence: Built-in anti-spoofing logic distinguishes legitimate “on-behalf-of” emails from forgeries. Defender for Office 365 can block senders that impersonate your domain or trusted partners while allowing known forwarding services and permitted senders[2]. Both intra-org and cross-domain spoofing attempts are detected and stopped[2].
Mailbox Intelligence: The system leverages machine learning to understand normal communication patterns for each user. If an incoming email’s sender or context deviates from the user’s typical contacts, it may indicate a impersonation/phishing attempt[2]. For example, if an email claims to be from a colleague the user rarely contacts, it’s treated with suspicion. This helps catch Business Email Compromise attacks where attackers impersonate executives or vendors.
Bulk Mail Filtering: Bulk mail (e.g. newsletters) is identified with a Bulk Confidence Level. Admin-defined thresholds decide if bulk emails go to Junk or are allowed, balancing nuisance vs. missing wanted bulk mail[2].
Account Compromise Signals: If the sender is an internal account, Defender can detect anomalous sending behavior (possibly indicating a hacked account) and automatically block outgoing mail from that account to stop further spread[2].
Outcome: By the end of this stage, the email’s sender is verified. Unauthorized senders or obvious impersonation attempts are filtered out or marked as phish, and only authenticated, non-spoofed messages proceed[2].
Content Filtering – Malware and Phishing Detection:Inspecting the email’s content and attachments. Emails that pass sender checks are then scanned deeply for malicious content:
Anti-Malware Scanning: All email attachments are scanned by Microsoft Defender Antivirus engines for known malware signatures[2]. Files are examined by true type (so an .exe disguised as .txt is still caught)[2]. If an attachment is a known virus or high-confidence malware, the system will block the email or strip the attachment immediately[2]. The hash of any detected malware file is added to Microsoft’s threat intelligence, which means that file will be blocked in all Office 365 tenants and on Windows endpoints via Defender Antivirus in the future[2].
File Type and Heuristics: Admins can configure file type blocking (e.g. disallowing .exe, .js, or macro-enabled files via policy)[1]. If an attachment or the email contents match known malicious patterns or suspicious behaviors (heuristics), Defender will intervene. For instance, heuristic clustering might pause a message that has an unusual combination of properties (e.g. an invoice email with an unfamiliar attachment) for further analysis[2].
Phishing Content Analysis: The email’s headers and body are analyzed by machine learning models to identify phishing signs[2]. This includes scanning for malicious or misdirecting content, suspicious language patterns, and URL inspection. Any URLs in the email are checked against Microsoft’s database of malicious links (threat intelligence feeds)[2]. If a URL is already known to be dangerous, the email can be blocked at this point[2].
Safe Attachments Detonation (Dynamic Analysis): If an attachment is unknown (no known malware signature), Defender for Office 365’s Safe Attachments feature steps in. It will sandbox the attachment in a virtual environment to detonate it safely[2]. The attachment is opened in this secure sandbox where its behavior is monitored in real-time. If the file exhibits malicious behavior (like dropping malware or connecting to malicious servers), it is deemed unsafe. During this sandbox scan, depending on policy, the email can be delayed or delivered with the attachment held back: for example, with Dynamic Delivery, the email body is delivered promptly but the attachment is replaced by a placeholder until it’s cleared, ensuring minimal disruption to the user[1].
URL Detonation: For URLs that are not outright blocked but appear suspicious, Defender performs URL detonation – essentially clicking the link in a sandbox at time of delivery to see what happens[2]. If the linked content is a file (e.g. a downloadable document), it treats it like an attachment and sandboxes that file as well[2].
Machine Learning Classification: Throughout content filtering, machine learning models evaluate the message holistically – considering sender patterns, email content, and attachments together. These AI models assign the email a confidence level for spam or phishing[2]. For example, an email might be tagged as High Confidence Phishing if multiple indicators (failed authentication, known phish URL, suspicious language) are present.
Outcome: By this stage, Defender for Office 365 has identified any malicious payloads. If malware is confirmed, the email (or the unsafe attachment) is blocked or quarantined immediately[2][1]. Suspicious links are neutralized. Emails that pass content scanning continue to delivery, but with ongoing safeguards (Safe Links) in place.
Delivery & Post-Delivery Protection:Final delivery with ongoing monitoring. If the email is not blocked by earlier filters, it proceeds toward the user’s mailbox, but Defender’s protections continue even after delivery:
Safe Links (Time-of-Click Protection): All URLs in the email can be rewritten and wrapped by Safe Links[2][2]. This means if a user clicks a link in the email, the request goes through Defender’s Safe Links service first. At the moment of click, the system checks the latest URL reputation. If the link is newly identified as malicious (or found malicious upon dynamic analysis), the user is prevented from accessing the site – they’ll see a warning page instead of the dangerous site[2]. This time-of-click check is crucial because it protects against delayed attacks where an attacker sends a benign link that turns malicious later. Safe Links essentially continues to protect the user’s device when they interact with the email.
Zero-Hour Auto Purge (ZAP): Defender for Office 365 has the ability to retroactively remove emails from inboxes if they are later determined to be threats. This is known as ZAP. For instance, if an email was delivered but a few hours later its attachment is identified as malware in another environment, ZAP will quarantine that email from all mailboxes post-delivery[2]. ZAP operates for phishing, malware, and spam – automatically neutralizing threats that slipped through initial filters[2]. Users might notice an email disappear from inbox or junk folder; that’s ZAP at work removing a now-known threat.
Campaign Detection: If the malicious email is part of a larger attack campaign, Defender for Office 365 correlates signals across tenants. It can identify that multiple recipients (in one org or across many) are getting similar dangerous emails. In such cases, Microsoft can block the entire campaign once it has evidence of malicious intent[2]. This broad response stops all related emails from reaching users, not just one.
User Reporting: If a malicious (or suspicious) email somehow reaches a user, the built-in Report Phishing button in Outlook allows the user to flag it[2]. This user-reported mail is sent for analysis and can trigger alerts to administrators. Reports of missed phish help improve the filtering models and inform security teams of emerging threats.
Outcome: The email is either safely delivered (with protections in place) or removed/quarantined by post-delivery actions. Through features like Safe Links and ZAP, Defender for Office 365 continues to shield users and devices even after an email is in the mailbox, drastically reducing the chance that a user can be compromised by delayed or hidden threats[2].
**In summary, from the moment a malicious email arrives, Defender for Office 365 applies a *multi-layered defense*: it *blocks known bad senders* at the door, authenticates and evaluates sender trust, scans email content with signatures and machine learning, detonates suspicious attachments/links in a sandbox, and monitors the email after delivery (scanning links on click and pulling emails out if threats are discovered).** These layers work together to ensure that malicious emails are stopped or neutralized before they can compromise users or their devices[2][2].
Protective Actions and Threat Response
When Defender for Office 365 detects a malicious email, it takes immediate actions to protect the user and their device. The exact response depends on the type and severity of the threat, as dictated by configurable policies. Below are the key actions taken and how they safeguard the environment:
Quarantine or Block on Detection: For any email identified with high confidence as malicious (e.g. containing malware, high-confidence phishing), the default action is to quarantine the message (isolate it from the user’s inbox) or sometimes reject it outright.
Malware Email: By default, if an attachment is confirmed as malware, the entire email is sent to quarantine (a secure holding area) where it cannot harm the user[4][1]. The user does not see the email at all. Administrators can review quarantined items and decide to release or delete them. In severe cases, the system may delete the message automatically after a time if not reviewed.
Phishing Email: Suspected phishing emails are typically quarantined or sent to Junk Email folder depending on confidence levels and policy. High-confidence phish are usually quarantined so the user never interacts with them[4]. Lower-confidence phish or spam might go to the user’s Junk folder with safety tips. Quarantining ensures even if a user is curious, they cannot click links or open attachments unless an admin releases the email.
Spam/Bulk Email: Unwanted spam is often delivered to Junk Email by default. However, for Business Premium best practice, many administrators choose to quarantine high-confidence spam as well, to reduce any risk of user interaction[4].
Block vs Quarantine: In some cases, policies might be set to outright reject/drop certain messages (for example, block malware so it never even gets into quarantine). Quarantine is generally preferred for malicous content because it allows security teams to analyze what was caught.
Protection Provided: Quarantining or blocking ensures that malicious payloads never reach the user’s inbox or device, preventing infection. Even if malware was attached, it’s confined to the quarantine and cannot execute on the user’s machine.
User and Admin Notifications: Defender for Office 365 can notify relevant parties when it takes action:
End-User Notifications: Administrators can enable quarantine notifications to end users to inform them that messages were quarantined as spam or phish. For example, users might receive a daily digest email listing messages that were withheld. This allows users to review and request release of any false positives (messages incorrectly flagged) while keeping them informed that potentially unsafe messages were stopped. By default, these notifications are not sent until configured, to avoid confusing users with technical info.
Admin Alerts: Through Alert Policies, admins can configure real-time alerts for certain threat detections[4]. For instance, an alert can be set if a malware email is quarantined or if phishing emails exceed a threshold, etc. When triggered, an alert can send an email or SMS to administrators/security teams. This ensures the security team is immediately aware of serious threats and can investigate promptly. Additionally, the admin can be notified when a user requests release of a quarantined message, or if Defender blocks a suspicious email to an executive account[4][4].
In-Email Notifications: If a malicious attachment is removed from an email, the recipient might receive the email with a notice like “An attachment was removed because it contained malware.” This informs the user that content was stripped for safety (so they aren’t just puzzled by a missing attachment).
Portal Reports: Beyond direct alerts, admins can always view quarantined items and threat logs in the Security portal. The Threat Explorer in Defender for Office 365 provides a near-real-time view of all detected threats and actions taken[4].
Protection Provided: Notifications ensure that no threat goes unnoticed. End-user quarantine summaries empower users to double-check for any legitimate message caught by filters (reducing impact on business communications), while admin alerts allow IT security to respond to incidents quickly, such as by investigating if multiple users were targeted by the same attack.
Device Protection via Signal Sharing: Defender for Office 365 not only protects the mailbox, but also helps protect user devices through integration with Microsoft Defender Antivirus. When a new malware attachment is identified through an email scan, its signature (hash) is shared with the broader Microsoft security network. This means other defenses (like Defender for Endpoint on Windows devices) are informed to block that file in the future[2]. In practice, if a user tries to download or run that same malicious file from another source, Defender on their device will already know to quarantine it. This cloud-powered intelligence ensures email-borne malware can’t simply hop to a device by other means – the protection spans across email, cloud, and endpoints as part of the Microsoft 365 Defender ecosystem.
Preventing User Interaction: For threats that aren’t fully blocked (for example, a suspicious URL in an email that was delivered), Defender’s protections physically alter the content to make it safe:
Malicious attachments are replaced with dummy files or removed. If an attachment is detonated and found malicious, the user may receive a text file explaining the attachment was unsafe and removed.
Dangerous links are wrapped by Safe Links and will be blocked at click-time, as described. If the user clicks a phishing link, they will be stopped by a warning page instead of reaching the harmful site[2]. This prevents credential harvesting and drive-by downloads on the user’s device.
Even for emails delivered to Junk, Outlook disables active content by default (images, links) which helps mitigate risk if a user views spam.
Protection Provided: By neutralizing malicious content (attachments/links), Defender ensures that even if something reaches the user’s mailbox, it is disarmed and cannot easily lead to compromise. The user’s device is shielded from executing malware or connecting to attacker sites.
In summary, once a malicious email is detected, Defender for Office 365’s response actions (quarantine, blocking, content neutralization, and alerts) work in concert to protect users. Malicious emails are isolated away from inboxes, users are shielded from dangerous attachments or links, and security teams are kept aware. Through these actions, the service prevents infection and account compromise, fulfilling its role of safeguarding users and their devices from email-borne threats[1][2].
Key Features Enabling Email Threat Protection
Defender for Office 365 includes a rich set of security features specifically designed to counter email threats. Together, these features provide multi-layered protection against phishing, malware, and other malicious emails. Here are the key features and capabilities that protect your organization’s email:
Exchange Online Protection (EOP) Core Filters: At its foundation, Business Premium includes EOP’s anti-spam and anti-malware engine. This provides baseline filtering: block/allow lists, spam content filtering, and virus scanning using Microsoft’s antivirus signatures. EOP assigns each message a Spam Confidence Level (SCL) based on its likelihood of being spam. Defender for Office 365 builds on this with advanced capabilities, but this core ensures all known spam and viruses are already being handled. (Included in all Office 365 plans.)
Anti-Phishing Policies and Impersonation Protection: Defender for Office 365’s anti-phishing feature uses AI and heuristics to detect phishing emails that may slip past traditional spam filters[1]. Key elements:
Mailbox Intelligence: Learns each user’s normal contacts and flags anomalies[2].
User and Domain Impersonation Protection: Allows admins to protect specific high-profile users (like CEO, CFO) and your organization’s domains. If an incoming email attempts to impersonate a protected user (e.g., similar display name) or a look-alike domain (typosquat), Defender can automatically flag or quarantine it[2].
Spoof Intelligence: As part of anti-phishing, Defender distinguishes legitimate spoofing (such as third-party services sending on your behalf) from malicious spoofing. It blocks unauthorized spoof emails which pretend to be from your domains or partners[2].
Policy Options: Admins can customize actions for detected phish (e.g. send to junk vs. quarantine) and adjust sensitivity. Anti-phishing policies are a cornerstone for stopping business email compromise and credential-harvesting scams.
Safe Attachments (ATP Attachment Sandbox):Safe Attachments provides advanced malware protection for email attachments. It opens email attachments in a secure, isolated cloud environment to observe their behavior [2]. This feature is crucial for catching zero-day malware (new, previously unknown malware) which won’t be caught by file hashes or signatures:
If the attachment is clean, the email is delivered normally (or the attachment is reattached for the user after scanning).
If malicious activity is detected, the attachment is blocked/quarantined. Admins can choose whether the entire email is quarantined or delivered with the attachment removed.
Safe Attachments can be configured in ** Dynamic Delivery mode**, which ensures users don’t face big email delays – they get the email body quickly with a placeholder, and the real attachment arrives after it’s vetted[1].
This feature protects users from opening dangerous files that got past initial antivirus scans, by catching malware in execution.
Safe Links (URL Protection):Safe Links is Defender’s time-of-click protection for URLs in emails and Office documents[2]. All links are rewritten to go through Microsoft’s secure proxy. When a user clicks a link:
The system checks the URL against the latest threat intelligence. If the URL is known to be bad, access is blocked immediately with a warning page[2].
If not known, Safe Links can detonate the URL (open it in a sandbox) to analyze any content it leads to[2]. If that analysis finds something malicious, the site will be blocked for the user.
Safe Links protection persists even after email delivery; importantly, if a URL that was benign at delivery later turns malicious, the next click will be blocked. Safe Links is a key defense against phishing sites and malicious downloads, preventing users from unwittingly giving up credentials or infecting their devices.
Admins can configure Safe Links policies to apply to email, and even across Office apps, Teams, etc., as Business Premium’s Plan 1 covers cross-app usage[3].
Anti-Malware Policy with Zero-Hour Auto Purge: Defender for Office 365’s anti-malware policy complements Safe Attachments:
Real-time Malware Scanning: Uses the latest antivirus definitions to catch known malware in attachments or message body.
Common Attachment Types Filter: Allows blocking or warning on specific file types (e.g. executables, scripts) that are commonly dangerous[1].
Zero-Hour Auto Purge (ZAP): Automatically removes emails that are found to be malicious after they’ve been delivered[2]. For instance, if Microsoft later determines an email to be phish or identifies malware through updated signatures, ZAP pulls it from user mailboxes, mitigating damage from evolving threats.
Mail Flow Rules (Transport Rules): Although not unique to Defender, admins can create custom mail flow rules for additional filtering actions (e.g. strip attachments with certain names, or forward copies of suspect mail to security mailbox). These act as a supplementary feature in content filtering[2].
Quarantine and User Submissions:
Quarantine is a secure repository for emails identified as spam, phish, or malware. Admins (and optionally end-users) can review quarantined messages. This feature prevents dangerous emails from reaching users while still allowing recovery of any false positives. Quarantines are organized by category (spam, phish, etc.) for efficient management[4].
User Submission/Report Message: Integrated reporting tools let users flag suspicious emails. These user-reported messages feed into Defender’s analysis systems and appear in the admin center for review[2]. This encourages a “human sensor” network – users help catch what automated filters might miss, and the system learns from those submissions.
Threat Intelligence and Reporting:
Real-Time Reports & Explorer: Defender for Office 365 provides real-time dashboards and the Threat Explorer (available in Plan 1) for security teams to investigate threats[4]. Admins can search for indicators like a particular sender, file hash, or URL across all mail in the organization to see if anyone else was targeted[4]. This helps scope attacks quickly.
Campaign View: (Plan 2 feature) If ever upgraded, this lets you see the full picture of a phishing or malware campaign targeting your org, including all related messages, how they were handled, and which users clicked or were affected[2].
Alerts and Automated Investigation: Plan 1 allows custom alert policies as mentioned. Plan 2 (not included by default in Business Premium) adds Automated Investigation & Response (AIR) which can trigger automatic playbooks to investigate and remediate threats across emails and other domains[4]. Even without AIR, admins can manually invoke investigations or use the data from alerts to respond.
Microsoft Threat Intelligence Sharing: Defender for Office 365 taps into Microsoft’s vast threat intel from billions of emails and endpoints worldwide. It uses up-to-date intelligence feeds (including third-party sources) for URL and attachment reputations[2]. As a result, it can block emerging threats that have been seen elsewhere even if your organization hasn’t seen them yet.
All these features work together as a cohesive defense system for email. Anti-phishing policies thwart deception, Safe Attachments and Safe Links neutralize malicious payloads, anti-spam/anti-malware filters handle bulk threats, and quarantine with user reporting provides safety with flexibility. By leveraging these capabilities, organizations significantly reduce risk of malware infection, account compromise, and data breaches via email[1].
Best Practices and Configuration Steps for Defender for Office 365
To maximize protection in Microsoft 365 Business Premium, administrators should configure Defender for Office 365 according to Microsoft’s recommended best practices. Below is a comprehensive guide to setting up and fine-tuning Defender for Office 365 for optimal security:
1. Enable Core Email Authentication (SPF, DKIM, DMARC):Lay the groundwork for anti-spoofing. Before tweaking Defender-specific settings, ensure your own domain’s SPF, DKIM, and DMARC records are correctly configured. This helps external email systems trust your mail, and it allows Defender’s anti-spoof features to effectively block emails pretending to be your domain. On the flip side, Defender uses DMARC to reject or quarantine spoofed emails pretending to be from your domain if they fail authentication[2]. Configure DMARC with a policy of quarantine or reject for strong protection against domain spoofing[1].
2. Apply a Preset Security Policy:Quickly deploy best-practice settings. Microsoft provides preset security templates (“Standard” and “Strict”) that bundle recommended settings for all Defender for Office 365 features[4]. In the Microsoft 365 Defender portal, go to Policies & Rules > Threat Policies > Preset Security Policies and consider applying:
Standard Preset: A balanced security level suitable for most users. This enables Safe Links, Safe Attachments, anti-phishing, etc., with standard thresholds[4].
Strict Preset: A more aggressive policy intended for VIP users or high-target groups (like finance or execs)[4]. It has tighter rules (e.g. almost all detected phish go to quarantine, more stringent spam filtering).
Choosing a preset is an easy way to cover dozens of settings consistently. Ensure the preset is applied to all relevant users/groups. Note: You can still fine-tune specifics after applying a preset.
3. Configure Anti-Phishing Policies (Impersonation Protection):Stop phishing and BEC attacks proactively. Go to Threat Policies > Anti-Phishing and create or modify policies:
Enable mailbox intelligence: This lets Defender learn user communication patterns to identify unusual senders[1].
Protect high-risk users: Add your organization’s VIPs (CEO, CFO, IT Admins, etc.) to the “users to protect” list. Enable User Impersonation Protection and add these as protected users[1]. Defender will flag any external email that purports to be these users.
Protect your domains: Enable Domain Impersonation Protection and include your primary email domains[1]. This catches emails from look-alike domains (e.g. mycompany.co instead of mycompany.com).
Policy actions: Set phishing emails and impersonation detections to go to Quarantine, and optionally configure an alert to notify admins when an impersonation is detected[1]. This way, no potentially malicious phish reaches the inbox.
Tip: Regularly review the Blocked Senders and Allowed Senders in anti-phishing policies. Microsoft’s AI will automatically handle most, but you may add specific trusted partners to allowed spoofed senders if they get flagged, or block persistent phishers.
4. Strengthen Anti-Spam and Anti-Malware Settings:Fine-tune filters for junk and viruses. In Threat Policies > Anti-spam and Anti-malware, adjust the default policies:
Spam Filter Tuning: By default, EOP spam filter will send most spam to Junk. Consider raising the sensitivity: for example, set spam filter to quarantine high-confidence spam (SCL 9) rather than delivering to Junk. You can do this by editing the Anti-Spam Inbound Policy (Default) and increasing the threshold slider for spam and bulk mail[4][4]. Also enable advanced phishing threshold if available. This reduces the chance any obvious spam/phish lands in inbox.
Block Lists: Add any known malicious domains or problem senders to your block lists in the anti-spam policy[4]. Defender already blocks many, but if you’re seeing repetitive unwanted mails from certain domains, a manual block can help. Regularly update this list based on threat intel (Microsoft’s or your own)[4].
Allowed senders/domains: Likewise, maintain an allow list (whitelist) for trusted senders that should skip spam filtering[4][4]. Use this sparingly – only for well-vetted partners – to avoid attackers exploiting your allowed list. (E.g., allow a partner’s domain by adding it to Allowed domains in anti-spam policy[4], and keep this list reviewed for relevance[4].)
Anti-Malware Policy: Edit the default anti-malware policy to turn on Zero-Hour Auto Purge if not enabled (ZAP for malware/phish)[1]. Also configure Attachment types to block: consider blocking file types commonly used for malware that your organization doesn’t typically receive (e.g. .exe, .bat, .ps1, .vbs, or even .iso and .js files)[1]. This preemptively stops messages with such attachments.
Notifications: In the anti-malware policy, enable notification to admins (or a security mailbox) when malware is detected and quarantined[1]. This ensures the security team is alerted whenever a virus was stopped.
5. Set Up Safe Links Policies:Protect users from malicious URLs. Navigate to Threat Policies > Safe Links and ensure a policy covers all users:
Verify that Safe Links for Email is enabled tenant-wide. The default policy may already cover all users; if not, create a new Safe Links policy scoped to your domains/users.
Block click-through: Enable the option “Do not allow users to click through to the original URL” for malicious links[1]. This means if Safe Links identifies a URL as malicious, the user has no option to bypass the warning – the threat is completely blocked.
Apply to all apps: In Business Premium, Safe Links can also be applied to Microsoft Teams and Office applications. Make sure the policy is set to protect URLs in email and in Office apps (Word, Excel, PowerPoint) for comprehensive protection.
URL Exemptions: Optionally, define trusted URLs or domains that should not be rewritten by Safe Links if they are causing false positives (for example, internal company portals or very frequent business partners) – but add exemptions only if necessary. The recommendation is to keep the Safe Links filtering broad, as even trusted sites can be compromised.
6. Set Up Safe Attachments Policies:Enable sandboxing of email attachments. Go to Threat Policies > Safe Attachments:
If not already on, turn on Safe Attachments by creating a new policy. Scope it to All recipients (or at least all users who should be protected, typically everyone).
Choose the Action mode: Microsoft recommends “Dynamic Delivery” mode[1] for user convenience – this delivers emails immediately with a placeholder for attachments while scanning is in progress. Alternatively, “Block” mode holds emails until attachments are scanned (more secure but can delay delivery).
Set Post-scan Action: Configure what happens if malware is detected in an attachment. Commonly, Quarantine the entire message or Replace attachment with a banner/message are used[1]. Quarantine is safer, ensuring the user never touches the email if an attachment is malicious.
Enable Safe Attachments for SharePoint, OneDrive, and Teams files as well (there is a toggle for ATP for collaboration sites). This extends protection so that if a malicious file is uploaded or shared via cloud storage or Teams, it gets scanned and blocked similarly[2].
7. Optimize Quarantine Management:Balance security with usability regarding quarantined emails.
Quarantine Policy: In Defender portal under Policies & Rules > Threat Policies > Quarantine, you can adjust what users are allowed to see and do in quarantine. For best practice, allow users to review and release their own spam-quarantined emails (those classified as spam or bulk) via the Quarantine Portal or email digest[4]. This empowers users to self-serve for mild cases (reducing helpdesk tickets for “missing emails”) while still keeping malicious content at bay.
End-User Spam Notification: Enable periodic end-user quarantine notification emails for spam (e.g., daily or weekly)[4]. Users receive a summary of emails that were quarantined as spam/phish with options to release or report as not junk. This is turned off by default; turning it on can improve transparency.
Privileged Access: For content classified as high-confidence phishing or malware, it’s wise to not allow end-users to release these; only admins or security staff should. Use quarantine policies to enforce that (these are usually default — e.g., the default malware quarantine policy is admin-only access).
Review Routine: Security teams should regularly review quarantined messages and track how often users release items[4]. If you notice many false positives, adjust policies (allow lists or lower sensitivity slightly). Conversely, if users never need to release quarantined mail, you might tighten policies further.
8. Configure Alerts and Monitoring:Stay informed of threats in real time. Set up Alert Policies in the Defender portal for important events:
In Settings > Alert Policies, create alerts for things like “Malware detected in email”, “Phishing email detected”, or “User reported phish”. Configure who should get the alert (e.g., IT Security email, Teams channel via connector) and set the severity. This way, when Defender quarantines a malicious email or a user reports one, administrators get immediate notification to investigate[4][4].
Utilize the Threat Explorer (aka real-time detections) to proactively search for threats. For example, if news of a new phishing campaign arises, you can search if any user received related emails. The Explorer can also show all user-submitted reports and all automatically detected incidents for oversight[4].
Monitor Secure Score and the Configuration Analyzer in the security portal. The Config Analyzer compares your settings to recommended best practices (Standard/Strict) and will highlight if, for instance, Safe Links isn’t enabled or an anti-phish setting is turned off[4]. Regularly check this and follow its recommendations to patch any holes in your configuration.
9. Train Users and Encourage Use of Attack Simulation:The human element is critical. Technical defenses work best when users are also aware:
Deploy the “Report Phishing” button (if using Outlook, it’s often built-in now). Make sure users know how to use the Report Message feature to flag suspicious emails[2]. Reported messages feed into Defender and also alert admins, improving the overall security feedback loop.
Conduct periodic security awareness training. Microsoft Defender for Office 365 Plan 2 includes an Attack Simulation Training feature for phishing drills; Business Premium doesn’t include that by default, but you can run your own simulations or consider upgrading for this feature[3][1]. Simulated phishing campaigns help condition users to spot and avoid real attacks. Even without simulations, share regular tips or newsletters on identifying phishing (e.g., checking sender addresses, not clicking unexpected links).
Remind users that if they see something odd (emails asking for passwords, wire transfers, or any urgent unusual requests), they should report it or at least double-check offline. A well-trained user can catch a sophisticated phish that perhaps was borderline and not automatically filtered.
10. Continuous Improvement and Advanced Tools:Maintain a proactive security posture. Email threats evolve, so ongoing maintenance is necessary:
Review and adjust policies periodically: At least quarterly, review spam/phish detection rates, false positive/negative incidents, and adjust filters accordingly. Secure Score and Defender’s recommendations (from the Configuration Analyzer) are great to follow[4].
Stay informed on new features: Microsoft frequently updates Defender for Office 365. Keep an eye on the Message Center for announcements. For instance, new policy toggles or improved machine learning models may become available – adopting them can enhance security.
Integrate with broader security operations: If you use a SIEM like Azure Sentinel or the unified Microsoft 365 Defender portal, integrate Defender for Office 365 logs and alerts there. This allows cross-domain correlation – e.g., if a malicious email was sent to a user and that user’s device shows weird behavior, you can connect the dots faster. M365 Business Premium’s Defender for Office 365 P1 and Defender for Business (Endpoint) can both feed into a unified incident view (though full automated cross-domain investigation is a P2/XDR capability)[3].
Document exceptions and changes: Keep a simple internal doc of what you’ve whitelisted or any custom configurations. This helps during audits and when reviewing whether an exception (like an allowed domain) is still needed and safe[1].
By following these steps and best practices, you ensure that Defender for Office 365 is configured to its fullest potential, aligning with Microsoft’s security recommendations. A well-configured setup will minimize false negatives (missed threats) without generating too many false positives, providing strong security with minimal interruption to users[1][4].
Monitoring Effectiveness and User Involvement
Implementing Defender for Office 365 is not a “set and forget” exercise. Continuous monitoring and user feedback loops are vital to maintain an effective defense:
Security Monitoring and Incident Response: Leverage the Microsoft 365 Defender Security Center (security.microsoft.com) for a consolidated view of incidents. For example, if a malicious email was sent to multiple users, the portal can aggregate this into a single security incident for investigation. Use the Threat Explorer and Campaign Views to see if a threat is part of a larger pattern targeting your org[4][4]. If something got through to a mailbox and was reported, perform a targeted hunt: check that user’s mailbox for other similar messages, and those of peers. Promptly remove any found (the Explorer allows one-click purge of emails from all mailboxes if needed)[1].
Performance Review: Periodically review metrics such as: Number of phishing emails caught vs. missed, Spam trends, Top targeted users, etc., available in Defender reports. If available, the Attack Simulation Training results (for those with Plan 2) can show which users are vulnerable and need more training. Additionally, review the Secure Score for email security to track improvement over time.
User Reporting and Feedback: Encourage users to actively report suspicious emails. This not only helps catch what automated filters might miss, but also provides valuable data to refine those filters. Configure the User Submissions feature so that when users use the Report button, a copy goes to your security operations mailbox (or at least to the Defender portal’s User reported queue). Make it easy: in Outlook, the Report Phishing button is integrated; for other email clients, users can forward suspicious mails to a designated address.
Follow up on user reports: if a user reported an email that was not automatically flagged, analyze why. Perhaps you need a new block rule or the phish was very convincing. This process helps fine-tune the system.
Close the loop with users: when a user correctly reports a phishing attempt, consider informing or thanking them and confirming it was malicious. This reinforces good behavior and keeps them engaged in the organization’s security.
Integrating Device Signals: Since Business Premium also includes Defender for Endpoint (Defender for Business), watch for correlations like devices with malware alerts that correspond to email attachments. A unified approach (via the Microsoft 365 Defender portal) allows you to see if, for instance, an email-borne threat impacted a device and vice-versa. Use this to take action such as isolating a machine or resetting a password if an email attack may have led to account compromise.
Audit and Adjust: Monitor how often users release emails from quarantine or complain about missed spam. Lots of releases might mean the filter is overzealous (tune it down or add allows); complaints about spam in inbox mean you might tighten policies. Regular audits of allowed/blocked sender lists, policy configurations, and user feedback help maintain an optimal balance.
By actively monitoring Defender for Office 365’s performance and involving users in the process, administrators can ensure that the organization’s email security remains adaptive and effective against evolving threats. The goal is to maintain high security efficacy (catching the bad stuff) while preserving business continuity (not overly hindering the good stuff) – a goal that is achieved through vigilant oversight and continuous improvement.
Common Challenges and Solutions in Defender for Office 365 Configuration
While Defender for Office 365 is a powerful platform, administrators may encounter some challenges when configuring and maintaining it. Here are common challenges and how to address them:
Balancing Security with User Impact: Aggressive policies (e.g., quarantining all spam) maximize safety but can intercept some legitimate emails, impacting users.
Solution: Use a tiered approach – apply strict policies for high-risk users (who are more likely targets) and standard for others, or use the preset differentiation[4]. Enable end-user spam digests so users can self-release innocuous emails caught in quarantine[4]. Monitor quarantine release requests; if many users consistently release certain emails, consider loosening rules or whitelisting that sender[4]. The Configuration Analyzer tool can help identify if any settings are excessively strict compared to recommended baselines[4].
False Positives and False Negatives: No filter is perfect. You might see false positives (good emails marked bad) or false negatives (missed phishing caught by users).
Solution: Continuously refine allow/block lists for your organization’s context. If a known safe sender is constantly flagged, add them to the allowed list with caution[4][4]. For false negatives, encourage user reporting – each report is a learning opportunity for the system. Microsoft also uses these reports to improve their backend machine learning models. In critical cases, you can create a custom transport rule to catch specific threats (for instance, temporarily block emails containing a certain subject or link that is going around). Over time, the goal is to rely on the intelligent filters and minimize custom rules.
Keeping up with Evolving Threats: Attackers constantly adapt, using new file types or social engineering tricks. A configuration that was effective last year may need updates.
Solution: Stay informed via Microsoft’s security blogs and update notes. Review Secure Score recommendations regularly for new improvements. For example, Microsoft might introduce a new toggle like “tenant impersonation protection” – adopt these new features promptly. Also, update your block lists periodically with newly emerging threat domains (Microsoft adds many automatically, but you might have industry-specific intel). The best practices section above (like enabling ZAP, blocking rarely used file types, enabling DMARC) preemptively addresses many evolving tactics[1][1].
Integrating with Existing Systems: Some organizations use third-party email gateways or have hybrid on-prem setups.
Solution: If you have a third-party gateway in front of Office 365, ensure Connector configurations are correct so that Defender for Office 365 still sees the true sender info (use “Enhanced Filtering for Connectors” to preserve IP and authentication details through the hop)[2]. In hybrid setups, route all mail through Defender for consistency, or carefully split policies knowing some mail may be scanned elsewhere. Always test that Defender’s anti-phishing features (like spoof detection) aren’t bypassed by misconfigured connectors or mail flow rules.
User Resistance or Ignoring Warnings: Users might find the Safe Links redirect page or attachment delays inconvenient and attempt to bypass them.
Solution: Educate users on why these measures exist (a quick training snippet: “That delay when opening attachments is our security scanning working to keep you safe from ransomware”). Make policies in Safe Links that don’t allow opt-out clicking through[1], so even if frustrated, a user can’t proceed to a dangerous site. Highlight positive outcomes: e.g., share an anonymized story when the system caught a real phish — this reinforces user trust in the protective measures.
Limited Plan Features: Business Premium includes Plan 1 of Defender for Office 365. Some advanced features (automated investigation, attack simulation training, etc.) are Plan 2.
Solution: Even within Plan 1, use all available features (Safe Links, Safe Attachments, etc.) to their fullest. If your security needs grow, consider augmenting with Plan 2 licenses for key personnel or organization-wide if budget allows, to get features like Threat Explorer (already in P1), Campaign Views, and AIR[3]. Microsoft also occasionally offers trials for Plan 2 which can be useful to assess the benefit[2].
In tackling these challenges, a combination of technical adjustments and user awareness is key. Frequent review of policies, user feedback, and staying aligned with best practices will ensure that Microsoft Defender for Office 365 continues to protect effectively without impeding business operations. Over time, administrators typically find the “sweet spot” of configurations that yields strong security with minimal friction.
In conclusion, Microsoft Defender for Office 365 in M365 Business Premium provides a comprehensive, multi-phase defense against malicious emails. By understanding its step-by-step threat protection process – from initial sender vetting to post-delivery checks – and by applying thoughtful configuration and best practices, organizations can significantly reduce the risk of email-borne attacks. With the right setup, Defender for Office 365 will continuously protect users and devices by catching phishing attempts, defusing malware, and empowering administrators with rich tools to respond to incidents. Through ongoing vigilance and tuning, your organization can leverage Defender for Office 365 to maintain a secure email environment and keep evolving threats at bay[1]