Microsoft Purview Insider Risk Management (IRM) is a solution in the Microsoft Purview compliance suite designed to help organisations proactively identify and mitigate internal threats. This report provides an overview of IRM, guidance on deploying it in a small or medium-sized business (SMB) environment, best practices for effective use (including privacy and integration considerations), licensing/cost details in Australian dollars (AUD), and a summary of recent enhancements relevant to SMBs.
1. Overview: What is Microsoft Purview Insider Risk Management?
Microsoft Purview Insider Risk Management (IRM) is a cloud-based insider threat detection and mitigation solution within Microsoft 365’s Purview (compliance) suite. Its purpose is to help organisations minimise internal risks by detecting, investigating, and acting on potentially malicious or inadvertent activities performed by users[1]. IRM addresses modern workplace risks such as data leaks, intellectual property (IP) theft, confidentiality or policy violations, insider trading, fraud, and other inappropriate internal actions[1]. Unlike perimeter security tools, IRM focuses on authorised insiders (employees or contractors) whose behaviour might pose a threat, whether intentionally or by accident.
Key Features and Capabilities: Microsoft Purview IRM provides a rich set of features to monitor and manage insider risks:
-
Machine-Learning-Driven Signals: IRM correlates a broad range of user activity signals across Microsoft 365 and Windows endpoints (and even some third-party platforms) to identify suspicious patterns[1]. For example, it can track file downloads from SharePoint, unusual email forwarding, mass file deletions, copying of files to USB devices, or abnormal Teams communications. These signals are analysed to generate risk indicators (such as “download of sensitive files” or “mass deletion”) and are evaluated by built-in analytics to determine if they deviate from normal behaviour[2][1].
-
Risk Policies with Templates: Administrators can create insider risk policies using a set of predefined templates that target common scenarios[1]. There are over 10 ready-to-use policy templates covering cases like Data theft by departing users, Data leaks (general or by privileged users), Security policy violations, and specialised cases (e.g. “Risky AI usage” and “Patient data misuse”)[1]. Each policy defines the conditions (triggering events and risk indicators) to watch for – for instance, a “Departing user” policy might trigger when an employee is added to an HR exit list and starts downloading large amounts of confidential data. Policies also define which users or groups are in scope, which services/locations to prioritise (SharePoint, Exchange, endpoint, etc.), and the time window to observe. These templates enable quick deployment of industry-standard detection rules, which can then be customised to the organisation’s needs.
-
Risk Scores, Alerts and Dashboards: When user activities match a policy’s conditions, IRM will generate an alert. The alert includes a risk score/severity (low, medium, high) calculated based on the frequency and criticality of the activities[1]. All active alerts are visible in the Insider Risk Management dashboard in the Purview compliance portal, where a risk analyst can triage them. The dashboard provides an overview of alerts by status, severity, time detected, and indicates any associated risk factors[1] (e.g. if the user has a history of prior incidents). This allows the organisation’s designated reviewers to quickly identify and prioritise alerts that need investigation. Alerts can be filtered and sorted to focus on those needing immediate attention (for example, all “High severity” alerts in the last 24 hours)[1].
-
Case Management and Investigation Tools: For each alert (or group of related alerts) that warrants deeper investigation, IRM allows creation of a case. A case in IRM is a container that holds all information and evidence related to a particular insider risk incident. The Cases dashboard shows all ongoing cases, trends over time, and stats like average time to closure[1][3]. Inside a case, investigators have a rich toolkit:
- A user activity timeline that charts the sequence of risk events by date and risk level[1]. Investigators can interactively explore what the user did (e.g. accessed 50 files, attempted to print a confidential document, etc.) before and after the alert, helping identify patterns or escalation.
- Content explorer that automatically collects copies of files, emails, or messages related to the policy violation[1]. For example, if the alert was triggered by file downloads, the actual files or filenames can be reviewed; if it was an email-forwarding incident, the email content can be inspected. This provides crucial evidence in context.
- Built-in workflow actions, such as the ability to dismiss benign activities, add notes, or escalate the case to eDiscovery (now called Advanced eDiscovery) for further legal hold and forensic investigation[1]. Escalation to eDiscovery (Premium) is useful if the incident might lead to legal action or requires broader content search beyond what IRM automatically collected.
- A user activity timeline that charts the sequence of risk events by date and risk level[1]. Investigators can interactively explore what the user did (e.g. accessed 50 files, attempted to print a confidential document, etc.) before and after the alert, helping identify patterns or escalation.
-
User Privacy and Role Separation: A fundamental principle of IRM is privacy by design. By default, usernames are pseudonymised in the IRM dashboard (e.g. shown as “User1”, “User2”) so that risk investigators focus on the behaviours first, reducing potential bias[1]. Investigators cannot see the actual user identity until they explicitly “Unlock” it (which is an auditable action) or if they have appropriate permissions to de-anonymise. Additionally, only users in specific Purview role groups (such as “Insider Risk Management Admin” or “Insider Risk Analyst”) can access IRM data[4][4]. This role-based access control ensures that insider risk investigations are handled by authorised personnel (for example, a security officer or HR investigator) and not visible to those who shouldn’t see sensitive details. All actions in IRM (viewing an alert, resolving a case, etc.) are logged for audit purposes to ensure accountability[1]. This privacy-focused design helps organisations implement insider monitoring ethically and in compliance with privacy laws, which is especially important in regions (like the EU or Australia) that have strict regulations on employee monitoring.
-
Integration with Other Purview and Security Solutions: IRM does not operate in isolation; it benefits from and contributes to other Microsoft 365 security and compliance tools:
- It leverages Microsoft 365 audit logs and other services as inputs. IRM uses the logs and events from Exchange, SharePoint, OneDrive, Teams, Windows, and even Defender for Cloud Apps to gather the signals it needs[1]. For instance, if you have Microsoft Purview Data Loss Prevention (DLP) policies, an act that triggers a DLP alert (like an attempt to email out a credit card number) can be consumed as a signal in IRM as well. In this way, IRM correlates with DLP – DLP might block or warn on a specific activity, while IRM looks at the pattern of activities around it to gauge user risk.
- IRM is closely related to Communication Compliance, another Purview feature that scans communications (email, Teams chats) for policy violations like harassment or sensitive data sharing. While Communication Compliance focuses on reviewing message content, IRM focuses on user behaviour patterns. They complement each other: for example, if Communication Compliance flags a user for attempting to share confidential info via Teams, IRM can take that into account as a risk indicator. Microsoft even provides a combined workflow (via Microsoft Mechanics) to show how these solutions work together[1].
- For serious incidents, IRM cases can be escalated to eDiscovery (Premium) as mentioned. This integration ensures that if legal investigation is required, all data collected by IRM flows into the eDiscovery workflow seamlessly[1].
- Adaptive Protection: A newer capability in Purview allows dynamic adjustment of DLP or other controls based on IRM’s risk score for a user. For example, if IRM deems a user “high risk” (perhaps they have multiple serious alerts), the system can automatically impose stricter DLP rules on that user (like blocking any external sharing of files) via Adaptive Protection policies[3][3]. This showcases a powerful integration where IRM’s analytics inform preventative controls in real time.
- Microsoft Defender Integration: In a security operations centre (SOC) scenario, insider incidents can appear similar to external attacks. IRM now integrates with Microsoft Defender XDR (Extended Detection & Response) tools used by SOC analysts. IRM’s insights (like the user’s risk level or history of data downloads) are surfaced in Defender’s incident pages[2][2]. This helps the SOC distinguish between a compromised account vs. a malicious insider. (We discuss this more under recent enhancements.) In short, IRM is part of the broader Microsoft 365 “inside-out” defence strategy, working hand-in-hand with other tools to provide a 360-degree view of risks.
- It leverages Microsoft 365 audit logs and other services as inputs. IRM uses the logs and events from Exchange, SharePoint, OneDrive, Teams, Windows, and even Defender for Cloud Apps to gather the signals it needs[1]. For instance, if you have Microsoft Purview Data Loss Prevention (DLP) policies, an act that triggers a DLP alert (like an attempt to email out a credit card number) can be consumed as a signal in IRM as well. In this way, IRM correlates with DLP – DLP might block or warn on a specific activity, while IRM looks at the pattern of activities around it to gauge user risk.
In summary, Microsoft Purview Insider Risk Management serves as a centralized internal risk management hub – it enables SMBs to spot risky user behaviour early, investigate incidents thoroughly (with minimal privacy intrusion until necessary), and respond decisively (either by corrective action, enforcement through other tools, or involving HR/legal teams). It fits within the Microsoft Purview compliance suite as the solution focused specifically on people-centric risks inside the organisation, complementing other solutions that focus on data protection and external threats.
2. Step-by-Step Deployment Guide for an SMB
Deploying Insider Risk Management in an SMB environment involves preparing the tenant, configuring the tool, and tuning it to your organisation’s needs. Below is a step-by-step guide covering prerequisites, setup, and initial policy configuration.
")
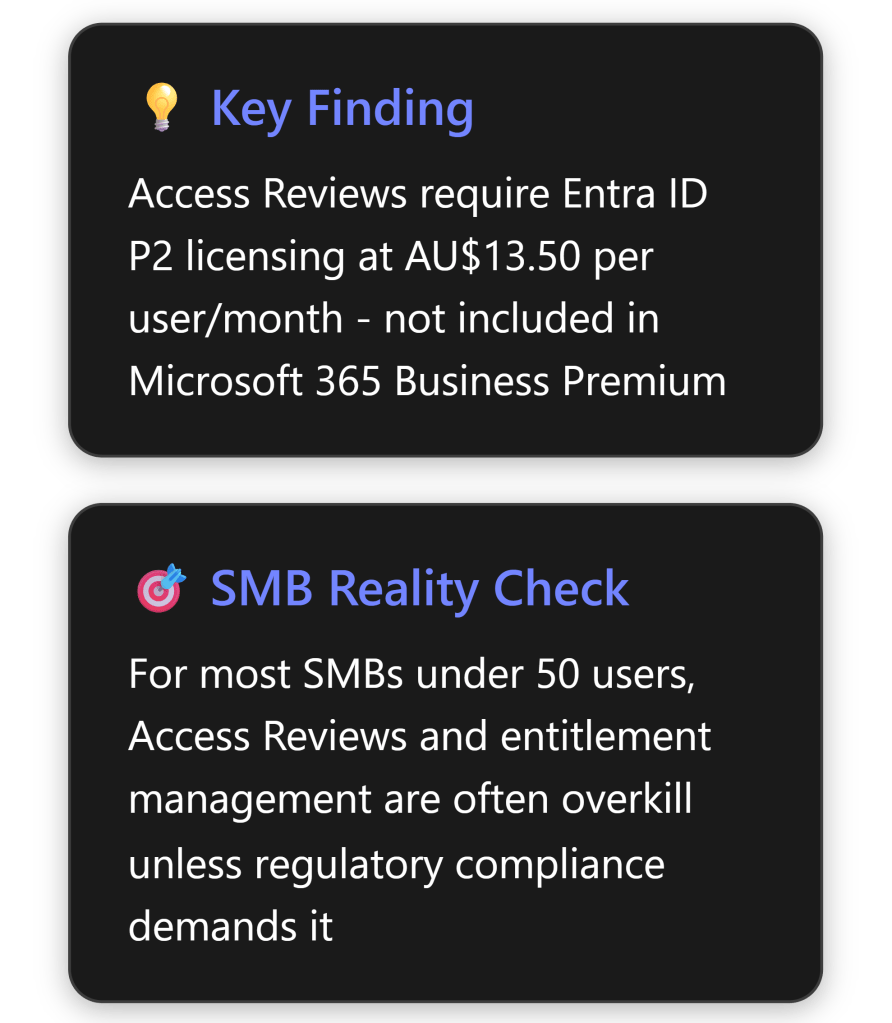
Step 1: Licensing and Permissions. Before anything else, ensure your organisation’s Microsoft 365 subscription includes Insider Risk Management. IRM is considered an advanced compliance feature and is not included in the base SMB plans by default (for example, it’s not part of Microsoft 365 Business Premium)[5]. The section on Licensing and Costs later in this report details the options; commonly, SMBs will either utilize a Microsoft 365 E5 plan or a Microsoft 365 E5 Compliance add-on to get IRM. If you don’t yet have the licenses, Microsoft offers a 90-day trial for Purview solutions which could be used to pilot IRM at no cost[4]. Once licensing is in place, assign the IRM licenses to the user accounts that will be monitored and to the admins who will manage the system (typically you’d license all users for compliance features like IRM to be safe). Next, set up permissions: in the Microsoft Purview compliance portal, navigate to Roles and add the appropriate people to Insider Risk Management roles (e.g. “Insider Risk Management Admin” for those who configure policies, and “Insider Risk Management Analysts” for those who will review alerts)[4]. By design, Global Admins do not automatically see IRM—you must be in one of these IRM-specific role groups to access the insider risk dashboards.
Step 2: Turn on Audit Logging. IRM draws on M365’s unified audit log to get much of its signal data. For IRM to function, audit logging must be enabled for your tenant[4]. Most tenants have this on by default (and any Microsoft 365 Business Premium or E3/E5 tenant will have basic audit capabilities), but verify by going to the Audit section in the compliance portal. If it’s off, turn it on (note: after enabling, it may take a few hours to start recording events)[4]. Without audit logs, IRM policies won’t trigger because they have no data to analyze. Also ensure that users and administrators are aware that audit logging is active (for transparency).
Step 3: Optional – Insider Risk Analytics. Microsoft Purview IRM includes an Analytics feature that can be run in “analysis mode” without any active policies. This is optional but highly recommended, especially for first-time setup. The analytics scan combs through your existing audit logs to identify any activities or users that appear risky before you even configure formal policies[4]. Think of it as a baseline risk assessment. For example, analytics might surface that a particular user has been mass downloading files or that there’s an unusual spike in permission changes in SharePoint. Running this can help you pinpoint where to focus your policies (perhaps your organisation has more of a data leakage issue vs. HR-related issues, for instance). You can start an analytics scan from the IRM Overview page in the Purview portal by enabling “Insider risk analytics”. Give it at least a day or two (up to 48 hours) to complete the scan and generate the analytics report[4]. The output will highlight top risk factors and potentially recommend policy templates to implement. This step is particularly useful for an SMB to right-size their approach and not enable every policy blindly. (It’s worth noting that the analytics feature might require the higher-tier license as well, since it’s part of the IRM solution.)
Step 4: Configure Connectors & Indicators (if needed). Out-of-the-box, IRM will already use many internal signals from M365 workloads. However, you should consider if you need to configure any connectors for additional signals:
- HR Connector for Departing Users: If you plan to use policies related to employees leaving the company, you should feed IRM with information about separations. In an enterprise, this is often done via an HR system connector (e.g. connecting Workday or SAP SuccessFactors into Azure AD or directly into Purview). In an SMB, you might not have a fancy HR system – but you can still inform IRM of departure events by using the “User resignation” data connector in Purview or simply by updating the user’s profile in Azure AD with a termination date. Microsoft Purview can import a CSV or use Azure AD attributes to mark someone as scheduled to leave[6], which triggers the “departing user” condition in relevant IRM policies. Configuring this ensures that when someone is put on notice or given their resignation, IRM policies for departing users will properly scope that person and apply heightened monitoring during the critical window around their exit.
- Endpoint and Cloud App Indicators: If your organisation wants to monitor actions like files being copied to USB drives, printed, or uploaded to cloud services like Dropbox, ensure that Microsoft Defender for Endpoint (if available via your license) is deployed on your user devices. For SMBs using Microsoft 365 Business Premium, Defender for Business provides some endpoint DLP capabilities that integrate with Purview. Check that devices are onboarded in the Microsoft 365 Defender portal so that endpoint signal (like device file events) flow into IRM. Similarly, if you want multi-cloud visibility (e.g., to get alerts when someone moves files to an unsanctioned cloud service), you might have had to enable a preview connector. As of late 2024, IRM introduced multi-cloud indicators (for Box, Dropbox, Google Drive, AWS, etc.) that can be toggled on, provided you link an Azure subscription for billing (more on this in Recent Updates)[7][7]. Decide which of these indicators are relevant to your SMB and enable them in Insider Risk Management > Settings if needed. Many SMBs may primarily focus on the core Microsoft 365 signals, but it’s good to know the system can extend to other cloud sources if your users commonly use them (for example, if some departments still use Dropbox for file sharing, you’d want IRM to catch risky moves there as well).
Step 5: Create and Customise Policies. With groundwork laid, proceed to create your insider risk policies:
- Navigate to the Insider Risk Management section in the compliance portal and select “Policies”. Click “+ Create policy”. A wizard will guide you.
- Choose a Template: Pick a template that aligns with a risk you’re concerned about. For an SMB just starting, two common ones are “Data leaks” (to catch general exfiltration of sensitive info) and “Data theft by departing users” (to monitor users who leave). The template will pre-select a set of indicators and a trigger. For example, Data leaks might look at things like mass file downloads, sharing files externally, etc., without needing a specific trigger event. Departing users template, on the other hand, will focus on users flagged as leaving.
- Name and Description: Give the policy a meaningful name (e.g. “Contoso – Departing User Data Theft Policy”) and description so others know its purpose.
- Scope (Users/Groups): Decide which users the policy will apply to. You can include or exclude users or Azure AD groups. In SMBs, it might be fine to include everyone initially. Alternatively, you might exclude executive accounts at first if you’re concerned about privacy, or vice versa mark only a certain group as “priority users.” (IRM has a concept of priority users for heightened monitoring of key roles – you can configure a list of priority users in the settings. There are also separate template variants for priority users[1]).
- Indicators and Triggering Events: Depending on the template, you may have options to refine what activities to watch. For example, in a Data leaks policy you can choose to monitor only files with certain sensitivity labels or only activities in specific SharePoint sites. In a Departing user policy, you will confirm what constitutes the “flight risk” trigger (usually it’s when the user is added to the HR departure list or disabled account). Ensure the indicators (like file downloads, printing, emailing attachments, etc.) make sense for your environment. Microsoft’s defaults are usually a good start, covering a broad range of risky actions.
- Timeframe: Set how far back and forward to look around a trigger event (for policies that have one). For instance, watch 30 days before and 30 days after a user’s termination date. For continuous policies (like Data leaks), you’ll set a monitoring interval (e.g. alert on risky activities within a 7-day window).
- Thresholds and Alerting: Some policies let you adjust thresholds – e.g., only alert if more than 100 files are downloaded in a day. Initially, you might keep the default values until you gather some data on what’s normal. Templates often come with research-based defaults. You can also set whether to alert on every event or only if a certain combination of events occur. Keep in mind SMBs might have fewer events overall, so you might lower certain thresholds (e.g., 20 files downloaded by one user might already be unusual in a 10-person company, whereas in a 1000-person company it’s not).
- Review and Create: Finish the wizard to create the policy, and make sure to turn it from “Test” mode to “Active” if you want real alerts. (There is a mode where you can simulate policies without generating alerts, but in SMBs it’s usually fine to go live, especially after doing an Analytics scan).
Repeat the above to create multiple policies if needed. A cautious approach for SMBs is to start with one or two policies that address your top concerns rather than enabling everything at once – this prevents overwhelming your team with alerts. Over time, you can add more policies (for different scenarios) as you become comfortable managing them.
Step 6: Monitoring Alerts and Tuning Policies. Once policies are active, IRM will begin monitoring user activities. Alerts will appear on the IRM Alerts page. At this stage:
- Establish a routine for alert review. For example, your IT manager or security officer might check the IRM dashboard daily or get email notifications (you can configure alert digest emails) if something triggers. In a small business, the person in charge of IT or compliance often takes on this role.
- When an alert comes in, click into it to see details: which user (pseudonymised as UserX until you reveal), what activities triggered it, and why it was flagged (e.g. “User downloaded 50 confidential files and uploaded 10 files to a personal Dropbox” might be listed under activities). Each alert shows the severity (low, medium, high) and the status (e.g. “Needs review”)[1].
- Triage the alert: Determine if it’s a true risk or a false positive. For example, maybe an employee legitimately moved documents to a SharePoint site but IRM flagged it as unusual – upon checking, you realise it’s part of their job. You can then resolve the alert as benign (dismiss it). If it’s potentially concerning (not obviously benign), leave it open for deeper investigation (or immediately escalate to a case if it looks very serious).
- As you handle alerts, you’ll learn whether your policies are too sensitive or not sensitive enough. Adjust the policies accordingly in the Purview portal. This might include: changing thresholds (maybe require 200 files downloaded before alert to cut down noise), adding an exclusion (e.g. exclude the Finance group from a particular policy if their large data exports are always causing alerts but are expected), or including additional indicators to catch missed incidents. Policy tuning is an iterative process. The goal is to reach a point where when an IRM alert fires, it is something truly worth looking at. Microsoft provides guidance in the dashboard via the Analytics feature which can suggest threshold changes (if you enabled Analytics, it can recommend tuning adjustments in real-time)[3].
Step 7: Investigating Incidents and Taking Action. For alerts that are confirmed as actual issues, use IRM’s case management to dig deeper:
- Create a Case from the alert (or add the alert to an existing case if it’s related to an ongoing investigation). In SMBs, it’s unlikely you have too many simultaneous cases, but using the case feature helps keep a record of what’s been investigated.
- In the case view, examine the User Activity timeline to reconstruct the user’s sequence of actions[1]. For example, you might see the user signed into their account at 8 AM from a new location, then at 9 AM downloaded a customer list from SharePoint, at 9:30 AM copied that to a USB drive, and at 10 AM attempted to delete a bunch of files. Plotting this out can tell a story – maybe they were preparing to leave and tried covering tracks, or maybe their account was compromised by an attacker (compare with their usual pattern).
- Use the Content Explorer to open or download copies of the files in question[1]. Check if the content is indeed sensitive. Sometimes IRM might flag a bulk action that isn’t actually harmful if the files are benign. Conversely, it might find the user also emailed those files out – the content explorer would show the email.
- Document findings in the case notes. If multiple people are involved in response (maybe an external IT consultant or a manager), you can share the case report with them (there’s an option to email a link to the case or export a summary).
- Decide on the response: Since SMBs may not have dedicated HR or security investigators, this likely involves leadership. You might have a conversation with the user to get an explanation, or you might immediately revoke their access if malfeasance is evident. IRM itself can’t automatically punish a user, but you can integrate it with other tools for response. For example, if you confirm that a user is leaking data intentionally, you could create a Power Automate flow that, when an IRM alert is tagged high severity, it alerts management and locks the user’s account. In smaller setups, manual action (disabling account, asking the user’s manager to follow up, etc.) is more likely.
- If the incident could have legal implications (e.g. theft of intellectual property), escalate the case to eDiscovery (Premium). With a click, IRM can send all its collected data to an eDiscovery case where legal teams can do a broader content search, preserve data (legal hold), and eventually export data for legal proceedings[1]. This is more relevant if you plan to pursue the matter legally or need to provide evidence to authorities.
Completing these steps sets up Microsoft Purview IRM in your SMB environment and initiates an ongoing cycle of monitoring and improvement. Remember that insider risk management is not a “set and forget” tool – it requires active management and periodic reassessment of policies as your business evolves. That said, after the initial heavy lift of configuration and tuning, many SMBs find that only a modest amount of time each week is needed to review IRM alerts once the system is calibrated to your normal operations.
3. Best Practices for Effective Use in SMBs
Implementing Insider Risk Management is not just a technical exercise – it also involves process and culture. Here are recommendations and best practices tailored for SMBs to use IRM effectively:
-
Target the Most Relevant Risks: Align IRM with your specific business context. For example, if you’re a software development startup, source code leakage might be your top concern – focus on policies that watch for large code repository downloads or sharing code outside approved channels. If you’re a professional services firm, client data confidentiality would be key – a policy for detecting bulk client file downloads or unusual email forwarding might be priority. Start with 1-3 core policies that cover your greatest “insider worry” scenarios rather than enabling all templates. This keeps management manageable and addresses the issues you care about most. You can always broaden coverage later as needed.
-
Tune Noise Down, Signal Up: In a smaller organisation, certain defaults may be too broad or trigger too often. Don’t hesitate to adjust sensitivity. For instance, a template might consider 5 deleted files as a risk – but if every employee typically deletes dozens of files (like cleaning up folders), that threshold is too low for you. Increase it to something more meaningful. Conversely, if something is very sensitive in your context (say any email sent to a personal address should be flagged), you might tighten a rule. Take advantage of IRM’s analytics recommendations if available – the system can suggest threshold changes to reduce unnecessary alerts[3]. The end goal is that when an alert comes through, it truly requires attention. During initial rollout, plan to spend a few weeks refining the policies. This investment will pay off by saving you time later and avoiding “alert fatigue”.
-
Regular Alert Triage and Response: For IRM to be effective, you need a consistent process to handle its output. Define who will review alerts and how often. In an SMB, this could be a role for the IT administrator, security officer if you have one, or a managed service provider (MSP) if you use one. Treat it similarly to how you handle antivirus or firewall alerts – it’s part of the security monitoring routine. We recommend checking the IRM dashboard at least once a day or set up email notifications for new High severity alerts, so you don’t miss something critical. When reviewing:
- Document decisions: If you dismiss an alert as false positive, add a note why (IRM allows notes on alerts/cases). This builds a knowledge base, so if another admin steps in, they understand the history. It also helps if you later need to explain your monitoring actions (for audit or compliance).
- Use the case management even for moderate incidents. It keeps things organised. For example, if User A triggers small alerts that on their own aren’t alarming but collectively seem suspicious, open a case to tie them together. You can keep that case open and see if a pattern emerges.
- Follow through on remediation: An alert that turned out valid should result in an action. That action might be as light as a coaching conversation with the employee or as heavy as termination or legal action, depending on severity. Make sure there’s a feedback loop – if an incident occurs, assess if additional controls are needed to prevent it in future (more training for staff, new DLP rule, etc.). IRM’s job is to shine a light on risky behaviour; it’s up to the organisation to remedy the root cause.
- Document decisions: If you dismiss an alert as false positive, add a note why (IRM allows notes on alerts/cases). This builds a knowledge base, so if another admin steps in, they understand the history. It also helps if you later need to explain your monitoring actions (for audit or compliance).
-
Privacy, Ethics, and Communication: SMBs often have close-knit teams, and introducing insider monitoring can raise trust concerns. While IRM is designed with privacy features (e.g. pseudonymisation) to mitigate this, it’s wise to be transparent with your employees to the extent possible. Best practice is to include a section in your employee handbook or IT policy stating that “the company may monitor user activities and communications for security and compliance purposes.” Emphasise that this is to protect the business and employees from risks, not because of lack of trust. In some jurisdictions (like certain Australian states, EU countries, etc.), employee monitoring requires consent or at least notification – make sure you comply with any such requirements. Avoid over-monitoring: use IRM to address genuine risks and not to spy on trivial matters. For example, do not use it punitively to track minor policy infractions unrelated to security (like using office internet for personal browsing – that’s not what IRM is for). Maintaining professionalism and respecting privacy will help ensure that IRM does not erode workplace morale. Only a very small group (maybe just one person in IT plus a manager or HR partner) should have access to IRM data. This prevents gossip or misuse of the sensitive information that could come up during an investigation. All these measures build an environment where employees can accept the idea of monitoring as a safety net rather than feeling constantly surveilled.
-
Leverage Integration with Other Tools: Use IRM in concert with the rest of your Microsoft 365 security stack:
- If you have Microsoft Defender for Endpoint (part of Business Premium or as an add-on), ensure its features like endpoint DLP are enabled. This will feed IRM with rich device-level events (e.g. copying to USB, printing docs) that purely cloud-based monitoring might miss. It also allows you to take device-focused actions if needed (like isolating a machine).
- Consider enabling Microsoft Purview Communication Compliance (if licensed) for things like acceptable use monitoring (e.g. detecting harassment in Teams or inappropriate sharing of data in chat). While communication compliance is separate, any serious findings there (like someone repeatedly trying to share confidential info via chat) can inform your insider risk picture. In fact, Microsoft has enabled certain Communication Compliance signals to flow into IRM as of recent updates[3]. For example, if a user is warned by a communication policy for attempting to share sensitive info, IRM can treat that as an indicator of potential risk.
- Use Azure AD (Entra ID) risk signals in conjunction: If Azure AD Identity Protection flags a user as high risk (say their credentials were detected in a leak), be extra vigilant with their insider risk alerts – it could mean an external actor is using an insider’s account. Interestingly, IRM now shows Entra ID compromised user alerts within its dashboard for enriched context[3]. So a best practice is to monitor those correlations; a user with both an IRM alert and an Identity Protection alert might point to account compromise rather than malicious intent.
- If you have Microsoft Teams or email flows set up for IT, you might integrate IRM alerts there for quicker response. For instance, you could use Power Automate to post a message in a private IT Teams channel whenever a high-severity IRM alert occurs, ensuring it’s seen promptly even if admins are not watching the portal.
- Respond holistically: IRM might highlight a problem that requires changes elsewhere. If, for example, IRM alerts show a user accessing a confidential SharePoint site they shouldn’t, the fix might be to adjust SharePoint permissions for that site (a preventive measure), not just to chastise the user. Similarly, frequent near-miss incidents (where IRM catches risky behaviour) might signal a need for employee training on security policies. Use IRM as feedback to improve your overall security posture.
- If you have Microsoft Defender for Endpoint (part of Business Premium or as an add-on), ensure its features like endpoint DLP are enabled. This will feed IRM with rich device-level events (e.g. copying to USB, printing docs) that purely cloud-based monitoring might miss. It also allows you to take device-focused actions if needed (like isolating a machine).
-
Periodically Review and Update IRM Configuration: At least twice a year (or whenever major changes happen in your org), review your IRM settings:
- Are the right people in the IRM roles? (E.g., if an admin left the company, remove their access.)
- Do the policies still align with current business priorities and threats? You might add new ones as new risks emerge (for example, if you adopt a new tool or if there’s a rise in a certain risky behaviour industry-wide).
- Check Microsoft’s updates to IRM (see next section) – new features or policy templates might be available that could benefit your SMB. Incorporating new capabilities (like the new “Risky browser usage” template or improved analytics) can increase the effectiveness of your insider risk program.
- Are the right people in the IRM roles? (E.g., if an admin left the company, remove their access.)
Overall, effective insider risk management in an SMB boils down to focus, balance, and follow-through: focus on the biggest risks, balance security with privacy and culture, and follow through on alerts with consistent action. When implemented with care, IRM becomes a valuable early-warning system for internal issues and fosters a security-conscious workplace.
4. Licensing and Cost Considerations (AUD) for SMBs
Microsoft Purview Insider Risk Management is available to SMBs, but it typically requires premium licensing. This section outlines the licensing options and costs, with prices in Australian dollars (AUD). All prices are per user, per month (excluding GST unless stated otherwise).
License Options for IRM in SMB:
| License Plan or Add-on | Insider Risk Management Availability? | Approx. Price (AUD) per user/month (ex. GST) |
|---|---|---|
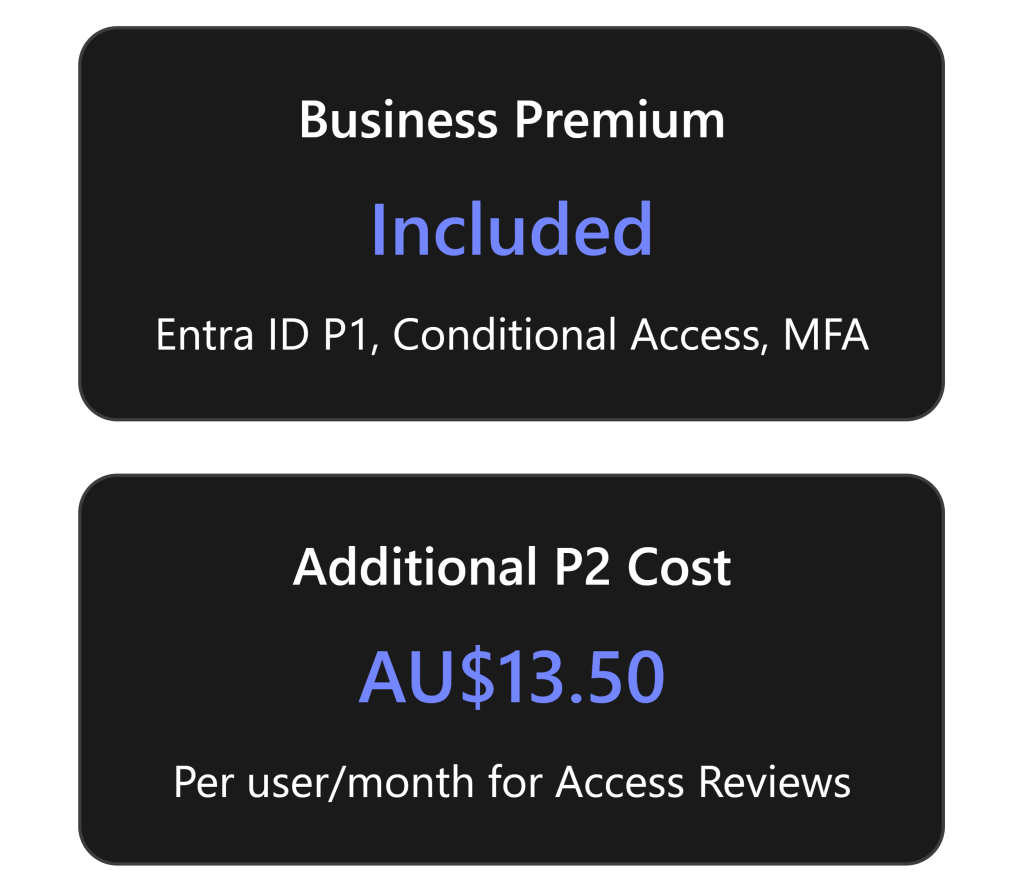
| Microsoft 365 Business Premium (SMB) | Not included (no IRM by default) | A$36.19 (inc GST) ~ A$33 ex GST |
| Microsoft 365 E5 Compliance Add-on | Yes – adds IRM + other compliance features to Business Premium or E3 | ~A$18 ex GST (≈ A$19.80 inc) |
| Microsoft 365 E5 (Full suite, Enterprise) | Yes – IRM included out-of-the-box | A$81.90 ex GST (A$90.09 inc GST) |
Table: Licensing tiers for Insider Risk Management and their approximate costs in Australia. Business Premium (the common SMB Microsoft 365 plan) does not include IRM; an add-on or upgrade is required.
-
Microsoft 365 Business Premium: This is the typical Microsoft 365 subscription for SMBs (up to 300 users), and it costs around A$36.19 per user per month in Australia (including GST)[8]. However, Business Premium does not include Insider Risk Management or other advanced Purview compliance features by default. It provides core security/compliance like basic DLP and sensitivity labels, but Insider Risk Management is absent in this plan. To get IRM, you have two choices: either purchase an add-on for the needed features or switch to an enterprise license tier.
-
Microsoft 365 E5 Compliance Add-on: Microsoft offers add-on licenses that SMBs can attach to their Business Premium (or E3) subscriptions to unlock E5-level capabilities without a full E5 upgrade. The M365 E5 Compliance add-on includes the advanced compliance suite – which covers Insider Risk Management, Advanced Auditing, eDiscovery (Premium), Communication Compliance, Advanced DLP, etc. Essentially, it brings your compliance features to E5 parity[5]. For an SMB on Business Premium, this is a popular route to get IRM. In Australia, the E5 Compliance add-on is roughly A$18 per user/month (about A$216 per user per year)[9], though prices can vary slightly by provider and whether you have annual commitments. This add-on requires that the user already has a base license like Business Premium or E3; it can’t be used alone. One nice aspect is that you can choose to buy it just for specific users who you want to monitor, but beware: if you only license some employees for IRM, officially you are only supposed to apply IRM policies to those licensed users. (In practice, many orgs will simply license everyone who has access to sensitive data, to cover their bases.)
-
Microsoft 365 E5 (Enterprise): This is Microsoft’s top-tier enterprise plan and includes all IRM capabilities natively (no add-on needed). It also includes a host of other advanced security tools (Defender for Endpoint P2, Defender for Office P2, etc.). SMBs (even with under 300 seats) can purchase E5, though it’s often more than what a small business needs or budgets for. The cost is approximately A$81.90 per user/month (annual commitment, excluding GST)[10] – around A$90/user/month including GST[8]. This is significantly higher than Business Premium’s cost, so most SMBs won’t go full E5 just for insider risk features. However, for a growing company that foresees needing multiple advanced security and compliance features, moving up to E5 can sometimes be justified. Microsoft also occasionally runs promotions (for example, a 50% off for certain compliance add-ons if you’re also trying their new services like Copilot – these come and go).
-
Other Add-ons and Plans: Microsoft also has a standalone “Insider Risk Management” add-on and an “Information Protection & Governance” add-on. These were mentioned in some licensing guides, aimed at flexibility (for instance, you could add just the Insider Risk component without the full E5 Compliance suite). In practice, the E5 Compliance bundle is more common and covers everything. If an SMB works with a Microsoft licensing partner, they can price out the option of the “Microsoft 365 E5 Insider Risk Management” add-on specifically – it would likely be slightly cheaper than the full compliance bundle, but note it only gives IRM (and possibly a couple of related pieces) without things like Advanced eDiscovery. The combination of “E5 Information Protection & Governance” + “E5 Insider Risk Management” add-ons together essentially equals the E5 Compliance features[6]. Licensing can be complex, so consulting with a Microsoft provider to find the most cost-effective option is advisable.
-
Education and Nonprofit Plans: (Not the focus here, but for completeness) – If you are an educational institution using A5 or a nonprofit, similar IRM rights come with those top-tier plans. For SMB corporate usage, those don’t apply, but it’s worth noting in case an organisation mistakenly thinks E5 is only for huge enterprises – it’s also used in large schools (A5) and can be scaled down to small seat counts if needed.
Cost Considerations: From a budget perspective, SMBs should weigh the cost vs. benefit. Adding IRM (via an add-on or E5) will increase your Microsoft 365 subscription costs. For example, Business Premium at ~$33 ex GST + E5 Compliance add-on ~$18 means about ~A$51 per user/month for those users to have IRM and all other compliance features. That is roughly half the price of full E5 (which is ~$82 ex). If you don’t need the security parts of E5 (since Business Premium already has many security features, just not the advanced compliance ones), the add-on route is cost-efficient.
The good news is you don’t have to license all users if you have some that truly don’t create any risk (although strictly speaking, any user could potentially cause an incident). Microsoft’s licensing guidance is that any user being monitored by an insider risk policy should be licensed. In a small company, it might be simplest (and fairest) to license everyone who uses a company device or data. But if budget is tight, you could decide to license only certain roles (for instance, only the executives and people in sensitive roles like finance or engineering). Keep in mind though, an unlicensed user won’t show up in IRM and could theoretically be an blind spot.
Trials and Scaling: Microsoft Purview IRM can be tried for free via the Purview trial program (90 days)[4], which is a smart way for an SMB to test the waters and see value before buying. If you anticipate only needing IRM for a short-term project or during a particular high-risk period, that trial might even cover your needs in the short run. Just remember to either remove the policies or get proper licenses after the trial to stay in compliance.
Finally, from a cost perspective, consider the potential cost of insider incidents. While IRM has a direct licensing cost, it may prevent expensive incidents (data breaches can cost organisations hundreds of thousands of dollars or more, and even a small breach can have outsized impact on a small business). Seen in that light, the licensing fee can be a prudent investment. Of course, every business needs to balance this with other priorities; many SMBs start with more pressing security needs like phishing protection and basic backups, then layer in insider risk management once they have the fundamentals and as they grow or handle more sensitive data.
5. Recent Updates and Enhancements Relevant to SMBs
Microsoft is continually improving Purview Insider Risk Management. In the last year or two (2024–2025), several new features and enhancements have been introduced. Here we highlight the most noteworthy updates, particularly those that could be useful for small and mid-sized organisations:
-
New Policy Templates (AI and Browser Risk): As work patterns evolve, Microsoft has added policy templates to address emerging risks. In late 2024, “Risky AI usage” and “Risky browser usage” templates were introduced (initially in preview)[1]. The Risky AI usage policy is designed to detect when users might be entering sensitive information into generative AI tools (like Microsoft 365 Copilot or even external ones like ChatGPT) or when AI outputs contain sensitive data[3][3]. With the surge in AI tool adoption, this helps organisations prevent accidental leaks via AI platforms. The policy includes indicators such as “Copilot prompts containing sensitive info” or “GPT responses with sensitive data”[3][3]. Similarly, the Risky browser usage template focuses on activities like using unmanaged or unapproved browsers to handle sensitive info, possibly indicating attempts to bypass security. For an SMB, these templates can be very useful if you allow use of AI or bring-your-own devices. For example, an employee trying out ChatGPT might unknowingly paste client data – IRM can flag that now. These templates are available alongside the standard ones, ready to be enabled if relevant.
-
Integration with Microsoft Defender XDR (SOC Integration): In October 2024, Microsoft announced a significant integration: Insider Risk Management alerts and insights are now integrated into Microsoft Defender XDR (the extended detection and response suite that combines signals from endpoints, identities, etc.)[2][3]. What this means: if you or your managed service provider uses Defender XDR to manage security incidents, insider risk alerts will show up in the same incident queue with your other security alerts. The Defender XDR user page for an account now can show the IRM risk level and recent insider risk activities for that user[2]. This helps a SOC analyst to determine if an alert (like data exfiltration from a device) is due to an insider acting maliciously or an external attacker who compromised the account[2][2]. For SMBs that might use a unified security operations console (perhaps via Microsoft 365 Defender portal or an MSP’s tools), this integration brings insider risk into the central security workflow. It can improve response times and ensure nothing falls through the cracks. Even if you don’t have a formal SOC, this integration shows Microsoft’s focus on breaking down silos between compliance and security – useful if in the future you ramp up your security operations.
-
Advanced Sequence Detection and Fewer False Positives: Microsoft has improved IRM’s analytics models over time to better catch complex sequences of behaviour and reduce noisy alerts. For instance, IRM can now recognize multi-step patterns (like a user who downloads files, then emails them to personal email, then deletes the originals) as a single incident rather than three separate alerts. The integration of multiple signals into single “alerts” and the correlation logic have improved, meaning you are more likely to see one comprehensive alert with a higher severity than many minor alerts. Additionally, features like “alert triage assistant” (in preview) give a quick summary of why an alert was triggered and suggest next steps, which can aid admins in SMBs who may not be insider risk experts.
-
Improved Analytics & Reporting: In late 2024, Microsoft enhanced the reporting capabilities for IRM. The new operational reports provide insights into alert trends over time, breakdown by departments, and average time to resolve cases[3]. For example, you can see if November saw a spike in alerts compared to October, or if a particular department (say IT or Sales) is triggering the most incidents. This is useful for SMB leadership to track the effectiveness of their insider risk program and identify if additional training or controls are needed in certain areas. Also, the IRM Analytics dashboard now highlights top emerging risks (including the aforementioned AI usage) directly and can even recommend creating a policy if it detects a pattern with no policy covering it[3].
-
Risky Users and Adaptive Protection: Another enhancement beneficial to SMBs is how IRM works with Adaptive Protection (which automatically adjusts DLP policies based on user risk levels). As of early 2025, IRM risk scores can directly feed into Adaptive Protection in general availability. For example, if IRM classifies a user as “high risk,” you can have a rule that automatically tightens that user’s DLP policy (perhaps blocking all downloads to USB for 30 days for that user)[3][3]. This dynamic response can be powerful for a small IT team – it’s like having the system automatically put a user on a “watch list” and restrict certain actions until they are back to normal. It’s an advanced feature (requires the full compliance suite and possibly Defender integration), but noteworthy as it brings enterprise-grade adaptive security to organisations of all sizes.
-
Multi-Cloud and Third-Party Support (Pay-as-you-go model): Recognising that not all data resides in Microsoft 365, IRM introduced multicloud support in preview, with the ability to monitor activities in third-party services like Box, Dropbox, Google Drive, and even AWS cloud services and Power BI[7]. In 2024, this feature moved to a pay-as-you-go model[7]. For SMBs, this is actually good news: you don’t have to purchase an expensive license to cover these, you can simply pay per activity monitored if you opt in. To use it, an admin links an Azure subscription to Purview for billing, and then you opt-in to whichever third-party indicators you need (say your company uses Box, you toggle on the Box indicators). From November 2024, Microsoft charges based on the volume of events it processes for those connectors[7][7]. The cost is generally low for small volumes (and if no one uses Dropbox in a month, you pay nothing that month, for example). This flexibility is great for SMBs who might have a few users on non-Microsoft platforms – you can still include their activities in IRM’s purview without licensing your whole organisation for an expensive third-party archiving solution. Keep an eye on the Azure bill if you enable this, but typically the costs for occasional usage are minimal. Microsoft has not published the exact per-action cost publicly in those announcements, but it’s designed to be consumption-based.
-
Entra ID (Azure AD) Compromised User Signals: A recent addition is that IRM now can show if a user was flagged by Microsoft Entra ID Identity Protection as compromised. If one of your users had their password leaked or was behaving like a breached account, Identity Protection generates an alert. IRM will display that info in the user’s risk profile[3]. For a small business, this is super useful – it connects the dots between external threat and insider threat. You might see that a user’s account is acting risky in IRM and also see a compromised indicator – telling you this might not be the employee acting maliciously but rather a hacker using their account. This helps you respond correctly (you’d reset their credentials and investigate the external breach, rather than, say, disciplining the employee).
-
Case Management and Multi-Tenant Support: Microsoft has improved the case management experience, for example by allowing easier export of case data and (for those who manage multiple tenants, like service providers) the ability to manage cases across tenants in the Defender portal was announced. For an individual SMB, multi-tenant isn’t likely applicable, but if you’re a partner managing security for multiple clients, this is handy.
-
User Activity Reports (Preview): Another feature in preview is User Activity Reports[1]. This lets an investigator generate an on-demand report of all activities by a specific user over a time period, even if that user isn’t currently triggering a policy. It’s useful if, say, you get a tip about a user and want to proactively see if they’ve done anything risky without making a formal policy for them. It’s currently a preview tool, but it can save time by giving a quick snapshot of a user’s recent file, email, and chat activities in one place.
In summary, Microsoft Purview IRM is becoming more powerful and versatile. Features that might have been considered “enterprise-only” – like AI monitoring or multi-cloud signals – are now accessible to smaller organisations with the proper licensing, often on flexible terms. Microsoft’s ongoing enhancements (especially those around automation and integration) mean that an SMB using IRM can benefit from state-of-the-art technology with relatively low administrative overhead. It’s wise to stay updated via Microsoft’s documentation or blog announcements for Purview (for instance, Microsoft’s “What’s New in Purview” page or the Tech Community blogs), as new improvements roll out frequently (monthly, in some cases).
By leveraging these updates, SMBs can continually strengthen their insider risk posture – keeping the organisation’s data secure while enabling employees to work productively and confidently.
Sources: The information in this report is based on Microsoft’s official documentation, blog announcements, and licensing guides, including Microsoft Learn content on Purview IRM[1][1], Microsoft Tech Community blogs (Oct & Nov 2024) for feature updates[2][3], and Microsoft licensing literature and partner pricing for cost details[5][10]. These references are cited throughout the report to provide further reading and verification of the details provided.
References
[1] Learn about Insider Risk Management | Microsoft Learn
[2] Demystify potential data leaks with Insider Risk Management insights in …
[3] Insider Risk Management empowering risky AI usage visibility and …
[4] Get started with Insider Risk Management | Microsoft Learn
[5] Minimum license required to use Purview features
[6] Access to Premium Assessment Template | Microsoft Community Hub
[7] Purview | Insider Risk Management: New pay-as-you-go model for cloud …
[8] Office 365 Pricing Australia | Crowd IT
[9] M365 – Microsoft 365 E5 Compliance – Ozi Telecom Australia