In today’s digital workspace, AI-powered assistants like Microsoft 365 Copilot and traditional search engines serve different purposes and excel in different scenarios. This guide explains why you should not treat an AI tool such as Copilot as a general web search engine, and details when to use AI over a normal search process. We also provide example Copilot prompts that outperform typical search queries in answering common questions.
Understanding AI Tools (Copilot) vs. Traditional Search Engines
AI tools like Microsoft 365 Copilot are conversational, context-aware assistants, whereas search engines are designed for broad information retrieval. Copilot is an AI-powered tool that helps with work tasks, generating responses in real-time using both internet content and your work content (emails, documents, etc.) that you have permission to access[1]. It is embedded within Microsoft 365 apps (Word, Excel, Outlook, Teams, etc.), enabling it to produce outputs relevant to what you’re working on. For example, Copilot can draft a document in Word, suggest formulas in Excel, summarize an email thread in Outlook, or recap a meeting in Teams, all by understanding the context in those applications[1]. It uses large language models (like GPT-4) combined with Microsoft Graph (your organizational data) to provide personalized assistance[1].
On the other hand, a search engine (like Google or Bing) is a software system specifically designed to search the World Wide Web for information based on keywords in a query[2]. A search engine crawls and indexes billions of web pages and, when you ask a question, it returns a list of relevant documents or links ranked by algorithms. The search engine’s goal is to help you find relevant information sources – you then read or navigate those sources to get your answer.
Key differences in how they operate:
Result Format: A traditional search engine provides you with a list of website links, snippets, or media results. You must click through to those sources to synthesize an answer. In contrast, Copilot provides a direct answer or content output (e.g. a summary, draft, or insight), often in a conversational format, without requiring you to manually open multiple documents. It can combine information from multiple sources (including your files and the web) into a single cohesive response on the spot[3].
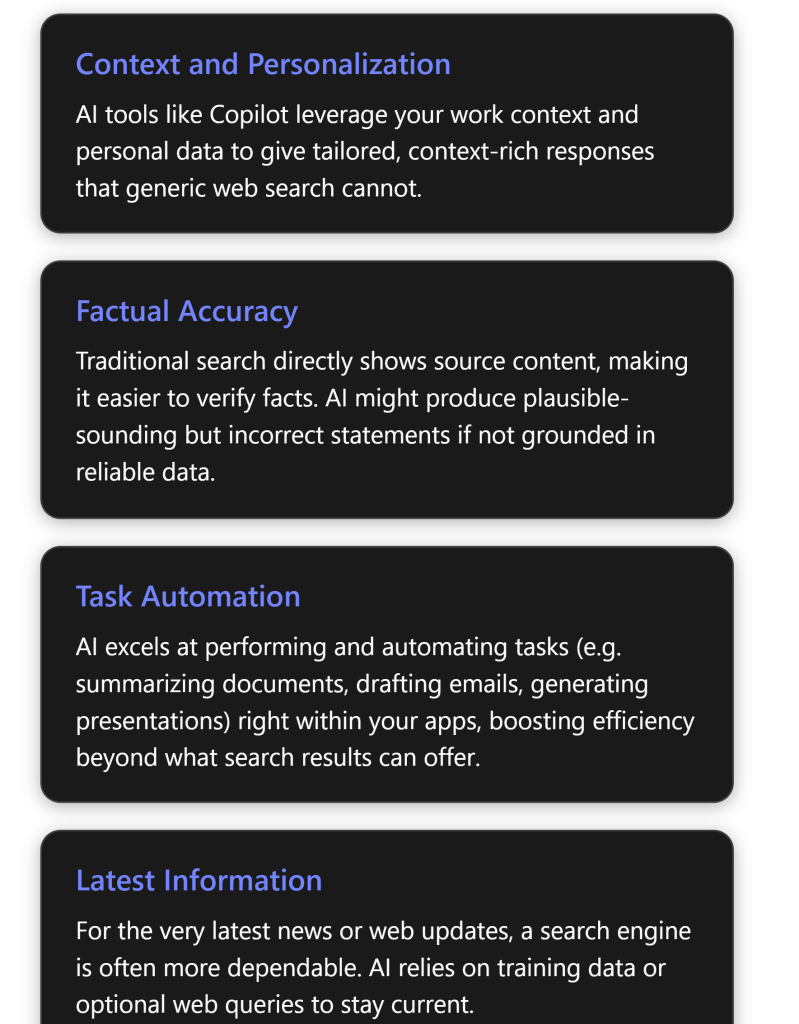
Context and Personalization: Search engines can use your location or past behavior for minor personalization, but largely they respond the same way to anyone asking a given query. Copilot, however, is deeply personalized to your work context – it can pull data from your emails, documents, meetings, and chats via Microsoft Graph to tailor its responses[1]. For example, if you ask “Who is my manager and what is our latest project update?”, Copilot can look up your manager’s name from your Office 365 profile and retrieve the latest project info from your internal files or emails, giving a personalized answer. A public search engine would not know these personal details.
Understanding of Complex Language: Both modern search engines and AI assistants handle natural language, but Copilot (AI) can engage in a dialogue. You can ask Copilot follow-up questions or make iterative requests in a conversation, refining what you need, which is not how one interacts with a search engine. Copilot can remember context from earlier in the conversation for additional queries, as long as you stay in the same chat session or document, enabling complex multi-step interactions (e.g., first “Summarize this report,” then “Now draft an email to the team with those key points.”). A search engine treats each query independently and doesn’t carry over context from previous searches.
Learning and Adaptability:AI tools can adapt outputs based on user feedback or organization-specific training. Copilot uses advanced AI (LLMs) which can be “prompted” to adjust style or content. For instance, you can tell Copilot “rewrite this in a formal tone” or “exclude budget figures in the summary”, and it will attempt to comply. Traditional search has no such direct adaptability in generating content; it can only show different results if you refine your keywords.
Output Use Cases: Perhaps the biggest difference is in what you use them for: Copilot is aimed at productivity tasks and analysis within your workflow, while search is aimed at information lookup. If you need to compose, create, or transform content, an AI assistant shines. If you need to find where information resides on the web, a search engine is the go-to tool. The next sections will dive deeper into these distinctions, especially why Copilot is not a straight replacement for a search engine.
Limitations of Using Copilot as a Search Engine
While Copilot is powerful, you should not use it as a one-to-one substitute for a search engine. There are several reasons and limitations that explain why:
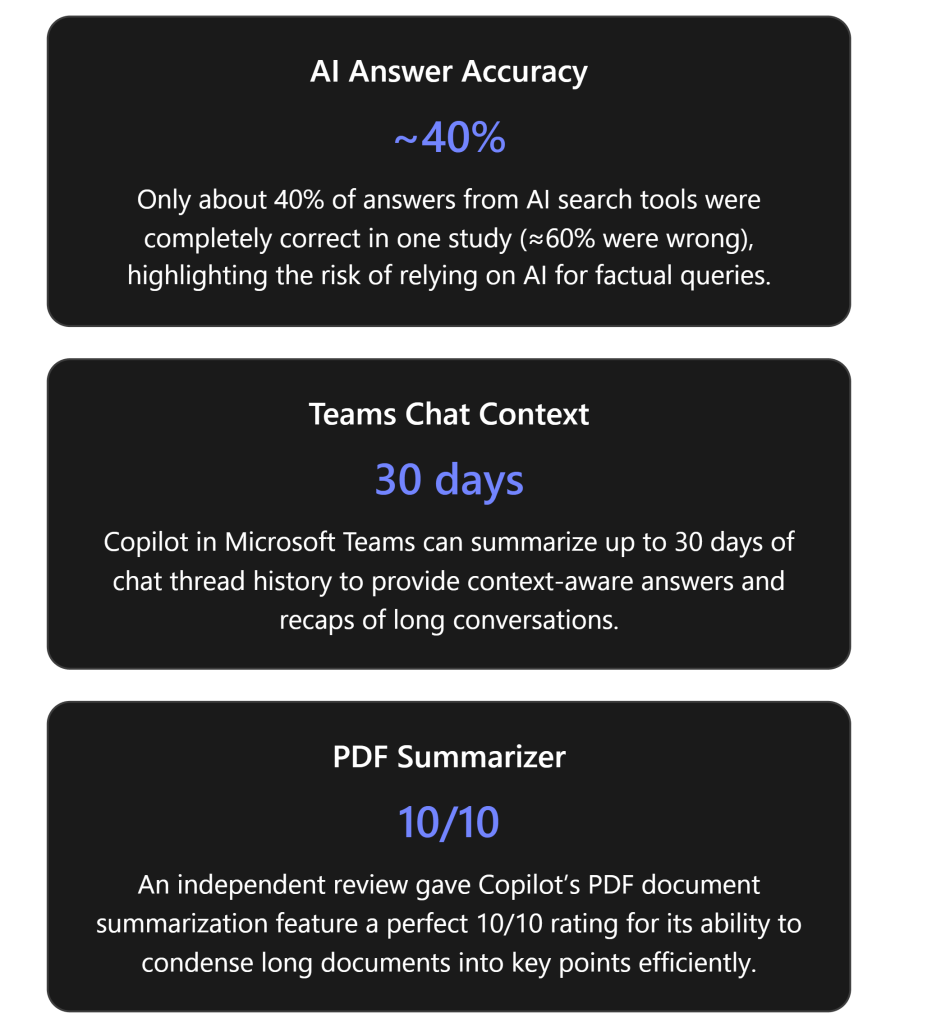
Accuracy and “Hallucinations”: AI tools sometimes generate incorrect information very confidently – a phenomenon often called hallucination. They do not simply fetch verified facts; instead, they predict answers based on patterns in training data. A recent study found that generative AI search tools were inaccurate about 60% of the time when answering factual queries, often presenting wrong information with great confidence[4]. In that evaluation, Microsoft’s Copilot (in a web search context) was about 70% completely inaccurate in responding to certain news queries[4]. In contrast, a normal search engine would have just pointed to the actual news articles. This highlights that Copilot may give an answer that sounds correct but isn’t, especially on topics outside your work context or beyond its training. Using Copilot as a general fact-finder can thus be risky without verification.
Lack of Source Transparency: When you search the web, you get a list of sources and can evaluate the credibility of each (e.g., you see it’s from an official website, a recent date, etc.). With Copilot, the answer comes fused together, and although Copilot does provide citations in certain interfaces (for instance, Copilot in Teams chat will show citations for the sources it used[1]), it’s not the same as scanning multiple different sources yourself. If you rely on Copilot alone, you might miss the nuance and multi-perspective insight that multiple search results would offer. In short, Copilot might tell you “According to the data, Project Alpha increased sales by 5%”, whereas a search engine would show you the report or news release so you can verify that 5% figure in context. Over-reliance on AI’s one-shot answer could be misleading if the answer is incomplete or taken out of context.
Real-Time Information and Knowledge Cutoff:Search engines are constantly updated – they crawl news sites, blogs, and the entire web continuously, meaning if something happened minutes ago, a search engine will likely surface it. Copilot’s AI model has a knowledge cutoff (it doesn’t automatically know information published after a certain point unless it performs a live web search on-demand). Microsoft 365 Copilot can fetch information from Bing when needed, but this is an optional feature under admin control[3][3], and Copilot has to decide to invoke it. If web search is disabled or if Copilot doesn’t recognize that it should look online, it will answer from its existing knowledge base and your internal data alone. Thus, for breaking news or very recent events, Copilot might give outdated info or no info at all, whereas a web search would be the appropriate tool. Even with web search enabled, Copilot generates a query behind the scenes and might not capture the exact detail you want, whereas you could manually refine a search engine query. In summary, Copilot is not as naturally in tune with the latest information as a dedicated search engine[5].
Breadth of Information:Copilot is bounded by what it has been trained on and what data you provide to it. It is excellent on enterprise data you have access to and general knowledge up to its training date, but it is not guaranteed to know about every obscure topic on the internet. A search engine indexes virtually the entire public web; if you need something outside of Copilot’s domain (say, a niche academic paper or a specific product review), a traditional search is more likely to find it. If you ask Copilot an off-topic question unrelated to your work or its training, it might struggle or give a generic answer. It’s not an open portal to all human knowledge in the way Google is.
Multiple Perspectives and Depth: Some research questions or decisions benefit from seeing diverse sources. For example, before making a decision you might want to read several opinions or analyses. Copilot will tend to produce a single synthesized answer or narrative. If you only use that, you could miss out on alternative viewpoints or conflicting data that a search could reveal. Search engines excel at exploratory research – scanning results can give you a quick sense of consensus or disagreement on a topic, something an AI’s singular answer won’t provide.
Interaction Style: Using Copilot is a conversation, which is powerful but can also be a limitation when you just need a quick fact with zero ambiguity. Sometimes, you might know exactly what you’re looking for (“ISO standard number for PDF/A format”, for instance). Typing that into a search engine will instantly yield the precise fact. Asking Copilot might result in a verbose answer or an attempt to be helpful beyond what you need. For quick, factoid-style queries (dates, definitions, simple facts), a search engine or a structured Q\&A database might be faster and cleaner.
Cost and Access: While not a technical limitation, it’s worth noting that Copilot (and similar AI services) often comes with licensing costs or usage limits[6]. Microsoft 365 Copilot is a premium feature for businesses or certain Microsoft 365 plans. Conducting a large number of general searches through Copilot could be inefficient cost-wise if a free search engine could do the job. In some consumer scenarios, Copilot access might even be limited (for example, personal Microsoft accounts have a capped number of Copilot uses per month without an upgrade[6]). So, from a practical standpoint, you wouldn’t want to spend your limited Copilot queries on trivial lookups that Bing or Google could handle at no cost.
Ethical and Compliance Factors: Copilot is designed to respect organizational data boundaries – it won’t show you content from your company that you don’t have permission to access[1]. On the flip side, if you try to use it like a search engine to dig up information you shouldn’t access, it won’t bypass security (which is a good thing). A search engine might find publicly available info on a topic, but Copilot won’t violate privacy or compliance settings to fetch data. Also, in an enterprise, all Copilot interactions are auditable by admins for security[3]. This means your queries are logged internally. If you were using Copilot to search the web for personal reasons, that might be visible to your organization’s IT – another reason to use a personal device or external search for non-work-related queries.
Bottom line:Generative AI tools like Copilot are not primarily fact-finding tools – they are assistants for generating and manipulating content. Use them for what they’re good at (as we’ll detail next), and use traditional search when you need authoritative information discovery, multiple source verification, or the latest updates. If you do use Copilot to get information, be prepared to double-check important facts against a reliable source.
When to Use AI Tools (Copilot) vs. When to Use Search Engines
Given the differences and limitations above, there are distinct scenarios where using an AI assistant like Copilot is advantageous, and others where a traditional search is better. Below are detailed reasons and examples for each, to guide you on which tool to use for a given need:
Scenarios Where Copilot (AI) Excels:
Synthesizing Information and Summarization: When you have a large amount of information and need a concise summary or insight, Copilot shines. For instance, if you have a lengthy internal report or a 100-thread email conversation, Copilot can instantly generate a summary of key points or decisions. This saves you from manually reading through tons of text. One of Copilot’s standout uses is summarizing content; reviewers noted the ability to condense long PDFs into bulleted highlights as “indispensable, offering a significant boost in productivity”[7]. A search engine can’t summarize your private documents – that’s a job for AI.
Using Internal and Contextual Data:If your question involves data that is internal to your organization or personal workflow, use Copilot. No search engine can index your company’s SharePoint files or your Outlook inbox (those are private). Copilot, however, can pull from these sources (with proper permissions) to answer questions. For example, *“What decision did
In this video, I walk you through my step-by-step process for creating a powerful, no-cost Microsoft 365 Copilot chat agent that searches my blog and delivers instant, well-formatted answers to technical questions. Watch as I demonstrate how to set up the agent, configure it to use your own public website as a knowledge source, and leverage AI to boost productivity—no extra licenses required! Whether you want to streamline your workflow, help your team access information faster, or just see what’s possible with Microsoft 365’s built-in AI, this guide will show you how to get started and make the most of your content. if you want a copy of the ‘How to’ document for this video then use this link – https://forms.office.com/r/fqJXdCPAtU
If you found this valuable, the I’d appreciate a ‘like’ or perhaps a donation at https://ko-fi.com/ciaops. This helps me know that people enjoy what I have created and provides resources to allow me to create more content. If you have any feedback or suggestions around this, I’m all ears. You can also find me via email director@ciaops.com and on X (Twitter) at https://www.twitter.com/directorcia.
If you want to be part of a dedicated Microsoft Cloud community with information and interactions daily, then consider becoming a CIAOPS Patron – www.ciaopspatron.com.
Here’s a detailed breakdown to help you decide when to use Microsoft 365 Copilot (standard) versus a dedicated agent like Researcher or Analyst, especially for SMB (Small and Medium Business) customers. This guidance is based on internal documentation, email discussions, and Microsoft’s public announcements.
Uses Microsoft Graph to access your tenant’s data securely.
Best for lightweight tasks and real-time assistance
Researcher Agent
Designed for deep, multi-step reasoning.
Gathers and synthesizes information from emails, files, meetings, chats, and the web.
Produces structured, evidence-backed reports with citations.
Ideal for market research, competitive analysis, go-to-market strategies, and client briefings.
Analyst Agent
Thinks like a data scientist.
Uses chain-of-thought reasoning and can run Python code.
Ideal for data-heavy tasks: forecasting, customer segmentation, financial modeling.
Can analyze data across multiple spreadsheets and visualize insights.
SMB-Specific Considerations
Licensing: SMBs using Microsoft 365 Business Premium can access Copilot, but Researcher and Analyst require Copilot licenses and are part of the Frontier program.
Security: Business Premium includes tools like eDiscovery, audit logging, and data loss prevention to monitor Copilot usage and protect sensitive data.
Deployment: SMBs should ensure foundational productivity setup, data structuring, and AI readiness before deploying advanced agents.
Simple Guidance for SMBs
Start with M365 Copilot Chat for daily tasks, onboarding, and quick answers.
Use Researcher when you need a comprehensive answer that spans multiple data sources and includes citations.
Use Analyst when you need to analyze or visualize data, especially for strategic planning or reporting.
To deploy Microsoft 365 Copilot, including the Researcher and Analyst agents, in small and medium-sized businesses (SMBs), you’ll need to follow a structured approach that balances licensing, governance, security, and user enablement. Here’s a detailed breakdown based on internal documentation, email guidance, and Microsoft’s official resources.
Deployment Overview for SMBs
1. Licensing Requirements
To use Microsoft 365 Copilot and its advanced agents:
Base License: Users must have one of the following:
Microsoft 365 Business Premium
Microsoft 365 E3 or E5
Office 365 E3 or E5
Copilot Add-on License: Required for access to tenant data and advanced agents like Researcher and Analyst. This license costs approximately \$360/year per user.
2. Agent Availability and Installation
Microsoft provides three deployment paths for agents:
Agent Type
Who Installs
Examples
Governance
Microsoft-installed
Microsoft
Researcher, Analyst
Admins can block globally
Admin-installed
IT Admins
Custom or partner agents
Full lifecycle control
User-installed
End users
Copilot Studio agents
Controlled by admin policy
Researcher and Analyst are pre-installed and pinned for all users with Copilot licenses.
Admins can manage visibility and access via the Copilot Control System in the Microsoft 365 Admin Center.
3. Security and Governance for SMBs
Deploying Copilot in SMBs requires attention to data access and permission hygiene:
Copilot respects existing permissions, but if users are over-permissioned, they may inadvertently access sensitive data.
Use least privilege access principles to avoid data oversharing.
Leverage Microsoft 365 Business Premium features like:
Microsoft Purview for auditing and DLP
Entra ID for Conditional Access
Defender for Business for endpoint protection
4. Agent Creation with Copilot Studio
For SMBs wanting tailored AI experiences:
Use Copilot Studio to build custom agents for HR, IT, or operations.
No-code interface allows business users to create agents without developer support.
Agents can be deployed in Teams, Outlook, or Copilot Chat for seamless access.
5. Training and Enablement
Encourage users to explore agents via the Copilot Chat web tab.
Use Copilot Academy and Microsoft’s curated learning paths to upskill staff.
Promote internal champions to guide adoption and gather feedback.
✅ Deployment Checklist for SMBs
Step
Action
1
Confirm eligible Microsoft 365 licenses
2
Purchase and assign Copilot licenses
3
Review and tighten user permissions
4
Enable or restrict agents via Copilot Control System
Managing Microsoft 365 (M365) issues on behalf of customers is a core responsibility for Small-to-Medium Business Managed Service Providers (SMB MSPs). A structured approach to working with Microsoft Support can significantly speed up issue resolution and ensure a seamless support experience for both the MSP and the customer. This guide outlines a step-by-step process for engaging Microsoft Support effectively, along with best practices to maintain clear communications and minimize downtime. We’ll cover initial troubleshooting, opening and managing support tickets, communication strategies, and post-resolution follow-ups – all tailored to help an MSP navigate Microsoft’s support system efficiently while keeping customers informed.
Step 1: Initial Issue Assessment and Troubleshooting
Begin with a thorough internal assessment of the problem. As soon as an issue is reported by the customer, the MSP should gather key details and attempt basic troubleshooting. Start by identifying what is not working and who is affected. For example, determine if the issue is isolated to a single user or widespread, and note any error messages or abnormal behaviors observed[1]. It’s important to replicate the problem if possible, to confirm its scope and symptoms. Documenting the exact steps that lead to the error will help both your team and Microsoft pinpoint the cause[1].
Next, perform common initial fixes and checks. Depending on the nature of the issue, this might include actions such as: clearing browser cache and cookies (for web app issues), trying an alternative browser, restarting the affected application or device, checking the user’s account status and permissions, and verifying internet connectivity[1]. For Outlook or desktop Office app problems, one might attempt steps like creating a new mail profile or ensuring the latest updates are installed[1]. These standard troubleshooting steps often resolve transient issues or reveal configuration problems without needing to contact Microsoft.
Meanwhile, check the Microsoft 365 Service Health Dashboard in the tenant’s admin center to see if any known outages or incidents could be related. Microsoft might already be aware of a problem affecting multiple customers; if so, the dashboard or Message Center will have alerts. If a relevant service incident is listed (e.g. “Exchange Online – Users may be unable to send emails”), this can save time by confirming the issue is on Microsoft’s side. In such cases, your role may shift to monitoring Microsoft’s updates and keeping the customer informed, rather than troubleshooting something that is out of your control.
If the issue appears to be specific to the customer’s environment, gather diagnostic data early. For example, note the exact time the issue occurred (important for log correlation)[1], and whether it is continuous or intermittent. Identify any changes in the environment that happened around the onset of the issue – for instance, was a new update applied, or was a configuration changed? Having this context will be valuable information. The initial assessment should result in a clear problem statement (what is happening, under what conditions, and impact), along with a list of steps already taken to troubleshoot.
By thoroughly completing this Step 1, the MSP can either resolve simple issues independently or, for more complex problems, be well-prepared to engage Microsoft with a solid understanding of the situation.
Step 2: Utilize Self-Help Resources and Tools
Before escalating to Microsoft Support, leverage the abundant self-help resources and automated tools available for M365. Microsoft provides extensive documentation and diagnostic utilities that MSPs can use to either fix the issue or collect additional information. Utilizing these resources can often lead to a quick solution and demonstrates due diligence when you do need to involve Microsoft.
Search Microsoft’s Knowledge Base and Community Forums: Microsoft’s official support site and Tech Community forums contain a wealth of articles and Q\&A threads on common M365 issues. It’s often helpful to search for the specific error codes or symptoms you’ve observed. This could surface known fixes or user-contributed solutions. For example, if a SharePoint site isn’t loading for a client, a quick search might reveal an ongoing issue or a configuration tweak that solves it. Microsoft’s documentation and the community can save time by pointing to existing solutions for known problems, so you’re not “reinventing the wheel.”
Run Microsoft 365 Troubleshooters: Microsoft offers automated troubleshooters in the “Get Help” app for many Office 365 applications[2]. These wizards can detect and often fix issues related to Outlook email configuration, Office activation, Teams connectivity, etc. For instance, the Microsoft 365 Support and Recovery Assistant (SaRA) is a downloadable tool that can diagnose problems with Outlook profiles, connectivity to Exchange Online, or OneDrive sync issues. Running these tools on the affected system can either fix the issue automatically or gather detailed logs and error reports that will be useful if you escalate to Microsoft[3][3]. Ensure you note any errors or results from these utilities to include in your case notes.
Use the Remote Connectivity Analyzer and Other Diagnostic Tools: For issues like Exchange mail flow, Skype for Business/Teams connectivity, or network-related problems, Microsoft’s Remote Connectivity Analyzer (available online) can perform tests from outside the environment to identify DNS misconfigurations or firewall issues[3]. Tools like Message Trace in the Exchange admin center, or SharePoint’s built-in health checks, are also valuable to run beforehand. If an email is not being delivered, a message trace might show it never left the outbound queue, indicating the problem lies before Microsoft ever needs to step in.
Performing these self-help steps serves two purposes: you might resolve the issue without needing formal Microsoft support, and if not, you will have richer information to provide to Microsoft. Microsoft’s support engineers often ask for these very diagnostics early in the support process. By doing them upfront, you can include the results in your initial ticket submission, potentially avoiding one or two back-and-forth cycles with support[4][4]. For example, instead of Microsoft asking you to run a network test after you open the case, you can preempt that request by saying “We ran the Microsoft 365 network connectivity test – see attached results showing high latency to the Exchange Online service endpoint.” This proactive approach shows Microsoft that the MSP has taken initiative and can accelerate the troubleshooting phase.
In summary, exhaust the readily available troubleshooting avenues. This will either fix the problem promptly or arm you with data and confirmation of what the issue is not, which is equally helpful. Once you have done this homework and the issue still persists, it’s time to engage Microsoft Support with confidence that you’ve covered the basics.
Step 3: Prepare Detailed Case Documentation for Microsoft
If the issue requires Microsoft’s assistance, preparation is critical before you actually create a support ticket. A well-documented case description can drastically reduce resolution time by enabling Microsoft engineers to understand the problem context immediately. Gather and organize all relevant information about the issue so that you can provide Microsoft a comprehensive picture from the outset.
Key information to collect includes:
In practice, creating a short document or ticket draft with all these points is helpful. Below is a checklist of information you should have ready (and ideally include in the support request description or attachments):
Checklist: Information to Include in a Microsoft Support Case
Information to Gather Description / Example
Issue Summary A one-sentence description of the problem and its effect. E.g., “Users receive error ‘Cannot connect to mailbox’ when launching Outlook, unable to send/receive email.”
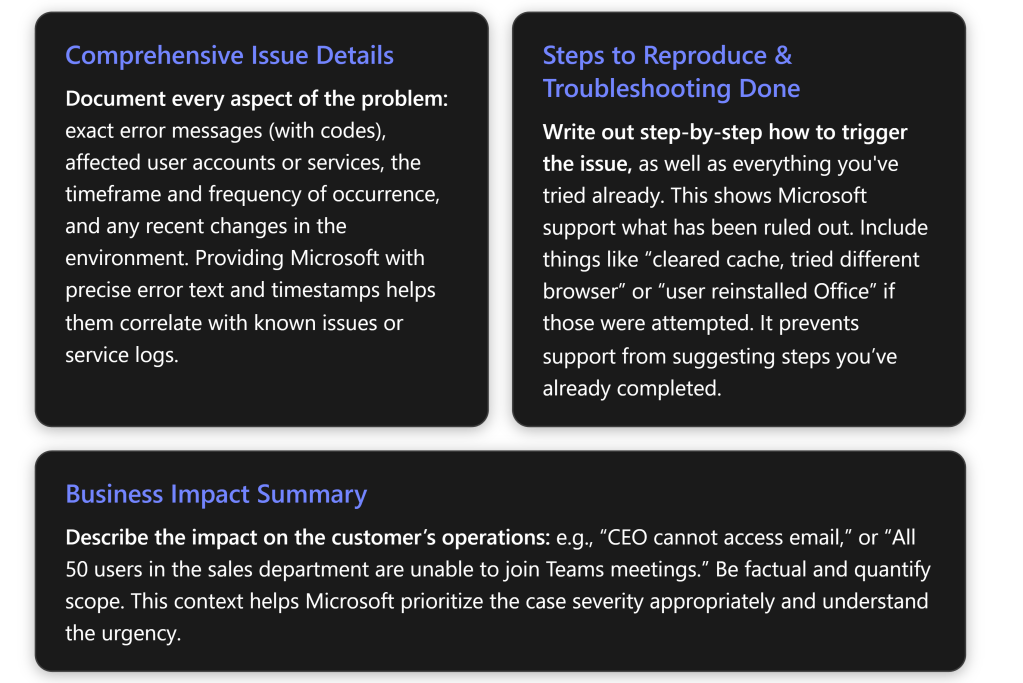
Error Messages or Codes The exact wording of any error and any error code displayed. Include screenshots if applicable[1][1]. E.g., Error 0x8004010F in Outlook.
Affected Users/Services Who or what is impacted. E.g., “One user (user@company.com)” or “All users in tenant” or “SharePoint site X.” This helps scope the issue[1].
Date/Time and Frequency When the issue started and how often it occurs. E.g., “Started around 3:00 PM UTC on July 10, happens every time user tries to login”[1].
Steps to Reproduce Step-by-step actions that consistently trigger the problem[1]. E.g., “Open Teams, click Calendar, error pops up.” If not consistent, describe conditions when it occurs.
Troubleshooting Performed List of actions already taken to diagnose or fix the issue[1]. E.g., “Rebooted PC, cleared app cache, tried on different network, issue persists.”
Environment Details Relevant technical context: operating system and version, Office app version, browser version, device type, etc.[1]. E.g., “Windows 11 + Office 365 Apps v2306, on domain-joined PC.”
Recent Changes Any notable changes prior to onset. E.g., “Exchange license was modified this morning” or “Windows update applied last night.”
Business Impact Briefly explain the severity from the customer’s perspective. E.g., “Executive assistant cannot access mailbox to schedule meetings, causing delays.”
Including screenshots or logs as attachments is highly recommended, especially if the issue is complex. For instance, if SharePoint is showing an error, take a screenshot of the error page. If email is not flowing, perhaps attach the non-delivery report (NDR) or relevant log excerpt. Ensure any sensitive information is handled appropriately (Microsoft support has mechanisms for secure file upload if needed). As a security measure, Microsoft may require you to consent to them accessing diagnostic information or logs from the tenant[5]; be prepared to grant that in the admin portal when opening the case.
This level of detailed documentation achieves two things: (1) it provides Microsoft the information needed to start troubleshooting immediately, and (2) it demonstrates that the MSP has been methodical, which can instill confidence and lead to more efficient collaboration. When you clearly communicate what you’ve observed and done, Microsoft support can skip asking basic questions and move straight to advanced diagnostics or known issue checks. According to internal guidelines, help desk agents appreciate when you “provide as much detail as possible… all symptoms, error messages, exact steps to reproduce, and any troubleshooting already completed”[1][1] up front.
Take a moment to review and organize this info before submitting it. Now you’re ready to create a well-informed support ticket.
Step 4: Create a Microsoft Support Ticket (Service Request)
With all the necessary information at hand, the next step is to open a support case with Microsoft through the appropriate channel. For M365 issues, this is typically done via the Microsoft 365 Admin Center for the customer’s tenant (or via your Partner Center if you are a Cloud Solution Provider managing on behalf of the client). The process is straightforward but there are a few things to do carefully to optimize the support experience.
Access the Support Interface: Log in to the Microsoft 365 Admin Center with an administrator account that has permissions to create support requests (Global Admin or a delegated admin role for partners)[6]. In the left navigation menu, click on “Support” (or the question mark icon), then choose “New service request” or “Get help”. This will initiate the case creation flow[6].
Fill in the Issue Details: You will be prompted to describe the problem. Provide a concise yet specific description in the summary or subject line, and paste in the detailed description you prepared (from Step 3) into the description field[6]. Focus on the key facts: what the issue is, when it started, who is affected, and what error is seen[6]. There may be dropdowns to categorize the issue (e.g., select “Exchange Online” or “Microsoft Teams” depending on the service). Choose the category that best fits so the ticket is routed to the right support team.
Most support forms allow attachments; attach your screenshots, error logs, or any files that can help illustrate the problem[6]. Also, if the form supports it, include the steps already taken and the business impact in the description. Essentially, you want the support engineer who picks up the ticket to see all the relevant information immediately upon reading your case.
Set the Severity (Priority) Level: Microsoft will ask you to indicate how severe/urgent the issue is. Choose the appropriate priority based on the business impact – do not understate it, but also be accurate and avoid inflating for a minor issue. Typically, the levels are something like[6]:
Critical (Severity A) – Severe business impact, e.g., entire service down or all users unable to work. (Use sparingly, reserved for major outages)[6].
High – Significant impact, but operations partially functioning, e.g., multiple users or a major feature is affected.
Medium – Moderate impact, e.g., issue affects one or a few users or has a workaround available.
Low – Non-urgent or consultative issues, general questions.
Selecting the right severity is important because it influences response times and resource allocation. For instance, a Critical incident may trigger immediate attention (in Premier Support cases, a 15-minute response is expected for Sev 1[7], whereas in standard support a Sev A might be around 1-hour initial response). Keep in mind that if you mark something Critical, Microsoft expects you to be actively available to work with them in real-time until resolution, as these are 24/7 engagement scenarios. Conversely, mislabeling a low-impact issue as Critical could strain credibility or lead to unnecessary urgency.
Review and Submit: Before hitting submit, double-check everything[6]. Ensure contact information (your email/phone) is correct. Verify that your description is clear and attachments are properly uploaded. It’s easy to overlook details in the rush, but spending an extra minute here can prevent miscommunication later. Once satisfied, submit the ticket. The system will generate a case number (write this down!) and you should receive an email confirmation with the case reference[6].
Immediately after submission, if the issue is very urgent (e.g., a production outage), consider also calling Microsoft support by phone and referencing your case number. For Microsoft 365, phone support is available for admins – the confirmation email or support portal will list a number for critical issues. By calling in and giving the case number, you can sometimes expedite the assignment of an engineer, especially off-hours.
In summary, treat the support ticket creation like crafting a medical chart for a doctor – clear symptoms, history, and severity. A well-crafted ticket with the right priority set will go to the correct support queue and person with minimal delay, setting the stage for a faster resolution[8]. Now that the case is open, the collaborative phase with Microsoft support begins.
Step 5: Engage and Communicate Effectively with Microsoft Support
Once your support case is logged, an engineer from Microsoft (or a support agent from the initial triage team) will be assigned to work with you. Effective communication with the support engineer is crucial for a smooth resolution. As an MSP acting on behalf of your customer, you are the liaison between Microsoft and the client’s issue, so managing this communication well will ensure nothing falls through the cracks.
Respond Promptly and Professionally: Microsoft may reach out via the case portal, email, or phone – often depending on severity and time of day. Aim to respond to any queries or requests for information as quickly as possible. The faster you answer their questions or perform requested tests, the faster the issue can progress. Keep your responses clear and concise, addressing all points the support engineer asked. For example, if they ask for a specific log file or to run a PowerShell command, do that promptly and report the results or upload the logs. Document each action and result in your reply so it’s easy for the engineer to follow[6].
Maintain Clarity and Completeness: When communicating with the support engineer, remember they might not be familiar with your environment beyond what you provided. Be explicit in your descriptions. Avoid acronyms or internal jargon that Microsoft might not know – use standard terminology. It can help to structure your communications in bullet points or numbered steps if you have multiple things to convey (much like how we prepared the case information). If sending an email update, for instance, recap: “We have tried X and Y as suggested, here are the outcomes… We are also seeing new error code __ at 10:15 AM. Attached are the latest logs.” This level of clarity ensures the engineer doesn’t miss important details. Microsoft’s own best practice guidelines suggest using clear, straightforward language and providing as much detail as possible in each communication[6].
Cooperate with Diagnostic Requests: It’s common for Microsoft support to request additional diagnostics – e.g., enabling logging, collecting trace files, or trying a specialized troubleshooting step. Even if you performed similar steps earlier, follow their guidance; they might want data captured in a specific way or format. For example, they may send you a link to run a Microsoft Support Diagnostic Package (which could collect detailed telemetry from your tenant with your approval). Work with the customer’s environment to run these and promptly share the results. Each iteration of data collection can take time, so the sooner you fulfill these requests, the better. When providing files or logs, double-check you are not omitting anything, which could lead to another round-trip (e.g., “Oops, you sent the wrong log file, can you send this other one too?”).
Keep a Log of Interactions: As an MSP, it’s wise to maintain an internal log of everything that happens on the case – basically your own running notes separate from the Microsoft case portal. Log timestamps of communications, the name of the Microsoft engineer(s) you speak with, and summary of discussions[6]. Note any case escalations or commitments (e.g., “Microsoft will get back to us by 5 PM with an update.”). This not only helps in case you need to brief someone else on your team or the customer, but also is useful if the case needs to be handed over to a different Microsoft engineer – you can quickly get them up to speed on what’s been done.
Importantly, ensure consistency and persistence. If the issue is ongoing, try to have one point of contact from your MSP (perhaps you or a designated engineer) handle communications with Microsoft, to avoid confusion. That person should stay engaged until resolution. Should you need to bring in another colleague (for example, a specialist on a technology), coordinate so Microsoft gets clear answers and doesn’t hear different information from multiple sources.
Escalation within Microsoft Support: If you sense that the support engineer is not grasping the problem or progress is stalled, you can politely request an escalation. Microsoft has tiers of support; the first engineer might be a generalist doing initial troubleshooting. If after a reasonable back-and-forth the issue remains unsolved, you can say: “This issue is impacting our customer significantly. Could we involve a senior engineer or a specialist for deeper analysis?” Many seasoned MSPs find that asking for a higher-tier engineer or a product expert can break a deadlock[4]. Microsoft’s own forums note that you can “specify in the ticket that you want an expert and not a level 1 support” for complex issues[4] – this can sometimes connect you with someone with deeper knowledge sooner. Of course, use this judiciously and always remain courteous; the front-line support is there to help, and showing collaboration (not frustration) often encourages them to champion your case internally.
Leverage Real-Time Communication if Available: Sometimes email or the portal isn’t enough, especially for complex issues. Don’t hesitate to schedule a call or Teams session with the support engineer. Interactive troubleshooting can resolve things faster since you can share screens, demonstrate the issue live, or perform actions while the engineer observes. In critical cases, Microsoft might initiate a conference call or even a remote session (with your permission) to solve the problem. Be ready to allocate time for these live sessions as they can be the quickest path to a fix for thorny problems.
Throughout engagement, maintain a professional and solution-focused tone. It’s understandable to be under pressure from your customer, but refrain from letting frustration seep into communications with Microsoft. If the process is dragging, you can firmly but politely highlight the urgency and impact to encourage swift action[4]. Microsoft’s support personnel generally want to help you; establishing a cooperative rapport will make them more likely to go the extra mile. Remember, you and Microsoft are essentially on the same team with the shared goal of resolving the customer’s issue.
By communicating effectively at this step – being responsive, clear, and collaborative – you increase the likelihood of Microsoft Support diagnosing the issue correctly and providing a resolution in the shortest possible time.
Step 6: Track Case Progress and Escalate if Necessary
While Microsoft is working on the issue, it’s important for the MSP to actively manage and monitor the support case. Do not assume that once the ticket is logged, you can sit back and wait indefinitely. Staying on top of the case progress, and knowing when to push for escalation, is key to ensuring the issue gets resolved in a timely manner.
Monitor Updates in the Portal: The Microsoft 365 Admin Center (or Partner Center) will show the status of your support requests. Check the case status regularly in the “View my requests” section[6]. Microsoft engineers often add notes or ask questions in the portal’s case log. Ensure you have notifications enabled (you should get an email when they update the case, but it’s good practice to manually check as well, especially if the issue is critical). Timely reading and responding to these updates keeps things moving. If Microsoft marked the case as “Solution Provided” or “Pending Customer,” be sure to review what they’ve given – sometimes they might post a potential fix and wait for you to test and confirm.
Keep the Customer Ticket Updated: In your internal MSP ticketing system, continue to log each development (this was touched on in Step 5 as well). Label the ticket status clearly – for example, “Waiting on Microsoft” is a common status to indicate the ball is in Microsoft’s court[9]. This way, if colleagues or managers look at the ticket, they know it’s been escalated externally. Document any interim solution applied or any promises of follow-up from Microsoft (e.g., “Microsoft will provide an update within 24 hours after their internal team analysis”). This internal documentation discipline ensures nothing is forgotten and is useful for post-incident review.
Follow Up Regularly: If you haven’t heard back within the timeframe you expected, don’t hesitate to follow up with Microsoft[6]. As a guideline, if a day passes with no update on a non-critical issue, it’s reasonable to send a friendly inquiry: “Just checking if there are any updates or if any further information is needed from our side.” For higher priority cases, follow up even sooner (e.g., every few hours for a critical outage). Support queues can be busy, so a gentle reminder can refocus attention on your case. Be sure to reference your case number in any communication to avoid confusion.
Recognize When to Escalate: Sometimes an issue might be stuck without progress – perhaps the support engineer is waiting on input from a back-end product team, or they haven’t identified the root cause yet. If your issue has been open for an extended period with little traction, or if the impact on the customer is escalating, it may be time to escalate the case to a higher support tier or to management. Microsoft has an escalation process; you can ask the current support engineer to “please escalate this case, as the situation is urgent and we’re not seeing progress.” Many MSPs have learned that persistent follow-up calls can prompt escalation – one admin described calling every day and asking for escalation until the case moved up to tier 3 and eventually an engineer who could reproduce the issue was assigned[4]. While hopefully not every case requires such aggressive follow-up, know that escalation is an option in your toolbox.
If you are a Microsoft partner with Premier/Unified Support or Advanced Support for Partners, you might also have an assigned Technical Account Manager (TAM) or service lead whom you can reach out to for escalation assistance. They can often pull strings internally to get more resources on a critical case. If not, escalating through the normal support line is fine – ask for a supervisor if needed, explaining the business impact.
Adjust Severity if the Impact Worsens: The initial severity you set (Step 4) might need to be updated if things change. For instance, you opened as “High” priority because it affected a few users, but now it’s affecting the entire company. Communicate this change to Microsoft and request the case be treated with higher severity. They may need to formally update the ticket classification on their end to get the appropriate attention. Conversely, if a workaround has mitigated the immediate pain, you might downgrade the urgency when speaking with support (though usually leaving the severity as-is until final resolution is fine).
Throughout this process, keep the customer informed (which we’ll address in the next section in detail). They should know that the case is in progress and that you’re actively managing it. It can be very reassuring for a client to hear, “We have a Microsoft support case open and we’re checking in with them regularly; we’ve also requested an escalation due to the importance of this issue.”
Finally, know the escalation path on your side as well. If you’re the frontline MSP engineer and things are not moving, loop in your own management or a senior engineer for advice. Maybe someone in your company has seen a similar issue before, or has a partner channel contact at Microsoft. As an MSP, it’s about leveraging all resources to advocate for your customer’s needs.
In summary, treat support cases as active projects that need management. Regular attention and timely escalation can shave days off the resolution time, minimizing the disruption for your customer[10]. Persistence (with politeness) is often necessary to ensure your case doesn’t get lost in the shuffle.
Step 7: Update the Customer and Manage Expectations
Parallel to the technical troubleshooting, client communication is a continuous thread that must be maintained. Your customer is likely anxious to have their problem resolved, and part of your role as their MSP is to keep them informed and confident that progress is being made. Effective communication with the customer ensures a seamless support experience, even if the issue itself is complex or lengthy to resolve.
Initial Notification to the Customer: As soon as you recognize the issue and have engaged Microsoft (or even before that, during initial troubleshooting if it’s obvious the problem is significant), let the customer know you are aware of the problem and taking action. Acknowledge the issue in clear terms – for example, “We’re aware that several users cannot access email and we have identified this as a likely server-side issue. We’ve engaged Microsoft support to assist.” According to MSP outage communication best practices, an immediate alert should include a brief description of the problem, who/what is impacted, and steps being taken[11]. This early communication reassures the client that their MSP is on top of things and prevents them from feeling the need to chase for updates.
Set Expectations on Timeline: In your initial or early communications, it’s important to manage expectations. If you’ve opened a Microsoft case, you might say, “Microsoft support is now investigating; based on similar cases, initial analysis might take a few hours. We will update you by this afternoon.” If it’s a severe issue, you might commit to more frequent updates. The key is not to promise unrealistic timelines; if you don’t know how long it will take, be transparent about that but assure them that it’s being treated with urgency. For instance, “We’ve marked this as a critical case with Microsoft. Their engineer is currently collecting data. We don’t have an ETA yet, but we will let you know as soon as we do. Expect an update from me in 2 hours even if it’s just to say we’re still working on it.” Even an update of “no new news” at a regular interval is better than silence.
Regular Status Updates: Throughout the life of the case, send periodic updates to the customer. The frequency should correspond to the impact and severity – in a total outage, every few hours or as agreed; in a less critical issue, maybe daily updates. These updates should summarize progress: what has been done recently (e.g., “We provided Microsoft with the log files they requested and they are analyzing them now”), what the current status is, and next steps or expected actions[11]. If Microsoft provided a potential workaround or asked for a test that involves the customer’s input, mention that too. For example, “Microsoft suggested a potential workaround. We implemented it on one affected user for testing, and it appears to restore email access. We are now rolling it out to all users as a temporary fix while Microsoft works on the root cause[11].” Such updates illustrate momentum and keep the customer in the loop.
Use Multiple Communication Channels (if appropriate): Determine the best way to reach your client for updates. Email is common for written status updates, but in urgent situations a phone call can be appreciated, especially for major milestones (like “We have a temporary fix, can we walk you through applying it?”). Some MSPs use client portals or dashboards where they post updates that clients can view at any time[11]. The medhacloud guidelines note using channels like email for detailed updates, phone for critical alerts, and even live chat for real-time queries during an ongoing incident[11]. Cater to your customer’s preferences and the severity of the scenario.
Be the Translator: Often you’ll get technical information from Microsoft that might be over the customer’s head. Part of expectation management is translating that into terms the customer understands and cares about. If Microsoft says, “We found a problem with Exchange Online service and they’re applying a fix on their backend,” you might tell the customer, “Microsoft identified an issue in their cloud email service and is deploying a fix. This likely means the issue was on Microsoft’s side. We expect the service to gradually recover within the next hour based on their update.” Keep it high-level – clients mainly want to know what impact or action for them and how much longer. Avoid forwarding raw technical logs or Microsoft’s lengthy explanations directly to business stakeholders who may not find it useful.
Provide Interim Solutions or Workarounds: If any workaround is available, inform the customer how they can use it to alleviate pain while the full fix is in progress. For example, “While Microsoft works on a permanent fix for the Outlook issue, users can access email through the Outlook Web App as a temporary solution.” Make sure they know this is temporary. Clients appreciate having options, even if not ideal, to keep business moving. Also, communicate any interim risk mitigations – e.g., “We’ve advised Microsoft this is an urgent issue for payroll processing, and in the meantime we’ve rolled back the software update that seemed to trigger the problem.” This level of detail shows proactive steps to reduce impact.
Stay Honest and Don’t Over-Promise: If things are taking longer than expected, let the customer know. It’s better to say “This is more complex than initially thought, but we are continuing to escalate with Microsoft; thank you for your patience” than to go quiet or give false assurances. By managing expectations, you maintain trust. Clients generally understand that some issues are outside anyone’s immediate control, especially if it’s on the vendor’s side, as long as they feel informed and involved. What frustrates customers most is feeling left in the dark or misled about progress.
Escalation Communication: If the customer is particularly high-stakes (say a VIP user or a business-critical system), you might involve their stakeholder in communications with Microsoft in some way. Sometimes on big calls you might invite a client’s IT representative to join. Or at least let them know, “We have escalated this to Microsoft’s senior engineers and even involved their product team due to the critical nature.” This again reinforces that you’re taking all possible actions. In extreme cases, the client might ask to speak with Microsoft support directly. Typically, as the MSP, you should remain the primary interface (both to control the flow of info and because you likely have the technical context), but you can arrange a joint call if needed.
Finally, when sending updates, highlight the good: “Microsoft has found the cause and is now deploying a fix,” but also be transparent about the not-so-good: “Their initial fix didn’t work, so the issue is still ongoing; we’ve escalated further.” It’s this trust through communication that defines a seamless support experience – even if the actual resolution takes time, the journey is managed in a way that the customer feels supported throughout[11]. In fact, effective communication during outages or issues often earns praise from clients, because it demonstrates reliability and commitment[11].
By properly managing customer expectations and keeping them informed, you ensure that when the issue is finally resolved, the customer remembers not just the problem, but also the professionalism and care with which it was handled.
Step 8: Verify Resolution and Ensure Recovery
After troubleshooting and collaboration with Microsoft Support, there will (hopefully) come a point where a solution or fix is identified. Step 8 is about executing that solution and verifying that it truly resolves the issue for the customer. It’s critical not to consider the case closed until both the MSP and the customer are confident that everything is back to normal.
Implement the Fix or Workaround: Microsoft might provide a fix in various forms – it could be a configuration change, a patch or update to apply, a command to run, or they might inform you that they have made a change on their side (in the cloud service) that should resolve the problem. Follow the instructions carefully. If it’s something you need to do on the customer’s environment (like adjusting a setting or installing a local update), schedule it at the earliest appropriate time (immediately for critical issues, or in a maintenance window for less urgent ones, coordinating with the client as needed). Document exactly what steps are taken to implement the fix.
For example, Microsoft might say: “We’ve identified a bug and applied a fix in the backend, please have the affected users restart Outlook.” In such a case, you’d proceed to have users restart and perhaps clear some cache as instructed. Or if they provided a script to fix mailbox permissions, run that and note the output.
Thorough Testing: After applying the fix, test the original issue scenario to confirm it is resolved. This should be done in a controlled way. If the issue was with a single user, work with that user to validate the fix (e.g., have them log in and confirm they can now send email, or that the error no longer appears). If it was a broader issue, test across a sample of affected users or systems. It’s often wise for the MSP to do their own test first, if possible, before saying to all end-users “go ahead, it’s fixed.” For instance, if SharePoint was down, test loading the site yourself and maybe ask one or two key users to retry and confirm performance is back. Don’t just take Microsoft’s word that it’s fixed – verify it in the real environment.
Ensure that all aspects of the problem are addressed: if the issue had multiple symptoms, check each one. Sometimes a fix might solve the primary error but reveal another minor issue, so you want to catch that before declaring victory. If the issue was time-sensitive (maybe causing backlog), also verify that any queued activities (like emails in queue, or pending tasks) have caught up once service is restored.
Customer Confirmation: Once your own testing suggests the problem is solved, reach out to the customer to confirm. Have the end-users try the scenario that was failing and report success. It’s important the end-user’s perspective is positive – maybe your test account works, but the user might do something slightly differently. When the customer confirms “Yes, everything works now, and I can do my job again,” you’ve achieved the main goal. This is also a good time to express empathy about the inconvenience and joy that it’s resolved: “I’m glad to report your email is functioning normally again. I apologize for the disruption, and we’re happy it’s been resolved.”
Restore Normal Operations: If any interim workarounds were in place (Step 7) or temporary measures enacted, remove or roll them back if appropriate. For example, if everyone was using webmail as a workaround, now that Outlook is fixed, ensure that’s communicated so they can go back to their usual workflow. If you deferred any maintenance or had to disable a feature temporarily, put things back to the regular state carefully.
It’s also wise at this stage to monitor the situation a bit longer even after the customer’s initial confirmation. If it’s a critical system, keep an eye on it for another day or two to be sure the issue doesn’t recur. Microsoft might close the case on their end as soon as they hear it’s fixed, but you can usually reopen within a short window if the issue comes back. Many support engineers will actually wait for you to confirm and might say “I’ll follow up tomorrow to ensure all is well before closing the ticket.” Use that safety net if offered.
Document the Outcome: Internally, note that the issue was resolved and how. Write a brief summary in your ticket: e.g., “Issue resolved on Microsoft’s end – root cause was a known bug in Exchange Online, Microsoft applied a fix at 3:00 PM. User confirmation received that email flows now work. Case #123456 closed.” This summary will be valuable later for your knowledge base and for any post-incident review (coming up in Step 9).
Microsoft often likes to confirm resolution as well; they might ask “Is it OK to close the case now?” Only agree once you are confident. If you need a day or two to be sure, you can tell them that and keep the case in monitoring status. Once confirmed, let them know and thank the support engineer for their assistance, which is good etiquette and helps maintain a good relationship.
In essence, Step 8 is about making sure “the patient is healthy” after the treatment. Just as a doctor would schedule a follow-up to ensure recovery, the MSP verifies that the fix delivered by Microsoft truly solved the issue and that the customer’s operations are back to normal. According to MSP resolution practices, this includes testing the fix and verifying with the client that everything is fully restored to normal operation[10]. Only then do we move on to closure and reflection.
Step 9: Close the Loop – Post-Incident Documentation and Actions
With the issue resolved and normalcy restored for the customer, the immediate fire is out. However, the process is not truly complete until you capture lessons learned and perform any follow-up tasks that can strengthen your service in the future. This step turns an incident into an opportunity for improvement and knowledge-building.
Document the Root Cause and Resolution: Work with the information from Microsoft and your own analysis to understand what exactly caused the issue. Sometimes Microsoft will explicitly tell you the root cause (for example: “A bug in the recent update caused a memory leak, which our engineering team has now fixed in the service” or “It turned out the customer’s mailbox was stuck due to a corrupt rule, which we removed”). Other times, the root cause might be “undetermined” especially if the solution was a workaround. Whatever the outcome, write down a clear description of the cause and the fix in your internal documentation[10]. If Microsoft provided a summary in an email or closure notes, you can use that as a starting point. Also include the case number and any important timelines (like “Outage from 10:00-14:00, resolved by Microsoft fix deployment”).
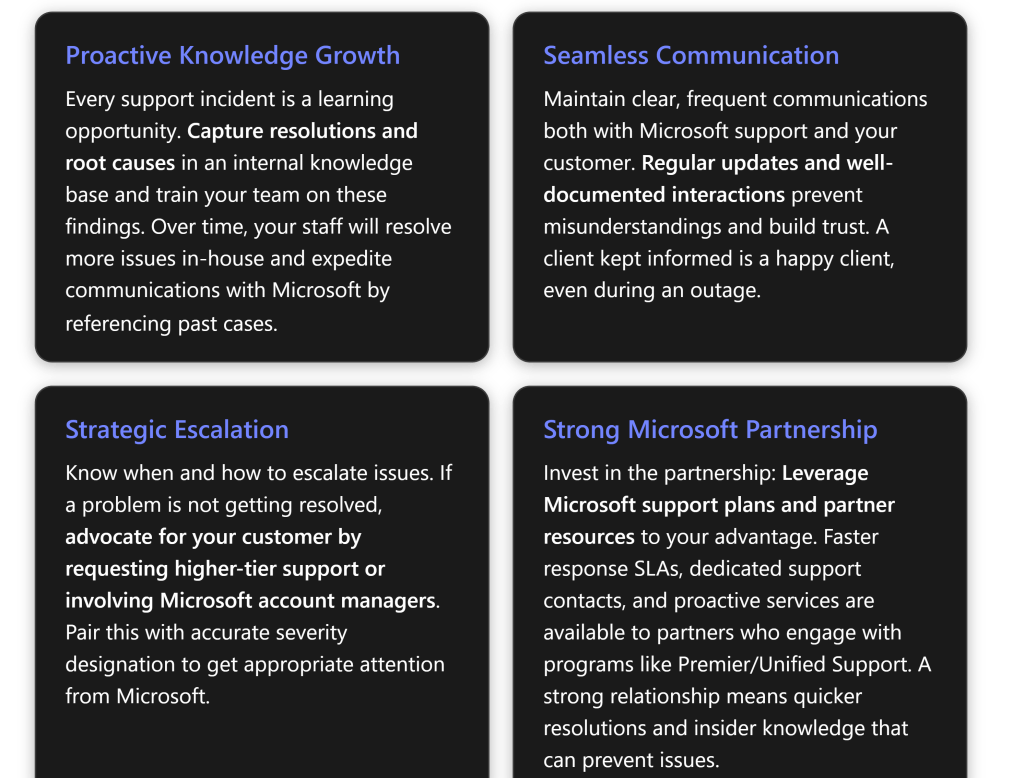
Add this information to your knowledge base or ticketing system in a way that’s easily searchable later. For instance, if you have a wiki or SharePoint for KB articles, create an article titled “Outlook clients failing to connect – July 2025 incident” that outlines the symptoms, cause, and resolution. This helps if the same or similar issue occurs again – your team can quickly reference what was done previously[10]. Even if the issue was a one-off, internal knowledge growth is invaluable.
Conduct a Post-Incident Review: For significant incidents, it’s a best practice to have a short internal meeting or debrief. Include the team members who worked on the issue and discuss questions like: What went well? What could have been done better?[10]. Perhaps your team reacted swiftly and communication was great (something to replicate next time), but maybe you realized you could have escalated to Microsoft 2 hours sooner than you did. Or maybe an internal monitoring system didn’t catch the issue early and you discuss how to improve that. Document any action items from this review, such as “implement better alerting” or “develop a checklist for future similar issues.”
It can also be useful to get the customer’s perspective: did they feel informed? If there were any complaints or confusion, incorporate that feedback. Many MSPs incorporate client feedback and internal retrospectives to refine their incident response process continually[11].
Update Internal Processes and Runbooks: If the incident revealed any gaps in your processes, now is the time to fix them. For example, if the team was uncertain how to contact Microsoft or wasted time figuring out how to gather certain logs, update your standard operating procedures to include those details for next time[9]. Make sure your internal documentation on “How to escalate to Microsoft” is up-to-date with correct phone numbers, portal instructions, etc. Possibly create a template for support requests that includes all the info from Step 3’s checklist so engineers have a guide for future cases.
Also, incorporate any new troubleshooting tips learned. If Microsoft taught you something (like a new PowerShell command or a hidden diagnostic tool), add that to your toolkit documentation. Each resolved case should enrich your MSP’s collective knowledge.
Preventive Measures: Determine if there are actions to prevent this issue from happening again (if preventable). For example, if the root cause was a misconfiguration on the customer side, you should correct that on all similar systems (e.g., fix that setting for all users, not just the one that had the issue). If it was a bug on Microsoft’s side, maybe there’s not much you can do except be aware. But sometimes Microsoft might provide guidance like “apply the latest patch” or “avoid using X feature until a fix is fully deployed.” Ensure those recommendations are followed through for your customer’s environment, and even across your other clients if applicable.
Measure and Record Key Metrics: It’s valuable to note metrics such as how long the issue lasted, the total time to resolution, and the downtime experienced. Also note how long the Microsoft support process took – e.g., case opened at 9 AM, first response at 9:30 AM, resolved at 3 PM. These metrics help assess the support experience and can be used to set expectations for the future or identify if something was unusually slow. Over time, tracking metrics like average resolution time for Microsoft tickets, number of cases per month, etc., can inform decisions (for instance, if you find support is too slow, maybe pushing for a higher support tier might be justified). Ultimately, the goal is minimizing downtime and quick resolution[10], so measuring these helps gauge success.
Communicate Closure to the Customer: Don’t forget to formally close the loop with the client as well. Send a final communication summarizing the resolution: “We have confirmed that the email issue is fully resolved. Microsoft identified the root cause as ___ and has addressed it. Your service was restored at [time]. We will be monitoring to ensure stability. Thank you for your patience.” This kind of wrap-up reassures the customer that the issue won’t linger. It also educates them on cause (which can help them understand if it was Microsoft’s fault, not the MSP’s, in a diplomatic way). If appropriate, schedule a follow-up meeting with the client, especially if it was a major incident, to review what happened and any next steps. This shows professionalism and dedication to continual improvement[11].
Feedback to Microsoft: If Microsoft sends a customer satisfaction survey for the support case, take the time to fill it out (or ask your customer to fill it out if it goes to them directly). Provide candid feedback on what went well and what didn’t. Microsoft does value this and it can influence the support they provide. If the support experience was great, recognize the engineer. If it was subpar, politely highlight the issues (e.g., “had to explain problem multiple times as it got passed around” or “initial response took too long”). This feedback can help Microsoft improve and also, as a partner, your feedback might be noted by account teams.
By diligently performing these post-incident activities, the MSP turns a resolved ticket into a stronger foundation for future support. Every incident becomes a learning opportunity. Over time, this means faster resolution and fewer escalations, as the team builds up a robust knowledge base and refined processes. It also demonstrates to the customer that you’re not just fixing and forgetting, but actively investing in preventing future issues – a hallmark of a proactive and reliable MSP.
Step 10: Continuous Improvement and Strengthening the Microsoft Partnership
The final step is an ongoing one – to leverage the experience gained and your relationship with Microsoft to improve future support interactions. A strong partnership with Microsoft and a well-trained team underpin a seamless support experience in the long run. This involves training, integration of support processes into your business, and nurturing the partnership.
Team Training and Knowledge Sharing: Take the lessons from the recent support issue and share them with the broader team. If only one engineer handled the case, ensure the others know what was learned. Conduct a short internal session or update your team newsletter/slack with “Support Case Spotlight” highlighting the key takeaways (cause of issue, how it was fixed, how we navigated Microsoft support). Emphasize any best practices that were validated, or new ones discovered. Over time, compile these into a playbook. Also, identify if there are skill gaps that training could fill. For example, if your team struggled to gather certain logs Microsoft needed, maybe a workshop on advanced M365 troubleshooting is in order.
Encourage your staff to pursue relevant Microsoft certifications or training courses. For M365, that could be certifications like MS-100 / MS-102 (Microsoft 365 Administrator) or specialists tracks for Exchange, SharePoint, Teams, etc. Certified staff are often better equipped to diagnose issues and speak Microsoft’s language when engaged in support. The benefits of ongoing training for MSP staff include faster issue identification and resolution (less downtime for clients) and being up-to-date on the latest technologies[12][12]. Additionally, vendor-specific training – i.e., training directly related to Microsoft tools and support processes – ensures your team is using Microsoft’s recommended methods effectively[12]. For instance, knowing how to use Microsoft’s advanced diagnostic tools or the latest admin center features could save precious time during an incident.
Integrate Microsoft Support Processes into MSP Operations: Make Microsoft support an extension of your own support workflow. This means having clear internal policies on when and how to escalate to Microsoft. Define triggers: e.g., “if an issue is cloud-related and not resolved in 30 minutes, consider opening a Microsoft case.” Ensure your ticketing system has a field or flag for ‘Escalated to Vendor/Microsoft’ and that engineers update it accordingly[9][9]. Track these tickets so you can report on them (how many vendor escalations, average resolution time, etc.).
Another aspect is to maintain a list of important Microsoft contacts or resources. For example, keep the support phone numbers handy, know your Tenant ID (often needed when calling support), and if you have a Microsoft Partner Center account, ensure your team knows how to use it to file support tickets on behalf of customers.
If you often work with Microsoft support, consider setting up regular reviews with Microsoft’s support/account team if available. Some Microsoft support plans (like Premier/Unified Support) offer quarterly service reviews where they look at your cases, patterns, and can advise how to reduce incidents. Even if you don’t have that, as a partner you might have a partner manager who can provide insights or escalation assistance when needed.
Leverage Microsoft Partner Programs: SMB MSPs that are Microsoft partners should take full advantage of the support-related benefits in those programs. For instance, if you have a Microsoft Action Pack or Solutions Partner designation, you might have some Azure or M365 support incidents included or access to Advanced Support for Partners at a discount. Evaluate if upgrading your support plan with Microsoft makes sense. Microsoft Premier/Unified Support for Partners, for example, offers faster response times, dedicated account management, and proactive services[8][8]. Benefits of such a relationship include having a designated escalation manager and access to workshops that can prevent issues[8]. If you faced a very painful downtime that could have been mitigated by faster Microsoft response, that’s a business case to invest in a higher support tier.
Even without a paid support plan, being a partner means you can sometimes access the Microsoft Partner Support Community or get delegate admin access to customer tenants which streamlines support interactions. Stay connected with Microsoft’s communications – for example, partner newsletters or the M365 roadmap alerts – so you’re aware of upcoming changes that could affect clients, thus preventing some support issues proactively.
Building Relationships: Over time, try to build a rapport with Microsoft support personnel and teams. While support cases are transactional, you might frequently interact with certain regional support teams. Professionalism and constructive interactions may make them a bit more attentive to future cases (support engineers sometimes remember helpful customers/partners). If you have a Technical Account Manager (TAM) through a support contract, maintain regular contact, not just during crises. A TAM can champion your cause internally.
Continuous Feedback Loop: Keep soliciting feedback from your customers about how they feel support is going (this can be part of a quarterly business review: discuss any major support incidents and how they were handled). Use that to tweak your approach. And likewise, provide feedback to Microsoft via any channel available. Microsoft has feedback forums and often after closing a case, they’ll send a survey – use those to voice your experience. If you encountered a particularly outstanding or poor support experience, Microsoft should hear about it. This helps them improve and also can indirectly benefit you as future cases might be handled with lessons learned from that feedback.
Finally, stay proactive. The best support issue is the one that never happens. Use what you learn from past incidents to implement monitoring or preventive fixes for other clients. For example, if one customer had a misconfigured setting that caused a support ticket, audit your other customers for that same setting. Engage with Microsoft’s preventive resources: they publish best practice analyzers and health checks (like Secure Score, Microsoft 365 Apps health, etc.). Proactively fixing things reduces the number of times you need to call Microsoft at all.
In conclusion, by continuously refining your internal processes and nurturing your partnership with Microsoft, you create a virtuous cycle. Each support case not only gets resolved but makes the next one easier or less likely. Your team becomes more skilled, your relationship with Microsoft more collaborative, and your customers more confident in your service. An MSP that effectively integrates vendor support into its own workflow stands out for delivering reliable, end-to-end support experiences – exactly what clients expect when they entrust you with their IT needs.
Conclusion
Optimizing the support process as an SMB MSP when working with Microsoft is all about preparation, communication, and continuous improvement. By following a structured step-by-step approach – from diligent initial troubleshooting and comprehensive case documentation, through effective engagement with Microsoft support, to thorough resolution verification and post-incident analysis – an MSP can ensure that issues are resolved as swiftly as possible with minimal customer impact.
Best practices like providing detailed information, maintaining open lines of communication with both Microsoft and your customer, and knowing how to navigate escalations make the support experience smoother for everyone involved. Implementing these processes not only speeds up individual issue resolution but also strengthens the MSP’s overall service capability. Over time, your team will become more adept at handling M365 problems (preventing many outright), and your working relationship with Microsoft support will become more efficient and collaborative.
In essence, a seamless support experience results from being proactive and methodical: anticipate what Microsoft will need and have it ready, keep all stakeholders informed, and never stop refining your approach. By doing so, you demonstrate to your customers that even when issues arise, they are in capable hands – you and Microsoft’s – working together to keep their business running smoothly. With each resolved case and each improvement in process, you build trust and reliability, solidifying your reputation as a responsive and effective managed service provider.
Blocking Applications on Windows Devices using Intune (M365 Business Premium)
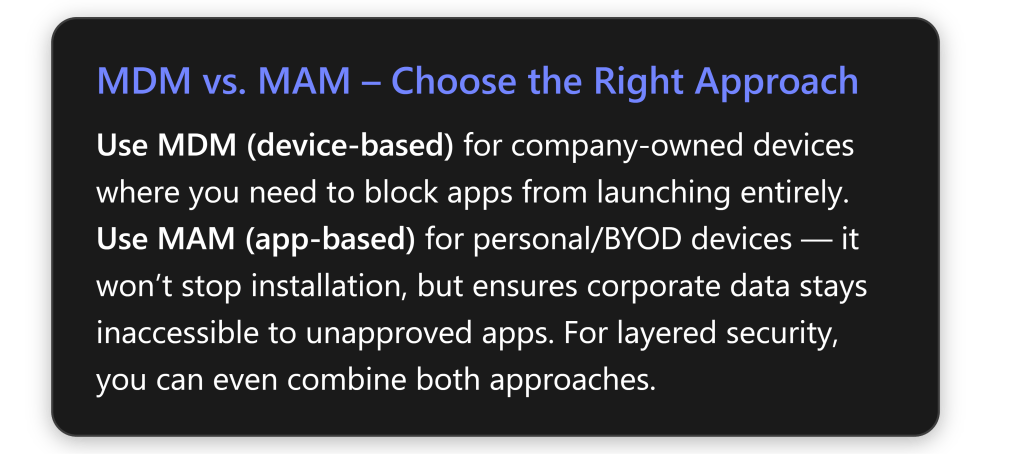
Managing which applications can run on company devices is crucial for security and productivity. Microsoft Intune (part of Microsoft 365 Business Premium) offers powerful ways to block or restrict applications on Windows 10/11 devices. This guide explains the most effective method – using Intune’s Mobile Device Management (MDM) with AppLocker – in a step-by-step manner. We also cover an alternative app-level approach using Intune’s Mobile Application Management (MAM) for scenarios like BYOD.
Introduction and Key Concepts
Microsoft Intune is a cloud-based endpoint management service (included with M365 Business Premium along with Azure AD Premium P1) that provides both MDM and MAM capabilities[1]. In the context of blocking applications on Windows:
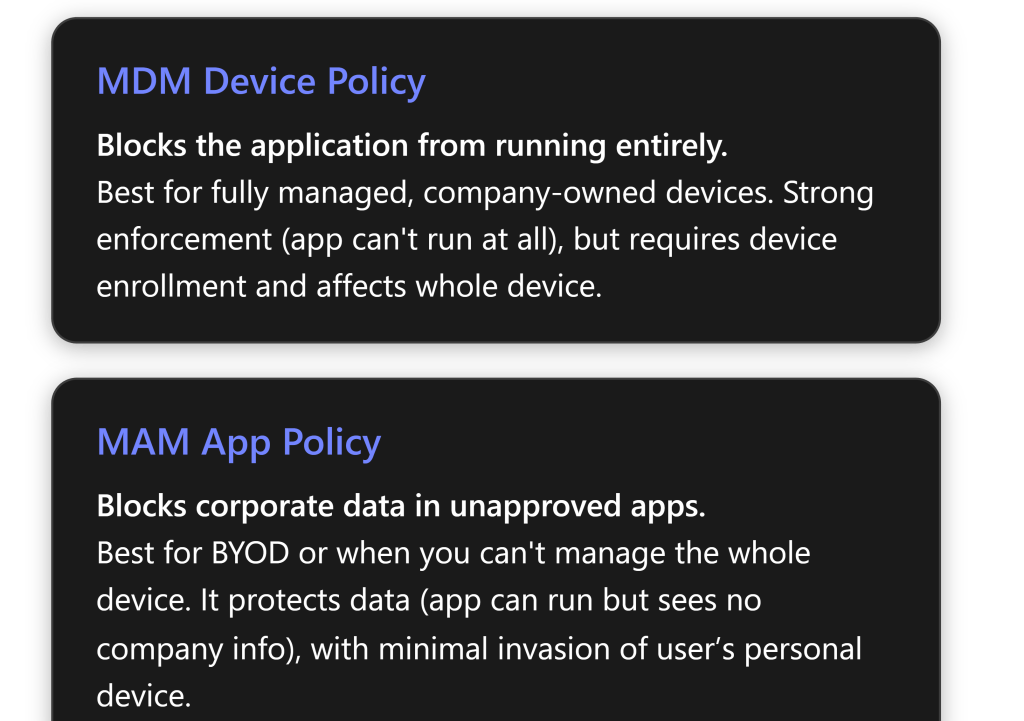
MDM (Mobile Device Management) means the Windows device is enrolled in Intune, allowing IT to enforce device-wide policies. With MDM, you can prevent an application from launching at all on the device[1][1]. Attempting to run a blocked app will result in a message like “This app has been blocked by your system administrator”[1]. This is ideal for corp-owned devices where IT has full control.
MAM (Mobile Application Management) uses App Protection Policies to protect corporate data within apps without full device enrollment. Instead of stopping an app from running, MAM blocks the app from accessing or sharing company data[1][1]. Users can install any app for personal use, but if they try to open corporate content in an unapproved app, it will be prevented or the data will remain encrypted/inaccessible[1]. This is suited for BYOD scenarios.
Most Effective Method: In a typical small-business with M365 Business Premium, the MDM approach with AppLocker is the most direct way to block an application on Windows devices – it completely prevents the app from launching on managed PCs[1][1]. The MAM approach is effective for protecting data (especially on personal devices) but does not physically stop a user from installing or running an app for personal use[1]. Often, MDM is used on corporate devices and MAM on personal devices to cover both scenarios without overreaching on user’s personal device freedom[1][1].
Prerequisites and Setup
Before implementing application blocking, make sure you meet these prerequisites[1][1]:
Intune License: You have an appropriate Intune license. Microsoft 365 Business Premium includes Intune, so if you have M365 BP, you’re covered on licensing and have the necessary admin access to the Intune admin center[1][1].
Supported Windows Edition: Devices should be running Windows 10 or 11 Pro, Business, or Enterprise editions. (Windows Home is not supported for these management features[1].) Ensure devices are up to date – recent Windows 10/11 updates allow AppLocker enforcement even on Pro edition (the historical limitation to Enterprise has been removed)[1][1].
Device Enrollment (for MDM): For device-based blocking, Windows devices must be enrolled in Intune (via Azure AD join, Hybrid AD join, Autopilot, or manual enrollment)[1]. Enrollment gives Intune the control to push device configuration policies that block apps.
Azure AD and MAM Scope (for app protection): If using app protection (MAM) policies, users should exist in Azure AD and you need to configure the MAM User Scope so Intune can deliver app protection to their devices[1]. In Azure AD -> Mobility (MDM and MAM), set Intune as the MAM provider for the relevant users/groups. (Typically, for BYOD scenarios you might set MDM scope to a limited group or none, and MAM scope to all users[1].)
Administrative Access: Ensure you have Intune admin permissions. Log into the https://endpoint.microsoft.com (also known as Microsoft Endpoint Manager portal) with an admin account to create policies[1].
Test Environment: It’s wise to have a test or pilot device/group enrolled in Intune to trial the blocking policy before broad deployment[1]. Also, identify the application(s) you want to block and have one installed on a test machine for creating the policy.
With the basics in place, we can proceed with the blocking methods.
Method 1: Block Applications via Intune MDM (AppLocker Policy)
Overview: Using Intune’s device (MDM) capabilities, we will create an AppLocker policy to block a specific application and deploy that policy through Intune. AppLocker is a Windows feature that allows administrators to define which executables or apps are allowed or denied. Intune can deliver AppLocker rules to managed devices, effectively preventing targeted apps from running[1][1].
Create an AppLocker rule on a reference Windows PC to deny the unwanted application.
Export the AppLocker policy to an XML file.
Create an Intune Device Configuration profile (Custom OMA-URI) in the Intune portal and import the AppLocker XML.
Assign the profile to the target devices or user group.
Monitor enforcement and adjust if necessary.
We will now go through these steps in detail:
Step 1: Create & Export an AppLocker Policy (Blocking Rule)
First, on a Windows 10/11 PC (your own admin machine or a lab device), set up the AppLocker rule to block the chosen application:
Open Local Security Policy: Log in as an administrator on the reference PC and run “Local Security Policy” (secpol.msc). Navigate to Security Settings > Application Control Policies > AppLocker[1].
Enable AppLocker & Default Rules: Right-click AppLocker and select “Properties.” For each rule category (Executable, Script, Windows Installer (.msi), Packaged app (*.appx)), check “Configured” and set it to “Enforce rules”, then click OK[1]. Next, create the default allow rules for each category: e.g., right-click Executable Rules and choose “Create Default Rules.” This adds baseline allow rules (e.g., allow all apps in %ProgramFiles% and Windows directories, and allow Administrators to run anything) so that you don’t inadvertently block essential system files or admin actions[1][1]. (Ensuring default rules exist is crucial to avoid locking down the system accidentally.)
Create a Deny Rule for the Application: Decide which app to block and under the appropriate category, right-click and select “Create New Rule…”[1]. This launches the AppLocker rule wizard:
Action: Choose “Deny” (we want to block the app)[1].
User or Group: Select “Everyone” (so the rule applies to all users on the device)[1]. (Alternatively, you could target a specific user or group if needed.)
Condition (Identification of the app): If it’s a classic Win32 app (an EXE), you can choose a Publisher rule (recommended for well-known signed apps), a Path rule, or a File hash rule. For a well-known signed app (e.g., Chrome, Zoom), choosing Publisher is ideal so that all versions of that app from that publisher get blocked[1][1]. You will be prompted to browse for the app’s executable on the system – select the main EXE (for example, chrome.exe in C:\Program Files\Google\Chrome\Application\chrome.exe for Google Chrome)[1][1]. The wizard will read the digital signature and populate the publisher and product info. You can adjust the slider to define the scope (e.g., blocking any version of Chrome vs. a specific version) – typically, slide to “File name” or “Product” level to block all versions of that app[1]. If blocking a Microsoft Store (UWP) app, switch to Packaged app Rules and select the app from the list of installed packages (e.g., TikTok if installed from Store)[1]. This will use the app’s package identity as the condition. (If the app isn’t installed on your ref machine to select, you can use a File hash, but Publisher rules are easier to maintain when possible[1].)
Complete the wizard by giving the rule a name and optional description (e.g., “Block Chrome”) and finish. You should now see your new Deny rule listed under the appropriate AppLocker rule category[1] (e.g., under Executable Rules for a .exe).
Confirm Rule Enforcement: Ensure AppLocker enforcement is enabled (the earlier step of setting to Enforced in Properties should handle this). With the deny rule created and default allow rules in place, the local policy will block the chosen app on this test machine.
Export the Policy: Now export these AppLocker settings to an XML file so we can deploy them via Intune. In the AppLocker console, right-click the AppLocker node and choose “Export Policy.” Save the file (e.g., BlockedApps.xml)[1][1]. This XML contains all AppLocker rules you configured.Tip: We only need the relevant portion of the XML for the rule category we configured (to avoid conflicts with categories we didn’t use). For example, if we only created an Executable rule, open the XML in a text editor and find the <RuleCollection Type="Exe" EnforcementMode="Enabled"> ... </RuleCollection> section[1]. Copy that entire <RuleCollection> block to use in Intune[1]. (Similarly, if blocking a packaged app, use the <RuleCollection Type="AppX"...> section, etc.) This way, we import just the necessary rules into Intune without overriding other categories that we didn’t configure[1][1].
Step 2: Deploy the AppLocker Policy via Intune
Now that we have our AppLocker XML snippet, we’ll create a Custom Device Configuration Profile in Intune to deliver this policy to devices:
Create a Configuration Profile in Intune: Log in to the Intune admin center (Endpoint Manager portal) and navigate to Devices > Configuration Profiles (or Devices > Windows > Configuration Profiles). Click + Create profile.
Platform: Select Windows 10 and later.
Profile type: Choose Templates > Custom (because we’ll input a custom OMA-URI for AppLocker)[1][1].
Click Create and give the profile a name (e.g., “Block AppLocker Policy”) and an optional description[1][1].
Add Custom OMA-URI Settings: In the profile editor, under Configuration settings, click Add to add a new setting. Enter the following details for the custom setting:
Name: A descriptive name like “AppLocker Exe Rule” (if blocking an EXE) or “AppLocker Store App Rule” depending on your target[1][1].
OMA-URI: This is the path that Intune uses to set the AppLocker policy via the Windows CSP. Use the path corresponding to your rule type:
For executable (.exe) apps:\ ./Vendor/MSFT/AppLocker/ApplicationLaunchRestrictions/Apps/EXE/Policy[1].
For Microsoft Store (packaged) apps:\ ./Vendor/MSFT/AppLocker/ApplicationLaunchRestrictions/Apps/StoreApps/Policy[1].
(If you were blocking other types, there are similar OMA-URI paths for Script, MSI, DLL under AppLocker CSP, but most common cases are EXE or StoreApps.)
Data type: Select String (we’ll be uploading the XML as a text string)[1].
Value: Paste the XML content of the <RuleCollection> that you copied earlier, including the <RuleCollection ...> tags. This is essentially the AppLocker policy definition in XML form[1]. Double-check that you included the opening and closing tags and that the XML is well-formed. (Intune will accept the large XML string here – if there’s a syntax error in the XML, the policy might fail to apply.)
Click Save after adding this OMA-URI setting.
Complete Profile Creation: Click Next if additional pages appear (for Scope tags, etc., usually can leave default). On Assignments, choose the group of devices or users to which this blocking policy should apply:
For initial testing, you might assign it to a small pilot group or a single device group (perhaps an “IT Test Devices” group).
For full deployment, you could assign to All Devices or a broad group like “All Windows 10/11 PCs” if all devices should have this app blocked[1]. (Consider excluding IT admin devices or others if you need to ensure they can run the app, but generally “Everyone” was set in the rule so any device that gets this policy will block the app for all users on it.)
After selecting the group, click Next through to Review + Create, then click Create to finish creating the profile[1][1].
Intune will now deploy this policy to the targeted Windows endpoints. Typically, devices check in and apply policies within minutes if online (or the next time they come online).
Step 3: Policy Assignment and Enforcement
Once the profile is created and assigned, Intune will push the AppLocker policy to the devices. On each device:
The policy is applied via the Windows AppLocker Configuration Service Provider (CSP). When the device receives the policy, Windows integrates the new AppLocker rule.
If the user attempts to launch the blocked application, it will fail to open. On Windows, they will see a notification or error dialog stating the app is blocked by the administrator or system policy[1][1]. Essentially, the app is now inert on those machines – nothing happens when they try to run it (or it closes immediately with a message).
To summarize the MDM enforcement: the application itself is blocked from running on the device – the user cannot launch it at all on a managed, compliant device[1]. This provides a strong guarantee that the software can’t be used (preventing both intentional use and accidental use of unauthorized apps).
Example: If we deployed a policy to block Google Chrome, any attempt to open Chrome on those Intune-managed PCs will be prevented. The user will typically see a Windows pop-up in the lower-right saying something like “ has been blocked by your organization”[1]. They will not be able to use Chrome unless the policy is removed.
Note: Intune/MDM-based AppLocker policies apply to any user on the device by default. If multiple users use the same PC (as Azure AD users), the blocked app will be blocked for all (since we set the rule for Everyone). Keep this in mind if any shared devices are in scope.
Step 4: Testing, Monitoring and Verification
After deploying the policy, it’s important to verify it’s working correctly and monitor device compliance:
Test on a Pilot Device: On a test device that received the policy, try launching the blocked application. You should confirm that it does not run and that you receive the expected block message[1][1]. If the app still runs, double-check that the device is indeed Intune-managed, in the assigned group, and that the policy shows as successfully applied (see below).
Intune Policy Status: In the Intune admin center, go to the Configuration Profile you created and view Device status or Per-user status. Intune will report each targeted device with status “Succeeded” or “Error” for applying the policy[1][1]. Verify that devices show Success for the AppLocker profile. If there are errors, click on them to get more details. A common error might be malformatted XML or an unsupported setting on that OS edition.
Event Logs: On a Windows client, you can also check the Windows Event Viewer for AppLocker events. Look under Application and Services Logs > Microsoft > Windows > AppLocker > EXE and DLL. A successful block generates an event ID 8004 (“an application was blocked by policy”) in the AppLocker log[1][1]. This is useful for auditing and troubleshooting – you can see if the rule fired as expected. If you see event 8004 for your app when a user tried to open it, the policy is working.
Monitor Impact: Ensure no critical application was inadvertently affected. Thanks to the default allow rules, your policy should not block unrelated apps, but it’s good to get feedback from pilot users. Have IT or a pilot user attempt normal work and ensure nothing else is broken. If something necessary got blocked (e.g., perhaps the rule was too broad and blocked more than intended), you’ll need to adjust the AppLocker rule criteria (see Step 5).
Common issues and troubleshooting:\ Even with a straightforward setup, a few issues can arise:
Correct App Identification: Make sure the rule accurately identifies the app. If using a publisher rule for an EXE, it should cover all versions. If the app updates and the publisher info remains the same, it stays blocked. If you used a file hash rule, a new version (with a different hash) might bypass it – so publisher rules are generally preferred for well-known apps[1][1]. For Store apps, ensure you selected the correct app package or used the correct Package Family Name. Microsoft documentation suggests using the Store for Business or PowerShell to find the precise Package Identity if needed[1].
Application Identity Service: Windows has a service called Application Identity (AppIDSvc) that AppLocker relies on to function. This service should start automatically when AppLocker policies are present. If it’s disabled or not running, AppLocker enforcement will fail. Ensure the service is not disabled on your clients[1][1]. (By default it’s Manual trigger-start – Intune’s policy should cause it to run as needed.)
Windows Edition: Remember that Windows Home edition cannot enforce AppLocker policies[1]. Pro, Business, or Enterprise should be fine (if fully updated). If a device is not enforcing the policy, check that it’s not a Home edition.
Default Rules: Always have the AppLocker default allow rules in place (or equivalent allow rules) for all categories you enforce, otherwise you might end up blocking the OS components or all apps except your deny list. If you skipped creating default rules, go back and add them, then re-export the XML. Missing default rules can lead to “everything is blocked” scenarios which require recovery.
Multiple Policies: In Intune, if you apply multiple AppLocker policies (say two different profiles targeting the same device), they could conflict or override each other[1]. It’s best to consolidate blocked app rules into one policy if possible. If you must use separate policies for different groups, ensure they target mutually exclusive sets of devices or users. In a small business, one AppLocker policy for all devices is simpler[1].
Policy Application Timing: Intune policies should apply within a few minutes, but if a device is offline it will apply next time it connects. You can trigger a manual sync from the client (Company Portal app or in Windows settings under Work & School account > Info > Sync) to fetch policies immediately.
Step 5: Maintaining and Updating the Block Policy
Over time, you may need to adjust which applications are blocked (add new ones or remove some):
Updating the Policy: To change the list of blocked apps, you have two main options:
Edit the AppLocker XML: On your reference PC, you can add or remove AppLocker rules (for example, create another Deny rule for a new app, or delete a rule) and export a new XML. Then, in Intune, edit the existing configuration profile – update the XML string in the Custom OMA-URI setting to the new XML (containing all current rules)[1][1]. Save and let it repush. The updated policy will overwrite the old rules on devices.
Create a New Profile: Alternatively, you could create a new Intune profile for an additional blocked app. However, as noted, multiple AppLocker profiles can conflict. If it’s a completely separate rule set, Intune might merge them, but to keep things simple, it’s often easier to maintain one XML that contains all blocked app rules and update it in one profile[1]. For example, maintain a “BlockedApps.xml” with all forbidden apps listed, and just update that file and Intune profile as needed.
Removing a Block: If an application should no longer be blocked (e.g., business needs change or a false alarm), you can remove the rule from the AppLocker XML and update or remove the profile. Removing the Intune profile will remove the AppLocker policy from devices (restoring them to no AppLocker enforcement)[1][1]. However, note that Intune’s configuration profiles sometimes “tattoo” settings on a device (meaning the setting remains even after the profile is removed, until explicitly changed)[2]. AppLocker CSP settings typically are removed when the profile is removed while the device is still enrolled. If a device was removed from Intune without first removing the policy, the block might persist. In such a case, you’d need to either re-enroll and remove via Intune, or use a local method to clear AppLocker policy. Microsoft’s guidance for Windows Defender Application Control (WDAC) suggests deploying an “Allow all” policy to overwrite a blocking policy, then removing it[2]. Similarly, for AppLocker, the cleanest removal is: (a) push an updated policy that doesn’t have the deny rule (or explicitly allows the app), then (b) remove that policy. So, plan the removal carefully to avoid orphaned settings.
Communication to Users: When implementing or updating blocked apps, inform your users in advance if possible. Users might encounter a blocked application message and create helpdesk tickets if they weren’t expecting it. Ensure that your organizational policy documentation lists which apps are disallowed and why (e.g. security or compliance reasons), so employees know the rules. If an important app is blocked, have a process for exception requests or review.
User Support: Be prepared to handle cases where a user says “I need this app for my work.” Evaluate if that app can be allowed or if there’s an approved alternative. Sometimes an app might be blocked for most users but certain roles might need it – in such cases, consider scoping the Intune policy to exclude those users or create a separate policy for them with a different set of rules.
Best Practices:
Pilot first, then deploy broad: As emphasized, always test your blocking policy on a limited set of machines before rolling out company-wide[1]. This prevents any nasty surprises (like blocking critical software).
Document and Align with Policies: Ensure that the list of blocked apps aligns with written company security policies or compliance requirements. For example, many organizations ban apps like BitTorrent or certain social media or games for compliance/security[3]. Some bans might be regulatory (e.g., government directives to ban specific apps due to security concerns[4]) – make sure your Intune policies support those mandates.
Gather feedback: After deploying, gather feedback from users or IT support about any impact. Users should generally not be impacted outside of being unable to use the forbidden app (which is intended). If there’s confusion or pushback, it might require management communication – e.g., explaining “We blocked XYZ app because it poses a security risk or is against company policy.”
Alternative Device-Based Protections (Compliance & Conditional Access)
In addition to AppLocker, Intune provides a few other mechanisms to deter or react to forbidden apps on devices:
Compliance Policy with Script: Intune compliance policies for Windows can detect certain conditions and mark a device non-compliant if criteria are met. While there isn’t a built-in “app blacklist” compliance setting for Windows, admins can use custom compliance scripts to check for the presence of an .exe. For instance, a PowerShell script could check if a disallowed app is installed, and if yes, set the device’s compliance status accordingly[1]. Then you could create an Azure AD Conditional Access policy to block non-compliant devices from accessing corporate resources. This approach does not directly stop the app from running, but it creates a strong incentive for users not to install it: their device will lose access to email, Teams, SharePoint, etc., if that app is present[1][1]. This is more complex to set up and punitive rather than preventive, but can be useful for monitoring and enforcing policy on devices where you might not be ready to hard-block apps.
Microsoft Defender for Endpoint Integration: If your M365 Business Premium includes Defender for Endpoint P1, note that P1 doesn’t have all app control features of P2, but one thing you can do is use Defender for Endpoint (MDE) for network blocking. For example, if the unwanted “app” is actually accessing a service via web, you can use MDE’s Custom Network Indicators to block the URL or domain (which also prevents usage of that service or PWA)[4][4]. Microsoft’s guidance for the DeepSeek app, for instance, shows blocking the app’s web backend via Defender for Endpoint network protection, so even if installed it can’t connect[4][4]. MDE can also enforce web content filtering across browsers (with network protection enabled via Intune’s Settings Catalog)[4][4].
App Uninstall via Intune: If an unwanted app was deployed through Intune (for example, a store app pushed earlier), Intune can also uninstall it by changing the assignment to “Uninstall” for that app[4][4]. However, Intune cannot directly uninstall arbitrary software that it did not install. For Win32 apps not deployed by Intune, you’d need to use scripts or other tools if you wanted to actively remove them. In many cases, simply blocking execution via AppLocker (and leaving the stub installed) is sufficient and less disruptive[1][1].
These alternatives can complement the primary AppLocker method, but for immediate prevention, AppLocker remains the straightforward solution on managed devices[1].
Method 2: Block Applications via Intune MAM (App Protection for Data)
For scenarios where devices are not enrolled (personal PCs) or you prefer not to completely lock down the device, Intune’s App Protection Policies provide a way to ensure corporate data never ends up in unapproved apps. This doesn’t stop users from installing or running apps, but it effectively blocks those apps from ever seeing or using company information[1][1]. In practice, an unapproved app becomes useless for work – e.g., a user could install a personal Dropbox or a game on their BYOD PC, but they won’t be able to open any work files with it or copy any text out of Outlook into that app.
This approach uses a feature formerly known as Windows Information Protection (WIP) for Windows 10/11, integrated into Intune’s App Protection Policies. M365 Business Premium supports this since it includes the necessary Intune and Azure AD features.
Key points about MAM data protection:
It works by labeling data as “enterprise” vs “personal” on the fly. Any data from corporate sources (e.g., Office apps signed in with work account, files from OneDrive for Business, emails in Outlook) is considered corporate and is encrypted/protected when at rest on the device.
You define a set of “protected apps” (also called allowed apps) that are approved to access corporate data (typically Office apps, Edge browser, etc.)[1][1]. Only these apps can open or handle the corporate data.
If a user tries to open a corporate document or email attachment in an app not on the allowed list, it will be blocked — either it won’t open at all, or it opens encrypted gibberish. Similarly, actions like copy-paste from a work app to a personal app can be blocked[1][1].
Unlike MDM, this doesn’t require device enrollment. You can apply it to any Windows device where a user logs in with a work account in an app (Azure AD registered). Enforcement is strengthened by pairing with Conditional Access policies to ensure they can only access, say, O365 data if they are using a protected app[1].
This is ideal for BYOD: the user keeps full control of their device and personal apps, but the company data stays within a managed silo.
Note: Microsoft has announced that Windows Information Protection (WIP) is being deprecated eventually[1]. It’s still supported in current Windows 10/11 and Intune, so you can use it now, but be aware that long-term Microsoft is focusing on solutions like Purview Information Protection and other DLP (data loss prevention) strategies[1][1]. As of this writing, WIP-based MAM policies are the main method for protecting Windows data on unenrolled devices.
Step-by-Step: Configure Intune App Protection (MAM) Policy for Windows
Follow these steps to set up a policy that will “protect” corporate data and block its use in unapproved apps:
1. Enable MAM for Windows in Azure AD (if not already):\ In the Azure AD (Entra) admin center, ensure Intune MAM is activated for Windows users:
Navigate to Azure AD > Mobility (MDM and MAM). Find Microsoft Intune in the MAM section.
Set the MAM User Scope to include the users who will receive app protection (e.g., All users, or a specific group)[1][1]. This allows those users to use Intune App Protection on unenrolled devices.
Ensure the MDM User Scope is configured as you intend. For example, in a BYOD scenario, you might set MDM user scope to None (so personal devices don’t auto-enroll) and MAM user scope to All. In a mixed scenario, you can have both scopes enabled; an unenrolled device will simply only get MAM policies, whereas an enrolled device can have both MDM and MAM policies (though device-enrolled Windows will prefer device policies)[1][1].
2. Create a Windows App Protection Policy:\ In the Intune admin center:
Go to Apps > App protection policies and click Create Policy.
It will ask “Windows 10 device type:” – choose “Without enrollment” for targeting BYOD/personal devices (this means the policy applies via MAM on Azure AD-registered devices, not requiring full Intune enrollment)[1]. (If you also want to cover enrolled devices with similar restrictions, you could create a separate policy “with enrollment.” For now, we’ll assume without enrollment for personal device usage.)
Give the policy a Name (e.g., “Windows App Protection – Block Unapproved Apps”) and a description[1].
**3. Define *Protected Apps* (Allowed Apps):**\ Now specify which applications are considered *trusted for corporate data*. These apps will be allowed to access organization data; anything not in this list will be treated as untrusted.
In the policy settings, find the section to configure Protected apps (this might be under a heading like “Allowed apps” or similar). Click Add apps[1].
Intune provides a few ways to add apps:
Recommended apps: Intune offers a built-in list of common Microsoft apps that are “enlightened” for WIP (e.g., Office apps like Outlook, Word, Excel, PowerPoint, OneDrive, Microsoft Teams, the Edge browser, etc.). You can simply check the ones you want to allow (or Select All to allow the full suite of Microsoft 365 apps)[1][1]. This covers most needs: you’ll typically include Office 365 apps and Edge. Edge is particularly important if users access SharePoint or web-based email – Edge can enforce WIP, whereas third-party browsers cannot[1].
Store apps: If there’s a Microsoft Store app not in the recommended list that you need to allow, you can add it by searching the store. You’ll need the app’s Package Family Name and Publisher info. Intune’s interface may allow selection from the Store if the app is installed on a device or via the Store for Business integration[1][1].
Desktop apps (Win32): You can also specify classic desktop applications to allow by their binary info. This requires providing the app’s publisher certificate info and product name or file name. For example, if you have a specific line-of-business app (signed by your company), you can allow it by publisher name and product name so it’s treated as a protected app[1][1]. This can also be used to allow third-party apps (e.g. perhaps Adobe Acrobat, if you trust it with corporate data).
After adding all needed apps, you’ll see your list of protected apps. Common ones: Outlook, Word, Excel, PowerPoint, Teams, OneDrive, SharePoint, Skype for Business (if used), Edge. The idea is to include all apps that you want employees to use for work data. Data will be protected within and between these apps.
(Optional) Exempt Apps: Intune allows designation of exempt apps which bypass WIP entirely (meaning they can access corporate data without restriction)[1]. Generally do NOT exempt any app unless absolutely necessary (e.g., a legacy app that can’t function with encryption). Exempting defeats the purpose by allowing data leakage, so ideally leave this empty[1][1].
4. Configure Data Transfer Restrictions:\ The policy will have settings for what actions are allowed or blocked with corporate data:
Key setting: “Prevent data transfer to unprotected apps” – set this to Block (meaning no sharing of data from a protected app to any app that isn’t in the protected list)[1]. This ensures corporate content stays only in the allowed apps.
Clipboard (Cut/Copy/Paste): You likely want to Block copying data from a protected app to any non-protected app[1]. Intune might phrase this as “Allow cut/paste between corporate and personal apps” – set to Block, or “Policy managed apps only”.
Save As: Block users from saving corporate files to unmanaged locations (e.g., prevent “Save As” to a personal folder or USB drive). In Intune, this might be a setting like “Block data storage outside corporate locations”[1].
Screen capture: You can disable screenshots of protected apps on Windows. This might be less straightforward on Windows 10 (since WIP can do it on enlightened apps). Set Block screen capture if available[1].
Encryption: Ensure Encrypt corporate data is enabled so that any work files saved on the device are encrypted and only accessible by protected apps or when the user is logged in with the right account[1].
Application Mode (Enforcement level): WIP had modes like Block, Allow Overrides, Silent, Off[1]. In Intune’s UI, this might correspond to a setting called “Protection mode”. You will want Block mode for strict enforcement (no override)[1][1]. Allow Overrides would prompt users but let them bypass (not desirable if your goal is full blocking of data transfer). Silent would just log but not prevent. So choose the strictest option to truly block data leakage.
There are other settings like “Protected network domains” where you specify which domains’ data is considered corporate (often your Office 365 default domains are auto-included, e.g., anything from @yourcompany.com email or SharePoint site is corporate). Intune usually auto-populates these based on your Azure AD tenant for Windows policies. Double-check that your organization’s email domain and SharePoint/OneDrive domains are listed as corporate identity sources.
Set any other policy flags as needed (there are many options, such as requiring a PIN for access to protected apps after a idle time, etc., but those are more about app behavior than data transfer).
5. (Optional) Conditional Launch Conditions:\ Intune’s app protection policies may allow you to set conditional launch requirements – e.g., require device to have no high-risk threats detected, require devices to be compliant, etc. For Windows, a notable one is integrating with Microsoft Defender:
You could require that no malware is present or device is not jailbroken (not as relevant on Windows), or if malware is detected, you can have the policy either block access or wipe corporate data from the app[1][1].
These settings can enhance security (ensuring the app won’t function if the device is compromised). They rely on Defender on the client and can add complexity. Use as needed or stick to defaults for now[1][1].
6. Assign the App Protection Policy:\ Unlike device config which targets devices, app protection policies target users (because they apply when a user’s account data is in an app).
Choose one or more Azure AD user groups that should receive this policy[1]. For example, “All Employees” or all users with a Business Premium license. In a small business, targeting all users is common, so any user who signs into a Microsoft 365 app on a Windows device will have these rules applied.
If you want to pilot, you could target only IT or a subset first.
7. Enforce via Conditional Access (CA):\ This step is crucial: to ensure that users actually use these protected apps and not find a workaround, use Azure AD Conditional Access:
Create a CA policy that targets the cloud apps you want to secure (Exchange Online, SharePoint Online, Teams, etc.).
In conditions, scope it to users or groups (likely the same users you target with the MAM policy).
In Access controls, require “Approved client app” or “Require app protection policy” for access[1]. In the CA settings, Microsoft 365 services have a condition like “Require approved client app” which ensures only apps that are Intune-approved (they have a list, e.g., Outlook, Teams mobile, etc.) can be used. On Windows, a more fitting control is Require app protection policy (which ensures that if the device is not compliant (MDM-enrolled), then the app being used must have an app protection policy).
One common approach: Require managed device OR managed app. This means if a device is Intune enrolled (compliant), fine – they can use any client. If not, then the user must use a managed (MAM-protected) app to access. For example, you could say: if not on a compliant (MDM) device, then the session must come from an approved client app (which essentially enforces app protection; on Windows this correlates to WIP-protected apps)[1][1].
This ensures that if someone tries to use a random app or an unmanaged browser to access, say, Exchange or SharePoint, they will be blocked. They’ll be forced to use Outlook or Edge with the app protection policy in place.
Without CA, the user could potentially use web access as a loophole (e.g., log into Outlook Web Access via Chrome on an unmanaged device). CA closes that gap by requiring either the device to be enrolled or the app to be a known protected app.
8. User Experience and Monitoring:\ Once deployed, the user experience on a personal Windows device with this policy is:
The user can install Office apps or use the Office web, but if they try to use a non-approved app for corp data, it won’t work. For example, if they try to open a corporate SharePoint file in WordPad or copy text from Outlook to Notepad, the action will be blocked by WIP (they might just see nothing happens or a notice saying the action is not allowed).
They might see a brief notification like “Your organization is protecting data in this app” when they first use a protected app[1].
Their personal files and apps are unaffected. They can still use personal email or personal versions of apps freely; the protection only kicks in for data that is tagged as corporate (which originates from the company accounts)[1][1].
If they attempt something disallowed (like pasting company data into a personal app), it will silently fail or show a message. These events can be logged.
Admins should monitor logs to ensure the policy works:
Intune App Protection Reports: Intune provides some reporting for app protection policies (e.g., under Monitor section for App Protection, you might see reports of blocked actions).
Event Logs on device: WIP events might be logged in the local event viewer under Microsoft->Windows->EDP (Enterprise Data Protection).
Azure AD Sign-in logs: If Conditional Access is used, sign-in logs will show if a session was blocked due to CA policy, which helps confirm that CA rules are working[1][1].
Periodically review these logs, and also gather any user feedback if they experience prompts or have trouble accessing something so you can fine-tune the allowed app list or policy settings.
9. Maintain the MAM Policy:\ If you need to add another allowed app (say your company adopts a new tool that should be allowed to access corp data), just edit the App Protection Policy in Intune and add that app to the protected list. Policy updates apply near-real-time to usage. Removing an app from allowed list effectively immediately prevents it from opening new corporate data (though any already saved corporate data in that app would remain encrypted and inaccessible). If an employee leaves, removing their account or wiping corporate data from their device is possible from Intune (App Protection has a wipe function that will remove corporate data from the apps on the next launch).
Summary of MAM Approach: With Intune MAM, the app itself isn’t blocked from running, but it’s blocked from accessing any company info[1][1]. This is ideal if you don’t manage the entire device, such as personal devices. Even if a user installs an unapproved app, it cannot touch work data – making it effectively useless for work. The user retains the freedom to use their device for personal tasks, while IT ensures corporate data stays confined to secure apps[1][1]. This approach requires less device control and is generally more palatable for users worried about privacy on their own machines[1]. The trade-off is that it doesn’t prevent all risks (a user could still run risky software on their personal device – it just won’t have company data to abuse)[1][1].
Comparison of MDM vs MAM Approaches
To summarize the differences between the device-based blocking (MDM/AppLocker) and app-based blocking (MAM/App Protection) approach, consider the following comparison:
What is blocked: MDM completely blocks the application from launching on the device – the user clicks it, and nothing happens (or gets a “blocked by admin” notice)[1][1]. MAM allows the app to run, but blocks access to any protected (corp) data. The app can launch and be used for personal things, but if it tries to access work files or data, that access is denied or the data is unreadable[1][1].
Use case: MDM is best for company-owned devices under IT control where you want to outright ban certain software for security, licensing, or productivity reasons[1]. MAM is best for personal/BYOD devices (or to add a second layer on corporate devices) where you can’t or don’t want full control over the device, but still need to protect corporate information[1][1].
Implementation effort: MDM/Applocker requires a more technical setup initially (creating rules, exporting XML, etc.) – but once in place, it’s mostly “set and forget”, with occasional updates to the XML for changes[1][1]. It does require devices to be enrolled and on supported Windows editions[1]. MAM is configured through Intune’s UI (selecting apps and settings), which is a bit more straightforward. However, to be fully effective, you also need to configure Conditional Access, which can be complex to get right[1][1]. MAM doesn’t require device enrollment, just Azure AD sign-in.
User experience: With MDM blocking, if a user tries to open the app, it will not run at all. This could potentially disrupt work if, say, an important app was accidentally blocked – but otherwise the enforcement is silent/invisible until they actually try the blocked app[1][1]. With MAM, the user might see some prompts or restrictions in effect (like copy/paste blocked, or a message “your org protects data in this app”)[1][1]. Personal use of the device is unaffected, only when they deal with work data they encounter restrictions. This usually necessitates a bit of user education so they understand why certain actions are blocked[1][1].
Security strength: MDM’s AppLocker is very strong at preventing the app from causing any trouble on that device – if the app is malware or a forbidden tool, it simply can’t run[1][1]. It also means you could lockdown a device to only a whitelisted set of apps if you wanted (kiosk mode scenarios). MAM is very strong for data loss prevention – corporate content won’t leak to unapproved apps or cloud services[1][1]. However, it doesn’t stop a user from installing something risky on their own device for personal use (that risk is mitigated only to the extent that company data isn’t exposed). So to fully cover security, an enterprise might use MDM+MAM combined (MDM for device posture, antivirus, etc., and MAM for data protection on the edge cases).
Privacy impact: MDM is high impact on user privacy – IT can control many aspects of the device (and even wipe it entirely). So employees might resist MDM on personal devices[1][1]. MAM is low impact – it doesn’t touch personal files or apps at all, only corporate data within certain apps is managed[1][1]. If someone leaves the company, IT can remotely wipe the corporate data in the apps, but their personal stuff stays intact[1].
Licensing considerations: Both approaches are fully supported in M365 Business Premium. MDM with AppLocker needs Windows 10/11 Pro or higher (which Business Premium covers via Windows Business, essentially Pro)[1][1]. MAM for Windows needs Azure AD Premium (for CA) and Intune, which are included in Business Premium[1][1]. No extra licensing is needed unless you want advanced features like Defender for Endpoint P2 or Purview DLP in the future.
Additional Tips and Resources
Use Intune Reporting: Regularly check Intune’s Discovered Apps report (in Endpoint Manager under Apps > Monitor > Discovered apps). This report shows what software is found on your managed devices[3]. It can help identify if users have installed something that should be blocked, or to verify that a banned app is indeed not present.
Stay Informed on Updates: Intune and Windows are evolving. For example, new features like “App Control for Business” (a simplified interface for application control in Intune) or changes to WIP deprecation may come. Keep an eye on Microsoft 365 roadmap and Intune release notes so you can adapt your approach.
Training and Communication: Ensure that your IT support staff know how the policies work, so they can assist users. For instance, if a user tries to use a blocked app, the helpdesk should be able to explain “That application isn’t allowed by company policy” and suggest an approved alternative. Provide employees with a list of approved software and explain the process to request new software if needed (so they don’t attempt to install random tools).
The Microsoft Tech Community and Q\&A forums have real-world Q\&As. For example, handling removal of a stuck AppLocker policy was discussed in a community question[2][2].
The Microsoft Intune Customer Success blog has a post on “Blocking and removing apps on Intune managed devices” (Feb 2025) which provides guidance using a real example (blocking the DeepSeek AI app) across different platforms[4]. It’s a good supplemental read for advanced scenarios and cross-platform considerations.
Compliance and Legal: If your blocking is driven by compliance (e.g., a government ban on an app), ensure you archive proof of compliance. Intune logs and reports showing the policy applied can serve as evidence that you took required action. Also ensure your Acceptable Use Policy given to employees clearly states that certain applications are prohibited on work devices — this helps cover legal bases and user expectations.
Conclusion
With Microsoft 365 Business Premium, you have robust tools to control application usage on Windows devices. By leveraging Intune MDM with AppLocker, you can completely block unauthorized applications from running on company PCs, thereby enhancing security and productivity. The detailed steps above guide you through creating and deploying such a policy in a manageable way. Additionally, Intune’s App Protection (MAM) capabilities offer a complementary solution for protecting corporate data on devices you don’t fully manage, ensuring that even in BYOD situations, sensitive information remains in sanctioned apps.
In practice, many organizations will use a blend: e.g., require MDM for corporate laptops (where you enforce AppLocker to ban high-risk apps) and use MAM for any personal devices that access company data. The most effective method ultimately depends on your scenario, but with MDM and MAM at your disposal, M365 Business Premium provides a comprehensive toolkit to block or mitigate unapproved applications. By following the step-by-step processes and best practices outlined in this guide, IT administrators can confidently enforce application policies and adapt them as the organization’s needs evolve, all while keeping user impact and security compliance in balance.
Overview: Microsoft 365 Copilot is an AI assistant integrated into the apps you use every day – Word, Excel, PowerPoint, Outlook, Teams, OneNote, and more – designed to boost productivity through natural-language assistance[1][2]. As a small business with Microsoft 365 Business Premium, you already have the core tools and security in place; Copilot builds on this by helping you draft content, analyze data, summarize information, and collaborate more efficiently. This roadmap provides a step-by-step guide for end users to learn and adopt Copilot, leveraging freely available, high-quality training resources and plenty of hands-on practice. It’s organized into clear stages, from initial introduction through ongoing mastery, to make your Copilot journey easy to follow.
Why Use Copilot? Key Benefits for Small Businesses
Boost Productivity and Creativity: Copilot helps you get things done faster. Routine tasks like writing a first draft or analyzing a spreadsheet can be offloaded to the AI, saving users significant time. Early trials showed an average of ~10 hours saved per month per user by using Copilot[1]. Even saving 2.5 hours a month could yield an estimated 180% return on investment at typical salary rates[1]. In practical terms, that means more time to focus on customers and growth.
Work Smarter, Not Harder: For a small team, Copilot acts like an on-demand expert available 24/7. It can surface information from across your company data silos with a simple query – no need to dig through multiple files or emails[1]. It’s great for quick research and decision support. For example, you can ask Copilot in Teams Chat to gather the latest project updates from SharePoint and recent emails, or to analyze how you spend your time (it can review your calendar via Microsoft 365 Chat and suggest where to be more efficient[1]).
Improve Content Quality and Consistency: Not a designer or wordsmith? Copilot can help create professional output. It can generate proposals, marketing posts, or slides with consistent branding and tone. For instance, you can prompt Copilot in PowerPoint to create a slide deck from a Word document outline – it will produce draft slides complete with imagery suggestions[3]. In Word, it can rewrite text to fix grammar or change the tone (e.g., make a message more friendly or more formal).
Real-World Example – Joos Ltd:Joos, a UK-based startup with ~45 employees, used Copilot to “work big while staying small.” They don’t have a dedicated marketing department, so everyone pitches in on creating sales materials. Copilot in PowerPoint now helps them generate branded sales decks quickly, with the team using AI to auto-edit and rephrase content for each target audience[3][3]. Copilot also links to their SharePoint, making it easier to draft press releases and social posts by pulling in existing company info[3]. Another challenge for Joos was coordinating across time zones – team members were 13 hours apart and spent time taking meeting notes for absent colleagues. Now Copilot in Teams automatically generates meeting summaries and action items, and even translates them for their team in China, eliminating manual note-taking and translation delays[3][3]. The result? The Joos team saved time on routine tasks and could focus more on expanding into new markets, using Copilot to research industry-specific pain points and craft tailored pitches for new customers[3][3].
Enhance Collaboration: Copilot makes collaboration easier by handling the busywork. It can summarize long email threads or Teams channel conversations, so everyone gets the gist without wading through hundreds of messages. In meetings, Copilot can act as an intelligent notetaker – after a Teams meeting, you can ask it for a summary of key points and action items, which it produces in seconds[3]. This ensures all team members (even those who missed the meeting) stay informed. Joos’s team noted that having Copilot’s meeting recaps “changed the way we structure our meetings” – they review the AI-generated notes to spot off-topic tangents and keep meetings more efficient[3].
Maintain Security and Compliance: As a Business Premium customer, you benefit from enterprise-grade security (like data loss prevention, MFA, Defender for Office 365). Copilot inherits these protections[2]. It won’t expose data you don’t have access to, and its outputs are bounded by your organization’s privacy settings. Small businesses often worry about sensitive data – Copilot can actually help by quickly finding if sensitive info is in the wrong place (since it can search your content with your permissions). Administrators should still ensure proper data access policies (Copilot’s powerful search means any overly broad permissions could let a user discover files they technically have access to but weren’t aware of[4]). In short, Copilot follows the “trust but verify” approach: it trusts your existing security configuration and won’t leak data outside it[2].
Roadmap Stages at a Glance
Below is an outline of the stages you’ll progress through to become proficient with Microsoft 365 Copilot. Each stage includes specific learning goals, recommended free resources (articles, courses, videos), and hands-on exercises.
Each stage is described in detail below with recommended resources and action steps. Let’s dive into Stage 1!
Stage 1: Introduction & Setup
Goal: Build a basic understanding of Microsoft 365 Copilot and prepare your account/applications for using it.
Understand What Copilot Is: Start with a high-level overview. A great first stop is Microsoft’s own introduction:
Microsoft Learn – “Introduction to Microsoft 365 Copilot” (learning module, ~27 min) – This beginner-friendly module explains Copilot’s functionality and Microsoft’s approach to responsible AI[5]. It’s part of a broader “Get started with Microsoft 365 Copilot” learning path[5]. No prior AI knowledge needed.
Microsoft 365 Copilot Overview Video – Microsoft’s official YouTube playlist “Microsoft 365 Copilot” has short videos (1-5 min each) showcasing how Copilot works in different apps. For example, see how Copilot can budget for an event in Excel or summarize emails in Outlook. These visuals help you grasp Copilot’s capabilities quickly.
Check Licensing & Access: Ensure you actually have Copilot available in your Microsoft 365 environment. Copilot is a paid add-on service for Business Premium (not included by default)[1][1].
How to verify: Ask your IT admin or check in your Office apps – if Copilot is enabled, you’ll see the Copilot icon or a prompt (for instance, a Copilot sidebar in Word or an “Ask Copilot” box in Teams Chat). If your small business hasn’t purchased Copilot yet, you might consider a trial. (Note: As of early 2024, Microsoft removed the 300-seat minimum – even a company with 1 Business Premium user can add Copilot now[1][1].)
If you’re an admin, Microsoft’s documentation provides a Copilot setup guide in the Microsoft 365 Admin Center[6]. (Admins can follow a step-by-step checklist to enable Copilot for users, found in the Copilot Success Kit for SMB.) For end users, assuming your admin has enabled it, there’s no special install – just ensure your Office apps are updated to the latest version.
First Look – Try a Simple Command: Once Copilot is enabled, try it out! A good first hands-on step is to use Copilot in one of the Office apps:
Word: Open Word and look for the Copilot () icon or pane. Try asking it to “Brainstorm a description for our company’s services” or “Outline a one-page marketing flyer for [your product]”. Copilot will generate ideas or an outline. This lets you see how you can prompt it in natural language.
Outlook: If you have any lengthy email thread, try selecting it and asking Copilot “Summarize this conversation”. Watch as it produces a concise summary of who said what and any decisions or questions noted. It might even suggest possible responses.
Teams (Business Chat): In Teams, open the Copilot chat (often labeled “Ask Copilot” or similar). A simple prompt could be: “What did I commit to in meetings this week?” Copilot can scan your calendar and chats to list action items you promised[1]. This is a powerful demo of how it pulls together info across Outlook (calendar), Teams (meetings), and so on.
Don’t worry if the output isn’t perfect – we’ll refine skills later. The key in Stage 1 is to get comfortable invoking Copilot and seeing its potential.
Leverage Introductory Resources: A few other freely available resources for introduction:
Microsoft Support “Get started with Copilot” guide – an online help article that shows how to access Copilot in each app, with screenshots.
Third-Party Blogs/Overviews: For an outside perspective, check out “Copilot for Microsoft 365: Everything your business needs to know” by Afinite (IT consultancy)[1][1]. It provides a concise summary of what Copilot does and licensing info (reinforcing that Business Premium users can benefit from it) with a business-oriented lens.
Community Buzz: Browse the Microsoft Tech Community Copilot for SMB forum, where small business users and Microsoft experts discuss Copilot. Seeing questions and answers there can clarify common points of confusion. (For example, many SMB users asked about how Copilot uses their data – Microsoft reps have answered that it’s all within your tenant, not used to train public models, etc., echoing the privacy assurances.)
✅ Stage 1 Outcomes: By the end of Stage 1, you should be familiar with the concept of Copilot and have successfully invoked it at least once in a Microsoft 365 app. You’ve tapped into key resources (both official and third-party) that set the stage for deeper learning. Importantly, you’ve confirmed you have access to the tool in your Business Premium setup.
Stage 2: Learning Copilot Basics in Core Apps ️♀️
Goal: Develop fundamental skills by using Copilot within the most common Microsoft 365 applications. In this stage, you will learn by doing – following tutorials and then practicing simple tasks in Word, Excel, PowerPoint, Outlook, and Teams. We’ll pair each app with freely available training resources and a recommended hands-on exercise.
Recommended Training Resource: Microsoft has created an excellent learning path called “Draft, analyze, and present with Microsoft 365 Copilot”[7]. It’s geared toward business users and covers Copilot usage in PowerPoint, Word, Excel, Teams, and Outlook. This on-demand course (on Microsoft Learn) shows common prompt patterns in each app and even introduces Copilot’s unified Business Chat. We highly suggest progressing through this course in Stage 2 – it’s free and modular, so you can do it at your own pace. Below, we’ll highlight key points for each application along with additional third-party tips:
Copilot in Word – “Your AI Writing Assistant”:
What you’ll learn: How to have Copilot draft content, insert summaries, and rewrite text in Word.
Training Highlights: The Microsoft Learn path demonstrates using prompts like “Draft a two-paragraph introduction about [topic]” or “Improve the clarity of this section” in Word[7]. You’ll see how Copilot can generate text and even adjust tone or length on command.
Hands-on Exercise: Open a new or existing Word document about a work topic you’re familiar with (e.g., a product description, an internal policy, or a client proposal). Use Copilot to generate a summary of the content or ask it to create a first draft of a new section. For example, if you have bullet points for a company About Us page, ask Copilot to turn them into a narrative paragraph. Observe the output and edit as needed. This will teach you how to iteratively refine Copilot’s output – a key skill is providing additional instructions if the initial draft isn’t exactly right (e.g., “make it more upbeat” or “add a call-to-action at the end”).
Copilot in Excel – “Your Data Analyst”:
What you’ll learn: Using Copilot to analyze data, create formulas, and generate visualizations in Excel.
Training Highlights: The Learn content shows examples of asking Copilot questions about your data (like “What are the top 5 products by sales this quarter?”) and even generating formulas or PivotTables with natural language. It also covers the new Analyst Copilot capabilities – for instance, Copilot can explain what a complex formula does or highlight anomalies in a dataset.
Hands-on Exercise: Take a sample dataset (could be a simple Excel sheet with sales figures, project hours, or any numbers you have). Try queries such as “Summarize the trends in this data” or “Create a chart comparing Q1 and Q2 totals”. Let Copilot produce a chart or summary. If you don’t have your own data handy, you can use an example from Microsoft (e.g., an Excel template with sample data) and practice there. The goal is to get comfortable asking Excel Copilot questions in plain English instead of manually crunching numbers.
Copilot in PowerPoint – “Your Presentation Designer”:
What you’ll learn: Generating slides, speaker notes, and design ideas using Copilot in PowerPoint.
Training Highlights: The training path walks through turning a Word document into a slide deck via Copilot[7]. It also shows how to ask for images or styling (Copilot leverages Designer for image suggestions[1]). For example, “Create a 5-slide presentation based on this document” or “Add a slide summarizing the benefits of our product”.
Hands-on Exercise: Identify a topic you might need to present – say, a project update or a sales pitch. In PowerPoint, use Copilot with a prompt like “Outline a pitch presentation for [your product or idea], with 3 key points per slide”. Watch as Copilot generates the outline slides. Then, try refining: “Add relevant images to each slide” or “Make the tone enthusiastic”. You can also paste some text (perhaps from the Word exercise) and ask Copilot to create slides from that text. This exercise shows the convenience of quickly drafting presentations, which you can then polish.
Copilot in Outlook – “Your Email Aide”:
What you’ll learn: Composing and summarizing emails with Copilot’s help in Outlook.
Training Highlights: Common scenarios include: summarizing a long email thread, drafting a reply, or composing a new email from bullet points. The Microsoft training examples demonstrate commands like “Reply to this email thanking the sender and asking for the project report” or “Summarize the emails I missed from John while I was out”.
Hands-on Exercise: Next time you need to write a tricky email, draft it with Copilot. For instance, imagine you need to request a payment from a client diplomatically. Provide Copilot a prompt such as “Write a polite email to a client reminding them of an overdue invoice, and offer assistance if they have any issues”. Review the draft it produces; you’ll likely just need to tweak details (e.g., invoice number, due date). Also try the summary feature on a dense email thread: select an email conversation and click “Summarize with Copilot.” This saves you from reading through each message in the chain.
Copilot in Teams (and Microsoft 365 Chat) – “Your Teamwork Facilitator”:
What you’ll learn: Using Copilot during Teams meetings and in the cross-app Business Chat interface.
Training Highlights: The learning path introduces Microsoft 365 Copilot Chat – a chat interface where you can ask questions that span your emails, documents, calendar, etc.[7]. It also covers how in live Teams meetings, Copilot can provide real-time summaries or generate follow-up tasks. For example, you might see how to ask “What did we decide in this meeting?” and Copilot will generate a recap and highlight action items.
Hands-on Exercise: If you have Teams, try using Copilot in a chat or channel. A fun test: go to a Team channel where a project is discussed and ask Copilot “Summarize the key points from the last week of conversation in this channel”. Alternatively, after a meeting (if transcript is available), use Copilot to “Generate meeting minutes and list any to-do’s for me”. If your organization has the preview feature, experiment with Copilot Chat in Teams: ask something like “Find information on Project X from last month’s files and emails” – this showcases Copilot’s ability to do research across your data[1]. (If you don’t have access to these features yet, you can watch Microsoft Mechanics videos that demonstrate them, just to understand the capability. Microsoft’s Copilot YouTube playlist includes short demos of meeting recap and follow-up generation.)
Additional Third-Party Aids: In addition to Microsoft’s official training, consider watching some independent tutorials. For instance, Kevin Stratvert’s YouTube Copilot Playlist (free, 12 videos) is excellent. Kevin is a former Microsoft PM who creates easy-to-follow videos on Office features. His Copilot series includes topics like “Copilot’s new Analyst Agent in Excel” and “First look at Copilot Pages”. These can reinforce what you learn and show real-world uses. Another is Simon Sez IT’s “Copilot Training Tutorials” (free YouTube playlist, 8 videos), which provides short tips and tricks for Copilot across apps. Seeing multiple explanations will deepen your understanding.
✅ Stage 2 Outcomes: By completing Stage 2, you will have hands-on experience with Copilot in all the core apps. You should be able to ask Copilot to draft text, summarize content, and create basic outputs in Word, Excel, PowerPoint, Outlook, and Teams. You’ll also become familiar with effective prompting within each context (for example, knowing that in Excel you can ask about data trends, or in Word you can request an outline). The formal training combined with informal videos ensures you’ve covered both “textbook” scenarios and real-world tips. Keep note of what worked well and any questions or odd results you encountered – that will prepare you for the next stage, where we dive into more practical scenarios and troubleshooting.
Stage 3: Practice with Real-World Scenarios
Goal: Reinforce your Copilot skills by applying them to realistic work situations. In this stage, we’ll outline specific scenarios common in a small business and challenge you to use Copilot to tackle them. This “learn by doing” approach will build confidence and reveal Copilot’s capabilities (and quirks) in day-to-day tasks. All suggested exercises below use tools and resources available at no cost.
Before starting, consider creating a sandbox environment for practice if possible. For example, use a copy of a document rather than a live one, or do trial runs in a test Teams channel. This way, you can experiment freely without worry. That said, Copilot only works on data you have access to, so if you need sample content: Microsoft’s Copilot Scenario Library (part of the SMB Success Kit) provides example files and prompts by department[8]. You might download some sample scenarios from there to play with. Otherwise, use your actual content where comfortable.
Here are several staged scenarios to try:
Writing a Company Announcement: Imagine you need to write an internal announcement (e.g., about a new hire or policy update).
Task: Draft a friendly announcement email welcoming a new employee to the team.
How Copilot helps: In Word or Outlook, provide Copilot a few key details – the person’s name, role, maybe a fun fact – and ask it to “Write a welcome announcement email introducing [Name] as our new [Role], and highlight their background in a warm tone.” Copilot will generate a full email. Use what you learned in Stage 2 to refine the tone or length if needed. This exercise uses Copilot’s strength in creating first drafts of written communications.
Practice Tip: Compare the draft with your usual writing. Did Copilot include everything? If not, prompt again with more specifics (“Add that they will be working in the Marketing team under [Manager]”). This teaches you how adding detail to your prompt guides the AI.
Analyzing Business Data: Suppose you have a sales report in Excel and want insights for a meeting.
Task: Summarize key insights from quarterly sales data and identify any notable trends.
How Copilot helps: Use Excel Copilot on your data (or use a sample dataset of your sales). Ask “What are the main trends in sales this quarter compared to last? Provide three bullet points.” Then try “Any outliers or unusual changes?”. Copilot might point out, say, that a particular product’s sales doubled or that one region fell behind. This scenario practices analytical querying.
Practice Tip: If Copilot returns an error or seems confused (for example, if the data isn’t structured well), try rephrasing or ensuring your data has clear headers. You can also practice having Copilot create a quick chart: “Create a pie chart of sales by product category.”
Marketing Content Creation: Your small team needs to generate marketing content (like a blog post or social media updates) but you’re strapped for time.
Task: Create a draft for a blog article promoting a new product feature.
How Copilot helps: In Word, say you prompt: “Draft a 300-word blog post announcing our new [Feature], aimed at small business owners, in an enthusiastic tone.” Copilot will leverage its training on general web knowledge (and any public info it can access with enterprise web search if enabled) to produce a draft. While Copilot doesn’t know your product specifics unless provided, it can generate a generic but structured article to save you writing from scratch. You then insert specifics where needed.
Practice Tip: Focus on how Copilot structures the content (it might produce an introduction, bullet list of benefits, and a conclusion). Even if you need to adjust technical details, the structure and wording give you a strong starting point. Also, try using Copilot in Designer (within PowerPoint or the standalone Designer) for a related task: “Give me 3 slogan ideas for this feature launch” or “Suggest an image idea to go with this announcement”. Creativity tasks like slogan or image suggestions can be done via Copilot’s integration with Designer[1].
Preparing for a Client Meeting: You have an upcoming meeting with a client and you need to prepare a briefing document that compiles all relevant info (recent communications, outstanding issues, etc.).
Task: Generate a meeting briefing outline for a client account review.
How Copilot helps: Use Business Chat in Teams. Ask something like: “Give me a summary of all communication with [Client Name] in the past 3 months and list any open action items or concerns that were mentioned.” Copilot will comb through your emails, meetings, and files referencing that client (as long as you have access to them) and generate a consolidated summary[1]. It might produce an outline like: Projects discussed, Recent support tickets, Billing status, Upcoming opportunities. You can refine the prompt: “Include key points from our last contract proposal file and the client’s feedback emails.”
Practice Tip: This scenario shows Copilot’s power to break silos. Evaluate the output carefully – it might surface things you forgot. Check for accuracy (Copilot might occasionally misattribute if multiple similar names exist). This is a good test of Copilot’s trustworthiness and an opportunity to practice verifying its results (e.g., cross-check any critical detail it provides by clicking the citation or searching your mailbox manually).
✅ Meeting Follow-Up and Task Generation: After meetings or projects, there are often to-dos to track.
Task: Use Copilot to generate a tasks list from a meeting transcript.
How Copilot helps: If you record Teams meetings or use the transcription, Copilot can parse this. In Teams Copilot, ask “What are the action items from the marketing strategy meeting yesterday?” It will analyze the transcript (or notes) and output tasks like “Jane to send sales figures, Bob to draft the email campaign.”[3].
Practice Tip: If you don’t have a real transcript, simulate by writing a fake “meeting notes” paragraph with some tasks mentioned, and ask Copilot (via Word or OneNote) to extract action items. It should list the tasks and who’s responsible. This builds trust in letting Copilot do initial grunt work; however, always double-check that it didn’t miss anything subtle.
After working through these scenarios, you should start feeling Copilot’s impact: faster completion of tasks and maybe even a sense of fun in using it (it’s quite satisfying to see a whole slide deck appear from a few prompts!). On the flip side, you likely encountered instances where you needed to adjust your instructions or correct Copilot. That’s expected – and it’s why the next stage covers best practices and troubleshooting.
✅ Stage 3 Outcomes: By now, you’ve applied Copilot to concrete tasks relevant to your business. You’ve drafted emails and posts, analyzed data, prepared for meetings, and more – all with AI assistance. This practice helps cement how to formulate good prompts for different needs. You also gain a better understanding of Copilot’s strengths (speed, simplicity) and its current limitations (it’s only as good as the context it has; it might produce generic text if specifics aren’t provided, etc.). Keep a list of any questions or odd behaviors you noticed; we’ll address many of them in Stage 4.
Stage 4: Advanced Tips, Best Practices & Overcoming Challenges
Goal: Now that you’re an active Copilot user, Stage 4 focuses on optimizing your usage – getting the best results from Copilot, handling its limitations, and ensuring that you and your team use it effectively and responsibly. We’ll cover common challenges new users face and how to overcome them, as well as some do’s and don’ts that constitute Copilot best practices.
Fine-Tuning Your Copilot Interactions (Prompting Best Practices)
Just like giving instructions to a teammate, how you ask Copilot for something greatly influences the result. Here are some prompting tips:
Be Specific and Provide Context: Vague prompt: “Write a report about sales.” ➡ Better: “Write a one-page report on our Q4 sales performance, highlighting the top 3 products by revenue and any notable declines, in a professional tone.” The latter gives Copilot a clear goal and tone. Include key details (time period, audience, format) in your prompt when possible.
Iterate and Refine: Think of Copilot’s first answer as a draft. If it’s not what you need, refine your prompt or ask for changes. Example: “Make it shorter and more casual,” or “This misses point X, please add a section about X.” Copilot can take that feedback and update the content. You can also ask follow-up questions in Copilot Chat to clarify information it gave.
Use Instructional Verbs: Begin prompts with actions: “Draft…,” “Summarize…,” “Brainstorm…,” “List…,” “Format…”. For analysis: “Calculate…,” “Compare…,” etc. For creativity: “Suggest…,” “Imagine…”.
Reference Your Data: If you want Copilot to use a particular file or info source, mention it. E.g., “Using the data in the Excel table on screen, create a summary.” In Teams chat, Copilot might allow tags like referencing a file name or message if you’ve opened it. Remember, Copilot can only use what you have access to – but you sometimes need to point it to the exact content.
Ask for Output in Desired Format: If you need bullet points, tables, or a certain structure, include that. “Give the answer in a table format” or “Provide a numbered list of steps.” This helps Copilot present information in the way you find most useful.
Microsoft’s Learn module “Optimize and extend Microsoft 365 Copilot” covers many of these best practices as well[5][5]. It’s a great resource to quickly review now that you have experience. It also discusses Copilot extensions, which we’ll touch on shortly.
⚠️ Copilot Quirks and Limitations – and How to Manage Them
Even with great prompts, you might sometimes see Copilot struggle. Common challenges and solutions:
Slow or Partial Responses: At times Copilot might take longer to generate an answer or say “I’m still working on it”. This can happen if the task is complex or the service is under heavy use. Solution: Give it a moment. If it times out or gives an error, try breaking your request into smaller chunks. For example, instead of “summarize this 50-page document,” you might ask for a summary of each section, then ask it to consolidate.
“Unable to retrieve information” Errors: Especially in Excel or when data sources are involved, Copilot might hit an error[1]. This can occur if the data isn’t accessible (e.g., a file not saved in OneDrive/SharePoint), or if it’s too large. Solution: Ensure your files are in the cloud and you’ve opened them, so Copilot has access. If it’s an Excel range, maybe give it a table name or select the data first. If errors persist, consider using smaller datasets or asking more general questions.
Generic or Off-Target Outputs: Sometimes the content Copilot produces might feel boilerplate or slightly off-topic, particularly if your prompt was broad[1]. Solution: Provide more context or edit the draft. For instance, if a PowerPoint outline feels too generic, add specifics in your prompt: “Outline a pitch for our new CRM software for real estate clients” rather than “a sales deck.” Also make sure you’ve given Copilot any unique info – it doesn’t inherently know your business specifics unless you’ve stored them in documents it can see.
Fact-check Required: Copilot can sometimes mix up facts or figures, especially if asking it questions about data without giving an authoritative source. Treat Copilot’s output as a draft – you are the editor. Verify critical details. Copilot is great for saving you writing or analytical labor, but you should double-check numbers, dates, or any claims it makes that you aren’t 100% sure about. Example: If Copilot’s email draft says “we’ve been partners for 5 years” and it’s actually 4, that’s on you to catch and correct. Over time, you’ll learn what you can trust Copilot on vs. what needs verification.
Handling Sensitive Info: Copilot will follow your org’s permissions, but it’s possible it might surface something you didn’t expect (because you did have access). Always use good judgment in how you use the information. If Copilot summarizes a confidential document, treat that summary with the same care as the original. If you feel it’s too easy to get to something sensitive, that’s a note for admins to tighten access, not a Copilot flaw per se. Also, avoid inputting confidential new info into Copilot prompts unnecessarily – e.g., don’t type full credit card numbers or passwords into Copilot. While it is designed not to retain or leak this, best practice is to not feed sensitive data into any AI tool unless absolutely needed.
Up-to-date Information: Copilot’s knowledge of general world info isn’t real-time. It has a knowledge cutoff (for general pretrained data, likely sometime in 2021-2022). However, Copilot does have web access for certain prompts where it’s appropriate and if enabled (for example, the case of “pain points in hospitals” mentioned by the Joos team, where Copilot searched the internet for them[3]). If you ask something and Copilot doesn’t have the data internally, it might attempt a Bing search. It will cite web results if so. But it might say it cannot find info if it’s too recent or specific. Solution: Provide relevant info in your prompt (“According to our Q3 report, our revenue was X. Write analysis of how to improve Q4.” – now it has the number X to work with). For strictly web questions, you might prefer to search Bing or use the new Bing Chat which is specialized for web queries. Keep Copilot for your work-related queries.
✅ Best Practices for Responsible and Effective Use
Now that you know how to guide Copilot and manage its quirks, consider these best practices at an individual and team level:
Use Copilot as a Partner, Not a Crutch: The best outcomes come when you collaborate with the AI. You set the direction (prompt), Copilot does the draft or analysis, and then you review and refine. Don’t skip that last step. Copilot does 70-80% of the work, and you add the final 20-30%. This ensures quality and accuracy.
Encourage Team Learning: Share cool use cases or prompt tricks with your colleagues. Maybe set up a bi-weekly 15-minute “Copilot tips” discussion where team members show something neat they did (or a pitfall to avoid). This communal learning will speed up everyone’s proficiency. Microsoft even has a “Microsoft 365 Champion” program for power users who evangelize tools internally[8] – consider it if you become a Copilot whiz.
Respect Ethical Boundaries: Copilot will refuse to do things that violate ethical or security norms (it won’t generate hate speech, it won’t give out passwords, etc.). Don’t try to trick it into doing something unethical – apart from policy, such outputs are not allowed and may be filtered. Use Copilot in ways that enhance work in a positive manner. For example, it’s fine to have it draft a critique of a strategy, but not to generate harassing messages or anything that violates your company’s code of conduct.
Mind the Attribution: If you use Copilot to help write content that will be published externally (like a blog or report), remember that you (or your company) are the author, and Copilot is just an assistant. It’s good practice to double-check that Copilot hasn’t unintentionally copied any text verbatim from sources (it’s generally generating original phrasing, but if you see a very specific phrase or statistic, verify the source). Microsoft 365 Copilot is designed to cite sources it uses, especially for things like meeting summaries or when it retrieved info from a file or web – you’ll often see references or footnotes. In internal documents, those can be useful to keep. For external, remove any internal references and ensure compliance with your content guidelines.
Looking Ahead: Extending Copilot
As an advanced user, you should know that Copilot is evolving. Microsoft is adding ways to extend Copilot with custom plugins and “Copilot Studio”[2]. In the future (and for some early adopters now), organizations can build their own custom Copilot plugins or “agents” that connect Copilot to third-party systems or implement specific processes. For instance, a plugin could let Copilot pull data from your CRM or trigger an action in an external app.
For small businesses, the idea of custom AI agents might sound complex, but Microsoft is aiming to make some of this no-code or low-code. The Copilot Chat and Agent Starter Kit recently released provides guidance on creating simple agents and using Copilot Studio[7][7]. An example of an agent could be one that, when asked, “Update our CRM with this new lead info,” will prompt Copilot to gather details and feed into a database. That’s beyond basic usage, but it’s good to be aware that these capabilities are coming. If your business has a Power Platform or SharePoint enthusiast, they might explore these and eventually bring them to your team.
The key takeaway: Stage 4 is about mastery of current capabilities and knowing how to work with Copilot’s behavior. You’ve addressed the learning curve and can now avoid the common pitfalls (like poorly worded prompts or unverified outputs). You’re using Copilot not just for novelty, but as a dependable productivity aid.
✅ Stage 4 Outcomes: You have strategies to maximize Copilot’s usefulness – you know how to craft effective prompts, iterate on outputs, and you’re aware of its limitations and how to mitigate them. You’re also prepared to ethically and thoughtfully integrate Copilot into your work routine. Essentially, you’ve leveled up from a novice to a power user of Copilot. But the journey doesn’t end here; it’s time to keep the momentum and stay current as Copilot and your skills continue to evolve.
Stage 5: Continuing Learning and Community Involvement
Goal: Ensure you and your organization continue to grow in your Copilot usage by leveraging ongoing learning resources, staying updated with new features, and engaging with the community for support and inspiration. AI tools evolve quickly – this final stage is about “learning to learn” continually in the Copilot context, so you don’t miss out on improvements or best practices down the road.
Stay Updated with Copilot Developments
Microsoft 365 Copilot is rapidly advancing, with frequent updates and new capabilities rolling out:
Follow the Microsoft 365 Copilot Blog: Microsoft has a dedicated blog (on the Tech Community site) for Copilot updates. For example, posts like “Expanding availability of Copilot for businesses of all sizes”[2] or the monthly series “Grow your Business with Copilot”[3] provide insights into newly added features, availability changes, and real-world examples. Subscribing to these updates or checking monthly will keep you informed of things like new Copilot connectors, language support expansions, etc.
What’s New in Microsoft 365: Microsoft also publishes a “What’s New” feed for Microsoft 365 generally. Copilot updates often get mentioned there. For instance, if next month Copilot gets better at a certain task, it will be highlighted. Keeping an eye on this means you can start using new features as soon as they’re available to you.
Admin Announcements: If you’re also an admin, watch the Message Center in M365 Admin – Microsoft will announce upcoming Copilot changes (like changes in licensing, or upcoming preview features like Copilot Studio) so you can plan accordingly.
By staying updated, you might discover Copilot can do something today that it couldn’t a month ago, allowing you to continually refine your workflows.
Leverage Advanced and Free Training Programs
We’ve already utilized Microsoft Learn content and some YouTube tutorials. For continued learning:
Microsoft Copilot Academy: Microsoft has introduced the Copilot Academy as a structured learning program integrated into Viva Learning[9]. It’s free for all users with a Copilot license (no extra Viva Learning license needed)[9]. The academy offers a series of courses and hands-on exercises, from beginner to advanced, in multiple languages. Since you have Business Premium (and thus likely Viva Learning “seeded” access), you can access this via the Viva Learning app (in Teams or web) under Academies. The Copilot Academy is constantly updated by Microsoft experts[9]. This is a fantastic way to ensure you’re covering all bases – if you’ve followed our roadmap, you probably already have mastery of many topics, but the Academy might fill in gaps or give you new ideas. It’s also a great resource to onboard new employees in the future.
New Microsoft Learn Paths: Microsoft is continually adding to their Learn platform. As of early 2025, there are new modules focusing on Copilot Chat and Agents (for those interested in the more advanced custom AI experiences)[7]. Also, courses like “Work smarter with AI”[7] and others we mentioned are updated periodically. Revisit Microsoft Learn’s Copilot section every couple of months to see if new content is available, especially after major Copilot updates.
Third-Party Courses and Webinars: Many Microsoft 365 MVPs and trainers offer free webinars or write blog series on Copilot. For example, the “Skill Up on Microsoft 365 Copilot” blog series by a Microsoft employee, Michael Kophs, curates latest resources and opportunities[7]. Industry sites like Redmond Channel Partner or Microsoft-centric YouTubers (e.g., Mike Tholfsen for education, or enterprise-focused channels) sometimes share Copilot tips. While not all third-party content is free, a lot is – such as conference sessions posted on YouTube. Take advantage of these to see how others are using Copilot.
Community Events: Microsoft often supports community-driven events (like Microsoft 365 Community Days) where sessions on Copilot are featured. These events are free or low-cost and occur in various regions (often virtually as well). You can find them via the CommunityDays website[8]. Attending one could give you live demos and the chance to ask experts questions.
♀️ Connect with the Community
You’re not alone in this journey. A community of users, MVPs, and Microsoft folks can provide help and inspiration:
Microsoft Tech Community Forums: We mentioned the Copilot for Small and Medium Business forum. If you have a question (“Is Copilot supposed to be able to do X?” or “Anyone having issues with Copilot in Excel this week?”), these forums are a good place. Often you’ll get an answer from people who experienced the same. Microsoft moderators also chime in with official guidance.
Social Media and Blogs: Following the hashtag #MicrosoftCopilot on LinkedIn or Twitter (now X) can show you posts where people share how they used Copilot. There are LinkedIn groups as well for Microsoft 365 users. Just be mindful to verify info – not every tip on social media is accurate, but you can pick up creative use cases.
User Groups/Meetups: If available in your area, join local Microsoft 365 or Office 365 user groups. Many have shifted online, so even if none are physically nearby, you could join say a [Country/Region] Microsoft 365 User Group online meeting. These groups frequently discuss new features like Copilot. Hearing others’ experiences, especially from different industries, can spark ideas for using Copilot in your own context.
Feedback to Microsoft: In Teams or Office apps, the Copilot interface may have a feedback button. Use it! If Copilot did something great or something weird, letting Microsoft know helps improve the product. During the preview phase, Microsoft reported that they adjusted Copilot’s responses and features heavily based on user feedback. For example, early users pointing out slow performance or errors in Excel led to performance tuning[1]. As an engaged user, your feedback is valuable and part of being in the community of adopters.
Expand Copilot’s Impact in Your Business
Think about how to further integrate Copilot into daily workflows:
Standard Operating Procedures (SOPs): Update some of your team’s SOPs to include Copilot. For example, an SOP for creating monthly reports might now say: “Use Copilot to generate the first draft of section 1 (market overview) using our sales data and then refine it.” Embedding it into processes will ensure its continued use.
Mentor Others: If you’ve become the resident Copilot expert, spread the knowledge. Perhaps run a short internal workshop or drop-in Q\&A for colleagues in other departments. Helping others unlock Copilot’s value not only benefits them but also reinforces your learning. It might also surface new applications you hadn’t thought of (someone in HR might show you how they use Copilot for policy writing, etc.).
Watch for New Use Cases: With new features like Copilot in OneNote and Loop (which were mentioned as included[1]), you’ll have even more areas to apply Copilot. OneNote Copilot could help summarize meeting notes or generate ideas in your notebooks. Loop Copilot might assist in brainstorming sessions. Stay curious and try Copilot whenever you encounter a task – you might be surprised where it can help.
Success Stories and Case Studies
We discussed one case (Joos). Keep an eye out for more case studies of Copilot in action. Microsoft often publishes success stories. Hearing how a similar-sized business successfully implemented Copilot can provide a blueprint for deeper adoption. It can also be something you share with leadership if you need to justify further investment (or simply to celebrate the productivity gains you’re experiencing!).
For example, case studies might show metrics like reduction in document preparation time by X%, or improved employee satisfaction. If your organization tracks usage and outcomes, you could even compile your own internal case study after a few months of Copilot use – demonstrating, say, that your sales team was able to handle 20% more leads because Copilot freed up their time from admin tasks.
Future-Proofing Your Skills
AI in productivity is here to stay and will keep evolving. By mastering Microsoft 365 Copilot, you’ve built a foundation that will be applicable to new AI features Microsoft rolls out. Perhaps in the future, Copilot becomes voice-activated, or integrates with entirely new apps (like Project or Dynamics 365). With your solid grounding, you’ll adapt quickly. Continue to:
Practice new features in a safe environment.
Educate new team members on not just how to use Copilot, but the mindset of working alongside AI.
Keep balancing efficiency with due diligence (the human judgment and creativity remain crucial).
✅ Stage 5 Outcomes: You have a plan to remain current and continue improving. You’re plugged into learning resources (like Copilot Academy, new courses, third-party content) and community dialogues. You know where to find help or inspiration outside of your organization. Essentially, you’ve future-proofed your Copilot skills – ensuring that as the tool grows, your expertise grows with it.
Conclusion
By following this roadmap, you’ve progressed from Copilot novice to confident user, and even an internal evangelist for AI-powered productivity. Let’s recap the journey:
Stage 1: You learned what Copilot is and got your first taste of it in action, setting up your environment for success.
Stage 2: You built fundamental skills in each core Office application with guided training and exercises.
Stage 3: You applied Copilot to practical small-business scenarios, seeing real benefits in saved time and enhanced output.
Stage 4: You honed your approach, learning to craft better prompts, handle any shortcomings, and use Copilot responsibly and effectively as a professional tool.
Stage 5: You set yourself on a path of continuous learning, staying connected with resources and communities to keep improving and adapting as Copilot evolves.
By now, using Copilot should feel more natural – it’s like a familiar coworker who helps draft content, crunch data, or prep meetings whenever you ask. Your investment in learning is paid back by the hours (and stress) saved on routine work and the boost in quality for your outputs. Small businesses need every edge to grow and serve customers; by mastering Microsoft 365 Copilot, you’ve gained a powerful new edge and skill set.
Remember, the ultimate goal of Copilot is not just to do things faster, but to free you and your team to focus on what matters most – be it strategic thinking, creativity, or building relationships. As one small business user put it, “Copilot gives us the power to fuel our productivity and creativity… helping us work big while staying small”[3][3]. We wish you the same success. Happy learning, and enjoy your Copilot-augmented journey toward greater productivity!
Managing SharePoint Online permissions is critical for secure and efficient collaboration, but it can be challenging – especially for small and medium businesses (SMBs). SharePoint’s permission system is powerful yet complex, with hierarchical inheritance and numerous sharing options[1]. Many administrators find themselves asking “Who has access to this, and why?” when permissions issues arise[1]. Common scenarios include users getting “Access Denied” errors or, conversely, sensitive content being accessible to unintended people due to misconfigured sharing[2][1]. This report provides an SMB-focused guide to troubleshoot permission issues, check and audit existing permissions, and structure permissions in a way that is easy to maintain. We’ll cover best practices (like using groups and inheritance wisely), recommendations for reviewing permissions, and step-by-step instructions for common permission management tasks.
Common SharePoint Permission Challenges: As highlighted above, typical permission issues include users being mistakenly left without access (or given too much access), confusion from broken inheritance, and limited visibility into current permission assignments. For example, breaking permissions on a folder or file for one person can snowball into many custom exceptions, resulting in an “unwieldy spiderweb” of unique permissions over time[1]. Similarly, overly permissive sharing links (like “Anyone with the link”) can lead to files being forwarded broadly without oversight[1]. SMBs often have lean IT teams, so keeping permissions simple and consistent is key. In the next sections, we’ll outline best practices to preempt these issues and keep your SharePoint Online permissions both secure and manageable.
Best Practices for SharePoint Online Permissions Management (SMB)
Adopting clear permission strategies will prevent many issues before they occur. Below are the top best practices to ensure an easy-to-maintain permission structure, tailored for SMB needs:
• Use Groups for Permissions, Not Individuals:“Granting permissions directly to individual users can make management overly complex over time.” Instead, assign permissions to SharePoint security groups or Microsoft 365 Groups, and then add users to those groups[3]. This centralizes management – you can change a group’s access in one step rather than updating many individual entries. For example, rather than giving 10 people each Edit rights on a site, put them in a “Site Members” group that has Edit permission. SharePoint comes with three default groups per site (Owners, Members, Visitors), which correspond to common role levels (Full Control, Edit, Read)[4]. For communication sites or classic sites, use these built-in groups for assigning access[5]. For team sites connected to Microsoft 365 (Office) Groups, manage access via the group’s membership (Owners and Members) to keep consistency across Teams, SharePoint, and other services[1]. Using groups makes it easier to audit who has access and ensures consistency across your site collections.
• Keep Permissions Inherited at Site Level Whenever Possible: The best practice is to manage security at the site level, not at the individual file or folder level[6]. In SharePoint, subsites, document libraries, and items by default inherit permissions from their parent site. Breaking this inheritance in many places leads to a confusing patchwork of permissions. It’s recommended to grant access at the highest level (site or library) that makes sense for your content[1]. Avoid creating unique per-item permissions unless absolutely necessary. If you must grant an exception (say, a confidential folder within a site), document it and periodically review it[3]. A simpler structure (e.g. whole site or whole library access) is much easier for a small team to maintain than dozens of item-specific rules.
• Leverage Default Roles and Group Memberships: Take advantage of SharePoint’s standard roles: Owners (Full Control), Members (Edit/contribute), and Visitors (Read)[7]. For most SMB scenarios, these cover the needed levels of access. In a Microsoft 365 Group-connected Team site, all group Owners automatically become site owners and group Members become site members[7]. Use that mechanism to manage who can access the site: adding someone to the M365 Group gives them site access, and removing them revokes it, which keeps SharePoint and Teams in sync[1]. For a communication site (which isn’t M365 group-connected), assign users to one of the three SharePoint groups via the Site Permissions panel[7]. Sticking to these default structures means you rarely need to define custom permission levels or unique groups, reducing complexity. Only if a set of users needs a very different level of access than the default groups provide should you create a new SharePoint group or custom role.
• Restrict and Monitor External Sharing: SMBs often collaborate with external clients or partners, but it’s important to control this carefully. Review your SharePoint external sharing settings at both the tenant and site level to match your security comfort level[3]. It’s usually best to avoid “Anyone with the link” sharing in favor of more restricted options. Use “Specific People” links when sharing documents with external users so that only intended individuals can use the link[3]. You can also set expiration dates on external sharing links (for example, 30 days) to prevent indefinite access[1]. In the SharePoint Admin Center, you can define the default sharing link type (e.g. internal only by default)[1]. For each site, consider disabling external sharing entirely if it contains sensitive data that should never leave the organization. Regularly audit external access: SharePoint provides an ability to review files or sites shared externally (for instance, via the “Shared with external users” report in site usage, or using PowerShell) – use these to keep tabs on what’s been shared outside.
• Follow the Principle of Least Privilege: Grant each user the minimum level of permission they need to do their job[6]. In practice, this means, for example, giving read-only access to users who only need to consume information, rather than edit access. Avoid the temptation to give everyone higher privileges “just in case” – unnecessary Full Control or Edit rights can lead to accidental changes or deletions[6]. Especially never put all users in the Owners group; Full Control allows deletion of the site or changing settings[6]. Instead, limit Full Control to a select few administrators. If the built-in roles don’t meet a specific need, you can create a custom permission level (for instance, a role that can edit but not delete items)[3]. SharePoint Online provides five main predefined levels (Full Control, Edit, Contribute, Read, and more) and supports defining custom levels[4]. It’s best to add new custom levels rather than modify the defaults, so you retain a known baseline[4]. In general, start with the lowest necessary access and only elevate if required.
• Review and Clean Up Permissions Regularly: Permissions tend to “drift” over time – people change roles or leave, and content gets reshuffled. Make it a routine to audit your SharePoint permissions on a schedule (e.g. quarterly or biannually)[3]. An admin or site owner should list who currently has access and verify it’s still appropriate. Remove users who no longer need access – for example, if a temporary contractor’s project ended, ensure their permissions (or guest account) are revoked[6]. Office 365’s audit log or third-party tools can help identify when users last accessed content, which is useful for clean-up. Some organizations use scripts or tools to generate permission reports (one example: a tool like DeliverPoint can report SharePoint access rights[3]) – SMBs might not need fancy software, but even a manual review of group memberships and shared links is valuable. Document any unusual permission setups (like if inheritance was broken deliberately) so that the context isn’t lost and can be revisited later[3]. Finally, train site owners or managers on these practices[3]. In an SMB, the person managing SharePoint might also wear other hats; investing a bit of time to understand permission concepts pays off by preventing mistakes.
By adhering to these best practices – using groups, simplifying inheritance, locking down external sharing, least-privilege assignments, and regular reviews – SMBs can maintain a secure yet flexible SharePoint environment that doesn’t require constant firefighting.
Checking and Auditing Existing Permissions
To troubleshoot or maintain SharePoint permissions, you first need to see what permissions are in place. SharePoint Online provides built-in ways to check who has access to sites, libraries, or even individual files/folders:
Site Permissions Page (Site-Level Overview): If you are a site owner, you can view the overall site permissions via Settings (gear icon) > Site Permissions. This will show the three default SharePoint groups (Owners, Members, Visitors) and who is in each group[7]. On modern team sites, it also shows the Microsoft 365 Group membership (Owners/Members). By expanding each group, you can review which users or AD security groups are members. This page also allows inviting new people and will add them to the selected group automatically (e.g. choosing “Read” adds them to Visitors)[7]. For a quick audit, list out the members of each group and ensure they are correct for the site’s purpose.
“Manage Access” Panel (File/Folder-Level Sharing): For individual files or folders, SharePoint’s Manage Access feature shows exactly who can access that item. To use it, navigate to the document library, select the file or folder, and click the “ Manage access” option (often found in the info/details pane or via the context menu). This panel has tabs for People, Groups, and Links[8]:
The Groups tab shows which SharePoint groups have access (and their permission level) inherited from the site. This tells you, for instance, that all members of “Site Members” group can edit the file[8].
The People tab lists any individuals who have unique access to that item (for example, directly shared via the Share dialog)[8].
The Links tab lists any share links that grant access (like anyone-with-link or specific-people links) and who has used those links[8]. This is a convenient way to audit sharing on a specific file/folder: you might discover that a file was shared with a guest external user or via a link open to your whole organization, and then take action to remove or tighten that if needed.
Check Permissions Tool (Effective Access for a User): SharePoint has a built-in “Check Permissions” feature that lets you input a user or group’s name and see what level of access they have and how they have it. To use this, go to the site’s Advanced permissions settings (from Site Permissions page, click the Advanced permissions link, which brings you to the classic permissions page). On that page, click the Check Permissions button, enter the user or group name, and click Check Now[8]. The result will show something like: “User X: has Contribute access via ” or “has access via sharing link”[8]. For example, it might say “Mary has Edit access to this item as a member of Site Members group.”[8] If the user has no access at all, it will show None[8]. This tool is extremely useful to troubleshoot – if a user says they can’t get into a site or file, run Check Permissions on them at the site (or item) to confirm if they are indeed missing permission and, if they do have permission, which group or link is granting it. (It might reveal that they do have access through a group, which means their issue might be elsewhere, like a sync/login problem, or they’re looking at the wrong location.)
Understanding “Limited Access” Entries: When reviewing site permissions, you might encounter a user listed with Limited Access. This status appears when a user has access to a specific item (like a single file or folder) but not to the parent site or library as a whole[5]. SharePoint gives them a behind-the-scenes limited access so they can reach the item. For instance, if you share one document to an external user, that user will show up with Limited Access at the site level. Limited Access by itself isn’t a full permission level — it’s a placeholder that allows the unique permission on the item to function. If you see many users with Limited Access, it’s a sign that there are lots of item-level shares; you might review those to ensure they’re all still needed. You can click “Show users” next to the limited access message to see which items are shared uniquely[5].
Audit Logs and Reports: Office 365 provides audit logging that can capture permission changes and access events. An admin (with appropriate roles) can search the Unified Audit Log for events like “Shared file, added user to group, removed user from site” etc. While this isn’t a real-time view of permissions, it’s useful for after-the-fact auditing or monitoring unusual changes. Additionally, in the SharePoint Admin Center, you can see external users and their access, and for each site, you can retrieve a report of what has been shared externally. For a broader insight, you might use PowerShell scripts (for example, using Get-SPOUser and Get-SPOSite cmdlets) to enumerate who has access to what on your sites[1]. SMBs with fewer sites might not need a full tenant-level report often, but if you suspect some sites have overly permissive settings, it might be worth running a script or using a third-party reporting tool to get a full picture[1].
Tip: It’s a good practice to periodically audit permissions on key sites. For each important site (like those with sensitive data), have the site owner or admin:
Review the members of Owners, Members, Visitors groups.
Check if any unique permissions exist on libraries or folders (Site Permissions > Advanced > look for any message about “some items have unique permissions”[5](https://support.microsoft.com/en-us/office/customize-permissions-for-a-sharepoint-list-or-library-02d770f3-59eb-4910-a608-5f84cc297782)).
Use Check Permissions for a couple of sample users (e.g., a regular team member, an external partner) to verify the setup is as expected.
Document any irregularities (e.g., “Folder X in Documents library is shared with external user Y with edit rights”) and decide if they are still necessary.
By proactively checking, you can catch issues like someone still having access after they left the company, or a confidential file that was accidentally shared too broadly. This reduces the chance of permission problems and also makes troubleshooting easier since the environment stays tidy.
Even with good practices, permission issues can occur. When a user reports a problem (like “I can’t access the site/folder” or “User X shouldn’t see Y document”), a systematic troubleshooting process helps identify and resolve the issue efficiently. Below is a step-by-step approach:
Gather Information from the User: Start by clearly identifying which site or content the user is trying to access and what error or outcome they are seeing. Are they getting an “Access Denied” message, or perhaps they can see a site but not a particular folder? Also note the user’s role (are they an internal employee, a guest, part of a specific department?). Understanding the scope of the issue (one file vs. entire site) will guide your investigation[2]. If the user sees an “Access Request” (they clicked a link and it let them send a request for access), that indicates they currently have no permission there at all.
Verify the Permissions Hierarchy: Check the permission inheritance and structure for the resource in question. Determine the nearest parent site or library that controls permissions. For example, if the issue is with a file, see if that library has unique permissions or inherits from the site. Ensure the user has access at each level: site -> library -> folder -> item[2]. If at any parent level the user is not included, that would cause a denial downstream. For instance, if a document library is set to only allow a “HR Team” group and the user isn’t in that group, the user will be denied for all files in that library. Use the Check Permissions tool on the site or library to see the user’s access (or lack thereof) as described earlier[8]. If the site itself denies the user, focus on fixing site-level membership; if the site is fine but a subfolder is unique, the issue is at that subfolder.
Examine Group Memberships: Most permissions in SharePoint come via group membership. Verify which groups the affected user belongs to. Compare that to which groups should have access. For example, if the site’s Members group has edit rights, confirm if the user is in that Members group. It’s possible the user was never added, or was removed. Conversely, if a user is seeing something they shouldn’t, check if they were accidentally added to a group that grants that access (e.g., their name might have been added to the Visitors group of a site they shouldn’t view). In an Office 365 Group-backed site, check the Office 365 Group membership list. In classic sites, check the user’s entry via Site Permissions > Check Permissions which will list groups[8]. If the user is missing from the expected group, that’s likely the cause of “no access.” Add them to the appropriate group (see the guide in the next section) and have them retry. On the other hand, if the user has unwanted access through a group, you’ll need to remove them from that group or adjust that group’s privileges (covered below under removal). Keep an eye out for group sync issues as well – if using AD security groups, ensure the user is in the right AD group; if there’s a delay in Azure AD syncing, the SharePoint site may not “see” their updated membership immediately[2].
Identify Unique or Broken Permissions: If group membership isn’t the issue, consider whether unique permissions are at play. Has someone broken inheritance on a particular subsite, library, or folder? These “permission break” points can cause inconsistencies. For example, maybe the user was added to the site, but a specific library was set to unique permissions and they weren’t included there – result: they can access the site homepage but get denied in that library. Navigate to the relevant library or folder and check its permissions (Settings > Library Settings > Permissions for this library). If you see a message “This library has unique permissions” or users listed directly, then inheritance was broken. Review those unique permissions: is the user (or a group they belong to) present? If not, that’s the gap[2]. You can choose to add the user/group there or possibly re-inherit permissions if the unique setup was not needed (restoring inheritance will make it match the parent site’s permissions again). Conversely, if troubleshooting someone seeing too much, look for unique grants that might have given broader access than intended (for instance, a folder shared with “Everyone”). Unique permission configurations should be carefully audited here.
Check for Deny or Policy Settings: SharePoint allows explicit deny permissions or other advanced policies, though these are less common in SharePoint Online (more typical in on-premises). If someone set up a permission policy that denies certain groups, it could override other permissions and cause unexpected access issues[2]. For example, if a “Deny Edit” permission was applied to a user on a particular list, that user cannot edit even if a group says they should. In Office 365, explicit denies would usually come from things like Information Rights Management or conditional access policies rather than SharePoint’s UI. It’s rare in an SMB scenario, but if all else fails, verify that there are no special deny entries (the classic permission page would show a red cross icon if a deny is in effect). Also, check site-level settings such as site collection read-only locks or missing licenses for the user – but those are edge cases. Typically, a straightforward SharePoint Online site won’t have deny rules set unless an admin specifically added one via advanced settings or code.
Review External Sharing Settings (if applicable): If the user in question is an external guest who can’t access something, the issue might be the site’s external sharing setting. Each site (especially new-style sites) can allow or disallow guest access. If a site disallows externals and you try to share with a guest, they’ll be unable to enter even if they got an invite. Similarly, if a guest can access the site but not open a document, it could be that the document is using a sharing link type they can’t use (like “Organization only” link, which guests can’t open). Ensure the site’s sharing setting is at least as permissive as needed (e.g., set to allow existing guests or new guests as appropriate). For internal users, also consider if the content is in a site they have never been given access to – maybe the user assumed they should have access but the site owner hasn’t shared it with them yet (communication gap). In such a case, the solution is simply to grant them access following governance procedures.
Use the Tools to Pinpoint the Issue: At this stage, leverage the tools described in the previous section:
Run Check Permissions for the user on the site and on the specific item (if it’s a single file/folder issue). This will explicitly tell you if the user has any access and through what means[8].
Look at the Manage Access panel on the item in question to see if perhaps a sharing link was expected but not in place, or if the user was mistakenly removed.
Check if the user appears in the Site Members or Visitors list. If not, that’s the red flag. These tools often pinpoint the exact cause (e.g., “None” in Check Permissions means the user needs to be added somewhere).
Apply the Fix – Adjust Permissions: Once you’ve identified the likely cause, fix the permissions configuration:
If the user was not in the appropriate group, add them to the site’s Members/Visitors (or relevant) group to grant access (or if inappropriate access, remove them from a group).
If inheritance was broken and the user needs access there, either add the user (or a group they are in) to the unique permissions on that library/folder or if the unique setup is unnecessary or overly complicated, restore inheritance to simplify and then add the user via the normal group.
If a sharing link was too permissive (e.g., “Anyone” link causing unintended access), consider disabling that link and using a tighter one.
If the user’s access is through a link and they need permanent access, a better fix is to formally add them to the site or relevant group instead of relying on a link.
In any case, aim to resolve by aligning with best practices (for example, if you find a user was given direct permissions, you might move them into a group for cleaner future management). While making changes, be mindful of the interface limitations: If you try to edit a user’s permissions on an item and see the option is greyed out, it’s likely because that item currently inherits permissions – you’d need to break inheritance first to individually modify or remove a user[9]. Similarly, if the site is group-connected, you typically manage members via the M365 group rather than the SharePoint UI (the UI will prompt you accordingly).
Test and Confirm Resolution: After making permission changes, verify that the issue is resolved. Have the user try accessing the resource again. If possible, test it yourself by logging in as a test account with similar permissions. Note that permission changes might not take effect instantaneously on the user’s end due to caching[10]. SharePoint Online’s interface can sometimes take a few minutes to reflect new access (for example, a user added to a group might need to sign out and back in, or close their browser, to pick up the new token)[10][9]. If the user still cannot access after being added, have them clear their browser cache or try an incognito window/different browser[9] – this often bypasses any cached credentials and forces a fresh permissions check. Likewise, if you removed someone’s access, double-check they truly can’t get in (you might use the Check Permissions tool again for their name to confirm it now shows “None”). In case the user still has access after removal, it means they still belong to a group granting it or a link is still active – re-check group memberships and sharing links for any you might have missed[9].
Document and Prevent Future Issues: Once resolved, take note of what the issue was and how it was fixed. Was it a process mistake (user never added to the site) that you can address by improving your onboarding checklist? Or was it a rare scenario of someone needing access outside of normal groups (maybe consider creating a new group if that’s a recurring need)? Document any permission changes you made, especially if you had to create new unique permissions or groups, so that this knowledge isn’t lost[2]. Keep an eye on the situation to ensure the fix sticks – for example, if the problem was due to a broken inheritance that you decided to remove (restore inheritance), make sure site owners don’t break it again without a good reason. If multiple similar issues arise, it might point to a need for user training or revisiting your permission architecture (see best practices above). For SMBs, a brief guide to site owners on how to manage access (and the importance of using the correct groups) can greatly reduce permission mishaps.
If you follow this systematic approach, most permission issues can be identified and resolved logically. It boils down to finding where the permission break is – at what level is the user’s access cutoff or opened – and then correcting it in line with your governance. Often, the fix is simply adding the user to the right place or removing an unintended permission. By carefully checking each layer and using SharePoint’s tools (Manage Access, Check Permissions), you remove the guesswork and zero in on the cause of the issue.
Step-by-Step Guide: Common Permission Management Tasks
In this section, we provide concise, step-by-step instructions for key tasks to manage SharePoint Online permissions. These tasks will help implement the best practices and fixes discussed above, and are geared toward administrators or site owners in SMB environments.
Checking a User’s Permissions on a Site or Item
To troubleshoot or audit, you often need to confirm what access a particular user has.
To check a user’s permissions on a SharePoint site:
Navigate to Site Permissions: Go to the site in question. Click the Settings (gear) icon in the top right, then choose Site permissions. In the site permissions pane, click Advanced permissions settings (this opens the classic permissions page for the site).
Use “Check Permissions”: On the Ribbon of the classic permissions page, click Check Permissions. In the dialog, enter the user’s name or email and click Check Now[8].
Review Effective Access: The result will show what permissions that user has on the site and through which group or mechanism[8]. For example, it might say the user “has Read access via group” or “None” if they have no access[8]. It may list multiple entries if the user has access via different paths (e.g., via a group and via a sharing link).
To check a user’s permissions on a specific file or folder:
Navigate to the library where the item resides and locate the file or folder.
Click the “…” (ellipses) or select the item and open the Details/Information pane (often an “i” icon). In the details pane, find the Manage Access section[10].
In Manage Access, click Advanced (usually an option if you scroll the Manage Access dialog/pane)[10]. This will take you to the item’s permission page (which looks similar to a site’s permission page).
On the item’s permission page, click Check Permissions and enter the user’s name, then Check Now[10].
Read the effective permissions as in the site case. This will tell you if the user has access to that item and if so, by what means (group, or direct share, etc.)[8].
Alternatively, on modern SharePoint, there’s a quicker way: in the Manage Access panel itself, you can use the search box “Enter a name or email” under the People section – typing a user’s name there will show if they have access and at what level (this effectively surfaces similar info).
Using these steps, you can quickly verify “does user X have access here, and how?” which is fundamental for deciding any permission changes.
Granting a User Access to a Site
When a new team member or an existing user needs access to a SharePoint site (or you discover someone lacks access during troubleshooting), the recommended method is to add them to an appropriate group for the site rather than granting individual rights.
For a Communication Site or classic SharePoint site (no Microsoft 365 group):
Go to the site and click the Settings (gear) icon > Site permissions.
Click Invite people (in modern UI) or Share site. Enter the user’s name or email.[7]
Select permission level: Choose the level of access – options typically are Full Control, Edit, or Read. (In modern Share dialog, these map to adding the user to Owners, Members, or Visitors groups respectively[7].) For example, choose Read to give view-only access (this will add the user to the Visitors group automatically).
(Optional) Uncheck the box to notify by email if you don’t want to send an email invitation (you might do this if you’ve already communicated access to the person).
Click Add or Share. The user will be added to the site’s permission group at the level specified[7]. They can now access the site according to that group’s rights.
Under the hood, this process is adding the user into one of the site’s SharePoint groups. You can verify by expanding the group list on the Site permissions page – the user’s name will appear under Owners, Members, or Visitors depending on what you chose[7].
For a Team Site connected to a Microsoft 365 Group (e.g., created via Teams or Office 365):\ In this case, the preferred method is to manage membership through the Microsoft 365 Group:
Open the site (or the associated Team in Microsoft Teams). On the SharePoint site, you may see a “Members” link or icon in the top right corner (it might show the current members’ icons). Click Members (or alternately, in Teams, go to the team’s Manage team > Members).
Click Add members. In SharePoint’s interface, this might prompt a panel to add members to the Microsoft 365 Group[7][7].
Enter the person’s name/email. Choose whether to add them as a Member (default, which gives edit rights on the site) or an Owner (which is like site admin)[7].
Click Save or Add. This action adds the user to the Microsoft 365 Group, which in turn grants them access to the SharePoint site (and other connected services like the Team, Planner, etc.)[7].
Because Microsoft 365 group sites don’t have a Visitors role via the group, if you need to give someone read-only access without making them a full member, you have two options:
Option 1: Temporarily treat the site like a standalone site and use Site permissions > Grant Access (as per communication site steps) to directly add the user with Read. This will add them to the Visitors group of the site without adding to the M365 group (SharePoint Maven calls this “Option 3” – sharing the site only)[7].
Option 2: Create a separate communication site for read-only audiences if applicable. Most SMBs just add needed users as members even for read, or use the first option for ad-hoc read access.
After adding a user, they should receive an email notification (if you kept that option checked) and can access the site by navigating to its URL. Always ensure you add users to the correct site (it’s a common mistake to add someone to a similarly named site or group by accident).
Creating and Using Permission Groups
While default groups suffice in many cases, sometimes you’ll want a custom SharePoint group – for example, a “Project Alpha Members” group for a subset of people who need access to only one library. Creating a SharePoint group allows you to re-use that group on various parts of the site or even across sites (if you assign it permissions).
To create a new SharePoint security group on a site:
Go to Site permissions > Advanced permissions settings (classic permissions page).
Click Create Group (usually in the Ribbon or near the top of the groups list).
On the Create Group page, enter a Name for the group (e.g., “Project Alpha Members”). You can add a description if desired.
Set the Group Owner (by default, the person creating it or site owners can be owners of the group).
Choose group settings: e.g., who can view or edit the membership (usually keep default so only owners can edit membership).
Assign a Permission Level to this group for the site. You’ll see a list of permission levels (Full Control, Edit, Contribute, Read, etc.). Select the appropriate level that this group should have on the site. For instance, if this group is meant to edit content, choose Edit; if read-only, choose Read.
Click Create.
This will create the group and automatically grant it whatever permission level you chose on the site. Initially the group is empty, so next:
Add users to the group: After creating, you’ll be taken to the group’s page (or you can access any group by clicking on it from the Advanced permissions page). Use the New > Add Users button (in classic interface) or “Add members” in modern interfaces to add people to this group. Enter the names/emails of users (or even other AD groups) to include, and confirm. Now those users are members of the new group.
You can use the new group to grant permissions elsewhere if needed. For example, you could break permission on a particular library and assign your new group Access just to that library (giving that group maybe higher or lower rights there as needed). This approach is cleaner than adding each of those individuals one by one to the library.
SMB Tip: Avoid proliferation of too many custom groups on a small tenant – stick to a clear naming convention and only create a group if you know you’ll manage it separately from existing ones. Each site’s groups are local to that site (unless you explicitly use the same named AD security group). So, “Project Alpha Members” group on Site A won’t automatically grant anything on Site B unless you also add it there. For cross-site consistency, you might use an Azure AD Security Group added into SharePoint groups, but that requires Azure AD management. Many SMBs find a few well-chosen SharePoint groups per site strikes the right balance.
Modifying Permissions for a Library or List (Breaking Inheritance)
Sometimes you want a specific document library or list within a site to have different permissions than the rest of the site. For example, in a team site, you might have a library that only managers should see. This requires breaking permission inheritance and then setting unique permissions on that library.
To set unique permissions on a document library (or list):
Navigate to the library (or list) on the site. Click the Settings (gear) icon > Library settings (or List settings for a list)[5]. In modern UI, you might need to click Settings > Site contents > … > Settings gear on the library.
On the Library Settings page, under Permissions and Management, click Permissions for this document library (or similar for list)[5]. You’ll see the library’s permission page, which by default will state it inherits from the parent (site).
Click Stop Inheriting Permissions (on the Ribbon “Permissions” tab). Confirm the prompt. Now the library’s permissions are independent from the site[5].
Immediately after breaking inheritance, the library will have a copy of the parent site’s permissions (everyone who had access to the site still has it here, but now you can change it). Adjust the permissions as needed:
Remove any groups or users that should not have access to this library. For example, if you want to restrict it from regular members, you might remove the “Site Members” group from the library’s permissions.
Grant access to specific group or users that need access if they aren’t already listed. For example, if this library is for managers, you might have a “Managers” group – click Grant Permissions, enter “Managers” group, and assign (perhaps Edit or Read as appropriate).
You can also change permission levels for a group on this library. For instance, maybe on the site “Members” have Edit, but on this library you want members to only have Read – you can edit the “Site Members” group entry here and lower it to Read.
Click OK/Save if necessary for any dialogs. The library now has a tailored permission set. Only the groups/users listed on its permission page have access; it no longer automatically includes everyone from the parent site.
To restore inheritance: If later you decide this unique permission setup is too much to manage, you can reverse it by going back to the library’s Permissions page and clicking Delete unique permissions / Inherit Permissions (the button may say “Delete unique permissions”, which essentially means “restore inheritance”). This will wipe out the custom settings on that library and re-inherit from the parent site’s current permissions[3]. Use this carefully – if you had very specific grants, you will lose them. It’s wise to document or screenshot the custom permissions before inheriting in case you need to reference what was there.
Note: Avoid breaking permissions at too granular a level (like individual items) frequently, as noted earlier. If you do break inheritance at a subfolder or item level, the steps are similar: go to that folder’s manage permissions and stop inheritance, then adjust. But manage such exceptions sparingly.
Removing or Revoking User Access
When someone should no longer have access to a site or content (e.g., they changed teams or left the organization), you’ll want to remove their permissions.
To remove a user from a site:
If the user was given access via a SharePoint Group: Remove them from that group. Go to Site permissions > Advanced, click the group name (e.g., Site Members), select the user, and choose Remove User from group. This revokes their access that was via that group.
If the user was given direct permissions (uncommon in SMB best practice, but possible via the Share dialog or someone adding them explicitly): Go to Site permissions > Advanced. If you see the user’s name listed individually with a permission level, check the box next to their name and click Remove User Permissions. In modern UI, the site permissions pane might list “Guests or individual people” if any – you can remove them there as well.
If the site is an M365 Group site: remove the user from the Microsoft 365 Group (via Outlook, Azure AD, or the Members panel). Once they’re no longer a member, they lose access to the site automatically.
To remove a user’s access to a shared file or folder:
Use the Manage Access panel on that item. Under the People section, if the user is listed with access, click the dropdown by their name and select Stop Sharing or Remove[8]. If their access was via a link you gave them, you might instead disable that link in the Links section.
If you had broken inheritance on a folder and added a user directly, you’d remove them on the folder’s permission page similar to above (select and remove).
After removal, the user might still show up with Limited Access on the site (due to sharing history) until all their direct links are removed. The key verification is using Check Permissions for that user – it should now show “None” for the site or item[8]. If it still shows access, it means they have it through some other route (perhaps another group). For example, an employee who moved departments should be removed not only from the site’s Members group, but also from any other groups (maybe a custom group) on that site or others that still grant access[9].
External Users: Removing an external user’s access can be done by removing them from the site’s guests (same as removing from groups or direct as above). Additionally, you might want to delete their guest account from your tenant if they no longer should have any access. This is done in the Microsoft 365 Admin Center (Azure Active Directory). However, simply removing them from SharePoint permissions will suffice for that site/library.
Always double-check by attempting to access as that user or using Check Permissions to ensure the removal is effective.
Customizing Permission Levels (Advanced)
SharePoint provides a set of default permission levels (Full Control, Edit, Contribute, Read, etc.) which cover most needs[4]. In some cases, you might require a custom level – for instance, a “Review” role that can edit content but not delete, or a “Contribute without delete” role. This is advanced and should be done sparingly (and only by experienced admins) because overly granular roles can confuse management. But here’s how to do it:
To create a custom permission level on a site:
Go to Site permissions > Advanced permissions settings. In the Ribbon, click Permission Levels[4].
You will see a list of existing permission levels. It’s best not to modify the built-in ones; instead click Add a Permission Level (or you can copy an existing level to start from its settings).
Give the new permission level a Name and description.
In the list of granular permissions (a long list of checkboxes like List Permissions, Site Permissions, Personal Permissions etc.), check the actions that you want to allow for this level. For example, to create “Edit without delete”, you might start with Edit and then uncheck “Delete Items” and “Delete Versions”.
Scroll to bottom and click Create (or Save).
Now you have a new permission level available on this site. You can assign it to users or (better) to groups via the usual permission assignment dialog. For instance, you could create a group, and when granting that group permission, choose your new custom level from the drop-down instead of the standard ones.
Note: Custom levels are scoped to the site collection. And remember the advice: only create custom levels if default ones don’t align with your needs, and do not edit or delete the default levels[4][3]. For SMB scenarios, custom roles aren’t often needed unless you have a very specific workflow (because they increase complexity). But the option is there.
Monitoring and Auditing Permissions Over Time
Managing permissions is not a one-and-done task. You should monitor changes and review access regularly to ensure the permission structure remains healthy:
Use Audit Logs: As mentioned, enable and utilize Office 365’s Unified Audit Log. Search for activities like “Added member to SharePoint group”, “Shared file externally”, “Site permission modified” etc. This helps you keep track of who is changing permissions or sharing content. For example, if an owner on one site keeps breaking inheritance or adding individuals, you might need to coach them on best practices.
Schedule Reviews: Set periodic reminders (perhaps every 6 months) to review each site’s permissions, especially for critical sites. Have site owners confirm the current membership of their groups is still valid. This can catch things like stale accounts or overly broad access. Microsoft’s recommendation and real-world best practice is to conduct regular permission reviews[3][1].
External Access Report: On the SharePoint Admin Center, you can get a report of files shared with external users. SMBs can use this to make sure ex-employees or old partners don’t retain access. Similarly, checking the list of guest users in your tenant periodically and validating if those accounts are still needed is wise.
Adhere to Governance Policies: If your organization has a security policy (even if informal), align your permission reviews with that. For instance, if policy says “Remove access immediately when someone leaves”, ensure your offboarding IT checklist includes removing from SharePoint groups. If policy says “client data sites must not be shared externally”, use the admin settings to enforce external sharing off on those sites.
Tools for Insight: If built-in capabilities aren’t enough, there are third-party tools (like Orchestry, ShareGate, etc.) that provide dashboards of SharePoint permissions and can alert you to issues. These can be overkill for some SMBs, but they highlight that the biggest challenge is often visibility – make sure you at least document your sites and who the primary owners are, so nothing falls through the cracks[1]. You can also maintain a simple spreadsheet inventory of sites with columns for Owners, Members, any special access, external sharing enabled, last review date, etc. This manual step can greatly help in tracking the state of permissions.
By continuously monitoring in these ways, you’ll catch and fix issues proactively. That means fewer surprise “I can see something I shouldn’t” or “I can’t get to my file” support tickets.
Conclusion
SharePoint Online permissions management for SMBs doesn’t have to be overwhelming. By understanding the common pitfalls (like too many unique permissions or oversharing) and following best practices (like group-based assignments and least privilege), you can set up a permission structure that is both secure and maintainable. Always start by planning your permissions at the site level – decide who should be owners, members, visitors – and try to keep to that model. Use the built-in tools to check and audit permissions, so you always know “who has access.” And when issues do arise, approach them methodically: verify the user’s access at each level, adjust group membership or inheritance as needed, and document the changes.
With regular reviews and a bit of training for those who manage sites, your SharePoint Online environment will stay clean and under control. In an SMB setting, resources are limited, but the steps outlined (which leverage mostly out-of-the-box features) are usually sufficient to handle permissions without needing expensive solutions. Stick to the fundamentals – clear structure, careful granting, and consistent reviews – and you’ll mitigate most permission problems before they impact your users[3][3]. This ensures that your team can collaborate efficiently on SharePoint, with the right people accessing the right content.
By implementing these best practices and using the step-by-step guidance, you’ll be well-equipped to troubleshoot permission issues and manage SharePoint Online permissions like a pro, keeping your SMB’s data both accessible and secure. [3][1]