I’m a low-volume mobile app user and prefer accessing corporate data on a large screen with a full-size keyboard. I install apps on my device very selectively, keeping them to a minimum. My limited use of mobile apps is primarily due to ergonomics—less is definitely more for me.
To see what I was using at the beginning of last year check out the article:
Lastpass password manager and authenticator for general password management. I spilt my authentications across multiple app to provide some way to minimise a single point of login failure issue.
Microsoft Authenticator – I use this for a number of select web sites as well as Microsoft 365.
I have Microsoft Defender protecting all my devices with Global Secure Access enabled full time.
Car Play – Connects to my daily drive to provide the ability to listen to podcasts as well as use Waze for navigation.
OneNote – is a must on every device I own. Syncs all my notes to every device. Allows me to not only truly have my information everywhere I am but also capture information quickly and easily.
OneDrive – This mobile app now not only allows me to manage my Microsoft 365 files but it also incorporates the more advanced Office Lens technology that scans and uploads, documents, whiteboards, etc.
Tripview – One of the few apps that I have happily paid for. I use this to let me know the Sydney train schedule to help me get around when I need to negotiate the ‘real world’. Although not much travel is happening at the moment, this app is super handy for negotiating local public transport.
Qantas – Given the amount of interstate travel I generally do having all my business flight information is handy. It also has my boarding pass so I can remove the need for paper.
Audible – This app allows me to listen to my audio books where ever I am.
Amazon Kindle – If I don’t have access to my Kindle then I can still read my books. In my case that will most likely be on my iPad. I also use the Kindle app on the iPad when the ebook has a lot of images that sometime don’t display well or are too small for the Kindle device.
Of course I have all the social media apps, such as X, and Linkedin on my devices, although I will say that I’m not a big users of these apps at all. They are used occasionally but I really limit my usage of these apps which I find very distracting.
I’ve been trying to understand Instagram in a business context so that app is now on my phone. I still struggle to see the point or how to use this effectively for my business. I’m going to keep trying but I honestly find Instagram such a distraction and of little business value but I do appreciate that I am the minority.
I also have all the Microsoft/Office 365 apps. The ones I use the most are probably To-Do, Outlook, SharePoint, OneDrive, and Teams, although Word and Excel also get used regularly. Just about every Microsoft Office 365 service has an app that you should have on your mobile device. I also have the Brave browser on my devices as I no longer use Chrome at all.
I have most AI services on my phone with Microsoft 365 Copilot being the main one I use. I prefer to use the desktop with AI services so I can copy and paste the results into OneNote say. I don’t spend much time ‘talking/dictating’ to AI services but will use them in the car to carry on a conversation if needed.
I’ve also added the Intune app to all my devices so they can be better managed.
I use the Signal messaging app for private conversations and groups that I am part of.
Some occasional ones I use include:
– Uber
– Amazon music
I use the normal personal apps for things like Internet banking, fitness, payments and so on.
One my iPad, which also serves as a personal entertainment device, I have the streaming services Youtube, Netflix and Amazon Prime Video. I also try apps regularly just to see what they do and whether they can benefit me. However, most don’t and summarily removed.
I will generally also update the apps on my mobile devices manually, so if there issues for some reason I know what has happened recently.
The above are my used apps across my various mobile devices. My aim to try and keep the apps standard across all the devices and as few as possible. I try and standardise on the Microsoft apps on all platforms and use these as much as possible. I certainly use a wide variety of apps on my devices by prefer the desktop versions if available.
Workforce Development Program for SMB Clients (Step 7 Outcomes)
Step Seven of the MSP priorities (“Investing in Workforce Development and Talent”) emphasizes building a skilled, engaged, and loyal workforce. The following is a step-by-step implementation program for MSPs to help their SMB clients achieve these outcomes using Microsoft 365 Business Premium. It is organized into phased actions with clear timelines, assigned roles, and measurable outcomes, leveraging tools like Viva Learning, Teams, SharePoint, Intune, Defender, and Entra ID.
Program Phases Overview
Below, each phase is detailed with specific steps, responsible roles, and expected outcomes:
Phase 1: Assess & Plan (Weeks 1–2)
Objective: Establish a clear workforce development strategy aligned with business goals.
Secure Executive Buy-in: The MSP works with the client’s leadership (e.g. CEO or Principal) to designate an Executive Sponsor who will champion the talent program. This sponsor should communicate the high-level vision and commit resources, signaling to all employees that this initiative is a priority. A visible executive sponsor greatly increases success of the transformation.
Identify Stakeholders & Roles: Form a joint working group including the MSP project lead and key client stakeholders:
Success Owner (client’s HR manager or operations lead) – to ensure the program meets business goals and employees actually use the new tools.
IT Lead (either the MSP or client’s IT admin) – to oversee technical setup of M365 features.
Team Champions – identify a few tech-savvy, enthusiastic employees who can act as champions in each department. Champions will help evangelize new tools and assist peers in learning (peer coaching), creating grassroots support.
(See Roles & Responsibilities table below for a summary of all key roles.)
Assess Skills & Needs: Conduct a quick skills gap analysis. The MSP can survey or interview managers to pinpoint critical skill gaps or training needs in the client’s workforce (e.g. cloud skills, cybersecurity awareness, productivity tool usage). Identify relevant competencies needed for the business to grow. For example, if the client plans to adopt new cloud software, ensure employees will be trained on it.
Define Program Goals & KPIs: Set measurable outcomes to target. For instance: “Improve employee satisfaction with training resources (measured via survey) by 30%”, “Achieve 100% completion of cybersecurity basics training”, or “Reduce staff turnover rate from 15% to 10% within a year”. Establish baseline metrics (e.g. current turnover, current skill certification levels, etc.) so progress can be measured later. Also determine technical KPIs like Teams usage, Viva Learning engagement (course completion rates), and so on, which will be tracked in Phase 4.
Plan the Curriculum & Schedule: Based on identified needs, outline the learning curriculum. Decide on a blend of self-paced learning (leveraging Viva Learning and LinkedIn Learning content) and live training sessions (e.g. monthly Teams workshops or lunch-and-learns). Schedule an official program kickoff event in Phase 3 and tentative dates for key training modules. Keep the initial program scope manageable (e.g. a 3-month push) with the option to extend. Ensure to build in time for employees to learn – e.g. allocate a few hours per week as “learning time.”
Communication Strategy: Plan how to announce and promote the program to all staff. Utilize the executive sponsor for an announcement email or Teams post explaining “what’s in it for me” for employees. Create a simple message that investing in skills will benefit both the employees’ careers and the company. Generating excitement early will drive participation. (We will execute the communications in Phase 3.)
Deliverables (Phase 1): A brief Workforce Development plan document outlining the program goals, phases, and schedule; a list of identified participants in key roles (sponsor, success owner, champions); and baseline metrics recorded for future comparison.
Stakeholder Roles & Responsibilities:
Phase 2: Prepare M365 Environment (Weeks 3–4)
Objective: Set up the technical infrastructure and content needed to support the development program. Leverage Microsoft 365 Business Premium features to create a learning-friendly, secure environment.
Enable Viva Learning: As the central hub for learning, Viva Learning will be used to distribute and track training content. The MSP ensures Viva Learning is activated in Teams for all users (it’s included in M365 and can be pinned in the Teams sidebar). Configure Viva Learning’s content sources:
Connect to Microsoft 365 Training and Microsoft Learn (free, included content) so users can access MS’s own tutorials. [talentedla…esclub.com]
If the client has licenses or subscriptions, integrate LinkedIn Learning or other LMS content libraries for a richer course catalog (optional).
Upload or link any internal training materials the client already has (for example, an onboarding PDF or process videos stored on SharePoint) into Viva Learning’s central repository. This way, employees will find all learning resources in one place within Teams. [talentedla…esclub.com]
Outcome: Employees get a “one-stop shop” for training content within their daily workspace, greatly reducing friction to engage in learning. [talentedla…esclub.com], [talentedla…esclub.com]
Set Up SharePoint Training Portal: The MSP creates a simple SharePoint intranet site or uses an existing one for training and knowledge sharing. This site will serve as a home for program information – e.g. an FAQ about the program, a calendar of training events, links to helpful resources (like the company’s process docs or Microsoft’s support articles). This ensures even those who may not use Viva Learning immediately have a place to find training info via the intranet. The SharePoint site can also host discussion pages or a Q\&A list if needed. (Note: Viva Connections could be used to surface this SharePoint portal in Teams for convenience, if time permits.)
Deploy Microsoft Teams Channels: Leverage Teams for communication and collaboration around learning:
Create a dedicated “Learning & Development” Teams channel (or Team) for the client. This will be used to post announcements, schedules, and allow employees to discuss training topics. For example, after a webinar, participants can continue the conversation in this channel.
Ensure Teams is rolled out to all users on all their devices. Since Teams is already part of M365, verify everyone has access and is in the necessary Teams/Channels. If some staff aren’t actively using Teams yet, consider a brief orientation for them because all program events will rely on Teams (meetings, chat).
Within Teams, integrate Viva Learning app – so users can find and share courses directly in chat. Encourage a culture where employees share interesting learning content with each other via Teams (Viva Learning allows sharing courses in Teams chats/posts) to make learning social.
Intune – Device and App Readiness: If not already in place, use Microsoft Intune (Endpoint Manager) to ensure all employee devices are ready for a modern, remote-friendly work environment:
Enroll company PCs/mobile devices into Intune for management. This allows pushing required apps (Teams, Office, etc.) and settings.
Deploy the Company Portal app which can list available business apps and resources – include links or apps for learning resources if applicable.
Ensure Teams, OneDrive, and Office apps are installed and updated on all devices. Intune can push updates or new apps if someone is missing them.
Configure device settings that support productive learning: for example, enable Windows 10/11 “Work Accounts” or single sign-on so that employees can easily access SharePoint and Teams without login hassles.
Bottom line: Intune helps guarantee every user—whether in office or remote—has a secure device with the needed software to participate in online training.
Security Baseline with Entra ID & Defender: A safe learning environment is crucial. Configure Azure AD (Entra ID) and Defender security features included in Business Premium to protect users as they engage in new online tools:
Enforce Multi-Factor Authentication (MFA) for all user logins (via Entra ID). This protects identities as more services (Teams, SharePoint) are accessed from potentially anywhere. It’s a quick win to dramatically improve security and is part of Business Premium’s Entra ID P1 features.
Set up Conditional Access policies if needed – e.g. require devices to be compliant (Intune-managed) to access sensitive SharePoint content. This ensures only secure, managed devices are used for work, reducing risk.
Defender for Office 365: Turn on anti-phishing, anti-malware, and Safe Links/Safe Attachments for email and Teams. Users will be safer from cyber threats during their day-to-day work and training. (If available, use Attack Simulation Training to periodically send test phishing emails and auto-enroll those who fall for it into a quick remedial training. This feature might require an upgrade, but it’s worth considering to directly tie Defender security into workforce education.)
Defender for Endpoint: If the client’s devices are Windows 10/11, ensure Defender antivirus is active and reporting to the portal. Set up baseline endpoint protection policies via Intune (e.g. requiring disk encryption, firewall on). These measures protect the devices used for learning and work, reducing the chance of disruptions (like malware outbreaks).\ By deploying these protections, the MSP also sets the stage to teach employees about security best practices in Phase 3. Tools like MFA and threat detection not only secure the environment but can be referenced in security training modules (e.g. “we have enabled MFA – here’s why it’s important”). Note that making security seamless is part of enabling flexible work – it addresses the challenge of maintaining data safety when people learn and work from anywhere. [whatjobs.com]
Content Curation: Before launch, load up the initial content into Viva Learning and SharePoint:
For example, identify 5–10 priority learning modules relevant to the client’s business. An MSP might include “Microsoft 365 Fundamentals” training for all staff, a specific course like “Teams Tips and Tricks for Daily Productivity,” and a mandatory “Security Awareness 101” training. Mark these as “featured” content in Viva Learning or list them on the SharePoint portal.
Ensure each piece of content has an assigned owner who will track completion (this could be automated via Viva Learning reports if available, or manually by the Success Owner tracking who finishes what).
Test access: have a few pilot users (like the champions) log into Teams, open Viva Learning, and access the SharePoint site to verify everything is accessible and content displays properly.
Deliverables (Phase 2): Microsoft 365 environment configured for learning:
Viva Learning deployed with curated content and integrations.
Security policies active (MFA, threat protection).\ The end of Phase 2 should provide a “sandbox” ready for users to start their learning journey safely and easily.
Phase 3: Launch Training & Drive Adoption (Month 2–3)
Objective: Roll out the workforce development program to employees, maximize engagement, and achieve quick wins in upskilling and engagement. This phase is about execution – delivering the training and fostering a learning culture using M365 tools.
Kickoff Event (Week 5): Host a program kickoff meeting with all employees. This can be a live town-hall style meeting on Microsoft Teams led by the executive sponsor. In the kickoff, announce the goals (e.g. “Our goal is to invest in each of you – by helping you grow your skills for the future. Here’s how we’ll do it…”). Demonstrate how to access Viva Learning in Teams and the SharePoint portal. Emphasize leadership’s commitment: e.g. the sponsor might say “We expect everyone to spend a few hours each month on learning – and we fully support that time.” This leadership messaging is critical to set the tone. Encourage questions and excitement. (If scheduling allows, consider bringing in a guest speaker or an MSP expert to briefly talk about the importance of continuous learning in tech.) The kickoff should leave employees motivated and clear on how to get started.
Deploy Training Modules: Immediately after kickoff, launch the first set of training modules:
Assign all employees an “Onboarding to Viva Learning” tutorial (so they learn how to use the tool itself). Microsoft provides a quick guide which can be shared. This ensures no one is lost on the platform.
Assign or invite employees to the initial learning courses chosen in Phase 2. For example, everyone might be assigned “M365 Basics” and “Cybersecurity Basics” courses via Viva Learning. The MSP or Success Owner can use Viva Learning’s assignment/recommendation feature to push these to each user’s learning queue. Employees will see these recommendations in Teams and email.
Schedule the first live training session via Teams. For instance, a “Teams Best Practices Workshop” in week 6, run by the MSP trainer or a champion. Send a Teams meeting invite to all required attendees. Tip: Record these sessions (Teams can record) and post the recording on the SharePoint portal for those who miss it or future new hires.
Encourage managers to set aside time: have department managers discuss these courses in their team meetings, and allow perhaps 2 hours during work time in the first week for employees to complete the initial trainings. By integrating it into the work schedule, you increase participation (otherwise, busy staff might postpone it indefinitely).
Foster Engagement and Culture: Make learning visible and social:
Use the Teams “Learning & Development” channel for daily/weekly touchpoints. For example, start a thread asking: “What’s one new thing you learned this week?” – prompt champions to answer first to get the ball rolling. Celebrate small wins: “Kudos to for completing the Excel Advanced course!” Public recognition in Teams can motivate others.
Set up a friendly competition or incentive. For instance, track points for each course completed (Viva Learning doesn’t natively gamify, but the Success Owner can manually track completions) and reward the top learners at quarter-end (small prizes or simply recognition in a company meeting). This appeals to those with a competitive spirit.
Leverage Yammer/Viva Engage if the organization uses it, to create a community for sharing learning experiences company-wide. (If not, Teams channels suffice as the community hub.)
Have the identified Champions host informal “office hours” or drop-in help sessions (via Teams meetings or in-person) once a week during this phase. This gives peers a place to ask questions about new tools or concepts. Champions can also periodically share tips in the Teams channel (e.g. “Tip of the Week: Use @VivaLearning in Teams chat to share a course with a colleague!”).
Use Teams Live Events or Webinars for larger training if needed (since all employees are on Teams, it’s an easy way to broadcast to many).
Throughout the launch, tie learning back to daily work. Encourage employees to discuss in Teams how they applied something from a course to their job. Example: someone completes a Teams productivity course and then shares how they used a new feature in a client meeting – these stories reinforce the practical value of the training and inspire peers.
Support and Monitor: The MSP and client leads should be hands-on during this launch period:
Track participation closely. Use Viva Learning’s analytics (if available, Viva Learning provides basic reports on content completion). If not, the Success Owner can manually note how many have completed key courses after a couple of weeks. Follow up with gentle reminders via Teams or email to those who haven’t started (“We see many of you have finished the first modules – fantastic! If you haven’t yet, please make time this week.”).
Gather feedback in real-time. After the first module, perhaps post a quick Microsoft Forms survey asking employees how they found the experience – was the content relevant? Was the tech easy to use? Use this to address any issues immediately (e.g. if someone says “I didn’t understand how to access Viva Learning,” plan another short demo or send a tip sheet).
Troubleshoot issues fast: If employees have trouble logging in, or content not loading, the MSP IT lead should assist immediately. Ensure no one is left behind due to technical difficulties.
Continue the communications campaign: send weekly update emails or posts highlighting progress (“Week 2: 80% of our team has completed the security module – great work! If you haven’t, here’s the link to get started.”). Share success stories or quotes from employees who found value. According to best practices, ongoing communication boosts long-term adoption.
Include External Opportunities: Workforce development isn’t only formal training. Encourage staff to also utilize other resources:
For example, let them know they have access to the Office 365 Champion community or Microsoft tech community. Provide links on SharePoint to things like Microsoft’s free webinars or community forums relevant to their roles.
If budget allows, consider certification paths: e.g. some employees might aim for a Microsoft certification (like MS-900 or Azure Fundamentals). The MSP can help identify candidates and perhaps organize study groups. This shows employees there’s room to grow professionally (a big factor in retention) and leverages the e-learning content in a goal-oriented way.
Alignment with HR: Work with the client’s HR to integrate these development activities into performance reviews or development plans. For example, managers can set a goal for each team member: “Complete X training and apply it in a project.” This alignment ensures the program isn’t seen as “extra work” but part of career growth in the company. HR can also outline potential career paths that training can enable (e.g. “Complete advanced Azure training and you could move into cloud solution roles internally”). Making the connection to career advancement will strongly motivate participation.
Quick Wins: Focus on achieving some quick, visible wins by the end of Phase 3:
Highlight any immediate improvements. For instance, if many employees took a Teams training, perhaps meetings are already more efficient – call that out: “We’ve reduced our average meeting time by 15 minutes thanks to everyone using new Teams features learned in training” (if data available).
If someone learned a skill that saved money or time, publicize it. Eg: an employee learns Power BI and automates a report – that success story should be showcased as a tangible outcome of the program.
Ensure every employee has completed at least the baseline mandatory training (like security or compliance topics) by the end of this phase – that itself is a win (100% compliance on required training).
Deliverables (Phase 3): Employees actively engaged in development:
Kickoff and at least one live training session completed.
All staff onboarded to Viva Learning and core modules (with high completion rates).
Active discussion in Teams around learning (qualitative indicator of engagement).
Early feedback collected on program experience.
Outcome: By the end of month 3, the client’s workforce should have visibly higher engagement in learning. Ideally, you’ll see improved confidence and productivity – e.g. over 50% of employees report they have applied something learned to their job (measure via survey or anecdotes). The cultural shift toward continuous learning will have begun.
Phase 4: Monitor, Measure, and Evolve (Month 4 and beyond)
Objective: Transition the program into an ongoing cycle. Measure outcomes against the goals set in Phase 1, demonstrate improvements, and refine the program for continuous development of talent.
Track Measurable Outcomes: Now that the program has been running for a few months, assess the impact:
Skill acquisition: How many courses were completed per employee on average? Use Viva Learning reports to get numbers. Did employees earn any certifications or credentials? For example, if 5 people passed a Microsoft certification exam, that’s a concrete outcome (count it).
Employee feedback & engagement: Send a follow-up survey to all staff. Ask about their satisfaction with training opportunities now vs before, their confidence in using new tools, etc. High positive responses or an increase from baseline indicates success. Also check engagement metrics – e.g. the Viva Learning usage, or Teams channel activity. 92% of employees say workplace learning improves their engagement – your survey should reflect a similar uplift if the program is working.
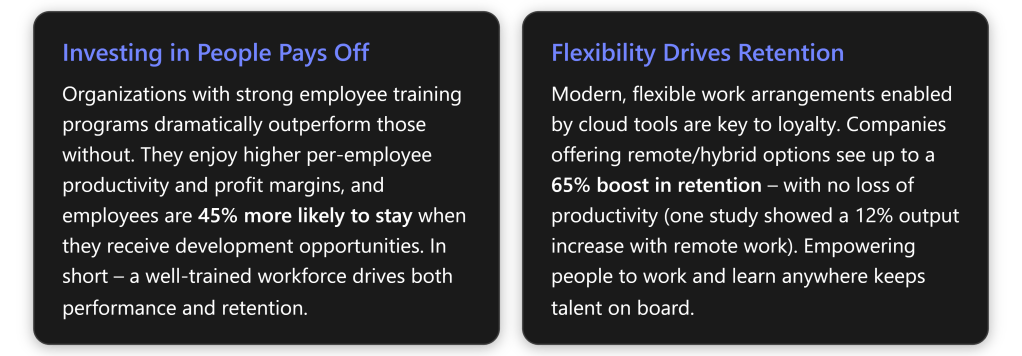
Retention and HR metrics: Although a few months is short, check early signals. Has voluntary turnover slowed in these months? (Even anecdotal evidence like fewer resignation notices, or employees expressing that they feel more valued, is useful.) Over longer term (6–12 months), compare retention rates. The expectation is that investing in development will improve loyalty, aligning with statistics that training access makes over 90% of employees less likely to leave.
Productivity or performance: This can be tricky to measure short-term, but you might use proxies. For example, are projects completing faster or with better quality after staff received training? If the client tracks metrics like sales per employee or tickets closed by IT per week, see if there’s an uptick. Global research suggests a ~17% productivity increase when employees get needed training, so look for any positive trend in relevant business metrics.
Security posture: Since we included security training, measure incidents. Did phishing click rates drop? (If attack simulations were run, compare results before/after training.) Did the Secure Score in Microsoft 365 improve? A more aware workforce should contribute to fewer risky behaviors, which may show up as fewer malware infections or lower support calls related to security.
Report to Stakeholders: The MSP should compile a progress report for the client’s executives at the end of the initial program period (around month 4). This report should highlight:
Training participation stats (e.g. “85% of staff completed at least 3 courses”).
Improvements or success stories (e.g. “Sales team reports 30% faster proposal turn-around after SharePoint training”, or “New hire ramp-up time reduced by 2 weeks due to improved onboarding training”).
Employee quotes (e.g. an employee says “I feel more confident using Teams now and it saves me time every day”).
Progress on KPIs: compare to the baseline set in Phase 1. If a goal was reducing turnover, show the current trend. If goal was increasing internal promotion rates, note any promotions that happened and if those employees engaged in learning.
ROI of the program: While it may be early for full ROI, outline the expected long-term benefits. For instance: improved retention avoids recruitment costs (the report can cite that replacing an employee costs ~50–60% of their salary – so retaining even a couple of people has saved $X already). If productivity gains are evident, translate that to value (17% more productive workforce can equate to significant revenue gain). This helps solidify executive support to continue investing.
Continuous Improvement: Use the data and feedback to refine the program:
Address any gaps. If employees say the content wasn’t advanced enough, introduce more advanced courses next. If participation lagged in a certain department, have one-on-one meetings with that department head to find out why (maybe their workload was too high, or times weren’t suitable – adjust scheduling or provide more manager support in that area).
Update the learning content catalog. Retire or replace modules that weren’t useful, and add new ones in response to technology changes or business plans. (For example, if the client adopts a new CRM software, coordinate with them to add training for that tool into Viva Learning).
Evolve the timeline for ongoing training: Perhaps shift to a quarterly theme (e.g. Q2 focus on advanced data analytics skills, Q3 focus on leadership skills, etc.) to keep the momentum. Plan regular “boost” campaigns to maintain high engagement, such as a quarterly Learning Day or hackathon where everyone takes on a learning project.
Continue leveraging M365 updates: Microsoft 365 is ever-evolving – new Viva Learning features, new Teams capabilities, etc. The MSP should keep the client informed and integrate those into the program. For instance, if Viva Learning adds a feature to track learning assignments better or Viva Insights starts providing training analytics, make use of that to enhance tracking of outcomes.
Maintain the champion network: refresh membership if needed (new champions as people rise in skill), and keep rewarding champions. They can eventually run much of the peer support with minimal MSP involvement.
Sustain and Support: After the initial intensive phase, the MSP can scale back to a supporting role while the client’s internal team sustains the program:
The MSP might move to a quarterly check-in model – meeting with the Success Owner to review training metrics, providing any new recommendations or content updates, and assisting with any technical adjustments.
Ensure the client has the knowledge to administer Viva Learning content, create new Teams events, and manage Intune/Defender policies as needed. Provide admin training if necessary in Phase 4 so they can be self-sufficient.
Keep the door open for the MSP to provide advanced training or new rollouts in future (e.g. if the client later wants to implement Viva Insights or other Viva modules for further talent development, the MSP can step back in to assist).
Celebrate Achievements: Finally, it’s important to recognize the progress to reinforce a culture of development:
Have the executive sponsor acknowledge the company’s efforts publicly. For example: “In the last 3 months, our team completed over 200 courses, and we’ve already seen improvements in our operations. Thank you for embracing this initiative – it’s just the beginning of what we can achieve together.”
Consider small rewards or an event to celebrate hitting a milestone (e.g. a team lunch after 100% of employees complete the initial learning path).
Share individual success stories in company newsletters or town halls: e.g. “Jane from Marketing transitioned to a new Data Analyst role after completing an Excel and Power BI learning path – congratulations to Jane!” This shows tangible career growth, motivating others to follow.
Deliverables (Phase 4): A metrics dashboard or summary report showing the outcomes of the program, and a set of recommendations for next steps. Also, a refined action plan for the next cycle (which modules to add, any changes in approach).
Long-term Outcome: A sustainable talent development program that continuously adapts. Over the coming year, the client should see:
Higher employee retention and satisfaction (monitor via HR surveys and retention stats – expecting positive movement in these metrics as the program’s impact solidifies).
Enhanced skills and innovation – employees capable of taking on new challenges, evidenced by more internal promotions or successful new projects.
A strong learning culture – where using tools like Viva Learning and Teams for knowledge-sharing is the norm, and employees proactively seek out training (the ultimate sign of success).
The MSP’s role evolves into a strategic partner maintaining this momentum, ensuring the client’s workforce keeps developing to meet future needs. This fulfills the vision of Step Seven: turning workforce development into a competitive asset for the business.
Feature-to-Outcomes Mapping
Finally, mapping the key Microsoft 365 Business Premium features to the workforce development outcomes ensures we leverage each tool optimally:
M365 Feature
Role in Program & Workforce Outcome
Microsoft Teams
Training delivery & daily collaboration: Central hub for live training (meetings, webinars) and ongoing peer discussion. Fosters a collaborative learning culture by integrating training into workflow (chat, channels). Outcome: increased teamwork and knowledge sharing across the organization.
SharePoint Online
Intranet & content management: Hosts the learning portal, knowledge base, and resources. Provides 24/7 access to policies, guides, and recorded trainings. Outcome: consistent, organization-wide access to learning materials, supporting self-service learning and faster onboarding.
Microsoft Viva Learning
Learning hub in the flow of work: Aggregates learning content (LinkedIn Learning, MS Learn, internal content) into Teams. Allows personalized and on-demand skill development. Outcome: employees continually develop skills as part of their normal work routine, leading to higher engagement and skill proficiency.
Intune (Endpoint Manager)
Device management for flexible learning: Ensures every user device is secure, compliant, and pre-loaded with required apps. Enables remote and hybrid work by managing endpoints and protecting data. Outcome: a reliable technical environment where employees can learn/work from anywhere safely, which supports retention through flexibility.
Defender (Security Suite)
Threat protection & security training: Shields users from phishing, malware during daily work (reducing incidents that disrupt productivity). Can be used to run attack simulations and identify training needs. Outcome: a security-aware workforce with fewer breaches, and an embedded security training program (e.g. ongoing phishing awareness) that protects the business while upskilling staff on cybersecurity.
Entra ID (Azure AD)
Identity & access management: Provides single sign-on and MFA, securing access to learning resources. Enforces conditional access for compliance (e.g. only trusted devices/users access sensitive content). Outcome: builds trust in the digital workplace (users feel safe using cloud tools) and reinforces good security practices organisation-wide. Also enables scenarios like guest access if external trainers/mentors are invited, all under proper security controls.
Every feature above works in concert to achieve Step Seven’s outcomes. Teams and Viva Learning drive the learning culture, SharePoint organizes knowledge, while Intune, Defender, and Entra ID create the secure, flexible foundation needed for modern workforce development. By executing this program, the MSP helps the SMB client transform workforce development from a one-time effort into a continuous, technology-enabled practice – leading to more capable employees, higher retention, and a stronger competitive position going forward
Driving Efficiency with Process Automation – Program Overview: To rapidly streamline SMB operations, MSPs should implement a structured program focusing on quick automation wins, gradual scaling, and strong governance. The plan below leverages Microsoft 365 Business Premium tools (Power Automate, Teams, SharePoint, Copilot, etc.) to automate high-volume, repetitive tasks and continuously improve processes while maintaining security and compliance.
Step-by-Step Program for MSPs (SMB Clients): The table below outlines each step, its purpose, tools, timeline, and key considerations:
Step Name
Description (What MSP does)
Tools Used (M365 Business Premium)
Est. Timeline
Key Considerations (Resources & Governance)
1. Process Discovery & Prioritization
Conduct an automation audit with client stakeholders. Identify repetitive, high-friction processes (e.g. data entry, approvals, reporting) and rank them by impact and feasibility [blog.sourcepass.com]. Produce a roadmap focusing on one or two quick-win processes first.
Workshops; Microsoft Forms/Lists to capture process info; Planner for backlog prioritization.
~2–4 weeks (Month 1)
Resources: Client process owners & MSP business analyst collaborate. Considerations: Ensure leadership buy-in on target processes and confirm any compliance requirements (e.g. data privacy) before automation.
2. Solution Design & Pilot Build
For the top priority process, design the workflow and choose the appropriate automation approach. Configure a pilot solution – e.g. build a Power Automate flow or simple Power App – addressing the selected task. Incorporate Copilot or AI if it adds value (e.g. use Copilot Studio to create an AI that handles unstructured inputs or generates content as part of the process) [blog.sourcepass.com], [blog.sourcepass.com]. Test the pilot in a controlled setting with sample data.
Power Automate (cloud flows or RPA desktop flows) for workflow logic; Power Apps for a custom input form (if needed); Teams (Copilot Chat) or Copilot Studio to design AI-assisted steps (optional); SharePoint (test data lists or library).
~4–6 weeks (Month 2)
Resources: MSP Power Platform developer (or skilled engineer) builds the pilot; client subject-matter experts provide feedback. Considerations: Adhere to security best practices – e.g. use least-privilege accounts for automation, and ensure data sensitivity labels/permissions are respected during design [blog.sourcepass.com]. Plan for pilot success metrics (e.g. time saved, error reduction).
3. Pilot Deployment & Evaluation
Deploy the pilot automation in the client’s live environment for a small user group or single department. Train those users on the new workflow (e.g. how approvals now come via Teams, or how a bot assists them). Monitor the results closely: verify the automation is running correctly, gather user feedback, and measure performance against baselines (e.g. process cycle time, error rates) [blog.sourcepass.com]. Evaluate ROI and satisfaction to decide on broader rollout.
Microsoft Teams (pilot users receive workflow notifications/approvals in Teams); SharePoint/OneDrive (live data storage); Power BI or Excel for tracking metrics (optional).
~2–4 weeks (Month 3)
Resources: MSP consultant & client IT lead to support pilot users; helpdesk ready for issues. Considerations: Implement initial governance checks – e.g. review audit logs of the flow, ensure compliance with data policies during pilot. Collect success data (e.g. “Process X now 50% faster”) to secure full rollout approval [cmitsolutions.com].
4. Broad Rollout & Expansion
With pilot success, roll out the automation to all relevant users or across the organization. Integrate the solution with additional systems if needed (e.g. link to email, CRM, or third-party apps via connectors). In parallel, expand automation to the next priority processes on the roadmap [cmitsolutions.com]. Use lessons from the pilot to accelerate development of new workflows (leveraging templates and proven patterns). Conduct user training and change management for each new automation to ensure adoption.
Power Automate (additional flows or RPA bots for new processes); Teams and Outlook (wider notification channels); Connectors for third-party apps (if automating beyond Microsoft ecosystem); possibly Power Virtual Agents (for chatbot interfaces to processes).
Phase-wise over ~3–6 months (Months 3–6+ for multiple automations)
Resources: Additional MSP engineering time for each new process; client department champions to help roll out and train colleagues. Considerations:Stagger deployments to manage change – e.g. automate one process at a time. Verify licensing (Business Premium covers standard automation; ensure any premium connectors or AI features are licensed appropriately). Continuously update documentation for each automated workflow. Maintain alignment with security policies for new processes (e.g. if automating finance tasks, involve compliance officer in design).
5. Ongoing Governance & Optimization
Establish a governance framework to sustain and improve the automation portfolio. Assign ownership for each automated workflow (who will update it when business processes change). Set up monitoring and alerts for failures or exceptions. Enforce security and compliance standards: e.g. use Azure AD role-based access control for connectors, regularly review permissions of automation accounts, and ensure data handling meets regulations. Optimize continuously by reviewing performance metrics and user feedback on a scheduled basis (e.g. quarterly). Identify new automation opportunities as the client’s needs evolve, and fold them into the program.
Power Platform Admin Center (governance of environments, data loss prevention (DLP) policies); Azure AD / Entra ID (manage service accounts and roles); Microsoft 365 Admin & Security Centers (monitor audit logs, compliance status); Power BI dashboards (ongoing KPI tracking).
Ongoing (governance reviews monthly; new enhancements each quarter)
Resources: MSP offers managed services for automation – providing a dedicated advisor for upkeep. Considerations: Treat governance as “business-as-usual”: implement policies for change control (e.g. approval required to publish new automation), and training programs to keep users and admins up to date. Ensure measurable outcomes are reported to client leadership regularly (e.g. quarterly business reviews highlighting time saved or error reduction) to demonstrate value and adjust the roadmap.
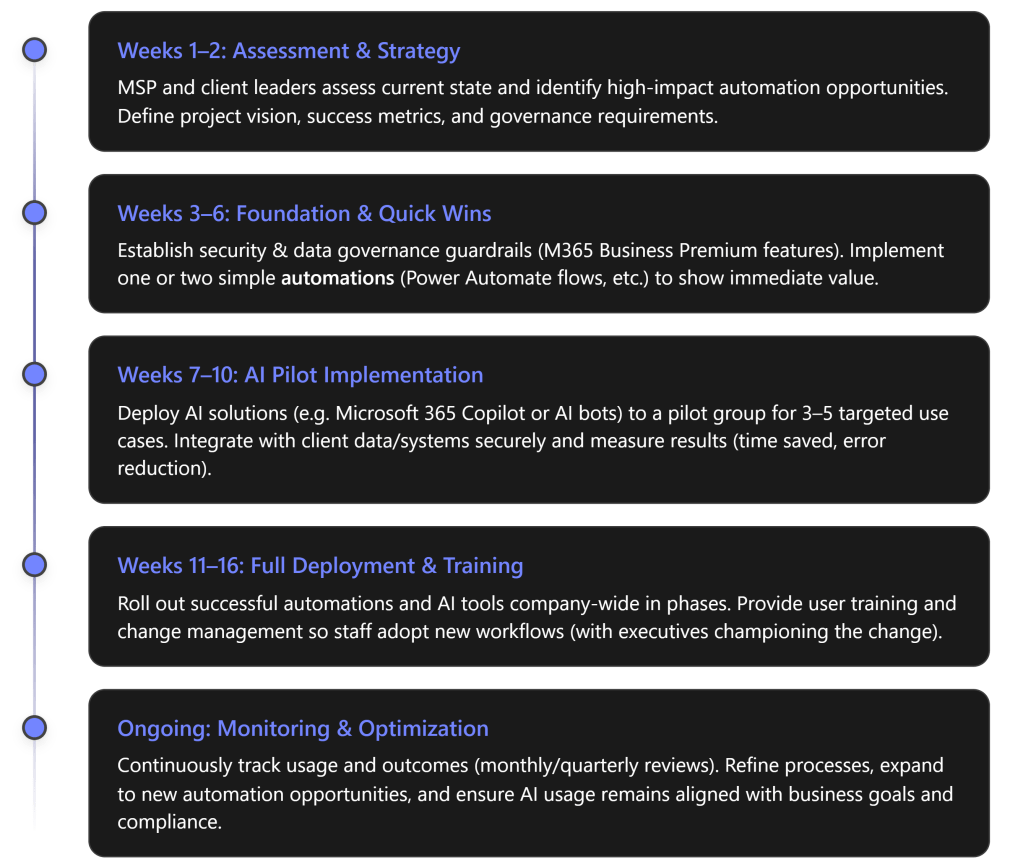
Implementation Timeline: This program is typically executed in phases over ~3–6 months for initial automations. For example, within 90 days an MSP can complete assessment, deliver one or two automation solutions, and have a roadmap for subsequent projects. Quick wins (like automating backups or simple approvals) are done first to reduce risk and show impact early, while more complex workflows are scheduled for later phases. The timeline can be adjusted based on the client’s size and readiness. [cmitsolutions.com]
Resource Requirements & Governance: Throughout the program, MSPs should plan for cross-functional resources – e.g. business analysts (to map processes), Power Platform developers, and cloud security experts. SMB client participation is vital, including process owners and IT admins to champion the changes. Leverage Microsoft 365 Business Premium’s integrated security (Azure AD identity, Microsoft Purview compliance, Defender) to build trust in the automation. Crucially, embed governance as a continuous thread: set clear data access boundaries, maintain an inventory of automations, and provide user training and support as new workflows roll out. This ensures that efficiency gains from automation are realized safely and sustainably – achieving the outcomes of reduced manual effort, faster service delivery, and higher consistency that Step Six outlines. [itarian.com], [cmitsolutions.com]
Continuous Monitoring & Improvement Program for MSPs (Microsoft 365 Business Premium)
For MSPs serving SMB clients, achieving continuous security monitoring, ongoing improvement, and user education (Priority #5 from the CIAOPS outlook) requires leveraging Microsoft 365 Business Premium’s built-in tools in a structured, repeatable way. Below is a step-by-step program focusing on technical implementation and monitoring, using only Business Premium features (Secure Score, Compliance Manager, Defender for Business, Intune, audit logging, etc.), with alerting and reporting to drive continuous improvement and informed end-users.
Overview of Key Steps (Core Actions First):
Establish Security & Compliance Baselines:Use Microsoft Secure Score and Compliance Manager to assess current security posture and compliance state. Identify gaps (e.g. missing MFA, outdated policies) and define target scores. [learn.microsoft.com], [blog.apps4.pro]
Deploy Continuous Threat & Device Monitoring:Enable Microsoft Defender for Business across all devices and apply Intune compliance policies. This ensures endpoints are protected (AV, EDR) and device configurations meet your security baseline (no drift).
Implement Audit Logging & Alerting:Turn on Unified Audit Log and configure alert policies for suspicious activities. Monitor user/admin activity (logins, file access, mailbox changes) and get immediate alerts for anomalies (e.g. mass failed logins, external forwarding rules).
Perform Regular Reviews & Improvements:Review Secure Score, Compliance Score, and Defender reports on a schedule (e.g. weekly/monthly). Track progress, address new recommendations, and adjust configurations/policies to continuously improve the security posture. Use built-in dashboards and reports for insight. [learn.microsoft.com]
Ongoing User Education:Conduct continuous user security training and awareness. Leverage Microsoft 365 tools and insights (phishing simulation for those with Defender P2, or regular security tip campaigns) to reduce human risk. Incorporate user feedback and real incident learnings into training. [syncromsp.com]
Each step is detailed below, followed by a summary table of Step, Feature, Actions, and Outcomes for quick reference.
Step 1: Establish Baselines with Secure Score & Compliance Manager
Objective: Create a clear starting point and roadmap by assessing the customer’s current security and compliance posture.
Gather Baseline Metrics: Begin with Microsoft Secure Score in the Microsoft 365 Defender portal to measure the tenant’s security posture (score 0-100%). Secure Score scans configurations and user behaviors across identity, device, app, and data protections. A higher score means alignment with more best practices. Similarly, check Compliance Manager’s Compliance Score in the Purview compliance portal to gauge adherence to data protection and regulatory controls. [syncromsp.com][blog.apps4.pro]
Identify Improvement Actions: Both Secure Score and Compliance Manager provide prioritized recommendations (“improvement actions”). For security: e.g. enable MFA for all users, disable legacy authentication, configure anti-phishing policies, etc., each worth points. For compliance: e.g. implement data retention labels, enable DLP for sensitive data, or train users on compliance policies. Document these recommended actions. [syncromsp.com], [syncromsp.com]
Set Target Goals: Use these baselines to set improvement targets (e.g. raise Secure Score from 50% to 80% within 6 months). Prioritize high-impact items first (Secure Score highlights actions by risk reduction). Similarly, aim to close top compliance gaps indicated by Compliance Manager’s score (e.g. resolve all “high risk” improvement actions). [learn.microsoft.com]
Obtain Stakeholder Buy-In: Ensure clients understand the baseline results and the plan. Secure Score provides an objective metric to justify security investments and measure progress over time. Compliance Score helps illustrate regulatory risk if not addressed. This sets the stage for continuous improvement as a collaborative effort with the client. [syncromsp.com]
Step 2: Deploy Continuous Threat & Device Monitoring (Defender for Business + Intune)
Objective: Implement 24/7 threat detection and enforce secure configurations on all user devices and services, using Microsoft 365 Business Premium’s security tools.
Microsoft Defender for Business (Endpoint Protection): Deploy Defender for Business (part of M365 Business Premium) to all client endpoints (Windows, macOS, mobile) via onboarding scripts or Intune integration. This provides next-gen antivirus, endpoint detection and response (EDR), and vulnerability management across the SMB’s devices. Ensure real-time protection, firewall, and automatic sample submission are enabled on all devices via security policies. Once deployed, the Defender portal will continuously monitor for malware, suspicious behaviors, and vulnerabilities (unpatched software) on endpoints.
Configure Security Policies in Defender: In the Defender for Business portal, review default threat protection policies (for email, files, and devices) and adjust as needed. For example, enable Safe Attachments & Safe Links for Office 365 email (Defender for Office 365 Plan 1 is included) and tune anti-phishing policies for the client’s domain. These settings ensure threats are proactively filtered. In Defender’s Vulnerability Management dashboard, monitor the “exposure score” and apply recommended patches or configurations to reduce it.[learn.microsoft.com], [learn.microsoft.com]
Microsoft Intune (Endpoint Manager) for Devices: Use Intune to enforce compliance and prevent configuration drift on devices. Define Compliance policies that require healthy settings – for example: require devices to have encryption enabled, require a minimum OS version/patch level, block jailbroken devices, and require Microsoft Defender anti-malware to be active. Non-compliant devices (which drift from this baseline) should be flagged and, via Conditional Access (Azure AD P1), denied access to corporate data until remediated. Also deploy Security Baselines (pre-configured baseline profiles for Windows 10/11 and Office apps) through Intune; these baseline profiles apply recommended security settings in bulk and will highlight any setting conflicts (drift) for review.
Integrate Device Signals: Microsoft 365 Business Premium ties these together – Intune device risk/compliance feeds into Defender and Azure AD. Ensure that Conditional Access policies leverage these signals (e.g. only allow sign-in from compliant devices and require MFA for an added layer of security). This guarantees that if a device falls out of compliance (e.g. antivirus is disabled or OS is outdated), the user’s access is limited, prompting immediate correction – effectively detecting and mitigating configuration drift in real time.
Outcome: With Defender for Business and Intune configured, the MSP now has continuous visibility into threats (malware, suspicious activities) on endpoints, and assurance that devices remain within the secure configuration guardrails. Any breach attempts or risky deviations trigger alerts or automatic responses (like quarantining a file or isolating a device) thanks to Defender’s EDR capabilities.
Step 3: Implement Audit Logging and Alerting Mechanisms
Objective: Gain awareness of security events and configuration changes as they happen, by enabling comprehensive logging and defining alert triggers for early warning.
Enable Unified Audit Log: In the Purview Compliance Center (or Defender portal’s Audit section), ensure the Unified Audit Log is turned on for the tenant. (It’s enabled by default for new tenants, but an older tenant might need manual activation.) Audit Logging records user and admin activities across Exchange, SharePoint, Teams, Azure AD, etc., into a central log. This is critical for investigating incidents and spotting unwanted changes. Verify mailbox auditing is also enabled (it is by default) so actions like mailbox access or rule creation are logged. With audit logs, you can later trace who did what (e.g. which admin changed a setting or which user deleted a file).
Set Up Security Alert Policies: Leverage built-in alerting in Microsoft 365 Defender/Compliance centers to detect suspicious or important events automatically. For example, configure alerts for:
Unusual mailbox activities – e.g. an inbox rule created to forward email externally or mass deletions. Possible compromised account – e.g. many failed login attempts, sign-ins from atypical locations (note: “impossible travel” detection requires Azure AD P2; without it, focus on obvious anomalies like multiple country logins in short time). Malware or Phish detection – e.g. when Defender flags an email with malware or multiple users report a phishing email. Admin role changes – e.g. any addition of a Global Admin role or privileges escalation in Azure AD.
These alerts can be set in the Microsoft 365 Defender portal under Alert Policies. Tailor the policies’ sensitivity to minimize noise (e.g. require a threshold of events where applicable). Configure each alert to send email notifications to the MSP’s operations team (and/or notify via Teams channel or mobile app). This ensures no critical event goes unnoticed.
Implement Configuration Drift Detection: Beyond reactive alerts, proactively schedule checks for drift from baseline configurations. For instance, run a Secure Score delta review weekly – if the score drops unexpectedly, investigate which action regressed (perhaps a setting was undone). Also, periodically export or review key tenant settings (using a script or Microsoft 365 Lighthouse) to catch unauthorized changes (like security group membership changes or policy toggles). Many such changes would appear in audit logs; consider using PowerShell or Graph API to query the Unified Audit Log for specific events (e.g. Set-OrganizationConfig changes or Intune policy edits) on a regular basis. While this is not an out-of-the-box “button,” an MSP can automate these checks as part of the service.
Leverage Microsoft 365 Lighthouse (for MSPs managing multiple clients): Although not a direct Business Premium feature for end-customers, MSPs can use the free Microsoft 365 Lighthouse tool to unify monitoring. Lighthouse provides a single pane for alerts, user activity, and device compliance across all your SMB tenants – e.g., it can highlight which customer tenants have new alerts or which need attention (like MFA not enabled on some accounts). This complements per-tenant alerting by helping MSP teams manage scalability.
Outcome: With audit logs capturing all activities and well-tuned alerts, the MSP gets instant visibility into potential incidents or misconfigurations. For example, if an employee creates a forwarding rule to an external address or an admin turns off a policy, the team will know in near real-time. This step shifts the security stance from passive to proactive, allowing quick response before small issues become major breaches.
Objective: Continuously improve the security posture by periodic reviews, using Microsoft 365’s built-in scoring and reporting tools to guide prioritization and verify progress.
Weekly Secure Score Reviews: At least weekly, review the Microsoft Secure Score dashboard. Note the current score and any new improvement actions introduced (Microsoft may add recommendations as new threats emerge or as you enable new features). Track which pending actions have been completed and which remain. Use Secure Score’s feature to compare your score with industry benchmarks or similar-sized organizations, if available, to give context. For any action that was recently completed, confirm the Secure Score reflects it (points should be earned once the system detects the change). This serves as a “scorecard” for ongoing security hygiene. [learn.microsoft.com]
Monthly Compliance Manager Check-ins: Similarly, review the Compliance Manager each month. Check the Compliance Score progress: have more improvement actions been implemented since last review? Ensure documentation or evidence is uploaded for any completed actions (for audit readiness). If the SMB has to meet specific standards (e.g. GDPR, ISO 27001), ensure the corresponding assessment is active in Compliance Manager and track its score. Address new or pending improvement actions – for example, if Compliance Manager suggests enabling retention on a SharePoint site or conducting staff training on a policy, schedule those tasks.
Analyze Defender and Intune Reports: Microsoft 365 provides various security reports – e.g. threat protection reports, device health and compliance reports, user sign-in trends:
In the Defender portal’s Reports section, generate the Security Report which shows threat detections, top targeted users, etc., and the Defender for Office 365 reports for email threats. This helps verify that defenses are working (e.g. “X malware blocked this month”) and identify any patterns (like repeated attacks on a particular user). [learn.microsoft.com]
In Intune (Endpoint Manager), review the Device Compliance report – see what percentage of devices are compliant vs. not, and drill into reasons for non-compliance (maybe a new device was enrolled but missing an update). Use Intune’s Configuration Analyzer to compare device settings to recommended baselines. [learn.microsoft.com]
Check Azure AD sign-in logs for anomalies or trends (available for 30 days with P1) – e.g. look at successful vs failed login attempts, any legacy authentication use that should be addressed, etc.
Quarterly Security Posture Meetings: Every quarter (or as appropriate), compile a summary for the client: improvements made (Secure Score up X points, Y number of attacks blocked, Z compliance actions done) and list planned next steps. Use the data from reports to illustrate ROI – e.g. “Multi-factor Authentication was enabled for all users, which Secure Score shows improved our identity security. As a result, 350 suspicious login attempts were thwarted this quarter”. Also discuss any incidents that occurred and lessons learned to feed into new improvements. This not only keeps the SMB informed but also reinforces the continuous improvement cycle.
Adjust and Evolve: Use findings from these reviews to update the program’s policies and priorities. For instance, if Secure Score and incident trends show phishing is a major issue, perhaps prioritize rolling out Defender for Office 365 Plan 2 (add-on) for enhanced phishing protection and attack simulation training (if the client agrees). If Compliance Manager shows new regulations or if the client expands into a new industry, add those compliance requirements into the plan. The key is to treat security and compliance as an ongoing process, not a one-time project. [syncromsp.com]
Step 5: Continuous User Education and Awareness
Objective: Create a security-aware culture among end-users so that technology improvements are complemented by responsible user behavior. Users should be regularly educated to recognize and avoid threats, and to follow best practices.
Security Awareness Training Program: Establish a recurring training program for employees. Leverage Microsoft 365’s resources where possible:
If available, use Attack Simulation Training (part of Defender for O365 Plan 2; if the client doesn’t have this, consider it as an add-on or use third-party tools). This feature lets you run phishing simulation campaigns to test and teach users. For example, send a benign phishing email to see who clicks it, then auto-enroll those users in a training module. While Plan 2 is not included in Business Premium by default, MSPs can simulate similar exercises manually or via third-party if needed, focusing on the same goal – reducing phishing susceptibility. [syncromsp.com]
Use Microsoft Learn and productivity training content: Business Premium tenants have access to free training resources (e.g. Microsoft 365 learning pathways on SharePoint, end-user security best-practice guides). Curate short monthly tips or an internal newsletter about recent scams or new security features (“Did you know? OneDrive now has ransomware restore – here’s how to use it if needed.”).
Policy and Compliance Training: When you roll out new policies (e.g. a requirement to use Outlook’s “Report Phish” button, or a policy for data classification), conduct a mini training or communication so users understand why and how to comply. For instance, if external email tagging is enabled or USB usage is restricted by Intune policy, inform users in advance with guidance on alternatives. Compliance Manager can also have improvement actions that involve user training (e.g. “Provide annual GDPR training to staff”); track these and ensure they’re delivered.
Encourage a Security Feedback Loop: Foster an environment where users can easily report suspicious emails or incidents (Microsoft 365’s built-in Report Message add-in helps with this). When users report phishing emails, ensure IT follows up and also closes the loop by thanking or informing the organization if it was a wider campaign. This positive reinforcement encourages vigilance. Additionally, share sanitized stories of security wins/losses: e.g. “Last month, an employee spotted and reported a phishing email impersonating our CEO – great job, this prevented a potential breach!” or “We recently had an incident where a weak password led to an account compromise; as a reminder, our policies now require MFA and strong passwords.”
Measure and Improve User Awareness: Just as we track Secure Score, track metrics for user awareness. This could be phishing simulation success rates (if using a tool), attendance/completion of trainings, or even simple quiz scores from training sessions. Over time, aim to see improvement (e.g. phishing click rates dropping). Use these metrics to identify departments or individuals who might need extra focus.
Keep Training Material Fresh: Update content to cover new threats or Microsoft 365 features. For example, if a new type of phishing attack is trending or if Teams introduces a new security feature for file sharing, incorporate those. Microsoft Secure Score itself sometimes recommends “user training” activities as part of improvement – integrate those suggestions to fulfill technical and human aspects together. [syncromsp.com]
The combination of these five steps creates a continuous loop of monitoring, improvement, and education. MSPs should integrate this program into their service delivery, using automation where possible (PowerShell scripts for reporting, Lighthouse for multi-tenant views, etc.) to stay efficient. The result for SMB clients is a steadily improving security posture, high compliance standards, and a workforce that is increasingly resilient against cyber threats.
Step-by-Step Program Summary
The table below summarizes each step of the program, the Microsoft 365 Business Premium feature(s) utilized, key implementation actions, and the expected outcomes for the MSP and client:
• Assess Secure Score: Record baseline and list recommended improvement actions (e.g. enable MFA) [syncromsp.com]. • Assess Compliance Score: Initiate relevant compliance assessments (e.g. Data Protection Baseline) and identify gaps in controls [blog.apps4.pro]. • Document & Prioritize: Compile all identified security and compliance gaps, prioritize by risk.
• Clear view of current security posture (score) and compliance status. • List of prioritized tasks mapped to M365 features (serves as roadmap). • Management buy-in on improvement plan (data-driven justification).
2. Deploy Monitoring Always-on threat protection
– Microsoft Defender for Business (Endpoints) – Defender for Office 365 P1 (Email/Collab security) – Intune (Endpoint Manager)
• Onboard Devices to Defender: Deploy Defender for Business to all endpoints; verify AV, EDR, and vulnerability management are active
• Apply Intune Baselines & Compliance: Enforce security baseline configurations and compliance policies (encryption, OS updates, device health)
• Configure Policies: Enable anti-phishing, Safe Links/Attachments, and other threat protection policies in Defender for O365
• Conditional Access: Require compliant devices and MFA for user access (using Azure AD P1).
• Comprehensive coverage against malware, phishing, and other threats across devices and email
• Devices stay in line with security standards; non-compliant ones are flagged/blocked (prevents config drift). • Automated threat response available (isolate infected device, etc.), reducing manual workload.
• Turn on Audit Logging: Ensure unified audit log is enabled to record all user/admin activities
extend log retention via Azure AD P1 (30 days by default)
• Create Alert Rules: Define alerts for suspicious events (e.g. new inbox forwarding rule, multiple failed logins, malware upload to SharePoint) with notifications to IT
• Tune and Test: Adjust alert thresholds to minimize false positives
; periodically test alerts (e.g. create a dummy policy change) to ensure they’re working. • Centralize Monitoring: Use Microsoft 365 Lighthouse for multi-tenant alert visibility (for MSP-scale efficiency)
.
• Immediate awareness of potential security incidents or policy changes – allows quick response before damage occurs
• Audit trail available for investigations and compliance audits (who did what, when). • MSP can monitor many clients efficiently (via Lighthouse), ensuring no tenant is overlooked.
• Weekly Secure Score Review: Log improvements made, plan next actions for pending Secure Score recommendations [learn.microsoft.com]; ensure no regression (score drop) went unaddressed. • Monthly Compliance Audit: Update and review compliance score; close out completed actions and identify new gaps (if regulations changed or new MS features available). • Monthly Reports: Analyze Defender threat reports (email and endpoint) [learn.microsoft.com] and Intune device reports; address any recurring issues (e.g. frequent malware on unpatched devices -> enforce stricter update policy). • Quarterly Exec Summary: Report to client on achievements (Score improvements, incidents prevented) and next-quarter focus areas.
• Measured improvement over time – higher Secure Score and Compliance Scores demonstrate progress (or reveal areas needing attention). • Up-to-date security posture: policies and configurations are continually refined based on latest data and threats. • Client sees value through regular reports (transparency), supporting retention and trust in the MSP partnership.
5. Continuous User Education Empower the humans
– User Training Content (Microsoft 365 Learning, SharePoint/Viva Engage) – (Optional) Attack Simulation (Defender for O365 P2 add-on) – Secure Score User Insights
• Phishing Drills & Training: Conduct periodic phishing simulations and follow-up training for susceptible users (using MS Attack Simulation Training if available) [syncromsp.com]; otherwise use custom email campaigns and track responses. • Monthly Security Tips: Share short lessons or tips via email or Teams (e.g. “how to spot a phishing email”, “data classification do’s and don’ts”). Leverage Microsoft’s ready materials when possible. • Policy Acknowledgements: When rolling out new policies, require users to read and acknowledge guidelines (can use SharePoint or Intune’s compliance terms). Reinforce with a brief quiz or Q\&A session. • Measure Engagement: Track metrics like training completion rates or reduction in simulated phish click-rate. Recognize improvements and address gaps with targeted coaching.
• Users are more vigilant and informed, reducing risky behavior (the “human firewall” is strengthened). • Fewer incidents caused by user mistakes (e.g. falling for scams), as shown by improved simulation results and real incident metrics. • A culture of security: Users actively participate in protection (reporting suspicious emails, following policies) rather than seeing security as a hindrance.
References: The program above is grounded in Microsoft’s best practices for Business Premium. Tools like Secure Score provide visibility and guidance to improve security posture, while Compliance Manager offers a structured approach to meeting regulatory requirements. Microsoft Defender for Business and Intune deliver enterprise-grade endpoint protection and management for SMBs, enabling MSPs to implement zero-trust principles (secure identity, devices, and data) in a manageable way. Logging and alerting ensure that no change goes unnoticed, forming the backbone of a proactive security stance. Finally, ongoing user education addresses the fact that technology is only part of the equation – educated users significantly lower the overall risk. By following this program, MSPs can confidently fulfill the “continuous monitoring, improvement, and user education” mandate using the capabilities already available in Microsoft 365 Business Premium, creating a safer and more compliant environment for their SMB clients. [learn.microsoft.com][blog.apps4.pro][syncromsp.com]
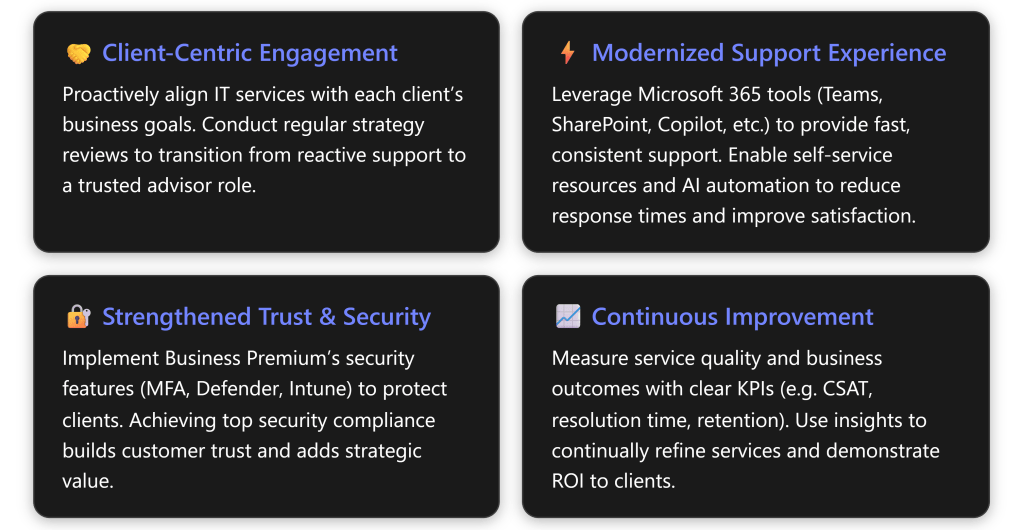
Managed Service Providers (MSPs) serving small and medium businesses in 2026 must go beyond break-fix IT support to deliver exceptional customer experiences and strategic business value. This roadmap outlines a step-by-step program leveraging Microsoft 365 Business Premium to transform an MSP’s service delivery – improving client satisfaction, building deeper partnerships, and driving measurable outcomes. The plan is organized into clear phases with targeted Microsoft 365 tools, assigned MSP roles, and key KPIs to track success. Key objectives include faster, more proactive support, alignment with clients’ business goals, empowered end-users through modern workplace solutions, and robust security/compliance as a trust builder. The result is an MSP that is seen not just as an IT fixer, but as a strategic partner delivering tangible business outcomes to SMB clients. [corkinc.com], [blog.ciaops.com][corkinc.com], [corkinc.com]
Implementation Roadmap Overview
The program is structured into four major phases, executed over roughly 6–9 months (followed by ongoing improvement). Each phase includes specific initiatives, responsible team roles, supporting Microsoft 365 Business Premium capabilities, and targeted outcomes. Table 1 below summarizes the phases with key activities, tools, role assignments, and success metrics:
Table 1: Phased Program Plan – Activities, Tools, Roles, and KPIs
Phase & Timeline
Key Activities & Deliverables
M365 Tools/Features
Responsible MSP Roles
Key Metrics (KPIs)
Phase 1: Discovery & Planning Month 1
– Client Vision & Needs Assessment: Gather client business goals, pain points, and current satisfaction levels. – CX Strategy Workshop: Define how IT can enhance client’s customer experience and map out value-add opportunities. – Roadmap & KPI Setting: Develop a tailored improvement plan with agreed success metrics and timeline.
Teams – for kickoff meetings & stakeholder interviews. Forms – to survey end-user satisfaction or needs. SharePoint – to document client requirements and share proposal.
– Baseline CSAT (customer satisfaction) captured via survey
Roadmap sign-off by client stakeholders. – Defined KPIs (e.g. target first-response time, CSAT %, etc.) established for program.
Phase 2: Solution Implementation Months 2–4
– Modernize Support Channels: Set up integrated support via Microsoft Teams (e.g. dedicated Teams channel or chat for client, Teams Phone/Voice for helpdesk) to provide quick, multi-channel help. – Self-Service & Knowledge Base: Create a client-facing SharePoint site or portal with FAQs, how-to guides, and possibly a Power Virtual Agent chatbot for common issues, enabling 24/7 answers
Process Automation: Streamline routine tasks (password resets, onboarding) using Power Automate flows or Azure AD self-service features, freeing up engineers for higher-value work
– Security & Reliability Enhancements: Deploy Intune for device management and Microsoft Defender for Business for threat protection across endpoints and email. Enforce Conditional Access + MFA for all users to significantly reduce breach risk. (Leverage M365 Lighthouse to apply and monitor these across clients.) – Collaboration Upgrade: Improve client’s internal collaboration using Teams & OneDrive (if not fully adopted) – e.g. set up Teams channels for projects, train on OneDrive file sharing – to boost their workforce productivity (an indirect CX benefit).
Teams – channels & chat for support; Teams Phone for call routing. SharePoint Online – client knowledge base portal (with search). Power Automate – automate repetitive support tasks/workflows. Power Virtual Agents (for Teams) – optional bot for common Q\&A. Intune (Endpoint Manager) – enforce device security policies (app updates, AV, etc.). Defender for Office 365 & Endpoint – threat protection (phishing, malware). Azure AD P1 – Conditional Access, MFA, SSO for user convenience. Microsoft 365 Lighthouse – multi-tenant monitoring of compliance/security.
Service Delivery Manager – oversees support improvements (Teams helpdesk setup, KB content). Cloud Engineer – implements Intune policies, Defender configuration, automation workflows. Security Specialist – leads security configuration (MFA, CA policies) and compliance checks. Collaboration Specialist – optimizes Teams/SharePoint usage for client’s staff (may coordinate with client’s IT champion).
– Average First Response Time (to support queries) ↓ – e.g. respond within X hours (measured via Teams or ticket system). – Ticket Volume↓ via self-service – track reduction in repetitive tickets (password resets, FAQs) as users self-help
– First Contact Resolution (FCR)↑ – more issues resolved on first touch (target >Y% FCR)
Security Posture Score↑ – e.g. Microsoft Secure Score improvement (demonstrating risk reduction). – Zero critical incidents during period (goal of no major downtime/security breaches, indicating reliability).
Phase 3: Training & User Engagement Month 5
– End-User Training Sessions: Conduct interactive training for client employees on new tools and portals (Teams usage, accessing the SharePoint help portal, any new self-service processes). Use Teams webinars or in-person workshops to ensure high adoption. – Enable Champions: Identify a client-side “IT champion” or power users and equip them to advocate best practices among peers. – Feedback Loop: Gather user feedback on the changes (via Forms surveys or during training Q\&A) to identify any friction points or additional needs. – Refinement: Fine-tune the solutions/configuration based on real-world use and feedback (e.g. adjust a Power Automate workflow, add content to FAQs).
Teams – live training meetings or webinars (recorded for future reference). Microsoft 365 Learning Pathways/Viva – provide on-demand training content (if available). Forms – collect attendee feedback and quiz for understanding. SharePoint – host user guides, tip sheets in portal. Yammer/Viva Engage (if in use) – establish community for peer support.
Training Specialist – leads user training sessions, creates help materials. Account Manager – communicates changes, manages expectations with client leadership throughout rollout. Support Engineers – on standby to assist users during initial go-live of new tools (floor-walking or rapid response).
– User Adoption Rate – e.g. % of users actively using Teams/OneDrive/portal (monitored via M365 usage analytics) ↑. – User Feedback – post-training survey shows confidence in using new tools (e.g. >90% feel “well prepared”). – Support Satisfaction – measure via quick post-ticket surveys; should show improvement as users find new system helpful. – Change Adoption Time – all users onboarded to new processes within X weeks (indicating successful change management).
– Performance Monitoring: Continuously monitor service performance and security. Use Microsoft 365 Admin Center and Lighthouse for alerts (e.g. new threats, device compliance) and track support metrics (ticket trends) over time. Ensure the improvements are sustained (e.g. no MFA lapses, knowledge base kept current). – Quarterly Business Reviews (QBRs): Every 3 months, hold a strategic meeting with the client (virtual or on-site via Teams) to review key metrics and business outcomes. Present how IT initiatives are impacting their business (e.g. productivity gains, zero major incidents, higher employee satisfaction) [corkinc.com]. Discuss new business needs or technology updates. – Introduce Innovation: Evaluate and propose new Microsoft 365 features or integrations that could further benefit the client’s business. For example, as AI capabilities mature, consider deploying Microsoft 365 Copilot or building a custom Copilot (via Copilot Studio) to automate customer service or data analysis tasks for the client.
Also explore Power BI reports for the client’s data to uncover insights they value. – Recognize & Adjust: Track outcomes against the defined KPIs. If targets aren’t met (e.g., CSAT below goal), analyze root causes and implement adjustments (additional training, process tweaks, etc.). Likewise, celebrate and reinforce successes (e.g., highlight that security compliance improvements have set the client apart in their industry, bolstering their trust with their own customers
Executive Communication: Maintain ongoing executive-level engagement – share newsletters or dashboards summarizing IT value delivered (uptime, new capabilities enabled, risk mitigated) in business terms, reinforcing the MSP’s strategic role. [corkinc.com], [corkinc.com]
Microsoft 365 Lighthouse – unified view of client tenants (monitor compliance, threat alerts). Azure AD & Endpoint Manager Admin – routine checks on sign-in security, device health. Teams – QBR meetings and ad-hoc strategy calls. Power BI – (optional) dashboards for service metrics or client business KPIs. Microsoft 365 Copilot – (optional) assist in drafting reports and mining insights for QBRs; potential client-facing use cases (with appropriate licensing). SharePoint – internal wiki for MSP to document lessons learned across clients; external newsletters via SharePoint News posts emailed out.
Account Manager / vCIO – leads QBRs, maintains strategic relationship, translates IT results to business value [corkinc.com]. Service Delivery Manager – monitors ongoing operations and SLA compliance; continuous improvement owner. Security/Compliance Lead – continuously audits security posture, keeps client compliant (e.g. industry standards, ACSC Essential Eight if relevant). Innovation Lead (optional) – explores new M365 features (AI, analytics) and pilots them for client benefit.
– Customer Satisfaction (CSAT) Score↑ – aim for high post-engagement ratings (e.g. ≥ 90% satisfaction on QBR feedback surveys). – Net Promoter Score (NPS)↑ – improved likelihood of client recommending the MSP (indicates strong trust/relationship). – Client Retention – 100% renewal of contracts and upsell of new services (zero churn). – Business Impact Metrics – client-specific outcomes achieved (e.g. reduced their internal support costs by X%, improved their end-customer ratings, etc., as gathered during QBR). – Compliance/Posture – maintain high security score and no major incidents (demonstrating risk managed effectively).
Phase 1: Discovery & Planning. In the first month, the MSP engages with client leadership to define a joint vision for how technology will enhance the client’s customer experience. This involves interviews and workshops to understand the client’s business objectives, current pain points, and what “great service” means to them. For example, if the client is an e-commerce firm struggling with downtime affecting their end-customers, the plan will prioritize reliability and fast support. Using Microsoft Teams meetings and perhaps Forms surveys, the MSP gathers both qualitative and quantitative baseline data (e.g. current CSAT scores, ticket volumes). The MSP’s virtual CIO (vCIO) or account manager leads a strategy workshop to map out how Microsoft 365 solutions can address these needs – aligning IT initiatives with business outcomes (e.g. faster issue resolution leading to the client’s increased sales or customer loyalty). By the end of Phase 1, there is a documented roadmap on a SharePoint site (accessible to client stakeholders) that outlines the upcoming implementation steps, timeline, and agreed success metrics. For instance, the client and MSP might set a goal to raise end-user satisfaction by 15% and cut average ticket resolution time by 30% over the next 6 months (these targets will later be measured and reported). Establishing these goals upfront creates accountability and clarity. [corkinc.com]
Phase 2: Solution Implementation. In this phase (spanning roughly months 2–4), the MSP executes on the roadmap by deploying Microsoft 365 Business Premium solutions that directly enhance the customer experience and add strategic value for the client:
Improve Responsiveness & Multi-Channel Support: The MSP configures modern support channels using Teams. For example, they might set up a Team with the client for real-time communication – enabling the client’s staff to @mention the MSP support team for quick questions or schedule ad-hoc support calls. If the client’s arrangement allows, the MSP may also integrate their ticketing system with Teams or use Teams Phone so that when the client calls for help, it rings into an organized call queue. The goal is to meet clients on the channels they prefer and respond faster. Outcome: Clients get help through chat or video within minutes rather than waiting hours for email responses, improving satisfaction (faster responses are strongly correlated with higher CSAT).
Enable Self-Service & Knowledge Access: Anticipating common questions and issues, the MSP creates a SharePoint Online knowledge base or client portal. This site contains how-to articles, troubleshooting guides, and even short how-to videos (stored in SharePoint/Stream). It might also include a Power Virtual Agent bot (using the included Power Platform capabilities) embedded on the site or in Teams, which can answer routine questions 24/7 (“How do I reset my email password?” etc.). By leveraging these Microsoft 365 tools, the MSP empowers client users to find answers instantly, reducing the number of trivial tickets and freeing up support staff for more complex issues. This not only speeds up resolutions but also gives users a sense of control, improving their experience.
Automate Routine Tasks: Using Power Automate, the MSP automates repetitive processes that previously required human intervention. For example, implement an automated user onboarding workflow: when the client hires a new employee, a Power Automate flow can automatically create the user account in Azure AD, assign licenses, email setup instructions, and schedule a Teams orientation call. Similarly, a self-service password reset (a feature of Azure AD) is enabled so users can resolve login issues without opening a ticket. These automations reduce manual effort and errors, allowing the MSP’s engineers to focus on strategic improvements instead of mundane tasks. Outcome: The MSP can handle client needs more efficiently – routine tasks that took hours or days now happen in seconds, and staff can devote more time to proactive projects (as Microsoft’s research notes, automation frees employees for high-value work).
Strengthen Security and Trust: Since a reliable, secure IT environment underpins any good customer experience, the MSP uses Business Premium’s security suite to harden the client’s infrastructure. This includes deploying Microsoft Defender for Endpoint & Office 365 to all client devices and mailboxes for advanced threat protection (guarding against malware, phishing, etc.), and enforcing Multi-Factor Authentication and conditional access policies via Azure AD to prevent unauthorized access. Device management with Intune ensures all client PCs and mobile devices have consistent security configurations, up-to-date patches, and compliance policies (like requiring encryption). These steps dramatically lower the risk of incidents like breaches or malware outbreaks, which can be devastating to the client’s operations and reputation. Achieving a high level of security compliance is framed as a strategic business value: the MSP explains that meeting top standards (for example, aligning with frameworks like ACSC Essential Eight Maturity Level 3) will differentiate the client in their market and foster trust with their customers and partners. In other words, the MSP turns cybersecurity into a customer experience issue — by preventing disruptions and building a trustworthy brand, the client improves the experience of its own customers. Outcome: measurable improvements in security posture (e.g., Microsoft Secure Score) and no major security incidents. Additionally, the client gains confidence that the MSP is safeguarding their business, reinforcing the partnership.
Enhance Productivity & Collaboration: Although not strictly “support,” improving the client’s internal collaboration tools can indirectly elevate their overall experience and the value they get from IT. The MSP ensures the client is taking full advantage of the productivity features of Microsoft 365: for instance, rolling out Teams company-wide if not already done, helping migrate files to OneDrive/SharePoint for easy sharing, and setting up Shared Teams or Channels between MSP and client for joint projects. By introducing features like Teams integration with third-party apps or simple Power Apps to streamline specific client workflows, the MSP helps the client’s employees work more efficiently. This kind of guidance shows the MSP is invested in the client’s success, not just basic IT upkeep. Outcome: The client sees increases in their own team’s productivity (which can be gauged via tool usage metrics or feedback) and attributes some of that success to the MSP’s recommendations – deepening the MSP’s strategic value. [corkinc.com]
By the end of Phase 2, the core enhancements are in place. The MSP should communicate the early wins to the client: e.g., “Since we launched your new support portal, we’ve deflected 20% of tickets through self-service, and urgent issues are now addressed within 1 hour on average, down from 4 hours. Security score has improved by 30 points, reducing your cyber risk.” This sets the stage for training and full rollout.
Phase 3: Training & User Engagement. Even the best tools won’t deliver value if people don’t use them correctly. In month 5 (or once Phase 2 solutions are ready), the MSP invests time in educating the client’s users and driving adoption:
The MSP’s training lead schedules live training sessions via Microsoft Teams webinars for different user groups. For example, a session for general employees on using the new IT self-service portal and Teams support channel; a session for managers on accessing new Power BI reports or compliance dashboards if those were provided; and perhaps a focused session for the client’s IT contact on the security improvements (so they understand the changes). These sessions are recorded and shared on SharePoint for any staff who could not attend live.
The MSP provides quick-reference guides and FAQs (stored on SharePoint or delivered through OneNote) to reinforce learning. These might include a one-page infographic on “How to get IT help faster using Teams,” or a short video demonstrating the new password reset process. By integrating with familiar Microsoft 365 apps (e.g., a Viva Connections or intranet link to the support portal), the MSP makes it easy for users to remember how to engage.
To ensure sustained adoption, the MSP encourages the client to nominate a few “digital champions.” These are tech-savvy employees at the client who will act as first-line support for their peers and promote the new tools internally. The MSP can host a separate, slightly more advanced training for these champions, equipping them to handle basic questions and gather feedback. This creates a partner on the inside and fosters user buy-in.
Feedback is actively solicited. The MSP might use a Microsoft Forms survey after each training or at the end of the pilot period asking users how the new support experience is working for them. Questions could include rating the responsiveness via Teams, the usefulness of the self-service portal, etc., and open prompts for suggestions. This not only identifies areas to tweak but also makes users feel heard – an important aspect of a positive experience.
By the end of Phase 3, the client’s team is onboarded and comfortable with the new system. We expect to see high engagement – e.g., many knowledge base views, active Teams chats – and a reduction in confusion about IT processes. Ideally, support satisfaction scores (perhaps measured by a simple “How was your support experience?” survey after tickets) are already trending up. Any critical feedback (e.g., “the portal search isn’t finding what I need”) is fed into minor adjustments in this phase. The MSP demonstrates flexibility by refining the solution to fit the users’ reality.
Phase 4: Ongoing Improvement & Strategic Review. With the new processes in full swing by month 6, the MSP transitions into a continuous improvement mode. This phase is indefinite/ongoing and is about maintaining momentum and proving value:
The MSP sets up regular monitoring using the admin tools in Microsoft 365. For instance, the Service Delivery Manager receives alerts from M365 Lighthouse or Intune if any device falls out of compliance or if there’s an unusual sign-in attempt on the client’s tenant, allowing the MSP to respond proactively (often before the client even notices an issue). They also watch helpdesk metrics: if ticket volume starts creeping up or satisfaction dips, that’s a signal to investigate and intervene early. This data-driven approach ensures the quality of service remains high over time, not just immediately after the project.
Critically, the MSP conducts Quarterly Business Review (QBR) meetings with the client’s executives. In these meetings (held via a Teams video conference or in person), the MSP comes prepared with reports illustrating the impact of the last quarter’s IT operations in business terms. For example, a QBR report might show: Average ticket resolution time dropped to 2 hours (meeting our target), and as a result the client’s employee satisfaction with IT rose to 95% as per the survey – which helps their overall productivity. It might also highlight: Zero security incidents occurred, and the client passed a compliance audit smoothly, which protects their reputation. The MSP might use Power BI to present trends (like a chart of monthly support satisfaction or security posture improvements). By speaking the language of outcomes and risks (not just tech metrics), the MSP solidifies their role as a strategic partner. These reviews are also a forum to plan ahead: discuss upcoming client initiatives (office expansion, new software, etc.) and how the MSP can support them, essentially doing ongoing IT roadmap planning that aligns with the client’s business roadmap. [corkinc.com]
The MSP keeps an innovation pipeline for each client. They stay abreast of new Microsoft 365 features (for example, new AI capabilities like Microsoft 365 Copilot and the Copilot Studio toolkit for custom AI assistants). Where relevant, the MSP pilot-tests these and introduces them to the client as additional enhancements. For instance, if the client’s customer service could benefit from AI, the MSP might propose building a custom Copilot chatbot integrated with the client’s data to handle tier-1 customer inquiries, leveraging the Copilot Studio platform. This would directly contribute to the client’s customer experience – an example of the MSP delivering strategic value beyond the initial scope. Even simpler, the MSP might implement small improvements continually: maybe a new Teams app for scheduling site visits, or a Power Automate update to integrate the client’s CRM with Teams notifications. By always seeking ways to improve, the MSP demonstrates commitment to the client’s evolving needs.
KPIs are tracked and reported as part of continuous improvement. The MSP uses the agreed metrics (set in Phase 1) to measure success. For example, if one KPI was Net Promoter Score (NPS) of the client for the MSP’s service, the MSP will measure NPS annually and aim for increases. Internally, the MSP also watches retention and growth: a satisfied client is likely to renew and possibly expand services, so a 100% retention rate and new project engagements are signs of success. Security metrics (secure score, incident counts) and compliance status are checked regularly, and the MSP provides the client with compliance reports (e.g., leveraging Microsoft Purview tools if available for audit readiness). If any metric falls short, the MSP treats it as an actionable item – for instance, if surveys show only 80% satisfaction and the target was 90%, the MSP will dig in to find out if perhaps response time is still an issue for certain ticket types and address that specifically.
Throughout this phase, communication is key. The MSP doesn’t wait for QBRs only; they maintain frequent, transparent communication, positioning themselves as an ongoing advisor. For example, monthly email updates might highlight “new features” or share a cybersecurity tip, subtly reinforcing the MSP’s value. As one industry leader put it, clients today demand certainty and partnership – “clients do not just need tools, they need certainty” in outcomes. The MSP’s continuous oversight and engagement provide that certainty. Over time, this cements loyalty: the client views the MSP as an integral part of their success, not an interchangeable supplier. This directly addresses the blog’s emphasis that MSPs must elevate their role and meet rising expectations in 2026. [corkinc.com]
Measuring Success and Outcomes
By implementing this program, MSPs can expect significant improvements in both service quality and client relationship health. Here are the core outcomes and how they are measured:
Higher Customer Satisfaction & Loyalty: The ultimate goal is improved CSAT and NPS from the client’s leadership and end-users. For example, post-implementation survey scores should show noticeable gains. High satisfaction is a leading indicator of client retention and referrals – key for an MSP’s growth. Evidence: Faster response and resolution directly drive up satisfaction, and clients who see their MSP proactively improving their business are far more likely to stay on and even expand the partnership.
Faster, More Efficient Support Operations: Metrics like first response time and average resolution time should improve substantially. If, for instance, first response went from 4 hours to 1 hour by using Teams and a knowledge bot, that’s a quantifiable win. First Contact Resolution rates should also rise due to better knowledge availability and skilled front-line handling, leading to fewer escalations. Evidence: A well-integrated knowledge base and AI assistance can reduce time spent searching for answers, leading to quicker resolutions and consistent responses.
Reduced Ticket Volume for Common Issues: With self-service in place, the MSP’s helpdesk will notice fewer repetitive questions (password resets, “how do I” queries). Those that do come will often be resolved by referring to the new portal, taking less effort. This efficiency gain can be tracked by categorizing tickets and seeing the drop in Tier-1 queries. The MSP can reallocate this saved time to value-added activities (e.g., more client consulting).
Improved Security and Compliance Posture: Thanks to Business Premium’s security features, the client’s risk of incidents is minimized. A tangible metric is the Secure Score within Microsoft 365 (aim for a high score, e.g. >90%). Another is compliance audits passed or certifications achieved. The absence of any major security breach over the year is itself a critical outcome – a negative result that speaks volumes. The client and MSP can publicize that robust security (like Essential Eight Maturity Level 3 compliance) as a competitive advantage, reinforcing the strategic value delivered.
Strategic Partnership & Business Outcomes: On a qualitative level, the client’s perception of the MSP should shift from “vendor” to “trusted advisor.” Are the MSP’s recommendations now part of the client’s business planning? Is the client asking the MSP for input on new initiatives (a clear sign of trust)? These are observable outcomes. Quantitatively, client retention rate and revenue per client are KPIs for the MSP’s business – satisfied clients stay and often grow the engagement (e.g., adding more Microsoft licenses or new projects, which in turn is a win-win). The program’s success is ultimately reflected in renewals, contract expansions, and maybe client testimonials attesting to the MSP’s value.
By focusing on these metrics, MSPs ensure they continuously align with what the client values most (e.g. uptime, responsiveness, innovation). Each metric ties back to the theme of customer experience and strategic value: for instance, client retention is a direct result of delivering strong experience and strategic insight; first-call resolution is a technical metric but heavily influences the customer’s day-to-day happiness.
Conclusion
In summary, MSPs can enhance customer experience and strategic value by systematically leveraging Microsoft 365 Business Premium across people, process, and technology dimensions. Starting with a deep understanding of client needs and ending with ongoing innovation, this program turns an MSP into a true partner in the client’s success. The use of Business Premium’s integrated suite – from Teams to Intune to the latest AI Copilot capabilities – enables proactive, personalized, and secure services at scale. Clients will notice the difference: quicker solutions, more engagement in planning, and technology that actually advances their business goals, not just maintains the status quo. [corkinc.com], [corkinc.com]
By following this roadmap, MSPs not only meet the “rising expectations” of 2026 but exceed them – delivering outcome-focused, relationship-driven service. This positions the MSP competitively in a changing market where, as experts note, “clients no longer want task-based IT support…they want outcomes”. Embracing that mindset, underpinned by Microsoft 365 tools, will translate into happier clients, stronger long-term partnerships, and growth opportunities for the MSP. [blog.ciaops.com][corkinc.com]
AI-Driven Automation Program for MSPs (SMB Clients)
Objective: Enable SMB clients to embrace AI-driven solutions and automation using Microsoft 365 Business Premium, through a phased program with clear steps, timelines, roles, and measurable outcomes. The program focuses on quick wins in efficiency and security, structured adoption of AI (e.g. Microsoft 365 Copilot, Power Automate), and ongoing optimization – all delivered in an executive-friendly, outcome-focused manner.
Phase 1: Assessment & Strategy (Weeks 1–2)
Key Actions: Kick off the program with a joint MSP–client assessment of the client’s current processes, pain points, and readiness for AI. The MSP conducts an AI readiness audit covering technology and workflow gaps, while client stakeholders (business managers and IT leads) catalog repetitive, labor-intensive processes and key data sources. Together, define 3–5 high-impact use cases where AI or automation can add value – focusing on tasks with heavy manual effort, clear rules, and measurable outcomes (e.g. time saved, fewer errors). For example, candidates might include automating invoice approvals, using an AI assistant for helpdesk ticket triage, or auto-generating routine reports. Additionally, establish success criteria for each use case (such as “reduce invoice processing time by 50%” or “save 10 hours/month on helpdesk responses”). Finally, align on scope, timeline, and sponsorship: ensure an executive sponsor is in place to communicate vision and support change management. The output of this phase is a clear automation roadmap (target use cases, required Microsoft 365 tools, and KPIs) and a shared understanding of responsibilities. [eatonassoc.com]
Roles: The MSP leads the assessment by bringing templates and expertise (e.g. conducting workshops to surface improvement areas). The client’s executives and process owners provide business context: for instance, “Office managers list the top 10 repetitive processes… IT leaders map where data resides”. This collaboration ensures the strategy focuses on relevant business priorities. The MSP also identifies which Microsoft 365 Business Premium capabilities will be leveraged for each opportunity – for example, Power Automate for workflow automation, Teams + Power Virtual Agents or Copilot for AI-driven assistance, and Azure AD/Intune for identity or device needs. Both parties agree on a high-level plan before moving forward. [eatonassoc.com]
Phase 2: Foundation & Quick Wins (Weeks 3–6)
Key Actions: Before rolling out advanced AI, the environment must be “AI-ready.” In this phase, the MSP establishes a strong foundation on the client’s Microsoft 365 Business Premium tenant. This includes implementing critical security and compliance controls and any pre-requisites for safe AI usage. For example, enforce Azure AD Conditional Access and MFA for all users if not already in place, and enable data protection policies (sensitivity labels, DLP for sensitive info) – essentially “minimum governance guardrails” to ensure AI is deployed on a secure identity and data foundation. Business Premium’s built-in tools (like Defender for Business, Intune, Conditional Access) are utilized here to harden security and manage devices, since successful AI adoption requires trust that corporate data is handled safely. The MSP also sets up an early win by deploying one or two simple automations immediately. For example, using Power Automate to streamline a common task: perhaps an approval workflow or an email alert integration that addresses a known pain point. These quick wins demonstrate tangible improvement within weeks. As one guide notes, introducing basic automations for common repetitive tasks can “deliver a quick efficiency win” and open clients’ eyes to the power of their M365 tools.
In parallel, the MSP finalizes any needed licensing or tool enablement for AI. Notably, Microsoft has introduced “Microsoft 365 Copilot Business” SKUs for SMBs (including one for Business Premium) that add AI capabilities. If the client opts for Copilot, the MSP ensures those licenses are in place and initial Copilot configurations (permissions, content accessibility) are set according to best practices. By the end of Phase 2, the client’s tenant should have a solid security posture and one or two automated workflows live – boosting confidence and setting the stage for broader AI rollout. [connectwise.com]
Roles: The MSP takes charge of technical execution in this phase. They configure M365 Business Premium features for security (e.g. enabling MFA, Intune policies, Defender) and build the initial Power Automate flows or other scripts. The MSP also advises on governance policies – for instance, deciding which data sources Copilot can access or which users should get early AI access. The client’s IT stakeholders assist by providing necessary approvals or information (e.g. which compliance policies apply, who should be in pilot groups). Client leadership should communicate to employees about upcoming improvements (“We are implementing new tools to eliminate manual drudgery and improve security”), helping set expectations and a positive tone. Early user involvement might be limited, but any quick-win automation that goes live should be explained to affected staff so they understand the new, easier process. [connectwise.com], [eatonassoc.com]
Measurable Outcomes (Phase 2): Quick security improvements and initial efficiency gains can be tracked. For example, after enforcing MFA and security baselines, the client’s Microsoft Secure Score should jump upward (a quantifiable security metric). A quick-win automation might be measured by the reduction in time to complete that process. Although Phase 2 is largely foundational, it should already yield visible results – e.g. “automated alerting for form submissions eliminated an hour of manual email sorting per week” – to build momentum.
Phase 3: AI Pilot Implementation (Weeks 7–10)
Key Actions: With the groundwork laid, the program moves to an AI pilot phase. The MSP now implements the core AI-driven solutions for the prioritized use cases, initially on a small scale. This typically involves:
Deploying AI Tools to a Pilot Group: For instance, enabling Microsoft 365 Copilot for a set of pilot users (such as a few people in sales, finance, or HR who will exercise it in their daily work), or developing a prototype AI chatbot in Teams for the helpdesk, or using Power Automate with GPT-based actions. The pilot group should be representative and enthusiastic, and they should have clear objectives for what to try (e.g. sales team uses Copilot to draft proposals and get data insights; helpdesk uses an AI assistant to classify and respond to common tickets).
Integrating and Configuring AI Workflows: Ensure the AI solutions are properly integrated with the client’s data and workflows. For example, if rolling out Copilot, the MSP checks that it’s grounded in the client’s SharePoint/OneDrive content in a governed way (respecting permissions set in Phase 2). If building a custom automation, connect it to relevant data sources (e.g. linking Outlook, Teams, or a third-party system via connectors). Business Premium provides a robust base here – identity and device management from Phase 2 help ensure only authorized, compliant data feeds into AI, addressing a key concern that AI adoption “must be built on the right identity controls, data permissions, and governance”. The MSP might use tools like the new Copilot Studio or Power Platform capabilities to create tailored AI agents or flows, and leverage their expertise to handle any API or integration work needed. [connectwise.com][eatonassoc.com]
Executing the Pilot and Collecting Feedback: The pilot users start using the AI-driven solutions in real scenarios, while the MSP closely monitors usage and outcomes. It’s critical to measure baseline vs. post-pilot metrics to validate the impact. For each use case, track things like: time to complete a task (before vs. after automation), number of manual steps or touchpoints eliminated, and quality indicators (e.g. error rates or response accuracy). Also gather subjective feedback: are users finding the AI helpful? Any confusion or adjustments needed? The program should allow for quick iteration – if the AI workflow isn’t yielding the expected result, tweak the prompts or logic. For example, if an AI helpdesk agent is piloted, measure if first-response resolution rates improve or if it correctly routes issues, and refine it if it’s missing certain categories. [eatonassoc.com]
During this phase, success means proving out value on a small scale. A well-run pilot will show, for instance, that generating a monthly report with Copilot takes 5 minutes instead of 2 hours, or that an automated approval cuts a three-day waiting process down to same-day. These results should be documented as they will justify expansion. Notably, MSPs are encouraged to “make Copilot outcomes measurable” – define concrete metrics and track them – so that the AI rollout is tied to business value from the start. [connectwise.com]
Roles: In the pilot, MSP experts build and oversee the AI solutions, while pilot users (client employees) actively participate and provide feedback. The MSP’s responsibilities include technical development (e.g. configuring Copilot, creating Power Automate flows with AI integrations) and ensuring the solution works within the client’s environment (taking care of any integration with line-of-business systems or adjusting security settings as needed). The MSP also acts as a coach: training the pilot users in how to use the new AI tools effectively (for example, showing them how to ask Copilot for certain analyses, or how to trigger and monitor the new automated workflow). The client stakeholders during this phase should include the business owners of each pilot use case – they will validate that the AI is producing acceptable outputs. For instance, the finance manager in the pilot can confirm that the AI-generated invoice summaries are accurate. These stakeholders help set the acceptance criteria for the pilot (“we need at least 90% accuracy on categorizing helpdesk tickets” or “proposal drafts should require minimal editing”). They work closely with the MSP to tweak rules or provide sample data to train/guide the AI if needed. Importantly, the client’s IT and compliance officers verify that all pilot activities stay within policy – e.g. that AI is not accessing restricted data or that any sensitive outputs are handled properly. This collaborative pilot execution ensures that by the end of Phase 3, there is solid evidence (in performance metrics and user satisfaction) that the AI-driven solutions deliver the promised outcomes.
Measurable Outcomes (Phase 3): Each pilot use case will have its own success measures, but collectively the pilot should demonstrate at least some of the following improvements: significantly reduced cycle times for the targeted processes, reduction in manual workload (e.g. “we eliminated 5 manual data entry steps in onboarding”), and improved responsiveness (e.g. “customer emails are now answered by the AI assistant within seconds, with an option for human follow-up”). Quantitatively, the team should capture things like “X hours of work saved per week” or “Y% increase in output per staff member” for pilot tasks. Early indications of user adoption are also key: if the majority of pilot users stick with the AI tool and find it beneficial, that’s a green light. (Many organizations see over 80% user adoption within 3 months when AI pilots are well-scoped and demonstrably improve daily work – the pilot phase aim is to hit such high adoption and enthusiasm in the test group.) [eatonassoc.com]
Phase 4: Full Deployment & Training (Weeks 11–16)
Key Actions: After a successful pilot, the program scales the AI-driven solutions to the broader organization. This phase is about deployment at scale, change management, and ensuring all users are enabled to use the new tools effectively. Key activities include:
Gradual Rollout: The MSP and client plan a phased rollout of the AI and automation solutions to additional departments or the entire company as appropriate. Rather than a big bang, it’s wise to sequence the deployment. For example, if an AI automation was piloted in Accounts Payable, extend it next to the Purchasing team, then to other finance functions. If Copilot was piloted with a handful of users, consider rolling it out to a larger group in waves (perhaps all managers first, then all knowledge workers). This staged approach allows any minor issues to be addressed and avoids overwhelming the support capacity. Microsoft 365 Business Premium with Copilot (if in use) will now be broadly enabled – this is where having Business Premium pays off, as it “already has identity, device management, and security controls in place, making secure AI adoption easier to operationalize”. In other words, scaling up Copilot or Power Automate usage is straightforward because the necessary licenses and security measures were handled in earlier phases. [eatonassoc.com][connectwise.com]
Comprehensive User Training & Awareness: A critical focus in Phase 4 is getting users comfortable and proficient with the new AI-driven processes. The MSP (or a training specialist) delivers targeted training sessions for different user groups. For instance, host a workshop for all employees on “Using Microsoft 365 Copilot for daily tasks” covering how to ask it to draft documents, find information, or generate insights. Likewise, if automated workflows affect certain roles, provide documentation or live demos of the new process (e.g. “how expense approvals happen in Teams now via automation”). It’s important to convey not just the how but the why – reassure staff that automation isn’t a threat but a means to eliminate drudgery so they can focus on higher-value work. Also set guidelines (especially for AI tools): clarify appropriate use, data handling, and any limitations. For example, train sales and marketing teams on how to review and refine AI-generated content to maintain quality. Executive sponsorship is crucial here: leadership should visibly endorse the changes, for example by using Copilot themselves in meetings and sharing success stories, which “sets an example that motivates employees”. When employees see managers actively embracing the new AI tools, it reinforces cultural adoption.
Governance and Policy Refinement: As AI usage becomes widespread, formalize the governance policies. In Phase 2 and 3, interim guardrails were set; now the MSP helps the client institute lasting policies and documentation. For instance, update the company IT policies to include AI acceptable use (what cannot be asked of Copilot, data categories that shouldn’t be fed into prompts, etc.), and ensure audit logging is enabled for AI-related activities for compliance. Microsoft 365 provides auditing and DLP tools that can track sensitive data usage even in AI scenarios. If not already done, define data access boundaries for AI – essentially confirming “what data AI tools can and cannot access” and setting any needed restrictions. Also, establish an internal support process: if users have questions or if the AI produces uncertain output, how should they escalate it? The MSP might set up a feedback channel (like a Teams channel for AI Q\&A or issues) to gather user inputs post-rollout. [eatonassoc.com]
By the end of Phase 4, the AI-driven solutions should be fully embedded in daily operations. All intended users have access, have been trained, and are actively using them for their work. The organization should start realizing the broader benefits: faster workflows across the board, more consistent outputs, and employees leveraging AI as a “copilot” in various tasks.
Roles: During full deployment, MSP responsibilities include technical rollout (e.g. pushing any required client-side updates or ensuring all targeted user accounts have the necessary licenses and access) and acting as the program manager for adoption. They will coordinate training sessions, prepare user guides or cheat-sheets, and remain on standby to troubleshoot any technical snags as user counts grow. The MSP continues to ensure security as new users come online – for example, confirming new users adhere to MFA and that any new devices are Intune-compliant, so the expansion doesn’t introduce vulnerabilities. The client’s leadership and managers hold a vital role in change management: they must encourage their teams to embrace the new ways of working. For example, a sales director might mandate that the team uses the AI proposal generation tool for all new proposals, or an operations manager might set a goal that 90% of routine service requests go through the AI triage bot. Managers should also celebrate early successes (e.g., “Our finance team closed the books in 3 days instead of 5, thanks to the automation – kudos to the team!”). Meanwhile, end-users are responsible for integrating these tools into their routine and providing feedback if something is not working well. The client’s IT support should now be prepared to handle basic inquiries about the AI tools (with the MSP as Tier-2 support for more complex issues). Essentially, in this phase the MSP gradually hands over day-to-day operation of the solution to the client (while still overseeing it), so clearly documented SOPs (Standard Operating Procedures) are created for the client’s IT team regarding the maintenance of these new systems. [eatonassoc.com]
Measurable Outcomes (Phase 4): By the end of the full deployment phase, the program should be hitting its targeted outcomes on a broad scale. Key metrics to look at include: User Adoption Rate – e.g. what percentage of employees are actively using Copilot or following the new automated process. The goal is high adoption; as a benchmark, >75% of the target users consistently using the AI tools is excellent (studies show many SMBs reach ~80% AI adoption in a few months with the right training and incentives). Productivity/Efficiency Gains – quantify the overall impact, such as “automated workflows now handle 100+ transactions per week that used to be manual” or “the average helpdesk ticket resolution time dropped from 4 hours to 1 hour after AI triage.” If the program included customer-facing improvements (like faster responses), customer satisfaction scores could be measured (e.g. an uptick in CSAT due to quicker service). Financial impact should also start to emerge: for example, if each hour saved is reinvested, calculate the notional cost savings. It’s not unrealistic to see on the order of $500–$2,000 per month in savings for an SMB through efficiencies and error reduction, as 66% of AI-adopting SMBs in one survey reported within a few months. The outcomes should be compiled into a report or dashboard – something an executive can glance at to see that, say, “AI automation has saved 50 worker-hours this month, prevented 10 potential errors, and improved our proposal turnaround by 2 days.” These concrete results validate the investment and set a baseline for continuous improvement. [eatonassoc.com]
Key Actions: The final “phase” is an ongoing effort that runs indefinitely once the solutions are in place. Achieving the outcomes is not a one-time event; sustaining and expanding them requires continuous monitoring and improvement. In this stage, the MSP transitions into a steady-state support and optimization role (often as part of a managed service agreement), and the client’s teams continue to refine their use of AI. Key activities:
Performance Monitoring & Support: The MSP (or client IT) should track key metrics on an ongoing basis – usage statistics, success rates of automations, system performance – using dashboards or reports. Regular reviews (e.g. monthly) are scheduled with client stakeholders to review these metrics and any incidents. For example, if Copilot usage data shows some departments lagging, the MSP can arrange additional training or investigate if there’s a blockage. If an automated workflow fails or is bypassed frequently, troubleshoot why and enhance it. It’s advisable to hold quarterly executive checkpoints focusing on AI/automation outcomes: in these, discuss ROI realized to date and decide on any course corrections or further investments. [connectwise.com]
Continuous Improvement & New Use Cases: With the first wave of AI solutions delivering value, identify further opportunities to leverage AI across the business. The MSP should help the client plan the next set of improvements. This might mean iterating on the current solutions (e.g. expanding an AI chatbot’s knowledge base to handle more queries) or applying AI to new domains in the organization. For instance, after seeing success in internal operations, the client may want to explore an AI-driven customer FAQ bot, or use Power BI with AI visuals for advanced analytics. Because technology evolves, new features in Microsoft 365 (especially around AI) will continue to emerge – the MSP keeps the client informed of relevant updates (for example, if Microsoft releases a new Copilot capability or integration, the MSP evaluates if it can help the client). Essentially, the MSP and client establish a cycle of innovation: pilot, rollout, measure, optimize, then repeat with new ideas. This prevents stagnation and ensures the client continues to benefit from the latest improvements. It also turns the initial project into a long-term partnership, where the MSP acts as a virtual CIO continuously aligning tech advances with the client’s business strategy.
Roles & Responsibilities Formalization: Over time, some responsibilities may shift more to the client’s internal team. Part of optimization is ensuring the client can manage day-to-day operations of the automations (with runbooks or admin guides provided by the MSP). However, areas like advanced AI tuning, major updates, or building new automations might remain the MSP’s role. It’s important to clearly define this in the ongoing phase to avoid gaps. Typically, the MSP handles system health, updates, and complex changes, while the client handles basic user administration and identifies business needs. Regular governance meetings should also ensure compliance is maintained – e.g. review audit logs to ensure AI usage is within policy, and update policies if regulations or business needs change.
Measurable Outcomes (Ongoing): In the long run, the program’s success is gauged by sustained and improved metrics. Efficiency gains should accumulate – for example, if in the first quarter 200 hours were saved, aim for 300+ hours saved in the next with further optimizations. User adoption should remain high or even increase as new features are added (you might target near-100% adoption for applicable roles after ample time and improvements). Business impact can be measured in higher-level terms too: perhaps the SMB client can handle a greater volume of business without adding headcount, or employees report higher satisfaction because they can focus on more creative tasks instead of routine work (this could be measured via employee surveys). The ultimate outcome is that the client organization is now more agile, efficient, and AI-augmented than before: they have, as the blog put it, truly “embraced AI-driven solutions and automation” in their day-to-day operations. The MSP should also track the ROI of the project for the client (e.g. productivity gains quantified in dollar value versus the cost of the solution over time), as well as for the MSP’s own business (since a successful outcome often leads to contract renewals, referrals, and case studies for the MSP).
Roles and Responsibilities Overview
To ensure clarity, the table below summarizes the key roles and responsibilities for the MSP and the client throughout this program:
MSP (Service Provider)
Client (SMB Stakeholders)
Strategic Advisor & Project Lead: Drive the overall program plan, phase by phase. MSP consultants perform the initial environment and process audit, uncovering automation opportunities [eatonassoc.com]. They define the solution architecture (which M365 Premium tools and AI services to use) and set success KPIs in consultation with client executives.
Executive Sponsor & Stakeholder Alignment: Assign a senior sponsor (e.g. CEO or Principal) to champion the initiative and communicate its importance. Ensure department heads are engaged to define business pain points and priorities. For example, finance and operations managers enumerate the manual processes and pain points that need improvement [eatonassoc.com], providing clear goals for the MSP to target.
Technical Implementation & Integration: Configure Microsoft 365 Business Premium security features, deploy Copilot/AI tools, and build Power Automate flows or bots as needed. The MSP handles all technical setup, from enabling licenses to integrating AI with line-of-business data [eatonassoc.com], ensuring solutions work seamlessly in the client’s environment. They maintain a secure and compliant configuration throughout (e.g. enforcing identity controls, data access limits as defined).
IT Coordination & Data Provisioning: Client’s IT staff or primary IT contact works with the MSP to provide access to systems and data required for automation (e.g. ensuring the MSP can connect to a CRM or database if needed). They validate that security and compliance requirements are met from the client’s perspective, approving changes like security policy updates. IT also prepares to support the new tools post-deployment (with documentation from MSP).
Training & Enablement: Educate and guide users on the new AI-driven processes. The MSP creates user-friendly documentation and conducts training sessions (live demos, Q&A) for various teams.
They also set usage guidelines (in line with company policies) for AI tools, so employees know how to use Copilot or automated workflows effectively and responsibly.
Employee Adoption & Change Management: The client’s management ensures that employees attend trainings and actually use the new tools. Leaders lead by example – e.g. management demonstrates its own use of AI tools in meetings – to foster a culture that embraces automation.
Department heads monitor their teams’ adoption and address any resistance or issues (with feedback to the MSP for further support if needed).
Monitoring & Optimization: Continuously monitor solution performance and results. The MSP tracks metrics (usage, time saved, errors prevented, etc.) and reports these to the client in regular reviews [connectwise.com]. They proactively fine-tune workflows or AI configurations to improve outcomes. The MSP also keeps the client informed about new Microsoft 365 features or AI updates that could enhance the solution, proposing enhancements over time.
Feedback & Continuous Improvement: Client stakeholders provide ongoing feedback on what’s working or where further improvements are needed. For instance, end-users report if an AI-generated report needs tweaking or if an automated process could cover more scenarios. Business units also identify new areas where automation could help. This feedback loop allows the program to adapt and expand, keeping the automation roadmap aligned with evolving business needs.
Measurable Outcomes and Success Metrics
By following this structured program, MSPs and their SMB clients can achieve concrete outcomes. Below are key success metrics to track, which tie back to the goals of “embracing AI-driven solutions and automation”:
Productivity Gains: Significant reduction in manual effort and process cycle times. Aim for on the order of 20+ hours per month of routine work eliminated for key teams (e.g. through automated workflows) – indeed, over half of SMBs using AI report saving at least 20 hours monthly by automating repetitive tasks. For example, if an approval process that used to take 3 days (with human reminders) is now done in half a day via Power Automate and Teams notifications, that translates to faster results and labor hours returned to the business. We should document such improvements for each automated process (e.g. “X process now 70% faster, saving Y hours per week”). Over a year, these efficiency gains should reflect as either capacity to handle more work with the same staff or cost savings by reallocation of effort. [eatonassoc.com]
User Adoption & Engagement: High adoption of AI tools across the organization, indicating user buy-in. A successful outcome is when a substantial majority of employees (75%+) in scope are actively using the provided AI-driven solutions in their day-to-day work. As a benchmark, many SMB deployments have seen around 80% of users adopting AI tools within 3 months when those tools clearly help in their job. We will track metrics like number of Copilot queries per user, number of tasks run through the automated workflows vs. old manual way, etc. A rising trend and broad usage means the workforce has embraced the change. Qualitatively, positive employee feedback – e.g. users saying “the new system saves me an hour each day” – signals cultural acceptance of AI. [eatonassoc.com]
Process Accuracy and Quality: Automation and AI should not only speed things up but also reduce errors and improve consistency. We will measure error rates or rework instances before vs. after. For example, if manual data entry in a report often had mistakes, and now an AI-driven process generates that report, the error rate should drop to near-zero. Similarly, an AI helpdesk triage might decrease misrouting of tickets. These quality improvements may be seen in metrics like a reduction in corrections needed or higher compliance (since automated steps occur the same way each time). In surveys, employees might report that outputs from AI (emails, analyses, etc.) meet quality standards most of the time, which is an improvement over previous human variability.
Business Impact & ROI: Ultimately, the program’s success will reflect in business-level outcomes. This can include cost savings, capacity for growth, and better service delivery. We will translate efficiency metrics into financial terms – for instance, 20 hours saved per month in a department is equivalent to approximately 0.5 FTE, which for an SMB might mean ~$1,000 in cost saved or re-deployable value (in line with findings that ~66% of AI-using SMBs save $500–$2,000 monthly through such optimizations). If automation allowed the company to avoid hiring an additional employee despite growth, that’s a direct cost avoidance benefit. Additionally, faster response times and improved deliverable quality can enhance customer satisfaction, which may lead to revenue retention or growth (though harder to measure short-term, we can use customer feedback or NPS as indicators if available). The MSP and client should agree on a few top-level KPIs that matter to leadership – for example, average project delivery time, monthly sales proposals completed, or customer ticket resolution rate – and see how those move after the AI implementations. These tie the technological outcomes to business outcomes like revenue growth or risk reduction. [eatonassoc.com]
Security & Compliance Posture: An often overlooked but crucial outcome of introducing automation under Business Premium is that it can increase security and compliance rather than risking it. By using M365’s secure ecosystem, the client’s data is now more centrally governed. We will note improvements such as an improved Microsoft Secure Score, 100% MFA coverage (if it was lower before), and adherence to data handling policies even as AI tools are used (verified via audit logs). A secure foundation means the AI-driven operations run without incidents – success is measured by the absence of security breaches or compliance violations despite increased automation. In other words, the client achieves efficiency without sacrificing security, thanks to the MSP’s careful governance (this addresses a key requirement that AI adoption be “measurable, compliant, and built to scale”). [connectwise.com]
In summary, by the end of this program the MSP-enabled initiative should deliver clear, executive-level results: faster workflows, empowered employees, and tangible savings. For example, an executive report might read: “Through AI-driven automation, the organization improved operational efficiency by 30%, saving an estimated 120 hours of work per month and $XV in costs. User adoption of the new tools is at 85%, and error rates in key processes have dropped to near zero. These enhancements were achieved while strengthening security (Secure Score up by 15 points), enabling the company to scale effectively into 2026.” Such outcomes demonstrate that the MSP’s step-by-step program not only met the objectives of item three (“Embracing AI-Driven Solutions and Automation”) but did so in a structured, risk-managed way that delivers value to the SMB client’s bottom line. [eatonassoc.com]