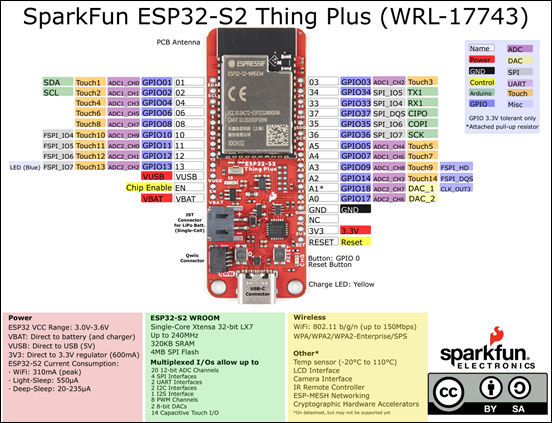
I had a recommendation to move to a different IoT device to make connection to Azure and programming easier going forward. The recommendations was to use a:
SparkFun Thing Plus – ESP32-S2 WROOM
So the first thing I needed to do was get the right board selection working with PlatformIO. The end result of this was the need to use this platformio.ini file in the project:
[env:sparkfun_esp32s2_thing_plus]
platform = espressif32
board = sparkfun_esp32s2_thing_plus
framework = arduino
and you can look at this for further reference:
Once I had the board being recognised and accepting uploads the next challenge was to execute some code. I went back to start and did the standard stuff I’d done with other devices like:
but with the SparkFun Thing Plus – ESP32-S2 WROOM device instead. All of that is pretty straight forward on any device, so I won’t repeat the details here. What I though I’d cover off is something new on attaching a servo motor to the device.
The configuration is pretty simple as shown above. I used a:
that basically has three connections – Power, Ground and Control as shown above.
I found some simple example code that I could use here:
I have also put all the code I’ve actually used for my ESP32-S2 device here:
https://github.com/directorcia/Azure/tree/master/Iot/ESP32-S2
I also needed to add the
library from Kevin Harrington to the project.
The code that I used to make the servo ‘sweep’ backwards and forwards is here for your reference:
https://github.com/directorcia/Azure/blob/master/Iot/ESP32-S2/servo.cpp
and here’s what it looked like when it ran on the device:
With this new device under control, it’s time to move onto bigger projects.


One thought on “New IoT device with a servo motor”