
Managing Microsoft 365 (M365) issues on behalf of customers is a core responsibility for Small-to-Medium Business Managed Service Providers (SMB MSPs). A structured approach to working with Microsoft Support can significantly speed up issue resolution and ensure a seamless support experience for both the MSP and the customer. This guide outlines a step-by-step process for engaging Microsoft Support effectively, along with best practices to maintain clear communications and minimize downtime. We’ll cover initial troubleshooting, opening and managing support tickets, communication strategies, and post-resolution follow-ups – all tailored to help an MSP navigate Microsoft’s support system efficiently while keeping customers informed.

Step 1: Initial Issue Assessment and Troubleshooting
Begin with a thorough internal assessment of the problem. As soon as an issue is reported by the customer, the MSP should gather key details and attempt basic troubleshooting. Start by identifying what is not working and who is affected. For example, determine if the issue is isolated to a single user or widespread, and note any error messages or abnormal behaviors observed[1]. It’s important to replicate the problem if possible, to confirm its scope and symptoms. Documenting the exact steps that lead to the error will help both your team and Microsoft pinpoint the cause[1].
Next, perform common initial fixes and checks. Depending on the nature of the issue, this might include actions such as: clearing browser cache and cookies (for web app issues), trying an alternative browser, restarting the affected application or device, checking the user’s account status and permissions, and verifying internet connectivity[1]. For Outlook or desktop Office app problems, one might attempt steps like creating a new mail profile or ensuring the latest updates are installed[1]. These standard troubleshooting steps often resolve transient issues or reveal configuration problems without needing to contact Microsoft.
Meanwhile, check the Microsoft 365 Service Health Dashboard in the tenant’s admin center to see if any known outages or incidents could be related. Microsoft might already be aware of a problem affecting multiple customers; if so, the dashboard or Message Center will have alerts. If a relevant service incident is listed (e.g. “Exchange Online – Users may be unable to send emails”), this can save time by confirming the issue is on Microsoft’s side. In such cases, your role may shift to monitoring Microsoft’s updates and keeping the customer informed, rather than troubleshooting something that is out of your control.
If the issue appears to be specific to the customer’s environment, gather diagnostic data early. For example, note the exact time the issue occurred (important for log correlation)[1], and whether it is continuous or intermittent. Identify any changes in the environment that happened around the onset of the issue – for instance, was a new update applied, or was a configuration changed? Having this context will be valuable information. The initial assessment should result in a clear problem statement (what is happening, under what conditions, and impact), along with a list of steps already taken to troubleshoot.
By thoroughly completing this Step 1, the MSP can either resolve simple issues independently or, for more complex problems, be well-prepared to engage Microsoft with a solid understanding of the situation.
Step 2: Utilize Self-Help Resources and Tools
Before escalating to Microsoft Support, leverage the abundant self-help resources and automated tools available for M365. Microsoft provides extensive documentation and diagnostic utilities that MSPs can use to either fix the issue or collect additional information. Utilizing these resources can often lead to a quick solution and demonstrates due diligence when you do need to involve Microsoft.
Search Microsoft’s Knowledge Base and Community Forums: Microsoft’s official support site and Tech Community forums contain a wealth of articles and Q\&A threads on common M365 issues. It’s often helpful to search for the specific error codes or symptoms you’ve observed. This could surface known fixes or user-contributed solutions. For example, if a SharePoint site isn’t loading for a client, a quick search might reveal an ongoing issue or a configuration tweak that solves it. Microsoft’s documentation and the community can save time by pointing to existing solutions for known problems, so you’re not “reinventing the wheel.”
Run Microsoft 365 Troubleshooters: Microsoft offers automated troubleshooters in the “Get Help” app for many Office 365 applications[2]. These wizards can detect and often fix issues related to Outlook email configuration, Office activation, Teams connectivity, etc. For instance, the Microsoft 365 Support and Recovery Assistant (SaRA) is a downloadable tool that can diagnose problems with Outlook profiles, connectivity to Exchange Online, or OneDrive sync issues. Running these tools on the affected system can either fix the issue automatically or gather detailed logs and error reports that will be useful if you escalate to Microsoft[3][3]. Ensure you note any errors or results from these utilities to include in your case notes.
Use the Remote Connectivity Analyzer and Other Diagnostic Tools: For issues like Exchange mail flow, Skype for Business/Teams connectivity, or network-related problems, Microsoft’s Remote Connectivity Analyzer (available online) can perform tests from outside the environment to identify DNS misconfigurations or firewall issues[3]. Tools like Message Trace in the Exchange admin center, or SharePoint’s built-in health checks, are also valuable to run beforehand. If an email is not being delivered, a message trace might show it never left the outbound queue, indicating the problem lies before Microsoft ever needs to step in.
Performing these self-help steps serves two purposes: you might resolve the issue without needing formal Microsoft support, and if not, you will have richer information to provide to Microsoft. Microsoft’s support engineers often ask for these very diagnostics early in the support process. By doing them upfront, you can include the results in your initial ticket submission, potentially avoiding one or two back-and-forth cycles with support[4][4]. For example, instead of Microsoft asking you to run a network test after you open the case, you can preempt that request by saying “We ran the Microsoft 365 network connectivity test – see attached results showing high latency to the Exchange Online service endpoint.” This proactive approach shows Microsoft that the MSP has taken initiative and can accelerate the troubleshooting phase.
In summary, exhaust the readily available troubleshooting avenues. This will either fix the problem promptly or arm you with data and confirmation of what the issue is not, which is equally helpful. Once you have done this homework and the issue still persists, it’s time to engage Microsoft Support with confidence that you’ve covered the basics.
Step 3: Prepare Detailed Case Documentation for Microsoft
If the issue requires Microsoft’s assistance, preparation is critical before you actually create a support ticket. A well-documented case description can drastically reduce resolution time by enabling Microsoft engineers to understand the problem context immediately. Gather and organize all relevant information about the issue so that you can provide Microsoft a comprehensive picture from the outset.
Key information to collect includes:
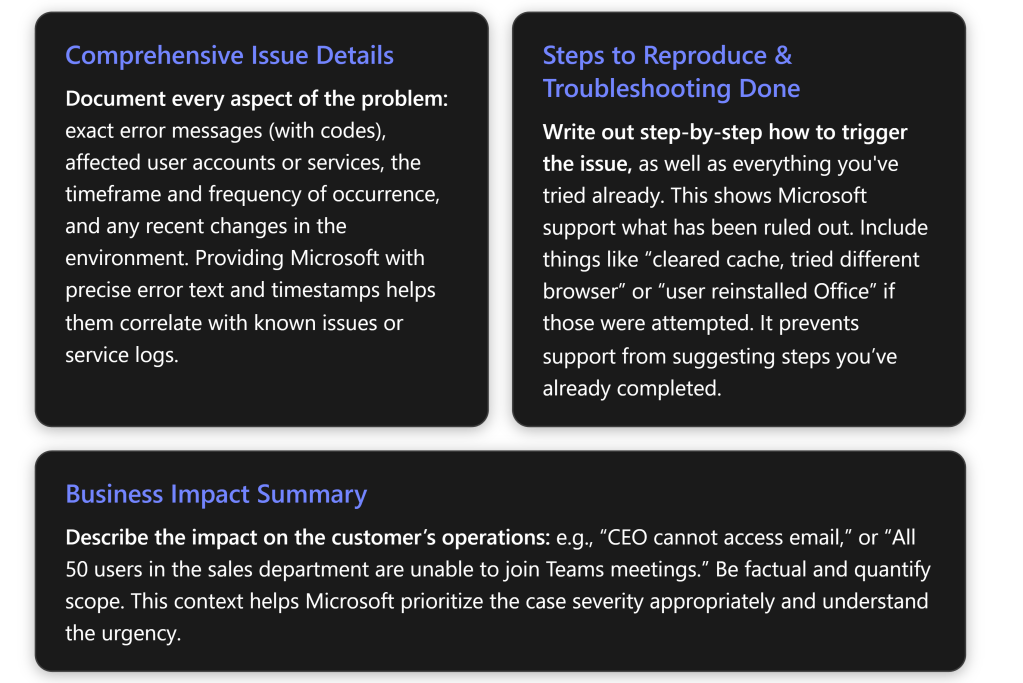
In practice, creating a short document or ticket draft with all these points is helpful. Below is a checklist of information you should have ready (and ideally include in the support request description or attachments):
Checklist: Information to Include in a Microsoft Support Case
Information to Gather
Description / Example
Issue Summary
A one-sentence description of the problem and its effect. E.g., “Users receive error ‘Cannot connect to mailbox’ when launching Outlook, unable to send/receive email.”
Error Messages or Codes
The exact wording of any error and any error code displayed. Include screenshots if applicable[1][1]. E.g., Error 0x8004010F in Outlook.
Affected Users/Services
Who or what is impacted. E.g., “One user (user@company.com)” or “All users in tenant” or “SharePoint site X.” This helps scope the issue[1].
Date/Time and Frequency
When the issue started and how often it occurs. E.g., “Started around 3:00 PM UTC on July 10, happens every time user tries to login”[1].
Steps to Reproduce
Step-by-step actions that consistently trigger the problem[1]. E.g., “Open Teams, click Calendar, error pops up.” If not consistent, describe conditions when it occurs.
Troubleshooting Performed
List of actions already taken to diagnose or fix the issue[1]. E.g., “Rebooted PC, cleared app cache, tried on different network, issue persists.”
Environment Details
Relevant technical context: operating system and version, Office app version, browser version, device type, etc.[1]. E.g., “Windows 11 + Office 365 Apps v2306, on domain-joined PC.”
Recent Changes
Any notable changes prior to onset. E.g., “Exchange license was modified this morning” or “Windows update applied last night.”
Business Impact
Briefly explain the severity from the customer’s perspective. E.g., “Executive assistant cannot access mailbox to schedule meetings, causing delays.”
Including screenshots or logs as attachments is highly recommended, especially if the issue is complex. For instance, if SharePoint is showing an error, take a screenshot of the error page. If email is not flowing, perhaps attach the non-delivery report (NDR) or relevant log excerpt. Ensure any sensitive information is handled appropriately (Microsoft support has mechanisms for secure file upload if needed). As a security measure, Microsoft may require you to consent to them accessing diagnostic information or logs from the tenant[5]; be prepared to grant that in the admin portal when opening the case.
This level of detailed documentation achieves two things: (1) it provides Microsoft the information needed to start troubleshooting immediately, and (2) it demonstrates that the MSP has been methodical, which can instill confidence and lead to more efficient collaboration. When you clearly communicate what you’ve observed and done, Microsoft support can skip asking basic questions and move straight to advanced diagnostics or known issue checks. According to internal guidelines, help desk agents appreciate when you “provide as much detail as possible… all symptoms, error messages, exact steps to reproduce, and any troubleshooting already completed”[1][1] up front.
Take a moment to review and organize this info before submitting it. Now you’re ready to create a well-informed support ticket.
Step 4: Create a Microsoft Support Ticket (Service Request)
With all the necessary information at hand, the next step is to open a support case with Microsoft through the appropriate channel. For M365 issues, this is typically done via the Microsoft 365 Admin Center for the customer’s tenant (or via your Partner Center if you are a Cloud Solution Provider managing on behalf of the client). The process is straightforward but there are a few things to do carefully to optimize the support experience.
Access the Support Interface: Log in to the Microsoft 365 Admin Center with an administrator account that has permissions to create support requests (Global Admin or a delegated admin role for partners)[6]. In the left navigation menu, click on “Support” (or the question mark icon), then choose “New service request” or “Get help”. This will initiate the case creation flow[6].
Fill in the Issue Details: You will be prompted to describe the problem. Provide a concise yet specific description in the summary or subject line, and paste in the detailed description you prepared (from Step 3) into the description field[6]. Focus on the key facts: what the issue is, when it started, who is affected, and what error is seen[6]. There may be dropdowns to categorize the issue (e.g., select “Exchange Online” or “Microsoft Teams” depending on the service). Choose the category that best fits so the ticket is routed to the right support team.
Most support forms allow attachments; attach your screenshots, error logs, or any files that can help illustrate the problem[6]. Also, if the form supports it, include the steps already taken and the business impact in the description. Essentially, you want the support engineer who picks up the ticket to see all the relevant information immediately upon reading your case.
Set the Severity (Priority) Level: Microsoft will ask you to indicate how severe/urgent the issue is. Choose the appropriate priority based on the business impact – do not understate it, but also be accurate and avoid inflating for a minor issue. Typically, the levels are something like[6]:
- Critical (Severity A) – Severe business impact, e.g., entire service down or all users unable to work. (Use sparingly, reserved for major outages)[6].
- High – Significant impact, but operations partially functioning, e.g., multiple users or a major feature is affected.
- Medium – Moderate impact, e.g., issue affects one or a few users or has a workaround available.
- Low – Non-urgent or consultative issues, general questions.
Selecting the right severity is important because it influences response times and resource allocation. For instance, a Critical incident may trigger immediate attention (in Premier Support cases, a 15-minute response is expected for Sev 1[7], whereas in standard support a Sev A might be around 1-hour initial response). Keep in mind that if you mark something Critical, Microsoft expects you to be actively available to work with them in real-time until resolution, as these are 24/7 engagement scenarios. Conversely, mislabeling a low-impact issue as Critical could strain credibility or lead to unnecessary urgency.
Review and Submit: Before hitting submit, double-check everything[6]. Ensure contact information (your email/phone) is correct. Verify that your description is clear and attachments are properly uploaded. It’s easy to overlook details in the rush, but spending an extra minute here can prevent miscommunication later. Once satisfied, submit the ticket. The system will generate a case number (write this down!) and you should receive an email confirmation with the case reference[6].
Immediately after submission, if the issue is very urgent (e.g., a production outage), consider also calling Microsoft support by phone and referencing your case number. For Microsoft 365, phone support is available for admins – the confirmation email or support portal will list a number for critical issues. By calling in and giving the case number, you can sometimes expedite the assignment of an engineer, especially off-hours.
In summary, treat the support ticket creation like crafting a medical chart for a doctor – clear symptoms, history, and severity. A well-crafted ticket with the right priority set will go to the correct support queue and person with minimal delay, setting the stage for a faster resolution[8]. Now that the case is open, the collaborative phase with Microsoft support begins.
Step 5: Engage and Communicate Effectively with Microsoft Support
Once your support case is logged, an engineer from Microsoft (or a support agent from the initial triage team) will be assigned to work with you. Effective communication with the support engineer is crucial for a smooth resolution. As an MSP acting on behalf of your customer, you are the liaison between Microsoft and the client’s issue, so managing this communication well will ensure nothing falls through the cracks.
Respond Promptly and Professionally: Microsoft may reach out via the case portal, email, or phone – often depending on severity and time of day. Aim to respond to any queries or requests for information as quickly as possible. The faster you answer their questions or perform requested tests, the faster the issue can progress. Keep your responses clear and concise, addressing all points the support engineer asked. For example, if they ask for a specific log file or to run a PowerShell command, do that promptly and report the results or upload the logs. Document each action and result in your reply so it’s easy for the engineer to follow[6].
Maintain Clarity and Completeness: When communicating with the support engineer, remember they might not be familiar with your environment beyond what you provided. Be explicit in your descriptions. Avoid acronyms or internal jargon that Microsoft might not know – use standard terminology. It can help to structure your communications in bullet points or numbered steps if you have multiple things to convey (much like how we prepared the case information). If sending an email update, for instance, recap: “We have tried X and Y as suggested, here are the outcomes… We are also seeing new error code __ at 10:15 AM. Attached are the latest logs.” This level of clarity ensures the engineer doesn’t miss important details. Microsoft’s own best practice guidelines suggest using clear, straightforward language and providing as much detail as possible in each communication[6].
Cooperate with Diagnostic Requests: It’s common for Microsoft support to request additional diagnostics – e.g., enabling logging, collecting trace files, or trying a specialized troubleshooting step. Even if you performed similar steps earlier, follow their guidance; they might want data captured in a specific way or format. For example, they may send you a link to run a Microsoft Support Diagnostic Package (which could collect detailed telemetry from your tenant with your approval). Work with the customer’s environment to run these and promptly share the results. Each iteration of data collection can take time, so the sooner you fulfill these requests, the better. When providing files or logs, double-check you are not omitting anything, which could lead to another round-trip (e.g., “Oops, you sent the wrong log file, can you send this other one too?”).
Keep a Log of Interactions: As an MSP, it’s wise to maintain an internal log of everything that happens on the case – basically your own running notes separate from the Microsoft case portal. Log timestamps of communications, the name of the Microsoft engineer(s) you speak with, and summary of discussions[6]. Note any case escalations or commitments (e.g., “Microsoft will get back to us by 5 PM with an update.”). This not only helps in case you need to brief someone else on your team or the customer, but also is useful if the case needs to be handed over to a different Microsoft engineer – you can quickly get them up to speed on what’s been done.
Importantly, ensure consistency and persistence. If the issue is ongoing, try to have one point of contact from your MSP (perhaps you or a designated engineer) handle communications with Microsoft, to avoid confusion. That person should stay engaged until resolution. Should you need to bring in another colleague (for example, a specialist on a technology), coordinate so Microsoft gets clear answers and doesn’t hear different information from multiple sources.
Escalation within Microsoft Support: If you sense that the support engineer is not grasping the problem or progress is stalled, you can politely request an escalation. Microsoft has tiers of support; the first engineer might be a generalist doing initial troubleshooting. If after a reasonable back-and-forth the issue remains unsolved, you can say: “This issue is impacting our customer significantly. Could we involve a senior engineer or a specialist for deeper analysis?” Many seasoned MSPs find that asking for a higher-tier engineer or a product expert can break a deadlock[4]. Microsoft’s own forums note that you can “specify in the ticket that you want an expert and not a level 1 support” for complex issues[4] – this can sometimes connect you with someone with deeper knowledge sooner. Of course, use this judiciously and always remain courteous; the front-line support is there to help, and showing collaboration (not frustration) often encourages them to champion your case internally.
Leverage Real-Time Communication if Available: Sometimes email or the portal isn’t enough, especially for complex issues. Don’t hesitate to schedule a call or Teams session with the support engineer. Interactive troubleshooting can resolve things faster since you can share screens, demonstrate the issue live, or perform actions while the engineer observes. In critical cases, Microsoft might initiate a conference call or even a remote session (with your permission) to solve the problem. Be ready to allocate time for these live sessions as they can be the quickest path to a fix for thorny problems.
Throughout engagement, maintain a professional and solution-focused tone. It’s understandable to be under pressure from your customer, but refrain from letting frustration seep into communications with Microsoft. If the process is dragging, you can firmly but politely highlight the urgency and impact to encourage swift action[4]. Microsoft’s support personnel generally want to help you; establishing a cooperative rapport will make them more likely to go the extra mile. Remember, you and Microsoft are essentially on the same team with the shared goal of resolving the customer’s issue.
By communicating effectively at this step – being responsive, clear, and collaborative – you increase the likelihood of Microsoft Support diagnosing the issue correctly and providing a resolution in the shortest possible time.
Step 6: Track Case Progress and Escalate if Necessary
While Microsoft is working on the issue, it’s important for the MSP to actively manage and monitor the support case. Do not assume that once the ticket is logged, you can sit back and wait indefinitely. Staying on top of the case progress, and knowing when to push for escalation, is key to ensuring the issue gets resolved in a timely manner.
Monitor Updates in the Portal: The Microsoft 365 Admin Center (or Partner Center) will show the status of your support requests. Check the case status regularly in the “View my requests” section[6]. Microsoft engineers often add notes or ask questions in the portal’s case log. Ensure you have notifications enabled (you should get an email when they update the case, but it’s good practice to manually check as well, especially if the issue is critical). Timely reading and responding to these updates keeps things moving. If Microsoft marked the case as “Solution Provided” or “Pending Customer,” be sure to review what they’ve given – sometimes they might post a potential fix and wait for you to test and confirm.
Keep the Customer Ticket Updated: In your internal MSP ticketing system, continue to log each development (this was touched on in Step 5 as well). Label the ticket status clearly – for example, “Waiting on Microsoft” is a common status to indicate the ball is in Microsoft’s court[9]. This way, if colleagues or managers look at the ticket, they know it’s been escalated externally. Document any interim solution applied or any promises of follow-up from Microsoft (e.g., “Microsoft will provide an update within 24 hours after their internal team analysis”). This internal documentation discipline ensures nothing is forgotten and is useful for post-incident review.
Follow Up Regularly: If you haven’t heard back within the timeframe you expected, don’t hesitate to follow up with Microsoft[6]. As a guideline, if a day passes with no update on a non-critical issue, it’s reasonable to send a friendly inquiry: “Just checking if there are any updates or if any further information is needed from our side.” For higher priority cases, follow up even sooner (e.g., every few hours for a critical outage). Support queues can be busy, so a gentle reminder can refocus attention on your case. Be sure to reference your case number in any communication to avoid confusion.
Recognize When to Escalate: Sometimes an issue might be stuck without progress – perhaps the support engineer is waiting on input from a back-end product team, or they haven’t identified the root cause yet. If your issue has been open for an extended period with little traction, or if the impact on the customer is escalating, it may be time to escalate the case to a higher support tier or to management. Microsoft has an escalation process; you can ask the current support engineer to “please escalate this case, as the situation is urgent and we’re not seeing progress.” Many MSPs have learned that persistent follow-up calls can prompt escalation – one admin described calling every day and asking for escalation until the case moved up to tier 3 and eventually an engineer who could reproduce the issue was assigned[4]. While hopefully not every case requires such aggressive follow-up, know that escalation is an option in your toolbox.
If you are a Microsoft partner with Premier/Unified Support or Advanced Support for Partners, you might also have an assigned Technical Account Manager (TAM) or service lead whom you can reach out to for escalation assistance. They can often pull strings internally to get more resources on a critical case. If not, escalating through the normal support line is fine – ask for a supervisor if needed, explaining the business impact.
Adjust Severity if the Impact Worsens: The initial severity you set (Step 4) might need to be updated if things change. For instance, you opened as “High” priority because it affected a few users, but now it’s affecting the entire company. Communicate this change to Microsoft and request the case be treated with higher severity. They may need to formally update the ticket classification on their end to get the appropriate attention. Conversely, if a workaround has mitigated the immediate pain, you might downgrade the urgency when speaking with support (though usually leaving the severity as-is until final resolution is fine).
Throughout this process, keep the customer informed (which we’ll address in the next section in detail). They should know that the case is in progress and that you’re actively managing it. It can be very reassuring for a client to hear, “We have a Microsoft support case open and we’re checking in with them regularly; we’ve also requested an escalation due to the importance of this issue.”
Finally, know the escalation path on your side as well. If you’re the frontline MSP engineer and things are not moving, loop in your own management or a senior engineer for advice. Maybe someone in your company has seen a similar issue before, or has a partner channel contact at Microsoft. As an MSP, it’s about leveraging all resources to advocate for your customer’s needs.
In summary, treat support cases as active projects that need management. Regular attention and timely escalation can shave days off the resolution time, minimizing the disruption for your customer[10]. Persistence (with politeness) is often necessary to ensure your case doesn’t get lost in the shuffle.
Step 7: Update the Customer and Manage Expectations
Parallel to the technical troubleshooting, client communication is a continuous thread that must be maintained. Your customer is likely anxious to have their problem resolved, and part of your role as their MSP is to keep them informed and confident that progress is being made. Effective communication with the customer ensures a seamless support experience, even if the issue itself is complex or lengthy to resolve.
Initial Notification to the Customer: As soon as you recognize the issue and have engaged Microsoft (or even before that, during initial troubleshooting if it’s obvious the problem is significant), let the customer know you are aware of the problem and taking action. Acknowledge the issue in clear terms – for example, “We’re aware that several users cannot access email and we have identified this as a likely server-side issue. We’ve engaged Microsoft support to assist.” According to MSP outage communication best practices, an immediate alert should include a brief description of the problem, who/what is impacted, and steps being taken[11]. This early communication reassures the client that their MSP is on top of things and prevents them from feeling the need to chase for updates.
Set Expectations on Timeline: In your initial or early communications, it’s important to manage expectations. If you’ve opened a Microsoft case, you might say, “Microsoft support is now investigating; based on similar cases, initial analysis might take a few hours. We will update you by this afternoon.” If it’s a severe issue, you might commit to more frequent updates. The key is not to promise unrealistic timelines; if you don’t know how long it will take, be transparent about that but assure them that it’s being treated with urgency. For instance, “We’ve marked this as a critical case with Microsoft. Their engineer is currently collecting data. We don’t have an ETA yet, but we will let you know as soon as we do. Expect an update from me in 2 hours even if it’s just to say we’re still working on it.” Even an update of “no new news” at a regular interval is better than silence.
Regular Status Updates: Throughout the life of the case, send periodic updates to the customer. The frequency should correspond to the impact and severity – in a total outage, every few hours or as agreed; in a less critical issue, maybe daily updates. These updates should summarize progress: what has been done recently (e.g., “We provided Microsoft with the log files they requested and they are analyzing them now”), what the current status is, and next steps or expected actions[11]. If Microsoft provided a potential workaround or asked for a test that involves the customer’s input, mention that too. For example, “Microsoft suggested a potential workaround. We implemented it on one affected user for testing, and it appears to restore email access. We are now rolling it out to all users as a temporary fix while Microsoft works on the root cause[11].” Such updates illustrate momentum and keep the customer in the loop.
Use Multiple Communication Channels (if appropriate): Determine the best way to reach your client for updates. Email is common for written status updates, but in urgent situations a phone call can be appreciated, especially for major milestones (like “We have a temporary fix, can we walk you through applying it?”). Some MSPs use client portals or dashboards where they post updates that clients can view at any time[11]. The medhacloud guidelines note using channels like email for detailed updates, phone for critical alerts, and even live chat for real-time queries during an ongoing incident[11]. Cater to your customer’s preferences and the severity of the scenario.
Be the Translator: Often you’ll get technical information from Microsoft that might be over the customer’s head. Part of expectation management is translating that into terms the customer understands and cares about. If Microsoft says, “We found a problem with Exchange Online service and they’re applying a fix on their backend,” you might tell the customer, “Microsoft identified an issue in their cloud email service and is deploying a fix. This likely means the issue was on Microsoft’s side. We expect the service to gradually recover within the next hour based on their update.” Keep it high-level – clients mainly want to know what impact or action for them and how much longer. Avoid forwarding raw technical logs or Microsoft’s lengthy explanations directly to business stakeholders who may not find it useful.
Provide Interim Solutions or Workarounds: If any workaround is available, inform the customer how they can use it to alleviate pain while the full fix is in progress. For example, “While Microsoft works on a permanent fix for the Outlook issue, users can access email through the Outlook Web App as a temporary solution.” Make sure they know this is temporary. Clients appreciate having options, even if not ideal, to keep business moving. Also, communicate any interim risk mitigations – e.g., “We’ve advised Microsoft this is an urgent issue for payroll processing, and in the meantime we’ve rolled back the software update that seemed to trigger the problem.” This level of detail shows proactive steps to reduce impact.
Stay Honest and Don’t Over-Promise: If things are taking longer than expected, let the customer know. It’s better to say “This is more complex than initially thought, but we are continuing to escalate with Microsoft; thank you for your patience” than to go quiet or give false assurances. By managing expectations, you maintain trust. Clients generally understand that some issues are outside anyone’s immediate control, especially if it’s on the vendor’s side, as long as they feel informed and involved. What frustrates customers most is feeling left in the dark or misled about progress.
Escalation Communication: If the customer is particularly high-stakes (say a VIP user or a business-critical system), you might involve their stakeholder in communications with Microsoft in some way. Sometimes on big calls you might invite a client’s IT representative to join. Or at least let them know, “We have escalated this to Microsoft’s senior engineers and even involved their product team due to the critical nature.” This again reinforces that you’re taking all possible actions. In extreme cases, the client might ask to speak with Microsoft support directly. Typically, as the MSP, you should remain the primary interface (both to control the flow of info and because you likely have the technical context), but you can arrange a joint call if needed.
Finally, when sending updates, highlight the good: “Microsoft has found the cause and is now deploying a fix,” but also be transparent about the not-so-good: “Their initial fix didn’t work, so the issue is still ongoing; we’ve escalated further.” It’s this trust through communication that defines a seamless support experience – even if the actual resolution takes time, the journey is managed in a way that the customer feels supported throughout[11]. In fact, effective communication during outages or issues often earns praise from clients, because it demonstrates reliability and commitment[11].
By properly managing customer expectations and keeping them informed, you ensure that when the issue is finally resolved, the customer remembers not just the problem, but also the professionalism and care with which it was handled.
Step 8: Verify Resolution and Ensure Recovery
After troubleshooting and collaboration with Microsoft Support, there will (hopefully) come a point where a solution or fix is identified. Step 8 is about executing that solution and verifying that it truly resolves the issue for the customer. It’s critical not to consider the case closed until both the MSP and the customer are confident that everything is back to normal.
Implement the Fix or Workaround: Microsoft might provide a fix in various forms – it could be a configuration change, a patch or update to apply, a command to run, or they might inform you that they have made a change on their side (in the cloud service) that should resolve the problem. Follow the instructions carefully. If it’s something you need to do on the customer’s environment (like adjusting a setting or installing a local update), schedule it at the earliest appropriate time (immediately for critical issues, or in a maintenance window for less urgent ones, coordinating with the client as needed). Document exactly what steps are taken to implement the fix.
For example, Microsoft might say: “We’ve identified a bug and applied a fix in the backend, please have the affected users restart Outlook.” In such a case, you’d proceed to have users restart and perhaps clear some cache as instructed. Or if they provided a script to fix mailbox permissions, run that and note the output.
Thorough Testing: After applying the fix, test the original issue scenario to confirm it is resolved. This should be done in a controlled way. If the issue was with a single user, work with that user to validate the fix (e.g., have them log in and confirm they can now send email, or that the error no longer appears). If it was a broader issue, test across a sample of affected users or systems. It’s often wise for the MSP to do their own test first, if possible, before saying to all end-users “go ahead, it’s fixed.” For instance, if SharePoint was down, test loading the site yourself and maybe ask one or two key users to retry and confirm performance is back. Don’t just take Microsoft’s word that it’s fixed – verify it in the real environment.
Ensure that all aspects of the problem are addressed: if the issue had multiple symptoms, check each one. Sometimes a fix might solve the primary error but reveal another minor issue, so you want to catch that before declaring victory. If the issue was time-sensitive (maybe causing backlog), also verify that any queued activities (like emails in queue, or pending tasks) have caught up once service is restored.
Customer Confirmation: Once your own testing suggests the problem is solved, reach out to the customer to confirm. Have the end-users try the scenario that was failing and report success. It’s important the end-user’s perspective is positive – maybe your test account works, but the user might do something slightly differently. When the customer confirms “Yes, everything works now, and I can do my job again,” you’ve achieved the main goal. This is also a good time to express empathy about the inconvenience and joy that it’s resolved: “I’m glad to report your email is functioning normally again. I apologize for the disruption, and we’re happy it’s been resolved.”
Restore Normal Operations: If any interim workarounds were in place (Step 7) or temporary measures enacted, remove or roll them back if appropriate. For example, if everyone was using webmail as a workaround, now that Outlook is fixed, ensure that’s communicated so they can go back to their usual workflow. If you deferred any maintenance or had to disable a feature temporarily, put things back to the regular state carefully.
It’s also wise at this stage to monitor the situation a bit longer even after the customer’s initial confirmation. If it’s a critical system, keep an eye on it for another day or two to be sure the issue doesn’t recur. Microsoft might close the case on their end as soon as they hear it’s fixed, but you can usually reopen within a short window if the issue comes back. Many support engineers will actually wait for you to confirm and might say “I’ll follow up tomorrow to ensure all is well before closing the ticket.” Use that safety net if offered.
Document the Outcome: Internally, note that the issue was resolved and how. Write a brief summary in your ticket: e.g., “Issue resolved on Microsoft’s end – root cause was a known bug in Exchange Online, Microsoft applied a fix at 3:00 PM. User confirmation received that email flows now work. Case #123456 closed.” This summary will be valuable later for your knowledge base and for any post-incident review (coming up in Step 9).
Microsoft often likes to confirm resolution as well; they might ask “Is it OK to close the case now?” Only agree once you are confident. If you need a day or two to be sure, you can tell them that and keep the case in monitoring status. Once confirmed, let them know and thank the support engineer for their assistance, which is good etiquette and helps maintain a good relationship.
In essence, Step 8 is about making sure “the patient is healthy” after the treatment. Just as a doctor would schedule a follow-up to ensure recovery, the MSP verifies that the fix delivered by Microsoft truly solved the issue and that the customer’s operations are back to normal. According to MSP resolution practices, this includes testing the fix and verifying with the client that everything is fully restored to normal operation[10]. Only then do we move on to closure and reflection.
Step 9: Close the Loop – Post-Incident Documentation and Actions
With the issue resolved and normalcy restored for the customer, the immediate fire is out. However, the process is not truly complete until you capture lessons learned and perform any follow-up tasks that can strengthen your service in the future. This step turns an incident into an opportunity for improvement and knowledge-building.
Document the Root Cause and Resolution: Work with the information from Microsoft and your own analysis to understand what exactly caused the issue. Sometimes Microsoft will explicitly tell you the root cause (for example: “A bug in the recent update caused a memory leak, which our engineering team has now fixed in the service” or “It turned out the customer’s mailbox was stuck due to a corrupt rule, which we removed”). Other times, the root cause might be “undetermined” especially if the solution was a workaround. Whatever the outcome, write down a clear description of the cause and the fix in your internal documentation[10]. If Microsoft provided a summary in an email or closure notes, you can use that as a starting point. Also include the case number and any important timelines (like “Outage from 10:00-14:00, resolved by Microsoft fix deployment”).
Add this information to your knowledge base or ticketing system in a way that’s easily searchable later. For instance, if you have a wiki or SharePoint for KB articles, create an article titled “Outlook clients failing to connect – July 2025 incident” that outlines the symptoms, cause, and resolution. This helps if the same or similar issue occurs again – your team can quickly reference what was done previously[10]. Even if the issue was a one-off, internal knowledge growth is invaluable.
Conduct a Post-Incident Review: For significant incidents, it’s a best practice to have a short internal meeting or debrief. Include the team members who worked on the issue and discuss questions like: What went well? What could have been done better?[10]. Perhaps your team reacted swiftly and communication was great (something to replicate next time), but maybe you realized you could have escalated to Microsoft 2 hours sooner than you did. Or maybe an internal monitoring system didn’t catch the issue early and you discuss how to improve that. Document any action items from this review, such as “implement better alerting” or “develop a checklist for future similar issues.”
It can also be useful to get the customer’s perspective: did they feel informed? If there were any complaints or confusion, incorporate that feedback. Many MSPs incorporate client feedback and internal retrospectives to refine their incident response process continually[11].
Update Internal Processes and Runbooks: If the incident revealed any gaps in your processes, now is the time to fix them. For example, if the team was uncertain how to contact Microsoft or wasted time figuring out how to gather certain logs, update your standard operating procedures to include those details for next time[9]. Make sure your internal documentation on “How to escalate to Microsoft” is up-to-date with correct phone numbers, portal instructions, etc. Possibly create a template for support requests that includes all the info from Step 3’s checklist so engineers have a guide for future cases.
Also, incorporate any new troubleshooting tips learned. If Microsoft taught you something (like a new PowerShell command or a hidden diagnostic tool), add that to your toolkit documentation. Each resolved case should enrich your MSP’s collective knowledge.
Preventive Measures: Determine if there are actions to prevent this issue from happening again (if preventable). For example, if the root cause was a misconfiguration on the customer side, you should correct that on all similar systems (e.g., fix that setting for all users, not just the one that had the issue). If it was a bug on Microsoft’s side, maybe there’s not much you can do except be aware. But sometimes Microsoft might provide guidance like “apply the latest patch” or “avoid using X feature until a fix is fully deployed.” Ensure those recommendations are followed through for your customer’s environment, and even across your other clients if applicable.
Measure and Record Key Metrics: It’s valuable to note metrics such as how long the issue lasted, the total time to resolution, and the downtime experienced. Also note how long the Microsoft support process took – e.g., case opened at 9 AM, first response at 9:30 AM, resolved at 3 PM. These metrics help assess the support experience and can be used to set expectations for the future or identify if something was unusually slow. Over time, tracking metrics like average resolution time for Microsoft tickets, number of cases per month, etc., can inform decisions (for instance, if you find support is too slow, maybe pushing for a higher support tier might be justified). Ultimately, the goal is minimizing downtime and quick resolution[10], so measuring these helps gauge success.
Communicate Closure to the Customer: Don’t forget to formally close the loop with the client as well. Send a final communication summarizing the resolution: “We have confirmed that the email issue is fully resolved. Microsoft identified the root cause as ___ and has addressed it. Your service was restored at [time]. We will be monitoring to ensure stability. Thank you for your patience.” This kind of wrap-up reassures the customer that the issue won’t linger. It also educates them on cause (which can help them understand if it was Microsoft’s fault, not the MSP’s, in a diplomatic way). If appropriate, schedule a follow-up meeting with the client, especially if it was a major incident, to review what happened and any next steps. This shows professionalism and dedication to continual improvement[11].
Feedback to Microsoft: If Microsoft sends a customer satisfaction survey for the support case, take the time to fill it out (or ask your customer to fill it out if it goes to them directly). Provide candid feedback on what went well and what didn’t. Microsoft does value this and it can influence the support they provide. If the support experience was great, recognize the engineer. If it was subpar, politely highlight the issues (e.g., “had to explain problem multiple times as it got passed around” or “initial response took too long”). This feedback can help Microsoft improve and also, as a partner, your feedback might be noted by account teams.
By diligently performing these post-incident activities, the MSP turns a resolved ticket into a stronger foundation for future support. Every incident becomes a learning opportunity. Over time, this means faster resolution and fewer escalations, as the team builds up a robust knowledge base and refined processes. It also demonstrates to the customer that you’re not just fixing and forgetting, but actively investing in preventing future issues – a hallmark of a proactive and reliable MSP.
Step 10: Continuous Improvement and Strengthening the Microsoft Partnership
The final step is an ongoing one – to leverage the experience gained and your relationship with Microsoft to improve future support interactions. A strong partnership with Microsoft and a well-trained team underpin a seamless support experience in the long run. This involves training, integration of support processes into your business, and nurturing the partnership.
Team Training and Knowledge Sharing: Take the lessons from the recent support issue and share them with the broader team. If only one engineer handled the case, ensure the others know what was learned. Conduct a short internal session or update your team newsletter/slack with “Support Case Spotlight” highlighting the key takeaways (cause of issue, how it was fixed, how we navigated Microsoft support). Emphasize any best practices that were validated, or new ones discovered. Over time, compile these into a playbook. Also, identify if there are skill gaps that training could fill. For example, if your team struggled to gather certain logs Microsoft needed, maybe a workshop on advanced M365 troubleshooting is in order.
Encourage your staff to pursue relevant Microsoft certifications or training courses. For M365, that could be certifications like MS-100 / MS-102 (Microsoft 365 Administrator) or specialists tracks for Exchange, SharePoint, Teams, etc. Certified staff are often better equipped to diagnose issues and speak Microsoft’s language when engaged in support. The benefits of ongoing training for MSP staff include faster issue identification and resolution (less downtime for clients) and being up-to-date on the latest technologies[12][12]. Additionally, vendor-specific training – i.e., training directly related to Microsoft tools and support processes – ensures your team is using Microsoft’s recommended methods effectively[12]. For instance, knowing how to use Microsoft’s advanced diagnostic tools or the latest admin center features could save precious time during an incident.
Integrate Microsoft Support Processes into MSP Operations: Make Microsoft support an extension of your own support workflow. This means having clear internal policies on when and how to escalate to Microsoft. Define triggers: e.g., “if an issue is cloud-related and not resolved in 30 minutes, consider opening a Microsoft case.” Ensure your ticketing system has a field or flag for ‘Escalated to Vendor/Microsoft’ and that engineers update it accordingly[9][9]. Track these tickets so you can report on them (how many vendor escalations, average resolution time, etc.).
Another aspect is to maintain a list of important Microsoft contacts or resources. For example, keep the support phone numbers handy, know your Tenant ID (often needed when calling support), and if you have a Microsoft Partner Center account, ensure your team knows how to use it to file support tickets on behalf of customers.
If you often work with Microsoft support, consider setting up regular reviews with Microsoft’s support/account team if available. Some Microsoft support plans (like Premier/Unified Support) offer quarterly service reviews where they look at your cases, patterns, and can advise how to reduce incidents. Even if you don’t have that, as a partner you might have a partner manager who can provide insights or escalation assistance when needed.
Leverage Microsoft Partner Programs: SMB MSPs that are Microsoft partners should take full advantage of the support-related benefits in those programs. For instance, if you have a Microsoft Action Pack or Solutions Partner designation, you might have some Azure or M365 support incidents included or access to Advanced Support for Partners at a discount. Evaluate if upgrading your support plan with Microsoft makes sense. Microsoft Premier/Unified Support for Partners, for example, offers faster response times, dedicated account management, and proactive services[8][8]. Benefits of such a relationship include having a designated escalation manager and access to workshops that can prevent issues[8]. If you faced a very painful downtime that could have been mitigated by faster Microsoft response, that’s a business case to invest in a higher support tier.
Even without a paid support plan, being a partner means you can sometimes access the Microsoft Partner Support Community or get delegate admin access to customer tenants which streamlines support interactions. Stay connected with Microsoft’s communications – for example, partner newsletters or the M365 roadmap alerts – so you’re aware of upcoming changes that could affect clients, thus preventing some support issues proactively.
Building Relationships: Over time, try to build a rapport with Microsoft support personnel and teams. While support cases are transactional, you might frequently interact with certain regional support teams. Professionalism and constructive interactions may make them a bit more attentive to future cases (support engineers sometimes remember helpful customers/partners). If you have a Technical Account Manager (TAM) through a support contract, maintain regular contact, not just during crises. A TAM can champion your cause internally.
Continuous Feedback Loop: Keep soliciting feedback from your customers about how they feel support is going (this can be part of a quarterly business review: discuss any major support incidents and how they were handled). Use that to tweak your approach. And likewise, provide feedback to Microsoft via any channel available. Microsoft has feedback forums and often after closing a case, they’ll send a survey – use those to voice your experience. If you encountered a particularly outstanding or poor support experience, Microsoft should hear about it. This helps them improve and also can indirectly benefit you as future cases might be handled with lessons learned from that feedback.
Finally, stay proactive. The best support issue is the one that never happens. Use what you learn from past incidents to implement monitoring or preventive fixes for other clients. For example, if one customer had a misconfigured setting that caused a support ticket, audit your other customers for that same setting. Engage with Microsoft’s preventive resources: they publish best practice analyzers and health checks (like Secure Score, Microsoft 365 Apps health, etc.). Proactively fixing things reduces the number of times you need to call Microsoft at all.
In conclusion, by continuously refining your internal processes and nurturing your partnership with Microsoft, you create a virtuous cycle. Each support case not only gets resolved but makes the next one easier or less likely. Your team becomes more skilled, your relationship with Microsoft more collaborative, and your customers more confident in your service. An MSP that effectively integrates vendor support into its own workflow stands out for delivering reliable, end-to-end support experiences – exactly what clients expect when they entrust you with their IT needs.
Conclusion
Optimizing the support process as an SMB MSP when working with Microsoft is all about preparation, communication, and continuous improvement. By following a structured step-by-step approach – from diligent initial troubleshooting and comprehensive case documentation, through effective engagement with Microsoft support, to thorough resolution verification and post-incident analysis – an MSP can ensure that issues are resolved as swiftly as possible with minimal customer impact.
Best practices like providing detailed information, maintaining open lines of communication with both Microsoft and your customer, and knowing how to navigate escalations make the support experience smoother for everyone involved. Implementing these processes not only speeds up individual issue resolution but also strengthens the MSP’s overall service capability. Over time, your team will become more adept at handling M365 problems (preventing many outright), and your working relationship with Microsoft support will become more efficient and collaborative.
In essence, a seamless support experience results from being proactive and methodical: anticipate what Microsoft will need and have it ready, keep all stakeholders informed, and never stop refining your approach. By doing so, you demonstrate to your customers that even when issues arise, they are in capable hands – you and Microsoft’s – working together to keep their business running smoothly. With each resolved case and each improvement in process, you build trust and reliability, solidifying your reputation as a responsive and effective managed service provider.
References
[1] Microsoft 365 – Troubleshooting and Data Required to Open a Case
[2] Microsoft 365 troubleshooters – Microsoft Support
[3] Microsoft 365 – Troubleshooting Options
[4] Has anyone ever had a successful resolution working with … – Reddit
[5] Understanding Microsoft 365 case creation and diagnostic data access
[6] How To Create A Support Ticket With Microsoft Office 365
[7] Microsoft Support Ticket Severity Levels: What You Should Know
[8] Microsoft Premier Support for Partners
[9] MSP Best Practices – Support Adventure
[10] Escalating IT Issues: 5 Powerful Steps MSPs Quick Resolution


