Join me for the free monthly CIAOPS Need to Know webinar. Along with all the Microsoft Cloud news we’ll be taking a look at how to get the most from SharePoint.
Shortly after registering you should receive an automated email from Microsoft Teams confirming your registration, including all the event details as well as a calendar invite.
You can register for the regular monthly webinar here:
CIAOPS Need to Know Webinar – October 2025 Friday 31st of October 2025 11.00am – 12.00am Sydney Time
All sessions are recorded and posted to the CIAOPS Academy.
The CIAOPS Need to Know Webinars are free to attend but if you want to receive the recording of the session you need to sign up as a CIAOPS patron which you can do here:
Also feel free at any stage to email me directly via director@ciaops.com with your webinar topic suggestions.
I’d also appreciate you sharing information about this webinar with anyone you feel may benefit from the session and I look forward to seeing you there.
If you found this valuable, the I’d appreciate a ‘like’ or perhaps a donation at https://ko-fi.com/ciaops. This helps me know that people enjoy what I have created and provides resources to allow me to create more content. If you have any feedback or suggestions around this, I’m all ears. You can also find me via email director@ciaops.com and on X (Twitter) at https://www.twitter.com/directorcia.
If you want to be part of a dedicated Microsoft Cloud community with information and interactions daily, then consider becoming a CIAOPS Patron – www.ciaopspatron.com.
In Episode 354 of the CIAOPS “Need to Know” podcast, host Robert Crane sits down with Philip Meyer, a seasoned Microsoft veteran, to explore the seismic shifts in the IT landscape driven by artificial intelligence. From reflections on decades of industry evolution to practical advice for SMBs and partners, this episode delivers a rich blend of insights, personal stories, and actionable strategies. Topics include AI’s impact on employment, cybersecurity challenges, digital labor, and the future of partner enablement.
Just completed a simple 2 page comparison table of the features of M365 Business and the new add ons, Defender and Purview suites. It shows what M365 Business Premium provides already and then what each suite add across all the features in a single 2 page PDF download for free.
To get a copy of the PDF emailed to you just complete this form:
If you found this valuable, the I’d appreciate a ‘like’ or perhaps a donation at https://ko-fi.com/ciaops. This helps me know that people enjoy what I have created and provides resources to allow me to create more content. If you have any feedback or suggestions around this, I’m all ears. You can also find me via email director@ciaops.com and on X (Twitter) at https://www.twitter.com/directorcia.
If you want to be part of a dedicated Microsoft Cloud community with information and interactions daily, then consider becoming a CIAOPS Patron – www.ciaopspatron.com.
Microsoft Purview’s Data Lifecycle Management (DLM) and Records Management solutions provide a comprehensive toolkit to help organisations keep the data they need and delete the data they don’t – critical for meeting regulatory requirements and managing information in Small and Medium-sized Businesses (SMBs)[1]. This report details the full range of features offered by these solutions, how to set them up and use them effectively in an Australian SMB context, and the licensing options (and costs in AUD) for Microsoft 365 Business Premium customers. Practical examples are included to illustrate common use cases like email retention policies, protecting sensitive documents, and automated labelling.
Features and Capabilities of Purview DLM and Records Management
Microsoft Purview Data Lifecycle Management focuses on broad retention and deletion policies for Microsoft 365 data, ensuring your organisation “keeps what you need and deletes what you don’t”[1]. Microsoft Purview Records Management builds on this by managing high-value or regulated content as formal records, with stricter controls and tracking[1]. Below is a comprehensive overview of their capabilities:
Data Lifecycle Management (Retention and Archiving)
Retention Policies (across Microsoft 365) – Create organisation-wide or location-specific retention policies to automatically retain or delete data at scale[1]. A single policy can cover multiple workloads (Exchange email, SharePoint sites, OneDrive, Teams chats, Viva Engage/Yammer, etc.) so that content is kept for a required period or removed when it’s no longer needed. These policies apply at the service or container level (mailbox, site, etc.), ensuring all items in those locations inherit the retention settings[1]. For example, an SMB could apply a 7-year retention policy to all Exchange mailboxes to meet record-keeping rules. (Note: For Teams messages, Business Premium supports retention ≥30 days by policy[2].)
Retention Labels (for exceptions) – In addition to broad policies, you can use retention labels for more granular control as exceptions. A retention label is applied to individual items (a specific document or email) and travels with that item, even if moved across locations[1]. Labels can have their own retention period and action (retain or delete), overriding any general policy. For instance, most content might be covered by a 3-year policy, but you could label certain files as “Keep 7 Years” individually. (Basic manual labelling is included in Business Premium[3] – advanced auto-labeling requires additional licensing, discussed later.)
Mailbox Archiving (Online Archive) – Archive mailboxes provide additional storage for email beyond the primary 50 GB mailbox. Business Premium includes Exchange Online Plan 2 capabilities, meaning each user gets a 50 GB archive mailbox and the option to enable auto-expanding archiving up to 1.5 TB[2]. This effectively gives users a long-term email storage solution separate from their active inbox. Admins can enable the archive for users in the Exchange admin center; once enabled, older emails can be moved automatically via retention or manually by the user to the archive folder. Archive mailboxes ensure older emails are retained without cluttering the main mailbox.
Inactive Mailboxes – When an employee leaves, you can retain their mailbox content without paying for an active license by leveraging inactive mailboxes. This is achieved by placing a retention policy (or hold) on the mailbox before the user’s account is removed; once the user license is removed, Exchange converts it to an inactive mailbox that preserves the data as per the policy[1]. Administrators and compliance officers can still search and access this mailbox data for compliance or legal needs[1]. For example, an SMB can retain ex-employee John’s emails for 7 years after departure by ensuring a retention policy covers his mailbox; after John’s account is deleted, his mailbox remains searchable as inactive. (No extra licence is required for inactive mailboxes, but only content covered by a retention policy or hold is kept.)
Importing PST Files – Purview DLM includes an import service for PSTs to help bring legacy email data into Exchange Online[1]. SMBs often have old Outlook PST archives on network drives; using the PST Import feature, you can upload these files (via network upload or drive shipping) and ingest emails into designated mailboxes or archives. This ensures historical emails are now governed by retention policies and searchable. This is useful during migration or to consolidate compliance data. (Business Premium users have rights to use the PST import service since it’s part of Exchange Plan 2 functionality[1].)
Records Management (Retention Labels & Records Lifecycle)
Retention Labels & Item-Level Retention – At the core of Records Management are retention labels that you create and configure with specific retention periods and actions. These can be published for users to manually apply in Outlook, SharePoint, OneDrive, etc., or applied by default to certain locations (e.g. a SharePoint library)[4][4]. Retention labels support flexible schedules – you can base retention on when an item was created or last modified, or even when a custom event occurs (see below)[5]. They also define what happens after the period: deletion, retention (do nothing), or even a review before deletion. Importantly, labels can be configured to mark content as a record or regulatory record (this adds controls; see next points). Publishing and using retention labels allows a consistent retention strategy at the item level, complementing broader policies[1]. For example, an “HR Record – 7 years” label could be applied to specific employee files, irrespective of where they reside. (Business Premium supports creating and publishing retention labels for manual use[3], while certain advanced settings noted below require additional licensing[2].)
Marking Items as Records – A retention label can be configured to declare content as a record. When an item is labelled as a record, certain actions on that item are blocked or restricted to preserve its integrity[5][5]. For example, if a SharePoint document or an email is marked as a record, users cannot delete it and, depending on settings, might be prevented from editing its content or metadata while the record label is in effect[5]. All modifications are logged for audit purposes[5]. This helps ensure important documents (legal, financial, etc.) remain unaltered and are retained for the required period. An SMB might use this for contracts or policy documents that must remain unchanged. By default, records in SharePoint/OneDrive can be unlocked by a Records Manager (to allow edits) and then relocked – this is called record versioning[5][5]. (Record declaration via labels requires an advanced compliance license – see Licensing section – as it’s not available with just Business Premium[2].)
Regulatory Records – A regulatory record is a special (more strict) type of record for the most sensitive needs. If a label is set as a regulatory record, nobody – not even a global administrator – can remove that label or delete the content before the retention period ends[5]. The retention period on such a label becomes locked (you cannot reduce it once set)[5]. This provides an immutable retention hold, often needed for certain regulated data. For example, in an industry where law mandates certain data must be absolutely undeletable for 7 years, a regulatory record label can enforce that. (Because of its irreversible nature, this option is disabled by default and must be enabled via PowerShell if needed[5]. Regulatory record labels also cannot be auto-applied and must be manually published and applied[5]. Using regulatory records requires E5-level licensing.)
File Plan & Label Management – Purview provides a File Plan interface to manage retention labels in bulk. It lets you import a spreadsheet of retention schedule details to create multiple labels at once, each with metadata like category, department, etc., and you can export the plan for analysis or documentation[1]. This is especially useful if your organisation already has a records retention schedule (e.g., from a policy document) – you can mirror that in Purview. The file plan also allows adding descriptive info to each label (like a reference to legal citation, record category, etc.) for tracking regulatory requirements[1]. An SMB with a simple retention schedule might not need bulk import, but a file plan can still document what each label is for. (The file plan import/export capability is considered an advanced feature – available with E5 compliance licensing[2].)
Event-Based Retention – With Records Management, retention can be triggered by real-world events. An admin can define an event type (e.g. “Employee Departure” or “Contract Closed”) and then, when such an event is registered in the system with a date and associated items, it will start the retention period for those items[5]. For example, you might have documents labeled to retain for 5 years after an employee leaves. When the employee leaves and an “Employee Departure” event is triggered for that person, all items tagged to that employee can start their 5-year countdown from that date. Common event scenarios include employee leaving, contract expiration, or project end. Event-based retention ensures the clock starts at a meaningful time rather than at creation or modification of the content[5]. (This feature requires advanced licensing – not available with just Business Premium[2]. It’s typically used alongside retention labels and events must be managed in the Purview portal.)
Disposition Reviews and Proof of Deletion – At the end of a retention period, instead of auto-deleting content sight unseen, Purview can require a disposition review. This means designated reviewers (e.g. a records manager or content owner) get to manually approve the deletion of each item labeled for review[1]. They can examine the content and decide to delete it, extend retention, or re-label it. This is especially helpful for records where human judgment is needed before disposal. All items that are deleted (whether via automatic expiration or after a review) are logged, and Purview provides proof of disposition – an audit trail showing what was deleted and when[1][5]. This proof can be exported for compliance evidence[5]. For example, an SMB in finance could have a disposition review for all client files prior to deletion, to ensure no required records are mistakenly purged. (Disposition review capability is an E5-level feature; Business Premium users would need an add-on to use it[2].)
Automatic Application of Labels – Rather than relying only on users to apply labels, Purview can auto-classify content and apply retention labels based on conditions. There are three main methods:
Sensitive info detection: e.g. automatically tag any document containing a credit card number or tax file number with a “Financial Data – Retain 7 Years” label.
Keyword or query-based: e.g. auto-apply a label to items containing specific keywords (like “Confidential” or project codes), or to specific content types or metadata properties.
Trainable classifiers: using AI models to identify content by concept (for example, a classifier that recognises resumes/CVs or contracts and applies a relevant label). Auto-labeling greatly eases policy enforcement – ensuring items are labeled even if users forget. For instance, you could configure Purview to automatically label any email with an attachment containing personal data as a record to be retained for compliance. However, these auto-labeling features require advanced licensing (Microsoft 365 E5 Compliance or the E5 Information Protection & Governance add-on)[2]. Business Premium includes the ability to create and use retention labels manually[3], but auto-apply (by sensitive info, keywords, or classifiers) is unlocked only with the add-on[2]. Auto-applying by default to all content in a location (e.g. default label for a SharePoint library) also falls under this requirement[2].
Monitoring and Analytics – Purview provides some monitoring tools for retention. In the Records Management section, you can see the label usage across your tenant and track items pending disposition, etc. Additionally, Activity Explorer (in the Data Classification section of Purview) can show label application events. These help admins ensure policies are in effect. (These are available with appropriate permissions; some advanced analytics might need higher SKUs, but basic audit of label actions is present with any retention usage[5].)
How These Features Work Together
In practice, Data Lifecycle Management features (like broad retention policies, email archive, etc.) are used to establish baseline data governance for all users, while Records Management features (retention labels, records, disposition) are used for specific content that needs special handling. For example, an SMB might use a retention policy to delete all emails older than 5 years (general cleanup) and use retention labels to mark certain emails (like executive correspondence or legal notices) to be retained for 10 years as records despite the general policy.
It’s important to note that retention policies and retention labels can coexist. If both apply to an item, the most retentive action wins (content won’t be deleted before the longest retention period applicable). Also, if something is marked as a record, that takes precedence and prevents deletion until the record schedule is up. This layered approach gives flexibility: use broad policies for general compliance, and labels for exceptions or special categories.
Setting Up Purview Compliance (Records & Retention) in an SMB
Implementing Microsoft Purview’s retention and records capabilities in an SMB environment involves a series of steps to configure the policies, labels, and ensure compliance processes are in place. Below is a step-by-step guide for setup and effective use, from planning through to monitoring:
Step 1: Define Requirements. Start by documenting retention requirements. This includes legal mandates (for example, Australian tax law might require keeping financial records for 7 years, and email records could fall under discovery rules) as well as business needs (e.g. “we want to delete old Teams chats after 1 year to reduce clutter unless flagged as record”). Classify the types of data you have and decide how long each type should be kept. Tip: It’s often better to involve leadership or compliance officers in this discussion to ensure the retention schedule aligns with business policy.
Step 2: Assign Compliance Roles. Next, ensure the right people have access to set up and manage Purview features. It’s recommended not to use the global admin account for day-to-day records management. Instead, add your responsible users to the Records Management role group or Compliance Administrator role in the Purview portal[4][6]. The Records Management role group grants the ability to manage retention labels, records, disposition, etc. (including adaptive scopes and disposition reviews)[4]. If someone should only view records info and not change it, use the View-Only roles (e.g. View-Only Record Management)[4]. For general retention policies without record functionalities, the Retention Management role would suffice[6]. In an SMB, this might just be one or two people (e.g. the IT admin and perhaps a compliance officer). Setting these roles up ensures audit accountability (actions are tracked under those roles) and limits risk.
Step 3: Implement Baseline Retention Policies. With requirements set, create broad Retention Policies in Purview for each type of location:
Go to Data Lifecycle Management > Retention policies in the Purview compliance portal.
Add a new policy, give it a name and description (e.g. “All Exchange Mailboxes – 7yr retain, then delete”).
Choose locations: you can target All or specific locations/users for Exchange email, SharePoint sites, OneDrive, Teams (chats or channel messages), etc., as needed.
Set the retention period (a number of days, months, or years, or choose “Forever” if no deletion is to occur). For example, 7 years = 2555 days.
Choose the action: e.g. “Retain items for 7 years, then delete permanently” or “Only delete items older than 7 years” or “Only retain (don’t delete after)” depending on your scenario. (Retain+delete means items are kept for at least 7 years and auto-deleted after; Delete only means items older than 7 years are purged even if not retained before, and Retain only means keep for 7 years then do nothing – user could delete after that point.)
If using advanced scopes (available with E5 add-on), you could create adaptive scope policies (for instance, apply a policy to all users in Department = X). But for most SMB scenarios, static scopes (all or select list of locations) are used. Business Premium supports static includes/excludes for policies[2].
Save the policy and let it deploy (can take up to 1 day to fully take effect across all content).
For example, you might configure:
Email: Retain all Exchange Online mail for 7 years and then delete. This means even if a user deletes an email, it’s preserved in a hidden Recoverable Items store until the 7 years are up (ensuring compliance), and at 7 years, the service will purge it[1].
SharePoint/OneDrive: Retain content for 5 years after last modification, then delete. This would clean up old files five years after they were last edited, which might suit an SMB’s data lifecycle.
Teams: Perhaps, if no compliance need to keep chats, you might just delete Teams messages after 1 year (no retention). Note: As mentioned, Teams chat retention policies for <30 days aren’t available for Business Premium (shorter periods require enterprise licenses)[2], but 30 days or more is fine. Many SMBs choose 1 year or more for Teams if they retain at all, due to these limitations and to preserve conversation history for a while.
Step 4: Create Retention Labels (and File Plan). Now address the more specific needs via retention labels:
In the Purview portal, go to Records Management > File plan (Labels). You can create labels one by one here or import a CSV file with multiple label definitions if you planned them externally.
For each retention label, define the name (e.g. “Legal Hold – 10yr record”, “General Docs – 3yr”), a description for admins and users (so it’s clear when to use it), and the retention settings.
Choose if the label will mark the item as a record or regulatory record (if you have advanced licensing and truly need regulatory-level immutability).
Set the retention duration (finite number or “Never delete” if it should be kept indefinitely).
Set when the retention period begins: either when the content was created, last modified, or when an event is triggered (if using event-based retention)[5].
Select the action after period: delete the content automatically, or trigger a disposition review (for a human to decide at that time)[1]. If neither, you can just have the label indicate “ensure it’s retained for at least X years” without auto-deletion.
(Advanced) Optionally, configure what happens after deletion – e.g. you can have it auto-apply a different label after deletion (relabeling), but this is a niche scenario and requires higher licensing.
If using the file plan import, fill in the template with all labels and their settings and import in bulk[1].
Once labels are created, you might organise them in the file plan with categories or reference IDs if useful, but that’s optional metadata for administrative ease.
For SMBs, you might only need a handful of labels. Example set: – “Standard Record – 7 years”: marks as record, 7-year retention from creation, auto-delete, with disposition review enabled (so someone checks before final deletion). – “Financial Record – 7 years (Regulatory)”: marks as regulatory record (for things like tax or financial statements that must not be altered), 7-year retention from year-end, auto-delete without review. – “Transient – 1 year delete”: not a record, just a label to tag data that should purge sooner (could be applied to trivial files or communications). – “Permanent”: perhaps a label for things that should be kept indefinitely until manually reviewed (retain only, no deletion). Use sparingly – “keep forever” can be risky unless truly needed.
Step 5: Publish and Apply Labels. After defining labels, they must be published so they become usable:
Create a Retention label policy (in Records Management > Label policies). Add the labels you want to deploy, then choose the locations: you can select all Exchange mailboxes, or specific SharePoint sites, etc., or even specific users’ OneDrives or specific Microsoft 365 Groups. For broad deployment, you might publish to “All” for simplicity (so the label is available everywhere content lives)[4].
Once published (this can take up to a day to appear to end users), users will see these labels in the Compliance or Retention settings of Outlook, SharePoint, OneDrive, or Office apps (depending on the app, they might appear under File -> Info for documents, or in Outlook’s Assign Policy menu).
If you have labels you want automatically applied and you have the license for it:
Set up an auto-labeling policy (under Records Management or Information Governance, “Auto-apply retention label”). Here you choose a label and define the conditions (specific words, a built-in sensitive info type like “Credit Card Number”, or choose a trainable classifier if one is prepared)[2].
Alternatively, to auto-apply by location, you can configure default label on a SharePoint document library or to all content in an Exchange folder. For SharePoint libraries, this is done in the library’s settings (requires that the label is published to that site). For Exchange default folder (like default for Inbox), this can be done via PowerShell or the Compliance portal’s label policy settings. Both are considered “auto-application” methods that require the advanced license as well[2].
Make sure to inform users (if relevant) about how to manually apply labels. Typically, for SharePoint/OneDrive, users can right-click a document > Details pane > Apply label; in Outlook, they can assign retention labels to emails if you enable that in Outlook’s compliance settings.
Step 6: Enable Archive Mailboxes. In the Exchange Admin Center (EAC), check under Recipients > Mailboxes for each user that the Archive is enabled. For Business Premium, the archive mailbox feature is available[2], but it may not be auto-on. You can multi-select mailboxes and click “Enable archive” to turn it on for all. Once enabled:
Optionally enable auto-expanding archiving (via PowerShell or the Purview portal’s Exchange settings). This allows mailboxes to grow beyond 100 GB by automatically adding additional storage as needed[2].
Ensure your users are aware of how the archive works – by default, nothing moves to archive automatically unless you use a Retention Tag (an older Exchange feature) or a retention policy that explicitly moves items to archive after X days. Purview retention policies do not move emails to archive (they only delete/not delete). If you want messages to move to archive after, say, 2 years, you must configure an MRM policy with an archive tag (this is separate from Purview retention and configured in Exchange’s Messaging Records Management). Many organisations skip this – archive is often used as user-driven storage or for auto copying old mail via Microsoft’s Default Archive and Retention policy (which by default moves mail >2 years to archive). Verify or adjust those settings in Exchange if needed[6][6].
With archiving enabled, if your retention policy is “delete after 7 years”, users can still offload older emails to archive (which is still subject to the retention policy) but at least their primary mailbox stays smaller. Inactive mailbox functionality also relies on the mailbox having had retention in place (with archive, it preserves everything in primary + archive).
Step 7: (Advanced) Configure Event-Based Retention. If you decided some content should start the clock based on events like employee leaving or contract closure, set up event types:
In Purview’s Records Management > Events, create a new Event Type (e.g. “Employee Departure”). Provide a description and perhaps link it to a particular retention label if that label will use this event.
Ensure your retention label from Step 4 is configured to start on that event.
When an actual event happens (say Alice leaves on Oct 1, 2025), you need to trigger the event. This can be done by going to the Events page, creating a new Event instance for “Employee Departure”, date = Oct 1, 2025, and add references to Alice’s content (likely her mailbox or OneDrive URL). You can also do bulk via PowerShell if multiple items. After submission, the service marks those items so that their retention period starts counting from Oct 1, 2025.
From then, those items will behave as per their label (e.g. retain 3 years from that date, then delete).
If using this for many users frequently (like every time someone leaves), it can be a bit of overhead without automation – larger organisations integrate HR systems to call the compliance API, but SMBs might handle events manually on a case-by-case basis.
Step 8: Import Legacy Data (if needed). Many SMBs migrating to Microsoft 365 have old data silos:
To import PST files: In Purview > Data Lifecycle Management > Import, use Network upload for PST. This provides an Azure Storage SAS URL to upload PSTs. You upload them (e.g. using Azure Storage Explorer or AzCopy tool). Then you use the Import wizard to map each PST to a target mailbox (either to the primary mailbox or archive of a user). Once you finalize, Microsoft will ingest those PSTs into the mailboxes[6].
After import, those emails become part of Exchange Online and your retention policies will include them (e.g. if you imported 10-year-old emails and your policy deletes after 7 years, those older-than-7 emails might get deleted soon after import unless you adjust policies for them – consider that in planning).
For old documents (if coming from file servers), you might manually migrate them to SharePoint/OneDrive libraries and then apply appropriate retention labels/policies to those libraries.
The goal is to bring all important data under Purview management, so you’re not leaving things out and uncategorised.
Step 9: Monitor and Refine. With everything deployed:
Regularly check the Disposition tab in Records Management if you configured any labels with disposition review. This will list files or emails whose retention period ended and are pending approval for deletion. Reviewers can go in, inspect content, and approve or postpone deletions. Ensure this process is followed so records don’t sit indefinitely awaiting review.
Use audit logs to verify retention actions. For instance, you can search the Unified Audit Log for events like ”Retention label applied” or ”Record deleted”.
Spot-check that users are indeed seeing the labels. Go into a few SharePoint sites or Exchange mailboxes and verify the labels appear in the UI.
Over time, gather feedback: Are any important items getting deleted too soon? (If so, you may need to prolong retention or ensure those items get a special label.) Are you keeping too much redundant data? (Maybe shorten a policy if storage or legal considerations warrant.)
Also ensure new content locations are covered – e.g. if a new SharePoint site is created and your policy was not set to “All sites” but specific ones, you’ll need to update it or change scope.
By following these steps, an SMB can methodically configure Microsoft Purview to manage data lifecycle and records in line with its needs. The key is to start with broad strokes (policies) then refine with labels where needed. This hybrid approach ensures compliance (nothing important is lost) while also enabling data minimisation (old stuff is cleaned up when permitted).
Licensing Considerations and Pricing (AUD)
Microsoft 365 Business Premium includes core compliance features, but some of the advanced capabilities of Purview Records Management require additional licensing. Below we outline what is included in Business Premium versus what requires an upgrade or add-on, and provide a comparison of licensing options relevant to retention and records management. All prices are in Australian dollars (AUD) and are per user per month (estimated retail costs).
Pricing notes:A$32.90 is the approximate price per Business Premium licence per month (excluding GST) as of early 2024[7]. The add-on prices (~A$13 and ~A$18) are approximate conversions/estimates based on typical Microsoft USD pricing ($8–$12 USD) and available Australian pricing info, as Microsoft’s MSRP in AUD can vary. These add-ons are purchased on top of Business Premium for only those users who need the capabilities.
Included with Business Premium: Microsoft 365 Business Premium covers many standard compliance features out-of-the-box. For data retention, a Business Premium user already has rights to:
Exchange Online Archiving (Plan 2) – i.e. 50GB archive mailbox and auto-expand up to 1.5TB[2] (this is part of the Exchange license within Business Premium).
Core retention policies – You can create organisation-wide or location-based retention policies covering Exchange, SharePoint, OneDrive, Teams, etc. Business Premium (like Office 365 E3) allows these baseline policies[2][3].
Manual retention labels – You can create and publish retention labels for users to manually apply, and use them to enforce retention or deletion (except the settings that specifically need E5). Basic label usage is included[3].
In-place records management (basic) – Essentially, you can implement a rudimentary records management by instructing users to not delete certain content and using retention policies to protect it. However, the explicit “Declare as record” functionality via label is not active without E5.
Data Loss Prevention (DLP) for emails & files – (Though not our focus here, note that Business Premium includes DLP for Exchange, SharePoint, OneDrive – this complements retention by preventing improper sharing of info[3].)
Sensitivity Labels (AIP P1) – Again tangential, but Business Premium includes sensitivity labels (without auto-label) which is separate from retention labels but often used in the same Purview portal for classifying data.
In short, Business Premium provides retention policies and manual labeling – the fundamental tools to implement a retention strategy[3]. What it lacks are the more automated and advanced governance capabilities (which are typically reserved for E5 Compliance or the add-on).
Add-On: Microsoft 365 E5 Information Protection & Governance – This is a specific add-on licence that “offers the same information protection and governance capabilities as E5 Compliance, but at a lower cost” (it excludes things like eDiscovery, Audit, Insider Risk)[3]. By adding this to a Business Premium user, you unlock Purview’s advanced retention and records management features, namely:
Auto-apply retention labels based on sensitive info or keywords[2].
“Priority” retention policies (to override other policies in special cases)[2].
For an SMB, the most relevant of these are auto-labeling, record immutability, event triggers, and disposition – all enabled by this add-on. The E5 Info Protection & Governance add-on is generally cheaper than the full E5 Compliance; as of 2023 its global list price was about US$8 user/month (versus US$12 for E5 Compliance), which we’ve estimated around A$12–13.
Add-On: Microsoft 365 E5 Compliance – This is a superset that includes all compliance features: everything in Info Prot & Gov plus things like Insider Risk Management, Communication Compliance, eDiscovery (Premium), Audit (Premium), Customer Key, etc. If an SMB also needs those (which is less common unless in highly regulated industry or legal proceedings heavy), they might opt for the full E5 Compliance. Price is roughly ~A$17–18 per user/month (ex GST) in Australia for commercial customers (it can be purchased as an add-on to Business Premium or Office 365 E3, etc.)[8]. It requires that the user already has a base licence (which Business Premium satisfies).
For the scope of Records Management and Data Lifecycle, either the E5 Compliance or the E5 Information Protection & Governance add-on will give the needed features. The Info Prot & Gov add-on is more cost-effective if you don’t need the other fluff. Microsoft documentation notes that many customers are unaware of the IP\&G add-on, but it can “reduce costs by about $5 per month per license” for the same retention features[3].
Below is a feature-by-feature breakdown of what Business Premium offers versus what the E5 Compliance add-on provides, specifically for Purview retention and records functions:
Table: Purview Retention/Records features in Business Premium vs E5 Compliance Add-on. (✔ = available, ❌ = not available)
Key Takeaways:
With Business Premium alone, you can do a lot: implement retention policies and use retention labels manually. This covers fundamental compliance needs for many SMBs (e.g. keep email 7 years, allow manual tagging of a few records).
By adding the E5 Information Protection & Governance or E5 Compliance add-on for specific users (e.g. those managing records or those mailboxes that need auto-classification), you gain the automation and stricter record controls. This is often worth it if your regulatory environment is complex or you have a high volume of content to manage.
If you only need one or two features (like just auto-labeling), you still have to purchase the whole add-on – Microsoft doesn’t sell these capabilities standalone. However, you can choose to license just a subset of users. Only users who ”benefit from the service” need to be licensed[2]. For example, if only the compliance officer is doing disposition reviews, and records labels are applied tenant-wide (affecting all mailboxes), technically all mailboxes with a record label benefit from Records Management features, so Microsoft’s guidelines suggest those users should be licensed. It can be a grey area, but generally for compliance features, if a user’s content is subject to an advanced policy (like auto-label or record), that user should have the add-on. In practice, some SMBs license just the admin and a few key users, but formally one should license everyone whose data is being governed by those advanced features[2].
Finally, Microsoft offers a 90-day free trial of Purview add-ons for up to 25 users[4]. It’s a great way for an SMB to test out auto-labeling, event retention, etc., before deciding to purchase the add-on. You can activate this trial in the Compliance admin center (look for the Purview solutions trial banner).
Practical Examples and Use Cases for SMBs
To illustrate how Microsoft Purview’s Records Management and Data Lifecycle features can be used in a small or mid-sized business, here are a few common scenarios:
Managing Email Records (Compliance with Law): An Australian accounting firm with 20 staff uses Exchange Online (via Business Premium) and is obligated under tax law to retain correspondence for 7 years. They configure a 7-year Exchange retention policy to cover all mailboxes[1]. This means if an accountant accidentally deletes an email about a client’s tax return, the email remains in the recoverable items for 7 years and can be produced if needed. After the 7 years, Exchange auto-deletes it, so the firm isn’t keeping data longer than necessary. They also enable online archives for all users to ensure mailbox size isn’t an issue over that period. In practice, this has made compliance automatic – users continue using email normally, and the system transparently takes care of retention. If a legal discovery request arises, the admin can search the mailboxes knowing even deleted mails within 7 years will be available.
Securing Important Documents as Immutable Records: A construction company often deals with multi-year projects and legal contracts. They use SharePoint to store project documents. For each new project, the project contract and blueprint files are labeled as records using a retention label (e.g. “Project Contract – 6yr Record”). Once applied, no one at the company can delete those files or alter their contents[5]. Employees can still read them and even update minor metadata if allowed, but the critical content is locked. After 6 years (starting from project completion date, set via an event trigger), a records manager will get a notification in the Purview portal to review the contract file. Only upon approval will the document be deleted, and a proof of deletion is logged. This process protects the documents from tampering – which is crucial if there’s a future dispute about what was agreed in the contract – and it also means the company isn’t holding onto contracts indefinitely. They have a defensible deletion process after 6 years, reducing storage and liability.
Cleaning Up Chat Data: A 50-person tech startup uses Microsoft Teams heavily for daily communication. Not all those chats need to live forever (and they could pose a risk if kept). With Business Premium, they set a Teams retention policy to delete Teams channel messages and chat messages after 1 year. They chose 1 year since Business Premium allows ≥30 days for Teams retention[2] and they figured one year is enough history for any practical business need. Now, any Teams message older than 365 days is automatically removed. Users see a notice if they scroll back in a chat that older messages have been deleted due to policy. This keeps their Teams environment more performant and minimizes old irrelevant messages. They combine this with a policy that SharePoint (where files shared in Teams channels reside) retains files for 3 years, ensuring that any file shared isn’t lost too soon. Essentially, routine conversation is cleaned up, while important files or discussions can be saved separately if needed.
Automated Labelling of Sensitive Files: A small law firm deals with sensitive case files in Word and PDF format. They created a trainable classifier in Purview to detect “legal case files” based on samples, or they could simply use a query (Subject: Case# OR contains words like 'Privileged'). With the E5 Compliance add-on, they set up an auto-label policy: any document in their SharePoint or OneDrive that matches the pattern of a legal case file is automatically tagged with a “Legal – Retain 10 years” label and marked as a record. Now lawyers don’t have to remember to tag each file; if a paralegal creates a new file and it has indicators of being a case document, within a day or so, Purview will label it. This label prevents premature deletion – even if someone tried to delete it, retention will keep it for the period. It also helps the firm demonstrate to clients that their data management is strict. (Before using auto-label, they often relied on manual practice which was hit-or-miss. Now it’s consistent.)
Lifecycle for Employee Data (Event-based): A human resources consulting company needs to purge personal data when it’s no longer needed. They keep employee data for 2 years after an employee leaves, per their data retention policy. They use event-based retention to manage this: All employee files in a particular SharePoint folder (“Alumni Records”) are labeled “Former Employee – 2yr”. The retention is configured to start when an “Employee Departure” event is triggered for that employee. When an employee leaves, the HR manager goes into Purview > Events, triggers “Employee Departure” for that person effective on their leave date. Now all documents related to that employee (which are labeled accordingly) will be retained for exactly 2 years from that date, then subject to deletion. Purview will list them for disposition, and the HR manager can approve deletion knowing the policy was to keep for 2 years. This ensures the company isn’t holding personal data longer than allowed, aiding GDPR-like compliance and saving space. Without event-based capability, they would have to calculate dates manually or keep a spreadsheet – the system now automates it. (This requires the add-on for the event trigger functionality.)
Proving Compliance via Disposition Logs: A medical clinic (SMB with 15 staff) must delete certain health records 8 years after a patient’s last visit. They tag those in Teams or SharePoint with appropriate labels. When the time comes, they use disposition review to double-check and then delete the records. Purview then provides a disposition report (CSV or Excel) that lists each item deleted, with its label and date[5]. The clinic’s compliance officer downloads this report annually and files it. If ever audited by health regulators, they can produce this report as evidence that, for example, “All patient records from 2015 were indeed disposed of in 2023 as per our policy.” This kind of audit trail is something they never had when using shared folders on a server – it adds confidence and transparency to their data lifecycle management.
Each of these scenarios demonstrates how Purview’s tools can be applied in a practical, business-centric way. For SMBs, the strategy is often to start simple (broad strokes like email retention) and progressively layer on more controls (like records and auto-labeling) as needed. Microsoft Purview’s integration into Microsoft 365 means even smaller organisations can leverage enterprise-grade compliance features – tailoring them to ensure regulatory peace of mind without onerous manual processes.
References:
The information and best practices above were based on Microsoft’s official documentation and licensing guidance, including Microsoft Learn articles on Purview Records Management[5][1] and Data Lifecycle Management[1], as well as the Microsoft 365 licensing guide for security & compliance[2][2]. Pricing references were drawn from Australian price lists and partner sources[7][3]. All feature descriptions correspond to capabilities as of September 2025. Always consult the latest Microsoft documentation for updates, especially since Purview features (and licensing) evolve regularly.
Securing Data in the Age of AI – Features, Setup, Policies, Licensing & Use Cases
Introduction
Adopting generative AI tools like Microsoft 365 Copilot and ChatGPT brings powerful productivity gains, but also new data security challenges[1]. Organisations need not choose between productivity and protection – Microsoft Purview’s Data Security Posture Management (DSPM) for AI is designed to let businesses embrace AI safely[2]. This solution provides a central dashboard in the Purview compliance portal to secure data for AI applications and proactively monitor AI use across both Microsoft and third-party AI services[2]. In an SMB environment, where IT teams are lean, Purview DSPM for AI offers ready-to-use policies and insights to balance the benefits of AI with robust data governance[1][2].
Overview of DSPM for AI Features
Microsoft Purview’s DSPM for AI builds on existing data protection capabilities (like information protection and DLP) with AI-specific monitoring and controls. Key features include:
Sensitivity Labelling: Integrates with Microsoft Purview Information Protection to classify and label data (e.g. Confidential, Highly Confidential)[1]. Labeled content is respected by AI tools – for example, admins can prevent Copilot from processing documents tagged with certain sensitivity labels[3]. This ensures that AI systems handle data according to its sensitivity level.
Auditing & Activity Logs: Leverages Purview’s unified audit to capture AI-related activities[3]. All interactions with AI (prompts, responses, file accesses by Copilot, etc.) can be logged and reviewed. Auditing is enabled by default in Microsoft 365; once Copilot licenses are assigned, AI interaction events (including prompt and response text) start appearing in the audit logs and DSPM reports[2][3].
Data Classification & Discovery: Automatically discovers and classifies sensitive information across your data estate. DSPM for AI performs real-time data classification of AI interactions[1] – for example, if a user’s Copilot prompt or ChatGPT query contains credit card numbers or customer PII, Purview will detect those sensitive info types. This continuous classification provides insight into what sensitive data is being accessed or shared via AI[1].
Risk Identification & Assessment: Identifies potential data exposure risks (e.g. oversharing or policy violations) related to AI usage. Purview runs a weekly Data Risk Assessment on the top 100 SharePoint sites to flag if sensitive data in those sites might be over-exposed or shared too broadly[2]. It surfaces vulnerabilities – for instance, detecting if a confidential file is open to all employees or if an AI app accessed unusually large volumes of sensitive records[2][1]. These risk insights allow proactive remediation (such as tightening permissions or adding encryption).
Access Permissions Evaluation: DSPM for AI evaluates how AI apps access data and who has access to sensitive information. It correlates sensitivity of data with its access scope to find oversharing – e.g. if an AI is pulling data from a SharePoint site that many users have access to, that could indicate unnecessary exposure[2]. By analyzing permissions and usage patterns, Purview can recommend restricting access or applying labels to secure content that AI is touching.
Proactive Monitoring & Alerts:Real-time monitoring detects when users interact with AI in ways that break policy[1]. Purview DSPM includes one-click, ready-to-use policies that automatically watch for sensitive data in AI prompts and trigger protective actions[2][1]. For example, if an employee tries to paste sensitive text into an AI web app, a DLP policy can immediately warn or block them[3]. This immediate detection and response helps stop data leaks as they happen, not after the fact. Administrators also get alerts and actionable insights on potential incidents (e.g. a spike in AI usage by one user might flag a possible data dump)[1].
Policy Recommendations & One-Click Policies: The DSPM for AI dashboard provides guided recommendations to improve your security posture[2]. It can suggest enabling certain controls or creating policies based on your environment. In fact, Microsoft provides preconfigured “one-click” policies covering common AI scenarios[2]. With a single activation, you can deploy multiple policies – for instance, to detect sensitive info being shared with AI, to block Copilot from processing labeled confidential data, or to monitor risky or unethical AI use[3][3]. These default policies (which can later be tweaked) accelerate the setup of robust protections even for small IT teams.
Compliance and Regulatory Support: Purview DSPM for AI is built with compliance in mind, helping SMBs uphold regulations like GDPR, HIPAA, or Australian Privacy laws even when using AI. It integrates with Microsoft Compliance Manager to map AI activities to regulatory controls[2]. For example, it provides a template checklist for “AI regulations” so you can ensure you have the proper auditing, consent, and data handling measures in place for using AI[2]. It also supports features like retention policies and records management for AI-generated content, and can capture AI interactions for eDiscovery in case of audits or legal needs[3]. In short, it extends your compliance program to cover AI usage, with continuous monitoring and recommendations to maintain compliant data handling and storage practices[2].
These features work together to ensure AI applications adhere to your organisation’s security policies and regulatory standards[1]. With DSPM for AI, an SMB gains visibility into how tools like Copilot, ChatGPT, or Google’s Gemini are accessing and using company data, and the means to prevent misuse or leakage of sensitive information in those AI interactions[1].
Deployment and Configuration in an SMB Environment
Setting up Microsoft Purview DSPM for AI in a small or mid-size business involves enabling the feature, meeting a few prerequisites, and then configuring policies to suit your needs. Below is a step-by-step guide for SMBs to get started and use DSPM for AI effectively.
Step-by-Step Setup Instructions
Step 1: Prepare Licensing and Admin Access. First, verify that your Microsoft 365 tenant has the appropriate licenses for the features you plan to use (see Licensing section below for details). At minimum, Business Premium includes core Purview features like sensitivity labels and DLP[4], but advanced AI-specific capabilities (like content capture and insider risk analytics) require the Purview compliance add-on or an E5 licence[5]. Ensure you are assigned a role with compliance management permissions (e.g. Compliance Administrator) in Entra ID (Azure AD), since DSPM for AI is managed from the Purview compliance portal[2].
Next, double-check that Unified Audit Logging is enabled for your organisation. In new Microsoft 365 tenants, auditing is on by default, but it’s worth confirming via the Compliance Center settings[2]. Audit data is crucial because many DSPM for AI insights (like Copilot prompt/response logs) rely on audit events being recorded[3].
Step 2: Enable Auditing (if needed) and Onboard Devices. In the Purview portal (https://compliance.microsoft.com), navigate to Solutions > DSPM for AI[2]. The overview page will list any prerequisites not yet met. If audit is off, turn it on following Microsoft’s instructions (this may take a few hours to take effect)[2].
For monitoring third-party AI websites, you need to set up endpoint monitoring: this means onboarding user devices to Purview and deploying the Purview browser extension. Onboard devices – typically Windows 10/11 PCs – via the Microsoft Purview compliance portal or Microsoft Defender for Endpoint, so that they can report activity to Purview[3]. Onboarded devices allow Purview’s Endpoint DLP to inspect content users might copy to external apps. Then deploy the Purview browser extension (available for Edge and Chrome) to those devices[2]. This extension lets Purview detect when users visit or use known AI web services. It’s required for capturing web activities like someone pasting text into ChatGPT in a browser[3]. On Microsoft Edge, you may also need to set an Edge policy to activate the DLP integration[3]. For example, once devices and the extension are in place, Purview can detect if a user tries to input a credit card number into an AI site and trigger a DLP action[3].
Step 3: Access DSPM for AI and Activate One-Click Policies. With prerequisites done, go to the DSPM for AI page in the Purview portal. Ensure “All AI apps” view is selected to get a comprehensive overview[2]. You’ll see a “Get started” section listing immediate actions. Microsoft provides built-in one-click policies here to jump-start your AI protection[2]. For instance, an “Extend your insights” button will create default policies to collect information on users visiting third-party AI sites and detect if they send sensitive info there[2]. Click through each recommended action – such as enabling AI activity analytics, turning on AI DLP monitoring, etc. – and follow the prompts to activate the corresponding policies.
Behind the scenes, these one-click steps deploy multiple Purview policies across different areas (DLP, Insider Risk Management, Communication Compliance, etc.) pre-configured for AI scenarios[3]. For example, activating “Extend your insights” will create:
a DLP policy in Audit mode that discovers sensitive content copied to AI web apps (covering all users)[3], and
an Insider Risk Management policy that logs whenever a user visits an AI site[3].
Similarly, other recommended one-click actions will set up policies like “Detect risky AI usage” (uses Insider Risk to flag users with potentially risky prompts or AI interactions)[3], or “Detect unethical behavior in AI apps” (a Communication Compliance policy that looks at AI prompt/response content for things like sensitive data or code-of-conduct violations)[3]. Each policy is created with safe defaults, usually initially in a monitoring (audit) mode. You can review and fine-tune them later. Allow about 24 hours after enabling for these policies to start gathering data and populating the DSPM for AI dashboards[2].
Step 4: Configure Sensitivity Labels and AI-specific DLP Rules. A crucial part of protecting data in AI is having a data classification scheme in place. If your organisation hasn’t defined sensitivity labels, DSPM for AI can help you create a basic set quickly[2]. Under the recommendations, there may be an option like “Protect your data with sensitivity labels” – selecting this will auto-generate a few default labels (e.g. Public, General, Confidential, Highly Confidential) and publish them to all users, including enabling auto-labeling on documents/email using some standard patterns[2]. You can accept these defaults or customise labels as needed (e.g. creating labels specific to customer data or HR data). Make sure to also configure label policies (to assign labels to users/locations) and consider auto-labeling rules for SharePoint/OneDrive content if you have the capability – auto-labeling requires the advanced Information Protection (available with the Purview add-on/E5)[5]. Even without auto-classification, users can manually apply these labels in Office apps to tag sensitive content.
Next, set up targeted DLP policies for AI scenarios. The one-click setup in Step 3 already created some base DLP policies in audit mode (for monitoring AI usage)[3]. You should now add or adjust preventive DLP rules according to your risk tolerance. Two important examples:
DLP for Copilot: In Purview’s DLP policy section, you can create a policy scoped to the “Microsoft 365 Copilot” location (a new location type)[6]. Configure this policy to detect your highest sensitivity labels or specific sensitive info types, and set the action to “block Copilot” from accessing or outputting that content[3][6]. Microsoft has introduced the ability to block Copilot from processing items (emails, files) that bear certain sensitivity labels[3]. For example, you might specify that anything labeled Highly Confidential or ITAR Restricted is not allowed to be used by Copilot. This means if a user asks Copilot about a document with that label, Copilot will be unable to include that data in its response[3]. (Internally, Copilot will skip or redact such content rather than risk exposing it.) Enabling this type of DLP rule ensures sensitive files or emails stay out of AI-driven summaries.
DLP for Third-Party AI (Web): Create or edit a DLP policy to cover endpoint activities in browsers. Microsoft provides a template via DSPM for AI (the “Fortify your data security” recommendation) that you may have enabled, which includes a policy to block sensitive info from being input into AI web apps via Edge[3]. If not already active, define a new DLP policy with the Endpoint location (which covers Windows 10/11 devices that are onboarded to Purview) and specifically target web traffic (Purview DLP can filter by domain or category of site). You can use Microsoft’s managed list of “AI sites” (which includes popular generative AI services like chat.openai.com, Bard, etc.) as the trigger. The policy condition should look for sensitive info (e.g. built-in sensitive info types like credit card numbers, tax file numbers, health records, or any data classified with your sensitive labels). Set the action to block or block with override. For example, you might block outright if it’s highly sensitive (like >10 customer records), or allow the user to override with justification for lower sensitivity cases. This ensures that if an employee attempts to paste confidential text into, say, ChatGPT, the content will be blocked before leaving the endpoint[3]. In fact, with Adaptive Protection (an E5 feature), the policy can automatically apply stricter controls to high-risk users – e.g. if a user is already flagged as an insider risk, the DLP will outright block the action, whereas a low-risk user might just see a warning[3].
After setting up these policies, use the Purview “Policies” page under DSPM for AI to verify all are enabled and healthy[2]. You can click into each policy (it will take you to the respective solution area in Purview) to adjust scope or rules. For instance, during initial testing you might scope policies to a few pilot users or exclude certain trusted service accounts. Over time, refine the policies: add any custom sensitive info types unique to your business (like project codes or proprietary formulas) and tweak the blocking logic so it’s appropriately strict without hampering legitimate work.
Step 5: Monitor AI Usage Reports and Refine as Needed. Once DSPM for AI is running, the Purview portal will start showing data under the Reports section of DSPM for AI[2]. Allow at least 24 hours for initial data collection. You will then see insightful charts, for example: “Total AI interactions over time” (how often users are engaging with Copilot or other AI apps), “Sensitive interactions per AI app” (e.g. how often sensitive content appears in ChatGPT vs. Copilot), and “Top sensitivity labels in Copilot” (which labels are most commonly involved in Copilot queries)[1][1]. These reports help identify patterns – for instance, if Highly Confidential data is appearing frequently in AI prompts, that might signal users are attempting to use AI with very sensitive info, and you may need to educate them or tighten policies.
Regularly review the Recommendations section on the DSPM for AI dashboard as well[2]. Purview will surface ongoing suggestions. For example, it may suggest running an on-demand data risk assessment across more SharePoint sites if it detects possible oversharing, or recommend enabling an Azure OpenAI integration if you deploy your own AI app. Each recommendation comes with an explanation and often a one-click action to implement it[2]. SMBs should treat these as a guided checklist for continuous improvement.
Also utilize Activity Explorer (within Purview) filtered for AI activities[2]. Here you can see log entries for specific events like “AI website visit”, “AI interaction”, or DLP triggers[3]. For example, if a DLP policy was tripped by a user’s action, you’ll see a “DLP rule match” event with details of what was blocked[3]. You might discover, say, a particular department frequently trying to use a certain AI tool – insight that could inform training or whitelisting a corporate-approved AI solution.
Continuously refine your configuration: if you find too many false positives (blocks on benign content), adjust the DLP rules or train users on proper procedures (e.g. using anonymised data in prompts). If you find gaps – e.g. an AI service not covered by the default list – you can add its URL or integrate it via Microsoft Defender for Cloud Apps (to extend visibility). Purview DSPM for AI is an ongoing program: as your business starts using AI more, periodically update your sensitivity labels taxonomy, expand policies to new AI apps, and leverage compliance manager assessments to ensure you meet any new regulations or internal policies for responsible AI use[2].
Policy Configuration for Microsoft 365 Copilot and Third-Party AI Tools
A core strength of Purview DSPM for AI is that it extends your data protection policies directly into AI scenarios. Here we provide specific guidance on configuring policies for Microsoft 365 Copilot and for external AI applications in an SMB context.
Protecting Data Used by Microsoft 365 Copilot: By design, Copilot abides by Microsoft 365’s existing security framework. It will only access data that the requesting user has permission to access, and it respects sensitivity labels and DLP policies[2][6]. Admins can create explicit policies to control Copilot’s behavior:
Sensitivity Label-based Restrictions: Use Purview DLP to create a rule that targets the Copilot service. In the DLP rule, set a condition like “If content’s sensitivity label is X, then block Copilot from processing it.” Microsoft’s new DLP feature (in Preview mid-2025, GA by Aug 2025) allows detection of sensitivity labels in content that Copilot might use[6]. When such a label is found, Copilot is automatically denied access to that item[6]. For example, if an email is labeled Privileged (using a sensitivity label), a DLP policy can ensure that Copilot will not read or include that email in response to a prompt[6]. This configuration is done in the Purview Compliance Portal under Data Loss Prevention by choosing ‘Microsoft 365 Copilot’ as a policy location and specifying the sensitive labels or data types to act on[6]. Notably, Microsoft has made it such that you don’t need a Copilot license to set up these protective policies – any organization can create Copilot-targeted DLP rules to prepare in advance[6] (though of course Copilot will only be active if you have purchased it).
Data Type-based Restrictions: In addition to labels, consider using sensitive info types. For instance, you might want to prevent Copilot from ever revealing personally identifiable information (PII) like tax file numbers or health record numbers. You can configure a DLP policy: If Copilot’s output would include data matching ‘Australian Tax File Number’ or ‘AU Driver’s License Number’, then block it. This is essentially treating Copilot as another channel (like email or Teams) where DLP rules apply. In practice, Copilot won’t include that content in its responses if blocked – the user might see a message that some content was excluded due to policy.
Retention/Exposure Controls: Leverage Purview’s Retention and Records policies for Copilot interactions if needed. For example, if your industry regulation requires that certain data not be maintained, you can set a retention label to auto-delete Copilot chat content after X days. Also, if using Security Copilot or Copilot in Fabric, enabling the recommended Purview collection policy captures their prompts and responses for compliance auditing[3].
After configuring these, test Copilot’s behavior: e.g., label a document as Secret and try asking Copilot about it with a user account. You should find Copilot refuses or gives a generic answer if policies are correctly in place. Over time, review Copilot-related DLP events in Purview reports to see if it attempted to access something blocked – this indicates your policies are actively protecting data.
Policies for Third-Party AI Tools (e.g. ChatGPT, Bard, etc.): Third-party AI apps are outside the Microsoft 365 ecosystem, so policies focus on monitoring and preventing sensitive data from leaving your environment:
Endpoint DLP for AI Websites: As discussed in the setup, configure Endpoint DLP rules to cover major AI sites. Microsoft Purview comes with a built-in list of “supported AI sites”[2] (this includes OpenAI’s ChatGPT, Google Bard, Claude, Microsoft Bing Chat, etc.). You can use this list in your DLP conditions so that the rule triggers when any of those sites are detected. The policy can be in block mode or user override mode. For SMBs, a common approach is to warn/justify – i.e. when an employee tries to paste corporate data into ChatGPT, show a warning: “This action may expose sensitive data. Are you sure?” The user can then either cancel or proceed with justification, and the event is logged[3]. High-risk or highly sensitive cases should be outright blocked and logged. Purview’s one-click “Block sensitive info from AI apps in Edge” policy uses exactly this approach, targeting a set of common sensitive info types (financial info, IDs, etc.) and blocking those from being submitted to AI web apps via Edge[3]. You can customize the sensitive info types and message per your needs. For example, you might add keywords unique to your company (like project codenames) to the policy to ensure those cannot be shared with external AI.
Insider Risk Management (IRM): For an SMB with an E5 Compliance/Purview add-on, Insider Risk Management policies can complement DLP. An IRM policy can watch for patterns that suggest risky behavior, even if individual DLP rules weren’t violated. For AI, Microsoft provides a template “Detect risky AI usage” – this looks at prompt and response content from Copilot and other AI and if a user is frequently attempting to input or extract large amounts of sensitive data, it raises their risk level[3]. It essentially correlates multiple AI interactions over time. If an employee starts copy-pasting client lists into various AI tools, IRM might flag that user for a potential data leakage risk, prompting further investigation or mitigation (like removing their access to certain data). While setting up IRM can be complex (requires defining risk indicators, etc.), the preset AI-focused policy simplifies it for you. SMBs should consider enabling it if they have the license, as it provides an additional safety net beyond point-in-time DLP rules.
Communication Compliance: Another advanced feature (in E5/Purview suite) is Communication Compliance, which can now analyze AI-generated content. For instance, a policy can detect if employees use inappropriate or regulated content in AI prompts or outputs[3]. Microsoft’s default “Unethical behavior in AI apps” policy looks for sensitive info in prompts/responses, which can catch things like attempts to misuse AI for illicit activities or to share confidential data inappropriately[3]. In an SMB, this could be used to ensure employees aren’t, say, asking an AI to generate harassing language or to divulge another department’s secrets. While not directly a data protection in the sense of preventing data loss, it does enforce broader usage policies and can be part of a responsible AI governance approach.
Cloud App Security (optional): If your organisation uses Microsoft Defender for Cloud Apps (formerly MCAS), you can leverage its Shadow IT discovery and app control features alongside Purview. Defender for Cloud Apps can identify usage of various AI SaaS applications in your environment (by analyzing log traffic from firewalls/proxies or directly via API if using sanctioned apps). You could combine this with Purview DLP by using Cloud Apps’ capability to route session traffic through a conditional access app control, enabling real-time monitoring of what users upload to AI web apps. This is more of an advanced setup, but the Purview DSPM dashboard might highlight to you which AI apps are most accessed by your users[1], helping you focus your Cloud App Control policies accordingly.
In summary, for Microsoft 365 Copilot, focus on label-based and content-based DLP policies and let Copilot’s compliance integration handle the rest. For third-party AI tools, rely on Endpoint DLP to police what data leaves your endpoints, and consider Insider Risk and Communication Compliance for broader oversight. Microsoft has provided templates for all these – by reviewing the pre-created DSPM for AI policies in your portal, you can see concrete examples of configurations for each scenario and adjust them to fit your organisational policies[3][3].
Licensing and Pricing Considerations
Implementing Purview DSPM for AI touches on several Microsoft 365 services, so it’s important to understand licensing. Small and mid-sized businesses often use Microsoft 365 Business Premium, and Microsoft now offers add-ons to bring advanced Purview capabilities to that tier without requiring full Enterprise E5 licenses. Below we compare what features different licenses provide and the respective costs (prices are per user, per month, in Australian dollars):
Covers the enterprise basics similar to Business Premium: Purview Information Protection P1 and standard DLP (cloud), retention, basic Audit (90 days), Core eDiscovery. Does **not** include Insider Risk or advanced analytics. M365 E3 is roughly analogous to Business Premium in compliance features; the main differences are in device management and security (E3 lacks some features Business Premium has, and vice versa).
~AU$50–55** (est.)
Microsoft 365 E5
Includes the full range of Purview compliance & security features. For data protection, that means Information Protection P2, Auto-labeling, **Endpoint DLP**, Insider Risk, Communication Compliance, Advanced eDiscovery, long-term audit, Compliance Manager, and DSPM for AI – all **built-in**. No add-ons needed (E5 covers both what the Defender and Purview suites offer)[7](https://diamondit.com.au/microsoft-security-addons/). M365 E5 effectively gives the same capabilities an SMB would get by combining Business Premium + the Defender and Purview add-ons[7](https://diamondit.com.au/microsoft-security-addons/).
~AU$85–90** (est.)
Pricing Notes: Microsoft 365 Business Premium has a list price around A$30.20 per user/month in Australia (excluding GST). The newly introduced Purview Suite add-on for Business Premium is priced at US$10, which is roughly AU$15 per user/month[5]. (Similarly, a Defender security add-on is US$10 ~AU$15, or both bundled for US$15 ~AU$22.50.) These add-ons are available as of September 2025 and can be applied to up to 300 users (the Business Premium tenant limit)[5][5]. By comparison, an M365 E5 license that natively includes all Purview features costs about US$57 (~AU$88) per user/month, so for many SMBs it’s far more economical to keep Business Premium and add Purview rather than jumping to E5. In fact, Microsoft quotes that the combined Defender+Purview add-on (at ~$22 AUD) provides roughly a 68% cost saving versus buying equivalent E5 licenses or individual products[8][8].
Feature Availability by License: In practical terms, if you have Business Premium without add-ons, you can still use Purview DSPM for AI in a limited capacity. You will be able to see the DSPM for AI page and get some insights (since you do have basic DLP and labeling). For example, you can label data and apply DLP to Copilot to restrict labeled content[4][6]. However, certain features will not fully function: the one-click policies that leverage Insider Risk or Communication Compliance won’t do anything without those licenses. You also won’t be able to capture the actual prompt/response content from Copilot or other AI (content capture for eDiscovery requires the collection feature which is part of E5). Essentially, Business Premium gives you foundational protection, but the Purview add-on (or E5) is needed for the “full” DSPM for AI experience – including the fancy dashboards of AI usage and the advanced policies for insider risk and content capture[5][1].
For many SMBs, the sweet spot is Business Premium + Purview Suite add-on. This combination unlocks all the E5 compliance capabilities at a fraction of the cost of an E5 license, while allowing the organisation to stay within the 300-user SMB licensing model. It means your Business Premium users get enterprise-grade tools like auto-labeling (which can automatically label or encrypt documents that Copilot might access), advanced DLP actions on endpoints (to stop data going to unsanctioned AI), and insight into AI usage trends – all integrated in the same Microsoft 365 admin experience[5][5].
(Note: The above prices are approximate and current as of 2025. Australian pricing may vary slightly based on exchange rates and whether billed annually or monthly. GST is typically not included in listed Microsoft prices. Always check with Microsoft or a licensing partner for the latest local pricing.)
Example SMB Use Cases and Benefits
To illustrate how Microsoft Purview DSPM for AI can protect a small/medium business’s data, here are several common use cases and how the features come into play:
Use Case 1: Protecting Customer Data. Imagine a sales manager tries to use ChatGPT to draft a proposal and copies in a list of customer names and phone numbers. This action could leak personally identifiable information (PII). With Purview DSPM for AI, the moment the manager attempts to paste that data into the ChatGPT site, the Endpoint DLP policy kicks in. For example, it might detect the pattern of phone numbers or customer names marked as sensitive and immediately block the transfer in the browser[3]. A notification would pop up on the manager’s screen explaining that company policy prevents sharing such data with external apps. In the Purview portal, an alert or event log is generated showing that “Sensitive info (Customer List) was blocked from being shared to chat.openai.com”. The manager is thus prevented from inadvertently exposing customer data, fulfilling the company’s privacy commitments. Later, the IT admin sees this event in the DSPM report, and can follow up to ensure the manager uses a safer approach (perhaps using anonymised data with the AI). In essence, Purview acted as a last line of defense to keep customer data in-house[3].
Use Case 2: Safeguarding Financial Records. A mid-sized investment firm (say 50 employees) uses Business Premium and has started deploying Microsoft 365 Copilot to employees. The CFO is using Copilot to get summaries of financial spreadsheets. Purview’s sensitivity labels have been applied to certain highly sensitive financial documents – e.g. the quarterly financial statement is labeled Highly Confidential. When the CFO (or anyone) tries to ask Copilot “Summarize the Q4 Financial Statement,” Copilot checks if it’s allowed to use that document. Thanks to a DLP policy we set (Copilot location blocking that label), Copilot will refuse, perhaps responding with “I’m sorry, I cannot access that content.” The CFO’s request is not fulfilled, which is exactly the intended outcome: that report is too sensitive to feed into any AI. Meanwhile, less sensitive data (like aggregated sales figures labeled “Internal”) might be allowed. Additionally, Purview’s auditing logs record that Copilot attempted to access a labeled item and was blocked[3]. If needed, later on the compliance officer can show auditors that “Even our AI assistants cannot touch certain financial records,” demonstrating strong controls. This scenario shows how DSPM for AI prevents accidental exposure of financial data via AI while still letting Copilot be useful on other data.
Use Case 3: Protecting Intellectual Property (IP). Consider a small engineering firm that has proprietary CAD designs and source code. They classify these files under a label “Trade Secret – No AI”. They also worry about developers using public coding assistants (like GitHub Copilot or ChatGPT) and potentially pasting in chunks of internal code. With Purview, they enable a policy to detect their code patterns (they could even use a custom sensitive info type that matches code syntax or specific project keywords). If a developer tries to feed a snippet of secret code into an AI code assistant in the browser, Purview can intercept that and block it. On the flip side, if the company builds its own secure AI (maybe using Azure OpenAI), they can register it as an “enterprise AI app” in Purview – and Purview DSPM will capture all prompts and outputs from that app for audit[3][3]. That means if any IP is used within that internal AI, it’s still tracked and remains within their controlled environment. Overall, the firm gets to leverage AI for boosting developer productivity on non-secret stuff, while ensuring trade secrets never slip out via AI.
Use Case 4: Securing Employee Information. A human resources team might use Copilot in Microsoft Word to help draft salary review documents or summarise employee feedback. These documents naturally contain highly sensitive personal data. Purview’s role here is twofold: it can automatically classify and label such content (e.g. detect presence of salary figures or personal IDs and apply “Confidential – HR Only” label), and it can enforce policies so that AI cannot misuse it. For instance, an admin can configure that the label “Confidential – HR Only” is in Copilot’s blocked list[3]. So even if an HR staff member tries to use Copilot on a file containing an employee’s medical leave details, Copilot will not process it. Furthermore, if the HR person tries to share any text from that file to an outsider or to a different AI, DLP would intervene. Compliance Manager in Purview also helps here by providing regulatory templates – e.g. if under GDPR, the company should limit automated processing of personal data, the tool will remind the admins of requirements and suggest controls to put in place[2]. Thanks to these measures, the company can confidently use AI internally for HR efficiency while maintaining compliance with privacy laws and keeping employee data safe.
In all these scenarios, Microsoft Purview DSPM for AI acts as a safety harness – it gives SMBs the visibility and control needed to embrace modern AI tools responsibly. By leveraging sensitivity labels, DLP, and intelligent monitoring, even smaller organisations can enforce “our data stays protected, no matter if it’s a person or an AI accessing it.”[1][1] The result is that SMBs can benefit from AI-driven productivity (be it drafting content, analyzing data, or assisting customers) with assurance that confidential information won’t slip through the cracks. Purview DSPM for AI essentially brings enterprise-grade data governance into the AI era, allowing SMBs to innovate with AI securely and in compliance[5][1].
The m365-inactiveusers-get.ps1 script is a comprehensive PowerShell tool designed to analyze user activity within Microsoft 365 tenants. It identifies inactive users, tracks license assignments, monitors external/guest user access, and generates detailed reports to help administrators maintain security and optimize license usage.


")
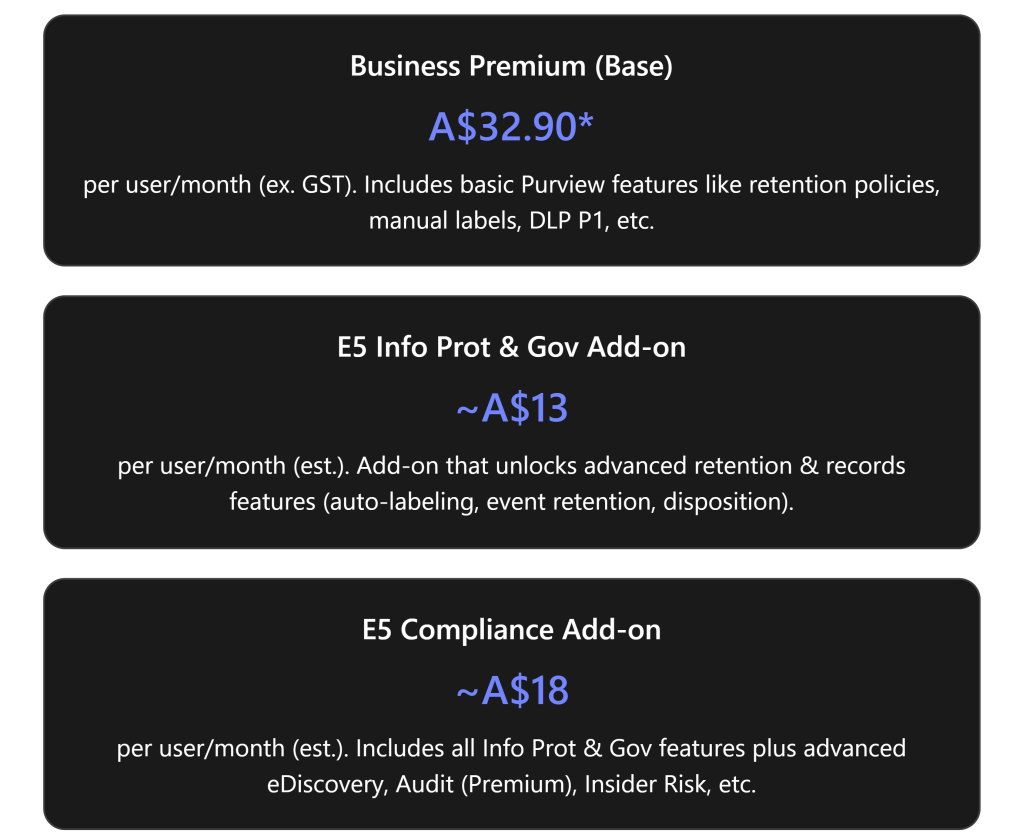
")
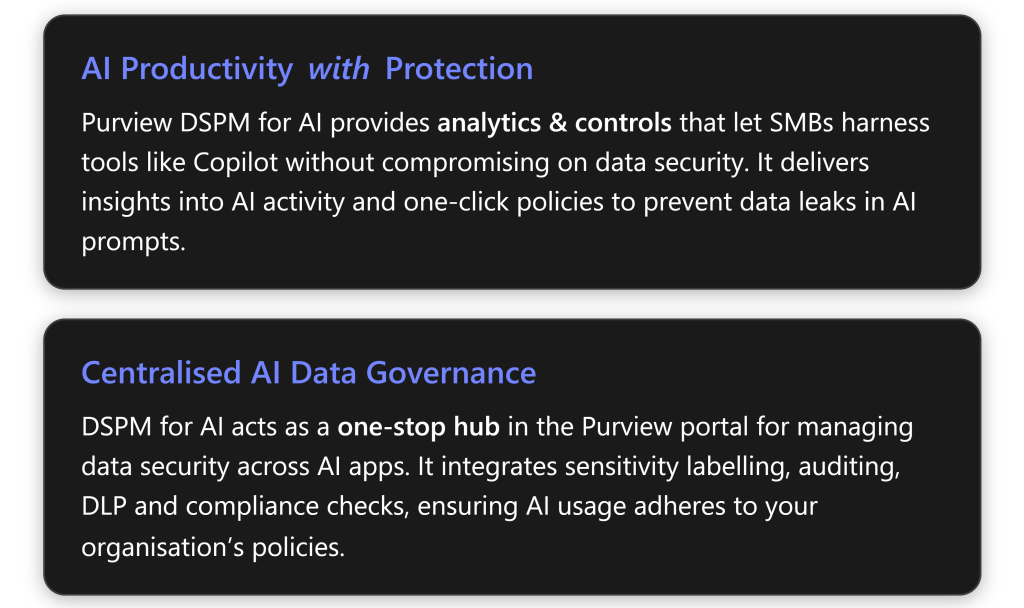
")
")

